Table of Contents
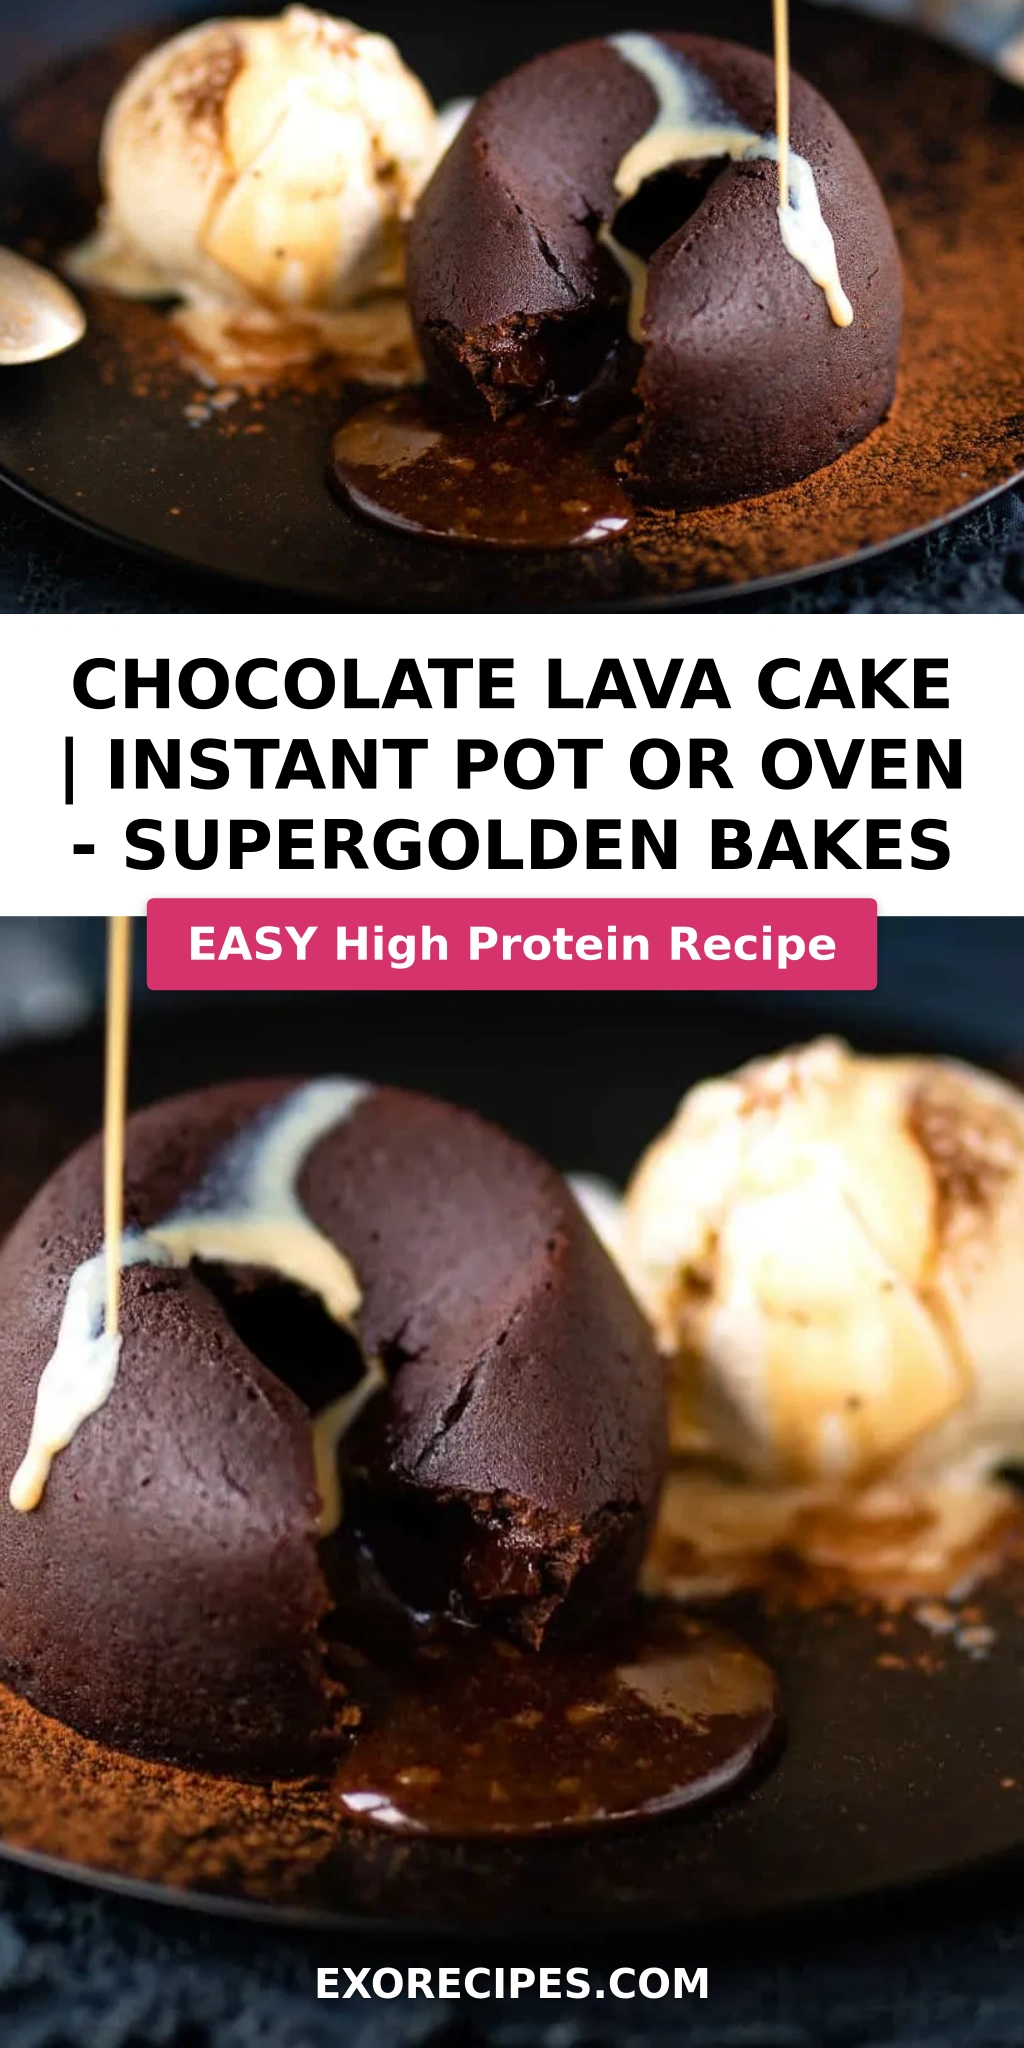
Chocolate Lava Cake | Instant Pot or Oven – Supergolden Bakes – The Easiest Molten Dream Dessert
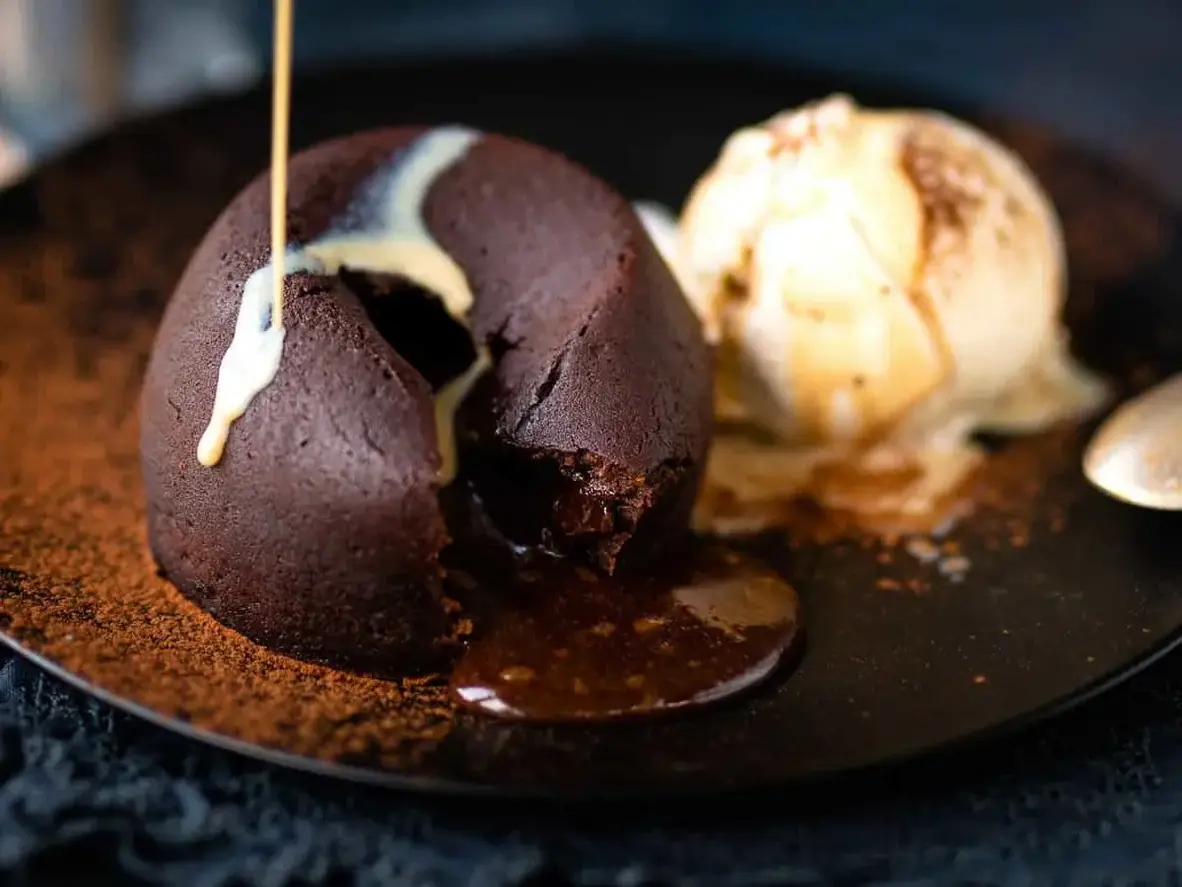
Growing up in Morocco, desserts were often steeped in honey, nuts, and floral essences. But when I moved to Paris for culinary school, I discovered a whole new world of chocolate alchemy. One dessert, in particular, captured my heart: the molten chocolate lava cake. The sheer elegance of a perfectly baked cake yielding to a warm, rivers of gooey chocolate center is simply divine. Today, I’m sharing my favorite, most foolproof recipe for this classic, which you can make either in your Instant Pot or a conventional oven. Whichever method you choose, the result is an easy chocolate lava cake recipe that’s guaranteed to impress.
Imagine breaking through a delicate, slightly crisp crust to unleash a luscious, rich molten chocolate core that pools onto your plate. The aroma alone is enough to send you into a chocolate dream. This recipe, with its hint of espresso and cinnamon, elevates the deep chocolate flavor without overpowering it. It’s that perfect balance of textures and tastes: a tender cake exterior, a warm, silky-smooth fondant interior, and the subtle warmth of spices that reminds me of the souks back home, albeit with a very French touch. It’s an experience, not just a dessert.
Over my years of cooking in NYC kitchens, I’ve refined this recipe to be utterly dependable, whether you crave the speed of an Instant Pot chocolate lava cake or prefer the traditional method of an oven baked lava cake. My secret? A precise ratio of butter to chocolate, and a keen eye on cooking times. I’ll even share a pro tip for achieving that perfect gooey center every time and walk you through a common mistake that can turn your molten masterpiece into a solid brownie. Trust me, it’s easier than you think to achieve perfection.
Why This Chocolate Lava Cake Recipe Is the Best
This chocolate lava cake isn’t just any recipe; it’s a testament to balancing rich flavors with a delicate touch. Drawing from my French culinary training, I’ve ensured that the dark chocolate chips and butter create a deeply intense, luxurious base. The hint of espresso powder doesn’t just add depth; it subtly elevates the chocolate’s natural bitterness, transforming it into a more complex, sophisticated taste that even my Parisian instructors would approve of. It’s the kind of chocolate experience that lingers delightfully on your palate.
Achieving that perfect, quivering molten center without sacrificing a structurally sound exterior is an art. My recipe focuses on precise cooking times for both Instant Pot and oven methods, ensuring a cake that’s neither raw nor overbaked. The exterior bakes just enough to provide a tender crumb, while the interior remains gloriously liquid. I emphasize the use of good quality dark chocolate – something I learned early on in Paris – because it truly makes all the difference in achieving that silky, flowing lava effect once you break into the cake.
Beyond taste and texture, what makes this recipe truly stand out is its adaptability and ease. Whether you’re leaning on the magic of an Instant Pot for a quick dessert or using your oven for a more traditional bake, this recipe is designed to be foolproof. I’ve broken down each step to eliminate guesswork, making it accessible even for novice bakers. Plus, the options for both Instant Pot and oven baked lava cake mean you can whip up this decadent treat anytime, anywhere, with minimal fuss. Your guests will think you spent hours, but it’ll be our little secret!
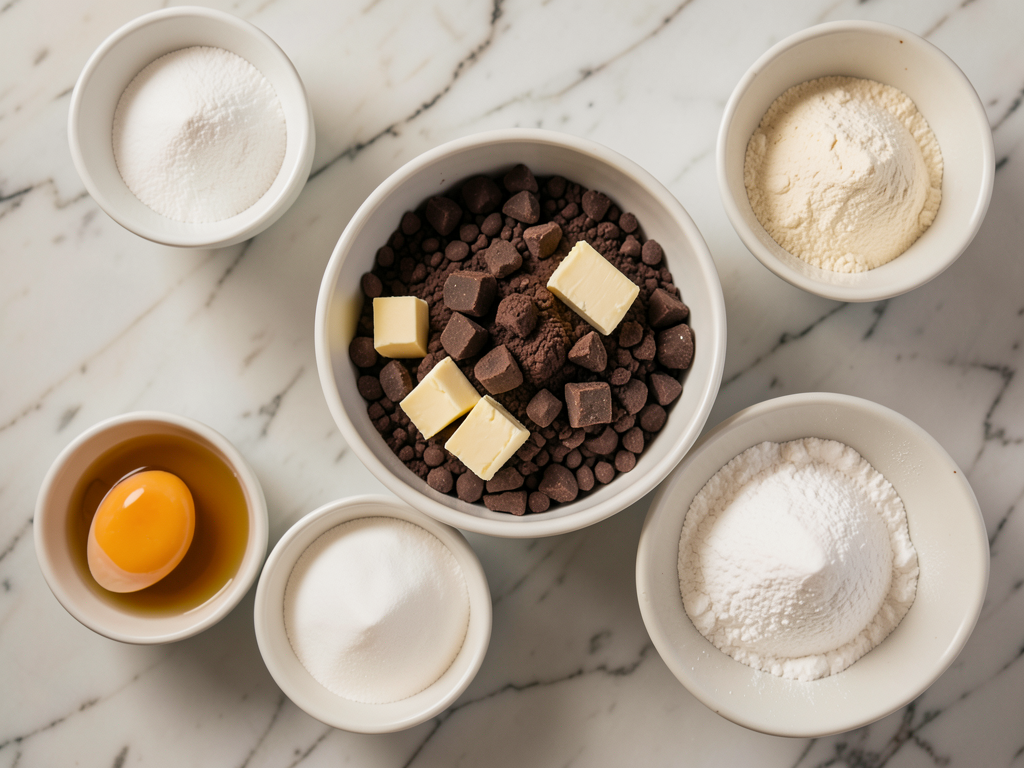
Chocolate Lava Cake Ingredients
When I shop for ingredients for this easy chocolate lava cake recipe here in NYC, I always look for the best quality I can find, often hitting up local markets. But don’t worry, these staples are easy to find anywhere and will bring that perfect molten magic right to your kitchen.
Ingredients List
- 1 cup (180g) dark chocolate chips (or chopped dark chocolate)
- ½ cup (113g) unsalted butter (cubed)
- 3 large eggs
- 1 tsp vanilla bean paste (or extract)
- 1 ½ cups (180g) powdered sugar ((= icing sugar))
- 7 tbsp flour (all purpose / plain)
- 1 tsp instant Espresso powder (optional)
- 1 tsp ground cinnamon
- ¼ tsp salt
- 4 tsp cocoa powder (or as needed)
- melted butter (or cake release spray)
- 2 tbsp Baileys (optional)
- vanilla ice cream (optional)
Ingredient Spotlight
Dark Chocolate Chips: The star of our show! I always recommend using a good quality dark chocolate, ideally 60-70% cocoa solids. This ensures the rich, intense chocolate flavor and the perfect molten texture. Bits of good quality dark chocolate, like a bar chopped roughly, melt more smoothly than chips sometimes do. Don’t skimp here; it’s the foundation of your molten lava cake.
Unsalted Butter: Cubed butter melts more evenly and quickly when combined with the chocolate. Using unsalted butter allows you to control the salt content in the recipe, which is crucial for balancing sweetness. If you only have salted butter, omit the added ¼ tsp of salt from the recipe.
Powdered Sugar: Also known as icing sugar, this finely milled sugar dissolves perfectly into the batter, ensuring a smooth, lump-free texture without any grainy bits. Granulated sugar can sometimes leave a grittiness, which we definitely want to avoid in a silky lava cake.
All-Purpose Flour: Just a touch of flour is needed to give the cake its structure. Too much, and you’ll end up with a fully baked cake instead of a molten center. Too little, and it might not hold its shape. The 7 tablespoons here are carefully calculated to strike that perfect balance, inspired by the precision I learned in culinary school in Paris.
Espresso Powder: This is a secret weapon! Instant espresso powder doesn’t make your cake taste like coffee; it simply intensifies the chocolate flavor, making it deeper and richer. It’s a trick I picked up early on and use often. If you don’t have it, don’t worry, the cake will still be delicious, but it adds a wonderful complexity.
| Original Ingredient | Best Substitution | Flavor / Texture Impact |
|---|---|---|
| Dark Chocolate Chips | Good quality dark chocolate bar, chopped | Similar richness and melt, potentially even smoother if high-quality. |
| Unsalted Butter | Salted Butter (omit added salt) | Slightly saltier profile, ensure no other salt is added. |
| Vanilla Bean Paste | Vanilla Extract | Slightly less intense vanilla flavor, but still delicious. |
| Powdered Sugar | Granulated Sugar (finely processed in food processor) | Can be a little gritty if not processed very finely. |
| Instant Espresso Powder | Strong brewed coffee, 1/2 tsp | Adds similar depth of flavor, might add a tiny bit more liquid. |
How to Make Chocolate Lava Cake — Step-by-Step
Don’t let the elegance of this dessert fool you; making a molten chocolate lava cake is wonderfully straightforward whether you choose the oven or your Instant Pot. Just follow these steps, and you’ll be enjoying chocolate heaven in no time!
Step 1: Melt the Chocolate and Butter
Combine the dark chocolate and cubed unsalted butter in a heatproof bowl. Microwave in 30-second bursts, stirring well after each interval, until completely melted and smooth. Alternatively, use a double boiler: set the bowl over a pot of barely simmering water, ensuring the water doesn’t touch the bottom of the bowl, and stir until melted. Once melted, set it aside to cool slightly. This cooling step is important for the next stage.
⚠️ Common Mistake to Avoid: Overheating the chocolate. High heat can seize chocolate, making it grainy. Always melt gently and stir frequently.
Step 2: Incorporate Eggs and Vanilla
Once the chocolate mixture has cooled a bit (it should be warm to the touch, not hot), add the large eggs and vanilla bean paste (or extract). Use a small balloon whisk to mix everything together. You’ll notice the chocolate mixture will thicken significantly as the eggs are incorporated. Continue whisking until it’s uniform and glossy.
💡 mia’s Pro Tip: Ensure the chocolate isn’t too hot before adding eggs, or you risk scrambling them! You want a silky, not lumpy, batter.
Step 3: Add Dry Ingredients
Sift the flour, powdered sugar, instant espresso powder (if using), ground cinnamon, and salt directly over the chocolate mixture. This sifting step prevents lumps and ensures a smooth batter. Gently fold the dry ingredients into the chocolate using a spatula or spoon until just combined. Be careful not to overmix; stop as soon as no dry streaks remain and you have a thick, glossy batter.
Step 4: Prepare Ramekins and Fill
Prepare four 6-ounce ramekins or metal pudding molds. Generously spray them with cake release spray or brush them thoroughly with melted butter. Then, add about a scant teaspoon of cocoa powder into each ramekin and swirl it around to coat the bottom and sides. Discard any excess cocoa powder. This cocoa powder coating helps prevent sticking and gives the cakes a nice finish. Divide the lava cake batter evenly among the prepared ramekins.
💡 mia’s Pro Tip: The cocoa powder coating is a trick I learned in Paris — it not only helps release but also subtly enhances the chocolate flavor of the crust.
Step 5: Cook in Instant Pot
Place the metal trivet into your Instant Pot and add 1 cup (250ml) of water. Carefully place the filled ramekins on the trivet. Most Instant Pots will fit all four in a single layer, but if yours is smaller, you can stack them if they fit securely. Secure the lid, set the vent to sealing, and cook on high pressure for 10 minutes. Once cooking is complete, perform a manual release of the steam. Carefully remove the lava cakes from the cooker. If any condensation has collected on top, gently pat it dry with a paper towel.
⚠️ Common Mistake to Avoid: Don’t natural release the pressure. Manual release is key to prevent overcooking and maintaining that molten center.
Step 6: Serve Instant Pot Lava Cakes
Allow the Instant Pot lava cakes to cool for just a couple of minutes in their ramekins. Then, carefully run a knife around the edge of each cake to loosen it. Invert the ramekin onto a serving plate. The moisture from the pressure cooker often makes them incredibly easy to release. Serve immediately!
Step 7: Cook in Oven
If using an oven, preheat it to 400°F (200°C). Place the filled ramekins on a heavy baking tray (one that won’t warp in the oven). Bake for 18-20 minutes. The cakes are done when the edges are set and a slight jiggle remains in the center when gently shaken. If they are very soft and squidgy on top, they might need a minute or two more, but be careful not to overbake, or you’ll lose the molten center!
Step 8: Serve Oven Lava Cakes
Once baked, remove the oven baked lava cakes from the oven and let them cool for two minutes. Gently run a knife around the edge of each mold to loosen the cake. Invert onto plates and serve immediately while the center is still warm and liquid.
Step 9: Cook in Air Fryer
Preheat your air fryer to 350°F (180°C). Carefully place the prepared ramekins into the air fryer basket. Bake for 10-12 minutes, or until the edges are set and the tops appear slightly firm but still have a slight jiggle in the middle when gently moved. Cooking time can vary depending on your air fryer model, so keep an eye on them.
Step 10: Serve Air Fryer Lava Cakes
Remove the air fryer lava cakes from the basket and let them rest for two minutes. As with the other methods, run a knife around the edge of the molds to help release them. Invert onto serving plates, and get ready to enjoy that beautiful molten core.
Step 11: Final Presentation
No matter your cooking method, serve these molten chocolate lava cakes warm. A scoop of good vanilla ice cream on the side is classic, but a drizzle of Baileys (if you’re feeling indulgent) adds a wonderful grown-up touch. Enjoy the magic!
| Step | Action | Duration | Key Visual Cue |
|---|---|---|---|
| 1 | Melt Chocolate & Butter | 3-4 minutes | Smooth, glossy, no lumps |
| 2 | Add Eggs & Vanilla | 1-2 minutes | Thickened, uniform, glossy batter |
| 3 | Fold Dry Ingredients | 1-2 minutes | No dry streaks, thick batter |
| 4 | Prepare Ramekins & Fill | 5 minutes | Evenly coated, divided batter |
| 5 | Cook in Instant Pot | 10 minutes (HP) | Manual release, slight condensation |
| 7 | Cook in Oven | 18-20 minutes | Set edges, jiggly center |
| 9 | Cook in Air Fryer | 10-12 minutes | Set edges, slight jiggle |
| 6/8/10 | Rest & Serve | 2 minutes | Easily inverted onto plate, molten center |
Serving & Presentation
When it comes to a molten chocolate lava cake, the presentation is almost as important as the taste! A perfectly plated dessert truly elevates the experience. I always aim for that ‘wow’ factor, something I learned from the meticulous pastry chefs in Paris. Once your lava cakes are inverted onto individual serving plates, there are so many ways to make them shine.
My go-to pairing is always a scoop of creamy vanilla ice cream. The cold, sweet creaminess provides a beautiful contrast to the warm, rich chocolate and even helps cool your palate between bites. For an extra touch of decadence, a sprinkle of fresh raspberries or a dusting of powdered sugar makes them look incredibly elegant. Sometimes, a tiny sprig of fresh mint brings a pop of color that just sings visually.
For a more sophisticated touch, particularly if you’re serving this after a dinner party inspired by my Moroccan heritage, I might offer a small dish of candied orange peel on the side, or a tiny spoonful of high-quality raspberry coulis. The citrus brightens the deep chocolate, preventing it from being too heavy. And for those adult diners, a shot of espresso or a small glass of a rich dessert wine or, as suggested in the recipe, a drizzle of Baileys, completes this luxurious experience. It’s all about creating layers of indulgence!
| Pairing Type | Suggestions | Why It Works |
|---|---|---|
| Side Dish | Vanilla Ice Cream, Fresh Berries (raspberries, strawberries) | Cold, creamy vanilla contrasts with warm chocolate; berries add tartness and freshness. |
| Sauce / Dip | Raspberry Coulis, Caramel Sauce, Baileys | Fruit sauces cut richness; caramel adds another layer of decadent sweetness; Baileys provides a boozy depth. |
| Beverage | Espresso, Red Wine (like a Zinfandel or Port), Milk | Coffee enhances chocolate flavor; robust red wine complements richness; milk offers a simple, comforting balance. |
| Garnish | Powdered Sugar, Mint Sprigs, Chocolate Shavings | Adds visual appeal, a touch of extra sweetness, and a fresh aroma. |
Make-Ahead, Storage & Reheating
Living in NYC, I know the value of a dessert that can be prepped ahead of time. It allows me to enjoy my guests rather than be stuck in the kitchen last minute. This chocolate lava cake recipe is surprisingly flexible, offering convenient make-ahead options for those busy evenings.
| Method | Container | Duration | Reheating Tip |
|---|---|---|---|
| Refrigerator | Airtight container, unbaked batter or baked cakes | 2-3 days (batter), 1-2 days (baked) | Reheat baked cakes in microwave (20-30s) or oven (10mins at 350°F). Bake unbaked batter as directed. |
| Freezer | Individually wrapped unbaked batter or baked cakes | Up to 1 month | Bake unbaked batter directly from frozen, adding an extra 5-7 minutes to cook time. Reheat baked frozen cakes in oven (15-20mins at 350°F). |
| Make-Ahead | Filled and chilled ramekins | Up to 2 days in advance | Remove from fridge 30 mins before baking, then bake as per recipe instructions for oven/Instant Pot. |
For unbaked batter, you can prepare it, fill your ramekins, and cover them tightly with plastic wrap. They’ll keep beautifully in the refrigerator for up to 2-3 days. When you’re ready to bake, just remove them from the fridge about 30 minutes before so they can lose a bit of their chill, then follow the instructions for your chosen cooking method (oven, Instant Pot, or air fryer). This is perfect for dinner parties – all the hard work is done long before your guests arrive!
If you’ve already baked your lava cakes and have leftovers (a rare occurrence in my kitchen!), simply cover them and store them in the refrigerator for 1-2 days. To reheat, a quick zap in the microwave for 20-30 seconds or a few minutes in a preheated oven at 350°F (175°C) will bring back that glorious molten center, although the texture might be slightly different than freshly baked. If you plan to freeze, wrap unbaked ramekins or fully baked cakes tightly. Bake from frozen, adding extra time, or thaw baked cakes before reheating.
Variations & Easy Swaps
While the classic molten chocolate lava cake is perfection, I often find myself experimenting with variations, drawing inspiration from my Moroccan roots or the diverse flavors I discover in NYC. A recipe is always a starting point for culinary creativity!
| Variation | Key Change | Best For | Difficulty Impact |
|---|---|---|---|
| Spiced Chocolate Lava Cake | Add cayenne pepper or cardamom | Those who love a hint of spice and warmth with their chocolate. | Minimal – just an extra ingredient. |
| Gluten-Free Molten Lava Cake | Substitute all-purpose flour for gluten-free baking blend | Individuals with Celiac disease or gluten sensitivity. | Low – may require slight adjustment to flour amount. |
| Orange Zest & Dark Chocolate | Infuse batter with fresh orange zest | Fans of classic chocolate-orange combination. | Minimal – easy addition. |
Spiced Chocolate Lava Cake
For a taste of North Africa meets French pastry, try adding a pinch of a warm spice blend. I sometimes include ¼ teaspoon of ground cardamom or a tiny pinch of cayenne pepper to the dry ingredients. The cardamom offers a wonderfully aromatic, slightly floral note reminiscent of Moroccan desserts, while cayenne pepper provides a subtle heat that truly amplifies the dark chocolate’s depth, creating a sophisticated and intriguing flavor profile your guests won’t soon forget.
Gluten-Free Molten Lava Cake
Making this recipe gluten-free is quite simple! Just swap the all-purpose flour for an equal amount of a good quality gluten-free all-purpose baking blend that contains xanthan gum. You might find the batter slightly thinner or thicker, so adjust with a tiny bit more GF flour if too liquid, or a tablespoon of milk if too thick. The result is a molten lava cake that still delivers on that rich, gooey center, perfect for those with dietary restrictions.
Orange Zest and Dark Chocolate Lava Cake
One of my favorite flavor pairings with dark chocolate is orange. To create an exquisite orange-infused lava cake, simply add 1 teaspoon of finely grated orange zest (using organic oranges, of course!) to the melted chocolate and butter mixture in Step 1. The fragrant oils from the zest infuse the chocolate as it cools, providing a bright, citrusy counterpoint that cuts through the richness beautifully. It’s a combination that always reminds me of the vibrant produce I find at the farmers’ markets here in New York.
How do you make chocolate lava cake in the Instant Pot without it overcooking?
The key to making chocolate lava cake in your Instant Pot without overcooking is careful timing and a swift manual release of pressure. After placing your ramekins on the trivet with 1 cup of water, set the Instant Pot to High Pressure for exactly 10 minutes. Once the time is up, immediately perform a manual quick release of the steam. Do not let it natural release, as even a few extra minutes of residual heat can firm up that molten center you’re aiming for. This precise timing ensures the edges are set and cake-like, while the interior remains gloriously liquid and gooey, just as it should be.
Can I substitute cocoa powder for the baking chocolate in this lava cake recipe?
No, unfortunately, you cannot directly substitute cocoa powder for the baking chocolate or chocolate chips in this recipe. Baking chocolate (or chocolate chips) contains cocoa butter and sugar, which contribute to the texture, richness, and ability to melt into that luscious molten center. Cocoa powder, on the other hand, is a dry ingredient that is almost entirely cocoa solids with very little fat. Using it instead of solid chocolate would drastically change the consistency and prevent the creation of the molten core. You’d likely end up with a denser, drier cake without the signature gooey interior.
What is the baking time and temperature for chocolate lava cake in a conventional oven?
For a perfect oven baked lava cake, preheat your oven to 400°F (200°C). Place the ramekins on a sturdy baking sheet to ensure even heat distribution and bake for approximately 18-20 minutes. The exact time can vary slightly depending on your oven and the size of your ramekins. You’ll know they’re done when the edges are visibly set and slightly firm, but the center still has a distinct and appealing jiggle when you gently shake the tray. This jiggle indicates the molten core is still liquid and ready to ooze out when you cut into it.
What can I serve with chocolate lava cake for a special occasion?
For a special occasion, elevating your chocolate lava cake presentation is delightful! A classic pairing is a scoop of high-quality vanilla bean ice cream; the cold, creamy contrast is simply divine. For something a little more gourmet, consider a fresh raspberry coulis (a simple blend of raspberries, a touch of sugar, and lemon juice) or a rich salted caramel sauce drizzled over the top. A light dusting of powdered sugar, a few fresh mint leaves, or even some edible gold dust can add an elegant touch. For adult gatherings, a small accompaniment of a rich red wine, like a Port or Zinfandel, or a digestif such as Baileys, completes the sophisticated experience.
Can I make the chocolate lava cake batter ahead of time?
Absolutely! This easy chocolate lava cake recipe is fantastic for making ahead. You can prepare the entire batter, divide it into your greased and floured (or cocoa-dusted) ramekins, and then cover each tightly with plastic wrap. Store them in the refrigerator for up to 2-3 days. When you’re ready to bake, just pull them out about 30 minutes beforehand to let them come closer to room temperature, and then proceed with the baking instructions for your chosen method (oven, Instant Pot, or air fryer). This makes entertaining so much less stressful!
My lava cake didn’t have a molten center. What went wrong?
If your chocolate lava cake didn’t have a molten center, it’s almost always a sign of overcooking. The delicate balance for lava cakes is to bake the exterior just enough to set, while the interior remains liquid. This can happen if the oven or Instant Pot cooked for too long, or at too high a temperature. Ovens can sometimes run hotter than their display, so a separate oven thermometer can be very helpful. For Instant Pot cooking, make sure you’re doing a manual (quick) release of pressure, not a natural release, which continues to cook the cakes.
What kind of dark chocolate is best for this recipe?
For the best results in your molten chocolate lava cakes, I highly recommend using a good quality dark chocolate with a cocoa content between 60% and 70%. Brands like Ghirardelli, Callebaut, or Valrhona are excellent choices. Using a high-quality chocolate ensures a rich, deep chocolate flavor and a smooth, luxurious molten texture. Chips work well, but a chopped dark chocolate bar often provides an even silkier melt. Avoid using milk chocolate as it’s too sweet and doesn’t offer the same intensity, and steer clear of overly bitter chocolate unless that’s your preference.
Can I use cupcake liners instead of ramekins?
While you can bake chocolate lava cakes in muffin tins lined with paper cupcake liners, I generally don’t recommend it if you want the classic presentation and perfect molten center. Cupcake liners are much thinner and heat differently than ceramic ramekins or metal molds, which means cooking times will be drastically reduced and it’s much easier to overbake them, leading to a diminished “lava” effect. If you must use them, bake them for a shorter period, keeping a very close eye on the doneness, and remove them as soon as the edges are set. However, for true molten fondants, dedicated ramekins are best.
Share Your Version!
I pour my heart into developing and refining these recipes for you, drawing from my Moroccan heritage, French training, and vibrant NYC life. There’s nothing I love more than seeing your creations come to life in your own kitchens!
So, once you’ve whipped up these decadent molten chocolate lava cakes, please don’t be shy! Leave a star rating and a comment below to share your experience – I read every single one. And if you snap a photo, share it on Instagram or Pinterest and tag @exorecipes. Did you try the spiced variation, or maybe pair it with something unexpected? I’m so curious to hear how you customized your perfect lava cake!
From my NYC kitchen to yours — I hope this recipe brings as much warmth to your table as it does to mine. — mia 🧡
Love This Recipe? Save It to Pinterest!
If you enjoyed this Chocolate Lava Cake recipe, don’t let it get lost in your browser tabs! 😄 Pin it now so you can find it again anytime — and explore hundreds more tried-and-tested recipes waiting for you on my Pinterest boards.
👉 Follow mia on Pinterest @chefrecipes2
📌 Pin this recipe · 🔁 Re-pin your favorites · 💬 Tag me when you make it — I love seeing your creations!
Molten chocolate lava cakes
Description
These molten chocolate lava cakes (also known as chocolate fondants) hide a core of gooey chocolate inside their sponge shell. A delicious and easy dessert in your Instant Pot or oven.
Ingredients
- 1 cup (180g) dark chocolate chips (or chopped dark chocolate)
- ½ cup (113g) unsalted butter (cubed)
- 3 large eggs
- 1 tsp vanilla bean paste (or extract)
- 1 ½ cups (180g) cups powdered sugar ((= icing sugar))
- 7 tbsp flour (all purpose / plain)
- 1 tsp instant Espresso powder ((optional))
- 1 tsp ground cinnamon
- ¼ tsp salt
- 4 tsp cocoa powder (or as needed)
- melted butter (or cake release spray)
- 2 tbsp Baileys (optional)
- vanilla ice cream (optional)
Instructions
- Put the chocolate and butter in a bowl and microwave for 30 second bursts, stirring in between, until melted and smooth. Alternatively set the bowl over a pot of barely simmering water and allow the chocolate to melt gradually (double boiler method). Set aside to cool slightly.
- Add the eggs and vanilla. Mix together using a small balloon whisk. The chocolate will thicken.
- Sift the flour, icing sugar, espresso powder, ground cinnamon and salt over the chocolate. Fold together until you have a glossy, thick batter and no dry streaks remain.
- Spray four ramekins or metal pudding molds with cake release or brush with melted butter. Add a scant teaspoon of cocoa powder in each and swirl to cover. Discard any excess cocoa powder. Divide the batter between the prepared ramekins or molds.
- Place the metal trivet in your pressure cooker and add 1 cup / 250ml of water. Place the ramekins on the trivet – you should have enough space to fit them all in a single layer but if not you can stack them.
- Set vent to sealing and cook for 10 minutes at high pressure. Release the steam manually and remove them lava cakes from the cooker. If any condensation has collected on top of the cakes, pat it dry with kitchen paper.
- Leave to cool for a couple of minutes before serving. Carefully invert the lava cakes on plates (the moisture from the pressure cooker makes them really easy to release).
- Preheat your oven to 400°F / 200°C. Place the molds on a heavy baking tray (one that will not warp in the oven) and cook for 18-20 minutes. The lava cakes will rise slightly if they are very soft and squidgy on top you might need to cook them for a couple of minutes more.
- Leave to cool for two minutes. Carefully run a knife around the edge of the molds. Invert onto plates and serve.
- Preheat the air fryer to 350°F / 180°C. Place the molds in the air fryer basket and bake for 10-12 minutes until the lava cakes are set on top with a slight jiggle in the middle.
- Remove the lava cakes from the air fryer basket and leave them to cool for two minutes. Carefully run a knife around the edge of the molds. Invert onto plates and serve.
- Serve warm with a scoop of vanilla ice cream on the side and perhaps a little Baileys drizzled over.
Nutrition
- Calories: 671 kcal
- Sugar: 46 g
- Fat: 40 g
- Carbohydrates: 68 g
- Protein: 9 g
Tried This Recipe? Leave a Comment!
Did you make this recipe? I’d love to hear how it turned out! Please leave a comment and a rating below. Your feedback helps other home cooks and supports cheerychop.com!
For more delicious inspiration, follow me on Pinterest!
