Table of Contents
Chili Garlic Mozzarella Bread with Lemon Zest – A Bright, Spicy Twist
I still remember the first time I added lemon zest to a bread dough. I was standing in my little Parisian kitchen, fresh out of culinary school, and I had just pulled a loaf of chili garlic bread from the oven. The aroma was intoxicating — garlic and chili singed my senses — but something was missing. I reached for a lemon, grated the bright yellow peel over the warm crust, and that simple act changed everything. That balance of heat and citrus is at the heart of my Chili Garlic Mozzarella Bread with Lemon Zest. This is not your average cheesy garlic bread. It’s a soft, pull-apart loaf infused with the warmth of chili flakes, the punch of fresh garlic, and a whisper of lemon that makes every bite sing. I’ve brought this recipe from my mother’s Moroccan spice counter, through French pastry kitchens, and right into my NYC apartment. It’s the kind of bread that disappears in minutes — and I promise you, it will become a staple in your home too.
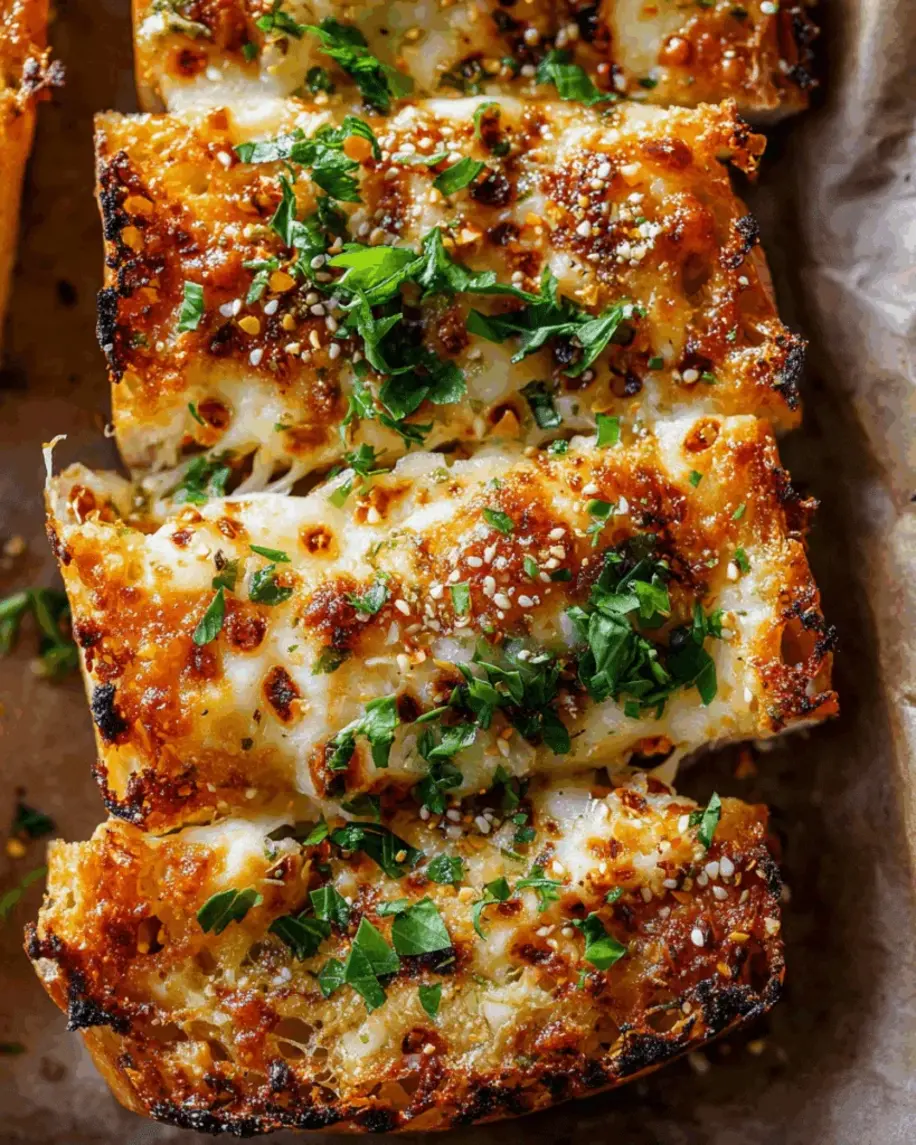
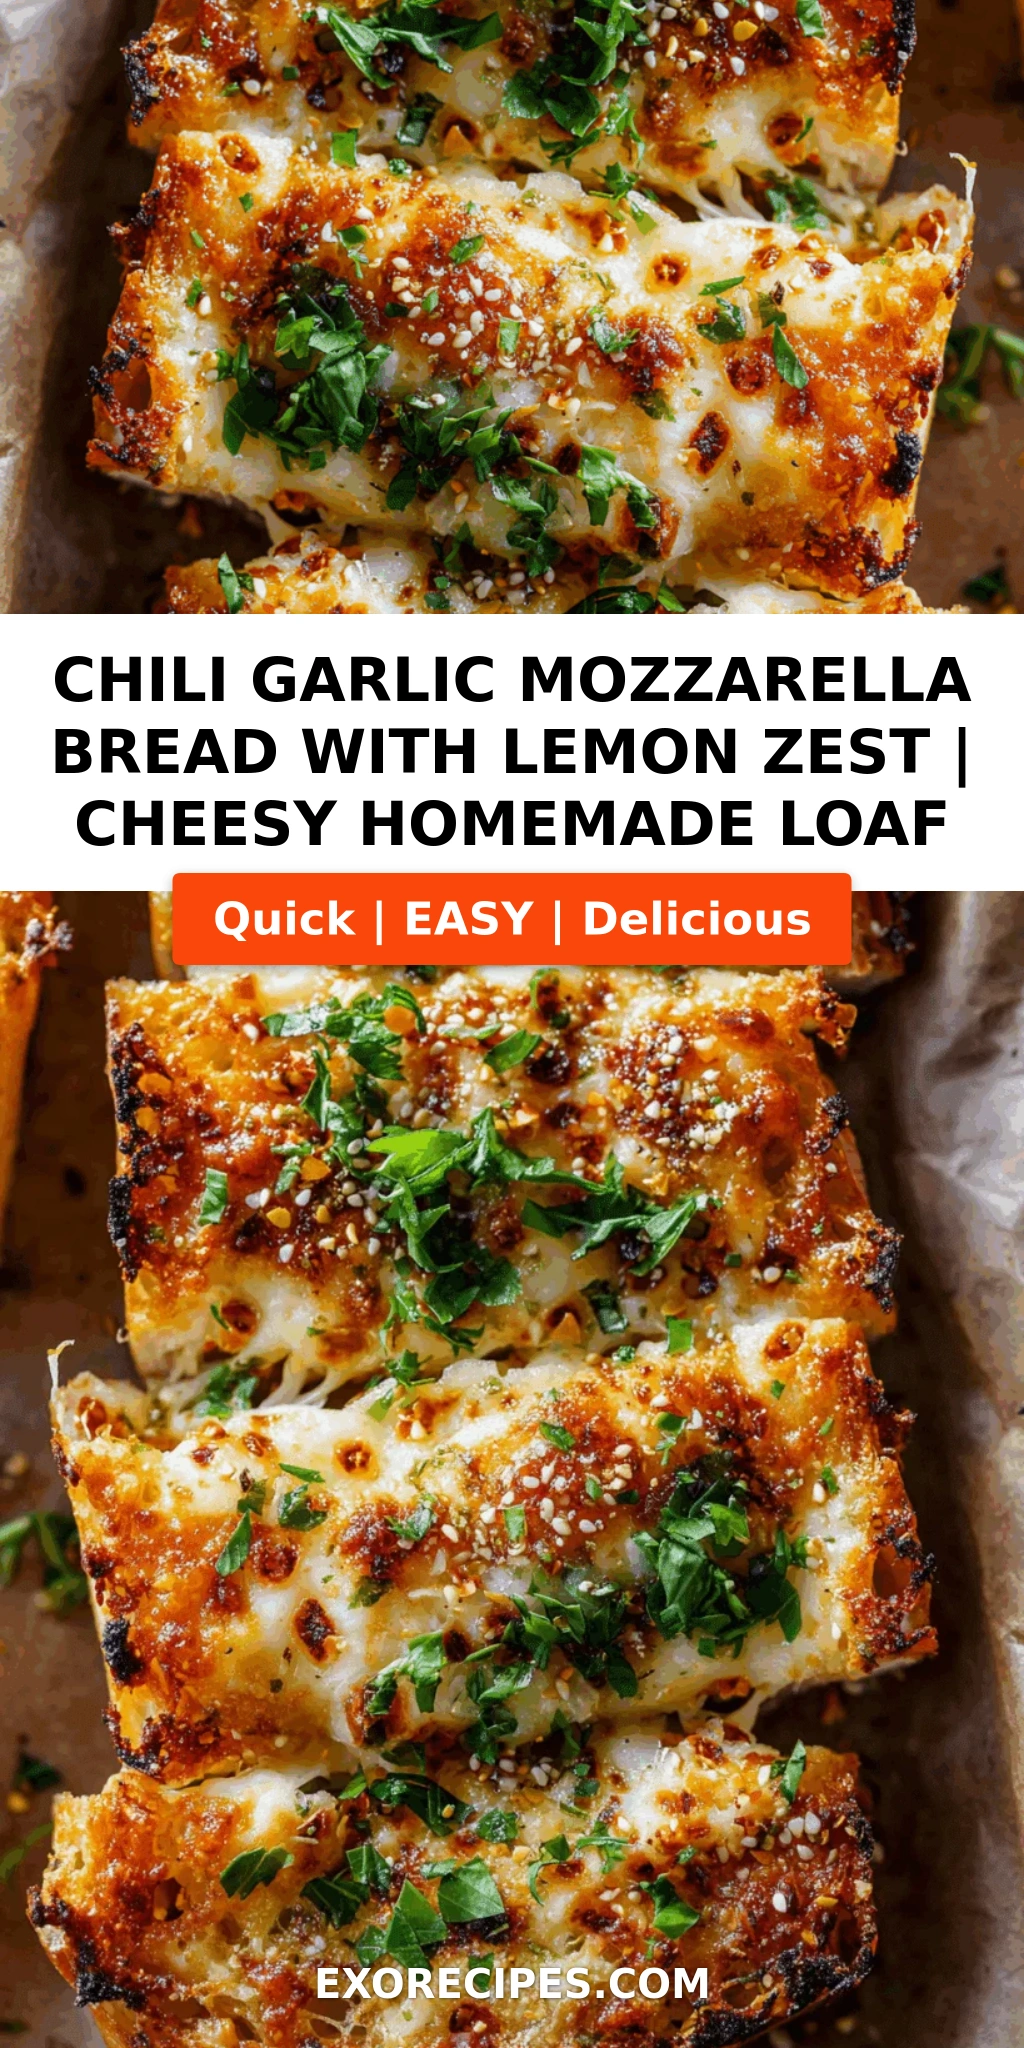
Close your eyes and imagine the first pull: steamy strands of mozzarella stretching between your fingers, the crust crackling under a golden butter glaze. The scent is a complex layering of toasted garlic, red chili, and that unmistakable lemon brightness. Each slice reveals a spiraled ribbon of melted cheese, speckled with chili seeds and tiny flecks of zest. The crumb is soft and airy, thanks to a long, slow rise, while the exterior bakes up crunchy and deeply caramelized. I’ve always loved the way a little heat wakes up the palate, and the lemon zest here does something magical — it lifts the richness of the mozzarella and makes the whole loaf feel unexpectedly light. It’s the kind of bread that pairs equally well with a bowl of tomato soup or a glass of crisp white wine. And if you’re like me, you’ll end up eating half the loaf straight from the pan, because some things are just too good to wait for.
What sets this chili garlic mozzarella bread apart is the technique I learned during my time at Le Cordon Bleu — how to build flavor into the dough itself rather than just topping the bread. By kneading the garlic, chili flakes, and lemon zest directly into the dough, every bite is infused from the inside out. I’ve also tested this recipe dozens of times to make sure the mozzarella melts into gooey pockets without turning into a greasy mess. The secret? Rolling the dough tightly and letting it rise a second time in the pan. This creates those beautiful layers of cheese and bread that pull apart like clouds. One thing I see home cooks do is overload the cheese or use pre-shredded mozzarella (which has anti-caking starches that prevent proper melting). I’ll show you exactly how to avoid that. So grab your apron — I’m about to take you through every step, from mixing the dough to pulling that golden loaf from the oven. Trust me, your kitchen is about to smell incredible.
Why This Chili Garlic Mozzarella Bread Recipe Is the Best
The flavor secret lies in the lemon zest. I know it sounds unusual — lemon and cheese? But trust me, the bright acidity cuts through the rich mozzarella and tempers the chili’s heat, creating a balanced bite that keeps you coming back. My Moroccan upbringing taught me that sweet-and-sour notes harmonize spices, and my French training refined the technique of zesting and blending. Here, I’ve combined both worlds. Each ingredient has a purpose: the chili adds warmth, the garlic delivers depth, and the lemon zest provides a clean, high note that makes the bread feel almost refreshing. It’s the kind of subtle touch that turns a simple side dish into a conversation starter.
Perfected texture is all about the double rise and the rolling method. I knead the dough until it’s silky and smooth, then let it rise slowly for a full hour. After punching it down, I roll it into a rectangle, sprinkle the mozzarella evenly (never clumped), and roll it up like a jelly roll. That second 30-minute rise in the loaf pan lets the gluten relax and the cheese settle inside the dough. The result? A bread that pulls apart in tender, cheesy spirals without any tough, doughy spots. I also brush the top with melted butter before baking — that creates a glossy, golden crust that shatters when you bite into it. It’s a small step, but it makes all the difference.
Finally, this recipe is foolproof and fast for a yeast bread. Total time from start to finish is about 2 hours, but most of that is inactive rising. The active work is only about 20 minutes. I’ve simplified the dough so it works with instant yeast — no proofing, no complicated steps. Even if you’ve never made bread from scratch before, you can pull this off. And because I’ve tested it in my own tiny NYC kitchen with limited counter space, I know it works. Whether you’re serving it alongside a big bowl of pasta or tearing into it as a snack with friends, this chili garlic mozzarella bread with lemon zest is guaranteed to be the star of your table.
Chili Garlic Mozzarella Bread Ingredients
I find the best lemons at the Union Square Greenmarket in NYC — they’re heavy with juice and intensely fragrant. The chili flakes I buy from a little spice shop in Astoria that reminds me of the souks in Marrakech. And for the mozzarella, I always choose a fresh, whole-milk block and shred it myself. Pre-shredded simply doesn’t melt the same way. Here’s everything you’ll need:
Ingredients List
- 2 1/2 cups all-purpose flour
- 1 teaspoon instant yeast
- 1 teaspoon salt
- 1 cup warm water (110°F)
- 2 tablespoons olive oil
- 2 cloves garlic, minced
- 1 teaspoon red chili flakes (adjust to taste)
- 1 tablespoon lemon zest (from about 2 lemons)
- 1 1/2 cups shredded mozzarella cheese (freshly grated)
- 1 tablespoon butter, melted (for brushing)
Ingredient Spotlight
Lemon Zest: The bright, citrusy oil in lemon zest cuts through the richness of mozzarella and tempers the chili heat. When buying, choose unwaxed, organic lemons for the best flavor. If you only have regular lemons, scrub them well with warm water. Lime zest makes a wonderful substitute — it’s slightly more floral and works beautifully with the garlic. Avoid bottled zest; it lacks the aromatic oils you need.
Mozzarella Cheese: I use whole-milk, low-moisture mozzarella for its superior melt and stretch. It creates those dreamy cheese pulls without turning greasy. Always buy a block and shred it yourself on the large holes of a box grater. Pre-shredded mozzarella contains starch and cellulose that prevent proper melting, leading to a grainy texture. For a dairy-free version, use a high-quality vegan mozzarella that melts (like Violife or Follow Your Heart) — the texture will be slightly less stretchy but still delicious.
Red Chili Flakes: I use standard red pepper flakes from the grocery store — they offer a gentle heat that builds slowly. For more intensity, add a pinch of cayenne or use Aleppo pepper flakes for a fruity warmth. My Moroccan influence sometimes leads me to add a little smoked paprika along with the chili for an extra layer of smokiness. If you’re heat-sensitive, start with 1/2 teaspoon and adjust up.
Garlic: Fresh garlic is non-negotiable here. I mince it finely and let it sit for a few minutes before adding to the dough — this allows the allicin (the compound responsible for garlic’s pungency) to develop. If you’re in a pinch, you can use 1/2 teaspoon of garlic powder, but the fresh variety gives a much more vibrant, aromatic result. I often roast a head of garlic and mash the soft cloves into the dough for a sweeter, mellower flavor — one of my favorite twists.
| Original Ingredient | Best Substitution | Flavor / Texture Impact |
|---|---|---|
| Lemon Zest | Lime Zest (1 tbsp) | More floral, slightly tarter; still bright. |
| Mozzarella (fresh block) | Low-moisture part-skim mozzarella | Slightly less stretchy but still melts; use same amount. |
| Red Chili Flakes | Aleppo Pepper Flakes | Fruity, milder heat; excellent substitution. |
| Fresh Garlic (2 cloves) | Garlic powder (1/2 tsp) | Milder, less aromatic; okay in a pinch. |
How to Make Chili Garlic Mozzarella Bread — Step-by-Step
Let me walk you through every step so you feel confident. This dough is forgiving, and I’ve added my chef’s tips to help you avoid the common pitfalls. Take your time — the wait is absolutely worth it.
Step 1: Mix the Dough
In a large bowl, whisk together 2 1/2 cups all-purpose flour, 1 teaspoon instant yeast, and 1 teaspoon salt. Add 1 cup warm water (about 110°F — it should feel like a warm bath) and 2 tablespoons olive oil. Stir with a wooden spoon until a shaggy dough forms. Turn it out onto a lightly floured surface.
💡 mia’s Pro Tip: If you don’t have instant yeast, you can use active dry — but proof it first in the warm water with a pinch of sugar until foamy (about 5 minutes). For this recipe, instant yeast saves time and is just as reliable.
Step 2: Knead and First Rise
Knead the dough for 5-7 minutes, pressing it away from you with the heel of your hand, folding it over, and repeating. It should become smooth, elastic, and slightly tacky but not sticky. Lightly grease a clean bowl with olive oil, place the dough inside, and turn to coat. Cover with a damp kitchen towel or plastic wrap. Let it rise in a warm spot for 1 hour, or until doubled in size.
⚠️ Common Mistake to Avoid: Under-kneading results in a dense, tough bread. The dough should spring back when you poke it with a finger. If it feels tight and tears easily, keep kneading. I always tell my students to think of it like giving the dough a good workout — you want that gluten to develop for a soft, airy crumb.
Step 3: Add Flavorings
Punch down the risen dough to release the air. Turn it out onto a floured surface and use your hands to flatten it into a rough rectangle. Sprinkle the minced garlic, 1 teaspoon red chili flakes, and 1 tablespoon lemon zest over the surface. Fold the dough over itself a few times to incorporate, then knead gently for about 1 minute until the add-ins are evenly distributed. Be careful not to overwork — you want the dough to stay soft.
💡 mia’s Pro Tip: Let the minced garlic sit in the lemon zest for a minute before adding — the acid helps mellow the garlic’s sharpness. I learned this trick from a Moroccan chef who always balanced raw garlic with citrus.
Step 4: Roll and Fill
Roll the flavored dough into a rectangle about 12×8 inches. Sprinkle 1 1/2 cups shredded mozzarella evenly over the surface, leaving a 1/2-inch border around the edges. Starting from one of the short sides, roll the dough up tightly into a log. Pinch the seam and the ends to seal — this prevents the cheese from leaking out during baking.
⚠️ Common Mistake to Avoid: Don’t overfill! If you add too much cheese, it will burst out and create a greasy mess. Stick to 1 1/2 cups and spread it evenly. Also, make sure your rectangle is an even thickness so the roll is uniform — lopsided rolls lead to uneven baking.
Step 5: Second Rise
Place the log seam-side down into a greased 9×5-inch loaf pan. Cover loosely with a towel and let it rise for 30 minutes. It should puff up noticeably but not double. Meanwhile, preheat your oven to 375°F (190°C).
💡 mia’s Pro Tip: If your kitchen is cool, place the loaf pan on the top of your preheating oven (the warmth from below helps the rise). Or put it in an unheated oven with a pan of hot water underneath — that creates a steamy environment that keeps the dough soft.
Step 6: Brush and Bake
Once the dough has risen, brush the top generously with 1 tablespoon melted butter. Bake for 25-30 minutes, until the top is deep golden brown and the loaf sounds hollow when tapped on the bottom. If the top is browning too quickly (after about 15 minutes), tent it loosely with foil.
⚠️ Common Mistake to Avoid: Don’t skip the butter brushing — it creates that beautiful, glossy crust and adds a touch of richness. Also, resist the urge to open the oven door frequently; you’ll let out heat and risk the bread sinking. Trust the timer and the gorgeous scent.
Step 7: Cool and Serve
Let the bread cool in the pan for 10 minutes. Then transfer it to a wire rack. Wait at least 5 more minutes before slicing — the cheese needs to set slightly so it doesn’t all ooze out. Serve warm, pulling apart those beautiful cheesy spirals.
💡 mia’s Pro Tip: For an extra golden crust, brush the bread with a little garlic butter right after it comes out of the oven. I sometimes sprinkle a pinch of flaky sea salt and a few extra chili flakes on top for a finishing touch.
| Step | Action | Duration | Key Visual Cue |
|---|---|---|---|
| 1 | Mix dough | 2 min | Shaggy mass that cleans the bowl |
| 2 | Knead & first rise | 5-7 min + 1 hr | Smooth, elastic; doubled in size |
| 3 | Add flavorings | 2 min | Zest and chili flecks visible throughout |
| 4 | Roll & fill | 3 min | Tight, even log with sealed seam |
| 5 | Second rise | 30 min | Puffy, rounded top |
| 6 | Brush & bake | 25-30 min | Deep golden brown, hollow tap sound |
| 7 | Cool & serve | 15 min total | Cheese set, bread warm to touch |
Serving & Presentation
This chili garlic mozzarella bread is at its absolute best served warm, right after baking. I love to place the whole loaf on a wooden board and let everyone tear into it — that pull-apart moment is pure magic. For a cleaner presentation, you can slice it into thick pieces and fan them out on a platter. A sprinkle of fresh parsley or thyme adds a pop of green and a hint of herbaceousness that plays nicely with the lemon.
When I entertain in my NYC apartment, I often serve this bread alongside a bowl of roasted tomato soup or a simple marinara for dipping. It also pairs beautifully with grilled meats or a crisp salad. The lemon zest means it even works with seafood — try it next to grilled shrimp or salmon. One of my favorite memories is serving this at a Moroccan-inspired dinner party: I placed the bread next to a fragrant tagine of lamb and apricots, and the guests couldn’t stop reaching for more. The chili and lemon cut through the richness of the stew perfectly.
For an extra special touch, drizzle a little extra-virgin olive oil over the top just before serving and sprinkle with sea salt and a few extra lemon zest curls. If you’re feeling fancy, warm up a small dish of honey with chili flakes for a sweet-spicy dip that will blow your mind. Trust me, it’s a combination that works.
| Pairing Type | Suggestions | Why It Works |
|---|---|---|
| Side Dish | Roasted tomato soup, marinara sauce, grilled vegetables | The bread’s heat and cheese complement the acidity of tomatoes and the char of veggies. |
| Sauce / Dip | Honey-chili drizzle, garlic aioli, herbed olive oil | Sweet or creamy dips balance the spicy, cheesy bread. |
| Beverage | Chilled Sauvignon Blanc, light lager, lemonade with mint | Crisp, cold drinks refresh the palate between bites of spicy, buttery bread. |
| Garnish | Fresh thyme, parsley, extra lemon zest curls, flaky sea salt | Herbs add color and freshness; salt enhances all flavors. |
Make-Ahead, Storage & Reheating
Living in NYC means I’m always trying to get ahead of the week’s cooking. This bread is perfect for meal prep because you can make it a day ahead and it still tastes amazing. Here’s how to store it so it stays soft and delicious.
| Method | Container | Duration | Reheating Tip |
|---|---|---|---|
| Refrigerator | Airtight container or zip-top bag | Up to 3 days | Wrap in foil and warm in 350°F oven for 10 minutes, or microwave in 20-second bursts. |
| Freezer | Wrap tightly in plastic wrap then foil, or in a freezer bag | Up to 2 months | Thaw at room temp, then reheat in oven at 350°F for 12 minutes. Do not microwave from frozen — it gets soggy. |
| Make-Ahead | Prepare dough through Step 5 (second rise), then refrigerate | Up to 12 hours in fridge | Let the pan sit at room temp for 30 min while preheating, then bake as directed. This gives a slow, flavorful rise. |
I often make this bread for Sunday night dinners and then keep leftovers for weekday lunches. To reheat, I prefer the oven — it crisps the crust and melts the cheese again beautifully. If you’re in a rush, the microwave works but the crust will be softer. One trick: if the bread has been refrigerated, let it come to room temperature before reheating to ensure even warming. And whatever you do, don’t throw it out if it’s a day old — I’ve turned stale slices into the most incredible croutons for Caesar salad. Just cube and toast with a little olive oil and garlic powder.
Variations & Easy Swaps
One of the things I love most about this recipe is how adaptable it is. Over the years, I’ve played with different cheeses, spices, and even flours. Here are three variations that have become favorites among my readers.
| Variation | Key Change | Best For | Difficulty Impact |
|---|---|---|---|
| Smoky Cheddar & Lime | Replace mozzarella with smoked cheddar, lemon zest with lime zest, add 1/2 tsp smoked paprika | Pairing with BBQ dishes or chili | No change (easy) |
| Herb & Garlic (No Chili) | Omit chili flakes, add 2 tbsp mixed fresh herbs (rosemary, thyme, oregano), keep lemon zest | Kid-friendly, milder flavor | No change (easy) |
| Gluten-Free Version | Use 1:1 gluten-free flour blend with xanthan gum (e.g., King Arthur Measure for Measure) | Celiac or gluten-sensitive guests | Medium (dough is stickier; handle with wet hands) |
Smoky Cheddar & Lime Variation
This is my go-to when I want a deeper, smokier flavor. Substitute the mozzarella with 1 1/2 cups of grated smoked cheddar (the creamier, the better) and swap the lemon zest for lime zest. Add 1/2 teaspoon smoked paprika along with the chili flakes. The lime zest brightens the cheddar’s richness, and the smoked paprika adds a barbecue-like warmth. I serve this version alongside grilled chicken or a hearty bean chili. It’s also incredible dipped into a creamy ranch dressing — the tang cuts through the smoke.
Herb & Garlic (No Chili) Variation
For those who prefer a milder bread, omit the chili flakes entirely and fold in 2 tablespoons of finely chopped fresh herbs — rosemary, thyme, and oregano work beautifully. Keep the garlic and lemon zest; they’ll still give the bread a bright, savory character. This version turns into a perfect companion for brunch — think alongside scrambled eggs or a breakfast frittata. The herbs infuse the dough with a garden-fresh aroma, and the lemon zest keeps it from feeling heavy. I especially love this one in spring when herbs are at their peak.
Gluten-Free Version
I’ve tested this with my favorite gluten-free all-purpose blend (King Arthur Measure for Measure) and it works surprisingly well. The dough will be stickier and more batter-like, so don’t try to knead it on a floured surface — instead, use wet hands and fold it gently in the bowl. Let it rise in the loaf pan directly (no need to shape a rectangle and roll). Just spoon the dough in layers: add a third of the dough, sprinkle some cheese, repeat. The texture is denser than the wheat version, but the flavor is still fantastic. For best results, let the dough rest for 10 minutes after mixing to hydrate the blend. And bake for 5-10 minutes longer, covering with foil if the top browns too fast.
How do you prevent the mozzarella from becoming too stringy or overcooked in chili garlic bread?
Great question! The key is to use low-moisture, whole-milk mozzarella (not fresh buffalo mozzarella, which releases too much water). Shred it yourself rather than using pre-shredded, which contains starches that lead to a grainy melt. Also, roll the dough tightly so the cheese is enclosed and protected from direct oven heat. Finally, don’t overbake — the bread is done when the crust is golden and sounds hollow when tapped, which takes about 25-30 minutes at 375°F. If the cheese does peek out and gets too brown, tent the loaf loosely with foil during the last 10 minutes. The cheese will still be beautifully stretchy inside without being stringy or tough.
What can I use instead of lemon zest to add brightness to chili garlic mozzarella bread?
Lemon zest is wonderful, but you have several excellent alternatives. Lime zest is my top pick — it’s more floral and slightly tarter, which pairs beautifully with chili and garlic. Orange zest is sweeter and adds a warmer, almost holiday-like flavor. If you don’t have fresh citrus, you can use a teaspoon of lemon juice mixed into the water (though it will add acidity rather than bright aromatic oil). Another option: add a tablespoon of finely chopped fresh herbs like cilantro or parsley — they won’t give you the same citrusy lift, but they bring a fresh green note that works well. For a completely different twist, try a splash of white wine vinegar in the dough — about 1/2 teaspoon — for a subtle tang.
Should I toast the bread before adding the chili garlic and mozzarella toppings?
No, you don’t need to toast the bread for this recipe because we’re baking the loaf from scratch — the dough contains all the flavorings and cheese, and it bakes into a complete bread. However, if you’re making a different style (like a quick bread or using pre-baked loaves), toasting could help create a barrier to prevent sogginess. In this recipe, the dough absorbs the garlic and chili during the rise, and the mozzarella melts into pockets. The bread itself bakes up soft with a crispy crust, so toasting is unnecessary and would actually prevent the cheese from melting evenly into the dough.
Can I make chili garlic mozzarella bread with lemon zest in an air fryer instead of an oven?
Yes, you can! The air fryer works great for this bread, though you’ll need a smaller loaf pan that fits inside your air fryer basket. I recommend a 7×3-inch mini loaf pan. After the second rise, brush with butter and place the pan in the air fryer. Cook at 325°F for 18-22 minutes, checking after 15 minutes. The air fryer circulates hot air faster, so the crust darkens more quickly. If the top is browning too fast, lower the temperature to 300°F and extend the time by a few minutes. Let it cool in the pan for 10 minutes before removing. The texture will be very similar to oven-baked — just a touch more crusty on the outside.
Can I use other cheeses instead of mozzarella in this chili garlic bread?
Absolutely! Mozzarella is classic because of its mild flavor and great melt, but you can experiment. Provolone adds a slightly sharper, buttery taste and melts beautifully — try using half provolone and half mozzarella. Fontina is creamy and nutty, melting into velvety pockets. For a bolder flavor, use cheddar or gouda (smoked gouda is fantastic). Just be aware that harder cheeses like Parmesan don’t melt as well; use them only in combination with a good melting cheese. A blend of mozzarella and gruyère would be divine — gruyère adds a nutty depth. Whichever you choose, shred it yourself and use about the same total amount (1 1/2 cups).
Why did my bread turn out dense and heavy instead of light and airy?
Dense bread usually comes from one of a few reasons. First, the dough may not have been kneaded enough — gluten development is crucial for a light crumb; you should knead for a full 5-7 minutes until the dough is smooth and elastic. Second, the water temperature matters: if it’s too hot (over 120°F), it will kill the yeast; too cool and the yeast will be sluggish. Use an instant-read thermometer to hit 110°F. Third, the first rise needs to be long enough — the dough should double in size. If your kitchen is cold, find a warmer spot (like near a preheating oven). Finally, don’t skip the second 30-minute rise in the pan; it gives the bread final volume before baking. Patience is the secret!
How do I store leftover chili garlic mozzarella bread?
Leftover bread can be stored in an airtight container or a zip-top bag at room temperature for up to 2 days. For longer storage, refrigerate it (up to 3 days) or freeze it for up to 2 months. When refrigerated, the bread will firm up slightly; reheat it in a 350°F oven for about 10 minutes to restore its soft, cheesy interior. If freezing, wrap the cooled loaf tightly in plastic wrap then foil — this prevents freezer burn. To serve from frozen, let it thaw at room temperature for an hour, then rewarm in the oven. Avoid microwaving directly from frozen, as it can make the bread soggy.
Can I double this recipe to make two loaves?
Yes, you can double all ingredients to make two loaves. Use a large bowl or stand mixer for the dough (the volume will be about 4 pounds). You may need to knead for a minute or two longer to fully incorporate everything. Let the dough rise in a single large bowl (it will double in size). After punching down, divide the dough in half and proceed with rolling, filling, and second rise in two separate loaf pans. Bake both loaves at the same time on the middle and lower racks of your oven, swapping positions halfway through for even baking. The baking time may need an extra 5 minutes since the oven is more crowded.
What is the best way to reheat this bread so the cheese is still stretchy?
The best way to reheat this bread is in the oven: wrap slices or the whole loaf in aluminum foil and warm at 350°F for about 10 minutes. The foil traps steam, which keeps the bread moist and the cheese soft. If you want a crispier crust, unwrap for the last 2 minutes. A toaster oven works similarly. For a single slice, you can microwave it in 15-second intervals — but watch closely, as the cheese can get rubbery if overheated. Slicing the bread before reheating helps distribute heat more evenly. And if you’ve frozen the bread, let it thaw completely first for the best texture.
Is it possible to make this bread vegan?
Yes, with a few simple swaps. Use a good-quality vegan mozzarella shred (I recommend Violife or Follow Your Heart) — they melt beautifully, though they won’t have the same stretch as dairy mozzarella. Replace butter with vegan margarine or olive oil for brushing. The dough itself is already vegan (flour, yeast, water, oil). The lemon zest, garlic, and chili are all naturally vegan. Some vegan mozzarella brands are saltier, so you may want to reduce the added salt by a quarter teaspoon. The result is still deliciously cheesy, spicy, and bright — a perfect plant-based crowd-pleaser.
Share Your Version!
Now it’s your turn — I can’t wait to see your chili garlic mozzarella bread with lemon zest! Did you try the smoky cheddar version? Or maybe you added extra chili for a fiery kick? Drop a star rating and a comment below to tell me how it turned out. Tag me @exorecipes on Instagram or Pinterest when you share your photo — I personally read every comment and love seeing your creations. And if you have a question about a substitution or technique, just ask! This recipe is meant to be your own, and I’m here to help you make it perfect.
From my NYC kitchen to yours — I hope this recipe brings as much warmth to your table as it does to mine. — mia 🧡
Love This Recipe? Save It to Pinterest!
If you enjoyed this Chili Garlic Mozzarella Bread with Lemon Zest recipe, don’t let it get lost in your browser tabs! 😄 Pin it now so you can find it again anytime — and explore hundreds more tried-and-tested recipes waiting for you on my Pinterest boards.
👉 Follow mia on Pinterest @chefrecipes2
📌 Pin this recipe · 🔁 Re-pin your favorites · 💬 Tag me when you make it — I love seeing your creations!
Chili Garlic Mozzarella Bread with Lemon Zest
- Prep Time: 20 minutes
- Cook Time: 30 minutes
- Total Time: 1 hour 50 minutes (includes rising time)
- Yield: 8 servings 1x
- Method: Appetizer / Side Dish
- Cuisine: Italian-American
Description
A soft, cheesy bread loaf infused with spicy chili, garlic, and fresh lemon zest for a bright twist.
Ingredients
- 2 1/2 cups all-purpose flour
- 1 teaspoon instant yeast
- 1 teaspoon salt
- 1 cup warm water (110°F)
- 2 tablespoons olive oil
- 2 cloves garlic, minced
- 1 teaspoon red chili flakes (adjust to taste)
- 1 tablespoon lemon zest
- 1 1/2 cups shredded mozzarella cheese
- 1 tablespoon butter, melted (for brushing)
Instructions
- In a large bowl, combine flour, yeast, and salt. Add warm water and olive oil; stir until a dough forms.
- Knead dough on a floured surface for 5-7 minutes until smooth. Place in a greased bowl, cover, and let rise for 1 hour until doubled.
- Punch down dough. Mix in minced garlic, chili flakes, and lemon zest until evenly distributed.
- Roll dough into a rectangle (about 12×8 inches). Sprinkle mozzarella cheese evenly on top.
- Roll up the dough tightly from the short side to form a log. Pinch seams to seal.
- Place the log seam-side down in a greased loaf pan. Cover and let rise for 30 minutes.
- Preheat oven to 375°F (190°C). Brush dough with melted butter.
- Bake for 25-30 minutes until golden brown. Cool in pan for 10 minutes, then transfer to a wire rack. Serve warm.
Notes
For extra heat, add more chili flakes or a pinch of cayenne. Lemon zest can be substituted with lime zest. Best served fresh.
Nutrition
- Calories: 280
- Sugar: 2g
- Fat: 12g
- Carbohydrates: 32g
- Protein: 10g
Tried This Recipe? Leave a Comment!
Did you make this recipe? I’d love to hear how it turned out! Please leave a comment and a rating below. Your feedback helps other home cooks and supports cheerychop.com!
For more delicious inspiration, follow me on Pinterest!
