
“`html
Table of Contents
Chicken Fried Chicken: Crispy & Classic Southern
There are meals that simply feel like home, and for me, after years of perfecting techniques in Paris and now navigating the vibrant culinary scene of New York City, a perfectly executed Chicken Fried Chicken is one of them. It’s a dish that speaks to comfort, tradition, and the sheer joy of good food done right. My journey with this iconic dish began not in a bustling bistro, but in my mother’s kitchen in Morocco, where the principles of breading and frying were applied to different ingredients, teaching me the magic of transforming simple elements into something extraordinary. This recipe is my homage to that foundational understanding, elevated with a touch of New York flair and a professional cook’s precision, making it an easy yet profoundly satisfying centerpiece for any meal.
Imagine sinking your fork into a piece of chicken with a crust so impossibly crisp, it shatters with the slightest pressure, revealing succulent, juicy meat beneath. That’s the promise of this classic fried chicken recipe. The aroma alone, a warm invitation to a delectable experience, hints at the savory depths to come. The secret isn’t just in the frying, but in the meticulous layering of flavors and textures — a fine flour coating infused with just the right blend of savory spices, married with a tangy buttermilk marinade that tenderizes the chicken to perfection. It’s a symphony of golden-brown perfection and comforting richness, all bound together by a luscious, silky gravy that’s a culinary hug in itself.
What sets this buttermilk fried chicken apart is its approachability without compromising on authenticity or flavor. I’ve streamlined a few steps and shared my secrets for achieving that picture-perfect crust every single time, even for home cooks. From my experience in professional kitchens, I know that the right marinade and coating are crucial, but a common mistake can be overcrowding the pan, which leads to soggy chicken. I’ll guide you through preventing this and ensure your fried chicken is as impressive as any bistro’s. Get ready for a crispy fried chicken recipe that will become a staple in your kitchen.
Why This Chicken Fried Chicken Recipe Is the Best
My approach to this classic dish combines the best of my culinary heritage and training. Coming from a Moroccan background where spices and marinades are key, I understand the foundational magic of tenderizing and flavoring protein. My time in Parisian culinary schools honed my understanding of emulsification and sauce-making, which I’ve applied to the gravy. This recipe isn’t just about dredging and frying; it’s about building layers of flavor and ensuring a perfectly tender interior with an unbelievably crispy exterior, a technique I’ve refined to be achievable and spectacular in any home kitchen.
The secret to that irresistible crunch lies in the dual-coating technique and the precise oil temperature, honed from countless hours spent perfecting emulsions and frying techniques in professional kitchens. I ensure the buttermilk marinade has a touch of hot sauce for a subtle kick and to help tenderize the chicken, while the flour mixture is seasoned generously. The careful balance of baking powder and soda in the dredge creates air pockets that lead to an exceptionally light and crispy coating. This isn’t just breading; it’s a carefully engineered crust designed for maximum flavor and textural delight.
For many, fried chicken can seem daunting, but I’ve designed this recipe with simplicity and success in mind for the home cook. The ingredients are common, and the steps are clearly laid out to guide you. You don’t need fancy equipment; a standard skillet or Dutch oven works beautifully. I’ll show you how to manage the oil temperature effectively and avoid the common pitfalls, ensuring you achieve a beautiful golden-brown finish and juicy meat every time, making this delicious chicken fried chicken a regular on your dinner rotation.
Chicken Fried Chicken Ingredients
Growing up in Morocco, we learned early on to appreciate the subtle art of transforming simple, high-quality ingredients into something spectacular. I often source my chicken from local butchers here in New York City, and for my pantry staples, I frequent the markets in Hell’s Kitchen. This recipe uses readily available items, but the quality of your chicken and your buttermilk can make a difference. It’s a testament to how classic French training meets global influences right here in my NYC kitchen.
Ingredients List
- 6-8 thin sliced chicken breasts (about 1.5-2 lbs total)
- 2 cups all-purpose flour
- 2 tsp baking powder
- 1 tsp baking soda
- 1 tsp salt
- 1 tsp black pepper
- 1 tsp garlic powder
- 1 ½ cups buttermilk
- 1 large egg
- 1 Tbs hot sauce (like Frank’s RedHot or Texas Pete)
- Vegetable or Canola oil for frying (enough for 2-3 inches deep)
- ¼ cup reserved oil from frying (for gravy)
- ⅓ cup all-purpose flour (for gravy)
- 2 cups milk (whole milk recommended)
- Salt and freshly ground black pepper, to taste (for gravy)
Ingredient Spotlight
Buttermilk: This is the star of the marinade! Its acidity tenderizes the chicken beautifully and adds a subtle tang that enhances the overall flavor profile. Look for full-fat buttermilk for the best results. If you don’t have any on hand, you can make a quick substitute by adding 1 tablespoon of lemon juice or white vinegar to 1 ½ cups of milk, letting it sit for 10-15 minutes until it thickens slightly.
Thin-Sliced Chicken Breasts: Using thin-cut chicken ensures quicker, more even cooking, preventing the outside from burning before the inside is done. This is crucial for that perfect crispy fried chicken experience. If your chicken breasts are thick, you can pound them thin yourself between two sheets of parchment paper using a meat mallet or the bottom of a heavy skillet. Aim for about ½-inch thickness.
All-Purpose Flour: This forms the base of your dredging mixture for that classic crispy coating. The addition of baking powder and baking soda helps create a lighter, crispier crust by incorporating air. Ensure your flour is fresh. For a gluten-free variation, a good quality gluten-free all-purpose flour blend works well, though you might need to adjust the liquid slightly.
| Original Ingredient | Best Substitution | Flavor / Texture Impact |
|---|---|---|
| Buttermilk | Milk + 1 Tbs Lemon Juice/Vinegar | Slightly less tangy, but effectively tenderizes. |
| Thin Chicken Breasts | Boneless, skinless chicken thighs (pounded slightly) | Thighs are more forgiving and juicier but may require slightly longer frying. |
| All-Purpose Flour | Gluten-Free All-Purpose Flour Blend | Works well, may require a slightly thicker batter consistency. Ensure it contains a binder like xanthan gum. |
How to Make Chicken Fried Chicken — Step-by-Step
This is where the magic happens, transforming simple ingredients into a culinary masterpiece. Just follow these steps and my tips along the way!
Step 1: Heat the Oil
Pour vegetable or canola oil into a deep fryer or a heavy-bottomed skillet, such as a cast-iron pan, to a depth of about 2-3 inches. Heat the oil to 325°F (160°C) over medium-high heat. Using a thermometer is highly recommended for perfect results.
💡 mia’s Pro Tip: Maintaining the correct oil temperature is crucial for crispy fried chicken. Too low, and it becomes greasy; too high, and the crust burns before the chicken cooks through. My Parisian chefs always stressed the importance of a reliable thermometer!
Step 2: Prepare Dry Mix
In a large bowl, whisk together the 2 cups of flour, baking powder, baking soda, salt, pepper, and garlic powder. This seasoned flour mixture is your base for the crispy coating.
Step 3: Prepare Wet Mix
In another medium bowl, whisk together the 1 ½ cups of buttermilk, 1 large egg, and 1 tablespoon of hot sauce until well combined. This is your binder and tenderizer.
Step 4: Dredge the Chicken
Take each thin-sliced chicken breast and dredge it thoroughly in the seasoned flour mixture, shaking off any excess. Then, dip it into the buttermilk mixture, letting any excess drip off, and finally, dredge it back into the flour mixture. Press the flour onto the chicken firmly to create a good, thick coating. Place the coated chicken pieces on a wire rack or parchment paper while you coat the rest.
⚠️ Common Mistake to Avoid: Don’t just lightly coat the chicken. Press the flour mixture onto it well, especially the second coating, to ensure the breading adheres properly during frying. This is key for that thick, crispy texture.
Step 5: Fry the Chicken
Carefully place 2-3 pieces of chicken into the hot oil at a time, being careful not to overcrowd the pan. Fry for 3-5 minutes per side, until the chicken is golden brown and cooked through. The internal temperature should reach 165°F (74°C). Remove the fried chicken with a slotted spoon or tongs and drain on a paper towel-lined plate. Repeat with the remaining chicken, ensuring the oil temperature returns to 325°F (160°C) between batches.
Step 6: Make the Gravy Base
Once all the chicken is fried, carefully pour out about ¼ cup of the reserved frying oil into a separate large pan or skillet. Heat this oil over medium-high heat. Whisk in the ⅓ cup of flour and cook, stirring constantly, for about 1 minute until smooth and slightly golden. This creates your roux.
Step 7: Finish the Gravy
Slowly pour in the 2 cups of milk, whisking continuously to blend the roux smoothly and prevent lumps. Continue to cook and whisk until the gravy thickens to your desired consistency. Season generously with salt and freshly ground black pepper to taste.
💡 mia’s Pro Tip: For an extra creamy gravy, use whole milk. If you find the gravy too thick, you can thin it out with a splash more milk. Seasoning is key here; taste and adjust until it’s perfect!
Step 8: Serve
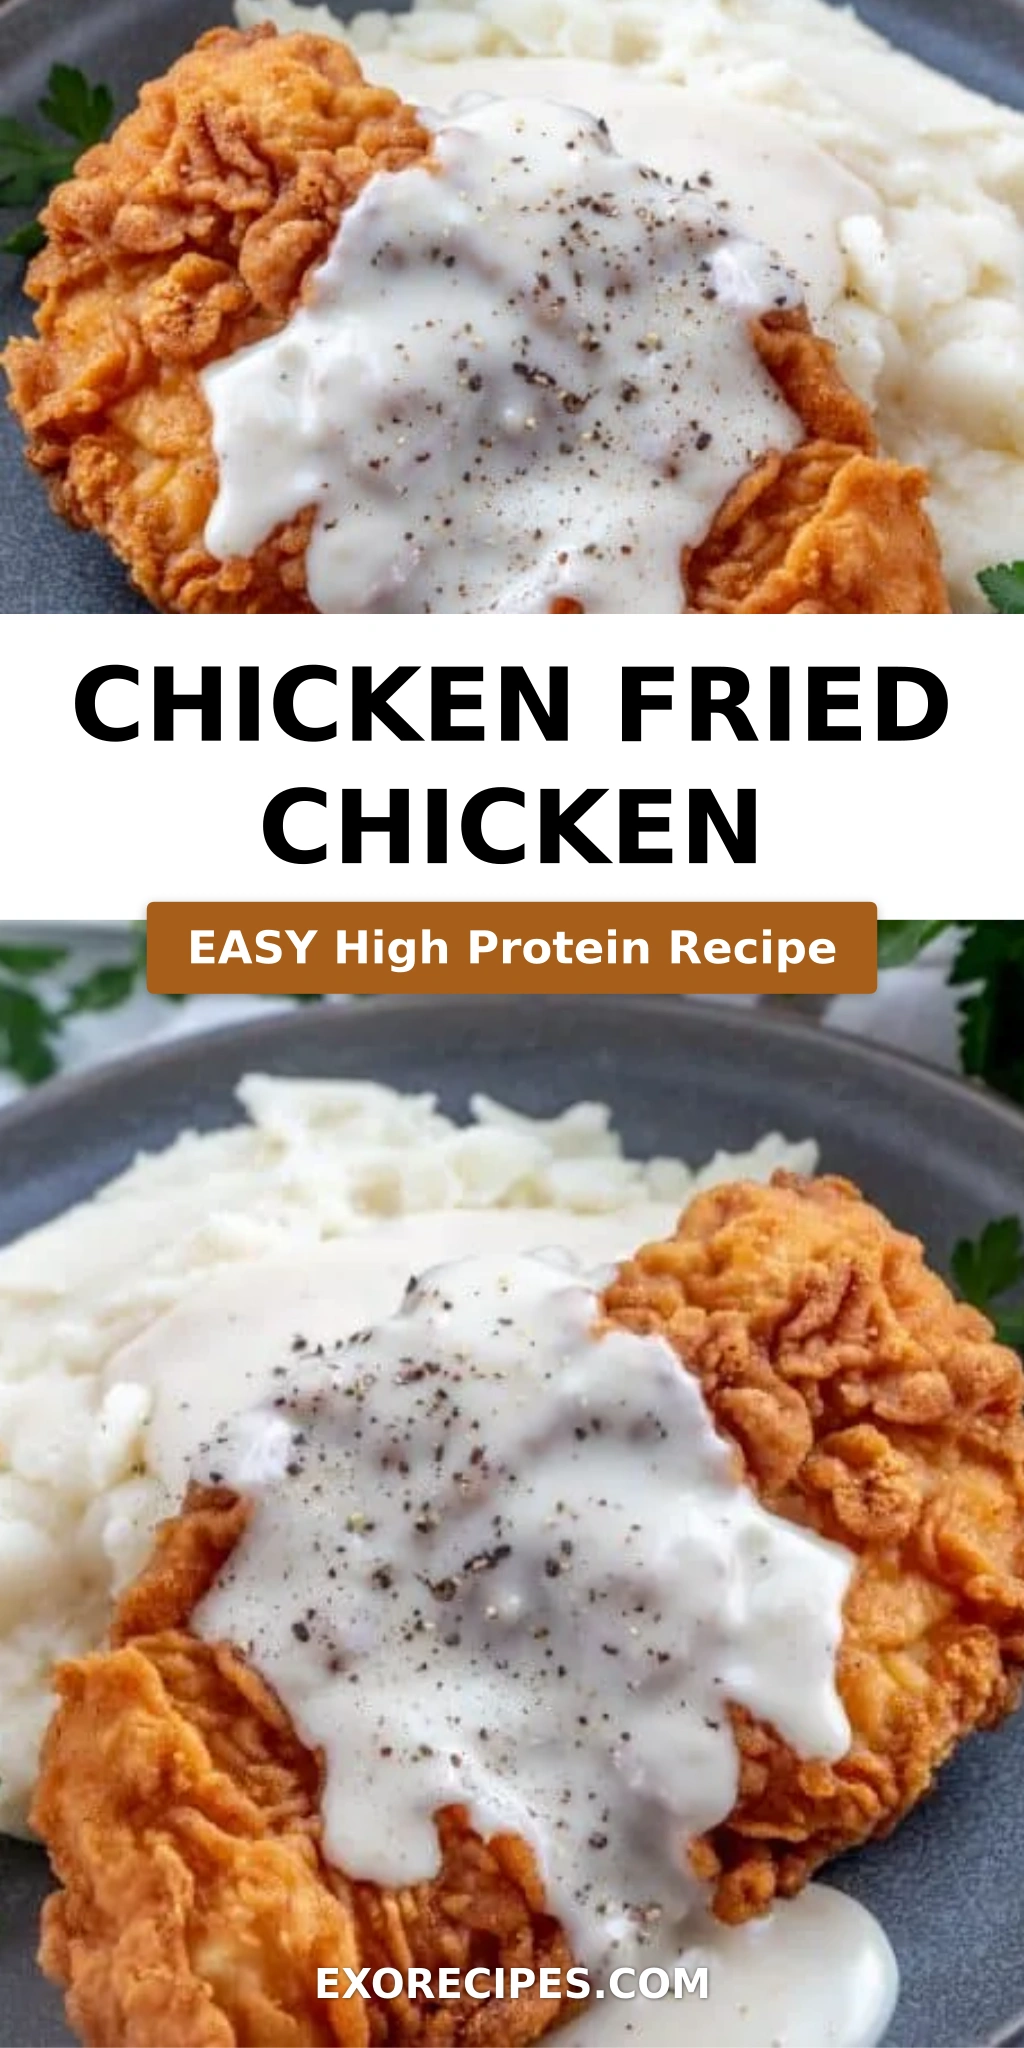
Serve the crispy fried chicken immediately, generously spooning your homemade gravy over each piece. Enjoy this classic comfort food!
| Step | Action | Duration | Key Visual Cue |
|---|---|---|---|
| 1 | Heat Oil | 10-15 mins | 325°F (160°C) on thermometer |
| 2 | Prepare Dry Mix | 2 mins | Well-combined powdery mixture |
| 3 | Prepare Wet Mix | 1 min | Uniform liquid consistency |
| 4 | Dredge Chicken | 5 mins | Thick, even coating on chicken |
| 5 | Fry Chicken | 15-20 mins (total) | Deep golden brown, crispy crust |
| 6 | Make Gravy Base | 1 min | Smooth, slightly thickened paste |
| 7 | Finish Gravy | 5-7 mins | Rich, pourable gravy consistency |
| 8 | Serve | Immediately | Hot, crispy chicken with gravy |
Serving & Presentation
Plating this classic dish is all about celebrating its comforting nature. I love serving Chicken Fried Chicken with a generous drizzle of that homemade white gravy. In New York, we often pair this with vibrant, fresh sides that cut through the richness. Think about a bright, crisp green salad, some tangy coleslaw, or fluffy mashed potatoes. A sprinkle of fresh parsley or chives can add a pop of color and freshness, reminiscent of the vibrant markets I love to explore on a Saturday morning. This humble dish deserves to be presented with the same care and attention I’d give a more elaborate meal.
| Pairing Type | Suggestions | Why It Works |
|---|---|---|
| Side Dish | Mashed Potatoes, Collard Greens, Mac & Cheese, Cornbread | Classic comfort food pairings that complement the richness. |
| Sauce / Dip | Extra Gravy, Hot Sauce, Honey Mustard | Enhance the savory notes or add a touch of spice and sweetness. |
| Beverage | Iced Tea, Lemonade, Lager Beer | Refreshing drinks to balance the fried food. |
| Garnish | Fresh Parsley, Chives, Pickled Red Onions | Adds a fresh, vibrant contrast and visual appeal. |
Make-Ahead, Storage & Reheating
While best served fresh, I know how busy life can get, especially in a city like New York. I often make this chicken ahead for busy weeknights, and it holds up beautifully. The key is proper storage and reheating to maintain that coveted crispiness. My Moroccan mother always said that good food deserves good care, even after it’s cooked.
| Method | Container | Duration | Reheating Tip |
|---|---|---|---|
| Refrigerator | Airtight container or wrapped tightly in foil | 3-4 days | Reheat in a 375°F (190°C) oven until heated through and crispy. |
| Freezer | Freezer-safe bag or container, separated by parchment | 1-2 months | Thaw in the refrigerator overnight, then reheat in oven as above. |
| Make-Ahead | Coat chicken, then refrigerate uncovered for 30 mins before frying. | Can fry within 2-3 hours of coating. | Fry as directed, ensuring oil is at correct temperature for best crisp. |
For reheating, the oven is your best friend. Avoid the microwave at all costs if you want to recapture that crisp. Spread the cooled chicken in a single layer on a baking sheet and warm it in a preheated oven at around 375°F (190°C) for 10-15 minutes, or until heated through and crispy again. For the gravy, gently warm it in a saucepan over low heat, whisking occasionally, or microwave it in short bursts.
Variations & Easy Swaps
I love to play with flavors, drawing inspiration from my Moroccan roots and French techniques. Here are a few ways I like to switch up this classic dish.
| Variation | Key Change | Best For | Difficulty Impact |
|---|---|---|---|
| Spicy Southern | Add cayenne pepper & smoked paprika to flour mix; increase hot sauce in buttermilk. | Spice lovers | Easy |
| Gluten-Free | Use a gluten-free flour blend for dredging; ensure gluten-free baking powder/soda. | Those with gluten sensitivities | Slightly more careful mixing |
| Herby Lemon Zest | Add finely chopped fresh parsley and lemon zest to the flour mix. | A brighter, fresher take | Easy |
Spicy Southern Fried Chicken
For a kick, I love to add about ½ teaspoon of cayenne pepper and 1 teaspoon of smoked paprika to my flour dredge. I also increase the hot sauce in the buttermilk to 2 tablespoons. This variation brings a beautiful depth of flavor and a pleasant warmth that makes the chicken irresistible, inspired by the vibrant spices I grew up with in Morocco.
Gluten-Free Buttermilk Fried Chicken
Achieving a great gluten-free fried chicken is entirely possible! Simply swap the all-purpose flour with a good quality gluten-free all-purpose flour blend in both the dredge and the gravy. Make sure your blend is suitable for baking and usually contains xanthan gum for binding. The texture will be very similar, with a delightful crunch, just without the gluten!
Herby Lemon Zest Variation
To brighten up this classic, I often incorporate fresh herbs and citrus. Finely chop about 2 tablespoons of fresh parsley or chives and mix them into the flour dredge along with the zest of one lemon. This adds a lovely, fresh counterpoint to the rich, fried chicken, making it feel a bit more modern and elegant, like something you might discover at a chic café in Paris.
What is the difference between chicken fried chicken and country fried chicken?
The main difference lies in the gravy and the coating. Country fried chicken is typically pan-fried and has a lighter, sometimes thinner, coating, and is served with a white gravy that’s often made with pan drippings. Chicken fried chicken, on the other hand, usually has a thicker, crispier coating, similar to Southern fried chicken, and is also served with a white gravy, though it might be made separately or in its own pan, as in this recipe. Both are delicious comfort food staples!
Can I use boneless chicken thighs instead of chicken breasts for chicken fried chicken?
Absolutely! Boneless, skinless chicken thighs are a fantastic alternative to chicken breasts for chicken fried chicken. They tend to be more forgiving and stay incredibly juicy and tender due to their higher fat content. You might need to pound them slightly to an even thickness for consistent cooking, and they might take a minute or two longer to fry than thin chicken breasts. The result is exceptionally moist chicken with that beloved crispy crust.
How do I keep the breading from falling off when frying chicken fried chicken?
To ensure your breading sticks, make sure the chicken is well-coated and pressed firmly into the flour mixture during the second dredge. Allowing the dredged chicken to rest on a wire rack for about 10-15 minutes before frying can also help the coating adhere better. Ensure your oil is at the correct temperature; if it’s too low, the coating can become heavy and detached. A good double-dredge with firm pressing is key!
What is the best oil temperature for frying chicken fried chicken?
The ideal oil temperature for frying chicken, including chicken fried chicken, is generally between 325°F and 350°F (160°C to 175°C). I personally prefer to start around 325°F (160°C) for the initial frying, as the chicken will cool the oil slightly. This temperature allows the chicken to cook through thoroughly without the exterior burning too quickly. It’s important to monitor the temperature and adjust as needed to maintain a consistent heat for even cooking and a perfectly crispy crust.
What kind of oil is best for frying chicken?
For deep frying chicken, it’s best to use oils with a high smoke point. Common choices include vegetable oil, canola oil, peanut oil, or sunflower oil. These oils can withstand the high temperatures required for frying without breaking down or imparting an undesirable flavor. I often reach for canola or vegetable oil as they are readily available and neutral in flavor, allowing the delicious taste of the chicken and its coating to shine.
Can I make the gravy ahead of time?
Yes, you can definitely make the gravy ahead of time! Store it in an airtight container in the refrigerator for up to 3 days. When ready to serve, gently reheat the gravy in a saucepan over medium-low heat, whisking constantly, or microwave it in short intervals, stirring between each. You might need to add a splash of milk or broth to thin it to the desired consistency, as it can thicken upon standing.
My chicken breading is soggy, what did I do wrong?
Soggy breading is usually a result of the oil temperature being too low, overcrowding the pan, or not draining the chicken properly. If the oil isn’t hot enough, the chicken absorbs too much grease instead of frying crisply. Overcrowding lowers the oil temperature drastically. Always ensure your oil is at the correct temperature (around 325-350°F), fry in batches, and drain the chicken well on a wire rack to allow air circulation.
What internal temperature should fried chicken reach?
For chicken fried chicken (or any fried chicken), the safe internal temperature is 165°F (74°C). It’s crucial to use a meat thermometer inserted into the thickest part of the chicken, avoiding bone if present, to ensure it’s fully cooked. While the exterior cooks quickly and turns golden brown, reaching the correct internal temperature guarantees that the chicken is safe to eat and perfectly cooked through without being dry.
Share Your Version!
I truly hope you give this classic Chicken Fried Chicken recipe a try! There’s nothing more rewarding to me than hearing about your kitchen successes. If you make it, please consider leaving a star rating and a comment below – your feedback helps other cooks immensely. I also love seeing your creations on Instagram or Pinterest! Tag me @exorecipes so I can get a glimpse of your beautiful dish. Have you tried adding any unique spices to your dredge? I’d love to know!
From my NYC kitchen to yours — I hope this recipe brings as much warmth to your table as it does to mine. — mia 🧡
Love This Recipe? Save It to Pinterest!
If you enjoyed this Chicken Fried Chicken recipe, don’t let it get lost in your browser tabs! 😄 Pin it now so you can find it again anytime — and explore hundreds more tried-and-tested recipes waiting for you on my Pinterest boards.
👉 Follow mia on Pinterest @chefrecipes2
📌 Pin this recipe · 🔁 Re-pin your favorites · 💬 Tag me when you make it — I love seeing your creations!
“`
Print

Chicken Fried Chicken
Description
Easy and delicious this Chicken Fried Chicken is a quick and flavorful dinnertime recipe that brings the whole family to the table, with minimal ingredients it’s a simple and comforting meal.
Ingredients
- 6–8 thin sliced chicken breasts
- 2 cups flour
- 2 tsp baking powder
- 1 tsp baking soda
- 1 tsp salt
- 1 tsp pepper
- 1 tsp garlic powder
- 1 1/2 cup buttermilk
- 1 egg
- 1 Tbs hot sauce
- Oil for frying
- 1/4 cup reserved oil from frying
- 1/3 cup flour
- 2 cup milk
- Salt & pepper
Instructions
- Heat oil in deep fryer or large pan on stove (a few inches deep) to 325.
- In large bowl whisk together your flour, baking powder, baking soda, salt, pepper and garlic powder.
- In another bowl whisk together buttermilk, egg and hot sauce.
- Dredge your chicken in the flour mixture then dip into the egg mixture than back into the flour mixture making sure to press down flour to get stuck on the steak real good.
- Place chicken in pan/deep fryer and fry on each side 3-5 minutes until golden brown, remove and drain on paper towel lined plate, repeat with all chicken.
- To make your gravy, in large pan add 1/4" of oil from cooking and heat on medium-high, stir in your flour until absorbed and cook for about 1 minute.
- Slowly add in your milk whisking to blend and heat until thickened then stir in salt and pepper to desired taste.
- Pour gravy over individual chicken before serving.
Nutrition
- Calories: 490 kcal
- Sugar: 7 g
- Fat: 18 g
- Carbohydrates: 45 g
- Protein: 35 g
k">
Tried This Recipe? Leave a Comment!
Did you make this recipe? I’d love to hear how it turned out! Please leave a comment and a rating below. Your feedback helps other home cooks and supports cheerychop.com!
For more delicious inspiration, follow me on Pinterest!
