Table of Contents
Chicken Caesar Wrap Recipe: Crispy Chicken Version for the Lunchbox Hero
Growing up in my mother’s kitchen in Marrakech, vibrant flavors and satisfying textures were always the stars of the show. We’d often have simple, yet delicious, stuffed flatbreads that packed a punch. Today, I’m bringing that spirit to New York City with a riff on a classic: my easy chicken Caesar wrap recipe. It’s that perfect balance of homemade goodness and weeknight convenience, transforming simple ingredients into something truly special, just like we used to do back home. This is more than just a wrap; it’s a taste of my heritage blended with the fast-paced energy of city living.
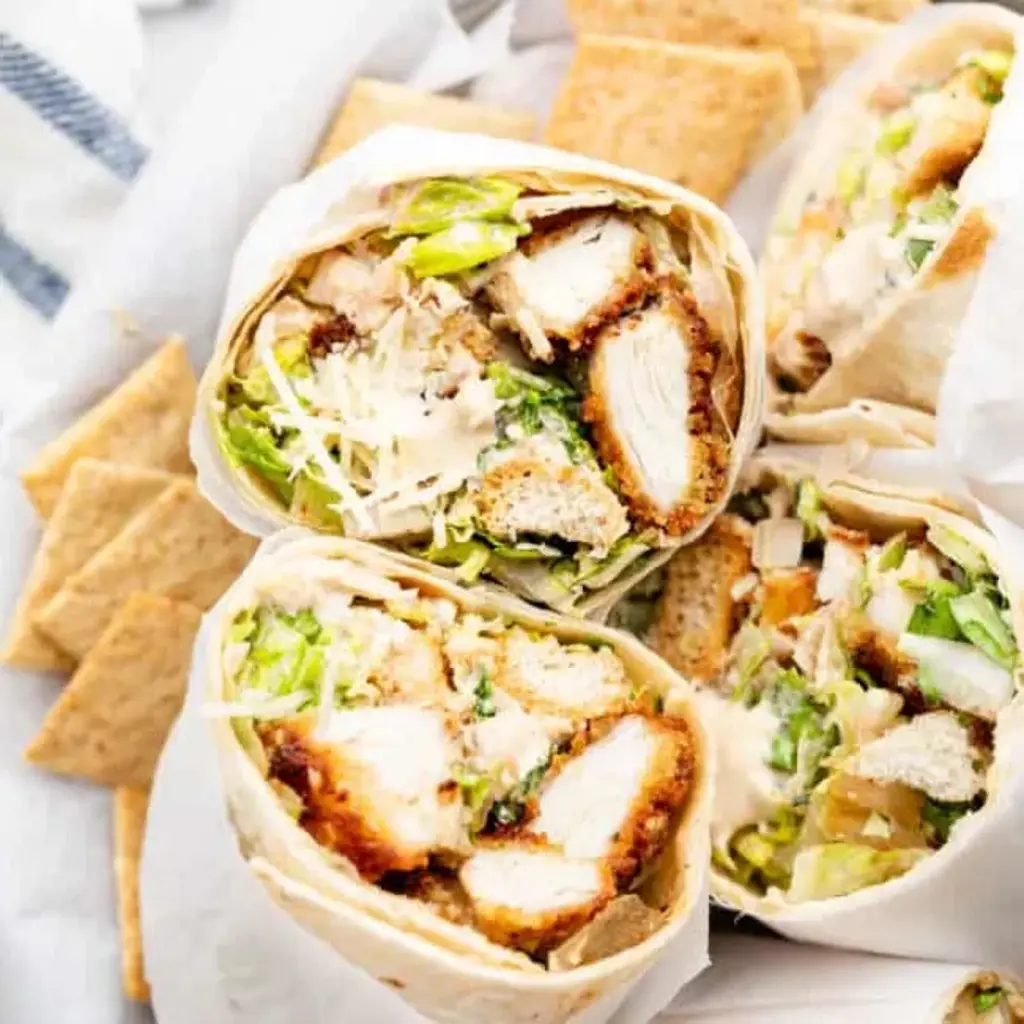
Imagine this: perfectly golden, crispy chicken cutlets, tender on the inside, nestled amongst crisp romaine lettuce, crunchy croutons, and a generous shower of salty Parmesan cheese. All of this is tossed in a creamy, tangy Caesar dressing, then snugly wrapped in a large, soft tortilla. The aroma alone is enough to make your stomach rumble! It’s a symphony of textures and tastes – the crunch of the panko, the chew of the wrap, the sharp bite of the cheese, and the creamy dressing tying it all together. It reminds me of the diverse street food you find here in NYC, a delightful mix of cultures and flavors.
What makes this homemade Caesar wrap recipe a standout is the panko-parmesan crusted chicken. It’s a little trick I learned in culinary school in Paris, perfecting the art of the crispy coating that stays that way. I’ll share my secret for achieving that ultimate crunch without any fuss. We’ll also touch on a common mistake many home cooks make, which can leave their chicken wraps soggy and uninspired. Get ready for a chicken wrap recipe that’s both impressive and wonderfully simple!
Why This Chicken Caesar Wrap Recipe Is the Best
The secret to this flavor explosion lies in the double-duty of the Parmesan cheese. Not only does it infuse the panko breadcrumbs with a nutty, salty depth that elevates the chicken beyond your average wrap, but it also adds a delightful savory note to the salad filling itself. Drawing on my North African roots, where spices are layered for complexity, I apply this principle to classic European flavors, creating a truly unique profile that’s more than just a standard Caesar wrap. It’s this thoughtful layering that makes the dish truly sing.
From my days mastering French sauces, I know that texture is paramount. That’s why we pound the chicken to an even 1/4-inch thickness. This ensures even cooking, so every bite is tender, never tough or dry. The panko-parmesan coating then creates a beautiful, shatteringly crisp exterior once fried. It’s these simple, precise techniques, often overlooked, that separate a good wrap from an exceptional one, giving you that satisfying crunch that holds up even when tossed with the dressing.
This recipe is designed to be incredibly approachable, even if you’re new to making things from scratch. The ingredients are readily available at any New York City grocery store, and the steps are straightforward. I’ve streamlined the process so you can confidently create a restaurant-worthy chicken Caesar wrap in under an hour. It’s the perfect answer for a healthy, protein-packed lunch or a quick, satisfying dinner that the whole family will love.
Chicken Caesar Wrap Recipe Ingredients
One of the joys of living in NYC is the access to incredible ingredients. I love grabbing my crisp romaine from the Union Square Greenmarket and the best quality chicken from my local butcher. If you can’t find specific items, don’t worry – I’ve included some fantastic substitutions that will work beautifully. My mother always said that a good cook can make magic with whatever is at hand, and that’s the spirit I want to share with you here!
Ingredients List
- 2 large chicken breasts (~1.5lbs)
- 1 cup all-purpose flour
- 1/2 tsp salt
- 1/2 tsp black pepper
- 2 large eggs
- 2 cups panko breadcrumbs
- 1 cup grated Parmesan cheese (for breading)
- 1/4 cup neutral oil, with more as needed (vegetable, smooth olive oil, avocado oil)
- 1 large head romaine lettuce, chopped small
- 1 cup croutons
- 1 cup shredded Parmesan (for salad)
- 1/2 cup Caesar dressing (use your favorite, or try my homemade version if you’re feeling adventurous!)
- 4 extra large burrito wraps (flour tortillas)
Ingredient Spotlight
Chicken Breasts: I always opt for plump, boneless, skinless chicken breasts for this recipe. Look for ones that are similar in size for even cooking. In NYC, I find the best quality at Zabars or my local kosher butcher. The protein in the chicken makes this a truly satisfying meal.
Panko Breadcrumbs: Panko is a Japanese-style breadcrumb that is lighter and airier than traditional breadcrumbs. This creates an exceptionally crispy coating that holds up well, even when mixed into the salad. If you can’t find panko, regular fine breadcrumbs will work, but the texture will be less crisp.
Parmesan Cheese: Freshly grated Parmesan is key here. It not only provides a wonderful salty, nutty depth to the chicken crust but also adds a savory kick to the Caesar salad filling. For the crust, finely grated is best, while shredded works perfectly for the salad. If you must use pre-grated, aim for the highest quality you can find, as it truly makes a difference in flavor.
Extra Large Burrito Wraps: These are essential for properly encasing all the delicious filling. Look for wraps that are at least 10-12 inches in diameter. If you can only find standard-sized tortillas, you might need to use two per serving or slightly reduce the filling.
| Original Ingredient | Best Substitution | Flavor/Texture Impact |
|---|---|---|
| Panko Breadcrumbs | Plain fine breadcrumbs or crushed cornflakes | Less crisp texture; cornflakes add a slight sweetness. |
| Parmesan Cheese (for breading) | Grana Padano or Pecorino Romano | Similar salty, nutty profile; Pecorino is sharper and saltier. |
| Buttermilk (for dressing) | Plain yogurt or sour cream mixed with milk | Thicker consistency; yogurt adds tang, sour cream adds richness. |
| Romaine Lettuce | Iceberg or chopped kale | Iceberg is crunchier, kale is heartier but may need massaging. |
How to Make Chicken Caesar Wrap Recipe — Step-by-Step
Don’t be intimidated by the breading process! It’s straightforward and the key to that incredible crispy chicken that makes this homemade Caesar wrap recipe so satisfying.
Step 1: Butterfly and Pound the Chicken
Take your two large chicken breasts and carefully slice them horizontally through the middle, almost like butterflying them but cutting all the way through to create four thinner pieces. Then, place each piece between two sheets of parchment paper or inside a large zip-top bag. Using a meat mallet or the bottom of a heavy pan, gently pound each piece to an even 1/4-inch thickness. This is crucial for quick, even cooking.
💡 mia’s Pro Tip: Pounding the chicken not only ensures even cooking but also tenderizes the meat, giving you a melt-in-your-mouth texture that’s essential for a perfect wrap.
Step 2: Set Up Breading Station
Prepare a breading station by lining up three shallow bowls or pie plates. In the first bowl, whisk together the flour with salt and pepper. In the second bowl, whisk your eggs until smooth. In the third bowl, combine the panko breadcrumbs with the 1 cup of grated Parmesan cheese.
Step 3: Bread the Chicken
Working with one piece of chicken at a time, dredge it thoroughly in the seasoned flour, tapping off any excess. Next, dip it into the whisked egg, ensuring it’s fully coated, and let any excess drip off. Finally, press the chicken firmly into the panko-Parmesan mixture, coating both sides completely. Press the breadcrumbs onto the chicken to help them adhere. Set the coated chicken aside on a clean plate or wire rack, and repeat with the remaining pieces.
⚠️ Common Mistake to Avoid: Don’t skip the flour dredging! It acts as a ‘glue’ for the egg, ensuring the panko mixture sticks much better to the chicken, preventing a patchy coating.
Step 4: Heat the Pan
Place a large skillet (cast iron works wonderfully here!) over medium-high heat. Add about 1/4 cup of neutral oil. You want the oil to be shimmering but not smoking. If it starts to smoke, your pan is too hot, so reduce the heat slightly.
Step 5: Cook the Chicken
Carefully place two coated chicken cutlets into the hot oil, being careful not to overcrowd the pan. Cook for 4-5 minutes per side, until golden brown and cooked through. The internal temperature should reach 165°F (74°C). Transfer the cooked chicken to a plate lined with paper towels to drain any excess oil. Repeat with the remaining two chicken cutlets, adding more oil to the pan if needed.
| Step | Action | Duration | Key Visual Cue |
|---|---|---|---|
| 1 | Butterfly & Pound Chicken | 5 mins | Even 1/4-inch thickness |
| 2 | Set up Breading Station | 3 mins | Three bowls ready |
| 3 | Bread Chicken | 7 mins | Even, well-adhered coating |
| 4 | Heat Pan | 5 mins | Shimmering oil |
| 5 | Cook Chicken | 8-10 mins per batch | Golden brown, 165°F internal temp |
Slice the Chicken and Toss the Salad
Step 6: Prepare the Filling
While the chicken is resting, grab a large bowl. Add your chopped romaine lettuce, croutons, shredded Parmesan cheese, and about 1/2 cup of your chosen Caesar dressing. Toss everything together until well combined and the lettuce is lightly coated. Don’t overdress it at this stage; you can always add more.
Step 7: Assemble the Wraps
Slice the cooked chicken cutlets into bite-sized strips or cubes. Add the sliced chicken to the salad mixture and toss gently to combine everything. Now, take your large burrito wraps. Spoon a generous amount of the filling down the center of each wrap. Fold in the sides, then tightly roll up from the bottom to create a secure wrap. If desired, cut each wrap in half for easier handling and a more appealing presentation.
💡 mia’s Pro Tip: Warm your tortillas slightly before assembling the wraps – this makes them more pliable and easier to roll without tearing.
Serving & Presentation
These vibrant Chicken Caesar Wraps are beautiful on their own, but a little extra flair never hurts! I love serving them cut in half, revealing the colorful layers within. For a touch of Moroccan flair, I sometimes add a sprinkle of sumac or a drizzle of my favorite harissa-spiced yogurt sauce on the side, offering a contrasting flavor profile to the creamy Caesar. It’s all about balancing those classic flavors with a hint of something unexpected, something I learned from my travels and my mom’s cooking.
Here in NYC, we eat with our eyes first! A few extra croutons sprinkled on top or a fresh sprig of parsley can elevate the presentation. They’re perfect for a quick lunch at your desk, a picnic in Central Park, or even a casual dinner party where guests can customize their own. The ultimate goal is a meal that looks as good as it tastes, bringing a little joy and indulgence to any occasion.
| Pairing Type | Suggestions | Why It Works |
|---|---|---|
| Side Dish | Sweet potato fries, Simple green salad with lemon vinaigrette, Fruit salad | Complements the rich wrap with contrasting flavors and textures. |
| Sauce / Dip | Extra Caesar dressing, Spicy aioli, Lemon-herb yogurt dip | Adds moisture and an extra layer of flavor, especially for dipping. |
| Beverage | Iced tea, Sparkling water with lemon, Light lager | Refreshing drinks cut through the richness of the wrap. |
| Garnish | Fresh parsley, Cracked black pepper, Lemon wedges | Adds visual appeal and a burst of fresh flavor. |
Make-Ahead, Storage & Reheating
As a busy New Yorker, I rely on smart meal prep! These chicken Caesar wraps are fantastic for making ahead. I like to prepare the chicken and the salad mixture separately. Then, right before I pack them for lunch the next day, I assemble the final wrap to keep the lettuce crisp and the chicken coating crunchy.
| Method | Container | Duration | Reheating Tip |
|---|---|---|---|
| Refrigerator | Airtight container (separate components recommended) | 2-3 days | Assemble just before eating. Reheat chicken briefly if desired. |
| Freezer | Airtight container or freezer bag | 1-2 months (best quality) | Thaw in refrigerator. Assemble fresh for best texture. |
| Make-Ahead (Component Prep) | Airtight containers | Cooked chicken: 3 days; Chopped lettuce: 2 days | Assemble just before serving for maximum crispness. |
If you are making the wraps entirely ahead of time for lunch, I strongly advise keeping the dressing separate until just before eating. This is my biggest tip to prevent a soggy wrap! Toss your salad components with dressing and add the chicken right before wrapping. Even better, layer your wrap components carefully: start with the wrap, then a light smear of dressing, then lettuce, chicken, and top with cheese and croutons as close to the eating time as possible. This keeps everything fresh and texturally delightful.
Variations & Easy Swaps
| Variation | Key Change | Best For | Difficulty Impact |
|---|---|---|---|
| Meal Prep Powerhouse | Prepare components separately. Include dressing in a small container. | Busy work lunches, Quick weeknight dinners. | Slightly more prep time, but quicker assembly later. |
| Gluten & Dairy-Free | Use gluten-free breadcrumbs, dairy-free Parmesan alternative, and check dressing. | Dietary restrictions, Health-conscious eaters. | Minor ingredient swaps, no change in technique. |
| Spicy Moroccan Twist | Add a pinch of cayenne to breadcrumbs, serve with a harissa-yogurt drizzle. | Adventurous eaters, Those craving a flavor kick. | Easy flavor addition, minimal extra effort. |
Meal Prep Powerhouse
To make these wraps ahead of time for easy lunches, I follow a similar strategy to what my grandmother used when preparing mezze platters in Morocco. Components are prepped and stored separately. Cook the chicken, chop the lettuce and other salad ingredients, and have your dressing ready. The key is to assemble the wrap *just* before you plan to eat it, or at least within a few hours, to maintain the crispness of the lettuce and the chicken coating.
Gluten and Dairy-Free Delight
For a gluten-free version, simply swap out the all-purpose flour for a gluten-free all-purpose flour blend and use gluten-free panko breadcrumbs for the chicken coating. Ensure your Caesar dressing is also gluten-free. To make it dairy-free, use a good quality dairy-free Parmesan alternative in the breading and salad. Checked your dressing ingredients too, as some contain cheese. The texture might be slightly different from the original, but the flavor will still be delightful and satisfying.
Spicy Moroccan Twist
If you love a little heat, as we often do in Moroccan cuisine, add a pinch of cayenne pepper or smoked paprika to the panko-Parmesan mixture for the chicken. Serve the finished wraps with a dollop of Greek yogurt mixed with a teaspoon of harissa paste and a squeeze of lemon. This adds a lovely creamy texture with a fiery kick that beautifully complements the savory Caesar flavors, much like the way spices are balanced in a tagine.
How do you keep a chicken Caesar wrap from getting soggy?
The number one way to prevent a soggy chicken Caesar wrap is to control moisture. I always recommend keeping the dressing separate until you’re ready to assemble the wrap, or at least dress the salad components right before wrapping. If you’re meal prepping, store the dressing in a small, sealed container and add it right before eating. Another tip is to drain the cooked chicken well on paper towels to remove excess oil, and ensure your lettuce is thoroughly dried after washing.
What can I use instead of Caesar dressing in a chicken Caesar wrap?
There are many delicious alternatives to traditional Caesar dressing! For a lighter option, a lemon-herb vinaigrette or a simple Dijon mustard-based dressing works wonderfully. If you prefer something creamier, a ranch dressing or a creamy avocado dressing can be excellent. For a bit of a flavor twist, consider a tahini-based dressing, reminiscent of flavors from my Moroccan heritage, or even a light balsamic glaze for a touch of sweetness.
How long should you cook the chicken for a chicken Caesar wrap?
Since we pound the chicken to about 1/4-inch thickness, it cooks very quickly. In a medium-high heat pan with oil, it typically takes only about 4-5 minutes per side. The key is to ensure it reaches an internal temperature of 165°F (74°C). Using a meat thermometer is the most accurate way to check. Overcooked chicken will be dry and tough, so keep an eye on it and remove it from the pan as soon as it’s cooked through.
Can I make chicken Caesar wraps ahead of time for lunch?
Yes, you absolutely can make chicken Caesar wraps ahead of time, but with a small caveat: to maintain crispness, I highly recommend keeping the components separate until just before you eat. Cook the chicken and store it in an airtight container. Prepare the salad mixture (lettuce, cheese, etc.) and store it separately. Keep the dressing in its own small container. Assemble the wrap right before you pack it for lunch or when you’re ready to eat it. This simple step makes all the difference!
Why is my chicken Caesar wrap filling soggy?
The most common reason for a soggy chicken Caesar wrap filling is excess moisture. This can come from a few sources: not draining the lettuce properly after washing, over-dressing the salad, or adding warm chicken directly to the wrap without letting it cool and drain. If the chicken is still very hot when assembled, it can also steam the lettuce. My tip is to ensure all components are as dry as possible and that dressing is added sparingly and right before serving.
What are the best types of wraps to use for a chicken Caesar wrap?
For the most satisfying chicken Caesar wrap experience, I prefer using large, pliable flour tortillas, often labeled as “burrito size” or “jumbo.” These are best because they are large enough to hold a generous amount of filling without tearing and have a soft texture that complements the crispy chicken and crisp lettuce. You can also use whole wheat wraps for a healthier option, or even large spinach or tomato-flavored tortillas for a bit of added color and flavor.
Can I air fry or bake the chicken for a chicken Caesar wrap instead of frying?
Absolutely! If you prefer to avoid frying, baking or air frying the chicken is a fantastic alternative. For baking, spread the breaded chicken on a wire rack set over a baking sheet and bake at 400°F (200°C) for about 18-22 minutes, flipping halfway through, until golden and cooked through. For air frying, place the breaded chicken in the air fryer basket in a single layer and cook at 380°F (190°C) for about 10-12 minutes, flipping once, until crispy and cooked. The coating will be slightly less uniformly crisp than fried, but still delicious!
Share Your Version!
I truly hope you adore this easy chicken Caesar wrap recipe as much as I do! It brings me so much joy to share these dishes that are close to my heart, blending flavors from my Moroccan roots with my life here in New York. If you try this recipe, please consider leaving a star rating and a comment below. It helps other home cooks find the recipe and lets me know what you loved!
And if you snap a photo of your beautiful creation, I’d be thrilled if you’d share it with me on Instagram or Pinterest and tag me @exorecipe! I genuinely love seeing your take on my recipes. Do you think you might try the spicy Moroccan twist next time, or are you sticking to the classic for your first go? Let me know your thoughts!
From my NYC kitchen to yours — I hope this recipe brings as much warmth to your table as it does to mine. — mia 🧡
Love This Recipe? Save It to Pinterest!
If you enjoyed this Chicken Caesar Wrap Recipe recipe, don’t let it get lost in your browser tabs! 😄 Pin it now so you can find it again anytime — and explore hundreds more tried-and-tested recipes waiting for you on my Pinterest boards.
👉 Follow mia on Pinterest @chefrecipes2
📌 Pin this recipe · 🔁 Re-pin your favorites · 💬 Tag me when you make it — I love seeing your creations!

Chicken Caesar Wrap Recipe
Description
Fill up on a protein-rich, satisfying Chicken Caesar Wrap Recipe made with parmesan cheese, panko breadcrumbs, and a mouth watering homemade dressing.
Ingredients
- 2 large chicken breasts (~1.5lbs)
- 1 cup flour
- 1/2 tsp salt
- 1/2 tsp pepper
- 2 eggs
- 2 cups panko breadcrumb
- 1 cup grated parmesan cheese
- 1/4 cup neutral oil, with more as needed (vegetable, smooth olive oil, avocado oil)
- 1 large head romaine lettuce, chopped small
- 1 cup croutons
- 1 cup shredded parmesan (or more grated)
- 1/2 cup caesar dressing (I used this one)
- 4 extra large burrito wraps
Instructions
- Slice chicken in half through the width, like butterflying but cutting all the way through.
- Pound each of the 4 chicken pieces into 1/4 inch thick using a meat pounder or rolling pin.
- Set up a station in three wide bowls. In the first bowl, mix the flour and salt and pepper. In the second bowl, whisk both eggs. In the third bowl, mix together the panko and parmesan cheese.
- Coat each chicken breast evenly in flour on both sides, then dip the chicken breasts into the egg mixture and coat well. After the egg mixture, dip into the breadcrumb mixture and coat very well, pressing into breadcrumbs and covering the whole surface of chicken on both sides. Repeat until all chicken has been coated.
- Heat a large saucepan over medium-high heat and add the oil.
- Once hot, add two chicken breasts at a time, cooking for 4-5 minutes on each side. Set chicken breasts aside on paper towel lined plate and repeat until all are cooked.
- Meanwhile, in a bowl, add lettuce, croutons, parmesan, and caesar dressing. Toss till combined.
- Slice chicken cutlets into bite sized pieces. Add to salad mixture and toss.
- In a large wrap, add salad mixture and wrap tightly. Cut in half and serve.
Nutrition
- Calories: 1192 calories
- Sugar: 8.8 g
- Fat: 57.2 g
- Carbohydrates: 100.6 g
- Protein: 66.9 g

Tried This Recipe? Leave a Comment!
Did you make this recipe? I’d love to hear how it turned out! Please leave a comment and a rating below. Your feedback helps other home cooks and supports cheerychop.com!
