How to Make Orange Creamsicle Moonshine: A Creamy Citrus Delight

creamsicle-flavored moonshine, orange moonshine recipe, DIY creamsicle moonshine, homemade flavored moonshine, citrusy alcoholic drinks, orange and vanilla moonshine

Orange Creamsicle Moonshine: The Ultimate Homemade Recipe Guide Orange Creamsicle Moonshine is a nostalgic, creamy, and citrusy alcoholic beverage perfect for gatherings or enjoying as a dessert-inspired drink. This recipe combines the tang of oranges with the smoothness of vanilla, delivering a delightful taste reminiscent of the classic creamsicle. For a more in-depth understanding of … Read more

Delicious Christmas Rocky Road Recipe for Festive Treats

Delicious Christmas Rocky Road Recipe for Festive Treats

⚖️
Difficulty
Easy

⏲️
Prep Time
20 mins

🕒
Cook Time
10 mins

⏱️
Total Time
30 mins

🍽️
Servings
12 pieces

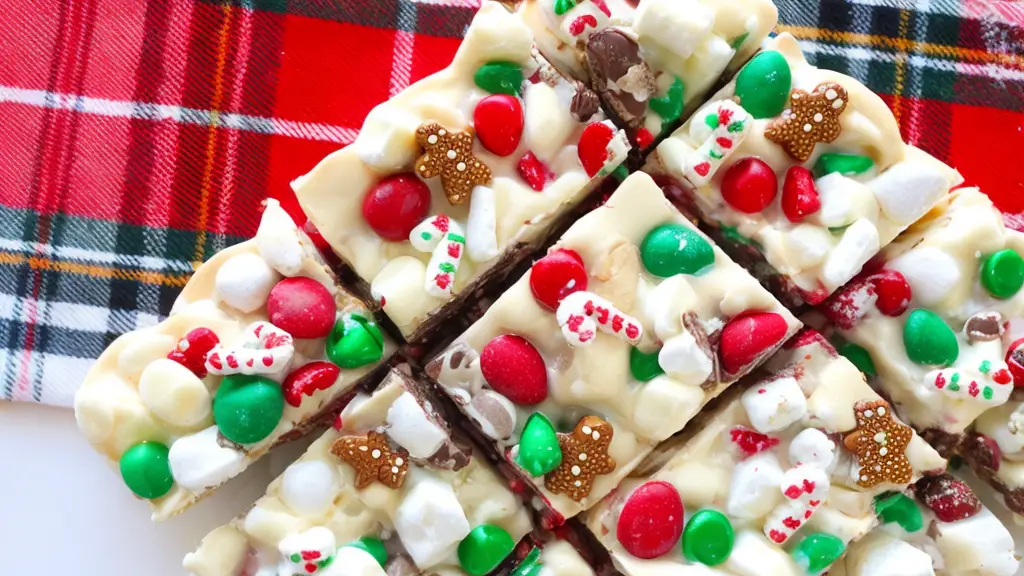
This Delicious Christmas Rocky Road recipe is the ultimate festive treat that combines scrumptious chocolate with marshmallows, nuts, and a sprinkle of holiday cheer. Perfect for sharing with family and friends during festive gatherings, this no-bake dessert is not only easy to make but also visually stunning. Featuring a rich chocolate base topped with gooey marshmallows and crunchy nuts, each bite offers a delightful blend of sweetness and texture that embodies the essence of the holidays.

As you whip up this delightful Christmas Rocky Road, your kitchen will be filled with the warm, inviting aromas of melting chocolate mingling with the nutty scent of roasted almonds. The vibrant colors from the various ingredients make this treat not only delicious but also a feast for the eyes, truly capturing the spirit of the season. Gather your loved ones and join in the fun of creating these festive delights together!

Quick Recipe Highlights

  • Flavor Profile: A harmonious blend of rich chocolate and the sweetness of marshmallows, perfectly complemented by the crunch of nuts.
  • Texture: A delightful combination of smooth, creamy chocolate and chewy marshmallows, with a satisfying crunch from the nuts.
  • Aroma: The warm scent of melted chocolate with hints of vanilla and roasted nuts fills the air, creating a comforting atmosphere.
  • Visual Appeal: The vibrant colors of the marshmallows and nuts against the dark chocolate create an eye-catching contrast, perfect for festive displays.
  • Skill Level Needed: This recipe is perfect for beginners, requiring minimal cooking skills and only a few simple steps.
  • Special Equipment: You’ll need a microwave or a double boiler for melting the chocolate, along with a baking dish to set the mixture.

Recipe Overview

  • Difficulty Level: This Delicious Christmas Rocky Road is classified as easy, making it perfect for novice bakers or seasoned chefs looking for a quick festive treat.
  • Category: This dessert fits well into the sweet treats category, making it an ideal addition to festive spreads and dessert tables.
  • Cuisine: While chocolate treats are popular worldwide, this recipe draws inspiration from traditional no-bake desserts often enjoyed during holiday seasons.
  • Cost: The ingredients are budget-friendly, with a total cost of around $15, making it accessible for everyone eager to celebrate the holidays.
  • Season: This recipe shines brightest during the festive winter season, bringing joy to celebrations and gatherings with family and friends.
  • Occasion: Ideal for Christmas, holiday parties, or as a homemade gift, this dessert adds a special touch to any festive occasion.

Why You’ll Love This Recipe

This Delicious Christmas Rocky Road will captivate your palate with its unique taste and texture that perfectly melds chocolatey sweetness with crunchy undertones. Every bite delivers a luscious chocolate experience that is dynamically coupled with the soft chewiness of marshmallows and the satisfying crunchiness of nuts, providing an exciting mouthfeel. You can’t go wrong with this seasonal treat that is sure to delight chocolate lovers and dessert aficionados alike.

Convenience is key, and this recipe offers the benefit of being effortless to prepare. It requires no baking, significantly cutting down on time and allowing you to quickly create delicious treats, even if you’re pressed for time during the holiday rush. The straightforward steps make it easy for everyone, from experienced bakers to kitchen novices, to participate in the joy of making this festive treat.

Nutritionally, while it is a sugary indulgent, Rocky Road can be modified slightly for those looking for some healthier facets. By opting for dark chocolate and adding nuts, you acquire beneficial fats and proteins that provide energy. The presence of marshmallows adds a small amount of fun carbohydrates which can be enjoyed in moderation.

This recipe has a wonderful social and entertaining value, as it encourages sharing and creates moments of joy in its preparation. Gather your loved ones and indulge in the fun of crafting the perfect holiday treat together. These delicious squares can easily be packaged as gifts, delighting friends and neighbors during the holiday season.

Lastly, cost-effectiveness sets this recipe apart. With minimal expenses needed for abundant flavors, preparing this festive delight can fit well within any budget. Plus, it yields a dozen servings, perfect for spreading the festive joy without breaking the bank, allowing everyone to partake in delicious holiday treats.

Historical Background and Cultural Significance

The history of Rocky Road dates back to the 1850s when it was created as an ice cream flavor in the United States. It was often made with chocolate, almonds, and marshmallows, symbolizing the prospect of a brighter future after a tumultuous time, thus its name “Rocky Road.” This delightful treat quickly grew in popularity, especially during the holiday season, when families sought out sweet indulgences to celebrate togetherness and joy.

Culturally, Rocky Road represents more than just a dessert; it embodies the spirit of holiday festivities and community. It encourages families and friends to gather in the kitchen to create delicious treats, fostering connections and creating lasting memories amid the holiday hustle and bustle. Each family may have their own twist on the classic recipe, bringing unique elements and traditions into their interpretation of this beloved dish.

Over the years, the recipe has evolved, transitioning from its original ice cream form to various baked and no-bake versions. The inclusion of different mix-ins, such as various types of nuts, dried fruits, or even marshmallow flavors, reflects the personal preferences of home bakers and the modern culinary trend of customization.

Regional variations also play a significant role in this dessert’s rich tapestry. In some cultures, Rocky Road might incorporate local nuts or flavorings, providing a distinct twist that aligns with local tastes and traditions. These adaptations highlight the versatility of Rocky Road, making it a continually evolving dish cherished throughout the world.

Ingredient Deep Dive

Chocolate is the star ingredient in the Delicious Christmas Rocky Road, and its cultural significance is immense. Historically, cacao has been celebrated for its delightful taste and rich implications within various societies, often utilized in ceremonies and celebrations. When selecting chocolate for your recipe, aim for high-quality options; dark chocolate offers a richer flavor and beneficial antioxidants, while milk chocolate can add sweetness.

Marshmallows add a playful, fluffy texture that contrasts beautifully with chocolate. Originally created as a medicinal pastille, marshmallows have since evolved into the sweet treat we adore today. Always choose soft, fresh marshmallows, which will better hold up in the mixture. They can be stored in a cool, dry place to prevent them from hardening.

Nuts, such as almonds or walnuts, provide a necessary crunch within the Rocky Road. Their cultural significance is tied to harvest celebrations and communal feasting. When selecting nuts, look for fresh, unsalted varieties for the best flavor. Store your nuts in airtight containers away from sunlight to maintain their crisp texture.

Common Mistakes to Avoid

  • Overheating chocolate: Melt the chocolate gently, using a microwave or double boiler to avoid scorching it, which can lead to a grainy texture.
  • Not using fresh marshmallows: If your marshmallows are stale, they won’t provide the desired chewy texture. Always check for freshness before use.
  • Packing the mixture too tightly: When pressing the mixture into the baking dish, avoid compacting it too tightly, which can affect texture and result in a hard dessert.
  • Skipping the chilling step: Allowing the Rocky Road to chill properly in the refrigerator is crucial for it to set correctly, ensuring perfect cutting and shaping.
  • Ignoring ingredient quality: Using subpar chocolate or stale nuts will impact the overall flavor; always opt for high-quality ingredients for the best results.
  • Making substitutions without testing: Some substitutive ingredients may alter the dessert’s chemistry, leading to undesirable outcomes; be mindful when switching elements.
  • Not preparing hands with oil: When cutting the set mixture, lightly oiling your knife or hands can help prevent sticking, making the process neater.
  • Cutting too soon: Allow the mixture to set completely before cutting to ensure clean, even squares and the right texture.

Essential Techniques

Melting chocolate properly is key. This method is important because improper melting techniques can lead to burnt chocolate, ruining the entire dessert’s flavor. To master this skill, use either a microwave in 30-second intervals, stirring in between, or a double boiler that allows gentle melting. Look for a smooth, glossy appearance as the visual cue for success.

Mixing ingredients is another essential technique for this recipe. Carefully folding in the marshmallows and nuts ensures even distribution throughout the chocolate, creating a harmonious blend of flavors. Avoid over-mixing, which can break the marshmallows down and ruin the desired texture.

Setting the mixture is crucial to achieving a proper Rocky Road. By allowing it to chill in the refrigerator for at least two hours, you give a chance for the chocolate to solidify and meld with other ingredients. The visual cue for success is when the mixture feels firm to the touch and is easy to cut into squares.

Pro Tips for Perfect Delicious Christmas Rocky Road

1. For a fun flavor twist, experiment with different types of chocolate like white or milk chocolate for varied sweetness levels.
2. Toast the nuts lightly in the oven to enhance their flavor before mixing them in with the melted chocolate.
3. Add a pinch of sea salt or a drizzle of caramel to elevate the overall taste profile.
4. Use silicone molds for a unique shape, making your treats even more festive and fun.
5. If you’re making this recipe in warmer climates, consider placing the Rocky Road in a cooler area to prevent melting during the setting process.
6. Pair with a scoop of ice cream for a delightful dessert experience that combines textures and temperatures.
7. For an even more delightful presentation, sprinkle some crushed peppermint candy on top for added festive flair.
8. Wrap pieces in decorative cellophane or boxes for homemade gifts during the holidays that are beautifully presented and delicious.

Variations and Adaptations

Rocky Road lends itself well to regional variations. For instance, in Australia, adding coconut transforms it into a tropical version. Incorporating dried fruits like cherries or cranberries is another great seasonal adaptation to infuse additional festive flavors. For those with dietary restrictions, gluten-free cookies can replace the nuts or marshmallows to cater to allergies or preferences.

Seasonal adaptations include using autumn spices like cinnamon or nutmeg to evoke additional warmth during colder months. For flavor variations, considering adding peanut butter or almond butter for a creamy twist, which melds wonderfully with the chocolate and enhances the nutty flavor profile.

Texture modifications can be made by experimenting with crunchy rice cereal, adding even more layers of crunch and flavor to each piece. Another way to present these treats can involve creating parfaits layered with whipped cream and chocolate sauce to offer a light yet indulgent twist.

Serving and Presentation Guide

When it comes to plating your Delicious Christmas Rocky Road, cutting them into uniform pieces can enhance the appearance, ensuring a clean and tidy dessert display. Garnishing options like a dusting of powdered sugar or a drizzle of melted chocolate can elevate the visuals. For a traditional accompaniment, consider serving alongside a scoop of vanilla ice cream for a delightful contrast in temperature and texture.

Modern serving suggestions can include offering these treats in individual cupcake liners, presenting them as delightful bites at holiday parties. Remember to consider temperature when serving; they are best enjoyed at room temperature to maintain the perfect texture.

For portion control, cut into smaller squares for an easy grab-and-go treat, allowing guests to enjoy this delightful dessert without overindulging.

Wine and Beverage Pairing

When it comes to pairing beverages with your Delicious Christmas Rocky Road, rich red wines such as Merlot or Zinfandel create a beautifully complementary experience, enhancing the chocolate flavors. For a sparkling alternative, consider Prosecco, adding a refreshing note that contrasts well with the sweetness of the dessert.

For non-alcoholic options, rich hot chocolate served with a swirl of whipped cream mirrors the chocolatey delight of the treat, creating a warm and cozy pairing ideal for holiday gatherings. Alternatively, consider serving chai tea, whose spices can enhance the flavors of the Rocky Road, making it an enjoyable palatable choice.

Ensure that beverages are served at optimal temperatures – chilled wines and warm drinks create an inviting atmosphere for your festive celebration.

Storage and Shelf Life

Storing your Delicious Christmas Rocky Road requires a few tips to optimize freshness and taste. Keep it in an airtight container at room temperature for up to a week. If you live in a warm climate or wish to prolong shelf life, these treats can be stored in the refrigerator for up to two weeks.

For longer-term storage, freezing is an excellent option. Wrap each piece in plastic wrap and place them in a freezer-safe container. They can maintain their quality for up to three months in the freezer. Just ensure to let them thaw at room temperature before enjoying to bring back their delightful texture.

When reheating, avoid the microwave. Instead, let them sit out for a bit – allowing the chocolate to regain its creamy consistency without becoming overly melty or changing its texture.

Make Ahead Strategies

Preparing your Delicious Christmas Rocky Road ahead of time allows for smoother holiday planning. The mixture can be made up to two days ahead, stored in the refrigerator to set. This preparation not only saves time but also enables the flavors to meld, enhancing the overall taste.

Taking advantage of this recipe’s simplicity means you can freeze portions for a swift holiday dessert grab at a moment’s notice. Just be sure to allow for sufficient time for thawing to always achieve the desired texture just before serving.

Consider assembling the Rocky Road in stages—melting the chocolate one day and mixing the other. This method breaks down the workload, allowing fresh additions like nuts or toppings just prior to serving, maintaining their crunch for the ultimate festive treat.

Scaling Instructions

Halving the recipe is an easy adaptation for smaller gatherings, ensuring you won’t have an excessive amount of treats to store. When scaling down ingredients, be mindful to proportionately divide each component to maintain flavor balance.

If doubling or tripling the recipe for larger gatherings, ensure to have adequate mixing space and containers for chilling. You may need larger baking dishes or additional trays to accommodate the increased volume of chocolate mixture.

Consider adjusting the chilling time when scaling, as a larger amount may take longer to set properly. Always check for firmness before cutting to ensure the best texture.

Nutritional Deep Dive

Each piece of Delicious Christmas Rocky Road provides a delightful treat, containing a balance of macros such as carbohydrates from marshmallows, fats from chocolate, and proteins from nuts. When portioning, moderation is key, typically suggesting one piece per serving for a satisfying yet not overwhelming dessert experience.

In terms of micronutrients, the inclusion of nuts can contribute essential vitamins and minerals, providing health benefits such as healthy fats, fiber, and heart-healthy benefits. However, given the sugar content within the marshmallows and chocolate, it’s important to consider the overall intake when savoring this festive delicacy.

For those managing their diet, analyzing total caloric intake serves beneficial. As part of a balanced holiday indulgence, savoring a piece can fit within a well-rounded plan when accounted for during festive meals.

Dietary Adaptations

Gluten-free adaptations can be made by ensuring that the chocolate and any added ingredients are certified gluten-free, allowing those with sensitivities to enjoy this holiday treat without worry. For those who are dairy-free, using dairy-free chocolate and plant-based marshmallows ensures everyone can partake in the festive cheer.

For vegan adaptations, swapping traditional marshmallows for plant-based versions and confirming chocolate choices are suitable creates a delectable treat that aligns with plant-based dietary restrictions. Additionally, for those following low-carb or keto diets, consider using a low-carb chocolate option and adjusting the sweetener choices accordingly.

Paleo diets may benefit from using honey as a sweetener and incorporating nuts while avoiding sugary marshmallows. Lastly, remember to communicate with guests about dietary modifications to ensure everyone can revel in the holiday joys.

The Recipe

Delicious Christmas Rocky Road

Serves: 12 pieces

Prep Time: 20 mins

Cook Time: 10 mins

Total Time: 30 mins

Kitchen Equipment Needed

  • Microwave or double boiler
  • Baking dish (9×9 inch)
  • Mixing bowls
  • Spoon or spatula

Ingredients

  • 200g dark chocolate
  • 100g unsalted butter
  • 200g mini marshmallows
  • 150g mixed nuts (e.g., almonds, walnuts)
  • 1 tsp vanilla extract

Directions

  1. Melt the chocolate and butter together in a microwave or double boiler, stirring until smooth.
  2. Remove from heat and stir in vanilla extract.
  3. Add mini marshmallows and mixed nuts, stirring gently to combine.
  4. Pour the mixture into a greased baking dish, spreading it evenly.
  5. Chill in the refrigerator for at least 2 hours or until set.
  6. Once set, cut into squares and serve. Enjoy!

Recipe Notes

  • Toasted nuts can intensify the flavor.
  • For an extra festive touch, top with crushed candy canes.
  • This recipe can easily be doubled or halved based on your needs.

Troubleshooting Guide

If your Rocky Road has a grainy texture, the most likely cause is burned chocolate – ensure to melt carefully in low increments. Look out for flavor imbalance; if it’s too sweet, consider cutting with a slight pinch of salt to balance flavors.

If the mixture doesn’t set properly, this may be due to inadequate chilling time or incorrectly proportioned ingredients. Always check that the chocolate mixture is evenly coated when adding in marshmallows and nuts to avoid uneven textures.

In case of stubborn sticking while cutting, slide a warm, oiled knife through the chocolate to help ease it out or warm the mixture slightly to soften it before attempting to slice again.

Recipe Success Stories

Readers have shared how they’ve enjoyed customizing this Delicious Christmas Rocky Road over the years, adding personal family twists and ingredients to create a unique blend of flavors. One reader shared a success with adding peppermint pieces, creating a winter wonderland taste that delighted everyone at their holiday party.

Another user recounted storing these treats in decorative tins, providing special gifts for co-workers and friends during the holiday season; feedback was overwhelmingly positive regarding the presentation and flavors, spreading joy far and wide.

Photography tips also emerged from many attempting to capture the vibrant colors of the Rocky Road. Many noted that natural lighting enhanced the chocolate’s gloss and made the festive colors pop, contributing to their social media success.

Frequently Asked Questions

Can I use milk chocolate instead of dark chocolate?

Absolutely! While dark chocolate provides a richer flavor, milk chocolate can be used for a sweeter, creamier taste. Be mindful of the sweetness level, as it can affect the balance of flavors in your Rocky Road.

How do I store leftover Rocky Road?

Store leftover Rocky Road in an airtight container at room temperature for up to a week. For longer shelf life, you can refrigerate it for two weeks or freeze it in portions for up to three months.

Can I add other mix-ins?

Definitely! Feel free to experiment with various mix-ins like dried fruits, coconut flakes, or different types of nuts. Each addition will impart unique flavors and textures to the Rocky Road.

What if my mixture doesn’t set properly?

If the mixture doesn’t set properly, it may not have been chilled long enough. Ensure to refrigerate the Rocky Road for at least two hours to allow it to solidify adequately.

Is this recipe nut-free?

If you need a nut-free version, simply omit the nuts from the recipe. You can replace them with extra marshmallows or even crunchy rice cereal for added texture.

Can I make Rocky Road vegan?

Yes! To create a vegan version, use plant-based chocolate and marshmallows. Ensure to check labels for any non-vegan ingredients, allowing vegans to join in on the holiday fun!

How long does it take to prepare the recipe?

The preparation time for this Delicious Christmas Rocky Road is about 20 minutes, with an additional 2 hours for chilling. Overall, you’ll be enjoying your delicious creations in a short time!

Can I use different flavors of chocolate?

Experimenting with different types of chocolate, like white or milk chocolate, can add fun new flavors. Just ensure to balance sweetness as needed when substituting chocolates.

Is it safe to eat the Rocky Road if I’ve made it a few days prior?

Yes, it is safe to eat as long as it has been stored in an airtight container. The chocolate and nuts help preserve it, but be mindful of how long it has been stored.

What can I serve with Rocky Road?

Rocky Road pairs wonderfully with a scoop of vanilla ice cream, whipped cream, or warm chocolate sauce. Offering these accompaniments elevates the experience and makes it even more indulgent.

Additional Resources

For those interested in variations of the Delicious Christmas Rocky Road, check out additional recipes that emphasize festive treats like peppermint bark, holiday cookies, and various chocolate confections. Supplementary technique guides covering chocolate tempering and ingredient substitutions provide valuable insight into enhancing your baking skills.

Explore ingredient information related to different types of nuts, chocolate varieties, and their respective origins to gain a deeper appreciation for what makes this treat a holiday favorite. Equipment recommendations, from quality mixing bowls to storage options, will aid in your baking adventure.

Seasonal variations might inspire you to adapt your recipes based on what’s available throughout the year, ensuring that your culinary creativity knows no bounds!

Join the Conversation

We love connecting with you! Share your own creations of this Delicious Christmas Rocky Road or post your personalized variations on social media using the hashtag #RockyRoadTreats. Show off that vibrant chocolatey delight and inspire others with your unique touches.

Don’t hesitate to leave your feedback or share your photography tips—the community benefits from varied perspectives and experiences as we all strive for the perfect holiday treat. Join in and share your thoughts about this seasonal favorite and let’s celebrate the joy of baking together!

Delicious Pear and Brie Cheese Salad Skewers Recipe

Delicious Pear and Brie Cheese Salad Skewers Recipe: A Perfect Appetizer for Any Gathering

⚖️
Difficulty
Easy

⏲️
Prep Time
15 mins

🕒
Cook Time
0 mins

⏱️
Total Time
15 mins

🍽️
Servings
6 servings

Indulge in the delightful combination of flavors with our Delicious Pear and Brie Cheese Salad Skewers Recipe. This easy-to-make appetizer not only bursts with freshness but also offers a unique blend of creamy brie and the juicy sweetness of ripe pears. Perfect for summer gatherings, picnics, or as an elegant starter for dinner parties, these skewers will impress your guests and tantalize their taste buds. Each bite provides a satisfying contrast of textures: the smoothness of the brie balances beautifully with the crispness of fresh greens and the tender bite of juicy pear.

The beauty of this salad skewers recipe lies in its simplicity. You’ll find that no cooking is required, making it incredibly convenient for busy hosts. Preparing this dish takes just 15 minutes, keeping stress levels low while still allowing you to serve a visually stunning platter. Also, customizable to personal tastes, the ingredients can be adjusted to feature seasonal fruits or different types of cheese, ensuring your skewers are always fresh and exciting.

Quick Recipe Highlights

  • Flavor Profile: The sweet flavor of ripe pears complements the earthy richness of brie, creating a balanced taste that is refreshing and light.
  • Texture: The smooth, creamy texture of brie contrasts with the firm, juicy bite of the pears, while the crispy greens add a crunch.
  • Aroma: The subtle nuttiness of brie pairs beautifully with the sweet aroma of fresh fruit, inviting you to indulge.
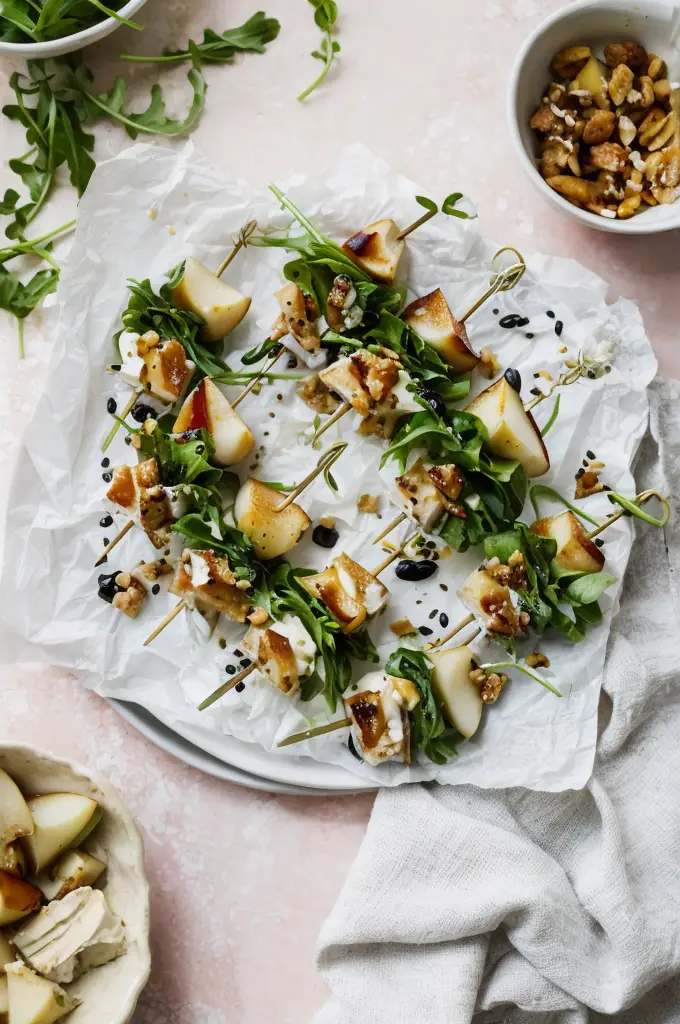
  • Visual Appeal: These skewers are visually striking with the contrasting colors of green, yellow, and white, making them a delightful centerpiece on any table.
  • Skill Level Needed: This is an easy recipe suitable for novice cooks, requiring no prior cooking experience or special skills.
  • Special Equipment: You will need skewers or toothpicks to assemble the salad skewers, along with a cutting board and knife for preparation.

Recipe Overview

  • Difficulty Level: This recipe is classified as easy due to its minimal preparation and no cooking required, making it accessible for everyone.
  • Category: The Delicious Pear and Brie Cheese Salad Skewers Recipe falls under appetizers and finger foods, perfect for gatherings.
  • Cuisine: It is inspired by French cuisine, known for its sophisticated use of cheese paired with fruits, highlighting gourmet flavors.
  • Cost: The ingredients are relatively inexpensive, with costs primarily coming from the brie cheese and fresh produce, making it an affordable option for entertaining.
  • Season: This recipe is best enjoyed in late summer to early fall when pears are in season, ensuring the ripeness and sweetness of the fruit.
  • Occasion: Ideal for casual summer parties, potlucks, or elegant dinner parties, these skewers bring a touch of sophistication to any occasion.

Why You’ll Love This Recipe

The combination of sweet pears and creamy brie is not only delicious but also offers an appealing contrast that delights the senses. With each bite, the juicy fruit mingles with the rich cheese, resulting in a culinary experience that balances both savory and sweet flavors. This unique pairing ensures a satisfying taste while providing freshness, making it feel light yet indulgent. Whether served as a party appetizer or a light snack, this salad recipe captures the essence of satisfying but simple fare.

In terms of preparation, you will appreciate how quick and effortless this recipe is. Designed for minimal fuss, it allows you to spend more time with your guests rather than slaving away in the kitchen. Simply slice the pears, cube the cheese, and assemble the skewers—it’s as easy as that! You’ll be able to whip up this recipe in about 15 minutes, ensuring you can easily accommodate spontaneous gatherings.

Nutritionally, the pears are a great source of dietary fiber and essential vitamins, while brie offers protein and calcium. Together, they create a snack that’s not only tasty but also nutritious. When you’re looking for a guilt-free solution to satisfy your cravings, this recipe is an excellent option.

When entertaining guests, these delicious skewers provide an elegant presentation that always impresses. The combination of the richness of cheese and the sweetness of fruit elevates them beyond typical snacks, allowing for a sophisticated dining experience. It’s a surefire way to make your gathering memorable while providing an element of fun as guests pick and choose their preferred skewers.

Lastly, the affordability of this recipe ensures that you don’t have to break the bank to create an impressive appetizer. With simple, readily available ingredients, anyone can make this dish without any high-cost items, enabling you to host gatherings while remaining budget-friendly.

Historical Background and Cultural Significance

The origins of pairing cheese and fruit can be traced back to ancient civilizations where rich dairy products were enjoyed with fresh, local produce. This tradition has evolved over centuries, particularly in European cuisine, where the balance of flavors is a hallmark of many well-composed dishes. The French have played a significant role in popularizing cheese boards that include fruits, making this a widely appreciated culinary combination.

Culturally, cheese holds a significant place in many European diets, with specific contexts in which it is consumed. For instance, artisan cheeses, such as brie, are often celebrated in France, where they are paired with a variety of accompaniments, including fruits, nuts, and bread. This practice highlights the idea of gastronomy as an art form and emphasizes the importance of sourcing high-quality ingredients.

Over the years, the recipe has metamorphosed, adapting to various dietary preferences and ingredient availability. The Delicious Pear and Brie Cheese Salad Skewers Recipe reflects this evolution, demonstrating a playful and modern take on a classic tradition. Seasonal variations allow for diverse ways to enjoy this combination throughout the year, ensuring that flavors remain vibrant and enticing.

Regional adaptations have further diversified how cheese and fruit are paired worldwide. In some countries, a selection of cheese and fresh fruit is served as part of an antipasto spread, while in others, cooked fruits might accompany cheese boards. The versatility of cheese and fruit pairings exemplifies a culinary practice that transcends borders, inviting endless creativity in preparation and presentation.

Ingredient Deep Dive

Pears

Pears have a rich history dating back to ancient Greece and Rome, where they were praised for their sweet and juicy flesh. The fruit symbolizes prosperity and nourishment across cultures. Nutritionally, pears are a fantastic source of fiber, vitamin C, and antioxidants, making them a healthy choice in any recipe. When selecting pears for this skewer recipe, look for ones that yield slightly to pressure and have a fragrant aroma. Store ripe pears in the fridge to prolong freshness, and consider alternative fruits like apples or figs if pears are out of season.

Brie Cheese

Brie cheese, with its soft rind and creamy interior, hails from France, where it’s celebrated for its rich flavor and luxurious texture. It is a high-quality cheese packed with protein, calcium, and essential fats. When choosing brie, opt for cheeses with a creamy, supple texture and a fresh aroma. Store brie in the cheese drawer of your refrigerator, wrapped tightly to maintain its quality. While brie is a fantastic pairing, you could substitute it with camembert or another mild cheese for a different taste experience.

Common Mistakes to Avoid

  • Overripe Peaches: Selecting overly ripe pears can lead to undesirable mushiness. Aim for pears that are firm yet yield slightly to pressure.
  • Skewer Stability: Not ensuring the ingredients are balanced on the skewers may lead to them falling apart. Place heavier items on the bottom for better stability.
  • Serving Temperature: Serving the salad skewers either too cold or too warm can impact flavor. Allow them to sit out for a few minutes before serving for the best taste experience.
  • Inappropriate Pairings: Not considering complementary flavors can result in less enjoyable skewers. Always pair fruits with cheeses that contrast in flavor profiles.
  • Neglected Garnishes: Forgetting to add fresh herbs or a drizzle of balsamic glaze can make the dish visually and flavor-wise less appealing.
  • Preparing Too Early: Assembling skewers too long before serving can cause the ingredients to oxidize. Prepare them no more than an hour in advance.
  • Using Inferior Quality Ingredients: Skimping on cheese or fruit quality can detract from the overall experience. Always opt for fresh and gourmet choices for the best results.
  • Overcomplicating the Recipe: Adding too many ingredients can overwhelm the flavor profile. Keep it simple to let the pears and brie shine through.
  • Ignoring Dietary Restrictions: Not considering guests’ dietary needs may lead to uneaten skewers. Always have a variety of options available.
  • Poor Presentation: Serving the skewers haphazardly can diminish their visual appeal. Arrange them intentionally on a beautiful platter for the best presentation.

Essential Techniques

Cutting Fruits

Properly cutting fruits like pears is crucial to maintaining the visual appeal of your skewers. Aim for even, bite-sized pieces to ensure easy handling. Using a sharp knife will provide cleaner cuts, which prevents the fruit from browning quickly. Watch for common pitfalls, such as cutting fruits before they are fully ripe, leading to excessive juiciness, or unevenness that affects presentation.

Assembling Skewers

Assembly is key to creating visually appealing skewers. Begin with a base layer of greens, then add alternating pieces of pears and brie, ensuring a beautiful contrast. Be cautious not to overcrowd the skewers; too much weight can cause them to snap. Pay attention to the arrangement of colors and textures for maximum impact.

Pro Tips for Perfect Delicious Pear and Brie Cheese Salad Skewers

– Choose ripe but firm pears that will hold their shape on the skewer and provide a sweet, juicy bite.
– When selecting brie, look for high-quality artisan options for a richer flavor.
– Consider marinating the pear slices in a splash of lemon juice to preserve their color and enhance their tartness.
– Serve with a side of balsamic reduction as a dipping sauce to add a tangy element to the skewers.
– Opt for decorative skewers or toothpicks that complement the dish’s aesthetic for added flair.
– Prepare extra skewers to cater for unexpected guests and ensure everyone has a taste.
– Experiment with adding nuts or prosciutto between the layers for added crunch and flavor.
– Arrange the skewers on a beautiful platter, garnished with fresh herbs or edible flowers for an elegant touch.

Variations and Adaptations

For regional variations, explore using local fruits that are fresh and in season, such as figs, peaches, or apples instead of pears. Seasonal adaptations allow you to enhance flavor profiles. In the fall, consider adding roasted seasonal veggies for a heartier skewer. For dietary modifications, use vegan cheese alternatives to make the dish entirely plant-based, ensuring everyone can enjoy it.

If you’re looking to enhance flavors, try different cheese pairings such as goat cheese for a tangy contrast or sharp cheddar for a bolder taste. Texture modifications could include adding crispy bacon or toasted nuts for a savory crunch. Presentation alternatives might involve serving the skewers in small cups with dipping sauces on the side for easy handling.

Serving and Presentation Guide

Plating techniques are essential to showcasing your Delicious Pear and Brie Cheese Salad Skewers. Arrange them in a circular pattern on a large white platter to draw the eye and make the colors pop. Garnishing the dish with fresh herbs, like basil or mint, will elevate the dish’s appearance. Traditional accompaniments, such as crackers or French baguette slices, can be served alongside for an appealing contrast.

For modern servings, consider individual servings in small jars or cups for a fun and trendy presentation. Be mindful of temperature; these skewers should be served at room temperature to ensure the best flavor experience. Lastly, with portion control in mind, serve 2-3 skewers per guest, allowing for satisfaction without overindulgence.

Wine and Beverage Pairing

When it comes to wine pairings, a chilled Chenin Blanc or a light Rosé complements the sweet and creamy notes of the pears and brie wonderfully. If looking for non-alcoholic alternatives, consider sparkling apple cider or a refreshing mint lemonade that can balance the flavors beautifully.

Additionally, coffee or tea aficionados might enjoy a light herbal tea to accompany these skewers, offering a soothing contrast to the richness of this appetizer. Always serve drinks chilled, particularly white wines and ciders, to ensure the best pairing experience.

Storage and Shelf Life

To keep your Delicious Pear and Brie Cheese Salad Skewers fresh, store them in an airtight container in the refrigerator for up to two days. Ensure you layer parchment paper between layers to prevent moisture buildup and maintain texture. When assembled, the skewers should be consumed fresh to enjoy the best taste and appearance. If you need to reheat leftover ingredients, consider allowing them to come to room temperature before serving again, avoiding the microwave to reduce the risk of melting the cheese excessively.

If you’re considering freezing leftover ingredients, do so before assembly, as the texture of the fruit and cheese may degrade after freezing, impacting later preparation.

Make Ahead Strategies

To streamline preparation, consider slicing the pears and cheese in advance, storing them in separate airtight containers until ready to assemble. You can also wash and dry greens a few hours ahead of time, keeping them crisp for serving. The skewers can be assembled and kept in the refrigerator under a damp paper towel for up to an hour before guest arrival, minimizing last-minute stress.

To maintain quality, avoid placing the skewers on ice as condensation can cause the cheese to become watery. Instead, prepare to serve them on a warm summer day with ample time for guests to mingle before enjoying.

Scaling Instructions

For halving the recipe, simply divide the quantities of all ingredients in half while maintaining the preparation time. Doubling or tripling the recipe can be easily done, ensuring that you have ample skewers for larger gatherings; however, when scaling up, consider the size of your serving platter to allow for a beautiful presentation. Keep in mind that assembly time may increase slightly due to the volume.

Storage considerations also become important at larger scales; ensure adequate refrigeration is available after prep to maintain freshness.

Nutritional Deep Dive

Each serving of the Delicious Pear and Brie Cheese Salad Skewers provides a healthy balance of macronutrients. Expect approximately 150 calories per serving, with a blend of carbohydrates from the pears and proteins from the brie. Both pears and brie offer micronutrients, including vitamin A, calcium, and potassium, contributing to overall health.

This appetizers also supports dietary flexibility with its plant-based ingredients. For weight management, consider portion control by serving smaller quantities while allowing guests to return for seconds without excess waste.

Dietary Adaptations

For gluten-free options, ensure all components are certified gluten-free, especially any sauces or dips served alongside. Dairy-free variations can be accommodated with coconut cream cheese or other vegan alternatives to brie for a similar creamy texture without dairy.

If catering to specific diet plans like low-carb or keto, opting for lower-carb fruits and cheeses can make this a delightful option. Additionally, those on Paleo diets can also substitute the cheese with nuts or avocados for a creamy quality while remaining true to dietary restrictions.

The Recipe

Delicious Pear and Brie Cheese Salad Skewers

Serves: 6 servings

Prep Time: 15 mins

Cook Time: 0 mins

Total Time: 15 mins

Kitchen Equipment Needed

  • Skewers or toothpicks
  • Cutting board
  • Knife
  • Airtight containers for storage

Ingredients

  • 3 ripe pears, sliced
  • 8 oz brie cheese, cut into cubes
  • 2 cups mixed greens (arugula, spinach)
  • Balsamic reduction for drizzling (optional)
  • Fresh basil for garnish (optional)

Directions

  1. Prepare all ingredients by slicing pears and cubing brie cheese.
  2. Assemble the skewers by alternating pieces of pear and brie cheese, leaving space for greens.
  3. Add greens onto each skewer, ensuring balance in weight.
  4. Drizzle with balsamic reduction if desired and garnish with fresh basil.
  5. Serve immediately or refrigerate for up to an hour before serving.

Recipe Notes

  • Feel free to substitute pears with seasonal fruits like figs or seasonal apples.
  • Can add nuts (walnuts or pecans) for an extra delicious crunch.

Troubleshooting Guide

If you experience texture issues such as overly mushy fruit, ensure to select pears that are ripe yet firm when preparing the skewers. If flavor balance seems off, try adjusting the brie volume or drizzling a bit more balsamic reduction for added depth.

Temperature problems may occur if skewers are prepared too early; always allow them to rest at room temperature for the best flavor. If equipment challenges arise, ensure sharp knives are employed for all preparations to minimize struggle.

Should you need ingredient substitutions, always consider seasonal fruits or local cheese varieties that provide comparable textures. Timing concerns may arise if skewers were prepared too early – remember to keep them covered in the fridge, but not for too long before serving to maintain optimal quality.

Recipe Success Stories

Our community has shared their creative adaptations of this Delicious Pear and Brie Cheese Salad Skewers Recipe, showcasing its versatility. Variations such as adding prosciutto have received rave reviews for adding a savory twist to this already sweet and creamy starter. Many have enjoyed sharing alongside their cheese boards during gatherings, elevating their entertaining game.

Readers have also shared that their children loved assembling the skewers themselves, making it a fun activity for family bonding time. Others noted that the vivid colors and fresh ingredients made for stunning social media photos, highlighting the appetizing nature of this dish. Recipe tips on making the skewers more visually appealing have continued to roll in, inspiring greater creativity in presentation.

Frequently Asked Questions

Can I make these skewers in advance?

Yes, you can prepare the ingredients ahead of time, but it’s best to assemble the skewers no more than an hour before you plan to serve them to maintain freshness and crispness.

What are some good substitutes for brie cheese?

If you don’t have brie, you could use camembert, goat cheese, or cream cheese for a different flavor profile. Each will provide a creamy texture.

Are there any other fruits that pair well with brie?

Absolutely! Other fruits such as figs, apples, or even grapes work beautifully with brie and can add diverse flavors and textures to your skewers.

Can I use different greens?

Definitely! Feel free to use any fresh greens you prefer, such as arugula, spinach, or kale, to complement the flavors of the brie and pears.

Is this recipe gluten-free?

Yes, this recipe is gluten-free as it uses only fresh fruit and cheese. Ensure any garnishing or accompanying sauces are also gluten-free.

How long can I store leftover skewers?

Leftover skewers should be consumed within two days when stored in an airtight container in the refrigerator. However, they are best eaten fresh.

What drinks pair well with this dish?

Chenin Blanc or light rosé wines are excellent for pairing. For non-alcoholic options, try sparkling apple cider or herbal tea to balance the flavors.

Can I make this recipe vegan?

Yes, you can make this recipe vegan by substituting brie with a nut-based cheese or vegan cream cheese, and ensure all other components are plant-based.

What kind of skewers can I use?

You can use wooden or metal skewers. Just make sure to soak wooden skewers in water if you are going to put them on the grill or cook them.

Do I need to peel the pears?

No, you do not need to peel the pears. The skin adds fiber and texture to the dish; just make sure to wash them thoroughly before use.

Additional Resources

If you’re interested in exploring more related recipes, consider checking out our fruit and cheese platter ideas or exploring appetizers that emphasize seasonal produce. Additionally, our technique guides on cheese carving and cheese pairing suggestions can enhance your culinary skills. Don’t forget to read up on ingredient information to get the most out of your purchases, while our equipment recommendations can provide ideas for the best cookware and serveware to use for this recipe.

Join the Conversation

We invite you to share your experience with our Delicious Pear and Brie Cheese Salad Skewers Recipe! Connect with us on social media by sharing your photography tips and enjoyed variations. Your feedback is invaluable and helps us continue to provide the best recipe recommendations. Engage with fellow culinary enthusiasts and inspire them with your personal adaptations and suggestions for making this delightful skewers recipe your own.

Create a Stunning Charcuterie Wreath for Your Holiday Feast

Create a Stunning Charcuterie Wreath for Your Holiday Feast: A Festive Culinary Centerpiece

⚖️
Difficulty
Easy

⏲️
Prep Time
30 mins

🕒
Cook Time
0 mins

⏱️
Total Time
30 mins

🍽️
Servings
8-10 servings

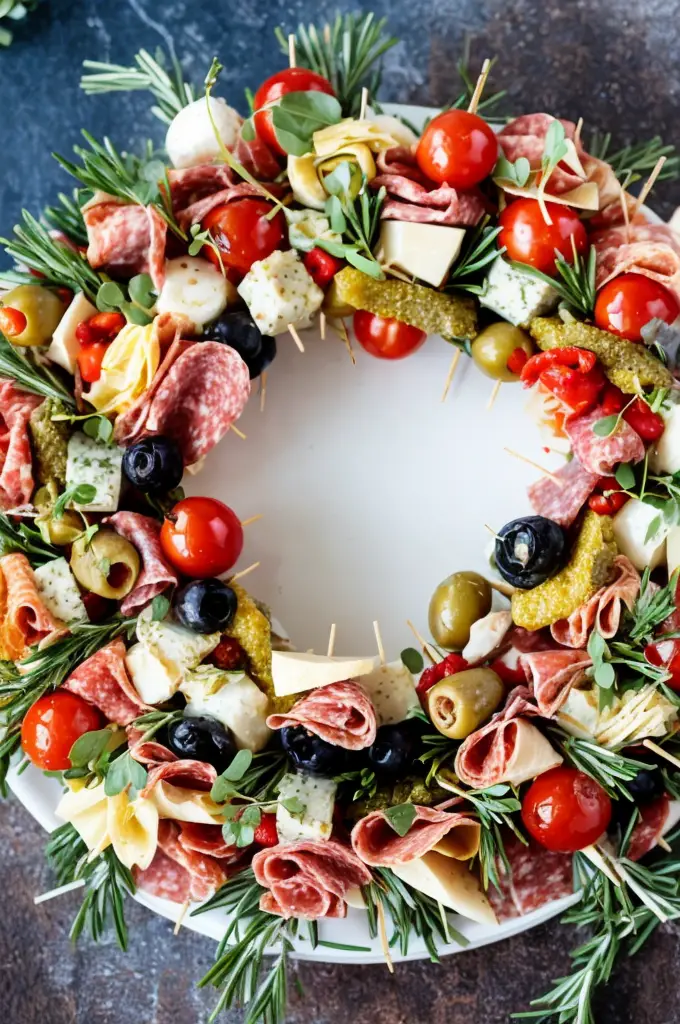
As the holidays approach, many are looking to create a festive atmosphere that includes delicious food and beautiful presentations. One of the most eye-catching items you can add to your holiday table is a stunning charcuterie wreath. This delightful display not only serves as a fantastic appetizer that will impress your guests but also allows for a wide variety of flavors and textures. Imagine colorful cheeses, crispy crackers, and vibrant fruits elegantly arranged to resemble a lush, festive wreath that invites everyone to indulge.

The beauty of a charcuterie wreath lies in its versatility. You can customize it to fit your taste preferences and dietary needs, making it a perfect fit for any gathering. Featuring an array of meats, cheeses, seasonal fruits, and creativity, this dish can serve as both a starter and a conversation piece that climaxes the holiday celebration experience. Each bite is bursting with flavor, and the decorative nature of the wreath ensures that it will be a centerpiece at your holiday feast.

Quick Recipe Highlights

  • Flavor Profile: Expect a delightful balance of savory from the meats, creamy from the cheeses, and a touch of sweetness from the seasonal fruits.
  • Texture: The mix of crunchy crackers and soft, creamy cheeses creates a satisfying combination that is pleasing to the palate.
  • Aroma: The fragrant spices of cured meats blend with the fresh bouquet of herbs and seasonal fruits, making it irresistibly inviting.
  • Visual Appeal: The vibrant colors of the fruits, nuts, and cured meats come together to create a visually stunning wreath that is sure to draw attention.
  • Skill Level Needed: This recipe is easy to assemble, perfect for both novice cooks and seasoned chefs looking for a festive project.
  • Special Equipment: A large platter or a round board will be essential for arranging your charcuterie wreath elegantly.

Recipe Overview

  • Difficulty Level: This charcuterie wreath is classified as easy since it involves no cooking. It’s all about the arrangement of prepared ingredients.
  • Category: This dish falls under hors d’oeuvres or appetizers, making it ideal for holiday gatherings or cocktail parties.
  • Cuisine: Drawing from various culinary traditions, charcuterie combines elements of French and Italian cuisines, celebrating their love for cured meats and cheeses.
  • Cost: Depending on your ingredient choices, the cost may range from moderate to slightly high but can be tailored to fit any budget.
  • Season: The best seasons for this dish are during the holiday months, where the ingredients are at their peak freshness and availability.
  • Occasion: Perfect for holiday gatherings, parties, and family celebrations, this wreath adds a touch of elegance to any occasion.

Why You’ll Love This Recipe

The taste and texture appeal of a charcuterie wreath make it a favorite among many. Each bite offers a different flavor experience, from the tangy cheese to the rich, savory meats, paired with crisp crackers that bring texture and crunch to the mixture. The variety of elements means there’s something for everyone, ensuring all guests leave happy and satisfied.

Convenience is another reason to love this recipe. With no cooking required, assembly is stress-free and can be done quickly. Gathering your ingredients ahead of time allows for easy setup when guests arrive, making it perfect for impromptu gatherings or carefully planned parties alike.

Nutritionally, a homemade charcuterie wreath can be balanced with healthier ingredients. Opting for lean meats, low-fat cheeses, and including plenty of fruits and nuts can give your guests a healthier snacking option while still satisfying their taste buds.

Socially, this wreath brings people together. Guests will gather around the colorful platter, chatting and selecting their favorites, fostering an element of interaction that elevates the dining experience. It encourages sharing, and conversation, and provides a hands-on eating experience that feels festive.

Lastly, the cost-effectiveness of this dish cannot be overlooked. You can easily substitute expensive ingredients with more affordable ones without compromising the overall look and taste. This means you can treat your guests to something high-end without stretching your budget too thin.

Historical Background and Cultural Significance

The origins of charcuterie date back to ancient times when meats were cured as a method of preservation before the advent of refrigeration. Initially stemming from French traditions, charcuterie has evolved over the centuries and has incorporated influences from various regions, including Italy’s antipasto and Spain’s tapas. The enchanting visual appeal of beautifully arranged cured meats and cheeses has always captivated individuals during feasts and celebrations.

Culturally, the charcuterie board represents hospitality and generosity. The act of sharing food is foundational in human connection, and when beautifully displayed, a charcuterie wreath embodies the spirit of welcome and warmth during gatherings. This tradition transcends holidays; it’s a celebration of community, love, and the joy of good food.

Over time, the art of charcuterie has expanded beyond just meats to include a plethora of ingredients. With the rise of gourmet charcuterie, various gourmet cheeses, artisan crackers, and seasonal vegetables have become staples in modern arrangements. This evolution continues to open doors to creativity, allowing for personalized touches.

Regional variations also play a significant role in the cultural significance of charcuterie. Different areas highlight local flavors, whether it’s cured meats specific to a region or cheeses renowned for their unique characteristics. This local tradition infuses the charcuterie wreath with a sense of identity and pride in culinary craftsmanship.

Ingredient Deep Dive

Meats

Cured meats are the star of any charcuterie board. Historically, these preparations were born of necessity in order to preserve meat for future use. Today, there’s a wide array of options available, each with its own unique flavor profile, such as prosciutto, salami, or chorizo. Nutritionally, these meats can offer protein and essential vitamins, but they can also be high in sodium and preservatives, so selecting high-quality options is advisable.

When selecting meats, look for artisanal products that are free of artificial additives or fillers. It’s also best to purchase them from a reputable deli or butcher who can provide recommendations on freshness. Proper storage includes refrigeration, and for longer storage, freezing may be an option.

Cheeses

Cheese brings richness and diversity to your charcuterie wreath. From creamy brie to sharp cheddar, each cheese offers both texture and flavor that pairs beautifully with meats and fruits. Cheese also provides protein, calcium, and beneficial fats. Selecting a variety of textures and flavors is key—aim for a mix of hard, soft, and blue cheeses.

While choosing cheese, seek out high-quality cheeses from local dairies or specialty shops. When storing cheese, keep it wrapped in breathable wax paper, and maintain the temperature in a cheese drawer of your refrigerator to preserve the quality. If replacing a cheese due to dietary restrictions, look for vegan cheese options or low-fat alternatives.

Fruits and Nuts

Fruits like grapes, figs, and apples not only enhance flavor but also add a natural sweetness that balances the saltiness of meats and richness of cheeses. Nuts add a satisfying crunch and are a source of healthy fats and protein. Including these ingredients contributes to a well-rounded nutritional profile.

To select fruits, it’s best to choose seasonal options for the freshest taste. For example, berries are perfect in summer, while pomegranates shine in fall and winter. Nuts should be fresh and unsalted to ensure they enhance but do not overpower the other ingredients. Store dried fruits and nuts in airtight containers away from heat to prolong their shelf life.

Common Mistakes to Avoid

  • Overloading the wreath: A common mistake is overcrowding the platter, which can make it look messy. Focus on balance and allow space between items for a visually appealing arrangement.
  • Choosing mismatched flavors: While variety is important, complementing flavors is crucial. Ensure that meats, cheeses, and fruits work well together to enhance the overall experience.
  • Ineffective ingredient prep: Cutting fruits and arranging meats ahead of time is essential. Avoid waiting until the last minute to prep your ingredients, as it may affect quality and readiness.
  • Ignoring seasonality: Using out-of-season fruits can lead to bland flavors. Always opt for seasonal produce for the best taste and texture.
  • Forgetting garnishes: Herbs like rosemary or thyme can elevate your presentation. Skipping these small details can make the wreath look less festive.
  • Not including a variety of textures: Failing to incorporate creamy, crunchy, and chewy elements can lead to a monotonous mouthfeel.
  • Serving at the wrong temperature: Cheese and meats should be served at room temperature for optimal flavor. Avoid serving cold ingredients straight from the refrigerator.
  • Neglecting dietary needs: Consider the dietary restrictions of your guests. Not having vegetarian or gluten-free options can alienate some attendees.
  • Not replenishing items: If the wreath is out for an extended period, make sure to replenish items that are frequently chosen to keep the presentation appealing.
  • Insufficient tools for assembly: Ensure you have the right platters, cutting boards, and serving utensils before you begin assembling to avoid chaos later on.

Essential Techniques

Arranging Ingredients

Properly arranging the ingredients is crucial in creating an appealing charcuterie wreath. Start with your base items, such as crackers or bread, to form the foundation. Then, layer the meats and cheeses accordingly. Use fruits and nuts to fill in the gaps for visual interest. A circular or spiral arrangement usually works best, with larger items placed first and smaller ones filling in spaces.

Choosing Complementary Flavors

Understanding flavor profiles will ensure maximum enjoyment for your guests. For instance, pairing tangy cheeses with sweet fruits or savory meats with tart pickles enhances the overall experience. Experimenting with various pairings can lead to delightful discoveries. Pay attention to textures as well, mixing crispy, creamy, and chewy ingredients will add depth to the dish.

Presentation Skills

The presentation of your charcuterie wreath is key to its appeal. Use vibrant colors, contrasting shapes, and varying heights within your arrangement. Garnishing with fresh herbs or edible flowers adds a professional touch that can impress guests. Aim for a balanced visual where no one ingredient overpowers the others.

Understanding Portion Control

Portion control is essential in ensuring all guests have the chance to experience every component. Pre-cut cheeses into small triangular pieces and arrange meats in overlapping patterns to give clear servings. Providing small serving tongs at both ends of the wreath also helps manage portion sizes effectively.

Pro Tips for Perfect Charcuterie Wreath

1. Use a seasonal theme to inspire your ingredient selection, such as cranberries and pumpkin seeds for fall or vibrant berries in summer.

2. Incorporate a small dish of honey or jam as a sweet complement to the flavors, allowing guests to customize their bites.
3. Freeze fresh herbs in ice cubes and use them for decoration, adding a fun twist while promoting fresh flavors.
4. Cold cut meats should be laid out in an overlapping style to enhance visual intrigue and allow for easy grabbing.
5. Do not limit yourself to traditional ingredients; feel free to experiment with different cheeses or add charred vegetables for a unique twist.
6. Arrange on a wooden board or elegant platter to elevate the aesthetic appeal and allow for easy access for your guests.
7. Ensure everything is at room temperature for serving to maximize taste and enjoyment.
8. Prepare the wreath just before serving time to maintain freshness and color vibrancy.

Variations and Adaptations

One of the joys of creating a charcuterie wreath is the opportunity to incorporate regional variations. For instance, if you’re in the Mediterranean, consider using local meats like prosciutto along with olives and feta cheese. A Southern-style adaptation could include smoked meats and homemade preserves alongside cornbread crackers.

You can also adapt your wreath according to the season. For summer gatherings, fresh berries and light cheeses provide a refreshing taste, while autumn can highlight pumpkin-spiced cheeses or roasted nuts to embrace the cozy vibes.

For guests with dietary restrictions, it’s important to include alternatives. Vegan cheese, gluten-free crackers, or nut-based spreads can effectively cater to those avoiding animal products or gluten without sacrificing enjoyment.

Flavor variations are endless; consider adding chocolate pieces or spicy nuts to introduce sweetness or heat into the mix. The texture can also be modified; for a crunchier experience, include grilled vegetable slices or a variety of crackers with different flavors.

Finally, presentation alternatives will help to beautify your wreath. You may choose to use a large wooden cutting board or a festive platter that features elegant materials to enhance the visual feast.

Serving and Presentation Guide

Arranging your charcuterie wreath can set the stage for a delightful experience. Start by positioning your main items towards the center, allowing smaller elements like fruits and nuts to encircle them. For garnishing, consider fresh herbs like rosemary or thyme sprigs which can add vibrancy and a seasonal touch.

In terms of temperature, it’s best to present your wreath at room temperature, as both meats and cheese taste best when slightly warmed. Pay attention to portion control; offer small plates or napkins for guests to easily navigate and enjoy their selections.

Serve your charcuterie wreath with a side of dips or spreads to enhance the flavor. Mustard, flavored oils, or a selection of jams can complement the elements beautifully. Finally, remember to consider the visual aspects, using colorful ingredients that will draw the eye and make your wreath an irresistible centerpiece.

Wine and Beverage Pairing

A charcuterie wreath pairs best with a variety of wines. A crisp Sauvignon Blanc or a light Pinot Noir can complement the richness of the cheeses and meats beautifully. For a fuller-bodied wine, a robust Cabernet Sauvignon or Malbec would work well with stronger flavors of aged cheeses and cured meats.

If you prefer non-alcoholic options, sparkling water infused with fruits, or herbal iced teas can be refreshing alternatives that cleanse the palate. For coffee lovers, a light roast coffee served at room temperature on the side provides an interesting contrast when enjoyed with sweeter fruits and nuts.

Temperature is key when selecting wines; they should be served at their ideal temperatures for maximum enjoyment. White wines should be chilled, whereas red wines can be slightly warmer to enhance their flavors.

Storage and Shelf Life

To best store your charcuterie wreath, wrap leftover ingredients tightly in plastic wrap or place them in airtight containers. Meats and cheeses will generally keep for up to 3 days, but it’s important to keep an eye on freshness, as some items may spoil faster.

Temperature control is crucial. Meats and cheeses are best stored in the fridge; however, they should be brought to room temperature for serving to enhance their flavors. When it comes to prepared herbs or garnishes, they can be stored in the fridge but should be added just before serving for optimal visual appeal.

Recognizing signs of spoilage is key. Look for discoloration, an off-smell, or changes in texture to help gauge freshness. Reheating isn’t necessary for a charcuterie wreath, but any leftover cooked elements can easily be repurposed into salads or sandwiches.

For freezing options, consider freezing leftover cheese only if absolutely necessary; it can alter its texture significantly. Nuts and dried fruits can usually be frozen without affecting their quality, making them a great ingredient to store long term.

Make Ahead Strategies

Planning ahead can be a lifesaver when hosting holiday gatherings. To effectively prepare your charcuterie wreath, consider creating a timeline. You can slice meats and cheeses the night before and store them in the fridge.

Assemble your wreath in stages, laying out the main elements first and storing them separately. The day of the event, finish with the fresh produce and garnish just before serving to ensure maximum freshness and visual appeal.

Quality is paramount, so do a taste test of your selected meats, cheeses, and fruits a day prior to ensure everything is on par. Consider leaving some ingredients to be added fresh, like herbs or certain fruits, that may lose their appeal if prepped too far in advance.

Don’t forget the incorporation of elements that can be added last minute for freshness—items like avocado or fresh herbs—will bring a lively touch to your finished wreath without a lot of last-minute work.

Scaling Instructions

Scaling a charcuterie wreath is straightforward! If you want to create a smaller version, simply halve your ingredients while still maintaining the same variety. For larger gatherings, doubling or even tripling the ingredients can accommodate larger groups; just ensure that your platter can handle the volume.

Equipment adjustments may include using larger cutting boards or platters to accommodate more ingredients. Timing can remain flexible, as most components can be assembled quickly regardless of size.

When scaling, keep in mind that some ingredients may need extra space to shine. Allow for proper layering and arrangement to prevent overcrowding. Additionally, consider the storage space in your fridge when prepping for a larger wreath.

Nutritional Deep Dive

Breaking down the nutritional content of a charcuterie wreath can be enlightening. The macro breakdown typically reveals a good source of protein from meats and cheeses, healthy fats from nuts, and vitamins from fruits. Adjustments can be made depending on preferences, with options for lower-fat cheeses or leaner meats.

Micronutrient analysis shows that incorporating various fruits can enhance nutrient density, providing fibers, vitamins, and antioxidants. This is particularly important during the holiday season when maintaining healthy habits can be challenging.

The health benefits should not be overlooked; choosing leaner ingredients and adding fresh produce increases fiber content while reducing saturated fats for a healthier balance. Mindful portion analysis can also aid in weight management while enjoying festive foods.

Lastly, adjusting portion sizes based on guests’ preferences allows for a varied approach—offering everything from bite-sized portions to fuller servings can help meet individual dietary needs.

Dietary Adaptations

Creating a charcuterie wreath that caters to various dietary needs can be easily achieved with some mindful substitutions. For gluten-free diets, ensure you choose alternative crackers made from rice or cornmeal, keeping flavors intact while being accessible.

Dairy-free options can replace cheeses with nut-based alternatives or even vegan cheese spreads. These can satisfy those avoiding dairy without sacrificing the creamy goodness traditionally found in standard recipes.

For vegan diets, focus on plant-based meats or hearty vegetables such as artichoke hearts, alongside hummus or tahini as dips. Low-carb and keto variations can tap into meats, cheeses, and low-carb vegetables like cucumber and radishes.

If your guests are following a paleo diet, stick with natural ingredients that reflect whole foods, leaning on meats, vegetables, and fruits while avoiding processed items. Low-FODMAP dieters can plump for cheeses that are lactose-free and stick to lower-fructose fruits, ensuring everyone can join the festive fun.

The Recipe

Create a Stunning Charcuterie Wreath

Serves: 8-10 servings

Prep Time: 30 mins

Cook Time: 0 mins

Total Time: 30 mins

Kitchen Equipment Needed

  • Large round platter or cutting board
  • Knife for cutting meats and cheeses
  • Serving tongs or toothpicks for easy serving
  • Small dishes for dips and spreads

Ingredients

  • 1 pound of assorted cured meats (e.g., prosciutto, salami, chorizo)
  • 1 pound of assorted cheeses (e.g., brie, cheddar, goat cheese)
  • 2 cups of seasonal fruits (e.g., grapes, figs, apple slices)
  • 1 cup of assorted nuts (e.g., almonds, walnuts, pecans)
  • 1 box of gourmet crackers
  • Fresh herbs for garnish (e.g., rosemary, thyme)
  • Optional: dips or spreads (e.g., honey, mustard, hummus)

Directions

  1. Gather all your ingredients and equipment to begin assembling your wreath.
  2. Start with a base of crackers, arranging them in a circular pattern on your platter or board.
  3. Layer the cured meats, folding or rolling them for an appealing presentation, and section them around the wreath.
  4. Place the cheeses next, cutting them into bite-sized pieces, and distribute them evenly.
  5. Add your seasonal fruits in gaps between the meats and cheeses to add color and diversity.
  6. Fill in with a mix of nuts and any dips or spreads placed in small dishes around the wreath.
  7. Finish by garnishing with fresh herbs to add a festive touch and visual interest.

Recipe Notes

  • Feel free to customize the ingredients based on your preferences or dietary needs.
  • Choose quality cheeses and meats for the best flavor experience.
  • Assembling the wreath just before guests arrive will maximize freshness.

Troubleshooting Guide

If your charcuterie wreath’s texture seems off, it may be due to improper ingredient storage. Ensure that meats and cheeses are kept at optimal temperatures before serving. If flavors seem unbalanced, introduce more fruits or nuts; these can effectively balance the richness of meats and cheeses.

For temperature problems, ensure that meats and cheeses are taken out of the fridge ahead of time to warm up. If ingredients have been unwrapped for too long, consider quickly reheating or chilling, depending on what is needed.

Equipment challenges can sometimes arise; ensure that your area is well-organized and you have the right tools at hand to avoid delays. Ingredient substitutions should be done carefully, as not all replacements offer the same flavor profile, so aim to choose similar-tasting alternatives.

In terms of timing concerns, ensure you prep your ingredients in advance to allow for a smoother assembly process. This can include cutting cheeses and washing fruits a day prior, leading to a stress-free experience when hosting guests.

Recipe Success Stories

In our community, readers have reported rave feedback on creating charcuterie wreaths for their gatherings. Many have shared how elegant settings made a lasting impression on their guests. Variations of the wreath—such as those featuring local ingredients—often led to exciting discoveries that enhanced flavors, drawing on regional traditions.

Photography tips have been a big hit, with followers recommending natural lighting to showcase their arrangements’ colors may amplify social engagement. Furthermore, readers have encouraged others to get creative, suggesting their own adaptations, including themed wreaths based on personal favorites or seasonal inspirations.

Adaptation stories illustrate the versatility of the wreath as hosts tailor ingredients to match specific dietary preferences, effectively including everyone in the celebration. Other readers have emboldened participants to let their imaginations run wild, pushing the boundaries of creativity and allowing their personalities to shine through in their culinary creations.

Frequently Asked Questions

How long will the charcuterie wreath last?

The charcuterie wreath can last up to three days in the fridge, but freshness should be prioritized. Meats and cheeses are best enjoyed when recently prepared, so aim to assemble close to serving time.

What are the best types of cheese for a charcuterie wreath?

Some excellent cheese options include creamy brie, sharp cheddar, tangy goat cheese, and blue cheese. Aim for a balance of flavors and textures to keep guests engaged.

Can I make a charcuterie wreath in advance?

While you can prepare certain elements like cutting fruits or prepping meats ahead of time, it’s best to assemble the wreath just before guests arrive for optimal freshness and appearance.

Are there any dietary restrictions I should be aware of?

Yes, it’s wise to consider guests’ dietary restrictions. Options for gluten-free, dairy-free, and vegan substitutions can be easily incorporated to ensure everyone can enjoy the platter.

How can I make my wreath visually appealing?

To enhance visual appeal, use colorful ingredients, varying sizes, and layers of texture. Adding fresh herbs or edible flowers can also elevate the presentation significantly.

What beverages pair well with a charcuterie wreath?

A range of wines pairs excellently, such as white or light red wines. For non-alcoholic options, try sparkling water infused with fruits or herbal iced teas for a refreshing palate cleanser.

Can I include other foods besides meat and cheese?

Absolutely! Feel free to add crackers, fruits, vegetables, dips, and a selection of nuts. Be creative, as there are no strict guidelines on what can be included.

What is the best way to serve the wreath?

Present the wreath on a large platter or board, allowing guests to serve themselves easily. Providing small plates or napkins can ease the process and keep things organized.

What’s the best way to store leftover charcuterie?

Wrap leftover items tightly or store them in airtight containers in the refrigerator. Ensuring they stay fresh and maintaining quality can enhance their shelf life.

Can I use frozen ingredients?

It’s not recommended to use frozen fresh items on a charcuterie wreath. However, frozen nuts can generally be thawed without losing quality; opt for fresh ingredients whenever possible for the best experience.

How can I ensure portion control for my guests?

Offering small serving utensils and arranging ingredients thoughtfully can promote portion control. Additionally, pre-cut items encourage guests to select appropriate sizes for their plates.

Additional Resources

To complement your charcuterie wreath, consider exploring related recipes that highlight seasonal flavors and festive ingredients. Technique guides for preparing meats and cheeses can elevate your skills, while ingredient information can provide insight into unique products to try.

Equipment recommendations such as high-quality cutting boards or platters can significantly enhance your presentation and ease of assembly. Lastly, seasonal variations on charcuterie boards offer fresh ideas that can keep your culinary creativity flowing throughout the year.

Join the Conversation

We invite you to share your charcuterie wreath creations on social media and engage with fellow cooking enthusiasts! Share your photography tips, provide reviews, and celebrate community engagement through shared experiences.

Encourage friends and family to enter the kitchen with their variations and thoughts. Your unique adaptations could inspire others and further enhance dish enjoyment at holiday gatherings or casual get-togethers.

Let’s continue the dialogue about flavors, creativity, and wonderful culinary moments while diversifying our recipe collections together!

Create a Stunning Charcuterie Wreath for Your Next Gathering

Create a Stunning Charcuterie Wreath for Your Next Gathering

⚖️
Difficulty
Easy

⏲️
Prep Time
30 mins

🕒
Cook Time
0 mins

⏱️
Total Time
30 mins

🍽️
Servings
8-10

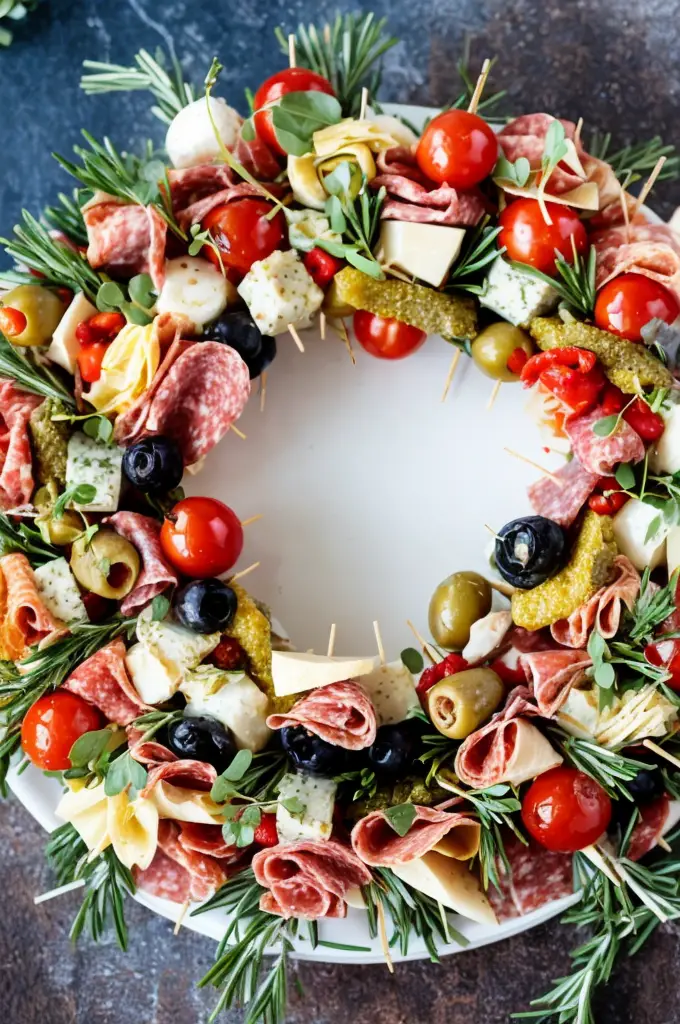
If you’re looking to impress your guests at your next gathering, creating a stunning charcuterie wreath is a delightful way to do so. This festive and artistic presentation combines both flavor and aesthetic, making it the centerpiece of any occasion. The charcuterie wreath is not just a treat for the palate, but also a feast for the eyes, elegantly arranged to resemble a seasonal wreath adorned with a variety of meats, cheeses, fruits, and nuts.

Imagine an array of vibrant colors, crunchy textures, and savory flavors that come together in this beautiful, circular arrangement. Each ingredient plays a role; from the rich taste of cured meats to the creamy texture of artisanal cheeses, every bite provides a new culinary experience. Whether it’s for a holiday celebration, a casual gathering with friends, or an elegant dinner party, a charcuterie wreath is sure to elevate your entertaining game.

Quick Recipe Highlights

  • Flavor Profile: The combination of savory meats, creamy cheeses, and sweet fruits creates a balanced taste experience that’s both satisfying and indulgent.
  • Texture: Enjoy the contrast between crunchy nuts and soft cheeses paired with the tenderness of sliced meats.
  • Aroma: The aromatic notes of smoked meats and aged cheese mingle with the fresh scents of herbs and fruits enticing guests from the moment they walk in.
  • Visual Appeal: The wreath’s circular shape, filled with vibrant colors, garnished with fresh herbs, and adorned with edible flowers, makes for an eye-catching display.
  • Skill Level Needed: This easy charcuterie wreath requires minimal culinary skills, making it accessible for everyone.
  • Special Equipment: You’ll need a large serving platter or a round wooden board for optimal presentation.

Recipe Overview

  • Difficulty Level: This charcuterie wreath is classified as easy, perfect for both novice and experienced home cooks looking to showcase their creativity without the stress.
  • Category: Ideal as an appetizer or party snack, this dish fits beautifully into any casual or festive meal setting.
  • Cuisine: Drawing inspiration from French and Italian traditions, the charcuterie board has evolved to become a popular social appetizer worldwide, showcasing artisanal meats and cheeses.
  • Cost: The cost can vary based on the choice of ingredients but expect an average range of $40 to $75 depending on selections.
  • Season: This recipe shines in the fall and winter, taking advantage of festive gatherings and seasonal ingredients.
  • Occasion: Perfect for holidays, birthdays, or any festive gathering where friends and family come together.

Why You’ll Love This Recipe

First and foremost, the taste and texture appeal of a charcuterie wreath will captivate any palate. The beautiful combination of flavors, from the rich and salty curl of prosciutto to the creamy bite of brie, provides something for everyone, making it an ideal communal dish. The freshness of fruits like grapes and figs contrasts perfectly with the aged cheeses, culminating in a delightful taste experience.

Next is the convenience and preparation benefits that come with assembling a charcuterie wreath. There’s no cooking involved, allowing you to prepare this stunning dish in less than 30 minutes. It’s easily adjustable based on dietary restrictions or guest preferences; you can swap out meats or cheeses based on what’s available or your guests’ tastes.

The nutritional advantages should not be overlooked either. Packed with protein from meats and cheeses, as well as vitamins from fruits and nuts, this wreath can also serve as a well-rounded appetizer. With thoughtful ingredient selection, you can create a healthier version that still satisfies cravings.

Socially, a charcuterie wreath serves as a great conversation starter at any gathering. Guests can comfortably congregate around the display, encouraging mingling and interaction. The shared experience of constructing their own plates fosters a relaxed and enjoyable atmosphere, making your gathering memorable.

Lastly, the cost-effectiveness of a charcuterie wreath is impressive. With careful selection, it can be tailored to fit any budget. Many ingredients can be sourced locally, and buying in bulk can further reduce costs while still providing an abundance of flavors and options for your guests to enjoy.

Historical Background and Cultural Significance

The origins of charcuterie can be traced back to ancient times, where preservation methods of meats were vital to survival. The art began in France, where various techniques were developed to make salami, sausages, and other cured meats. Over time, this craft transformed into more than just a method of food preservation, becoming a culinary art form celebrated in dining experiences worldwide.

Charcuterie holds a significant cultural importance as it brings people together to share a meal. It fosters a sense of community during meals, making it a staple at family gatherings, social events, and special occasions. The DIY aspect of charcuterie boards allows for creativity, ensuring that each arrangement can reflect personal tastes and local ingredients.

Over the years, the practice of assembling charcuterie boards has evolved with trends, incorporating diverse flavors and ingredients. The rise of artisanal cheeses and local produce has contributed to this evolution, leading to new styles and presentations including the contemporary charcuterie wreath, which optimizes visual appeal with its wreath shape.

Variations of charcuterie can be found in many regions globally. In Italy, for example, antipasto platters include cheeses, olives, and marinated vegetables, while Spain features tapas. Each cuisine brings its own flavors and traditions, blending seamlessly into the charcuterie concept that we cherish today.

Ingredient Deep Dive

Cured Meats: Cured meats like prosciutto and salami are at the heart of any charcuterie wreath. Historically significant in Mediterranean diets, these meats offer high protein and intense flavor. When selecting cured meats, look for high-quality options without fillers. Store them wrapped in parchment in the refrigerator to maintain freshness, and they can typically last several weeks. Alternatives include turkey breast or vegan deli slices for dietary modifications.

Artisanal Cheeses: Cheeses like brie and aged cheddar provide creamy and rich elements to your wreath. Cheese has long been celebrated in numerous cultures across Europe, bringing both flavor and texture to dishes. Aim for a variety that includes soft, hard, and blue cheeses. For longevity, store cheese wrapped in wax paper and then placed in an airtight container. Substitute with dairy-free options if necessary.

Fresh Fruits: Incorporating fruits like grapes, figs, and apple slices not only adds sweetness but also complements savory elements beautifully. Fruits have cultural significance as symbols of abundance and vitality in numerous traditions. They pack nutritional benefits, like fiber and vitamins, and can be stored in the refrigerator for a few days. For substitutions, consider berries or citrus for variety and seasonality.

Nuts and Seeds: Nuts such as almonds and walnuts add crunch and earthiness to your wreath. These ingredients are rich in healthy fats and protein, and their diverse inclusion reflects their popularity in different cuisines. Store nuts in a cool, dry place to prolong freshness, and if allergies are a concern, seeds like pumpkin or sunflower can be great alternatives.

Common Mistakes to Avoid

  • Overcrowding the Wreath: A common mistake is to overload the wreath, making it difficult for guests to serve themselves. Aim for balance and allow enough space between ingredients for a beautiful presentation.
  • Choosing Generic Ingredients: Not all meats and cheeses are created equal. Opt for high-quality artisanal products rather than generic brands to maximize flavor and impact.
  • Not Balancing Flavors: Avoid creating a wreath that leans heavily to one flavor profile. Balance savory, sweet, and tangy ingredients for a harmonious taste experience.
  • Ignoring Aesthetics: Presentation matters! Dull arrangements can make even the best ingredients seem unappealing. Take the time to arrange your ingredients artistically.
  • Forgetting Accompaniments: Pairing your wreath with the right spreads and sides, like honey or mustard, enhances the flavors and elevates the entire dining experience.
  • Not Using Fresh Herbs: Fresh herbs add bright flavor and visual appeal. Don’t skip garnishing your wreath for that final touch!
  • Improper Storage: If leftovers remain, ensure they are stored properly to maintain freshness. Use airtight containers and consume within a few days.
  • Neglecting Dietary Restrictions: Always check for food allergies and dietary preferences amongst your guests. Provide options to accommodate everyone’s needs.

Essential Techniques

Arranging Ingredients: The art of arranging a charcuterie wreath is vital to its success. Start with your larger items, like cheeses and meats, and then fill in gaps with smaller items like nuts and fruits. This not only creates a visually appealing display but encourages guests to explore the entire arrangement.

Flavor Pairing: Understanding which flavors complement each other is crucial. When selecting meats, cheeses, and fruits, consider the taste and texture combinations. For example, pairing sharp cheddar with sweet figs enhances the flavor profiles beautifully.

Garnishing: Garnishing with fresh herbs or edible flowers can elevate the presentation immensely. Use herbs like rosemary or basil for a fragrant touch, and consider the seasonality of blooms for added decoration.

Pro Tips for Perfect Charcuterie Wreath

1. Use a variety of textures – combine soft, hard, crunchy, and creamy ingredients for an exciting mouthfeel.

2. Incorporate seasonal produce for freshness and vibrant colors that will enhance the overall presentation.

3. Ensure all ingredients are at room temperature before serving, as this allows flavors to shine through.

4. Use a mix of meats and cheeses from different regions to create an eclectic taste experience.

5. Don’t forget about portion sizes; plan accordingly if you’re catering to a larger crowd.

6. Experiment with different shapes – while a wreath is traditional, feel free to try hearts or stars for themed gatherings.

7. Set the stage with beautiful crackers or breads offering a contrast to the richness of the meats and cheeses.

8. Always leave room for creative expression; this is your opportunity to showcase local or favorite ingredients.

Variations and Adaptations

When it comes to regional variations, consider exploring Mediterranean influences by adding olives and hummus, providing different flavor profiles. For a seasonal adaptation, incorporate roasted vegetables in the fall or light, citrus-based fruits in the summer. Dietary modifications can easily be made; for a vegan version, swap meats for marinated tofu and use nut-based cheeses. For texture variations, try adding crispy chickpeas or toasted seeds for extra crunch. And for presentation alternatives, consider using mini wreaths for individual servings at more formal events.

Serving and Presentation Guide

When plating your charcuterie wreath, start with a large, flat surface to allow ample space for arrangement. Group similar items together but keep the layout playful—a mix of colors and shapes can draw the eye. Garnish with fresh herbs to add pops of color and aroma. Include serving utensils like tongs and small forks for convenience. Consider traditional accompaniments, such as crusty bread or artisan crackers, to complement the wreath.

Wine and Beverage Pairing

For a sophisticated pair, opt for a fruity red wine like Pinot Noir that complements the richness of the meats while contrasting the saltiness. If white wine is more preferred, a crisp Sauvignon Blanc can lift the flavors with its acidity. For non-alcoholic options, consider sparkling water infused with citrus or a refreshing iced tea for a lovely balance to the heavier flavors of the charcuterie.

Storage and Shelf Life

When storing your charcuterie wreath, wrap leftovers in plastic wrap or place them in an airtight container to prevent drying out. The wreath is best enjoyed within 2-3 days for optimal freshness. Store in a cool part of the refrigerator, ensuring meats and cheeses do not come into contact over time. If applicable, reheat to desired temperatures, particularly for any cooked components, and avoid refreezing as it alters the texture significantly.

Make Ahead Strategies

To make meal prep easier, you can slice and prepare your meats, cheeses, and fruits a day in advance. Assemble them on your board, cover with plastic wrap, and refrigerate until ready to serve. This strategy maintains freshness while allowing you to display creatively. Add fresh herbs and any delicate components just before serving to maintain crispness and vibrant appearances.

Scaling Instructions

If you plan to halve the recipe, adjust the arrangement slightly to maintain visual appeal while reducing the quantity of each ingredient. For larger gatherings, doubling or even tripling the portions is easy; simply maintain proportionate quantities to achieve balance in taste and presentation. Be mindful of the serving equipment as you scale—larger boards or multiple boards might be necessary to accommodate a bigger display.

Nutritional Deep Dive

When assessing the nutritional aspects of the charcuterie wreath, focus on macro breakdowns; the proteins from meats and cheeses provide vital amino acids, while fats contribute to satiety. Micronutrients from fruits and nuts support overall health, contributing vitamins and minerals essential for various bodily functions. Be attentive to portion sizes, as charcuterie can be quite calorie-dense, making awareness crucial for maintaining weight management goals.

Dietary Adaptations

To cater to gluten-free diets, ensure you use gluten-free crackers or serve with sliced vegetables instead. A dairy-free version can replace all dairy components with plant-based alternatives such as nut cheeses or coconut yogurts. If following a vegan or low-carb lifestyle, there are plenty of meat substitutes available that simulate texture and taste, allowing for creative freedom while staying aligned with dietary preferences.

The Recipe

Create a Stunning Charcuterie Wreath

Serves: 8-10

Prep Time: 30 mins

Cook Time: 0 mins

Total Time: 30 mins

Kitchen Equipment Needed

  • Large serving platter or wooden board
  • Knife for cutting cheese and fruits
  • Small bowls for spreads
  • Tongs or small forks for serving

Ingredients

  • 200g of prosciutto
  • 200g of salami
  • 200g of brie cheese
  • 200g of cheddar cheese
  • 100g of almonds
  • 100g of walnuts
  • 1 cup of grapes
  • 2-3 figs, sliced
  • Fresh rosemary for garnish
  • Crackers or bread for serving

Directions

  1. Begin by choosing a large serving platter or wooden board as your base.
  2. Start arranging the cheeses around the platter, creating a circular shape.
  3. Next, layer the cured meats around the cheeses, overlapping slightly for a beautiful display.
  4. Fill in the gaps with nuts and fresh fruits to create color and variety.
  5. Garnish with fresh herbs for an additional pop of color and flavor.
  6. Serve with a selection of crackers or breads on the side, and enjoy the beautiful presentation!

Recipe Notes

  • Feel free to substitute any meats or cheeses based on your preferences or dietary needs.
  • Experiment with different fruits and nuts for variety with each wreath.

Troubleshooting Guide

For texture issues, ensure meats and cheeses are at room temperature while serving. If flavors feel unbalanced, consider adding acid with lemon zest or vinegar-based dressings to brighten the overall taste. If the arrangement seems challenging, break it down by starting with cheeses, then layering the meats and finishing with fruits and nuts.

Recipe Success Stories

Readers have shared incredibly positive feedback regarding their experiences making the charcuterie wreath for various events. Many felt it was the highlight of their gatherings, praising the vibrant presentation that sparked great conversations. Additionally, several users have mentioned loving the flexibility in modifying the ingredients based on seasonality and personal preference, making it an approachable yet impressive dish.

Frequently Asked Questions

Can I make a charcuterie wreath ahead of time? Yes, you can prepare it a few hours in advance. Just keep it covered in the fridge, and add delicate components just before serving.

What if I have dietary restrictions among my guests? Feel free to substitute ingredients. Use dairy-free cheeses and gluten-free crackers for those with allergies.

How do I keep ingredients fresh for longer? Wrap any leftovers tightly and store them in airtight containers in the refrigerator. Consume within a few days for the best taste.

What are some popular pairings with a charcuterie wreath? Classic pairings include fruits, nuts, and a selection of gourmet crackers or artisan bread.

How can I ensure the best flavor combinations? Consider sweet, savory, and creamy contrasts while choosing your ingredients for a well-balanced wreath.

Are there vegetarian options available? Absolutely! You can use vegetables, cheeses, and plant-based proteins to create a delicious vegetarian wreath.

Can I make a smaller or larger version? Yes! The beauty of a charcuterie wreath is in its flexibility. Adjust ingredient quantities to fit your gathering size.

What to do if I run out of ingredients? Be creative with what you have! Create a unique twist on the traditional wreath using available ingredients.

How do I select the best meats? Look for high-quality cured meats without fillers, and consider regional artisanal options for unique flavors.

What are some fun garnishing ideas? Fresh herbs, edible flowers, or even citrus slices can add visual appeal to your wreath.

Additional Resources

To enhance your culinary experience, explore related recipes like different variations of charcuterie boards. Dive into technique guides for expert tips on selecting the best ingredients, learn about cheese making at home, or discover seasonal variations that can complement different times of the year.

Join the Conversation

We encourage you to share your charcuterie wreath creations on social media using our hashtag. Capture beautiful photography of your wreaths, and exchange tips with the community on variations that successfully wowed your guests. Your reviews and feedback play an essential role in creating a vibrant and growing cooking community. Join us in celebrating our love for engaging culinary experiences!