Table of Contents
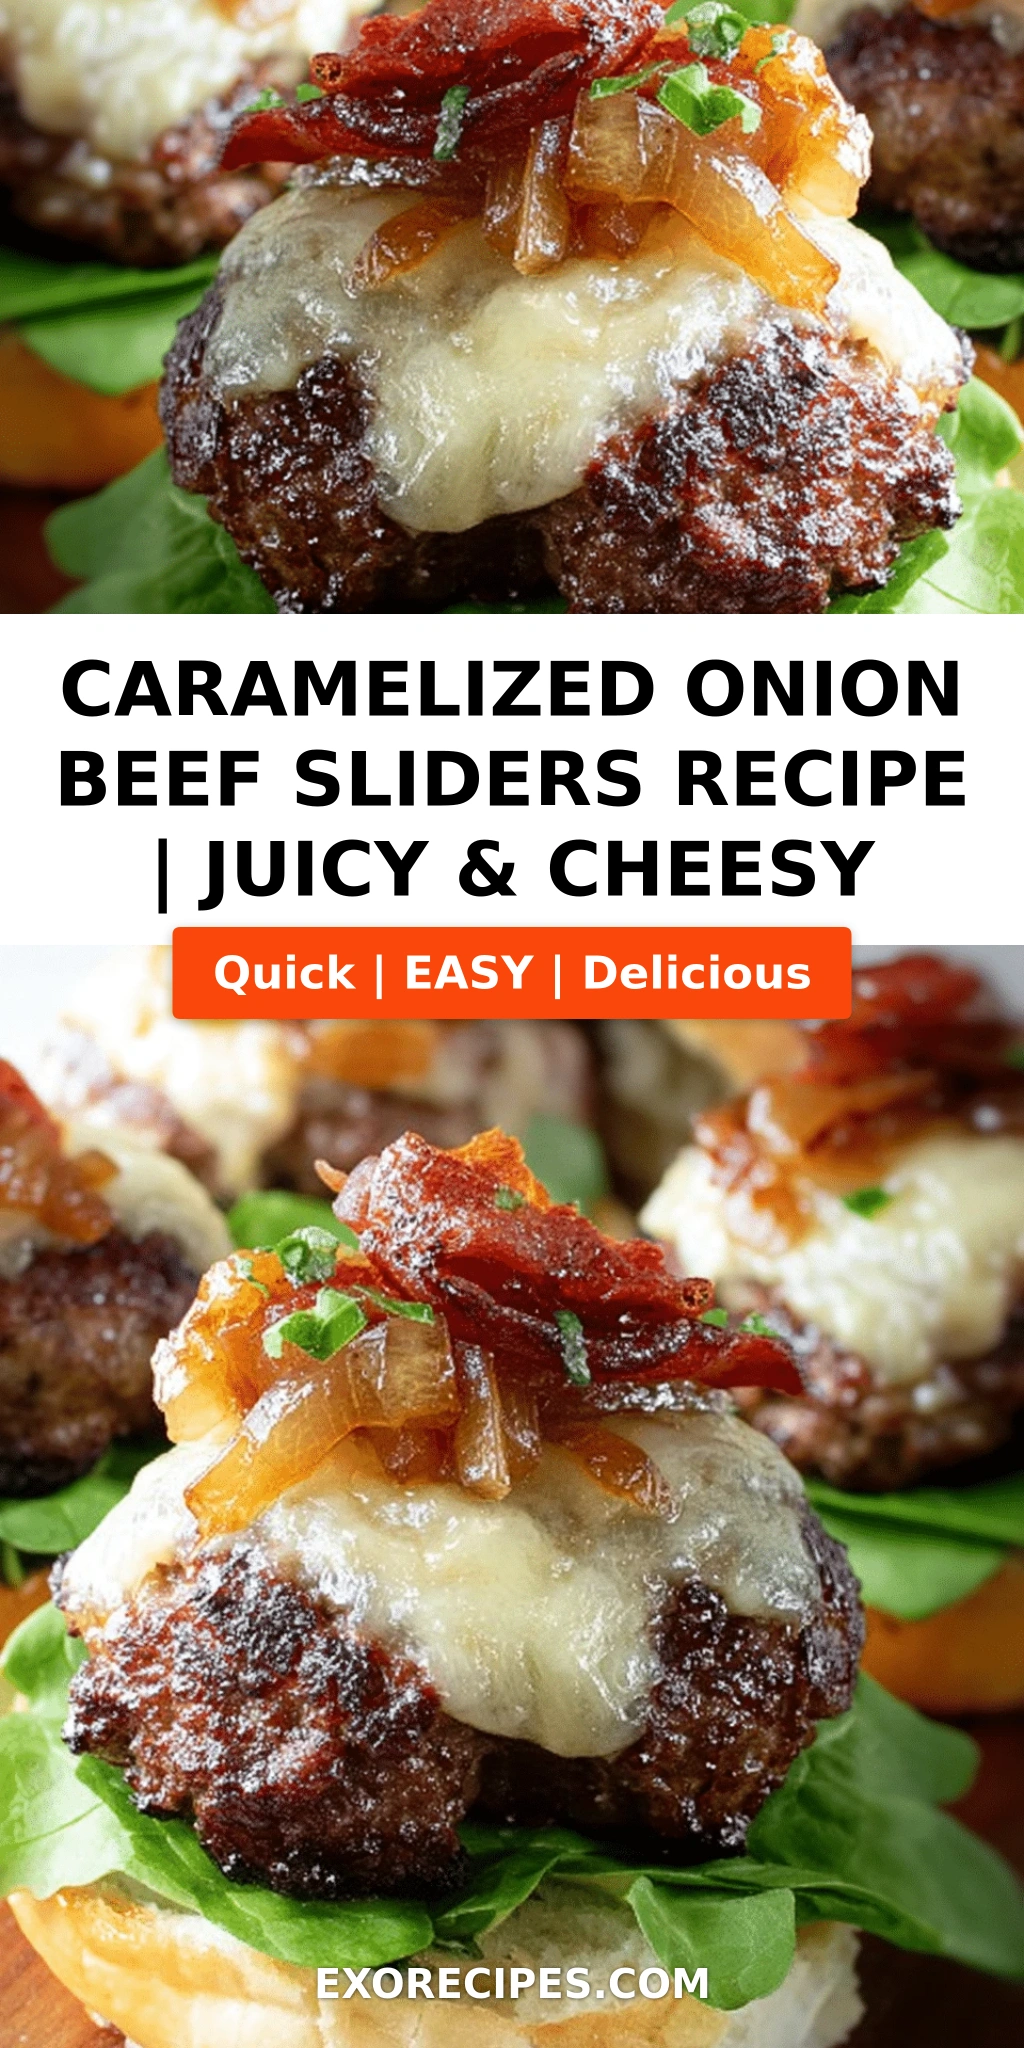
Caramelized Onion Beef Sliders – Juicy, Cheesy & Irresistible
I remember the first time I made caramelized onion beef sliders for a game-day gathering in my New York City apartment. The smell of onions slowly browning in butter and olive oil filled every corner, and my friends hovered around the kitchen island, unable to wait. These beef sliders are the perfect mini burger — juicy, cheesy, and piled high with sweet, golden onions. The secret? A touch of balsamic vinegar and brown sugar that takes the caramelization to a whole new level. I call this my easy beef sliders recipe because even a beginner can nail it on the first try.
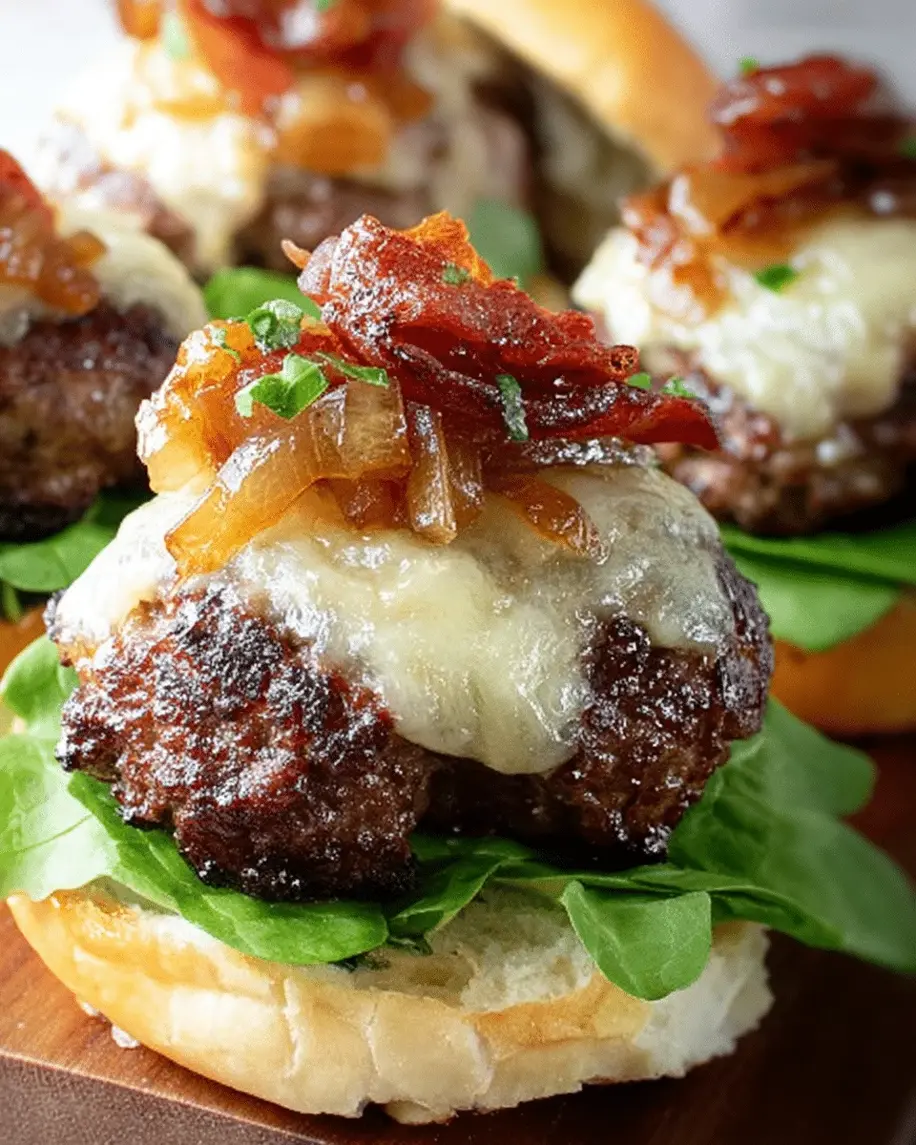
Each bite delivers a burst of savory beef, gooey provolone, and silky caramelized onions that melt in your mouth. The onions are cooked low and slow until they’re jammy and deeply flavorful — a technique I mastered during my pastry training in Paris, where patience is a virtue. The patties are seasoned simply with garlic and onion powder, letting the meat shine. I love serving these sliders with a side of crispy sweet potato fries and a tangy dipping sauce — it’s the kind of meal that feels both indulgent and comforting.
What sets my version apart is the careful balance of flavors and textures. I use 80/20 ground beef for extra juiciness, and I caramelize the onions in a mix of butter and olive oil to prevent burning while adding richness. A common mistake? Rushing the onions. They need a full 20-25 minutes to become truly sweet and tender. Trust me — your patience will be rewarded. These mini burger slider bites are guaranteed to disappear in minutes.
Why This Caramelized Onion Beef Sliders Recipe Is the Best
The flavor secret lies in the caramelized onions. In my mother’s kitchen in Morocco, we used caramelized onions as a base for many tagines, but here I give them a modern twist with balsamic and brown sugar. The acidity cuts through the richness of the beef, while the sugar helps achieve that deep mahogany color. Paired with provolone — a mild, melty cheese — every element complements the next without overpowering the patty.
Perfected texture is a non-negotiable for me. I shape the patties slightly larger than the buns, because they shrink during cooking. A quick sear on a hot grill or grill pan creates a beautiful crust, while the inside stays tender and pink (medium doneness is my sweet spot). The toasted buns add a gentle crunch that holds up to the juicy fillings.
This recipe is foolproof and fast — from start to finish, you’re only 45 minutes away from the best caramelized onion beef sliders you’ve ever made. I’ve tested it countless times for casual dinners and parties, and it never fails. 💡 mia’s Pro Tip: For extra flavor, spread a thin layer of Dijon mustard on the buns before assembling — it cuts through the richness and adds a lovely tang.
Caramelized Onion Beef Sliders Ingredients
I pick up my ground beef from the butcher at the Union Square Greenmarket, and the yellow onions are always from a local farm stand — they’re so sweet and fragrant. The provolone I get from a little Italian shop in the East Village. These simple, quality ingredients make all the difference.
Ingredients List
- 1 lb ground beef (80/20)
- 1 teaspoon salt
- 1/2 teaspoon black pepper
- 1 teaspoon garlic powder
- 1 teaspoon onion powder
- 2 tablespoons olive oil
- 3 large yellow onions, thinly sliced
- 2 tablespoons butter
- 1 tablespoon balsamic vinegar
- 1 teaspoon brown sugar
- 6 slider buns
- 6 slices provolone cheese
- Optional: mayonnaise, ketchup, or mustard for serving
Ingredient Spotlight
Ground Beef (80/20): The 20% fat content ensures juicy patties that don’t dry out on the grill. If you prefer leaner meat, mix in a tablespoon of olive oil or grated onion for moisture. Substitution: Ground turkey works, but add a little olive oil and season generously.
Yellow Onions: These are the workhorses of caramelization. They break down into sweet, jammy strands. Red onions are a fine substitute — they’re a bit milder and cook slightly faster. Avoid sweet onions like Vidalia unless you reduce the brown sugar.
Provolone Cheese: Its mild, buttery flavor melts beautifully without overwhelming the beef. For a stronger flavor, try sharp cheddar or smoked gouda. If you need dairy-free, use a good-quality plant-based provolone or cheddar shreds.
Slider Buns: Soft, squishy buns are essential — think potato rolls or brioche sliders. They should be sturdy enough to hold the filling but light enough to let the meat shine. Toasting them adds a nice structural crunch.
| Original Ingredient | Best Substitution | Flavor / Texture Impact |
|---|---|---|
| Ground beef (80/20) | Ground turkey + 1 tbsp olive oil | Leaner, slightly drier; add moisture with grated onion |
| Yellow onions | Red onions | Milder, slightly sweeter; reduce sugar slightly |
| Provolone cheese | Sharp cheddar or smoked gouda | Bolder flavor; melt consistency similar |
| Slider buns (potato/brioche) | Whole wheat slider buns or lettuce wraps | Less soft, more fiber; lettuce = low-carb option |
How to Make Caramelized Onion Beef Sliders — Step-by-Step
Ready to cook? Follow these simple steps and you’ll have the best sliders on the block. I’ll guide you through each one with the exact timing and visual cues I use.
Step 1: Caramelize the Onions
In a large skillet over medium heat, combine 2 tablespoons olive oil and 2 tablespoons butter. Add the thinly sliced yellow onions and stir to coat. Cook, stirring occasionally, for 20–25 minutes. The onions will shrink dramatically and turn a deep golden brown. Stir more frequently in the last 10 minutes to prevent sticking. When they’re soft and jammy, add 1 tablespoon balsamic vinegar and 1 teaspoon brown sugar; cook for 2 more minutes. Remove from heat and set aside.
💡 mia’s Pro Tip: Use a wide skillet so the onions aren’t crowded — they’ll steam instead of caramelize. If they start to brown too quickly, lower the heat and add a splash of water.
Step 2: Season and Shape the Patties
In a large bowl, gently combine 1 lb ground beef with 1 tsp salt, 1/2 tsp black pepper, 1 tsp garlic powder, and 1 tsp onion powder. Mix lightly with your hands — don’t overwork the meat or the patties will be tough. Divide into 6 equal portions and shape into small patties about 1/2 inch thick, slightly larger than the slider buns (they’ll shrink as they cook).
⚠️ Common Mistake to Avoid: Pressing down on the patties while they cook. This squeezes out the juices and makes them dry. Let them sizzle undisturbed.
Step 3: Grill the Patties
Heat a grill or grill pan over medium-high heat. Lightly oil the grates. Cook the patties for 3–4 minutes per side for medium doneness (internal temperature 160°F for well done, 145°F for medium). Don’t move them around — let a nice crust form.
💡 mia’s Pro Tip: Make a small indentation in the center of each patty with your thumb. This helps them cook evenly and prevents puffing up in the middle.
Step 4: Melt the Cheese
During the last minute of cooking, place a slice of provolone on top of each patty. Cover the pan or grill (or use a dome lid) and cook for about 1 minute until the cheese is melted and bubbly.
⚠️ Common Mistake to Avoid: Adding the cheese too early — it will overcook and become greasy. Wait until the patty is nearly done.
Step 5: Toast the Buns
While the patties rest briefly, toast the slider buns on the grill cut-side down (about 30 seconds) or in a toaster oven until lightly golden. Watch them — they burn quickly!
💡 mia’s Pro Tip: Brush the cut sides of the buns with a little melted butter before toasting for extra flavor and a golden crust.
Step 6: Assemble and Serve
Place a cheese-topped patty on the bottom half of each bun. Top generously with caramelized onions (use all of them — they’re the star!). Add the top bun and serve immediately with your favorite condiments. I love a swipe of Dijon mustard on the top bun.
⚠️ Common Mistake to Avoid: Letting the sliders sit assembled too long — the buns get soggy from the onions and the patty loses its sear. Best eaten right away.
| Step | Action | Duration | Key Visual Cue |
|---|---|---|---|
| 1 | Caramelize onions | 20–25 min | Deep golden brown, soft, jammy |
| 2 | Season and shape patties | 5 min | Patties about 1/2-inch thick, slightly larger than buns |
| 3 | Grill patties | 3–4 min per side | Dark crust forms, juices appear on top |
| 4 | Melt cheese | 1 min covered | Cheese fully melted and bubbly |
| 5 | Toast buns | 30 sec – 1 min | Light golden brown, slightly crisp |
| 6 | Assemble and serve | 2 min | Stacked sliders, onions heaped on top |
Serving & Presentation
These sliders are made for sharing. Arrange them on a large wooden board or a platter lined with parchment paper. I like to garnish with a few fresh parsley leaves or a sprinkle of flaky sea salt right before serving — it adds color and a little crunch. For a Moroccan twist, serve with a side of harissa mayo (mix 2 tablespoons harissa with 1/2 cup mayo). My Parisian training taught me to keep it elegant but approachable: a neat stack of sliders with a pile of crispy fries and a small bowl of pickles.
In NYC, I often take these to picnic gatherings in Central Park or serve them at Sunday game-day parties. They pair beautifully with a crisp lager or a glass of iced tea. If you’re feeling fancy, a simple arugula salad with lemon vinaigrette cuts through the richness.
| Pairing Type | Suggestions | Why It Works |
|---|---|---|
| Side Dish | Sweet potato fries, coleslaw, or a simple green salad | Adds contrasting texture and freshness |
| Sauce / Dip | Dijon mustard, harissa mayo, garlic aioli | Enhances savory notes and adds a tangy kick |
| Beverage | Cold beer (IPA or lager), iced tea, or a light red wine | Clements the palate; complements the savory richness |
| Garnish | Fresh parsley, flaky sea salt, pickled red onions | Adds visual appeal and a pop of acidity |
Make-Ahead, Storage & Reheating
As a busy NYC food blogger, I often prep components ahead. The caramelized onions can be made up to 4 days in advance and stored in the fridge. The patties can be shaped and refrigerated (covered) for up to 24 hours. On the day of serving, simply grill and assemble. Here’s my go-to storage guide:
| Method | Container | Duration | Reheating Tip |
|---|---|---|---|
| Refrigerator | Airtight container (separate buns and patties) | Up to 3 days | Reheat patties in a skillet over medium heat 2–3 min per side; toast buns fresh |
| Freezer | Freezer-safe bag or container, patties separated by parchment | Up to 2 months | Thaw overnight in fridge; cook from chilled as directed |
| Make-Ahead | Store onions and patties separately in fridge | Up to 2 days in advance | Assemble and grill just before serving for best texture |
For reheating, avoid the microwave — it makes the patties rubbery and the buns soggy. Instead, reheat patties in a dry skillet over medium-low heat, covered, with a splash of water to steam them back to juiciness. Toast the buns separately. Reheat caramelized onions in a small pan with a teaspoon of water to restore moisture.
Variations & Easy Swaps
| Variation | Key Change | Best For | Difficulty Impact |
|---|---|---|---|
| Spicy North African | Add harissa & cumin to patties | Bold flavor lovers | Easy (just add spices) |
| Gluten-Free / Dairy-Free | Use GF buns & dairy-free cheese | Dietary restrictions | Easy (swap ingredients) |
| Mushroom & Swiss | Add sautéed mushrooms + Swiss cheese | Earthier, umami-packed | Easy (add a second pan) |
Spicy North African Sliders
Inspired by my Moroccan roots, I sometimes add 1 tablespoon of harissa paste and 1 teaspoon of cumin to the ground beef mixture. The heat and smokiness pair beautifully with the sweet caramelized onions. Top with a dollop of harissa mayo for extra kick. This version is a hit at parties — it’s unexpected and deeply flavorful.
Gluten-Free / Dairy-Free Version
For friends with dietary restrictions, I use gluten-free slider buns (look for soft ones — many are sturdy enough) and a plant-based provolone or cheddar shreds. The caramelized onions are naturally free of both, so the rest is easy. Just be careful with the bun toasting — GF buns dry out faster. Brush with olive oil instead of butter and watch them closely.
Mushroom and Swiss Sliders
On a chilly NYC evening, I love adding a handful of sliced cremini mushrooms sautéed in butter alongside the onions (add them after the onions have been cooking for 15 minutes). Replace provolone with Swiss cheese for a nutty, earthy flavor. The mushrooms add a meaty texture that makes the sliders even more satisfying.
Can I use a different type of meat for caramelized onion beef sliders?
Absolutely! While beef is classic, you can substitute ground turkey, chicken, or even lamb. For turkey or chicken, add a tablespoon of olive oil and a grated onion to keep the patties moist — lean poultry dries out quickly. Lamb pairs wonderfully with caramelized onions and a pinch of cumin or cinnamon. Just adjust cooking times slightly (poultry should be cooked to 165°F internal temperature). The caramelized onions and cheese will complement any of these meats beautifully.
How long does it take to caramelize onions for beef sliders?
Patience is key! Over medium heat, it takes about 20–25 minutes to get deeply caramelized onions. Stir occasionally, especially toward the end, to prevent burning. The onions are ready when they’re a deep golden brown, soft, and jammy — not mushy or burnt. If you’re short on time, you can speed up the process by adding a pinch of baking soda (1/4 teaspoon) after 10 minutes, but this can affect the texture slightly. I recommend the classic low-and-slow method for the best flavor.
What kind of cheese melts best on caramelized onion beef sliders?
Provolone is my top choice because it melts smoothly and has a mild, buttery flavor that doesn’t overpower the beef and onions. Other great melting cheeses include sharp cheddar, Swiss, mozzarella, or Gouda. For a stronger flavor, try blue cheese crumbles (though they don’t melt as smoothly). If you need dairy-free, look for a plant-based provolone or cheddar that melts well — many brands now offer excellent options. Always add the cheese during the last minute of cooking and cover the pan to trap steam and melt it evenly.
Can I make caramelized onion beef sliders ahead of time and reheat them?
Yes, you can prepare components ahead. The caramelized onions can be made up to 4 days in advance and stored in the fridge. The patties can be shaped and refrigerated for up to 24 hours. However, for best results, I recommend cooking the patties and assembling the sliders just before serving. If you have leftover assembled sliders, store them separately: patties and onions in one container, buns in another. Reheat patties in a skillet over medium-low heat with a splash of water and a lid (to steam them moist). Toast buns fresh. Avoid the microwave as it makes the beef tough and the buns soggy.
What is the best way to get perfectly juicy beef patties for sliders?
Use ground beef with at least 20% fat (80/20) and don’t overwork the meat when mixing. Gently combine the seasonings with your hands and shape the patties lightly. Make a small dimple in the center to prevent puffing. Cook over high heat to get a nice crust, and avoid pressing down on the patties while they cook. Let them rest for a couple of minutes after grilling before assembling — this redistributes the juices. Adding a tablespoon of grated onion or a splash of Worcestershire sauce to the meat can also boost moisture and flavor.
Can I make these sliders without a grill?
Absolutely. A grill pan or a regular cast-iron skillet works perfectly. Heat the pan over medium-high heat until it’s smoking hot, then cook the patties as directed. You’ll still get a beautiful crust. If using a non-stick skillet, you may not get as deep a sear, but it will still be delicious. For the buns, you can toast them in the same pan after the patties are done, or use a toaster oven.
How do I keep the caramelized onions from burning in the pan?
The key is medium heat and patience. Start with butter and oil together — the oil raises the smoke point and prevents the butter from burning. Stir every few minutes, and if the onions start to stick or brown too quickly, lower the heat and add a tablespoon of water or broth. Use a wide skillet so the onions are in a single layer. The cooking process should be a steady sizzle, not a violent sizzle. If you see black spots, the heat is too high.
What is the best bun for beef sliders?
Soft, slightly sweet slider buns like potato rolls or brioche are ideal. They’re sturdy enough to hold the juicy patties and onions, but light enough to let the fillings shine. Look for buns that are about 3–4 inches in diameter. If you’re using larger buns, you can still make the recipe — just shape your patties to fit. Toasting the buns is essential to prevent sogginess. For a healthier option, whole wheat slider buns work well too.
How can I add more flavor to the beef patties?
Besides salt and pepper, try adding a teaspoon of Worcestershire sauce, a minced garlic clove, or a pinch of smoked paprika to the meat. For a Moroccan touch, add a teaspoon of ras el hanout or cumin. Fresh herbs like chopped parsley or thyme also work. Since the patties are small, don’t overdo it — keep the seasonings balanced so the beef and caramelized onions remain the stars. You can also mix in a tablespoon of finely grated Parmesan for extra umami.
Can I freeze the assembled sliders for later?
It’s not recommended to freeze fully assembled sliders because the texture of the buns and onions suffers upon thawing. Instead, freeze the cooked patties (without buns) in a single layer on a baking sheet, then transfer to a freezer bag. The caramelized onions can also be frozen in a separate container. When ready to eat, thaw the patties and onions in the fridge, reheat the patties in a skillet, toast fresh buns, and assemble. This way you get a nearly fresh-tasting slider.
Share Your Version!
I’d love to hear how these caramelized onion beef sliders turned out in your kitchen! Leave a star rating and a comment below — tell me if you tried any of the variations or came up with your own twist. Did you add a secret spice? Swap the cheese? I’m always inspired by your creativity. Tag your photos on Instagram or Pinterest with @exorecipes — I scroll through every single one and it makes my day to see my recipes in your homes.
One question I often get: What’s your favorite dipping sauce for these sliders? Mine is a simple mix of Greek yogurt, lemon juice, and a pinch of za’atar (a Middle Eastern spice blend). It’s tangy and herby, and it balances the richness perfectly. Let me know your favorite pairing! From my NYC kitchen to yours — I hope this recipe brings as much warmth to your table as it does to mine. — mia 🧡
Love This Recipe? Save It to Pinterest!
If you enjoyed this Caramelized Onion Beef Sliders recipe, don’t let it get lost in your browser tabs! 😄 Pin it now so you can find it again anytime — and explore hundreds more tried-and-tested recipes waiting for you on my Pinterest boards.
👉 Follow mia on Pinterest @exorecipe
📌 Pin this recipe · 🔁 Re-pin your favorites · 💬 Tag me when you make it — I love seeing your creations!