
Table of Contents
Butterfinger Balls Recipe: No-Bake Wonder for Any Occasion
From the bustling streets of New York City to the sun-drenched kitchens of my childhood in Morocco, food has always been my language of love. Today, I’m thrilled to share a recipe that perfectly bridges my Moroccan heritage with my French training and my New York culinary adventures: these no-bake Butterfinger Balls. They’re a delightful explosion of textures and flavors, a true testament to how simple ingredients can create something utterly magnificent. If you’re searching for an easy peanut butter dessert that’s guaranteed to impress, this Butterfinger Balls recipe is your golden ticket to sweet success.
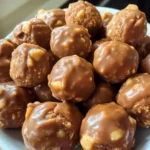
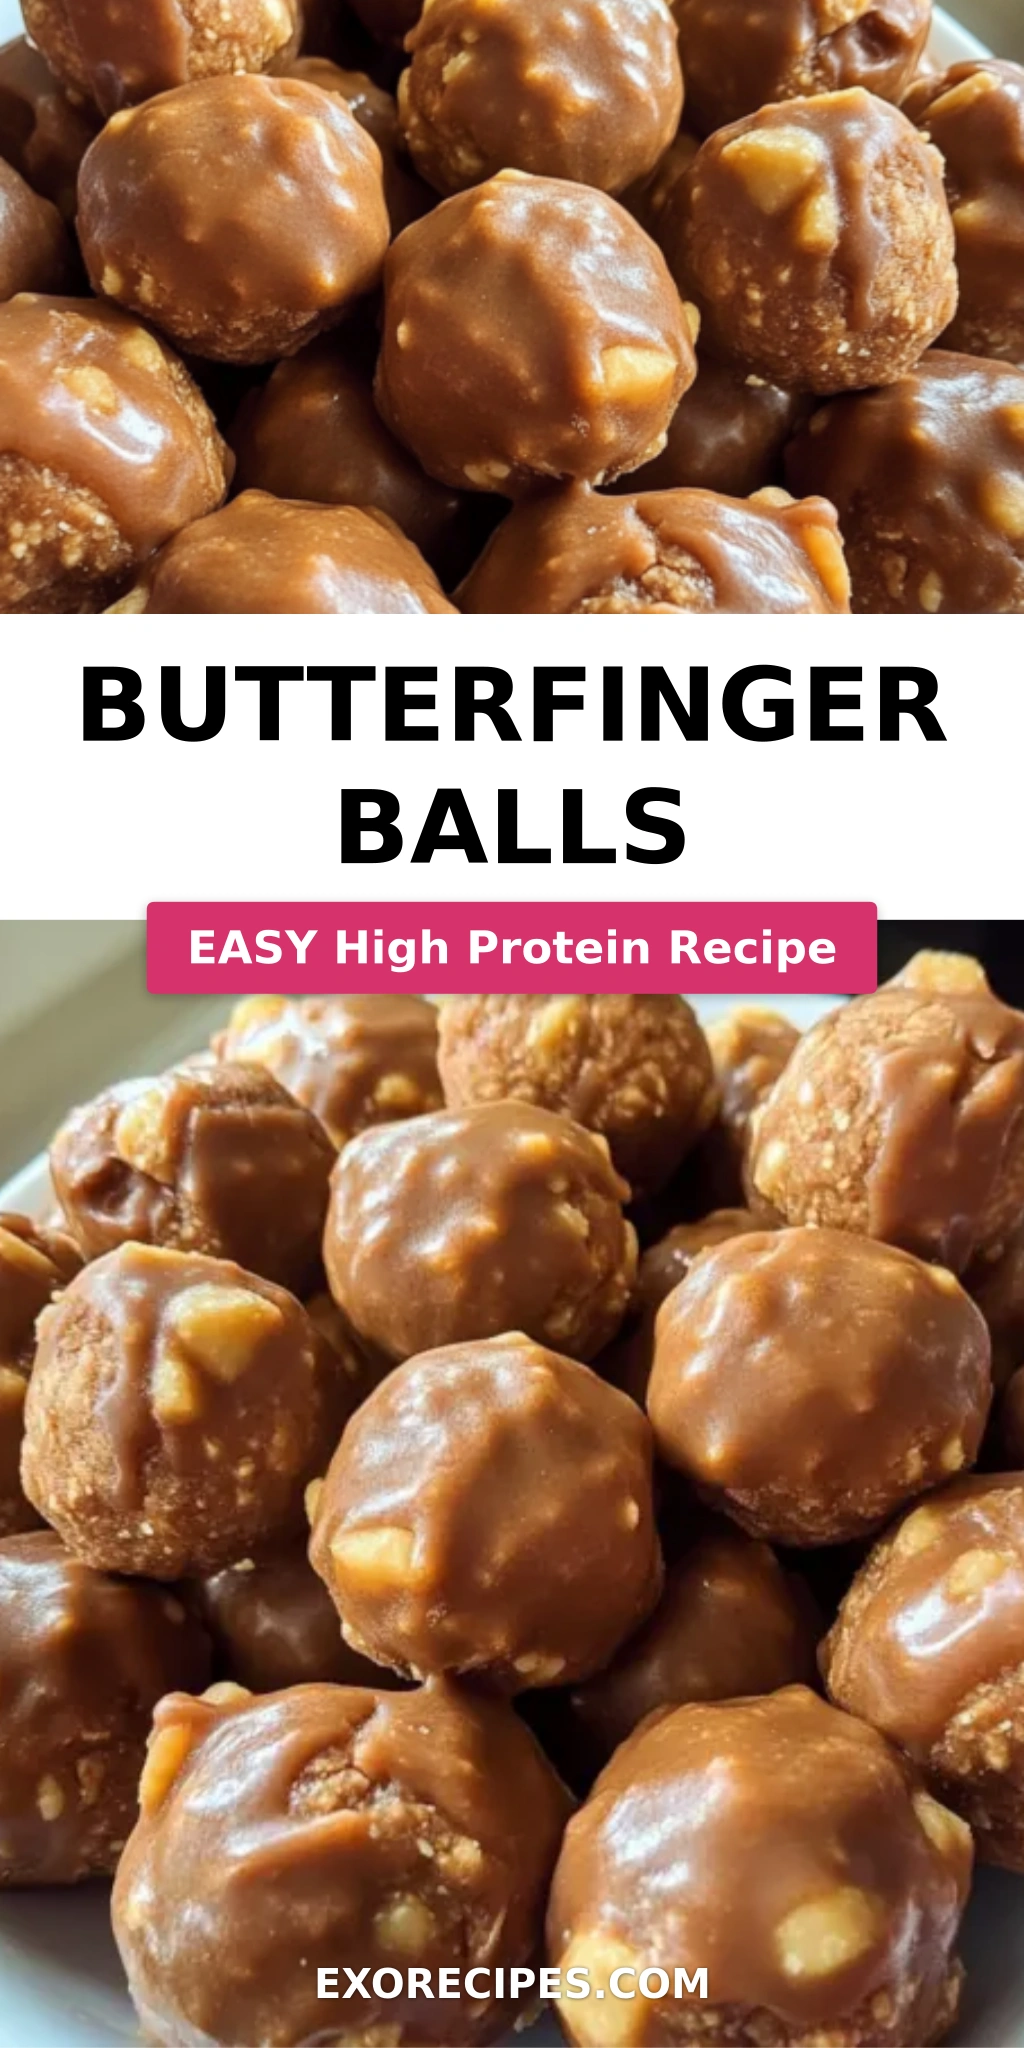
Imagine biting into a rich, creamy center, a harmonious blend of smooth peanut butter, tender butter, and crushed graham crackers, all elevated by the unmistakable, crisp, flaky, peanut-buttery crunch of Butterfinger candy bars. Then, that delightful core is enrobed in a luxurious shell of smooth chocolate, creating a symphony in your mouth. The aroma alone, a comforting mix of chocolate and peanut butter, will transport you. This isn’t just candy; it’s an experience, a handcrafted treat reminiscent of those special occasions where every bite was pure joy. My mother in Morocco always said that the best sweets are those made with patience and a good dose of sunshine – these Butterfinger Balls capture that spirit, with a NYC-made twist.
What sets my Butterfinger Balls recipe apart? It’s all about balance and technique, honed during my pastry studies in Paris. I’ve fine-tuned the ratios to ensure a perfect, scoopable dough that holds its shape beautifully, and developed a simple method for achieving that professional chocolate coating without a fuss. We’ll also dive into a common mistake that many home cooks make, which can lead to a crumbly disaster, and I’ll share a little secret that guarantees a smooth, even coating every single time. Get ready to elevate your homemade candy game with these irresistible, no-bake Butterfinger Balls; they are truly a crowd-pleaser.
Why This Butterfinger Balls Recipe Is the Best
The magic of these no-bake Butterfinger Balls lies in the intentional layering of textures and tastes, a principle I learned deeply during my French culinary training where precision in flavor profiles is paramount. The inherent sweetness and unique crunch of Butterfinger bars, when combined with the familiar comfort of peanut butter and graham crackers, create a flavor profile that is both nostalgic and excitingly new. My secret? It’s the specific ratio of creamy peanut butter to butter, which ensures a dough that is pliable enough to roll but firm enough to hold its shape, and the careful addition of finely crushed graham crackers that act as a binder and add a subtle spiced note, reminiscent of my mother’s spice blends back home.
Achieving that perfect, smooth chocolate coating on no-bake treats can seem daunting, but I’ve perfected a method using chocolate bark that guarantees a beautiful sheen and a satisfying snap every time. Unlike temperamental melted chocolate, chocolate bark is designed to set up beautifully without the need for complex tempering techniques. This means even if you’re new to candy making, you’ll achieve a professional-looking finish. This ease is crucial for any busy home cook, especially here in NYC, where time is often a luxury; these Butterfinger Balls are incredibly easy to make on a weeknight or for last-minute guests.
For anyone intimidated by candy making, this Butterfinger Balls recipe is your gateway. The process is incredibly straightforward, requiring no baking and minimal special equipment. The chilling step is key to success, ensuring your balls are firm for dipping, preventing them from melting into a chocolaty mess. It’s a foolproof method that delivers consistently delicious results, making it perfect for novice bakers and seasoned pros alike. You get the decadent taste of gourmet candy without the fuss, making these an ideal easy peanut butter dessert for parties, holidays, or just a sweet treat for yourself.
Butterfinger Balls Ingredients
One of the joys of creating homemade candy is sourcing uncomplicated, readily available ingredients, which is easy to do at any of my favorite NYC markets, like Eataly for fine chocolates or Whole Foods for quality pantry staples. This recipe celebrates the simple magic of everyday pantry items transformed into something truly special. For me, it brings back fond memories of my mother’s kitchen, where simple ingredients were always elevated with love and a touch of spice.
Ingredients List
- 4 tablespoons softened butter (½ stick)
- 1 teaspoon vanilla extract
- 8 ounces chocolate bark or chocolate chips
- ½ cup Butterfinger bars (crushed)
- 1 cup powdered sugar
- 1 cup peanut butter (avoid all-natural varieties)
- ¾ cup crumbs from graham crackers
- Optional garnishes: additional crushed Butterfinger bars, festive sprinkles, or coarse sea salt
Ingredient Spotlight
Peanut Butter: The heart of our Butterfinger Balls. For this recipe, I strongly recommend using a conventional peanut butter like Jif or Skippy. These brands contain stabilizers that help create a firmer, more cohesive dough for rolling and dipping. All-natural peanut butters can be oily and prone to separating, which can make the candy balls difficult to form and prone to falling apart. When shopping in the US, look for the creamy or crunchy varieties in the baking aisle. If you must use natural, ensure it’s well-stirred and consider draining off any excess oil.
Butterfinger Bars: This is where our candy gets its signature flavor and irresistible crunch! While you can find these in almost any US candy aisle, for the best texture, try to crush them finely but not into a powder. I like to pulse them a few times in a food processor or place them in a sturdy bag and crush them with a rolling pin. The goal is to retain some small, distinct pieces for that classic Butterfinger bite. If you can’t find Butterfingers, a similar crispety, crunchety bar with a peanut and candy coating could work as a substitute, though the flavor will differ.
Chocolate Bark: This is my secret weapon for a foolproof glossy coating! Chocolate bark, often found in candy-making sections of craft stores or supermarkets, is formulated to melt smoothly and set up firm without the need for tempering. It comes in various flavors, but I usually opt for milk chocolate or semi-sweet varieties for these balls. If you prefer to use chocolate chips, choose good quality ones, and be aware you might need to add a teaspoon of vegetable shortening or coconut oil to help them achieve a smoother consistency when melted, especially if you’re not tempering them.
| Original Ingredient | Best Substitution | Flavor / Texture Impact |
|---|---|---|
| Peanut Butter (Conventional) | Natural Peanut Butter (well-stirred, excess oil drained) | May result in softer dough, requires more careful rolling. Coating might be less smooth. |
| Butterfinger Bars | Crushed Reese’s Peanut Butter Cups or Heath Bars | Changes flavor profile significantly. Reese’s will be more distinctly peanut butter cup flavored; Heath will add toffee notes. Texture will remain crunchy. |
| Chocolate Bark | High-quality Chocolate Chips + 1 tsp shortening/coconut oil | May require more careful melting and stirring to achieve smooth consistency. Setting may be slightly less firm and glossy than bark. |
How to Make Butterfinger Balls — Step-by-Step
Crafting these homemade delights is a joy, and I’ve broken down each step to ensure perfection, just like the precise methods I learned in Paris. Follow along, and you’ll have a batch of stunning Butterfinger Balls ready in no time!
Step 1: Prepare the Dough
In a large mixing bowl, combine the peanut butter and softened butter. Using an electric mixer on medium speed, blend until the mixture is smooth, creamy, and well-combined. This forms the rich base for our balls.
💡 mia’s Pro Tip: Ensure your butter is truly softened but not melted. It should yield to gentle pressure but not be greasy. This creaminess is key for a smooth dough texture.
Step 2: Add Aromatic Notes
Incorporate the vanilla extract into the peanut butter and butter mixture. Blend thoroughly with your mixer until it’s fully incorporated and fragrant, adding that essential warm flavor note.
Step 3: Sweeten the Deal
Gradually add the powdered sugar to the bowl, about a cup at a time, blending on a low speed. Don’t forget to scrape down the sides of the bowl with a spatula between additions to ensure everything is evenly mixed and no dry pockets remain.
⚠️ Common Mistake to Avoid: Adding all the powdered sugar at once can create a stiff, crumbly dough that’s hard to work with. Gradual addition ensures that perfect, pliable consistency.
Step 4: Crunch Time
Gently fold in the graham cracker crumbs and the crushed Butterfinger bars using a sturdy spatula. Mix until they are evenly distributed throughout the dough. This adds the signature crunch and flavor burst.
Step 5: Shape ’em Up
Line a large baking sheet with parchment paper. Scoop about 1 to 1½ tablespoons of the dough for each ball. Roll the dough into neat, uniform balls using your hands and place them on the prepared cookie sheet.
Step 6: Chilling Phase
Place the cookie sheet with the dough balls into the freezer for approximately 30 minutes, or until they are completely firm. This chilling step is crucial for easy chocolate coating.
Step 7: Melting the Chocolate
Once the dough balls are chilled and firm, it’s time for the chocolate coating. Place the chocolate bark or chips in a microwave-safe bowl. Heat in 30-second intervals at 50% power, stirring well after each interval. Be cautious not to overheat; some small lumps are okay as they will melt into the rest of the chocolate with stirring.
💡 mia’s Pro Tip: For perfectly smooth melted chocolate, use a double boiler method if you’re concerned about overheating or scorching. It’s a gentler way to melt, just like we often do for delicate Parisian ganaches.
Step 8: Coat and Decorate
Take a chilled dough ball and submerge it completely into the luscious melted chocolate using a fork or dipping tool. Lift it out, allowing excess chocolate to drip back into the bowl. You can fully coat the balls or leave a small section of the peanut butter mixture exposed for visual contrast.
Step 9: Finishing Touches
Immediately after dipping, while the chocolate is still wet, add your desired garnishes. A sprinkle of additional crushed Butterfinger bars adds an extra crunch and visual cue. Festive sprinkles are fun for holidays, and a pinch of flaky sea salt can wonderfully balance the sweetness.
Step 10: The Grand Finale
Place the finished Butterfinger Balls back onto the parchment-lined baking sheet. Allow the chocolate to solidify completely at room temperature, or speed it up by placing them back in the refrigerator for about 10-15 minutes. Once firm, they are ready to be enjoyed!
| Step | Action | Duration | Key Visual Cue |
|---|---|---|---|
| 1 | Prepare Dough Base | 5 minutes | Smooth, creamy, uniform mixture |
| 2 | Add Vanilla | 1 minute | Fragrant, well-blended mixture |
| 3 | Incorporate Powdered Sugar | 4 minutes | Thick, pliable dough |
| 4 | Fold in Crumbs & Butterfinger | 2 minutes | Evenly distributed texture |
| 5 | Shape Balls | 5 minutes | Uniform, neat balls |
| 6 | Chill Balls | 30 minutes | Firm to the touch |
| 7 | Melt Chocolate | 2-3 minutes | Smooth and pourable |
| 8 | Coat Balls | 4-5 minutes | Even coating, excess dripping off |
| 9 | Garnish | 1 minute | Decorative elements applied |
| 10 | Set Chocolate | 10-15 minutes | Chocolate is fully solidified and firm |
Serving & Presentation
These Butterfinger Balls are little jewels that bring cheer to any dessert table. For a sophisticated New York touch, I love presenting them in a delicate pastry box or nestled in colorful cupcake liners arranged on a tiered serving stand. They look especially festive alongside other small treats, perhaps some French macarons or date-filled Moroccan cookies for a true international flair. The key is abundance; let people graze and enjoy these delightful bites.
For an extra touch of elegance, consider the optional garnishes. A drizzle of contrasting chocolate (like white chocolate over milk chocolate) can create a stunning visual pattern. If serving at a party, a small tent card identifying them as “Butterfinger Balls” is always appreciated. They’re perfect for holiday cookie platters, Halloween treats, or even as a small, sweet wedding favor. Their portable nature makes them fantastic for potlucks and office parties, as they travel well tucked into a sturdy container.
| Pairing Type | Suggestions | Why It Works |
|---|---|---|
| Side Dish | N/A – These are meant to be a standalone treat | Their rich flavor profile is best enjoyed on its own. |
| Sauce / Dip | Raspberry Coulis or Caramel Sauce | Complements the chocolate and peanut butter with fruity or buttery notes. |
| Beverage | Coffee, Milk, Espresso, or a Sweet Dessert Wine | The richness of the balls pairs well with both creamy and robust beverages. |
| Garnish | Extra crushed Butterfinger, sea salt flakes, sprinkles | Adds visual appeal, texture, and a pop of flavor. |
Make-Ahead, Storage & Reheating
As a busy New Yorker, I cherish recipes that can be prepped ahead. These Butterfinger Balls are perfect for that! I often make a double batch on a Sunday afternoon, storing them for easy grab-and-go treats throughout the week or for unexpected guests. They truly are a lifesaver when you need something sweet in a hurry.
| Method | Container | Duration | Reheating Tip |
|---|---|---|---|
| Refrigerator | Airtight container | 2-3 weeks | Serve chilled or let sit at room temp for 10 mins before serving. |
| Freezer | Freezer-safe airtight container or bag | 2-3 months | Thaw overnight in the refrigerator. |
| Make-Ahead | Airtight container | Up to 3 days before coating | Roll dough balls and freeze until firm before dipping in chocolate. |
For best results, I always recommend storing these candies in an airtight container. If the weather is warm where you are, or if you prefer your chocolate treats with a firmer bite, keeping them in the refrigerator is ideal. Freezing is also a great option for longer storage, but be sure to allow them ample time to thaw gently to prevent the chocolate from cracking. I’ve found that thawing them in the fridge overnight is the safest bet to maintain their beautiful finish.
Variations & Easy Swaps
| Variation | Key Change | Best For | Difficulty Impact |
|---|---|---|---|
| Classic Butterfinger Balls | Follow the recipe as is | Pure Butterfinger enthusiasts | Easy |
| Gluten-Free & Dairy-Free | Use GF graham crackers; DF butter & chocolate | Dietary needs | Easy (ensure substitutions are tested) |
| Seasonal & Flavor Twist | Swap Butterfinger for other candies or add spices | Holiday baking or adventurous palates | Easy to Medium (depending on swap) |
Classic Butterfinger Balls
This is the recipe as written, a true celebration of the iconic Butterfinger candy bar. The interplay between the smooth peanut butter base and the airy, crispy, peanut-buttery shards encased in chocolate is simply undeniable. It’s the flavor profile that most people know and love, a perfect balance of sweet and slightly salty. This classic version is what I bring to any gathering when I want a guaranteed crowd-pleaser.
Gluten-Free and Dairy-Free Butterfinger Balls
To make these Butterfinger Balls gluten-free, simply substitute the graham crackers with a gluten-free brand or use finely crushed gluten-free cookies like shortbread. For a dairy-free option, use dairy-free butter substitutes (like a good quality vegan butter stick) and dairy-free chocolate bark or chips. These substitutions maintain the integrity of the recipe without compromising on taste or texture, making them accessible to more people. I’ve tested this, and the result is just as delicious, with the dairy-free chocolate setting up beautifully.
Seasonal and Flavor Twist Butterfinger Balls
Embrace the seasons! For fall, consider crushing Heath bars instead of Butterfingers for a delightful toffee crunch. At Christmas, I love adding a pinch of cinnamon and nutmeg to the dough, and perhaps a swirl of red and green candy melts on top. For a lighter twist, try swapping half the Butterfinger for finely chopped peanuts or even some toasted coconut for a tropical feel. These small changes can completely transform the flavor profile, making them feel new and exciting for every occasion.
How do you keep Butterfinger Balls from falling apart when dipping them in chocolate?
The most critical step to prevent Butterfinger Balls from falling apart during dipping is to ensure they are thoroughly chilled and firm before you begin coating them in chocolate. Freezing the rolled dough balls for at least 30 minutes until they are solid is essential. A firm ball will hold its shape when submerged in warm chocolate. If the dough is too soft, it will easily break apart. Also, be gentle when handling them; use a fork or a dipping tool to minimize direct contact which can cause them to crumble.
Can I use creamy peanut butter instead of crunchy in Butterfinger Balls?
Yes, you can absolutely use creamy peanut butter in this Butterfinger Balls recipe. The primary role of the peanut butter in the dough is to provide flavor and act as a binder. While crunchy peanut butter adds another layer of texture, creamy peanut butter will still yield a delicious result. The crushed Butterfinger bars and graham cracker crumbs will provide plenty of crunch, so the peanut butter’s texture is less critical. Just ensure you’re using a conventional peanut butter for the best binding properties.
How long do Butterfinger Balls need to chill before serving?
The Butterfinger Balls need to chill until they are completely firm before they can be dipped in chocolate. This typically takes about 30 minutes in the freezer. After dipping and the chocolate has set, they can be served immediately. If you are planning to store them for later, they will firm up further in the refrigerator, which can take a few hours. For best eating texture, I like to let them sit at room temperature for about 10-15 minutes before serving if they’ve been refrigerated.
What is the best way to crush Butterfinger candy bars for this recipe?
The best way to crush Butterfinger candy bars is to ensure you get a nice, varied texture – not too fine a powder, but not large chunks either. My preferred method is to place the unwrapped Butterfinger bars into a sturdy zip-top bag, seal it tightly, and then use a rolling pin or the flat side of a meat mallet to gently crush them. Alternatively, you can pulse them a few times in a food processor. The goal is to break them down into smaller pieces that will distribute evenly within the candy dough, offering that signature Butterfinger crunch in every bite.
Can I make Butterfinger Balls ahead of time?
Absolutely! These Butterfinger Balls are perfect for making ahead. You can prepare the dough, roll them into balls, and freeze them prior to dipping. Store these frozen dough balls in an airtight container for up to 2-3 months. When you’re ready to finish them, you can dip them directly from the freezer – just allow a little extra time for the chocolate to set. The fully completed candies also store wonderfully in an airtight container in the refrigerator for up to 2-3 weeks, making them a fantastic make-ahead dessert.
Why is my chocolate coating not smooth when melting?
If your chocolate coating isn’t smooth, it’s usually due to overheating or moisture. When melting chocolate in the microwave, it’s crucial to use short intervals (30 seconds max) at reduced power (50%), stirring thoroughly between each. Overheating can cause chocolate to seize and become grainy or thick. Also, even a tiny bit of water can make chocolate seize unexpectedly. If you’re using chocolate chips, they can sometimes be trickier to melt smoothly than chocolate bark; adding a teaspoon of neutral oil or shortening can help achieve a silkier texture.
Share Your Version!
I pour so much love and culinary expertise into each recipe, and I truly hope you enjoy making and sharing these Butterfinger Balls as much as I do. If this recipe brought a smile to your face and a delicious treat to your table, please consider leaving a star rating down below and sharing your thoughts in the comments section. Your feedback helps me and other home cooks make the best recipes! You can also tag me on Instagram or Pinterest @exorecipes – I absolutely adore seeing your creations and how you put your own spin on my recipes!
Did you try any fun garnishes or variations with your Butterfinger Balls? I’m always curious to know how you adapt recipes, especially when it comes to adding a personal touch. Let me know in the comments below!
From my NYC kitchen to yours — I hope this recipe brings as much warmth to your table as it does to mine. — mia 🧡
Love This Recipe? Save It to Pinterest!
If you enjoyed this Butterfinger Balls recipe, don’t let it get lost in your browser tabs! 😄 Pin it now so you can find it again anytime — and explore hundreds more tried-and-tested recipes waiting for you on my Pinterest boards.
👉 Follow mia on Pinterest @chefrecipes2
📌 Pin this recipe · 🔁 Re-pin your favorites · 💬 Tag me when you make it — I love seeing your creations!
Butterfinger Balls
Description
Indulge your taste buds with these irresistible Butterfinger Bliss Balls, where creamy peanut butter harmoniously melds with the crunch of graham crackers and Butterfinger candy bars, all cloaked in sumptuous melted chocolate. Perfect for social soirées and festive occasions, these heavenly morsels will vanish before you know it!
Ingredients
- 4 tablespoons softened butter (½ stick)
- 1 teaspoon vanilla extract
- 8 ounces chocolate bark or chocolate chips
- ½ cup Butterfinger bars (crushed)
- 1 cup powdered sugar
- 1 cup peanut butter (avoid all-natural varieties)
- ¾ cup crumbs from graham crackers
- Optional garnishes: additional crushed Butterfinger bars (festive sprinkles, or coarse sea salt)
Instructions
- Prepare the Dough: In a mixing bowl, combine the peanut butter and softened butter. Use an electric or stand mixer set to medium speed and blend until the mixture is creamy and uniform.
- Add Aromatic Notes: Incorporate the vanilla extract and blend thoroughly.
- Sweeten the Deal: Gradually add the powdered sugar in increments, blending at a low speed. Don't forget to scrape down the sides of the bowl to ensure even mixing.
- Crunch Time: Gently fold in the graham cracker crumbs and crushed Butterfinger bars.
- Shape 'em Up: Align a large cookie sheet with parchment paper. Scoop out approximately 1 to 1½ tablespoons of the dough, roll into neat balls, and place on the cookie sheet.
- Chilling Phase: Freeze the dough balls on the sheet for roughly 30 minutes until they are completely firm.
- Melting the Chocolate
- Chocolate Symphony: Once the dough balls are chilled, proceed to melt the chocolate. Utilize a microwave-safe bowl and heat in 30-second spurts at 50% power, stirring in between each interval. Be cautious not to overheat; some lumps should remain and will melt as you stir.
- Coat and Decorate: Submerge each chilled ball into the luscious melted chocolate. You can fully coat them or leave a bit of the peanut butter mixture exposed.
- Finishing Touches: Add a sprinkle of additional crushed Butterfinger bars, holiday-themed sprinkles, or a dash of flaky sea salt for that extra pop.
- The Grand Finale: Allow the chocolate to solidify completely before indulging in your Butterfinger Bliss Balls.
k">
Tried This Recipe? Leave a Comment!
Did you make this recipe? I’d love to hear how it turned out! Please leave a comment and a rating below. Your feedback helps other home cooks and supports cheerychop.com!
For more delicious inspiration, follow me on Pinterest!
