Table of Contents
The Best Tiramisu Recipe: Velvety Cream, No Raw Eggs – An Authentic Italian Delight
Growing up in Morocco, the aromas of my mother’s kitchen were usually filled with fragrant tagines and spicy harissa, but every so often, a taste of Europe would make its way into our home. My personal introduction to tiramisu happened during my culinary training in Paris, where I learned the French art of pastry but quickly fell in love with Italian desserts. This best tiramisu recipe I’m sharing today isn’t just a dessert; it’s a testament to the seamless blend of global culinary influences that now define my cooking here in New York City. The secret to its luscious texture and incredible flavor lies in a beautifully prepared zabaglione base, ensuring a velvety cream without any raw eggs, making it truly the best classic tiramisu you’ll ever bake.
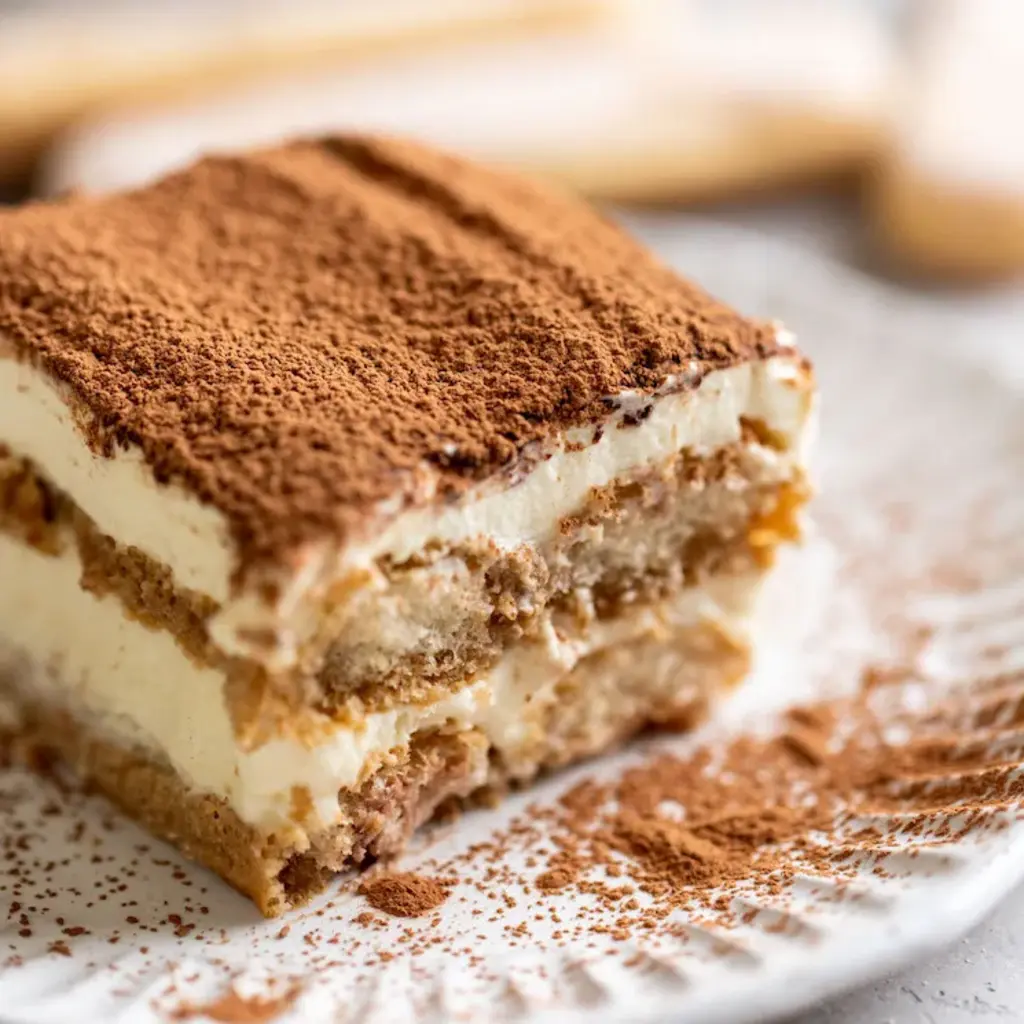
Imagine biting into layers of delicate ladyfingers, briefly dipped—not soaked—in robust, cold espresso, then nestled within clouds of rich, sweet mascarpone cream. The slight bitterness of cocoa powder on top provides a perfect counterpoint, making each spoonful an exquisite dance of textures and tastes: creamy, airy, moist, and just a hint of coffee-infused depth. This particular authentic tiramisu recipe highlights the importance of temperature and gentle folding, techniques I perfected in Parisian patisseries, ensuring every component shines without overpowering the others. It’s a symphony of flavors that manages to be both comforting and elegant, a true showstopper for any occasion.
What sets this recipe apart from the countless others out there? It’s the unique combination of traditional methods with a modern, safety-conscious twist: a gently cooked egg yolk and sugar mixture that forms the backbone of its incredible creaminess, ensuring no raw eggs are involved. This technique dramatically improves both the texture and food safety, giving you a smooth, stable, and utterly decadent mascarpone mixture every single time. I’ll also share my pro tip for preventing soggy ladyfingers, a common mistake that can ruin an otherwise perfect tiramisu, and why chilling is absolutely non-negotiable for that perfectly set, easy tiramisu.
Why This Tiramisu Recipe Is the Best
The true flavor secret to this tiramisu lies in the gently cooked egg yolk and sugar mixture, essentially a light zabaglione, which mia learned during her pastry training in Paris. Many recipes skip this crucial step, relying on raw eggs. By gently heating the yolks over a double boiler, we create a stable, incredibly rich, and velvety base that not only enhances the flavor but also ensures food safety, a technique I rely on heavily in my NYC kitchen for perfect confections.
Achieving the perfect texture is paramount in any dessert, and tiramisu is no exception. This recipe guarantees a creamy, airy mascarpone layer that doesn’t collapse, thanks to the careful folding of whipped cream into the cooled egg yolk mixture. The balance between light and rich is what makes it so irresistible. French pâtisserie taught me the delicate art of folding to incorporate air without deflating, leading to a mousse-like consistency that’s simply divine.
While it might seem intimidating, I’ve designed this recipe to be foolproof. The steps are clearly laid out, demystifying the process and making this classic tiramisu accessible to home bakers. From tempering eggs safely to assembling the layers with precision, I guide you through each stage, ensuring a beautiful and delicious outcome. Plus, the overnight chilling is a secret weapon that does most of the work for you, letting the flavors meld and the dessert set perfectly, so you can host with confidence.
Best Tiramisu Recipe Ingredients
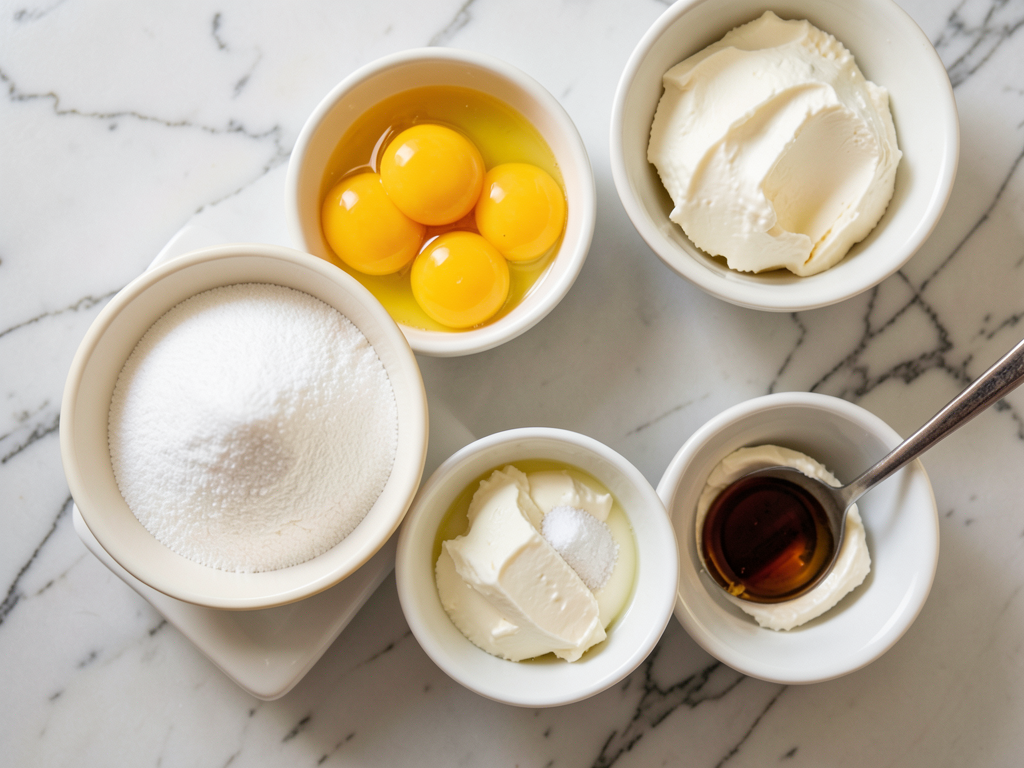
For me, the best tiramisu starts with the best ingredients. I often find myself at the Union Square Greenmarket here in NYC, seeking out fresh eggs for that rich, golden yolk, and I always opt for imported Italian mascarpone. It’s about respecting the origins of the dish and letting the quality of each component shine through.
Ingredients List
- 6 large egg yolks
- 2/3 cup (135 grams) granulated sugar
- 1/4 teaspoon salt
- 24 ounces (680 grams) cold mascarpone cheese (straight from the refrigerator)
- 2 teaspoons (10 ml) pure vanilla extract
- 1 1/2 cups (360 ml) cold heavy whipping cream
- 2 cups (480 ml) cold espresso
- 1/4 cup (60 ml) Kahlua (optional)
- 40 to 45 ladyfingers
- 1/4 cup (22 grams) unsweetened cocoa powder
Ingredient Spotlight
Egg Yolks: These are the backbone of our creamy base, providing richness and emulsification for a velvety texture. Always use fresh, large eggs for the best flavor and stability. If you’re concerned about raw eggs, this recipe mitigates that concern by gently cooking them, aligning with professional kitchen standards.
Mascarpone Cheese: This Italian cream cheese is essential for tiramisu’s signature rich, slightly tangy, and incredibly smooth cream. Look for full-fat, high-quality mascarpone, usually found in the specialty cheese section. Its high-fat content is what gives the cream its luxurious mouthfeel.
Espresso: The coffee hit is crucial. Use strong, freshly brewed espresso, chilled completely. The intensity of the coffee balances the sweetness of the cream and gives tiramisu its characteristic flavor. For a non-alcoholic tiramisu, you can omit the Kahlua without compromising the delicious coffee flavor.
Ladyfingers (Savoiardi): These delicate, dry, sponge-cake biscuits are designed to absorb liquid without turning immediately to mush. Don’t substitute with soft sponge cakes or other cookies as they won’t hold up. They’re key to the structure and texture of an authentic tiramisu.
| Original Ingredient | Best Substitution | Flavor / Texture Impact |
|---|---|---|
| Mascarpone Cheese | Full-fat cream cheese (softened, with a splash of heavy cream to loosen) | Slightly tangier, less rich, but still creamy. Some firmness may be lost. |
| Kahlua | Dark rum, brandy, or non-alcoholic vanilla extract/coffee syrup | Rum/brandy adds more kick, vanilla/syrup keeps it family-friendly. |
| Ladyfingers | Sponge cake (cut into strips) or biscotti (very briefly dipped) | Sponge cake can become very soggy quickly. Biscotti will be firmer. |
How to Make Tiramisu — Step-by-Step
Crafting the best tiramisu is a delightful process, and I’m here to guide you through each step to ensure your dessert turns out perfectly creamy and delicious every time.
Step 1: Prepare the Zabaglione Base
Combine the egg yolks, granulated sugar, and salt in a large heat-proof bowl. Choose a bowl that fits snugly over a saucepan without touching the simmering water below. Whisk these ingredients constantly over medium-low heat until the mixture thickens, becomes pale in color, and reaches a temperature of 165°F-170°F. This process typically takes about 10 to 13 minutes, transforming the raw eggs into a safe, delicious, and stable base for your cream.
💡 mia’s Pro Tip: The constant whisking is key here! It prevents the egg yolks from scrambling and ensures a smooth, silky custard. Think of it as a gentle dance over the heat, not a frantic sprint!
Step 2: Cool the Egg Mixture
Once the egg mixture has reached the desired temperature and consistency, immediately remove the bowl from the saucepan. Set it aside to cool for 5 to 10 minutes. It’s important for the mixture to cool down a bit before the next step to prevent it from melting the mascarpone cheese.
Step 3: Combine with Mascarpone
Whisk the cold mascarpone cheese and pure vanilla extract into the cooled egg mixture until everything is well combined and no lumps remain. Make sure your mascarpone is straight from the refrigerator, as its cold temperature helps maintain the body of the cream. Be careful not to overmix, as this can cause the mascarpone to separate and become grainy.
⚠️ Common Mistake to Avoid: Overmixing the mascarpone can cause it to break and become oily. Whisk just until it’s smooth and fully incorporated, then stop. Less is often more when it comes to delicate dairy.
Step 4: Whip the Cream
In a separate, very cold mixing bowl with clean, cold beaters (pop them in the freezer for 10 minutes beforehand!), beat the very cold heavy whipping cream to medium-stiff peaks. The cold temperature is crucial for achieving firm, stable whipped cream that will give your tiramisu its light, airy texture. Stop just before it gets too stiff.
Step 5: Fold the Cream into Mascarpone
Gently fold half of the whipped cream into the mascarpone-egg mixture until it’s fully combined. Then, carefully fold in the remaining whipped cream. This two-stage folding technique ensures that the airy cream is incorporated without deflating the mixture, maintaining that light and luxurious texture we’re aiming for. Set this luscious mixture aside.
💡 mia’s Pro Tip: Use a rubber spatula and a gentle hand. The goal is to incorporate the whipped cream’s airiness throughout the mascarpone mixture, not to beat it out. This folding technique is a fundamental lesson from my time in French patisseries.
Step 6: Prepare the Coffee Dip
In a shallow dish, combine the cold espresso and, if using, the Kahlua. A shallow dish makes it easier to quickly dip the ladyfingers without them becoming oversaturated. Ensure the espresso is completely cold, as warm liquid will make the ladyfingers too soggy.
Step 7: Assemble the First Layer
Working quickly, dip each ladyfinger into the coffee mixture one at a time. The key is a very quick dip – just a second or two on each side. Immediately arrange half of the dipped ladyfingers in a single layer in a 9×13 inch baking pan. They should be just moistened, not dripping wet.
⚠️ Common Mistake to Avoid: Over-soaking the ladyfingers is the number one cause of soggy tiramisu! A quick dip is all they need, as they will continue to absorb moisture as the dessert chills.
Step 8: Layer Mascarpone and Ladyfingers
Spread half of the prepared mascarpone mixture evenly over the first layer of ladyfingers. Then, repeat the dipping process with the remaining ladyfingers and arrange them over the cream, creating a second layer. Ensure even distribution for a balanced bite.
Step 9: Finish and Chill
Spread the remaining mascarpone mixture over the second layer of ladyfingers, smoothing the top. For that classic finish, dust generously with unsweetened cocoa powder. Cover the entire baking pan with plastic wrap and refrigerate for at least 8 hours, or ideally, overnight. This chilling time is essential for the flavors to meld and for the tiramisu to set properly, resulting in perfectly firm slices.
| Step | Action | Duration | Key Visual Cue |
|---|---|---|---|
| 1 | Prepare Zabaglione Base | 10-13 min | Pale, thickened, 165-170°F |
| 2 | Cool Egg Mixture | 5-10 min | Warm to touch, not hot |
| 3 | Combine with Mascarpone | 2-3 min | Smooth, no lumps |
| 4 | Whip Cream | 3-5 min | Medium-stiff peaks |
| 5 | Fold Cream into Mascarpone | 2-3 min | Light, airy, homogenous |
| 6 | Prepare Coffee Dip | 1 min | Espresso and Kahlua (if using) mixed |
| 7 | Assemble First Layer | 3-5 min | Ladyfingers briefly dipped, single layer |
| 8 | Layer Mascarpone & Ladyfingers | 3-5 min | Even layers of cream and dipped ladyfingers |
| 9 | Finish and Chill | 8 hrs to overnight | Smooth top, dusted cocoa, firm texture |
Serving & Presentation
After meticulously crafting the best tiramisu, presentation is the final flourish that makes it truly irresistible. Growing up, I learned from my mother that the way food looks is almost as important as how it tastes. For this classic dessert, simplicity often reigns supreme. Slice it into generous squares, ensuring each piece showcases the elegant layers of coffee-soaked ladyfingers and creamy mascarpone. A pristine, sharp slice is a testament to adequate chilling time.
While a simple dusting of cocoa powder is the authentic finish, you can elevate it further. Consider placing a perfectly ripe raspberry or a delicate chocolate curl on top of each slice just before serving for a pop of color and extra indulgence. In my NYC kitchen, I sometimes add a sprig of fresh mint for a vibrant contrast. For a truly unforgettable experience, serve your tiramisu with fresh berries like strawberries or blueberries on the side; their slight tartness cuts through the richness beautifully, a technique often seen in Parisian dessert cafés.
Tiramisu pairs wonderfully with a strong espresso, or for a more celebratory occasion, a small glass of Vin Santo or a rich dessert wine. Its luxurious texture also makes it a fantastic finale to a hearty meal, much like the comforting stews my mother made in Morocco. The lingering coffee and chocolate notes provide a sophisticated ending that your guests will adore. It’s a dessert that invites lingering conversations and joyful memories around the table.
| Pairing Type | Suggestions | Why It Works |
|---|---|---|
| Side Dish | Fresh berries (raspberries, strawberries), a light fruit compote | The tartness of berries cuts through the richness of the tiramisu, offering a refreshing contrast. |
| Sauce / Dip | Espresso shot, chocolate ganache (on the side) | Enhances the coffee or chocolate notes, allowing for custom intensity with each bite. |
| Beverage | Espresso, Vin Santo, Marsala, dark roast coffee | A strong coffee complements the dessert, while dessert wines offer a sophisticated end to the meal. |
| Garnish | Chocolate shavings, coffee beans, mint leaves | Adds visual appeal, a fresh aroma (mint), and textural contrast (chocolate shavings). |
Make-Ahead, Storage & Reheating
One of the beauties of this easy tiramisu recipe is how wonderfully it lends itself to making ahead. In my busy NYC life, I’m always looking for ways to streamline my cooking, and this dessert is a lifesaver for entertaining. Preparing it the day before not only frees up your time but also allows all those incredible flavors to meld and deepen, resulting in an even more delicious and authentic tiramisu experience.
| Method | Container | Duration | Reheating Tip |
|---|---|---|---|
| Refrigerator | Airtight container or covered baking dish | Up to 3-4 days | Serve directly from fridge, no reheating needed. |
| Freezer | Airtight, freezer-safe container (sliced or whole) | Up to 1 month | Thaw overnight in the refrigerator before serving. |
| Make-Ahead | Covered baking dish | 1-2 days in advance (chill) | Assemble fully, then chill. Dust with cocoa just before serving. |
When storing tiramisu in the refrigerator, always ensure it’s tightly covered with plastic wrap or in an airtight container. This prevents it from absorbing any unwanted odors from the fridge and keeps the mascarpone cream fresh and tender. I find that the flavor actually improves on day two, as the coffee and Kahlua (if used) fully penetrate the ladyfingers and the cream has even more time to set.
Freezing tiramisu is also an excellent option for long-term storage or if you want to prepare individual portions. I often freeze slices in advance – just wrap each one tightly in plastic wrap, then place them in a freezer-safe container. To serve, simply transfer the frozen tiramisu to the refrigerator and let it thaw overnight. It will be just as delicious, with all its creamy texture and rich flavor intact, ready to impress whenever you need a quick dessert solution.
Variations & Easy Swaps
| Variation | Key Change | Best For | Difficulty Impact |
|---|---|---|---|
| Alcohol-Free | Omit Kahlua, use coffee syrup or extra vanilla | Family-friendly, non-drinkers, retains coffee flavor | Minimal – just an omission |
| Gluten-Free | Use gluten-free ladyfingers | Gluten sensitivities, maintains classic structure | Minimal – ingredient swap |
| Citrus Tiramisu | Add lemon zest to cream, use Limoncello or orange liqueur in coffee | Refreshing twist, lighter summer dessert | Medium – flavor profile change |
Alcohol-Free Tiramisu
For those who prefer a non-alcoholic treat, creating a delicious tiramisu without alcohol is incredibly easy and yields a fantastic result. Simply omit the Kahlua from the coffee mixture entirely. The powerful flavor of the espresso is perfectly capable of carrying the dish on its own. If you want to replace that rich, subtle warmth, you can add an extra teaspoon of pure vanilla extract to the coffee, or even a dash of non-alcoholic rum extract. This ensures a family-friendly dessert that still delivers on that classic tiramisu flavour.
Gluten-Free Tiramisu
Transforming this recipe into a gluten-free tiramisu is simpler than you might think. The main substitution you’ll need is gluten-free ladyfingers, which are increasingly available in specialty stores or online. Ensure they have a similar dry, porous texture to their traditional counterparts so they can properly absorb the espresso without falling apart. The rest of the recipe — the creamy mascarpone mixture — remains naturally gluten-free and as decadent as ever, so your guests with gluten sensitivities won’t miss out on this classic treat.
Citrus Tiramisu
For a vibrant, unexpected twist, try a citrus tiramisu. Instead of Kahlua, infuse your cold espresso with a splash of Limoncello or Grand Marnier for a bright, zesty note. You can also fold finely grated lemon or orange zest directly into the mascarpone cream for an added layer of aroma and flavor that perfectly complements the coffee. In springtime, when I’m browsing the citrus at my local NYC farmers market, I love experimenting with these brighter variations that offer a refreshing departure from the classic.
What is the best substitute for mascarpone cheese in tiramisu?
While authentic tiramisu truly shines with mascarpone, if you find yourself in a pinch, full-fat cream cheese can be a viable substitute. You’ll want to soften it slightly and then whisk in a splash of heavy cream to loosen it, aiming for a similar consistency to mascarpone. The flavor will be a bit tangier and less rich, but it will still provide a creamy base. Another option, though less common, is a blend of cream cheese and ricotta, which can mimic some of mascarpone’s texture. Remember, these are alternatives, but for the best classic tiramisu, mascarpone is truly king.
How do you prevent tiramisu from becoming soggy?
The key to preventing soggy tiramisu lies in the ladyfingers. The most common mistake is over-soaking them in the coffee mixture. Ladyfingers are designed to absorb liquid, so a quick, decisive dip is all they need—literally, a second or two on each side. They will continue to absorb moisture from the mascarpone cream as the dessert chills, reaching the perfect tender yet structured consistency. Ensure your espresso is cold as well; warm liquid will accelerate the softening. Trust me on this, a light hand here is crucial!
Can you make tiramisu without alcohol?
Absolutely! Making tiramisu without alcohol is not only possible but also a popular choice for family gatherings or those who prefer to avoid spirits. The Kahlua (or other liquor) in classic tiramisu is primarily for flavor and a subtle warming sensation. You can simply omit it entirely and let the strong espresso shine. Alternatively, you can replace the Kahlua with an equal amount of additional cold espresso, a dash of non-alcoholic vanilla extract, or even a coffee-flavored syrup to retain some of that flavor depth without the alcohol content. The resulting easy tiramisu will still be incredibly delicious.
How long does tiramisu need to set in the fridge before serving?
For the best classic tiramisu experience, it needs at least 8 hours to set in the refrigerator. However, I always recommend chilling it overnight, or for a full 12 to 24 hours if you have the time. This extended chilling period is crucial for several reasons: it allows the flavors to truly meld and deepen, ensures the mascarpone cream firms up perfectly for clean slices, and lets the ladyfingers reach that ideal tender, moist-but-not-soggy texture. Patience is a virtue here, and it will be amply rewarded!
Is it safe to make tiramisu with raw eggs?
Traditional tiramisu often calls for raw egg yolks, but this recipe (which I consider the best tiramisu recipe) takes a safer, professional approach by gently cooking the egg yolks with sugar over a double boiler. This creates a pasteurized zabaglione-like base, eliminating any concerns about consuming raw eggs while still achieving that signature rich, creamy texture. My culinary training in Paris always emphasized food safety, and this method ensures a delicious and worry-free dessert for everyone. If you’re using whole raw eggs in a different recipe, ensure they are pasteurized or from a very reliable source.
Share Your Version!
I poured my heart into perfecting this best tiramisu recipe, blending my culinary training with my passion for creating unforgettable dishes. Now it’s your turn! I absolutely adore seeing your creations, so please, leave a star rating and a comment below to let me know how it turned out for you. Did you try the alcohol-free version? Or maybe you made it for a special occasion?
Don’t forget to share a photo of your beautiful tiramisu on Instagram or Pinterest and tag @exorecipes! It makes my day to see my recipes come alive in your kitchens. Tell me, what’s your favorite part of making tiramisu?
From my NYC kitchen to yours — I hope this recipe brings as much warmth to your table as it does to mine. — mia 🧡
Love This Recipe? Save It to Pinterest!
If you enjoyed this Tiramisu recipe, don’t let it get lost in your browser tabs! 😄 Pin it now so you can find it again anytime — and explore hundreds more tried-and-tested recipes waiting for you on my Pinterest boards.
👉 Follow mia on Pinterest @chefrecipes2
📌 Pin this recipe · 🔁 Re-pin your favorites · 💬 Tag me when you make it — I love seeing your creations!

Tiramisu
Description
This is hands down the best tiramisu recipe I’ve ever eaten. Ladyfingers are dipped in coffee and layered with a creamy mascarpone mixture. A dusting of cocoa powder finishes off this stunning dessert!
Ingredients
- 6 large egg yolks
- 2/3 cup (135 grams) granulated sugar
- 1/4 teaspoon salt
- 24 ounces (680 grams) cold mascarpone cheese ((straight from the refrigerator) )
- 2 teaspoons (10 ml) pure vanilla extract
- 1 1/2 cups (360 ml) cold heavy whipping cream
- 2 cups (480 ml) cold espresso
- 1/4 cup (60 ml) Kahlua ((optional) )
- 40 to 45 ladyfingers
- 1/4 cup (22 grams) unsweetened cocoa powder
Instructions
- Combine the egg yolks, granulated sugar, and salt in a large heat-proof bowl.
- Set the bowl over a saucepan of simmering water, whisking constantly to ensure that the eggs don’t scramble.
- Once the mixture has thickened, is pale in color, and reaches a temperature of 165°F-170°F (it should take about 10 to 13 minutes) remove the bowl from the saucepan and set aside to cool for 5 to 10 minutes.
- Whisk the cold mascarpone and vanilla extract into the egg mixture until well combined and no lumps remain (make sure not to overmix).
- In a separate cold mixing bowl with clean beaters, beat the heavy whipping cream to medium-stiff peaks.
- Fold half of the whipped cream into the mascarpone egg mixture until fully combined, then fold in the remaining whipped cream. Set aside.
- In a shallow dish, combine the cold espresso and Kahlua.
- Dip the ladyfingers into the coffee mixture, one at a time, and arrange half of them in a single layer in a 9×13 inch baking pan.
- Spread half of the mascarpone mixture over the ladyfingers and top with another layer of dipped ladyfingers.
- Spread the remaining mascarpone mixture over the ladyfingers and dust with cocoa powder.
- Cover the baking pan with plastic wrap and refrigerate for at least 8 hours or overnight before serving.
k">
Tried This Recipe? Leave a Comment!
Did you make this recipe? I’d love to hear how it turned out! Please leave a comment and a rating below. Your feedback helps other home cooks and supports cheerychop.com!
For more delicious inspiration, follow me on Pinterest!
