Table of Contents
Baked Goat Cheese and Bruschetta Dip – Creamy, Tangy, and Perfectly Baked
I’ll never forget the first time I made this baked goat cheese dip. It was a cold February evening in my tiny Paris apartment, and I was craving the warmth of my mother’s Moroccan kitchen. She would roast tomatoes with garlic and fresh herbs until the whole house smelled like sunshine. That memory collided with a French cheese course I had just mastered, and this dip was born. Today, living in New York City, I bring that same fusion to my table. This baked goat cheese dip is more than an appetizer – it’s a bridge between continents, a little bit of North African comfort and French elegance, all served in a single skillet.
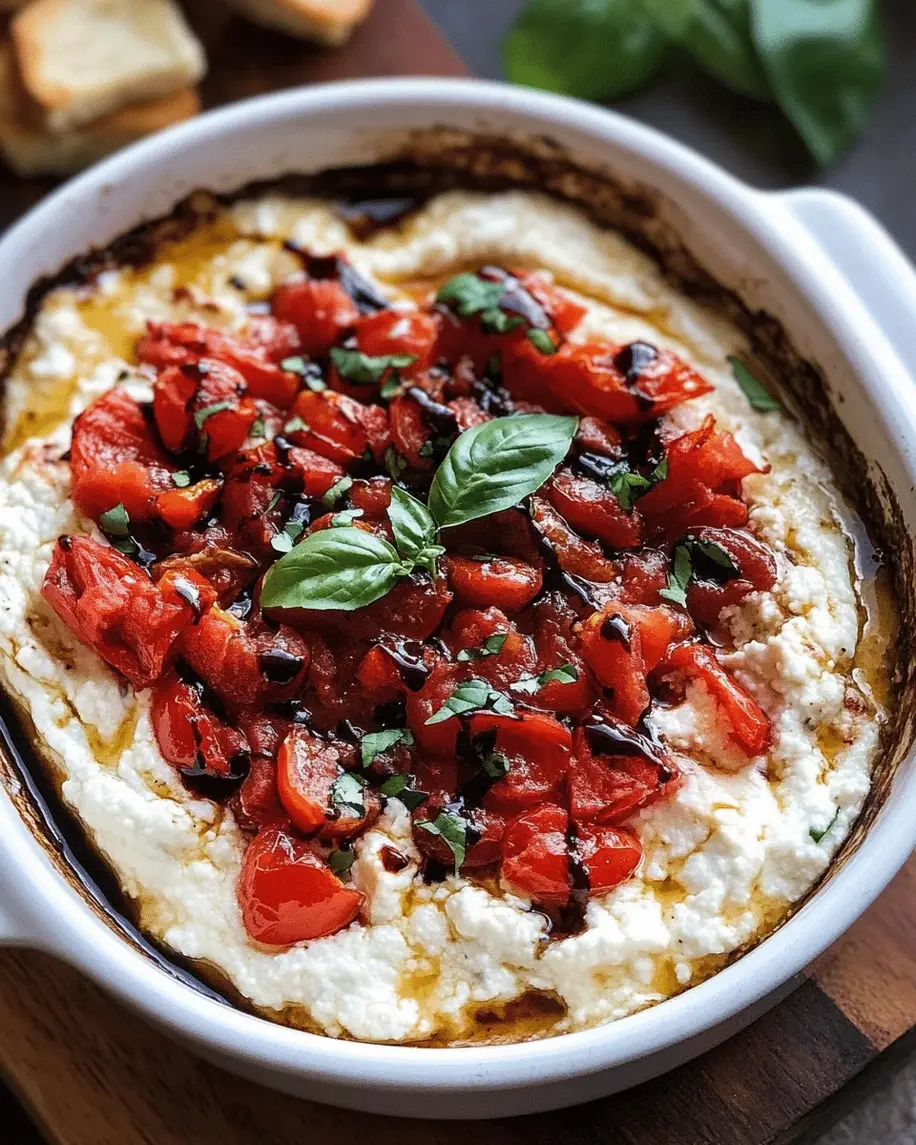
Picture this: a creamy, tangy layer of goat cheese and cream cheese, baked until golden and bubbly, topped with a bright, balsamic-kissed tomato and basil bruschetta. The first scoop is pure alchemy – the warm cheese pulls into long, luscious strands while the tomatoes burst with sweet acidity. A crack of black pepper and a drizzle of olive oil finish the picture. Every bite echoes the farmers markets of Marrakech, the fromageries of Paris, and the bustling brunch scene of the Upper West Side. The best part? It takes just 15 minutes of prep and 25 minutes in the oven.
What makes my version stand out is the double-cream technique I learned in culinary school: mixing softened goat cheese with cream cheese creates an ultra-smooth, spreadable base that doesn’t curdle under high heat. I also toss the cherry tomatoes with a touch of balsamic vinegar before baking – that subtle acidity cuts the richness perfectly. In this post, I’ll share my pro tip for getting that perfect golden crust and a common mistake that can turn your dip watery. Let’s dive in!
Why This Baked Goat Cheese Dip Recipe Is the Best
The Flavor Secret: The magic lies in the contrast between tangy, creamy cheese and bright, balsamic-infused tomatoes. My Moroccan childhood taught me that acidity is the soul of any great dish – that’s why I always splash a little balsamic vinegar onto the tomatoes. It’s a trick I picked up from my mother’s chermoula, but with an Italian-American twist. This isn’t just another bruschetta dip recipe; it’s a balanced, layered experience that keeps you coming back for another scoop.
Perfected Texture: In Paris, I learned that cheese should never be rushed. Softening the goat cheese and cream cheese at room temperature before mixing ensures a silky, homogeneous base. I also grate the Parmesan finely – it melts seamlessly into the other cheeses, adding umami without graininess. The result is a dip that’s creamy enough to spread yet thick enough to hold its shape when baked.
Foolproof & Fast: This recipe is designed for busy home cooks. You can assemble it in the morning, keep it in the fridge, and pop it in the oven when guests arrive. The instructions are straightforward, with no complicated techniques. Even if you’ve never baked a warm goat cheese dip before, you’ll nail it on your first try.
Baked Goat Cheese Dip Ingredients
Every time I walk through the Union Square Greenmarket, I can’t resist grabbing a basket of cherry tomatoes and a bundle of fresh basil. That’s where this recipe begins – with peak-season produce. But I also make it in the dead of winter using grape tomatoes from the grocery store, and it’s still incredible. The key is to treat the ingredients with care. Here’s what you’ll need.
Ingredients List
- 1 pint cherry tomatoes, halved
- 2 tablespoons olive oil
- 2 cloves garlic, minced
- 1/4 cup fresh basil, chopped
- 1 tablespoon balsamic vinegar
- Salt and pepper, to taste
- 8 ounces goat cheese, softened
- 4 ounces cream cheese, softened
- 1/4 cup grated Parmesan cheese
- 1 baguette, sliced and toasted, for serving
Ingredient Spotlight
Cherry Tomatoes: They’re the star of the bruschetta topping. Look for firm, deeply colored tomatoes – vine-ripened have the best flavor. In a pinch, grape tomatoes work; they’re slightly less sweet but hold their shape well. Roma tomatoes can be used but contain more water, so seed them first to avoid a watery dip.
Goat Cheese: The backbone of this dip. I prefer a soft, log-style goat cheese (like Chavrie or Vermont Creamery). Avoid crumbled goat cheese – it won’t melt as smoothly. For a milder flavor, use a fresh goat cheese from the tub. If you must substitute, a mix of ricotta and feta can work, but the texture will be grainier.
Balsamic Vinegar: Use a good-quality balsamic – you don’t need the expensive aged kind, just one with a nice balance of sweetness and acidity. It brightens the tomatoes and helps caramelize the topping. If you don’t have balsamic, red wine vinegar plus a pinch of sugar is an acceptable stand-in.
Fresh Basil: Essential for that classic bruschetta aroma. I chop it just before using to keep the oils vibrant. In winter, fresh basil can be pricey; a mix of dried oregano and a small handful of fresh parsley (if available) can work, but the flavor profile shifts toward Italian seasoning.
| Original Ingredient | Best Substitution | Flavor / Texture Impact |
|---|---|---|
| Cherry tomatoes | Grape tomatoes | Slightly less sweet, still holds shape |
| Goat cheese (soft log) | Ricotta + feta (1:1) | Grainier texture, saltier flavor |
| Balsamic vinegar | Red wine vinegar + pinch sugar | Sharper acidity, less sweetness |
| Fresh basil | Dried oregano + parsley | Less aromatic, more herbaceous |
How to Make Baked Goat Cheese and Bruschetta Dip – Step-by-Step
You’re going to love how straightforward this is. Just five simple steps from prep to table. I’ll walk you through each one with visual cues and insider tips.
Step 1: Prepare the Tomato Bruschetta
Preheat your oven to 375°F (190°C). In a medium bowl, combine the halved cherry tomatoes, olive oil, minced garlic, chopped basil, balsamic vinegar, and a generous pinch of salt and black pepper. Toss gently with your hands (or a spoon) until every tomato is coated. Set aside to macerate while you prepare the cheese. The salt will draw out a little juice – that’s good! It creates a light dressing for the dip.
💡 mia’s Pro Tip: Don’t over-toss or you’ll bruise the tomatoes. Let them sit for at least 10 minutes – the flavors meld beautifully.
Step 2: Mix the Cheese Base
In a separate bowl, combine the softened goat cheese, cream cheese, and grated Parmesan. Using a fork or a silicone spatula, mix until completely smooth and homogenous. Make sure both cheeses are at room temperature – if they’re cold, the mixture will be lumpy. If you’re in a hurry, you can microwave the cream cheese for 10–15 seconds, but don’t melt it.
⚠️ Common Mistake to Avoid: Using cold cream cheese straight from the fridge. It won’t blend evenly, resulting in a grainy dip. Always soften first!
Step 3: Assemble the Dip
Spread the cheese mixture evenly into a small baking dish or cast iron skillet (an 8-inch skillet or a 9-inch pie dish works perfectly). Smooth the top with the back of your spoon. Then, spoon the tomato mixture over the cheese, leaving a little border of cheese visible around the edges – that creates a beautiful caramelized rim as it bakes.
💡 mia’s Pro Tip: For extra flavor, season the cheese base with a tiny pinch of cayenne or smoked paprika before adding the tomatoes. It’s my Moroccan touch!
Step 4: Bake
Place the dish in the preheated oven and bake for 20–25 minutes, or until the dip is hot and bubbly. The cheese should be golden around the edges, and the tomatoes should look slightly blistered. If you want a deeper brown top, you can broil for 1–2 minutes at the end – but watch it carefully so the garlic doesn’t burn.
⚠️ Common Mistake to Avoid: Overbaking can cause the cheese to separate and become oily. Look for bubbly edges, not a full-on boil.
Step 5: Serve
Let the dip cool for about 3–5 minutes – it will be molten hot straight out of the oven. While it cools, toast the baguette slices. I like to brush them with olive oil and toast in a 400°F oven for 5 minutes, but you can also grill them on a pan. Serve the dip warm with the baguette alongside for scooping. Garnish with extra fresh basil or a drizzle of balsamic glaze if you’re feeling fancy.
💡 mia’s Pro Tip: For a more rustic presentation, serve the dip directly in the skillet and place it on a wooden board surrounded by the toasts. It’s gorgeous!
| Step | Action | Duration | Key Visual Cue |
|---|---|---|---|
| 1 | Toss tomatoes with oil, vinegar, garlic, basil | 5 min | Tomatoes glisten, herbs evenly distributed |
| 2 | Mix goat cheese, cream cheese, Parmesan | 3 min | Smooth, uniform paste; no lumps |
| 3 | Spread cheese, top with tomatoes | 3 min | Cheese layer smooth, tomatoes cover most of surface |
| 4 | Bake | 20–25 min | Bubbles at edges, cheese lightly golden, tomatoes wrinkled |
| 5 | Toast baguette and serve | 5 min | Toasts golden, dip slightly set but still warm |
Serving & Presentation
I love serving this dip in the same cast iron skillet it baked in – it keeps it warm for ages and looks rustic and inviting. Place the skillet on a large wooden board or a stone platter, and arrange the toasted baguette slices around it. Scatter a few fresh basil leaves on top and finish with a light drizzle of extra-virgin olive oil or balsamic glaze. The contrast of the green basil against the red tomatoes and golden cheese is stunning.
For a full appetizer spread, I pair this dip with a simple arugula salad dressed with lemon and shaved Parmesan, and maybe a bowl of marinated olives. It also works beautifully alongside charcuterie – think prosciutto or soppressata. And if you’re hosting a cocktail party, you can spoon the dip onto crostini as a passed hors d’oeuvre.
| Pairing Type | Suggestions | Why It Works |
|---|---|---|
| Side Dish | Arugula salad, marinated olives, grilled vegetables | Fresh, acidic elements cut the richness of the cheese |
| Sauce / Dip | Extra balsamic glaze, pesto, roasted red pepper dip | Adds variety and extra flavor layers for the crostini |
| Beverage | Crisp white wine (Sauvignon Blanc), dry rosé, or sparkling water with lemon | Acidity and bubbles cleanse the palate after each rich bite |
| Garnish | Fresh basil, balsamic glaze, flaky sea salt, edible flowers | Elevates visual appeal and adds pop of flavor |
Make-Ahead, Storage & Reheating
Life in New York is fast, and I’m all about smart meal prep. This dip is a dream for make-ahead entertaining. You can assemble the whole thing (cheese base + tomato topping) in the baking dish, cover it with plastic wrap, and refrigerate for up to 24 hours. When you’re ready to serve, simply bake it straight from the fridge – just add 5 minutes to the baking time. The tomatoes will release a bit more liquid as they sit, but that’s fine; it creates a saucier top layer.
| Method | Container | Duration | Reheating Tip |
|---|---|---|---|
| Refrigerator | Covered baking dish (or airtight container) | Up to 4 days | Bake at 350°F for 12–15 minutes until bubbly, or microwave in 30-second bursts for single servings |
| Freezer | Freezer-safe container or heavy-duty zip-top bag | Up to 2 months | Thaw overnight in fridge, then reheat as above. Texture may be slightly more watery; stir in a little extra Parmesan to thicken |
| Make-Ahead | Assemble in baking dish, wrap tightly | Up to 24 hours before baking | Bake directly from fridge, adding 5 minutes. Do not bring to room temp first – it may cause uneven heating. |
If you have leftovers (which is rare!), store them in an airtight container in the fridge. The dip will solidify as it cools – that’s normal. To reheat, I find the microwave works surprisingly well for small portions: 30 seconds on high, stir, then another 20 seconds. For the best texture, reheat on the stovetop over low heat, stirring constantly, until warm and creamy again. You can also spread leftover dip on a toasted baguette and pop it under the broiler for a minute – it’s like a mini pizza!
Variations & Easy Swaps
One of the things I love about this dip is how flexible it is. Over the years, I’ve adapted it for different seasons, dietary needs, and cravings. Here are three variations that I’ve tested in my own kitchen – they’re all winners.
| Variation | Key Change | Best For | Difficulty Impact |
|---|---|---|---|
| Spicy Harissa Twist | Stir 1–2 tsp harissa paste into the cheese base; top with roasted red peppers | North African flavor lovers | Same difficulty |
| Gluten-Free / Grain-Free | Serve with gluten-free crackers, endive leaves, or bell pepper slices | Gluten-sensitive guests | Same difficulty |
| Summer Peach & Basil | Replace half the tomatoes with diced ripe peaches; use mint instead of basil | Summer entertaining | Same difficulty (peaches soften faster – check at 18 min) |
Spicy Harissa Twist
This one takes me straight back to Morocco. I stir a tablespoon of harissa paste into the cheese mixture before spreading it in the dish. Harissa is a North African chili paste with smoky, roasted flavors – it gives the dip a wonderful warmth without overwhelming the goat cheese. Then I top the tomatoes with strips of jarred roasted red peppers. The combination of creamy, spicy, and sweet is magical. Serve with warm pita bread for an authentic touch.
Gluten-Free / Grain-Free
If you’re avoiding gluten, don’t skip this dip! The cheese base and tomato topping are naturally gluten-free. Instead of baguette, I serve it with sturdy gluten-free crackers (I love the ones with seeds), or even better – crisp endive leaves and colorful bell pepper strips. The crunch of the vegetables is a lovely contrast to the creamy dip. For a grain-free option, try cucumber rounds or jicama sticks. My NYC friends always request this version at our game nights.
Summer Peach & Basil
During peak summer, I swap half the cherry tomatoes for diced ripe peaches (about 1 cup). Peaches add a juicy sweetness that’s incredible with goat cheese. I also replace the basil with fresh mint – the combination of mint, peach, and balsamic is pure summer. Because peaches release more liquid, I bake the dip for 18–20 minutes instead of 25, and watch for the same bubbly edges. I discovered this variation at a Union Square farmers market demo, and it’s become a seasonal favorite.
Can you make baked goat cheese and bruschetta dip ahead of time?
Absolutely! This dip is perfect for prepping ahead. Simply assemble the cheese base and tomato topping in the baking dish (don’t bake yet), cover tightly with plastic wrap or foil, and refrigerate for up to 24 hours. When you’re ready to serve, bake it straight from the refrigerator – increase the baking time by about 5 minutes (total 25–30 minutes). The tomatoes will release a bit more juice as they sit, but that actually creates a lovely, slightly saucier top layer. I often do this for holiday gatherings so I can relax while guests arrive.
What is the best type of goat cheese to use for this dip?
For the creamiest, most luxurious texture, I recommend a soft, log-style goat cheese – the kind that comes in a cylinder with a white rind. Brands like Chavrie, Vermont Creamery, or Montrachet work beautifully. Avoid pre-crumbled goat cheese, as it often contains anti-caking agents that prevent smooth melting. If you have access to a fromagerie, ask for a fresh goat cheese (chèvre frais) – it’s even softer and tangier. The key is to let it soften to room temperature before mixing, which ensures a silky, lump-free base.
How long should you bake goat cheese and bruschetta dip for?
The standard baking time is 20–25 minutes in a preheated 375°F (190°C) oven. You’ll know it’s ready when the dip is hot and bubbly around the edges and the cheese has turned a light golden brown. The tomatoes should look slightly blistered and wrinkled. If you prefer a deeper color, you can finish under the broiler for 1–2 minutes – but watch it carefully to avoid burning the garlic. Keep in mind that if you’ve assembled the dip ahead and it’s cold from the fridge, add 5 minutes to the baking time.
What can I serve with baked goat cheese and bruschetta dip besides bread?
Plenty of options! For a gluten-free twist, try sturdy crackers, endive leaves, or colorful bell pepper strips. Cucumber rounds and jicama sticks add refreshing crunch. If you want something heartier, roasted potato wedges or sweet potato fries are fantastic. I also love serving this dip with grilled or raw vegetables – think zucchini slices, radishes, or cherry tomatoes on the stem. For a low-carb option, use pork rinds or cheese crisps. The dip is incredibly versatile, so feel free to get creative with whatever you have on hand.
Can I use dried herbs instead of fresh basil?
Fresh basil really makes this dip sing, but if you don’t have it, you can substitute with dried herbs. Use about 1 tablespoon of dried basil (or a mix of dried oregano and thyme) in place of the 1/4 cup fresh. Keep in mind that dried herbs are more concentrated, so adjust to taste. Another excellent substitute is a combination of fresh parsley and a pinch of dried oregano – it’s not exactly the same, but it still delivers a lovely aromatic lift. I often use this trick in winter when fresh basil is expensive.
Is it necessary to use balsamic vinegar?
Balsamic vinegar adds a crucial sweet-tangy note that balances the richness of the goat cheese and brightens the tomatoes. However, if you don’t have balsamic, you can substitute with red wine vinegar plus a pinch of sugar, or even a splash of white balsamic vinegar. The flavor will be slightly sharper and less sweet, but still delicious. You can also omit the vinegar entirely and add a squeeze of fresh lemon juice instead – that gives a different kind of brightness. I’ve tested all three options, and my personal favorite remains the balsamic, but any of these work!
Can I make this dip dairy-free?
You can! For a dairy-free version, use a good-quality vegan goat cheese alternative (brands like Violife or Miyoko’s make excellent ones) and vegan cream cheese. The texture will be a bit less creamy, but still very tasty. I also recommend adding about 2 tablespoons of nutritional yeast to the cheese mixture for a cheesy flavor boost. The tomato topping is naturally dairy-free. Bake time may need to be reduced by a few minutes, as vegan cheeses can melt and solidify differently. Watch closely and adjust as needed.
How do I prevent the dip from becoming watery?
Watery dip usually comes from excess moisture in the tomatoes. To avoid this, don’t over-toss the tomatoes – just coat them lightly with the oil and vinegar. Also, make sure you’re not using overripe tomatoes that are too soft. If you’re using Roma tomatoes instead of cherry tomatoes, seed them first and chop them coarsely. Another tip: don’t let the assembled dip sit too long before baking (more than 24 hours) because the salt will draw out more liquid. Finally, if you do end up with extra liquid, you can spoon it off before serving – no harm done!
Can I add meat to this dip?
Absolutely! Crumbled cooked Italian sausage or crispy pancetta would be lovely additions. Simply cook the meat until browned and crumbled, then fold it into the cheese base or sprinkle it on top before baking. For a lighter option, try finely chopped prosciutto – it crisps up beautifully in the oven. I sometimes add a layer of sautéed wild mushrooms under the tomatoes for an earthy twist. Keep in mind that adding meat will change the baking time slightly (not significantly), but ensure any raw meat is fully cooked before adding.
What’s the best way to reheat leftover dip?
Leftover dip tends to solidify as it cools, but it reheats beautifully. The best method is to place the dip in a small oven-safe dish and reheat at 350°F for about 10 minutes, until bubbly again. If you’re in a hurry, the microwave works: start with 30 seconds on high, then stir and add 15–20 seconds more. To restore the creamy texture, you can stir in a splash of milk or a teaspoon of olive oil. Avoid reheating multiple times – just take out what you need. I love spreading leftover dip on toasted baguette and broiling for a minute – it becomes a warm, gooey crostini.
Share Your Version!
I’d love to see how this dip turns out in your kitchen! Did you add a spicy twist? Serve it with something unexpected? Drop a star rating and a comment below – it helps other home cooks know what works. Tag a photo on Instagram or Pinterest with @exorecipes – I always browse the hashtag when I need a little cooking inspiration. And here’s a challenge: what one ingredient would you add to make this dip your own? Let me know – I’m genuinely curious.
From my NYC kitchen to yours — I hope this recipe brings as much warmth to your table as it does to mine. — mia 🧡
Love This Recipe? Save It to Pinterest!
If you enjoyed this Baked Goat Cheese and Bruschetta Dip recipe, don’t let it get lost in your browser tabs! 😄 Pin it now so you can find it again anytime — and explore hundreds more tried-and-tested recipes waiting for you on my Pinterest boards.
👉 Follow mia on Pinterest @exorecipe
📌 Pin this recipe · 🔁 Re-pin your favorites · 💬 Tag me when you make it — I love seeing your creations!

Baked Goat Cheese and Bruschetta Dip
- Prep Time: 15 minutes
- Cook Time: 25 minutes
- Total Time: 40 minutes
- Yield: 6 1x
- Method: Appetizer
- Cuisine: Italian-American
Description
A warm, creamy dip featuring tangy goat cheese topped with a fresh tomato-basil bruschetta, baked until bubbly and golden.
Ingredients
- 1 pint cherry tomatoes, halved
- 2 tablespoons olive oil
- 2 cloves garlic, minced
- 1/4 cup fresh basil, chopped
- 1 tablespoon balsamic vinegar
- Salt and pepper to taste
- 8 ounces goat cheese, softened
- 4 ounces cream cheese, softened
- 1/4 cup grated Parmesan cheese
- 1 baguette, sliced and toasted for serving
Instructions
- Preheat oven to 375°F (190°C).
- In a bowl, combine the cherry tomatoes, olive oil, garlic, basil, balsamic vinegar, salt, and pepper. Toss gently and set aside.
- In a separate bowl, mix together the softened goat cheese, cream cheese, and Parmesan until smooth.
- Spread the cheese mixture evenly into a small baking dish or cast iron skillet.
- Spoon the tomato mixture over the cheese layer.
- Bake for 20-25 minutes, until the dip is hot and bubbly.
- Serve warm with toasted baguette slices.
Notes
For a spicier dip, add a pinch of red pepper flakes to the tomato mixture. Can be assembled ahead and refrigerated; add 5 minutes to baking time.
Nutrition
- Calories: 320
- Sugar: 4 g
- Fat: 22 g
- Carbohydrates: 18 g
- Protein: 12 g

Tried This Recipe? Leave a Comment!
Did you make this recipe? I’d love to hear how it turned out! Please leave a comment and a rating below. Your feedback helps other home cooks and supports cheerychop.com!
For more delicious inspiration, follow me on Pinterest!
