Oreo Cheesecake

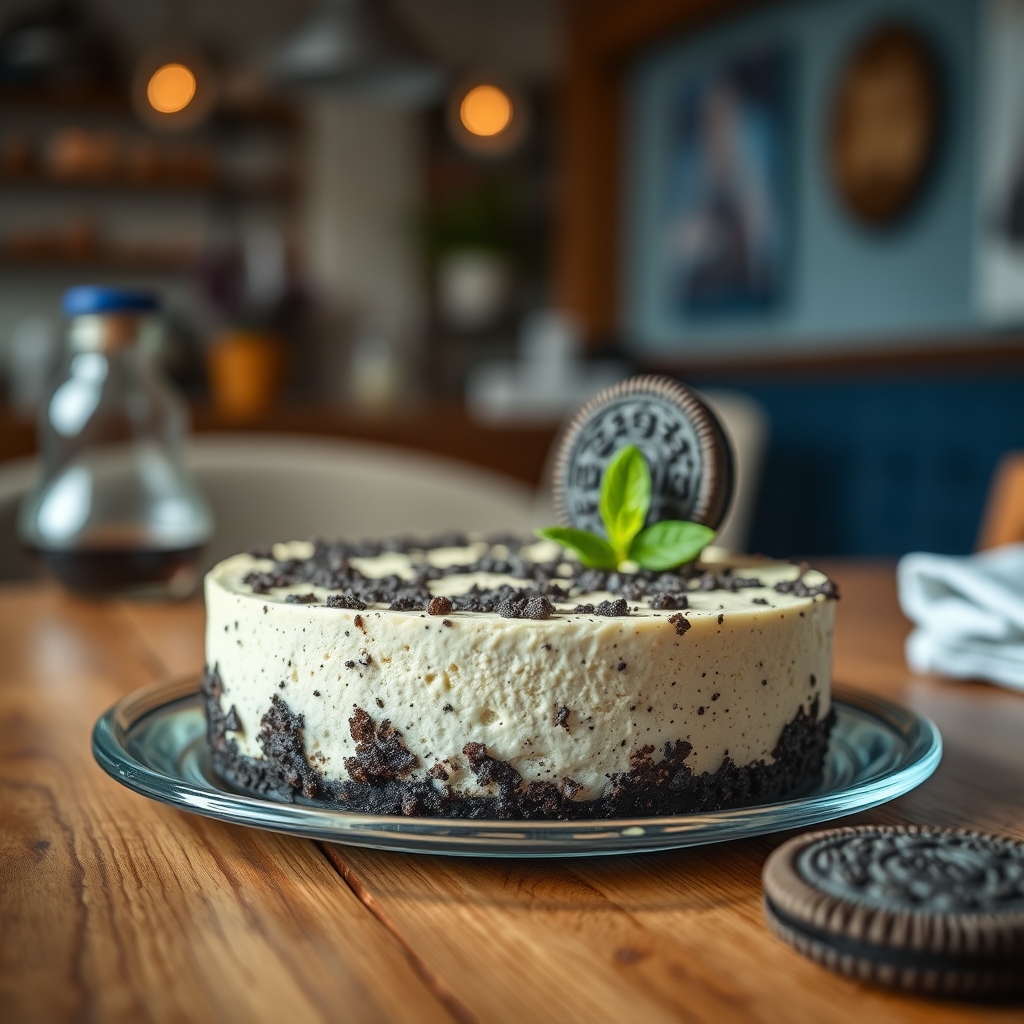
Oreo Cheesecake: The Ultimate No-Bake Dessert

This Oreo Cheesecake is a dream come true for cookie lovers. With its creamy texture, rich chocolate flavor, and irresistible Oreo crust, this no-bake dessert will become your go-to treat for any occasion. Perfect for birthdays, potlucks, or just satisfying your sweet tooth, this Oreo Cheesecake recipe is simple yet impressive.

Oreo Cheesecake Ingredients

For the perfect balance of creaminess and crunch, you’ll need:

  • 36 Oreo cookies (divided)
  • 5 tbsp unsalted butter (melted)
  • 24 oz cream cheese (softened)
  • 1 cup powdered sugar
  • 1 tbsp vanilla extract
  • 1 1/2 cups heavy whipping cream
  • Optional: extra Oreos for garnish

How to Make Oreo Cheesecake

Follow these simple steps for the best no-bake Oreo cheesecake:

  1. Prepare the crust: Crush 24 Oreos into fine crumbs. Mix with melted butter and press into a 9-inch springform pan. Chill for 15 minutes.
  2. Make the filling: Beat cream cheese until smooth. Add powdered sugar and vanilla, mixing well.
  3. Whip the cream: In a separate bowl, whip heavy cream to stiff peaks. Gently fold into cream cheese mixture.
  4. Add Oreo pieces: Crush remaining 12 Oreos and fold into the filling.
  5. Assemble: Pour filling over chilled crust. Smooth the top and garnish with extra Oreo pieces if desired.
  6. Chill: Refrigerate for at least 6 hours, preferably overnight, before serving.

Tips for the Best Oreo Cheesecake

  • Use full-fat cream cheese for the creamiest texture
  • Ensure your cream cheese is at room temperature to avoid lumps
  • For a firmer cheesecake, freeze for 1-2 hours before serving
  • Try different Oreo flavors for unique variations

Storage and Serving Suggestions

Store your Oreo Cheesecake covered in the refrigerator for up to 5 days. For longer storage, freeze individual slices wrapped in plastic wrap. Serve chilled with a drizzle of chocolate sauce or a scoop of vanilla ice cream for extra indulgence.

Frequently Asked Questions

Can I make this Oreo Cheesecake ahead of time?

Absolutely! This dessert actually tastes better when made a day in advance, allowing the flavors to fully develop.

Can I use reduced-fat ingredients?

While possible, full-fat ingredients yield the best texture and flavor. Reduced-fat cream cheese may result in a softer cheesecake.

How do I prevent cracks in my cheesecake?

Since this is a no-bake recipe, cracks aren’t typically an issue. Just be sure to mix the filling until smooth and chill properly.

More Decadent Dessert Recipes

If you loved this Oreo Cheesecake recipe, try these other crowd-pleasing treats:

  • Chocolate Peanut Butter Pie
  • Strawberry Shortcake Cheesecake
  • Triple Chocolate Mousse Cake

{“success”:false,”data”:{“message”:”Invalid JSON data”}}

Luxurious Chocolate Caramel Pecan Cake

Luxurious Chocolate Caramel Pecan Cake Recipe

Indulge in the ultimate dessert experience with this Luxurious Chocolate Caramel Pecan Cake. Perfect for special occasions or when you crave something decadent, this rich cake combines velvety chocolate, gooey caramel, and crunchy pecans for an unforgettable treat. Follow our step-by-step guide to create this showstopping dessert that will impress any crowd.

Why You’ll Love This Chocolate Caramel Pecan Cake

This Luxurious Chocolate Caramel Pecan Cake stands out because:

  • Features three layers of moist chocolate cake
  • Includes homemade caramel sauce with toasted pecans
  • Finished with silky chocolate ganache
  • Perfect balance of textures and flavors
  • Impressive presentation for special occasions

Ingredients for Chocolate Caramel Pecan Cake

For the Chocolate Cake Layers:

  • 2 cups all-purpose flour
  • 2 cups granulated sugar
  • ¾ cup unsweetened cocoa powder
  • 2 tsp baking powder
  • 1½ tsp baking soda
  • 1 tsp salt
  • 1 cup buttermilk
  • ½ cup vegetable oil
  • 2 large eggs
  • 2 tsp vanilla extract
  • 1 cup hot coffee

For the Caramel Pecan Filling:

  • 1 cup granulated sugar
  • 6 tbsp unsalted butter
  • ½ cup heavy cream
  • 1 tsp sea salt
  • 1½ cups chopped pecans, toasted

For the Chocolate Ganache:

  • 12 oz semisweet chocolate, finely chopped
  • 1½ cups heavy cream

How to Make Luxurious Chocolate Caramel Pecan Cake

Step 1: Bake the Chocolate Cake Layers

Preheat oven to 350°F. Grease and line three 8-inch cake pans. Whisk together dry ingredients in a large bowl. Add buttermilk, oil, eggs, and vanilla, mixing until combined. Carefully stir in hot coffee (batter will be thin). Divide evenly among pans and bake for 30-35 minutes until a toothpick comes out clean. Cool completely.

Step 2: Prepare the Caramel Pecan Filling

Heat sugar in a medium saucepan over medium heat, stirring constantly until melted and amber-colored. Carefully whisk in butter until melted. Slowly drizzle in cream while whisking (mixture will bubble vigorously). Remove from heat and stir in salt. Let cool slightly before folding in toasted pecans.

Step 3: Make the Chocolate Ganache

Place chopped chocolate in a heatproof bowl. Heat cream until just simmering, then pour over chocolate. Let sit for 5 minutes before whisking until smooth. Cool to spreading consistency.

Step 4: Assemble the Cake

Place first cake layer on serving plate. Spread half the caramel pecan filling evenly over the top. Repeat with second layer and remaining filling. Top with final cake layer. Frost entire cake with chocolate ganache, allowing some to drip down the sides decoratively. Garnish with additional pecans if desired.

Expert Tips for the Best Chocolate Caramel Cake

  • Toast pecans for maximum flavor – spread on baking sheet at 350°F for 8-10 minutes
  • Use room temperature ingredients for even mixing
  • Let caramel cool slightly before adding to cake layers
  • Chill cake for 30 minutes before slicing for cleaner cuts
  • Store leftovers in an airtight container at room temperature for up to 3 days

Frequently Asked Questions

Can I make this cake ahead of time?

Yes! Bake the cake layers up to 2 days in advance and store wrapped at room temperature. The caramel filling can be made 3 days ahead and refrigerated (reheat gently before using). Assemble the cake the day of serving for best texture.

Can I use store-bought caramel sauce?

While homemade caramel provides superior flavor, you can substitute 1½ cups of high-quality store-bought caramel sauce in a pinch. Warm it slightly and mix with the toasted pecans before assembling.

What’s the best way to slice this rich cake?

For clean slices, dip a sharp knife in hot water and wipe dry between cuts. The warmth helps glide through the ganache and caramel layers smoothly.

Serving Suggestions for Your Decadent Cake

This Luxurious Chocolate Caramel Pecan Cake needs no accompaniment, but for special presentations consider:

  • A scoop of vanilla bean ice cream
  • Fresh whipped cream
  • Drizzle of extra caramel sauce
  • Espresso or dark roast coffee
  • Dessert wine like port or late harvest riesling

Whether you’re celebrating a special occasion or simply treating yourself, this Luxurious Chocolate Caramel Pecan Cake delivers an unforgettable dessert experience. The combination of rich chocolate, buttery caramel, and crunchy pecans creates a symphony of flavors and textures that will have everyone asking for seconds.

{“success”:false,”data”:{“message”:”Invalid JSON data”}}

Air fryer canned potatoes.


Air Fryer Canned Potatoes: The Crispy Pantry Staple You Need

Air Fryer Canned Potatoes: The Crispy Pantry Staple You Need

Ever stared into your pantry, willing inspiration to strike? We’ve all been there—especially on those nights when time is short, but cravings are big. That’s where this magic trick comes in: air fryer canned potatoes. Yes, the humble canned potato, often overlooked, can transform into crispy, golden bites of comfort with just a few minutes in your air fryer. No peeling, no chopping, just pantry-to-plate perfection.

I discovered this trick during one of those “what’s for dinner?” scrambles. My daughter had swim practice, my work deadline loomed, and the fridge was eerily empty—except for a can of potatoes tucked behind the beans. Skeptical but desperate, I tossed them in the air fryer with a drizzle of oil and a sprinkle of garlic powder. Ten minutes later? Crispy-edged, tender-centered potatoes that disappeared faster than my to-do list. Now, they’re a weeknight hero in our house, and I’m betting they’ll be in yours too.

Why You’ll Love Air Fryer Canned Potatoes

This recipe isn’t just about convenience (though that’s a huge win). Here’s why it’s a game-changer:

  • Pantry-friendly: Uses shelf-stable ingredients you likely already have.
  • Speed demon: Ready in under 15 minutes—faster than delivery!
  • Customizable: Swap seasonings to match any meal (hello, rosemary or smoky paprika!).
  • Kid-approved: The crispy texture wins over even picky eaters.

How to Make Air Fryer Canned Potatoes

Ingredients

  • 1 (14.5 oz) can whole potatoes, drained and patted dry
  • 1 tbsp olive oil or avocado oil
  • ½ tsp garlic powder
  • ½ tsp onion powder
  • ¼ tsp smoked paprika (optional)
  • Salt and black pepper to taste

Instructions

  1. Prep: Drain potatoes thoroughly and pat dry with paper towels (this ensures crispiness!). Halve any large potatoes.
  2. Toss: In a bowl, mix potatoes with oil and seasonings until evenly coated.
  3. Air fry: Arrange in a single layer in the air fryer basket. Cook at 400°F for 10–12 minutes, shaking halfway, until golden brown.
  4. Serve: Sprinkle with fresh parsley or grated Parmesan if desired. Devour immediately!

Pro Tips for the Best Results

Want next-level potatoes? Try these tricks:

  • Dry well: Moisture is the enemy of crispness—take an extra minute to blot those spuds.
  • Don’t overcrowd: Cook in batches if needed for even browning (air fryer efficiency tips).
  • Experiment: Add a pinch of cayenne for heat or toss with grated Parmesan post-cooking.

Frequently Asked Questions

Can I use sliced canned potatoes?

Absolutely! Reduce cook time by 2–3 minutes since they’re thinner.

Do I need to preheat the air fryer?

Not necessary for this recipe—the quick cook time makes it forgiving.

How do I store leftovers?

Keep in an airtight container in the fridge for up to 3 days. Reheat in the air fryer at 375°F for 3–4 minutes to revive crispiness.

Can I make these oil-free?

Yes, but they’ll be less crispy. For a lighter option, try spritzing with oil-free cooking spray.

What dishes pair well with these potatoes?

They’re versatile! Serve alongside air fryer chicken tenders or atop a breakfast hash.

Can I freeze air-fried canned potatoes?

Freezing isn’t recommended—the texture becomes mealy upon thawing.

There you have it—the ultimate proof that great meals don’t require fancy ingredients or hours in the kitchen. The next time life gets hectic (or your fresh potatoes sprout eyes before you can use them), grab that can opener and let your air fryer work its magic. Because sometimes, the simplest solutions taste the most satisfying. Now, who’s ready to crisp up a batch?


Print
clock clock iconcutlery cutlery iconflag flag iconfolder folder iconinstagram instagram iconpinterest pinterest iconfacebook facebook iconprint print iconsquares squares iconheart heart iconheart solid heart solid icon

Air Fryer Canned Potatoes

  • Author: Home Cook

Description

A quick and easy way to transform canned potatoes into crispy, golden bites using an air fryer. Perfect as a side dish or snack!


Ingredients

Scale

For the Crust:

  • For the potatoes:
  • 1 (15 oz) can whole potatoes, drained and patted dry
  • 1 tablespoon olive oil
  • 1/2 teaspoon garlic powder
  • 1/2 teaspoon onion powder
  • 1/2 teaspoon paprika
  • 1/4 teaspoon salt
  • 1/4 teaspoon black pepper
  • For garnish (optional):
  • Fresh parsley, chopped
  • Grated parmesan cheese

Instructions

1. Prepare the Crust:

  1. Preheat the air fryer to 400°F (200°C) for 3-5 minutes.
  2. In a bowl, toss the drained potatoes with olive oil, garlic powder, onion powder, paprika, salt, and black pepper until evenly coated.
  3. Place the potatoes in the air fryer basket in a single layer, ensuring they are not overcrowded.
  4. Air fry for 10-12 minutes, shaking the basket halfway through, until the potatoes are crispy and golden brown.
  5. Remove from the air fryer and garnish with fresh parsley and parmesan cheese if desired.
  6. Serve immediately while hot.

Notes

For extra crispiness, you can lightly spray the potatoes with cooking oil before air frying. If using sliced canned potatoes, reduce cooking time by 2-3 minutes.

Top Pinterest Air Fryer Onion Rings

Top Pinterest Air Fryer Onion Rings: Crispy, Golden, and Guilt-Free

There’s something undeniably comforting about biting into a perfectly crispy onion ring—the crunch, the sweetness of the onion, and that satisfying golden exterior. But let’s be honest: deep-frying at home can feel like a messy, greasy ordeal. Enter the air fryer, your trusty kitchen sidekick for achieving that same irresistible texture with a fraction of the oil. These Top Pinterest Air Fryer Onion Rings are about to become your new obsession, whether you’re serving them as a game-day snack, a burger topper, or just because you deserve a little crispy joy today.

I’ll admit, I was skeptical at first. Could an air fryer really deliver that diner-style crunch? After a few experiments (and a couple of flops), I cracked the code. The secret? A light, seasoned coating and a quick spritz of oil to help things crisp up. These rings are so good, my kids now request them over store-bought versions—and that’s a win in my book. Plus, they’re ready in under 20 minutes, making them a last-minute lifesaver when cravings strike. Ready to make magic happen? Let’s dive in.

Why You’ll Love These Air Fryer Onion Rings

If you’re on the fence about air-fried onion rings, here’s why this recipe stands out:

  • Healthier, not healthy-ish: With just a tablespoon of oil for the whole batch, you get all the crunch without the guilt.
  • No soggy middles: The air fryer’s circulating heat ensures even cooking, so every bite is crisp.
  • Customizable flavors: Add smoked paprika, cayenne, or grated Parmesan to the coating for a twist.
  • Kid-approved: Picky eaters? These disappear faster than I can say, Save some for me!

How to Make Top Pinterest Air Fryer Onion Rings

Grab your air fryer and a large sweet onion (Vidalia works wonders), and let’s get started. Here’s your step-by-step guide to crispy perfection:

  1. Prep the onion: Slice it into ½-inch rings and separate the layers. Soak them in cold water for 10 minutes to reduce sharpness (trust me, it helps).
  2. Set up your coating station: Whisk together flour, paprika, garlic powder, salt, and pepper in one bowl. In another, beat an egg with a splash of milk. In a third, mix panko breadcrumbs with a drizzle of olive oil.
  3. Dip and coat: Pat the onion rings dry, then dredge in flour, dip in egg, and press into panko. Arrange them in the air fryer basket in a single layer—no crowding!
  4. Air fry: Cook at 375°F for 8–10 minutes, flipping halfway, until golden brown. Serve immediately with burger sauce or ranch.

Pro Tips for the Best Onion Rings

Want to level up? Here are my hard-earned lessons:

  • Dry those onions: After soaking, pat them thoroughly with paper towels. Wet onions = soggy coating.
  • Panko is key: It’s lighter and crispier than regular breadcrumbs. For extra crunch, try Japanese-style panko.
  • Work in batches: Overloading the basket steams the rings instead of crisping them.
  • Reheat like new: Leftovers? A 3-minute air fryer blast restores the crunch.

Frequently Asked Questions

Can I use regular breadcrumbs instead of panko?
You can, but the texture won’t be as light. Panko’s flaky structure is ideal for air frying.

Why do my onion rings fall apart in the air fryer?
Make sure to shake off excess flour after the first dredge, and press the panko firmly onto the egg-coated rings.

Can I make these gluten-free?
Absolutely! Swap the flour for GF flour blend and use gluten-free panko.

What’s the best onion for air fryer onion rings?
Sweet onions (like Vidalia or Walla Walla) are milder, but yellow onions work too. Avoid red onions—they’re too sharp.

Do I need to preheat the air fryer?
It’s not mandatory, but preheating for 3 minutes ensures even cooking from the start.

Can I freeze air fryer onion rings?
Yes! Freeze them after breading, then air fry straight from frozen, adding 2–3 extra minutes.

There you have it—the ultimate air fryer onion rings that live up to the Pinterest hype. Whether you’re pairing them with air fryer chicken tenders or enjoying them solo, they’re proof that comfort food can be easy and (almost) guilt-free. Now, if you’ll excuse me, I have a date with my air fryer and another onion waiting to be transformed. Happy crunching!

Print
clock clock iconcutlery cutlery iconflag flag iconfolder folder iconinstagram instagram iconpinterest pinterest iconfacebook facebook iconprint print iconsquares squares iconheart heart iconheart solid heart solid icon

Top Pinterest Air Fryer Onion Rings

  • Author: CrispyKitchen

Description

These air fryer onion rings are irresistibly crispy, golden, and healthier than deep-fried versions. Perfect as a snack or side dish with your favorite dipping sauce!


Ingredients

Scale

For the Crust:

  • For the onion rings:
  • 2 large sweet onions (Vidalia or Walla Walla work best)
  • 1 cup all-purpose flour
  • 2 large eggs
  • 1/4 cup milk
  • 1 cup panko breadcrumbs
  • 1/2 cup regular breadcrumbs
  • 1 tsp paprika
  • 1 tsp garlic powder
  • 1/2 tsp salt
  • 1/4 tsp black pepper
  • For the dipping sauce (optional):
  • 1/2 cup mayonnaise
  • 2 tbsp ketchup
  • 1 tsp horseradish
  • 1/4 tsp smoked paprika

Instructions

1. Prepare the Crust:

  1. 1. Slice onions into 1/2-inch thick rings and separate them.
  2. 2. Set up three bowls: one with flour, one with beaten eggs and milk, and one with mixed panko, regular breadcrumbs, and seasonings.
  3. 3. Dredge each onion ring in flour, then dip in egg mixture, and finally coat thoroughly with breadcrumb mixture.
  4. 4. Preheat air fryer to 375°F (190°C) for 3 minutes.
  5. 5. Arrange onion rings in a single layer in the air fryer basket (work in batches if needed).
  6. 6. Lightly spray with cooking oil for extra crispiness.
  7. 7. Air fry for 8-10 minutes, flipping halfway, until golden brown and crispy.
  8. 8. While cooking, mix all dipping sauce ingredients in a small bowl.
  9. 9. Serve onion rings immediately with dipping sauce.

Notes

For best results, don’t overcrowd the air fryer basket. Leftovers can be reheated in the air fryer at 350°F for 3-4 minutes. Try adding 1/4 tsp cayenne to the breading for a spicy kick!