Cinnamon-Sugar Air Fryer Banana Chips

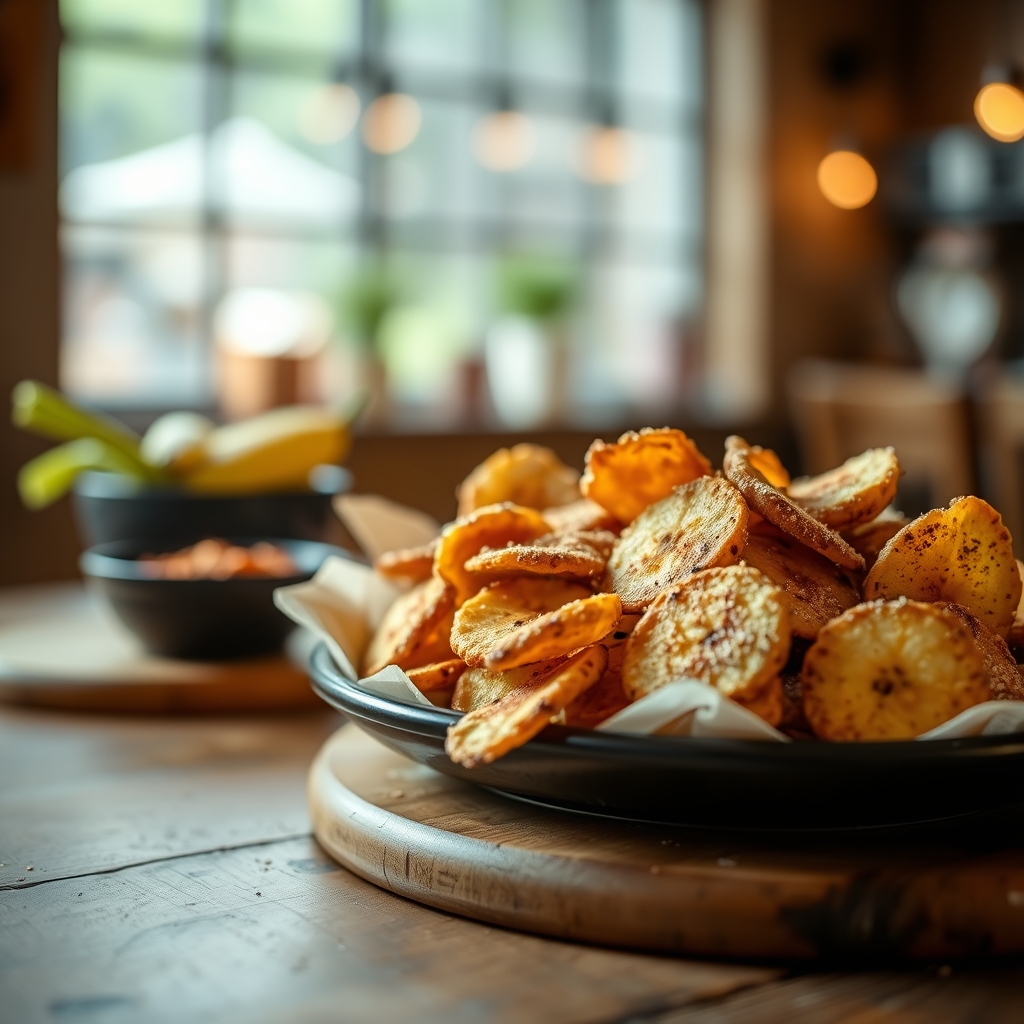
Cinnamon-Sugar Air Fryer Banana Chips: A Healthy Snack Recipe

These cinnamon-sugar air fryer banana chips are the perfect guilt-free snack for any time of day. Crispy, sweet, and packed with flavor, this easy recipe transforms simple bananas into delicious chips without deep frying. Using your air fryer makes them healthier than traditional banana chips while maintaining that satisfying crunch.

Frequently Asked Questions

Can I make banana chips without an air fryer?

Yes, you can bake them at 200°F for 2-3 hours in conventional oven, flipping halfway through.

Are banana chips healthy?

These air fried banana chips are healthier than store-bought versions since they contain less oil and you control the sugar content.

Why are my banana chips not crispy?

This usually means they needed more cooking time or were sliced too thick. Make sure to let them cool completely as they crisp up more while cooling.

Nutrition Information

Serving size: 1/4 recipe (about 15 chips)

  • Calories: 85
  • Carbohydrates: 22g
  • Fiber: 2g
  • Sugar: 12g
  • Protein: 1g

These cinnamon-sugar air fryer banana chips make a wonderful healthy snack, lunchbox addition, or dessert alternative. The combination of sweet banana with warm cinnamon creates irresistible flavor in every crispy bite. Try this simple recipe today for a nutritious treat the whole family will love!

Print
clock clock iconcutlery cutlery iconflag flag iconfolder folder iconinstagram instagram iconpinterest pinterest iconfacebook facebook iconprint print iconsquares squares iconheart heart iconheart solid heart solid icon

Cinnamon-Sugar Air Fryer Banana Chips

  • Author: Air Fryer Enthusiast

Description

Crispy, sweet, and lightly spiced banana chips made effortlessly in the air fryer. A healthier alternative to store-bought versions with no added oils or preservatives.


Ingredients

Scale

For the Crust:

  • For the Banana Chips:
  • 3 large slightly underripe bananas
  • 1 tbsp lemon juice
  • For the Cinnamon-Sugar Coating:
  • 2 tbsp granulated sugar
  • 1 tsp ground cinnamon
  • 1/8 tsp salt

Instructions

1. Prepare the Crust:

  1. 1. Slice bananas into 1/8-inch thick rounds using a sharp knife or mandoline.
  2. 2. Toss banana slices with lemon juice in a bowl to prevent browning.
  3. 3. In a separate small bowl, mix sugar, cinnamon, and salt for the coating.
  4. 4. Arrange banana slices in a single layer in the air fryer basket (work in batches if needed).
  5. 5. Air fry at 300°F (150°C) for 8 minutes, then flip slices.
  6. 6. Sprinkle half of the cinnamon-sugar mixture over the bananas.
  7. 7. Continue air frying for 4 minutes, then remove and sprinkle remaining mixture.
  8. 8. Air fry 2-3 more minutes until golden and crisp (watch closely to prevent burning).
  9. 9. Let cool completely – chips will crisp up further as they cool.

Notes

Store in an airtight container for up to 3 days. For extra crispness, leave the container slightly open. Best made with slightly green bananas as they hold shape better. Adjust cinnamon to taste preference.

Chocolate Lava M&M Surprise Cookies

Chocolate Lava M&M Surprise Cookies: A Gooey Delight

These Chocolate Lava M&M Surprise Cookies combine rich chocolate flavor with a molten center and colorful M&M candies for an irresistible treat. Perfect for parties, holidays, or anytime you crave a decadent dessert, these cookies will quickly become your new favorite.

Why You’ll Love These Chocolate Lava Cookies

What makes these cookies special is the surprise molten center hidden beneath a crisp exterior. The addition of M&Ms adds texture and visual appeal, making them perfect for cookie exchanges or gifting. They’re easier to make than you might think!

Chocolate Lava M&M Surprise Cookies Ingredients

  • 1 cup all-purpose flour
  • 1/2 cup unsweetened cocoa powder
  • 1 teaspoon baking powder
  • 1/4 teaspoon salt
  • 1/2 cup unsalted butter, softened
  • 3/4 cup granulated sugar
  • 1 large egg
  • 1 teaspoon vanilla extract
  • 24 chocolate truffles or chocolate kisses
  • 1/2 cup M&M candies

How to Make Chocolate Lava Cookies with M&Ms

  1. Preheat oven to 350°F (175°C) and line baking sheets with parchment paper
  2. Whisk together flour, cocoa powder, baking powder, and salt in a medium bowl
  3. Cream butter and sugar until light and fluffy, about 3 minutes
  4. Beat in egg and vanilla until well combined
  5. Gradually mix in dry ingredients until a soft dough forms
  6. Scoop 1 tablespoon of dough and flatten slightly in your palm
  7. Place a chocolate truffle in the center and wrap dough around it
  8. Roll into a ball and press M&Ms into the top
  9. Bake for 10-12 minutes until cookies are set but still soft
  10. Cool on baking sheets for 5 minutes before transferring to wire racks

Tips for Perfect Molten Center Cookies

For the best results with your Chocolate Lava M&M Surprise Cookies, follow these expert tips:

  • Use room temperature ingredients for even mixing
  • Don’t overbake – the centers should remain gooey
  • Experiment with different chocolate center options like caramel-filled chocolates
  • Let cookies cool slightly before eating to avoid burns from the hot center

Storage and Serving Suggestions

These cookies are best served warm when the chocolate center is still molten. Store leftovers in an airtight container at room temperature for up to 3 days. To reheat, microwave for 10-15 seconds to restore the gooey center.

Frequently Asked Questions

Can I use different candy in these lava cookies?

Absolutely! Try Reese’s Pieces, chopped peanut butter cups, or your favorite candy pieces instead of M&Ms.

How do I prevent my cookies from spreading too much?

Chill the dough for 30 minutes before baking and make sure your baking powder is fresh.

Can I make these cookies ahead of time?

You can prepare the dough balls (without baking) and freeze them for up to 3 months. Bake from frozen, adding 1-2 minutes to the baking time.

These Chocolate Lava M&M Surprise Cookies offer the perfect combination of textures and flavors that will impress any dessert lover. The crisp exterior gives way to a molten chocolate center, while the colorful M&Ms add festive crunch. Whether you’re baking for a special occasion or just treating yourself, these cookies deliver maximum deliciousness with every bite.

Print
clock clock iconcutlery cutlery iconflag flag iconfolder folder iconinstagram instagram iconpinterest pinterest iconfacebook facebook iconprint print iconsquares squares iconheart heart iconheart solid heart solid icon

Chocolate Lava M&M Surprise Cookies

  • Author: Bakery Delights

Description

Decadent chocolate cookies with a molten center and colorful M&M surprises. Perfect for celebrations or when you need a sweet pick-me-up!


Ingredients

Scale

For the Crust:

  • For cookie dough:
  • 1 cup unsalted butter, softened
  • 1 1/2 cups granulated sugar
  • 2 large eggs
  • 2 teaspoons vanilla extract
  • 2 cups all-purpose flour
  • 3/4 cup cocoa powder
  • 1 teaspoon baking soda
  • 1/2 teaspoon salt
  • For filling & topping:
  • 24 chocolate truffles (for molten centers)
  • 1 cup M&M’s (mixed colors)
  • 1/4 cup powdered sugar (for dusting)

Instructions

1. Prepare the Crust:

  1. 1. Preheat oven to 350°F (175°C) and line baking sheets with parchment paper.
  2. 2. Cream together butter and sugar until light and fluffy (about 3 minutes).
  3. 3. Beat in eggs one at a time, then add vanilla extract.
  4. 4. In separate bowl, whisk flour, cocoa powder, baking soda and salt.
  5. 5. Gradually mix dry ingredients into wet ingredients until fully combined.
  6. 6. Scoop 2 tablespoons dough, flatten slightly, place 1 truffle in center and wrap dough around it.
  7. 7. Roll dough balls gently in hands to smooth, then press 3-4 M&M’s onto surface of each cookie.
  8. 8. Bake for 10-12 minutes – centers should still be soft when pressed lightly.
  9. 9. Cool on baking sheet for 5 minutes before transferring to wire rack.
  10. 10. Dust with powdered sugar while slightly warm.

Notes

For best results: 1) Use room temperature ingredients 2) Don’t overbake – centers should stay molten 3) Store in airtight container for up to 3 days 4) Reheat 10 seconds in microwave for fresh-from-oven texture

Frozen S’mores Cheesecake Bars

Frozen S’mores Cheesecake Bars: A No-Bake Summer Dessert

These Frozen S’mores Cheesecake Bars combine the classic flavors of s’mores with creamy cheesecake in an easy no-bake dessert. Perfect for summer gatherings, potlucks, or whenever you crave a cool, indulgent treat. With layers of graham cracker crust, marshmallow cheesecake filling, and chocolate ganache, this dessert is sure to impress.

Why You’ll Love These Frozen S’mores Cheesecake Bars

If you love the combination of graham crackers, marshmallows, and chocolate, this recipe is for you. The no-bake method makes it simple to prepare, and the frozen texture keeps it refreshing on hot days. Plus, these bars are perfect for making ahead—just store them in the freezer until ready to serve.

Ingredients for Frozen S’mores Cheesecake Bars

For the Graham Cracker Crust:

  • 2 cups graham cracker crumbs
  • 1/4 cup granulated sugar
  • 1/2 cup unsalted butter, melted

For the Marshmallow Cheesecake Filling:

  • 16 oz cream cheese, softened
  • 1 cup marshmallow fluff
  • 1/2 cup powdered sugar
  • 1 tsp vanilla extract
  • 1 cup heavy whipping cream, whipped

For the Chocolate Ganache Topping:

  • 1 cup semi-sweet chocolate chips
  • 1/2 cup heavy cream
  • Mini marshmallows and graham cracker crumbs for garnish

How to Make Frozen S’mores Cheesecake Bars

Step 1: Prepare the Graham Cracker Crust

In a bowl, mix graham cracker crumbs, sugar, and melted butter until well combined. Press firmly into the bottom of a lined 9×9-inch baking dish. Chill in the freezer while preparing the filling.

Step 2: Make the Marshmallow Cheesecake Layer

Beat softened cream cheese until smooth. Add marshmallow fluff, powdered sugar, and vanilla, mixing until fully incorporated. Gently fold in whipped cream. Spread evenly over the chilled crust.

Step 3: Add the Chocolate Ganache

Heat heavy cream until steaming, then pour over chocolate chips. Let sit for 2 minutes before stirring until smooth. Pour over the cheesecake layer and spread evenly.

Step 4: Freeze and Garnish

Freeze for at least 4 hours or until firm. Before serving, sprinkle with mini marshmallows and graham cracker crumbs. Slice into bars and enjoy!

Tips for Perfect Frozen Cheesecake Bars

  • Use full-fat cream cheese for the creamiest texture.
  • For a toasted marshmallow effect, briefly torch the top before serving.
  • Store leftovers in an airtight container in the freezer for up to 2 weeks.

Variations and Substitutions

Try using dark chocolate ganache for a richer flavor, or swap graham crackers for chocolate cookies. For a nutty twist, add chopped pecans to the crust.

Final Thoughts

These Frozen S’mores Cheesecake Bars are the ultimate summer dessert—creamy, chocolaty, and packed with nostalgic s’mores flavor. Whether you’re serving them at a barbecue or enjoying a sweet treat at home, they’re guaranteed to be a hit. Give this easy no-bake recipe a try and enjoy a taste of summer in every bite!

Print
clock clock iconcutlery cutlery iconflag flag iconfolder folder iconinstagram instagram iconpinterest pinterest iconfacebook facebook iconprint print iconsquares squares iconheart heart iconheart solid heart solid icon

Frozen S’mores Cheesecake Bars

  • Author: Baking Enthusiast

Description

A decadent frozen dessert combining the classic flavors of s’mores with creamy cheesecake, all layered on a graham cracker crust. Perfect for summer gatherings or anytime you crave a sweet, chilled treat.


Ingredients

Scale

For the Crust:

  • For the crust:
  • 1 1/2 cups graham cracker crumbs
  • 1/4 cup granulated sugar
  • 6 tablespoons unsalted butter, melted
  • For the cheesecake layer:
  • 16 ounces cream cheese, softened
  • 1/2 cup granulated sugar
  • 1 teaspoon vanilla extract
  • 1 cup heavy whipping cream
  • For the topping:
  • 1 1/2 cups mini marshmallows
  • 1/2 cup chocolate chips
  • 1/2 cup graham cracker pieces

Instructions

1. Prepare the Crust:

  1. 1. Line an 8×8-inch baking pan with parchment paper, leaving an overhang on the sides for easy removal.
  2. 2. In a medium bowl, mix graham cracker crumbs, sugar, and melted butter until combined. Press firmly into the bottom of the prepared pan. Freeze for 10 minutes.
  3. 3. In a large bowl, beat cream cheese, sugar, and vanilla until smooth and creamy.
  4. 4. In a separate bowl, whip the heavy cream until stiff peaks form. Gently fold the whipped cream into the cream cheese mixture until fully incorporated.
  5. 5. Spread the cheesecake mixture evenly over the chilled crust. Sprinkle mini marshmallows, chocolate chips, and graham cracker pieces on top.
  6. 6. Freeze for at least 4 hours, or until firm. Once set, use the parchment overhang to lift the bars out of the pan. Slice into squares and serve immediately or store in the freezer.

Notes

For a toasted marshmallow effect, briefly torch the tops before serving. Store leftovers in an airtight container in the freezer for up to 2 weeks.

Crispy Baked Parmesan Potatoes

Crispy Baked Parmesan Potatoes: The Ultimate Side Dish

These crispy baked Parmesan potatoes are the perfect combination of golden crunch and cheesy flavor. Whether you’re serving them alongside a weeknight dinner or at your next gathering, this easy potato recipe delivers restaurant-quality results with minimal effort. The secret lies in the Parmesan crust that forms as the potatoes bake to perfection.

Why You’ll Love These Parmesan Crusted Potatoes

These crispy baked Parmesan potatoes offer several advantages over traditional roasted potatoes. The Parmesan cheese creates a delicious crust while keeping the inside tender. This recipe is naturally gluten-free and can be easily adapted for various dietary preferences. The combination of simple ingredients transforms into an extraordinary side dish that pairs well with everything from grilled meats to vegetarian mains.

Tips for Perfect Crispy Potatoes Every Time

To achieve the crispiest results with your baked Parmesan potato wedges, follow these professional tips:

  • Use starchy potatoes like Yukon Gold or Russet for best texture
  • Cut potatoes into uniform sizes for even cooking
  • Don’t overcrowd the baking sheet – space allows for proper crisping
  • For extra crispiness, place potatoes on a wire rack over the baking sheet
  • Freshly grated Parmesan works better than pre-shredded varieties

Serving Suggestions for Your Parmesan Potatoes

These versatile crispy cheese potatoes complement numerous dishes. Try them with:

  • Juicy grilled steaks or roasted chicken
  • Fresh salads for a satisfying vegetarian meal
  • As an appetizer with dipping sauces like garlic aioli or ranch
  • Alongside eggs for a hearty breakfast twist

Storage and Reheating Instructions

While these Parmesan roasted potatoes are best served fresh, you can store leftovers in an airtight container in the refrigerator for up to 3 days. Reheat in a 375°F oven for 10-15 minutes to restore crispiness. Avoid microwaving as it will make the potatoes soggy.

Frequently Asked Questions

Can I use other types of cheese?

While Parmesan works best for creating that signature crispiness, you can experiment with Pecorino Romano or Asiago cheese for similar results.

How do I make these potatoes dairy-free?

For a dairy-free version, substitute nutritional yeast for the Parmesan and increase the seasoning slightly.

Can I prepare these potatoes ahead of time?

You can cut and oil the potatoes up to 4 hours in advance, but wait to add the Parmesan coating until just before baking for maximum crispiness.

Print
clock clock iconcutlery cutlery iconflag flag iconfolder folder iconinstagram instagram iconpinterest pinterest iconfacebook facebook iconprint print iconsquares squares iconheart heart iconheart solid heart solid icon

Crispy Baked Parmesan Potatoes

  • Author: Chef HomeCook

Description

These Crispy Baked Parmesan Potatoes are the perfect side dish for any meal. Golden and crispy on the outside, tender on the inside, and loaded with savory Parmesan cheese and herbs. Easy to make and irresistibly delicious!


Ingredients

Scale

For the Crust:

  • For the potatoes:
  • 2 pounds Yukon Gold potatoes, cut into wedges
  • 2 tablespoons olive oil
  • 1 teaspoon garlic powder
  • 1 teaspoon onion powder
  • 1 teaspoon dried thyme
  • 1 teaspoon dried rosemary
  • 1/2 teaspoon salt
  • 1/4 teaspoon black pepper
  • For the Parmesan coating:
  • 1/2 cup grated Parmesan cheese
  • 1/4 cup breadcrumbs
  • 1 teaspoon paprika
  • 1/2 teaspoon dried parsley
  • For garnish:
  • Fresh parsley, chopped
  • Extra grated Parmesan cheese

Instructions

1. Prepare the Crust:

  1. Preheat oven to 400°F (200°C). Line a baking sheet with parchment paper.
  2. In a large bowl, toss potato wedges with olive oil, garlic powder, onion powder, thyme, rosemary, salt, and black pepper until evenly coated.
  3. In a separate bowl, mix Parmesan cheese, breadcrumbs, paprika, and dried parsley.
  4. Dredge each potato wedge in the Parmesan mixture, pressing lightly to adhere. Place on the prepared baking sheet in a single layer.
  5. Bake for 25-30 minutes, flipping halfway through, until golden brown and crispy.
  6. Garnish with fresh parsley and extra Parmesan cheese before serving.

Notes

For extra crispiness, broil for the last 2-3 minutes. Make sure to flip the potatoes halfway through baking for even browning. You can also use russet potatoes if Yukon Golds are unavailable.

Pink Vanilla Cake Squares

Pink Vanilla Cake Squares: A Delightful Treat for Any Occasion

These Pink vanilla cake squares are the perfect combination of soft, fluffy texture and delicate vanilla flavor with a playful pink twist. Ideal for birthdays, baby showers, or afternoon tea parties, this easy dessert recipe will quickly become your go-to for sweet cravings.

Frequently Asked Questions

Can I make these pink vanilla squares without food coloring?

Absolutely! The cake will taste just as delicious without the pink hue. For natural coloring, try adding 1-2 tbsp beetroot powder.

What’s the best way to get clean cuts when slicing?

Use a sharp knife dipped in hot water and wiped clean between cuts. For perfect squares, chill the cake briefly before slicing.

Can I turn this into a layer cake instead of squares?

Yes! Divide the batter between two 8-inch round pans and adjust baking time to 25-30 minutes.

These pink vanilla cake squares offer a delightful twist on classic vanilla cake that’s sure to impress. With their soft texture, beautiful color, and irresistible flavor, they’re perfect for any celebration or simply as a sweet treat to brighten your day.

Print
clock clock iconcutlery cutlery iconflag flag iconfolder folder iconinstagram instagram iconpinterest pinterest iconfacebook facebook iconprint print iconsquares squares iconheart heart iconheart solid heart solid icon

Pink Vanilla Cake Squares

  • Author: Sweet Treats Bakery

Description

A delightful and visually appealing pink vanilla cake cut into perfect squares. This moist and fluffy cake is infused with vanilla and tinted pink for a charming dessert that’s perfect for parties, tea time, or any special occasion.


Ingredients

Scale

For the Crust:

  • For the Cake:
  • 2 1/2 cups all-purpose flour
  • 2 1/2 teaspoons baking powder
  • 1/2 teaspoon salt
  • 1 cup unsalted butter, softened
  • 2 cups granulated sugar
  • 4 large eggs
  • 1 tablespoon vanilla extract
  • 1 cup whole milk
  • 12 drops pink food coloring
  • For the Frosting:
  • 1 cup unsalted butter, softened
  • 4 cups powdered sugar
  • 23 tablespoons heavy cream
  • 1 teaspoon vanilla extract
  • 12 drops pink food coloring
  • For Decoration:
  • Sprinkles (optional)
  • Edible glitter (optional)

Instructions

1. Prepare the Crust:

  1. Preheat oven to 350°F (175°C). Grease and line a 9×13-inch baking pan with parchment paper.
  2. In a medium bowl, whisk together flour, baking powder, and salt. Set aside.
  3. In a large bowl, beat butter and sugar until light and fluffy (about 3-4 minutes).
  4. Add eggs one at a time, beating well after each addition. Mix in vanilla extract.
  5. Alternately add the flour mixture and milk to the butter mixture, beginning and ending with the flour. Mix until just combined.
  6. Add pink food coloring and mix until the batter reaches your desired shade of pink.
  7. Pour batter into the prepared pan and smooth the top with a spatula.
  8. Bake for 30-35 minutes, or until a toothpick inserted into the center comes out clean.
  9. Let the cake cool in the pan for 10 minutes, then transfer to a wire rack to cool completely.
  10. For the frosting: Beat butter until creamy. Gradually add powdered sugar, then mix in heavy cream and vanilla extract until smooth. Add pink food coloring and mix well.
  11. Spread frosting evenly over the cooled cake. Decorate with sprinkles or edible glitter if desired.
  12. Cut into squares and serve.

Notes

For a deeper pink color, add more food coloring. Store leftovers in an airtight container at room temperature for up to 3 days.