Biscuits & Gravy Casserole: The Perfect Comfort Breakfast Dish
Biscuits & Gravy Casserole: A Hearty and Comforting Breakfast Dish
Introduction
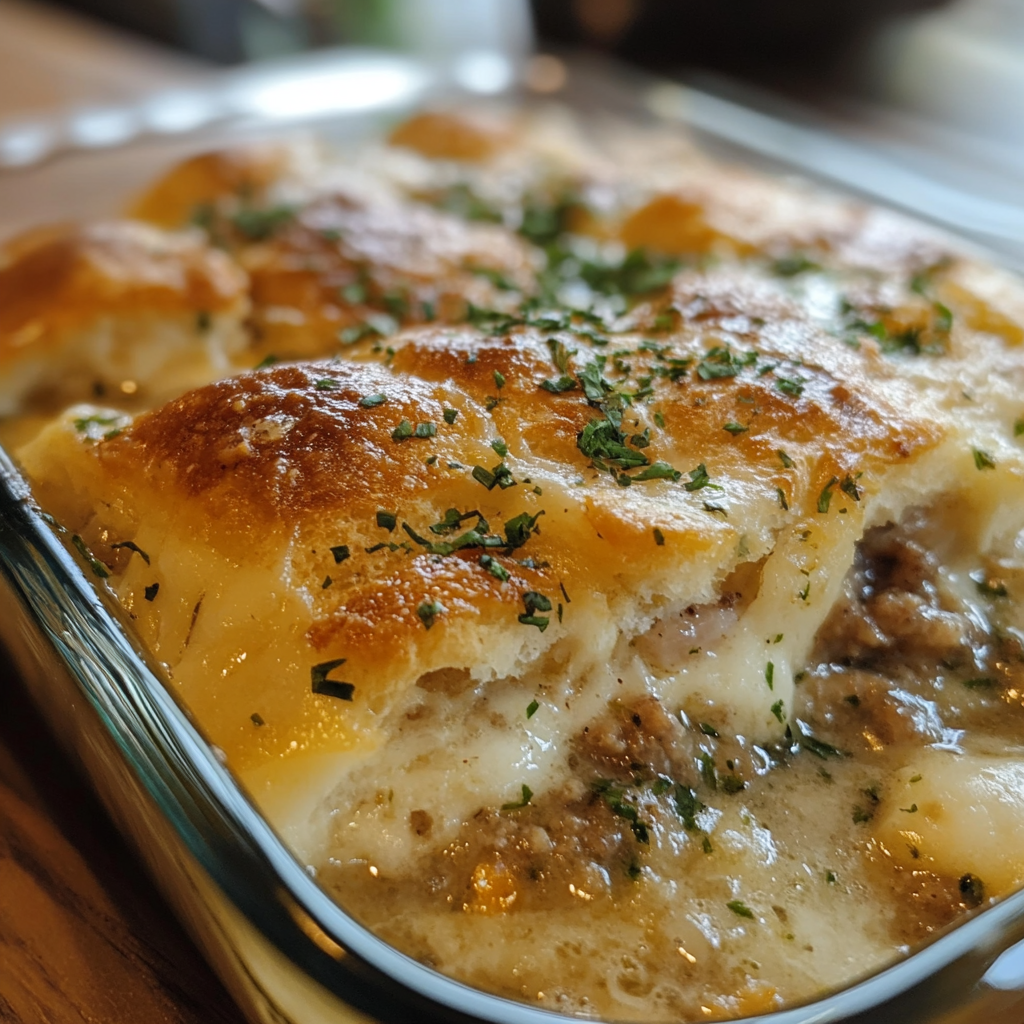
Biscuits & Gravy Casserole is a Southern comfort food classic that combines layers of buttery biscuits, savory sausage gravy, and eggs baked into a delicious casserole. It’s the perfect dish for breakfast or brunch, making it a hit for weekend gatherings or holiday mornings.
This dish takes the traditional biscuits and sausage gravy and turns it into a one-pan casserole, making it easier to serve for a crowd. The casserole is filled with fluffy biscuits, rich gravy, and eggs, making it a satisfying meal that’s perfect for feeding a family.
For more casserole recipes, you can explore this Slow Cooker Baked Ziti to add another easy meal to your recipe collection.
Ingredients and Nutritional Information
To make Biscuits & Gravy Casserole, you’ll need:
Canned Biscuits: Quick and easy to use.
Sausage: Adds a savory flavor to the gravy.
Eggs: Create a fluffy texture in the casserole.
Milk and Flour: For making the creamy gravy.
Optional Ingredients: Cheese, bacon, or green onions for added flavor.
Nutritionally, this casserole is high in protein and fat due to the sausage and eggs. You can make a lighter version by using turkey sausage or reducing the amount of butter in the gravy.
1. Preparing the Sausage Gravy
Start by browning the sausage in a skillet. Once cooked, add flour to create a roux, followed by milk to form a creamy gravy.
2. Assembling the Casserole
Cut the biscuits into quarters and layer them at the bottom of a greased baking dish. Pour the sausage gravy over the biscuit pieces, followed by a layer of whisked eggs.
3. Baking and Serving
Bake the casserole at 350°F (175°C) for 30-40 minutes or until the biscuits are golden and the eggs are set. Garnish with fresh herbs or cheese before serving.
For more breakfast ideas, you might enjoy this Reinvented Pancake Muffins for a quick and delicious breakfast option.
Creative Variations of Biscuits & Gravy Casserole
There are several ways to customize your Biscuits & Gravy Casserole:
Add Cheese: A layer of shredded cheddar or mozzarella adds a creamy, melty texture.
Incorporate Vegetables: Spinach, bell peppers, or mushrooms can be added for extra nutrients.
Bacon Upgrade: Crumbled bacon can be added to the gravy or used as a topping for a smoky flavor.
Serving Suggestions and Pairings
Biscuits & Gravy Casserole pairs well with:
Fresh Fruit: Lightens the richness of the casserole.
Hash Browns or Roasted Potatoes: For a crispy side.
Coffee or Mimosas: Perfect beverages for brunch.
For more inspiration on casseroles, check out this Dorito Chicken Casserole for a crunchy twist on comfort food.
Frequently Asked Questions (FAQs)
Can I make this casserole ahead of time?
Yes, you can assemble the casserole the night before and refrigerate it until ready to bake.
What type of sausage works best?
Ground pork sausage is traditional, but turkey sausage or chicken sausage can be used for a lighter version.
How do I keep the biscuits from getting soggy?
Make sure the biscuits are layered on top of the gravy rather than fully submerged to keep them crisp.
Can I add cheese to this recipe?
Absolutely! A layer of shredded cheese can be added for extra richness.
Is it possible to make a vegetarian version?
Yes, you can use a vegetarian sausage substitute and a plant-based milk for a vegetarian-friendly version.
Nutritional Benefits and Health Considerations
Biscuits & Gravy Casserole is a hearty, indulgent dish. To make it lighter, use lean sausage, reduce the amount of butter, and incorporate vegetables for added fiber and nutrients.
Conclusion
Biscuits & Gravy Casserole is the ultimate comfort food dish that’s perfect for family breakfasts, brunches, or special occasions. Whether you’re serving it for a holiday morning or a simple weekend brunch, this casserole is sure to please everyone at the table.
Homemade Picadillo with Flour Tortillas: A Hearty and Flavorful Meal
Homemade Picadillo with Flour Tortillas: A Classic Latin American Dish
Introduction
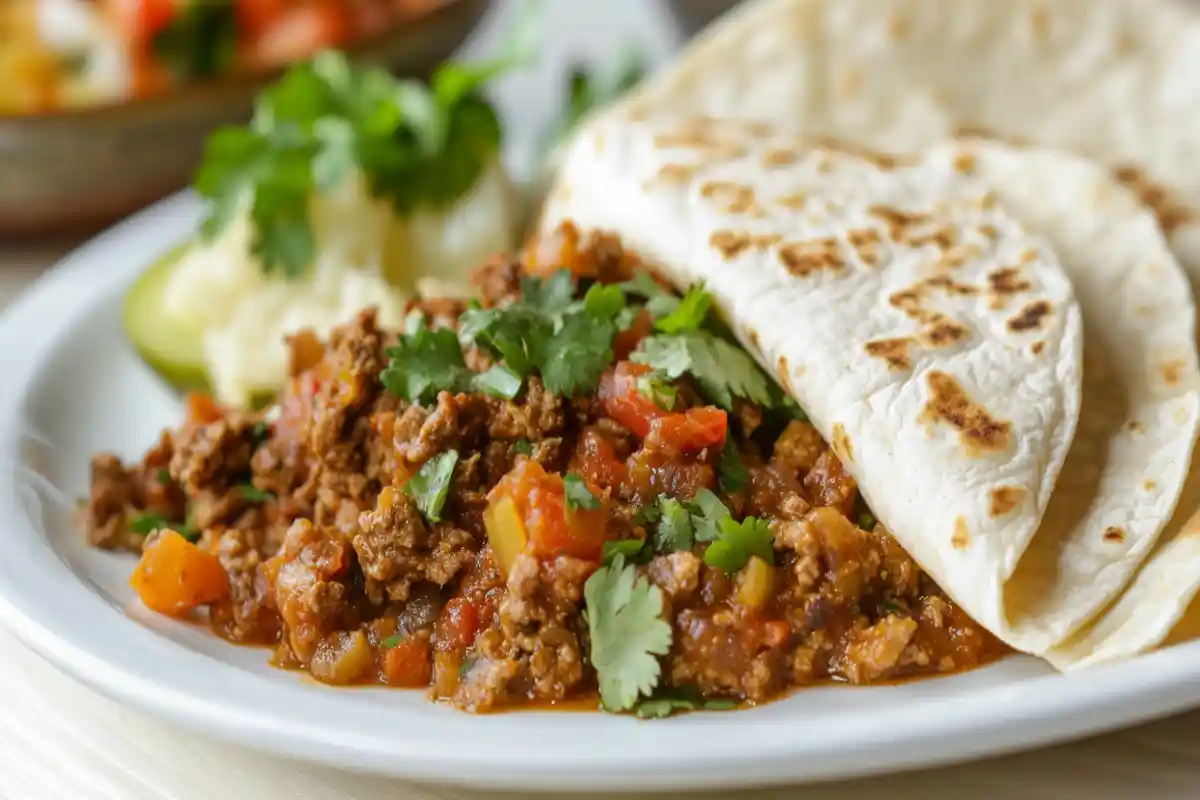
Homemade Picadillo is a traditional Latin American dish that blends the flavors of ground beef, vegetables, and a mix of savory seasonings. When paired with warm, soft flour tortillas, this dish becomes the perfect balance of comfort food and practicality. It’s ideal for family meals or a casual dinner with friends.
If you’re a fan of hearty and easy-to-make meals, check out this Crockpot Potato Soup with Hashbrowns for another comforting dish that pairs beautifully with warm tortillas.
Why Picadillo and Flour Tortillas?
Picadillo has a rich history in Latin American cuisine, and every region adds its own twist. It’s a versatile dish that can be customized with different ingredients to suit your taste. Combining Picadillo with freshly made flour tortillas allows for the perfect vessel to scoop up every flavorful bite.
For those looking for slow-cooked comfort food, consider this Slow Cooker Baked Ziti, which also works as a hearty meal to serve with tortillas.
Ingredients and Nutritional Information
To make Homemade Picadillo with flour tortillas, you’ll need the following ingredients:
Ground Beef or Pork: Provides a hearty base for the dish.
Vegetables: Potatoes, carrots, tomatoes, and onions add texture and flavor.
Seasonings: Garlic, cumin, and oregano are key spices.
Flour Tortillas: You can use store-bought or make them fresh at home.
Nutritionally, Picadillo is a protein-rich dish, and pairing it with flour tortillas adds fiber and carbohydrates for a balanced meal. You can adjust the recipe to make it healthier by using lean meat and adding more vegetables.
1. Preparing the Ingredients
Begin by chopping the vegetables—potatoes, carrots, tomatoes, and onions. Heat a large pan and sauté the ground beef with garlic and onions.
2. Cooking the Picadillo
Add the chopped vegetables and seasonings to the pan. Let everything simmer until the flavors meld together and the vegetables become tender.
3. Making the Flour Tortillas
If you’re making homemade flour tortillas, mix flour, salt, and water to form the dough. Roll the dough into small balls and flatten them before cooking on a hot skillet.
Creative Variations of Picadillo with Flour Tortillas
There are several ways to modify this dish to suit your taste:
Spicy Picadillo: Add jalapeños or chipotle peppers for a spicy kick.
Sweet and Savory: Incorporate raisins or diced apples for a slightly sweet contrast to the savory meat.
Vegetarian Option: Replace the ground beef with plant-based meat or beans for a vegetarian version of Picadillo.
Homemade Picadillo with flour tortillas can be served in various ways:
With Rice and Beans: Serve alongside a helping of rice and refried beans for a complete meal.
Taco-Style: Spoon the Picadillo into the tortillas and top with your favorite garnishes, such as cheese, avocado, or salsa.
As a Burrito: Wrap the Picadillo in the tortilla with additional toppings to create a flavorful burrito.
For more side ideas, try pairing it with Dorito Chicken Casserole to add crunch and complement the soft texture of the tortillas.
FAQs
Can I make Picadillo ahead of time?
Yes, Picadillo can be made in advance and stored in the refrigerator for up to 3 days. Reheat it gently on the stove or microwave before serving with freshly warmed tortillas.
What type of meat works best for Picadillo?
Ground beef or pork is traditionally used, but you can also use chicken or turkey for a leaner option.
How do I keep tortillas from becoming soggy?
To prevent sogginess, serve the tortillas and Picadillo separately and assemble just before eating.
Can I use corn tortillas instead of flour tortillas?
Yes, you can substitute corn tortillas if you prefer, but the texture will be different. Corn tortillas are more firm and provide a distinct flavor.
What are some low-carb alternatives?
For a low-carb version, serve the Picadillo in lettuce wraps instead of using tortillas.
Nutritional Benefits and Health Considerations
Picadillo is a versatile dish that offers a good source of protein, fiber, and essential nutrients, especially if you include plenty of vegetables. If you’re looking to make this dish healthier, consider using ground turkey or lean beef. Additionally, making your own flour tortillas allows you to control the ingredients and avoid preservatives.
Conclusion
Homemade Picadillo with Flour Tortillas is a comforting, versatile dish that’s perfect for any occasion. Whether you’re serving it as a quick family dinner or preparing it for meal prep, this classic Latin American recipe offers rich flavors that everyone will enjoy.
Savor the Flavor: Longhorn Steakhouse’s Sliced Baked Potatoes at Home
Welcome to a culinary journey that brings the esteemed taste of Longhorn Steakhouse into your kitchen with a recipe that’s both simple and sensational: Sliced Baked Potatoes. This dish is more than just a side; it’s a symphony of textures and flavors that elevate the humble potato to star status on your dining table.
The Magic of Russet Potatoes
Russet potatoes, with their fluffy texture and earthy flavor, are the backbone of this recipe. Their starchy composition makes them ideal for baking, turning golden outside while staying soft and fluffy inside.
Crafting the Perfect Seasoning Blend
The seasoning blend is where creativity meets tradition. The combination of salt, pepper, cayenne, garlic, and paprika doesn’t just add flavor; it infuses each slice of potato with a warm, aromatic complexity that’s hard to resist.
Step-by-Step Cooking Guide
Preparation: Start with washing your Russets thoroughly, patting them dry before making precise slices down each potato. This technique allows flavors to penetrate deeply and the heat to distribute evenly.
Seasoning: Mix your spices in the right proportions. The secret is in the balance – enough salt to enhance the natural potato flavor, a hint of garlic for depth, paprika for sweetness, and a touch of cayenne for heat.
Baking to Perfection: Lay your seasoned potatoes on a parchment-lined baking tray, giving them space to breathe and roast evenly. The oven does the rest, crisping the edges beautifully while keeping the inside tender.
Beyond the Basic Baked Potato
Elevate your dish with variations. Introduce new spices, perhaps a sprinkle of rosemary or thyme, for an herby note. Or, after baking, add toppings like sour cream, chives, or crumbled bacon for added texture and flavor.
The Art of Serving
Presentation matters. Serve these beauties fresh from the oven, garnished with fresh herbs or alongside your main dish. They’re not just delicious but also a feast for the eyes with their golden, crispy edges and steamy, aromatic centers.
Perfect Pairings
What to serve with these sliced baked potatoes? They’re versatile! From a juicy steak to a light, grilled fish, they complement a wide range of main courses. Or, let them shine as the main event, accompanied by a fresh salad.
Make-Ahead Tips and Storage Solutions
These potatoes are best enjoyed fresh, but if you need to prep ahead, here’s how to keep them crispy and delicious. Plus, tips on storing leftovers, though we doubt you’ll have any!
Frequently Asked Questions About Sliced Baked Potatoes Recipe
What type of potatoes work best for making Sliced Baked Potatoes? Russet potatoes are ideal for Sliced Baked Potatoes due to their starchy content, which helps achieve a fluffy interior and a crispy exterior when baked.
Can I use other seasonings for Sliced Baked Potatoes? Absolutely! While the recipe calls for salt, pepper, cayenne, garlic, and paprika, feel free to experiment with other seasonings like thyme, rosemary, or even a sprinkle of Parmesan cheese for a different flavor profile.
How do I prevent my Sliced Baked Potatoes from becoming too dry? To keep your Sliced Baked Potatoes from drying out, ensure you don’t slice them too deeply. Also, brushing them with a good amount of olive oil helps lock in moisture during baking.
Can Sliced Baked Potatoes be made ahead of time? Yes, you can partially bake the potatoes ahead of time and finish baking them just before serving. This method helps maintain their texture and warmth, making them just as delicious.
What are the best dishes to serve with Sliced Baked Potatoes? Sliced Baked Potatoes are versatile and can complement a wide range of dishes, from grilled steaks and roasted chicken to vegetarian options like grilled portobello mushrooms or a hearty salad.
Are Sliced Baked Potatoes gluten-free? Yes, Sliced Baked Potatoes are naturally gluten-free, making them a great side dish option for those with gluten sensitivities or celiac disease. Just ensure that any additional toppings or seasonings used are also gluten-free.
How can I store leftovers of Sliced Baked Potatoes? Leftover Sliced Baked Potatoes can be stored in an airtight container in the refrigerator for up to 3 days. Reheat them in the oven or toaster oven to restore their crispiness before serving.
Can Sliced Baked Potatoes be frozen? While you can freeze Sliced Baked Potatoes, freezing may alter their texture. For best results, wrap them tightly in aluminum foil or store them in freezer-safe bags. Reheat from frozen in the oven for a convenient side dish option.
Conclusion: A Dish for All Seasons
This Sliced Baked Potato recipe from Longhorn Steakhouse is more than a side; it’s a celebration of simple ingredients coming together in a dish that’s comforting, flavorful, and surprisingly easy to make. It proves that with the right technique and a little love, even the most basic ingredients can be transformed into something extraordinary.
Invitation to Explore
We invite you to try this recipe, to play with it, and make it your own. Share your experiences, your variations, and your successes. Cooking is an adventure, and dishes like this are your passport to discovering flavors and techniques that turn a meal into a memory.
There’s something about a perfectly baked potato that’s hard to resist. Its crispy skin, fluffy interior, and versatility make it a beloved side dish to countless meals. But when you take that classic baked potato and add a twist inspired by Longhorn Steakhouse, you elevate it from a simple side to a show-stopping dish. This recipe for Sliced Baked Potatoes, which my mom discovered in the newspaper, promises to deliver all the savory goodness of Longhorn’s version right in your own kitchen. Let’s dive into how you can recreate this delicious dish at home.
Ingredients
Scale
4 Medium Potatoes: Russet potatoes are preferred for their starchy texture and ability to crisp up nicely.
¼ tsp Salt: For seasoning.
⅛ tsp Pepper: Adds a slight kick.
⅛ tsp Cayenne Pepper: Brings a bit of heat.
⅛ tsp Garlic Powder: For a hint of garlic flavor.
⅛ tsp Paprika: Adds color and a subtle sweetness.
4 to 6 tbsp Olive Oil: Ensures the potatoes get a nice, crispy exterior.
Instructions
Prepare the Potatoes: Start by thoroughly washing and drying the potatoes. The skin should be clean since it will be a big part of the dish’s appeal.
Slice the Potatoes: Carefully slice each potato no more than halfway down, side to side. For an extra crispy outcome, you can make these slices at angles. This technique allows the heat to penetrate the potato more deeply and creates more surface area for crisping.
Preheat the Oven: Set your oven to 400°F to ensure it’s hot enough to crisp the potatoes properly.
Season the Potatoes: Mix the salt, pepper, cayenne pepper, garlic powder, and paprika together in a small bowl. This blend of spices is the secret to giving the potatoes that signature Longhorn Steakhouse flavor.
Oil and Season: Lightly spritz the potatoes with olive oil, then sprinkle the seasoning mix evenly over each potato. The olive oil not only helps the skin crisp up but also helps the seasonings adhere to the potatoes.
Bake to Perfection: Place the seasoned potatoes on a baking tray lined with parchment paper. This ensures they won’t stick and makes cleanup a breeze. Bake in the preheated oven for 40 to 45 minutes, or until the potatoes are crispy on the outside and tender on the inside.
Serving Suggestions:
These Sliced Baked Potatoes are incredibly versatile and can be served alongside a variety of main dishes. They’re particularly good with grilled steaks, roast chicken, or even as a substantial vegetarian main with a side salad. For an added touch, consider serving them with sour cream, chives, or your favorite cheese melted in between the slices.
Notes
Recreating Longhorn Steakhouse’s Sliced Baked Potatoes at home is a simple way to bring a bit of restaurant-quality flair to your meals. This recipe not only delivers on taste but also on texture, with each bite offering a perfect mix of crispy and fluffy potato. Whether for a special occasion or a weeknight dinner, these potatoes are sure to impress and satisfy any appetite
Homemade Chicago Style Deep Dish Pizza
Embarking on a Culinary Journey: The Deep Dish Pizza
Nestled within the bustling streets of Chicago lies the heart of a culinary legend—the deep dish pizza. This isn’t just any pizza; it’s a bold reinterpretation of an Italian classic, transformed by the hands of innovative chefs into something uniquely American, uniquely Chicagoan. The deep dish pizza, with its thick crust, inverted layers of cheese, toppings, and sauce, is more than a meal; it’s a reflection of the city’s rich history, its blend of cultures, and its indomitable spirit.
The Crust: The Foundation of Flavor
The journey begins with the crust, the foundation upon which the deep dish pizza builds its legacy. Unlike the thin, crisp bases found in traditional Italian pizzas, the Chicago-style crust is thick, flaky, and buttery, with a hint of cornmeal for that signature crunch. Crafting this crust requires patience and precision, as it must be strong enough to hold the generous layers of fillings yet tender enough to melt in your mouth. The process of kneading and allowing the dough to rise is not merely a step in the recipe; it’s a labor of love, a testament to the dedication required to create something truly magnificent.
The Filling: A Symphony of Flavors
With the crust prepared, we delve into the heart of the pizza—the filling. Here, the deep dish pizza sets itself apart with its generous, layered approach. Mozzarella cheese, traditionally placed atop pizzas, instead forms the first layer above the crust, creating a gooey, stretchy base that envelops the subsequent ingredients. The choice of fillings, from the robust Italian sausage to the sautéed vegetables, is a nod to the pizza’s Italian roots, reimagined through the lens of American abundance and diversity.
The sauce, rich, hearty, and tomato-based, crowns the pizza, a bold move that defies convention and elevates the dish to new heights. This inversion of the traditional pizza assembly isn’t just for show; it serves a purpose, preventing the crust from becoming soggy and allowing each flavor to shine individually yet harmoniously.
The Baking: Where Magic Happens
Baking the deep dish pizza is where the magic truly happens. The high heat of the oven transforms the assembled ingredients into a bubbling cauldron of flavors, melding them together while the crust turns golden and flaky. This step is a waiting game, a period of anticipation that builds as the aromas fill the kitchen, heralding the completion of a culinary masterpiece.
The Experience: More Than Just Eating
But the story of the deep dish pizza doesn’t end with its preparation. This dish is meant to be shared, to bring people together in a communal experience that’s as much about conversation and connection as it is about eating. Serving the pizza straight from the pan, slicing into the thick layers and revealing the rich tapestry of ingredients within, is an act of communal joy, a celebration of the effort and love that went into its creation.
The Legacy: Chicago’s Gift to the Culinary World
The deep dish pizza is more than just a regional specialty; it’s Chicago’s gift to the culinary world, a dish that speaks to the city’s history, its cultural melting pot, and its spirit of innovation. In creating and sharing this pizza, we participate in a tradition that spans decades, a ritual that is both deeply personal and universally relatable.
Conclusion: A Culinary Adventure at Home
Making Homemade Chicago Style Deep Dish Pizza is not just about following a recipe; it’s about embarking on a culinary adventure, exploring the depths of flavor, texture, and history that this dish embodies. It’s an invitation to experiment, to customize, to make the recipe your own, and to share the fruits of your labor with loved ones. In this way, the deep dish pizza becomes a bridge between past and present, tradition and innovation, individual and community.
FAQs for Homemade Chicago Style Deep Dish Pizza
Can I use store-bought dough for the deep dish pizza?
While homemade dough is recommended for authentic flavor and texture, you can use store-bought pizza dough in a pinch. Ensure it’s at room temperature for easier handling and try to choose a high-quality dough for the best results.
What type of pan is best for making deep dish pizza?
A deep-dish pizza pan or a cast-iron skillet is ideal for making Chicago-style pizza. These pans provide the depth needed for the thick layers of toppings and help achieve a crispy, golden crust.
Can I add different toppings to my deep dish pizza?
Absolutely! While traditional toppings include Italian sausage, mozzarella cheese, and tomato sauce, feel free to customize your pizza with your favorite ingredients. Just remember to layer the cheese directly on the dough, followed by your chosen toppings, and then cover everything with sauce.
How do I prevent the crust from becoming soggy?
The key to preventing a soggy crust is to pre-cook the dough for a few minutes before adding the toppings. Additionally, layering the cheese right on top of the dough creates a barrier that helps keep the crust crisp.
How thick should the crust be for a Chicago-style deep dish pizza?
The crust should be thick enough to support the weight of the toppings but not so thick that it becomes doughy. Aim for a crust that’s about ¼ to ½ inch thick on the sides and bottom.
Can I make deep dish pizza ahead of time?
You can prepare the dough and cook the toppings ahead of time, but it’s best to assemble and bake the pizza just before serving to maintain the best texture and flavor. If you must prepare it ahead, assemble the pizza, cover it tightly with plastic wrap, and refrigerate for a few hours before baking.
How long can I store leftover deep dish pizza?
Leftover deep dish pizza can be stored in an airtight container in the refrigerator for up to 3 days. Reheat in a 350°F (175°C) oven until warm throughout.
Is it necessary to sauté the vegetables before adding them to the pizza?
Sautéing vegetables like mushrooms, onions, and bell peppers before adding them to the pizza helps to remove excess moisture and concentrate their flavors, preventing a soggy pizza and adding depth to the overall taste.
Can deep dish pizza be frozen?
Yes, you can freeze baked deep dish pizza. Cool it completely, slice it, and wrap each slice individually in plastic wrap, then foil. Freeze for up to 3 months. Reheat slices in the oven at 375°F (190°C) until heated through.
What’s the best way to slice deep dish pizza?
Use a sharp knife or pizza wheel to slice through the thick layers of the deep dish pizza. It may help to make a small incision with a knife before cutting with the pizza wheel for cleaner slices.
Homemade Chicago-Style Deep Dish Pizza is a culinary adventure that brings the Windy City’s iconic dish right into your kitchen. Known for its thick, buttery crust that lines a deep pan, creating a generous edge to hold a hearty layer of cheese , toppings, and a chunky tomato sauce, this pizza is a meal in itself. Here’s how to create this delicious deep-dish masterpiece from scratch:
Ingredients
Scale
For the Dough:
4 cups of all-purpose flour
3 tablespoons of cornmeal
1 ¾ teaspoons of salt
2 ¾ teaspoons of instant yeast
4 tablespoons of unsalted butter, melted
2 tablespoons of olive oil
1 ¾ cups of lukewarm water
For the Filling:
2 tablespoons of olive oil
1 lb of mozzarella cheese, sliced
1 lb of Italian sausage, cooked and crumbled (optional)
1 large onion, diced and sautéed (optional)
2 cups of mushrooms, sliced and sautéed (optional)
1 green bell pepper, diced and sautéed (optional)
3 cups of marinara sauce
½ cup of grated Parmesan cheese
2 teaspoons of dried oregano
Salt and pepper to taste
Instructions
1. Prepare the Dough:
In a large bowl, mix the flour, cornmeal, salt, and instant yeast.
Add the melted butter, olive oil, and lukewarm water to the dry ingredients. Stir until everything is well combined.
Knead the dough on a floured surface until it’s smooth and elastic, about 7 minutes.
Place the dough in a lightly oiled bowl, cover it with a damp cloth, and let it rise until doubled in size, about 60 minutes.
2. Preheat the Oven:
Preheat your oven to 475°F (245°C). If you have a pizza stone, place it in the oven to preheat as well.
3. Prepare the Filling:
While the dough is rising, prepare your filling. Cook and crumble the Italian sausage, and sauté the onion, mushrooms, and green bell pepper in olive oil until they are soft and slightly caramelized.
4. Assemble the Pizza:
Once the dough has risen, punch it down and roll it out on a floured surface to about ½ inch thick. Transfer it to a deep-dish pizza pan or a cast-iron skillet, making sure to press it up the sides of the pan.
Layer the mozzarella cheese slices on the bottom of the dough.
Add the cooked sausage, sautéed vegetables, or any other toppings of your choice.
Pour the marinara sauce over the top of the fillings. Sprinkle with grated Parmesan cheese, dried oregano, salt, and pepper.
5. Bake the Pizza:
Place the pizza in the preheated oven on the pizza stone or directly on the rack.
Bake for about 25-30 minutes, or until the crust is golden brown and the cheese is bubbly.
Let the pizza cool for a few minutes before slicing and serving.
Notes
Tips:
For an authentic Chicago-style experience, make sure the sauce is on top of the cheese and fillings, not beneath. This unique layering is what sets Chicago deep-dish pizza apart from other styles.
Feel free to customize the fillings according to your preferences. Traditional Chicago deep-dish pizza often includes layers of mozzarella cheese, Italian sausage, pepperoni, and vegetables, but the possibilities are endless.
Enjoy your Homemade Chicago Style Deep Dish Pizza with family and friends for a taste of Chicago no matter where you are!
Fall Tater Tot Casserole
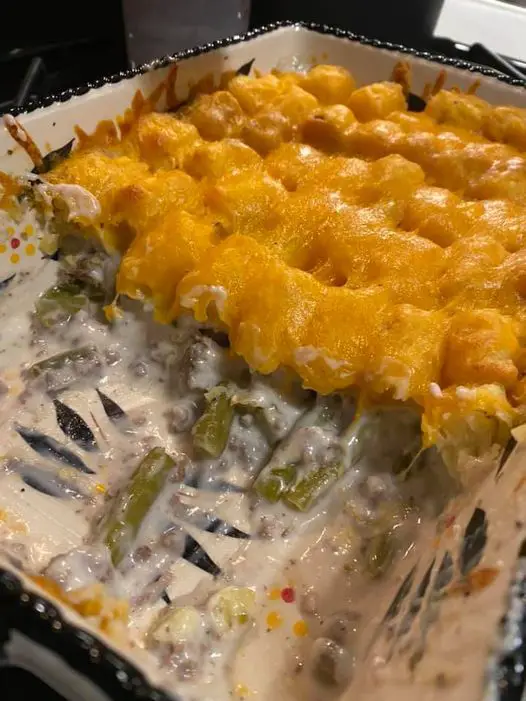
Embarking on a culinary journey through the heart of comfort food, there’s a dish that stands out for its simplicity, warmth, and the nostalgia it evokes: the Yummy Fall Tater Tot Casserole. This dish, a harmonious blend of crunchy tater tots, savory hamburger meat, creamy mushroom soup, tender green beans, and melted cheddar cheese, is more than just a meal; it’s a testament to the power of comfort food to bring people together, creating moments of joy and satisfaction. As we delve into the intricacies of this beloved recipe, we uncover not just the steps to create it but the stories, variations, and tips that make it a fall favorite in many households.
The Essence of Comfort Food
At its core, comfort food is about simplicity and the emotional connections it fosters. The Yummy Fall Tater Tot Casserole exemplifies this, combining basic ingredients in a way that is both straightforward and sublime. Each component brings its unique flavor and texture, contributing to the dish’s overall heartiness and appeal. As the cooler months approach, this casserole becomes a beacon of warmth, embodying the essence of fall with every bite.
Origins and Traditions
While the exact origins of tater tot casseroles, often called “hotdishes” in certain regions, are difficult to pinpoint, they have been a staple of American cuisine for decades. These casseroles are particularly beloved in the Midwest, where they symbolize communal gatherings, family dinners, and potluck suppers. The tradition of layering ingredients in a single dish and baking them to perfection is a testament to the ingenuity of home cooks looking to create filling, delicious meals that can feed a crowd without breaking the bank.
Crafting the Perfect Casserole
Ingredient Breakdown
Hamburger: The foundation of the casserole, providing rich, meaty flavors that anchor the dish.
Cream of Mushroom Soup: Offers a creamy base that binds the ingredients together, adding depth and umami.
Green Beans: Introduce a pop of color and a tender crunch, balancing the richness of the meat and cheese.
Tater Tots: The crowning glory of the casserole, these potato nuggets add a satisfying crispness and a nostalgic nod to childhood meals.
Cheddar Cheese: Melts into a gooey, golden layer, adding a sharpness that complements the other flavors beautifully.
Step-by-Step Guide
The process of assembling the casserole is as important as the ingredients themselves. Starting with the cooked hamburger, which is mixed with the cream of mushroom soup and green beans, the base is then layered with partially baked tater tots to ensure they retain their crispness. Topped with a generous sprinkle of cheddar cheese, the casserole is baked until bubbly and golden, a visual and olfactory delight that promises immense satisfaction.
Variations and Personal Touches
The beauty of the Yummy Fall Tater Tot Casserole lies in its versatility. Vegetarians can substitute the hamburger with a plant-based protein or additional vegetables, while those looking for a bit of spice might add jalapeños or chili powder to the mix. Experimenting with different soups, cheeses, and even types of potatoes can result in a dish that reflects personal tastes and dietary needs, making it a versatile recipe that invites creativity.
Serving and Pairing
The best way to serve this casserole is straight from the oven, when the cheese is at its meltiest and the aroma fills the kitchen. It pairs beautifully with a simple side salad or steamed vegetables to balance the richness, and a light, crisp white wine can elevate the meal to new heights. Whether for a cozy family dinner or a casual gathering with friends, this casserole is sure to be the centerpiece of the table, inviting everyone to dig in and enjoy.
The Role of Comfort Food in Our Lives
Beyond its ingredients and preparation, the Yummy Fall Tater Tot Casserole embodies the role of comfort food in our lives. It’s a reminder of the power of food to evoke memories, bring comfort, and gather loved ones around the table. In a world that often moves too fast, sitting down to a meal like this is a way to pause, reflect, and appreciate the simple pleasures in life.
Conclusion
The Yummy Fall Tater Tot Casserole is more than just a recipe; it’s a journey through the flavors and memories that define comfort food. As we explore its origins, ingredients, and the countless ways it can be customized, we’re reminded of the joy of cooking and the warmth it brings to our lives. This casserole, with its crispy tater tots, savory meat, creamy soup, and melted cheese, is a celebration of autumn, a tribute to home cooking, and a symbol of the comfort and joy that food can bring into our lives.
FAQs for Yummy Fall Tater Tot Casserole
1. Can I make this casserole ahead of time?
Yes, you can assemble the casserole ahead of time and store it in the refrigerator for up to 24 hours before baking. If you choose to do this, you might need to add a few extra minutes to the baking time since you’ll be starting from a colder temperature.
2. Is it possible to freeze this casserole?
Absolutely. Assemble the casserole without baking, cover it tightly with foil, and freeze. When ready to enjoy, thaw in the refrigerator overnight and bake as directed, adding a few extra minutes if necessary.
3. Can I use fresh green beans instead of canned or frozen?
Yes, fresh green beans can be used. It’s best to blanch them first by boiling for 3-4 minutes and then plunging into ice water to stop the cooking process. This ensures they’re tender but not overcooked when the casserole is baked.
4. What are some vegetarian alternatives for the hamburger?
For a vegetarian version, consider using a plant-based ground meat substitute, lentils, or a mixture of mushrooms and quinoa for texture and protein.
5. How can I make this casserole healthier?
To make a healthier version, opt for low-fat cream of mushroom soup, lean ground turkey or chicken instead of hamburger, and a reduced-fat cheese. You can also add more vegetables to the mix, such as diced bell peppers or zucchini.
6. Can I add other vegetables to the casserole?
Definitely! Feel free to add your favorite vegetables to the casserole. Corn, peas, diced carrots, and broccoli are great additions that can add flavor and nutritional value.
7. What if I don’t like cream of mushroom soup?
If cream of mushroom isn’t your favorite, you can substitute it with another cream soup such as cream of chicken, cream of celery, or even a homemade white sauce flavored with your choice of spices.
8. Can I use something other than tater tots?
While tater tots are a key ingredient in this casserole, you could substitute with diced or sliced potatoes for a similar effect. Just be aware that the texture and cooking time might vary slightly.
9. How do I know when the casserole is done?
The casserole is done when the cheese is melted and bubbly, and the edges of the tater tots are golden and crispy. You can also insert a knife in the center to ensure it’s heated through.
10. Any tips for making the tater tots extra crispy?
To ensure the tater tots are extra crispy, bake them separately on a baking sheet for a few minutes longer than the package suggests before adding them to the casserole. This extra step can make all the difference in achieving that desired crunch.
Creating a Yummy Fall Tater Tot Casserole is a fantastic way to enjoy a warm, hearty meal that combines simplicity with delicious flavors. This dish, inspired by the comfort food tradition, showcases a blend of creamy, crunchy, and savory elements that come together beautifully in one bake. Here’s how to make it:
Ingredients
Scale
1 family-size can of cream of mushroom soup
1 lb of hamburger, cooked beforehand
2 cans of green beans or 1 bag of frozen green beans
1 bag of tater tots
1 small bag of shredded cheddar cheese
Instructions
Preparing the Ingredients:
Cook the Hamburger: Begin by cooking the hamburger in a skillet over medium heat until it’s fully cooked. Make sure to break it into small pieces as it cooks for an even distribution in the casserole.
Bake Tater Tots Halfway: Preheat your oven to 425°F (218°C) and spread the tater tots on a baking sheet. Bake them for about 10 minutes or until they start to turn golden. This step ensures they remain crispy in the casserole.
Heat Cream of Mushroom Soup: In a saucepan, gently heat the cream of mushroom soup over medium heat. You don’t need to dilute the soup; just warm it up so it mixes easily with the other ingredients.
Mix Green Beans and Hamburger with Soup: Once the soup is heated, mix in the cooked hamburger and green beans. Stir until these ingredients are well combined with the soup, ensuring an even distribution of flavors.
Layering the Casserole:
First Layer – Meat, Green Bean, and Soup Mixture: In a large baking dish, spread the meat, green bean, and soup mixture evenly. This creates a flavorful and hearty base for your casserole.
Second Layer – Tater Tots: Arrange the partially baked tater tots on top of the meat and green bean mixture in a single layer. You can place them close together so the entire surface is covered.
Final Layer – Cheese: Sprinkle the shredded cheddar cheese generously over the tater tots. The cheese will melt and become bubbly in the oven, adding a deliciously gooey texture to the dish.
Baking the Casserole:
Preheat the Oven: Preheat your oven to 375°F (190°C), ready for the final bake.
Bake: Place the assembled casserole in the oven and bake for about 20 minutes, or until the cheese is melted and bubbly, and the edges of the tater tots are crispy and golden.
Serving:
Let the casserole cool for a few minutes after taking it out of the oven. This brief resting time allows the layers to set slightly, making it easier to serve. Cut into squares and enjoy a comforting, warm serving of Yummy Fall Tater Tot Casserole.
Notes
This dish is perfect for a cozy fall evening, bringing together the flavors and textures of the season in a simple yet satisfying meal. Whether you’re making it for a weeknight dinner or a casual gathering, this casserole promises to be a hit, offering a taste of home-cooked comfort with every bite.