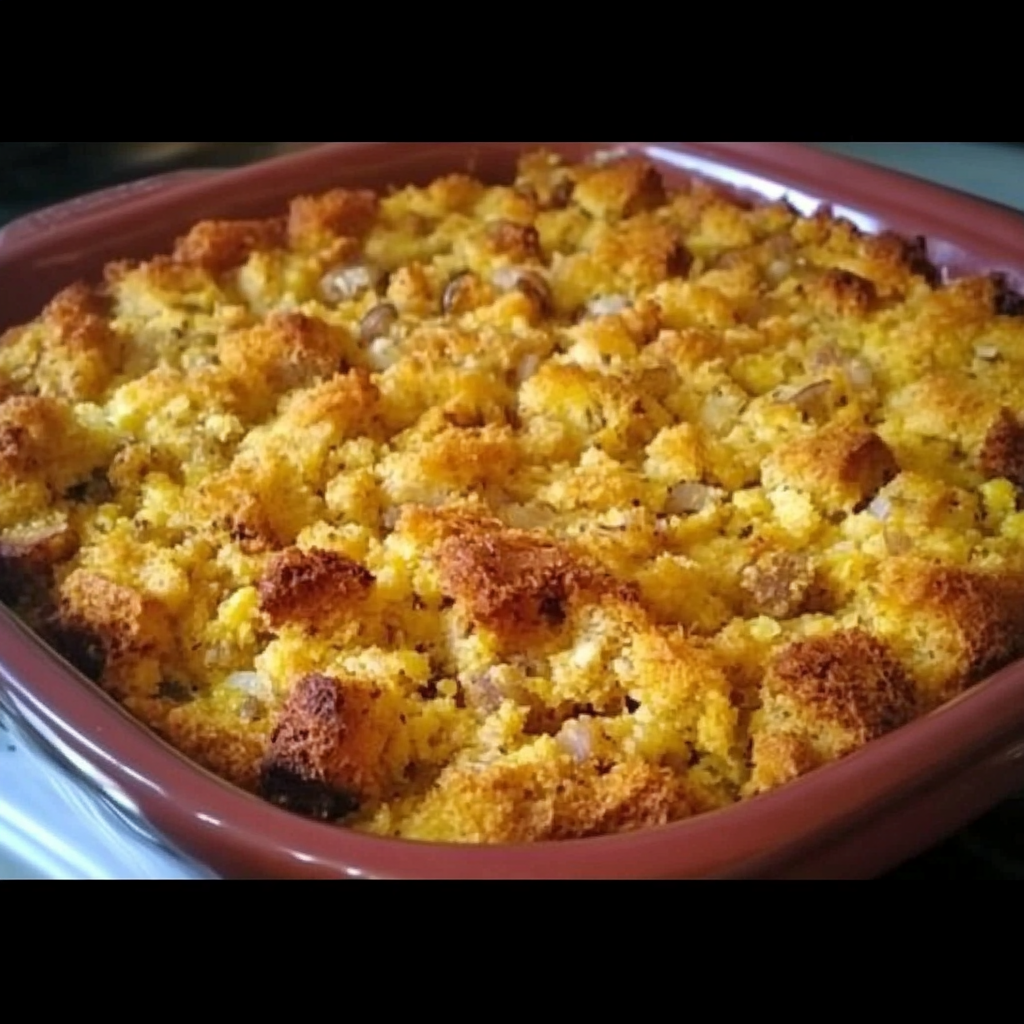
Family Favorite Slow Cooked Pot Roast: The Perfect Comfort Meal

slow cooker pot roast, easy pot roast recipe, family pot roast, crockpot pot roast, tender beef pot roast

Family Favorite Slow Cooked Pot Roast

Family Favorite Slow Cooked Pot Roast is a hearty, comforting meal that brings the family together. Made with simple ingredients and the convenience of a slow cooker, this recipe is perfect for busy families looking for a flavorful, tender roast. In this guide, we’ll walk through the steps to create a perfectly cooked pot roast and offer variations to suit your taste.


Why Slow Cooking is Perfect for Pot Roast

Slow cooking allows the meat to break down over time, creating a tender, juicy roast that’s full of flavor. The low, slow heat ensures that even the toughest cuts of meat become fork-tender. This method is ideal for pot roast because it gives time for the vegetables and meat to meld together into a rich, savory dish.

Internal linking opportunity: If you’re interested in more slow cooker recipes, be sure to check out Slow Cooker Magic: Unveiling the Ease of Crock Pot Baked Ziti.


Ingredients You’ll Need

Here’s what you’ll need for the perfect slow-cooked pot roast:

  • 3-4 lbs chuck roast
  • 4 large carrots, peeled and cut into chunks
  • 4 medium potatoes, quartered
  • 2 onions, quartered
  • 3 cloves garlic, minced
  • 2 cups beef broth
  • 2 tablespoons Worcestershire sauce
  • Salt and pepper to taste
  • 2 tablespoons olive oil for searing

Step-by-Step Instructions

Step 1: Sear the Meat

Before placing your roast in the slow cooker, sear it in a hot skillet with olive oil to lock in the flavor. Sear each side for 3-4 minutes until browned.

Step 2: Prepare the Vegetables

Layer the carrots, potatoes, and onions at the bottom of your slow cooker. Place the seared roast on top of the vegetables. Add minced garlic, beef broth, Worcestershire sauce, and season with salt and pepper.

Step 3: Cook on Low

Set your slow cooker to low and cook for 8-10 hours, or on high for 5-6 hours. The longer cooking time at a lower heat will give you the most tender result.

Step 4: Let it Rest

Once cooked, remove the roast from the slow cooker and let it rest for 10 minutes before slicing. This step ensures that the juices redistribute throughout the meat.

Internal linking opportunity: Pair this dish with a comforting side like Crockpot Potato Soup with Hashbrowns for a complete meal.


Tips for the Best Slow Cooked Pot Roast

  • Sear the Meat: Searing before slow cooking adds a depth of flavor that you won’t get otherwise.
  • Use Low Heat: The low and slow method is best for achieving tender meat. High heat can make the meat tough.
  • Add Vegetables Wisely: If you like firmer vegetables, consider adding them halfway through the cooking time.

Recipe Variations

  • Red Wine Pot Roast: Add 1 cup of red wine for a richer flavor.
  • Herb-Crusted Roast: Use fresh herbs like rosemary and thyme to create a herb crust on your roast.
  • Spicy Pot Roast: Add chili flakes or jalapeños for a bit of heat.

Storing and Reheating

Storing

Keep any leftover pot roast in an airtight container in the refrigerator for up to 3 days.

Reheating

To reheat, place the roast in an oven-safe dish, cover with foil, and heat at 300°F for about 20 minutes.


FAQs

Can I cook this on high instead of low?

Yes, you can cook it on high for 5-6 hours, but for the most tender result, cooking on low is recommended.

Can I use a different cut of meat?

Chuck roast is preferred because of its marbling, but you can also use brisket or bottom round roast.

How do I prevent the roast from drying out?

Make sure you have enough liquid in the slow cooker. The beef broth and Worcestershire sauce help keep the meat moist.


Pairing and Serving Suggestions

Serve your pot roast with mashed potatoes, rice, or fresh bread to soak up the flavorful juices. A side salad or roasted vegetables also pairs wonderfully with this dish.

Internal linking opportunity: Looking for more hearty meal ideas? Try this Ultimate Comfort Food: Bacon Ranch Chicken Quesadillas for another family favorite.


Conclusion

Slow-cooked pot roast is a timeless dish that is sure to please your family. With minimal prep and a slow cooker, you can enjoy a tender, flavorful meal without much effort. Be sure to try out the variations and make this dish your own.


External Links:

  1. “Mastering the Best Pot Roast”Serious Eats
    Anchor text: Mastering the Best Pot Roast
  2. “Perfect Pot Roast Recipe”The Pioneer Woman
    Anchor text: Perfect Pot Roast Recipe
  3. “Slow Cooker Pot Roast Tips”Bon Appétit
    Anchor text: Slow Cooker Pot Roast Tips

Mom’s Tender and Juicy Pork Chops: The Ultimate Comfort Food Recipe

juicy pork chops, tender pork chop recipe, pork chops with gravy, easy pork chop recipe, moist pork chops

Mom’s Tender and Juicy Pork Chops Recipe

Cooking tender and juicy pork chops is a skill every home cook should master. This recipe is a family favorite, passed down through generations, ensuring the pork chops come out moist and flavorful every time. Whether you prefer pan-fried, baked, or smothered in gravy, this recipe delivers delicious results.

For those interested in exploring other comfort foods, you can check out Rediscovering Comfort: Sour Cream and French Fried Onion Pork Chops for another pork chop variation or pair your meal with Slow Cooker Baked Ziti for a delightful Italian twist.


Why Mom’s Pork Chops Are So Tender and Juicy

One of the secrets to these pork chops is the brining process, which keeps the meat tender while infusing it with flavor. Cooking techniques such as flour-coating, frying, or baking are then used to seal in the moisture. The result is a dish that feels indulgent but remains easy to prepare.

Pair these chops with a side of mashed potatoes or a light salad for a balanced meal. You can also check out this guide on Slow Cooker Baked Ziti for more ideas on what to serve.


Ingredients

  • 4 pork chops (bone-in or boneless)
  • 1 cup flour
  • Salt and pepper to taste
  • 1 medium onion, sliced
  • 1 cup chicken broth
  • 2 tbsp olive oil or butter

Cooking Instructions

Step 1: Brine the Pork Chops

To ensure juicy pork chops, place the chops in a saltwater brine for at least 4 hours. This step tenderizes the meat and enhances the flavor.

Step 2: Coat and Fry

Pat the pork chops dry, then season with salt and pepper. Coat each chop lightly in flour. In a large skillet, heat the oil or butter over medium heat, then fry the chops for 3-4 minutes on each side, until they are golden brown.

Step 3: Prepare the Gravy

Remove the pork chops from the skillet and set them aside. Add the sliced onion to the pan and sauté until softened. Pour in the chicken broth, deglazing the pan, and let the mixture simmer for a few minutes to thicken into a rich gravy. Pour this gravy over the pork chops and serve.


Tips for Perfect Pork Chops

  • Don’t Overcook: Pork chops should be cooked to an internal temperature of 145°F for maximum juiciness.
  • Use Bone-In Chops: Bone-in pork chops tend to retain more moisture and flavor compared to boneless.
  • Rest the Meat: After cooking, allow the chops to rest for a few minutes before serving. This lets the juices redistribute within the meat.

Pairings and Serving Suggestions

To complete your meal, consider serving these pork chops with Crockpot Potato Soup for a hearty side dish or enjoy them with a side of roasted vegetables. Other comfort meals such as Ultimate Comfort Food: Bacon Ranch Chicken Quesadillas also pair well with this dish.


Recipe Variations

  • Baked Pork Chops: For a healthier version, bake the pork chops in the oven at 350°F for 25-30 minutes.
  • Smothered Pork Chops: After frying, cover the chops with sautéed onions and a creamy gravy for a Southern-style dish.
  • Spicy Pork Chops: Add cayenne pepper or paprika to the flour coating for an extra kick.

FAQs

  1. Can I make this recipe without brining the pork chops?
    Yes, but brining helps keep the meat juicy. If you skip this step, ensure the chops don’t overcook to retain moisture.
  2. Can I use boneless pork chops for this recipe?
    Yes, boneless pork chops work well, but be careful not to overcook them, as they tend to dry out faster than bone-in chops.
  3. How can I make this recipe gluten-free?
    Substitute the flour for a gluten-free alternative, such as almond flour or cornstarch.
  4. What should I serve with pork chops?
    Mashed potatoes, roasted vegetables, or a fresh salad are all excellent choices. You can also try something more indulgent like Slow Cooker Baked Ziti.

Conclusion

Mom’s Tender and Juicy Pork Chops are a comforting dish that’s perfect for any dinner occasion. With simple ingredients and a few tried-and-true techniques, you can create pork chops that are succulent, flavorful, and sure to impress. Try different variations and pair them with your favorite sides to make this recipe your own.

For more inspiration on comfort foods, check out Rediscovering Comfort: Sour Cream and French Fried Onion Pork Chops or Slow Cooker Baked Ziti.

Tex-Mex Beef Enchiladas: Easy Recipe for Bold Flavor

beef enchiladas, easy beef enchiladas, Tex-Mex enchilada recipe, cheesy beef enchiladas, Mexican beef enchiladas

Tex-Mex Beef Enchiladas Recipe: Flavor-Packed Comfort Food

If you’re a fan of bold flavors and comforting meals, Tex-Mex Beef Enchiladas are the perfect choice. These enchiladas are loaded with seasoned beef, wrapped in soft corn tortillas, and smothered in a rich enchilada sauce. Whether you’re preparing them for a family dinner or serving at a gathering, this dish is sure to impress.

Enchiladas pair wonderfully with sides like Crockpot Potato Soup for a cozy meal or Slow Cooker Baked Ziti for a pasta alternative.


What Makes Tex-Mex Beef Enchiladas So Special?

Enchiladas are a staple in Tex-Mex cuisine, blending traditional Mexican flavors with Texas-style comfort food. The combination of ground beef, warm tortillas, and spicy enchilada sauce creates a meal that’s both hearty and satisfying. The dish is versatile, allowing you to customize the heat level and the ingredients to suit your preferences.

For those looking to spice up their weeknight dinners, Tex-Mex enchiladas are a flavorful option. If you’re a fan of one-pan dishes, you might also like the One-Pot Creamy Broccoli Parmesan Noodles.


Ingredients

  • Main Ingredients:
    • 1 lb ground beef
    • 1 medium onion, chopped
    • 2 cloves garlic, minced
    • 10 soft corn tortillas
    • 1 cup shredded cheddar cheese
    • 2 cups red enchilada sauce or homemade chili gravy

Step-by-Step Recipe Guide

1. Preparing the Filling

In a skillet, brown the ground beef with onions and garlic. Drain any excess fat and season the mixture with cumin, chili powder, and a pinch of salt. This flavorful beef filling will be the core of your enchiladas.

2. Rolling the Tortillas

To assemble the enchiladas, dip each tortilla into the enchilada sauce, then fill it with a spoonful of the beef mixture. Roll the tortillas tightly and place them seam-side down in a greased baking dish.

3. Baking the Enchiladas

Once your dish is filled, pour the remaining enchilada sauce over the top and sprinkle generously with shredded cheese. Bake at 375°F for about 20-25 minutes, or until the cheese is bubbly and golden brown.


Tips for Perfect Tex-Mex Enchiladas

  • Use soft corn tortillas: For authentic Tex-Mex flavor, corn tortillas are a must. Be sure to dip them in sauce before rolling to prevent cracking.
  • Customize the heat level: Add diced jalapenos or extra chili powder to the beef mixture for a spicier kick.
  • Add variety: Consider adding sautéed veggies like bell peppers or spinach for extra texture and flavor.

Serving Suggestions

Tex-Mex Beef Enchiladas are a hearty main course, but they pair beautifully with classic sides like Mexican rice, refried beans, or a light salad. For dessert, try serving Smores Jars for a sweet and smoky finish to your Tex-Mex meal.


Storing and Reheating Tex-Mex Beef Enchiladas

  • Storing: Leftover enchiladas can be stored in an airtight container in the fridge for up to 3 days.
  • Freezing: To freeze, assemble the enchiladas in a baking dish and cover tightly before freezing. Thaw overnight before baking.
  • Reheating: Reheat individual portions in the microwave or bake at 350°F until warmed through.

Variations on Tex-Mex Beef Enchiladas

  • Cheesy Enchiladas: Use a blend of Monterey Jack and cheddar for an extra creamy, cheesy topping.
  • Vegetarian Enchiladas: Replace the ground beef with a medley of sautéed vegetables like zucchini, bell peppers, and black beans.
  • Spicy Enchiladas: Add a few chopped jalapenos or serrano peppers to the beef filling for added heat.

Frequently Asked Questions (FAQs)

  1. Can I make this dish ahead of time?
    Yes, you can assemble the enchiladas up to a day ahead and store them covered in the refrigerator. Simply bake when ready to serve.
  2. Can I use flour tortillas instead of corn?
    Corn tortillas are traditional, but flour tortillas can also be used for a softer texture.
  3. Can I make this gluten-free?
    Yes! Use gluten-free corn tortillas and check that your enchilada sauce is gluten-free.
  4. How do I keep tortillas from breaking?
    Warm the tortillas before filling or dip them in enchilada sauce to make them more pliable.

Conclusion

Tex-Mex Beef Enchiladas are a delicious and easy dish that can be customized to suit any taste. Whether you prefer extra cheese, added veggies, or extra spice, this dish is perfect for weeknight dinners or entertaining guests. Serve it with your favorite sides, and enjoy a meal packed with flavor and comfort.

For more savory dishes, check out Crockpot Ranch Chicken and Potatoes, which pairs wonderfully with enchiladas.

Ultimate Peanut Butter Pie: A Creamy, No-Bake Dessert

peanut butter pie, no-bake peanut butter pie, creamy peanut butter pie, best peanut butter pie, easy peanut butter pie recipe

Ultimate Peanut Butter Pie Recipe: Creamy, Decadent, and Irresistible

The Ultimate Peanut Butter Pie is a rich, creamy dessert perfect for peanut butter lovers. With its smooth peanut butter filling, crumbly crust, and optional chocolate ganache topping, this no-bake or baked pie is ideal for any occasion. If you’re looking for an easy dessert that’s sure to please a crowd, this is the perfect recipe.


What Makes the Ultimate Peanut Butter Pie So Special?

This peanut butter pie is packed with flavor and texture. The peanut butter filling is creamy, the crust is either made from crushed Oreos or graham crackers, and the optional chocolate ganache topping adds a decadent touch. If you want to take your dessert game to the next level, this is the recipe for you.

For those who enjoy rich, indulgent desserts, try pairing this pie with Crockpot Potato Soup with Hashbrowns for a full comfort food experience.

Ingredients

  • Crust:
    • 1 package of Oreo cookies or graham crackers, crushed
    • 6 tablespoons melted butter
  • Filling:
    • 1 cup creamy peanut butter
    • 8 oz cream cheese, softened
    • 1 cup powdered sugar
    • 1 cup whipped cream
  • Optional Topping:
    • 1 cup chocolate chips
    • 1/2 cup heavy cream

Step-by-Step Recipe Guide

1. Preparing the Crust

Mix the crushed Oreos or graham crackers with melted butter, then press it firmly into a pie pan. Chill the crust in the refrigerator for at least 30 minutes to set. For a more indulgent option, consider using an Oreo crust, as it pairs beautifully with the creamy filling.

2. Making the Peanut Butter Filling

In a large bowl, beat together the peanut butter, softened cream cheese, and powdered sugar until smooth and creamy. Fold in the whipped cream to make the filling extra light and fluffy. Pour the filling into the chilled crust and smooth out the top.

3. Optional Chocolate Ganache

For an extra decadent touch, melt the chocolate chips with heavy cream in a saucepan over low heat. Stir until smooth and glossy, then pour the ganache over the peanut butter filling. Chill the pie until the ganache sets.

If you’re a fan of rich, indulgent desserts, try the Slow Cooker Baked Ziti for another comforting recipe.


Tips for Making the Ultimate Peanut Butter Pie

  • Use quality peanut butter: Creamy peanut butter works best, but if you prefer a little crunch, feel free to use chunky peanut butter.
  • Ensure the cream cheese is softened: This helps prevent lumps and makes the filling smooth and creamy.
  • Chill thoroughly: The pie needs to be chilled for at least 3 hours before serving to let the filling set properly.

Creative Variations

  1. Chocolate Peanut Butter Pie: Swap the graham cracker crust for a chocolate cookie crust and add an extra drizzle of chocolate on top.
  2. Gluten-Free Peanut Butter Pie: Use gluten-free graham crackers or cookies for the crust to make this pie gluten-free.
  3. Banana Peanut Butter Pie: Add a layer of sliced bananas on top of the crust before adding the peanut butter filling for a fruity twist.

Serving Suggestions

Serve the Ultimate Peanut Butter Pie chilled, topped with whipped cream or a drizzle of chocolate sauce. For a complete dessert spread, pair it with other easy-to-make treats like No Bake Cheesecake Bites. It’s the perfect ending to a meal and sure to impress your guests.


How to Store and Reheat Peanut Butter Pie

  • Storage: Keep the pie in the fridge for up to 3 days. Cover it tightly with plastic wrap or aluminum foil to keep it fresh.
  • Freezing: You can freeze this pie for up to 2 months. Wrap the pie tightly in plastic wrap and then in aluminum foil. Thaw in the fridge before serving.

FAQs: Answering Your Common Questions

  1. Can I make this pie ahead of time?
    Yes, it can be made 1-2 days in advance and kept in the fridge until ready to serve.
  2. Can I use natural peanut butter?
    Natural peanut butter can be used, but it may affect the texture slightly due to oil separation. Be sure to stir the peanut butter well before using it in the recipe.
  3. Is this recipe gluten-free?
    If you use gluten-free graham crackers or cookies for the crust, the rest of the recipe is naturally gluten-free.
  4. Can I freeze the pie?
    Yes, you can freeze it. Just make sure to wrap it tightly to avoid freezer burn.

Nutritional Information

Each serving of Ultimate Peanut Butter Pie provides approximately:

  • 400-450 calories
  • 30g fat
  • 35g carbohydrates
  • 8g protein

This pie is a rich dessert, but peanut butter is packed with protein and healthy fats, making it a satisfying and indulgent treat. For a healthier option, reduce the sugar or use a lighter whipped topping.

For another decadent yet comforting dessert, try Peanut Butter Blossoms, which perfectly complement this pie.


Conclusion

The Ultimate Peanut Butter Pie is the perfect dessert for any peanut butter lover. Whether you stick with the classic recipe or add creative variations like a chocolate ganache or sliced bananas, this pie is sure to be a hit. With its smooth, creamy filling and rich crust, it’s a dessert you’ll come back to again and again. Enjoy it chilled and indulge in the ultimate peanut butter experience!

Southern Goulash Recipe: A Hearty, Flavorful One-Pot Classic

southern goulash recipe, easy goulash, one-pot goulash, southern-style goulash, beef goulash, hearty goulash, macaroni goulash

Article: Southern Goulash: A Hearty, Flavorful Southern Classic

Southern Goulash is the ultimate comfort food, blending hearty ingredients like ground beef, pasta, tomatoes, and rich spices for a simple one-pot meal. This Southern variation of goulash brings together classic ingredients with a Southern twist. Here’s everything you need to know to create this budget-friendly and filling meal, complete with internal links to other great comfort food recipes.


Why Southern Goulash Is a Must-Try

Southern Goulash offers a hearty and flavorful dish that’s easy to make and perfect for busy weeknights or family gatherings. With just a few ingredients, you can create a meal that’s filling and loved by both kids and adults.

Pair this dish with a side of cornbread or garlic bread and you’ve got a meal everyone will enjoy. For another comforting dish, try Crockpot Potato Soup with Hashbrowns, which complements this Southern classic perfectly.

Ingredients

  • For the Goulash:
    • 1 lb ground beef or turkey
    • 1 medium onion, chopped
    • 2 cloves garlic, minced
    • 1 can (28 oz) crushed tomatoes
    • 2 cups beef broth or water
    • 1 ½ cups elbow macaroni
    • Salt, pepper, paprika, and cayenne to taste

Nutritional Breakdown

Southern Goulash offers a good balance of proteins, carbohydrates, and fats. A typical serving provides approximately 350-400 calories, depending on the specific ingredients used. To make the dish lighter, you can substitute lean ground beef or turkey and use whole-wheat pasta.


Step-by-Step Recipe Guide

1. Preparing the Meat

In a large skillet or pot, brown the ground beef or turkey over medium heat. Add the chopped onions and garlic, cooking until the onions are softened and the meat is fully browned. Drain any excess fat from the pan.

2. Add the Seasonings and Liquids

Stir in the crushed tomatoes, beef broth, salt, pepper, paprika, and cayenne. Bring the mixture to a boil, then reduce the heat and let it simmer for 10-15 minutes to allow the flavors to meld.

3. Add the Pasta

Once the sauce has simmered, stir in the elbow macaroni. Let the goulash cook for another 10-12 minutes, or until the pasta is tender. Be sure to stir occasionally to prevent the pasta from sticking to the bottom of the pan.

For another easy and comforting meal, consider making Slow Cooker Baked Ziti, which offers a similar warm and hearty experience.

Tips for Perfect Southern Goulash

  • Use fresh ingredients: Fresh garlic, onions, and high-quality ground beef will elevate the flavors of your goulash.
  • Cook the pasta directly in the sauce: This allows the pasta to absorb the flavors of the goulash, making it even more delicious.
  • Customize the seasoning: For extra spice, add more cayenne or a dash of red pepper flakes.

Creative Variations of Southern Goulash

  • Cheesy Southern Goulash: Stir in shredded cheddar or mozzarella cheese just before serving for a cheesy twist on the classic.
  • Spicy Southern Goulash: Add jalapenos or extra cayenne for a kick of heat. This variation is perfect for spice lovers.
  • Vegetarian Goulash: Swap the ground meat for a plant-based protein or simply add extra vegetables like bell peppers, zucchini, or mushrooms.

Serving Suggestions and Pairings

Serve Southern Goulash hot, garnished with fresh parsley or a sprinkle of cheese. It pairs well with cornbread, garlic bread, or even a side of Sheetpan Pancakes for a unique Southern-inspired meal.

For a refreshing beverage, sweet tea or iced lemonade perfectly complements the rich and savory flavors of this dish.


How to Store and Reheat Southern Goulash

  • Storage: Store any leftovers in an airtight container in the refrigerator for up to 3 days. Southern Goulash also freezes well for up to 3 months.
  • Reheating: Reheat on the stovetop or in the microwave, adding a bit of broth or water to loosen the sauce if it thickens too much in storage.

Frequently Asked Questions (FAQs)

1. What is the difference between Southern Goulash and Hungarian Goulash?

Hungarian goulash is more of a stew with chunks of beef and a broth-based sauce, whereas Southern goulash uses ground meat, pasta, and a tomato-based sauce, making it a simpler, one-pot meal.

2. Can I use a different type of pasta in this recipe?

Absolutely! While elbow macaroni is traditional, you can use any short pasta like rotini, shells, or penne.

3. How can I make this dish gluten-free?

To make this dish gluten-free, use gluten-free pasta and ensure that your beef broth and canned tomatoes are gluten-free as well.

4. Can I make Southern Goulash in a slow cooker?

Yes! Brown the meat first, then add all the ingredients except the pasta to your slow cooker. Cook on low for 4-6 hours, adding the pasta during the last 30 minutes.


Nutritional Benefits of Southern Goulash

Southern Goulash offers a balanced meal with protein from the ground beef or turkey, carbohydrates from the pasta, and vitamins and fiber from any added vegetables. Using lean ground meat or whole-wheat pasta can make it a lighter, healthier option without sacrificing flavor.

For a lighter version of this dish, try pairing it with a side salad or consider making Chicken Bacon Ranch Potatoes for a more decadent meal.


Conclusion

Southern Goulash is a budget-friendly, easy-to-make dish that brings comfort and flavor to any dinner table. With its rich tomato base, tender pasta, and seasoned meat, it’s a versatile meal perfect for family dinners, potlucks, and more. Try one of the creative variations or serve it with a side of cornbread for the ultimate Southern experience.

Whether you’re serving this hearty dish or looking for other comfort food options, such as No Peek Beef Tips, you’re sure to satisfy everyone at the table!