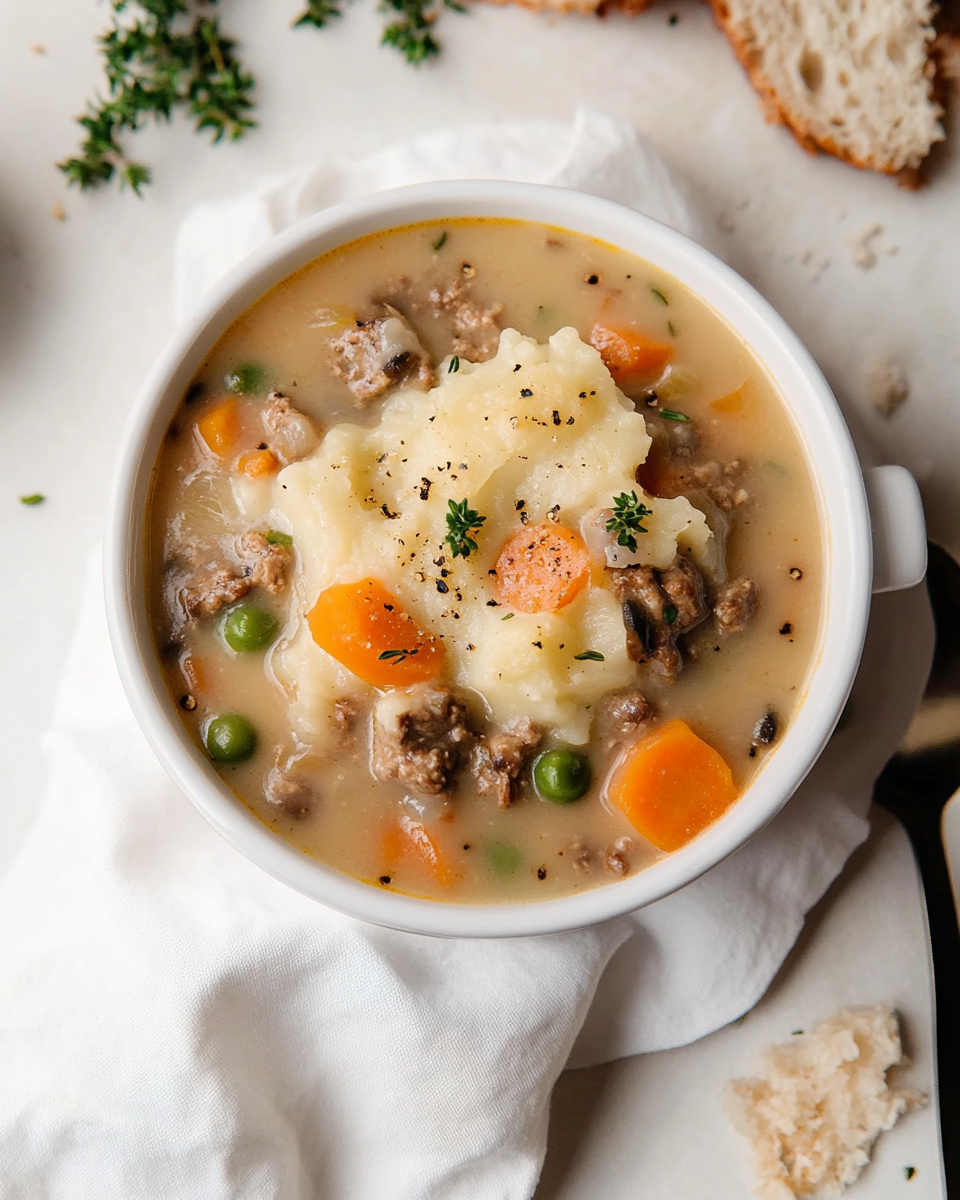
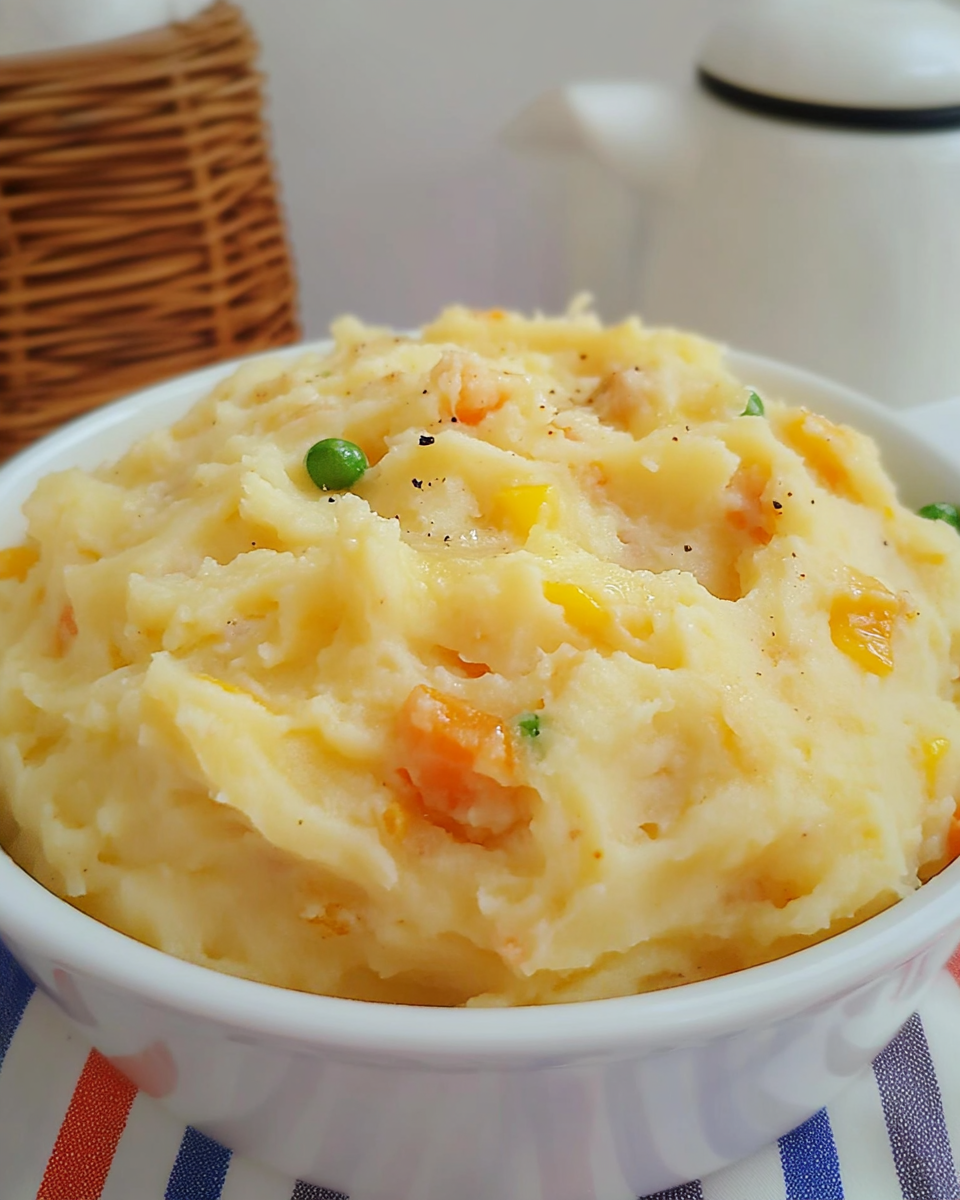
Crispy Air Fryer Pizza Roll Ups: Easy and Delicious Snack Recipe

Pizza roll ups in air fryer, easy air fryer pizza snacks, air fryer tortilla pizza rolls, homemade pizza rolls, crispy pizza roll ups

Air Fryer Pizza Roll Ups: A Quick and Delicious Snack

If you’re searching for a quick, delicious, and crispy snack, Air Fryer Pizza Roll Ups are the perfect solution. These savory roll-ups are a twist on the traditional pizza, offering all the classic flavors in a compact, handheld form. They’re ideal for busy weeknights, game days, or as a fun family meal that even kids will love. With the help of an air fryer, you can have these pizza roll-ups ready in minutes, without the need for deep frying or a greasy mess.

With their crispy outside and cheesy inside, Air Fryer Pizza Roll Ups are healthier than traditional pizza rolls and easy to customize with your favorite toppings.


Ingredients for Air Fryer Pizza Roll Ups

Here’s what you’ll need to make these delicious pizza roll-ups:

  • Tortillas or pizza dough (for the base)
  • Pizza sauce (use homemade or store-bought)
  • Mozzarella cheese (shredded for easy melting)
  • Pepperoni or your favorite pizza toppings (such as ham, sausage, or veggies)
  • Olive oil or cooking spray (to crisp up the roll-ups in the air fryer)
  • Italian seasoning or garlic powder (optional, for added flavor)

You can easily customize this recipe to suit your tastes or dietary preferences. For example, use whole-wheat tortillas for a healthier option, or add vegan cheese to make the roll-ups dairy-free.

For more ideas on using alternative ingredients, check out this guide to healthier snacks that offers tips on making your favorite dishes healthier without compromising flavor.


Step-by-Step Guide to Making Air Fryer Pizza Roll Ups

  1. Prepare the Tortillas or Dough
    If you’re using pizza dough, roll it out to about ¼-inch thickness. If you’re using tortillas, they’re ready to go as-is.
  2. Spread the Pizza Sauce
    Spread a thin layer of pizza sauce over each tortilla or dough round, leaving a small border around the edges. Too much sauce can make the roll-ups soggy.
  3. Add the Toppings
    Sprinkle mozzarella cheese evenly over the sauce, then add your choice of toppings. Classic pepperoni works well, but feel free to add other favorites like mushrooms, onions, or even pineapple.
  4. Roll and Seal the Edges
    Roll up each tortilla or dough round tightly, securing the edge with a little water or sauce to keep it from unraveling.
  5. Preheat the Air Fryer
    Set your air fryer to 375°F (190°C) and let it preheat for a few minutes.
  6. Air Fry the Pizza Roll Ups
    Lightly brush each roll-up with olive oil or spray with cooking spray. Arrange the roll-ups seam-side down in the air fryer basket in a single layer, making sure not to overcrowd them. Air fry for 6-8 minutes, or until they are golden and crispy. Flip halfway through for even cooking.
  7. Serve with Dipping Sauce
    Serve your crispy pizza roll-ups with a side of marinara sauce or ranch dressing for dipping.

For more easy snack ideas that pair well with pizza flavors, take a look at this slow-cooker magic guide featuring quick and satisfying comfort food recipes.


Tips for the Best Air Fryer Pizza Roll Ups

To make sure your pizza roll-ups turn out perfectly every time, follow these helpful tips:

  • Don’t overfill the roll-ups: Too many toppings can make the roll-ups harder to seal and may cause them to burst open while cooking.
  • Brush with olive oil for extra crispiness: A light coating of olive oil helps the roll-ups crisp up nicely in the air fryer.
  • Flip halfway through: For even browning, make sure to flip the roll-ups halfway through the cooking process.
  • Use cheese that melts well: Mozzarella is the best option for that gooey, melty texture, but you can also try a blend of cheddar and mozzarella for extra flavor.

For more air fryer tips, you might enjoy this guide on air frying snacks, which covers techniques for getting the best results with your air fryer.


Healthier and Customizable Variations

These Air Fryer Pizza Roll Ups are incredibly versatile, allowing you to adjust the recipe to fit your dietary needs or preferences:

  • Vegan Pizza Roll Ups: Use vegan cheese and load up on plant-based toppings like spinach, mushrooms, and bell peppers. You can also use a dairy-free pizza sauce.
  • Low-Carb Option: Swap the tortillas for low-carb wraps or use a cauliflower-based pizza crust to reduce carbs.
  • Whole-Wheat or Gluten-Free: Replace regular tortillas with whole-wheat or gluten-free options for a healthier twist.
  • Extra Veggies: Add spinach, artichokes, or roasted peppers to boost the veggie content and add flavor.

These variations allow you to make Air Fryer Pizza Roll Ups suitable for a range of dietary restrictions and preferences. For more ideas on adjusting recipes for different diets, check out this recipe collection for comfort foods with healthier alternatives.


How to Store and Reheat Air Fryer Pizza Roll Ups

If you have leftovers (though they tend to disappear fast!), here’s how to store and reheat your pizza roll-ups:

  • In the Refrigerator: Store any leftover roll-ups in an airtight container in the fridge for up to 3 days.
  • In the Freezer: Freeze the roll-ups after air frying them. To reheat, pop them in the air fryer for 3-5 minutes to regain their crispiness.
  • Reheating Tips: To avoid sogginess, reheat the roll-ups in the air fryer rather than the microwave. Preheat the air fryer to 350°F (175°C) and reheat for 3-4 minutes.

These storage and reheating tips ensure that your roll-ups stay as delicious as they were when freshly made. For more helpful tips on reheating air fryer recipes, see this ultimate comfort food guide.


Frequently Asked Questions (FAQs)

Can I make Air Fryer Pizza Roll Ups ahead of time?
Yes! You can assemble the roll-ups and store them in the fridge for up to 24 hours before air frying. This is a great option for meal prep or party planning.

How long should I cook Air Fryer Pizza Roll Ups?
The roll-ups take about 6-8 minutes at 375°F (190°C), but cooking times can vary slightly depending on your air fryer model. Keep an eye on them to ensure they’re golden and crispy.

Can I use pizza dough instead of tortillas?
Absolutely! Pizza dough works just as well, though the texture will be a bit different. Roll out the dough thinly and follow the same assembly and cooking steps.

What toppings work best for these pizza roll-ups?
Pepperoni and mozzarella are classic, but you can also try sausage, ham, veggies, or even a Hawaiian version with ham and pineapple. Get creative with your favorite pizza flavors!

Do I need to preheat the air fryer?
Preheating your air fryer helps ensure that the roll-ups cook evenly and become crispy on the outside. It’s recommended to preheat for about 3-5 minutes.


Conclusion

Air Fryer Pizza Roll Ups are a quick and tasty alternative to traditional pizza, perfect for a snack, appetizer, or even a light meal. They’re easy to make, customizable, and a healthier option thanks to the air fryer. Whether you’re prepping for a family gathering or just looking for a fast weeknight meal, these pizza roll-ups are sure to become a household favorite.

For more recipes and snack ideas that the whole family will love, visit the comfort food recipe section at ExoRecipes, where you’ll find plenty of inspiration for easy, delicious meals.

Hearty Shepherd’s Pie Soup: A Comforting Twist on a Classic Recipe

Shepherd’s pie soup recipe, beef and potato soup, classic Shepherd’s pie in soup form, comforting soup recipe, easy Shepherd’s pie soup

Shepherd’s Pie Soup: A Hearty, Comforting Twist on a Classic

If you’re a fan of classic Shepherd’s Pie, but crave a comforting, warm bowl of soup, then Shepherd’s Pie Soup is the perfect dish to try. This hearty soup combines all the familiar flavors of the traditional dish—ground beef (or lamb), mashed potatoes, and vegetables—into a creamy, savory bowl that’s perfect for chilly evenings. It’s a great alternative when you’re short on time but still want the satisfying taste of a homemade favorite.

With its rich, comforting flavors, Shepherd’s Pie Soup is an ideal recipe for a cozy family dinner or meal prep for the week ahead. To explore more comforting soup ideas, check out this ultimate comfort food guide that features warm, hearty recipes like crockpot soups and stews.


Ingredients for Shepherd’s Pie Soup

This easy soup comes together with a few simple ingredients, many of which you might already have in your pantry:

  • 1 lb ground beef or lamb (for that traditional Shepherd’s Pie flavor)
  • 1 large onion, chopped
  • 2 garlic cloves, minced
  • 2 medium carrots, chopped
  • 1 cup frozen peas
  • 4 cups beef broth (for a rich, savory base)
  • 1 tablespoon tomato paste (adds depth of flavor)
  • 1 tablespoon Worcestershire sauce
  • 2 cups mashed potatoes (you can make these fresh or use leftovers)
  • 1 tablespoon olive oil
  • Salt and pepper to taste
  • Chopped parsley for garnish (optional)

Feel free to get creative with your ingredients. For a lighter version, swap the ground beef for ground turkey or chicken, or add extra veggies like spinach or kale to boost the nutritional value. You can also try using sweet potatoes instead of regular mashed potatoes for a twist on the classic.

For more tips on preparing mashed potatoes, check out how to make perfect mashed potatoes, which will ensure your potato topping is creamy and delicious.


Step-by-Step Instructions for Shepherd’s Pie Soup

  1. Sauté the Vegetables
    In a large pot, heat olive oil over medium heat. Add chopped onions, carrots, and garlic, and sauté until softened, about 5 minutes. Season with salt and pepper.
  2. Cook the Meat
    Add the ground beef or lamb to the pot, breaking it up with a wooden spoon as it browns. Cook until the meat is no longer pink, about 5-7 minutes.
  3. Add Flavorings
    Stir in the tomato paste and Worcestershire sauce, letting the flavors meld together for about 2 minutes. This step gives the soup that deep, savory flavor that is key to Shepherd’s Pie.
  4. Add the Broth and Vegetables
    Pour in the beef broth and bring the mixture to a simmer. Add the frozen peas and cook for about 10 minutes, allowing the flavors to come together.
  5. Incorporate the Mashed Potatoes
    Stir in the mashed potatoes to create a thick, creamy consistency. If the soup is too thick, you can thin it out with a bit more broth or water.
  6. Season and Serve
    Taste the soup and adjust seasoning as needed. Garnish with chopped parsley and serve warm with crusty bread on the side.

For more ideas on thickening soups and creating the perfect texture, check out these tips for thickening soups, which can help you achieve the right consistency based on your preference.


Tips for Perfect Shepherd’s Pie Soup

  • Choose the Right Meat: Ground lamb gives the soup a more traditional Shepherd’s Pie flavor, but ground beef or turkey works well for a lighter option.
  • Make-Ahead Tip: This soup stores well, so feel free to make it in advance and reheat when needed. Store in the fridge for up to 3 days or freeze for longer storage.
  • Mashed Potato Consistency: If you want a chunkier soup, leave your mashed potatoes a bit rustic. For a creamier, smoother soup, make sure your mashed potatoes are well-blended before adding them to the pot.

For more time-saving tips and one-pot recipes like this, check out the crockpot recipes in this slow-cooker magic guide.


Variations and Substitutions

This Shepherd’s Pie Soup recipe is versatile, allowing you to make various substitutions or enhancements depending on your dietary needs or taste preferences.

  • Vegetarian Version: Replace the meat with lentils or a meat substitute like textured vegetable protein (TVP), and use vegetable broth instead of beef broth.
  • Gluten-Free Option: This recipe is naturally gluten-free, but always check your broth and Worcestershire sauce labels to ensure they don’t contain hidden gluten.
  • Dairy-Free: Use dairy-free mashed potatoes made with olive oil or vegan butter, and substitute coconut or almond milk if you want a creamier soup without the dairy.

For more creative ways to adapt traditional comfort food dishes for various diets, explore the healthy recipe collection at Exorecipes.


Serving Suggestions

This hearty soup is best served with some crusty bread for dipping or a side salad for a balanced meal. Here are a few other serving ideas:

  • Top with Cheddar Cheese: Add shredded cheddar cheese on top for a melty, savory addition.
  • Add Fresh Herbs: Fresh parsley, thyme, or rosemary can elevate the flavor of the soup.
  • Side Ideas: Serve alongside a light, tangy salad to contrast the rich flavors of the soup.

For more creative pairing ideas, explore Shepherd’s Pie-inspired dishes and other soups in the comfort food section.


How to Store and Reheat Shepherd’s Pie Soup

This soup is perfect for meal prepping or saving leftovers for later.

  • In the Fridge: Store any leftovers in an airtight container for up to 3 days.
  • In the Freezer: Freeze individual servings in freezer-safe containers. When you’re ready to enjoy, thaw the soup in the fridge overnight and reheat on the stove.
  • Reheating: Reheat gently over low heat on the stovetop, adding a splash of broth or water if needed to thin the soup.

For tips on how to reheat soups without losing flavor or texture, explore this comfort food recipe guide.


Frequently Asked Questions (FAQs)

Can I make Shepherd’s Pie Soup in the slow cooker?
Yes! Simply brown the meat and sauté the vegetables on the stovetop, then transfer everything to a slow cooker. Add the broth and cook on low for 6-8 hours. Stir in the mashed potatoes during the last 30 minutes of cooking.

Can I use sweet potatoes instead of regular potatoes?
Absolutely! Sweet potatoes add a slightly sweeter flavor that pairs well with the savory broth. Simply prepare your mashed sweet potatoes as you normally would and stir them into the soup.

What can I use to thicken the soup if it’s too thin?
If the soup is too thin, you can add a cornstarch slurry (1 tablespoon of cornstarch mixed with 2 tablespoons of water) or simply add more mashed potatoes.

Can I make this soup ahead of time?
Yes, this soup reheats beautifully. You can make it up to 3 days in advance and store it in the fridge. Reheat on the stovetop, adding a little extra broth if necessary.


Conclusion

Shepherd’s Pie Soup is the perfect marriage of classic comfort food and the ease of a one-pot soup. Whether you’re preparing this dish for a family dinner, meal prepping for the week, or looking for a cozy option on a cold day, this soup is sure to satisfy. With endless possibilities for customization and dietary adjustments, it’s a recipe you’ll come back to time and again.

For more comfort food recipes and cozy dishes, don’t miss out on the collection of comfort food recipes at Exorecipes.

Crispy Loaded Sliced Baked Potatoes: A Delicious and Easy Side Dish

Baked potato slices, crispy potato slices, cheesy potato rounds, loaded potato appetizers, easy potato side dish

Loaded Sliced Baked Potatoes: The Perfect Crispy and Cheesy Side Dish

There’s something undeniably comforting about loaded sliced baked potatoes. These savory, crispy slices, topped with gooey cheese, bacon, and other delicious toppings, are a fan favorite for any occasion—whether you’re hosting a party, preparing a family meal, or simply indulging yourself. The best part? They’re easy to make and completely customizable to suit any taste or dietary need.


Why Choose Loaded Sliced Baked Potatoes?

Loaded baked potato slices are a perfect balance between the simplicity of baked potatoes and the indulgence of loaded potato skins. The sliced approach ensures that every bite is crispy and packed with flavor. Compared to traditional baked potatoes, they cook faster and offer more texture due to their thin, crispy layers.

These potatoes can be served as a satisfying side dish or even as an appetizer for gatherings. If you’re looking for more comfort food inspiration, check out this ultimate comfort food guide, which includes other easy-to-make recipes like crockpot potato soup.


Ingredients for Loaded Sliced Baked Potatoes

Here’s what you’ll need to create your loaded potato masterpiece:

  • 4 large Russet potatoes (known for their ideal texture for baking)
  • Olive oil (for crisping the edges)
  • 1 ½ cups shredded cheese (cheddar, mozzarella, or your favorite blend)
  • 6 slices of cooked bacon (crispy and crumbled)
  • Sour cream (for topping)
  • Chopped green onions or chives (for garnish)
  • Salt and pepper to taste
  • Optional: jalapeños, ranch dressing, or caramelized onions for extra flavor

The beauty of loaded sliced baked potatoes lies in their versatility. You can swap out bacon for turkey bacon or omit it entirely for a vegetarian option. For those seeking healthier versions, consider using Greek yogurt in place of sour cream, or opt for low-fat cheese.

For more inspiration on healthy ingredient swaps, take a look at this comfort food recipe with a healthy twist.


Step-by-Step Guide to Making Loaded Sliced Baked Potatoes

  1. Preheat the Oven
    Set your oven to 400°F (200°C) to ensure even cooking. Line a baking sheet with parchment paper or lightly grease it to prevent sticking.
  2. Prepare the Potatoes
    Wash and scrub your potatoes clean. Slice them into ¼-inch thick rounds, ensuring they are all roughly the same thickness for even cooking.
  3. Season the Potatoes
    Lay the potato slices out on the baking sheet. Drizzle them with olive oil and season generously with salt and pepper. Flip the slices and season the other side as well.
  4. Bake the Potato Slices
    Place the baking sheet in the preheated oven and bake for about 25-30 minutes, flipping halfway through. You want the slices to be golden brown and crispy on the edges.
  5. Add the Toppings
    Once the potato slices are golden, remove them from the oven and sprinkle each slice with shredded cheese and crumbled bacon. Return to the oven for an additional 5 minutes, just until the cheese melts.
  6. Garnish and Serve
    Remove the loaded potato slices from the oven and top them with sour cream, green onions, and any additional toppings you prefer.

For more tips on baking the perfect crispy potato slices, explore this guide on achieving the perfect crisp.


Tips for the Best Loaded Sliced Baked Potatoes

  • Don’t Overcrowd the Pan: Overlapping slices can result in uneven cooking and prevent the potatoes from crisping up properly. Make sure the slices are laid out in a single layer.
  • Use Russet Potatoes: Russet potatoes provide the best texture for baked potato slices, but you can also experiment with sweet potatoes for a sweeter, more nutrient-dense option.
  • Pre-Cook the Bacon: If you’re adding bacon, make sure to pre-cook it until crispy, then crumble it over the cheese for the ultimate topping.

If you’re interested in more versatile potato dishes, you might enjoy this recipe for sliced baked potatoes with a twist in this detailed guide.


Healthier Variations of Loaded Sliced Baked Potatoes

If you’re looking to cut down on calories or adjust the recipe for dietary preferences, there are plenty of ways to make this dish healthier without sacrificing flavor:

  • Vegetarian Version: Skip the bacon and add caramelized onions, mushrooms, or roasted red peppers for added flavor.
  • Low-Fat Version: Use low-fat cheese and swap sour cream for Greek yogurt.
  • Vegan Option: Substitute the cheese with a plant-based option and omit the bacon or replace it with crispy tofu or tempeh.

For more ideas on adapting comfort foods to meet dietary needs, check out this article on healthy eating.


Serving Suggestions for Loaded Sliced Baked Potatoes

Loaded sliced baked potatoes are incredibly versatile. Here are some ideas for serving:

  • As a Side Dish: Serve alongside grilled meats, roasted chicken, or steak for a hearty meal.
  • As an Appetizer: These make for perfect finger food at parties or gatherings. Arrange them on a platter and serve with dipping sauces like ranch or aioli.
  • For Breakfast: Top with scrambled eggs and salsa for a delicious breakfast twist.

For more creative serving suggestions, check out this guide to side dishes.


Storing and Reheating Loaded Sliced Baked Potatoes

These potato slices store well and can be enjoyed later. Here’s how to keep them fresh:

  • In the Fridge: Store any leftover potato slices in an airtight container for up to 3 days.
  • In the Freezer: Freeze baked, but untopped, potato slices in a single layer on a baking sheet. Once frozen, transfer to a freezer-safe bag. They will keep for up to 3 months.
  • Reheating: Reheat in the oven at 350°F (175°C) for 10-15 minutes or until they’re heated through and crispy.

For more tips on storing loaded potato dishes and other comfort foods, visit this recipe collection.


Frequently Asked Questions (FAQs)

What kind of potatoes are best for loaded sliced baked potatoes?
Russet potatoes are ideal due to their starchy nature, which crisps up well when baked. However, Yukon Golds or red potatoes can also be used for a slightly creamier texture.

How can I make my potatoes extra crispy?
For extra crispiness, soak the sliced potatoes in cold water for about 30 minutes before baking. This helps to remove excess starch, allowing the potatoes to crisp up more effectively in the oven.

Can I make these ahead of time?
Yes, you can pre-bake the potato slices and store them in the fridge. When ready to serve, simply reheat in the oven, add the toppings, and bake until the cheese melts.

Are there dairy-free options for the toppings?
Absolutely! Use dairy-free cheese and substitute sour cream with a plant-based yogurt for a completely dairy-free version.


Conclusion

Loaded sliced baked potatoes are a flavorful, crispy, and cheesy treat that’s easy to make and perfect for any occasion. Whether you’re customizing them with different toppings or sticking to the classic bacon and cheese combo, these potato slices are sure to please.

For more exciting potato recipes, check out this collection of comfort food favorites at Exorecipes!

Homemade Peppermint Patties: Easy Recipe for a Delicious Minty Treat

DIY peppermint patties, homemade mint patties, chocolate mint patties, easy peppermint patty recipe

Homemade Peppermint Patties: A Cool and Refreshing DIY Treat

Who doesn’t love the refreshing combination of rich chocolate and cool mint? Homemade Peppermint Patties are a fantastic way to recreate this classic candy in your own kitchen. Not only are they easy to make, but you can also customize the flavors and ingredients to fit your preferences or dietary needs. In this detailed guide, we’ll take you through everything from ingredients to troubleshooting tips, ensuring your peppermint patties turn out perfect every time.

Why Make Homemade Peppermint Patties?

Making peppermint patties at home has a number of benefits:

  • You can control the quality of the ingredients, ensuring they’re free of preservatives and additives.
  • Customize the recipe to fit specific dietary needs, such as making vegan peppermint patties or sugar-free versions.
  • Homemade peppermint patties make for great gifts or party favors when packaged beautifully.

For more great dessert ideas, check out this guide that covers a wide variety of homemade treat recipes you can try at home.


Ingredients for Homemade Peppermint Patties

The beauty of homemade peppermint patties is in their simplicity. Here’s what you’ll need:

  • 2 cups powdered sugar (for the sweet filling)
  • 1 ½ teaspoons peppermint extract (adjust according to your mint preference)
  • 2 tablespoons butter or coconut oil (for a vegan alternative)
  • 2 tablespoons evaporated milk or coconut milk (for richness)
  • 10 oz dark chocolate or semi-sweet chocolate chips (for coating)
  • 1 teaspoon vanilla extract (optional, but enhances the chocolate flavor)

You can also experiment with different flavors or coatings. For example, using dairy-free chocolate or adding a hint of vanilla or orange extract can give the patties a unique twist. If you’re interested in more tips on using alternatives in baking, head over to this guide for expert advice on substitutions in sweet and savory dishes.


Step-by-Step Instructions for Perfect Peppermint Patties

  1. Prepare the Filling
    In a large bowl, combine the powdered sugar, peppermint extract, butter, and milk. Use a hand mixer to beat the ingredients together until they form a thick, smooth dough. If the mixture is too sticky, gradually add more powdered sugar until you achieve the right consistency.
  2. Roll and Shape
    On a clean, flat surface, sprinkle a little powdered sugar and roll out the peppermint mixture to about ¼ inch thickness. Use a small round cookie cutter (or even a shot glass) to cut out the patties.
  3. Chill the Patties
    Place the cut-out patties on a parchment-lined baking sheet and freeze them for at least 20 minutes. This step is crucial for keeping the filling firm when dipping into melted chocolate.
  4. Melt the Chocolate
    In a double boiler, melt the chocolate and stir until smooth. You can add 1 tablespoon of coconut oil to the chocolate to give it a glossy finish.
  5. Dip the Patties
    Remove the chilled patties from the freezer. Using a fork, dip each patty into the melted chocolate, letting the excess drip off before placing it back on the parchment-lined sheet. Let the patties set at room temperature or in the fridge until the chocolate is firm.

If you’re new to working with chocolate, it might help to check out this resource on tempering chocolate, which ensures your chocolate stays smooth and shiny without seizing.


Troubleshooting Common Issues

Like any homemade candy, peppermint patties can sometimes present challenges. Here’s how to avoid common problems:

  • Filling Too Sticky: If your peppermint filling is too sticky to roll, add more powdered sugar a tablespoon at a time until it firms up.
  • Chocolate Bloom: If white streaks appear on the chocolate, this is known as “bloom” and happens when the chocolate isn’t properly tempered. Avoid this by cooling the chocolate between 80-85°F before dipping.
  • Cracking Chocolate Coating: If the chocolate cracks when you bite into the patty, it may have been dipped while too cold. Let the patties sit at room temperature for a few minutes before dipping.

If you’re facing issues with your sweet treat recipes, you can find more troubleshooting tips in this detailed guide.


Healthier Variations of Homemade Peppermint Patties

For those looking to make a healthier or more diet-friendly version of this classic treat, there are plenty of ways to modify the recipe:

  • Vegan Peppermint Patties: Substitute butter with coconut oil or a dairy-free butter alternative. Use dairy-free chocolate for the coating.
  • Sugar-Free Peppermint Patties: Use a sugar-free powdered sugar alternative like stevia or erythritol to reduce the sugar content.
  • Gluten-Free Peppermint Patties: This recipe is naturally gluten-free, but double-check that all ingredients, particularly the chocolate, are certified gluten-free.

These alternatives allow you to enjoy a guilt-free treat that fits your dietary preferences.


Serving Suggestions for Peppermint Patties

  • As a Holiday Treat: These patties are perfect for holiday gatherings, whether it’s Christmas or a family reunion. Arrange them in festive tins for a thoughtful homemade gift.
  • Peppermint Patty Ice Cream Sandwiches: For a fun twist, place a peppermint patty between two cookies or layer it in an ice cream sandwich for a cool summer dessert.
  • Coffee Pairing: These patties make a great after-dinner treat paired with coffee or hot chocolate, balancing the sweetness of your drink with their refreshing mint flavor.

For more creative serving ideas, take a look at this roundup of unique dessert recipes, which provides great ways to showcase your homemade candies.


Storing and Freezing Peppermint Patties

One of the great things about homemade peppermint patties is how well they store. Here are some storage tips:

  • At Room Temperature: Store in an airtight container for up to 2 weeks. Keep them in a cool, dry place.
  • In the Fridge: If you want to keep them fresher for longer, place them in the refrigerator. They’ll last for about a month when stored properly.
  • Freezing Peppermint Patties: For even longer storage, freeze your peppermint patties. Place them in a single layer on a baking sheet to freeze individually before transferring them to a freezer-safe bag. They’ll last up to 3 months.

These tips will ensure that your homemade patties retain their freshness and flavor, whether you’re eating them the same day or saving them for later.


Frequently Asked Questions (FAQs)

How long do homemade peppermint patties last?
Homemade peppermint patties can last up to 2 weeks at room temperature or up to a month in the fridge. For long-term storage, freeze them for up to 3 months.

Can I make peppermint patties without using a candy thermometer?
Yes! Peppermint patties are relatively simple to make and don’t require a candy thermometer as long as you follow the steps closely.

What’s the best chocolate to use for dipping peppermint patties?
Dark chocolate and semi-sweet chocolate both work well for dipping. If you prefer a sweeter patty, milk chocolate is also an option. If you’re vegan, choose a dairy-free chocolate option.

Can I flavor peppermint patties with other extracts?
Absolutely! While peppermint extract is the classic choice, you can try other flavors like spearmint, orange, or even lemon for a fun twist on this classic treat.

Why is my peppermint filling too soft or too hard?
If the filling is too soft, add more powdered sugar. If it’s too hard, mix in a little more milk or butter until you reach the desired consistency.


Conclusion

Making your own Homemade Peppermint Patties is an easy and rewarding way to enjoy a timeless treat with healthier and customizable ingredients. Whether you’re gifting them for the holidays, savoring them after dinner, or storing them for later, you’ll find that this DIY version far surpasses the store-bought varieties.

For more delicious homemade recipes, check out this collection, filled with ideas for every occasion.

Healthy Carrot Cake Oatmeal Cookies: A Nutritious and Delicious Treat

Carrot oatmeal cookies, healthy carrot cake cookies, healthy oatmeal cookies, carrot cake cookies, nutritious carrot cookies

Healthy Carrot Cake Oatmeal Cookies: A Delicious and Nutritious Treat

Are you looking for a healthy yet indulgent cookie recipe? Healthy Carrot Cake Oatmeal Cookies are perfect for satisfying your sweet tooth while keeping things nutritious. Combining the goodness of oats, carrots, and natural sweeteners, these cookies offer a balanced treat that’s rich in fiber, vitamins, and healthy fats.

Let’s explore how you can bake these mouth-watering cookies, along with some helpful tips, variations, and serving suggestions.


Why Choose Healthy Carrot Cake Oatmeal Cookies?

There are plenty of reasons to fall in love with these cookies:

  • They provide a delightful combination of the classic carrot cake flavor and the hearty texture of oatmeal.
  • They’re a healthier alternative to traditional cookies, using ingredients like oats, carrots, and natural sweeteners.
  • They are perfect for a variety of diets, offering options for vegan, gluten-free, or low-sugar variations.

You can experiment with this nutritious cookie recipe to match your dietary preferences, making it an adaptable and versatile treat for everyone. For more healthy dessert inspiration, check out the ultimate comfort food section at ExoRecipes, where you’ll find even more options to enjoy guilt-free treats.


Ingredients for Healthy Carrot Cake Oatmeal Cookies

Here’s what you’ll need to make these delicious cookies:

  • 1 cup rolled oats (rich in fiber)
  • ½ cup whole wheat flour (can be substituted with gluten-free flour)
  • ½ teaspoon baking powder
  • ½ teaspoon cinnamon (for that classic carrot cake spice)
  • 1 teaspoon vanilla extract
  • ¼ cup coconut oil (or applesauce for a lower-fat option)
  • ¼ cup maple syrup or honey (natural sweeteners)
  • 1 large carrot, grated (vitamin-packed!)
  • ¼ cup raisins or nuts (optional, but adds texture and healthy fats)

These simple, wholesome ingredients ensure that each cookie is filled with nutrients without sacrificing flavor. For more tips on how to perfect your healthy baking, visit our guide on using alternative flours and sweeteners in baked goods.


Step-by-Step Instructions for Perfect Cookies

  1. Preheat the oven to 350°F (175°C) and line a baking sheet with parchment paper.
  2. Mix the dry ingredients: Combine rolled oats, flour, baking powder, and cinnamon in a large bowl.
  3. In a separate bowl, whisk together coconut oil, maple syrup (or honey), and vanilla extract.
  4. Fold in the carrots: Gently mix the grated carrots into the wet mixture.
  5. Combine wet and dry ingredients: Slowly stir the dry ingredients into the wet mixture until just combined.
  6. Shape the cookies: Use a tablespoon to scoop dough onto the prepared baking sheet, flattening slightly.
  7. Bake for 12-15 minutes, or until the edges are golden. Let cool on a wire rack before serving.

For more delicious cookie variations, try using gluten-free oats or experiment with different types of natural sweeteners. You can also find more easy cookie recipes like this in the recipe archive on ExoRecipes.


Health Benefits of Key Ingredients

  • Oats: A fantastic source of fiber, which helps with digestion and keeps you feeling fuller longer.
  • Carrots: Packed with vitamins, especially vitamin A, which promotes healthy skin and eyes.
  • Coconut Oil: Contains healthy fats that can boost metabolism and provide energy.
  • Maple Syrup or Honey: Natural sweeteners that are lower on the glycemic index compared to refined sugar, making these cookies a healthier option.

Each of these ingredients contributes to the nutritional powerhouse that these cookies are. When paired with the hearty texture of oats and the moisture from the carrots, they create a deliciously satisfying cookie that’s also great for you.


Baking Tips for the Best Healthy Carrot Cake Oatmeal Cookies

Here are some handy tips to make sure your cookies turn out perfectly every time:

  • Don’t overmix the dough: Overmixing can lead to dense cookies. Stir the ingredients just until combined for a lighter texture.
  • Use freshly grated carrots: Pre-grated carrots may be too dry and won’t provide the necessary moisture for your cookies.
  • Adjust the sweetness: If you prefer a sweeter cookie, feel free to increase the maple syrup or honey by a tablespoon or two.
  • Add-ins: For extra texture and flavor, try adding a handful of raisins, walnuts, or even a sprinkle of coconut flakes.

If you enjoy experimenting with flavors and textures, check out our guide on using different add-ins in baked goods.


Variations to Suit Your Preferences

These cookies are wonderfully versatile, allowing you to tailor them to your dietary needs or preferences:

  • Gluten-Free Version: Swap out the whole wheat flour for a gluten-free blend and make sure your oats are certified gluten-free.
  • Vegan Version: Use flaxseed meal mixed with water as an egg substitute and ensure that your sweetener is plant-based, such as agave syrup.
  • Lower Sugar Version: Opt for less sweetener by using mashed bananas or applesauce to add natural sweetness without additional sugar.
  • Add More Protein: Include a tablespoon of chia seeds, hemp seeds, or a scoop of protein powder to make these cookies a more filling snack.

These healthy variations allow you to enjoy these cookies while sticking to your dietary goals.


Serving Suggestions

Enjoy these cookies in a variety of ways:

  • As a breakfast treat: Pair with Greek yogurt or a glass of almond milk for a balanced and nutritious start to the day.
  • Post-workout snack: They provide a healthy dose of carbs and protein to refuel after a workout.
  • Dessert: Drizzle with a little almond butter or cream cheese frosting for an indulgent, yet healthy, dessert option.

No matter when or how you serve these cookies, they’ll be a hit with both kids and adults alike.


Storing and Freezing Healthy Carrot Cake Oatmeal Cookies

To keep your cookies fresh and delicious for as long as possible, follow these storage tips:

  • At Room Temperature: Store in an airtight container for up to 5 days.
  • In the Fridge: Store in an airtight container in the fridge for up to 2 weeks. Reheat slightly before eating for the best texture.
  • In the Freezer: Freeze the cookies individually in plastic wrap, then store in a freezer-safe bag. They’ll last for up to 3 months, and you can thaw them overnight in the fridge or microwave them for a quick treat.

For more tips on how to store your healthy baked goods, check out our guide on keeping cookies fresh.


Frequently Asked Questions (FAQs)

Can I make these cookies gluten-free?
Yes, you can substitute the whole wheat flour with a gluten-free blend and make sure your oats are certified gluten-free.

How can I make the cookies more chewy?
Add an extra tablespoon of coconut oil or reduce the baking time by 1-2 minutes for softer, chewier cookies.

Can I use a different sweetener?
Absolutely! You can substitute maple syrup or honey with agave syrup, date syrup, or even stevia for a sugar-free option.

Are these cookies freezer-friendly?
Yes, they freeze well! Just make sure to wrap them individually and store them in a freezer-safe container for up to 3 months.

How long will these cookies last?
They’ll stay fresh for up to 5 days at room temperature, 2 weeks in the fridge, and 3 months in the freezer.


Conclusion

Healthy Carrot Cake Oatmeal Cookies are a perfect fusion of flavor, texture, and nutrition. They’re not only easy to make, but they’re also packed with wholesome ingredients that will leave you feeling satisfied and energized. Whether you’re looking for a quick snack, a post-workout treat, or a delicious dessert, these cookies are a must-try.

So, the next time you’re craving something sweet but healthy, give these carrot cake oatmeal cookies a try. They’ll quickly become a household favorite!

For more healthy and delicious recipes, be sure to explore the recipe section at ExoRecipes.