Chicken Bacon Ranch Tater Tot Casserole: The Ultimate Comfort Dish

chicken casserole recipe, bacon tater tot casserole, ranch tater tot bake, cheesy chicken bacon casserole

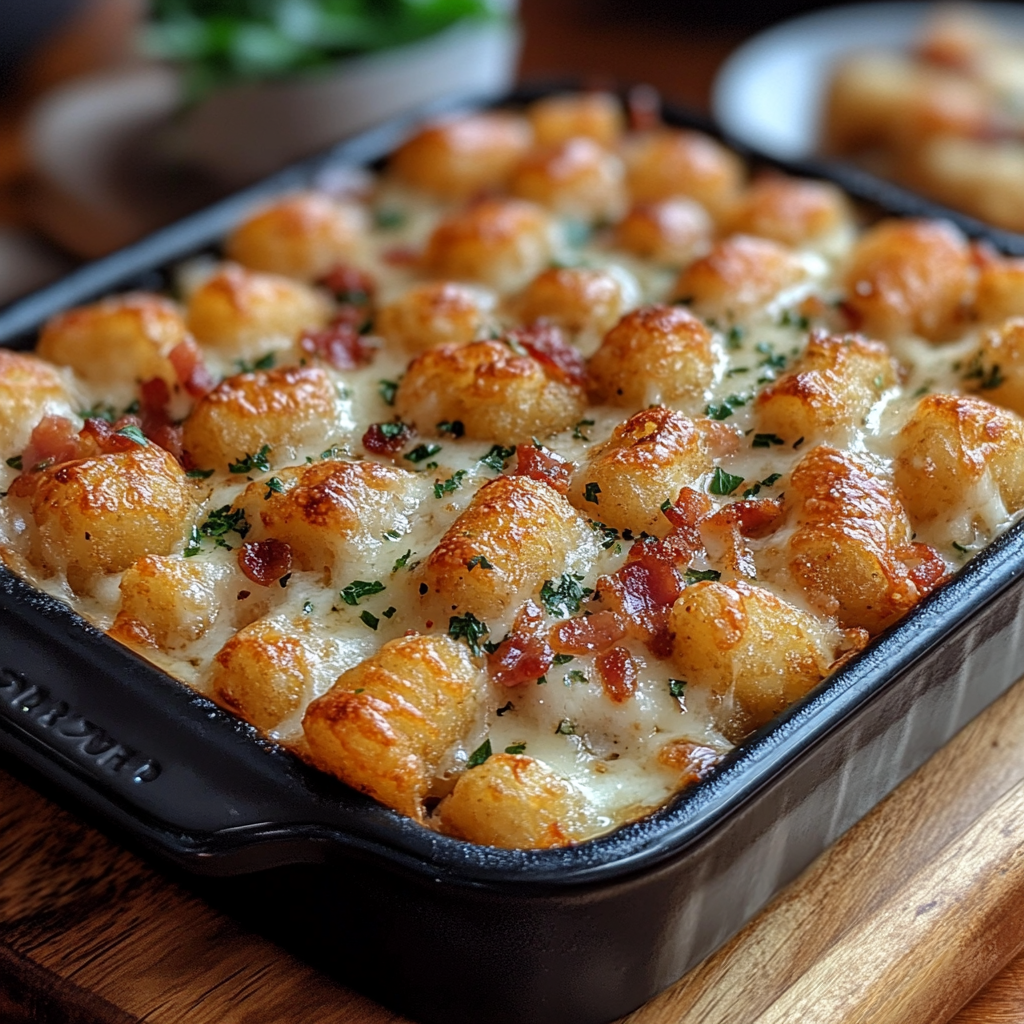
Chicken Bacon Ranch Tater Tot Casserole: The Ultimate Comfort Food

If you’re in search of a simple yet crowd-pleasing comfort food that combines the savory flavors of chicken, bacon, and ranch, look no further than Chicken Bacon Ranch Tater Tot Casserole. This dish is perfect for weeknight dinners, potlucks, or any gathering that calls for a hearty, satisfying meal.

For a similar recipe that brings rich flavors together, check out our Chicken Bacon Ranch Potatoes for another take on this flavor combination.

Why You’ll Love Chicken Bacon Ranch Tater Tot Casserole

This casserole hits all the right notes: creamy, savory, and comforting. Here are a few reasons why this recipe should be on your list:

  • Easy to Make: With just a few ingredients, this casserole is straightforward and easy to prepare.
  • Crowd-Pleaser: The combination of crispy bacon, tender chicken, and golden tater tots is a flavor combination loved by all ages.
  • Flexible and Customizable: This recipe can be adapted to suit various preferences and dietary needs.

Tip: If you’re looking for other comforting casseroles, try our Ham and Potato Casserole for another delicious, cheesy option.

Ingredients Needed

Here’s what you’ll need to make this delicious casserole:

  • Cooked Chicken: Rotisserie chicken works great for added flavor and convenience.
  • Bacon: Cooked until crispy and crumbled.
  • Tater Tots: The star of the topping, giving the casserole a satisfying crunch.
  • Cheese: Cheddar cheese or a cheese blend for creamy richness.
  • Ranch Seasoning: Adds that signature ranch flavor, making the dish creamy and savory.
  • Cream of Chicken Soup: Forms the creamy base of the casserole.
  • Green Onions (optional): For garnish, adding a touch of color and freshness.

External Resource: For tips on achieving crispy bacon, see How to Cook Perfect Bacon Every Time from Serious Eats.

Step-by-Step Recipe for Chicken Bacon Ranch Tater Tot Casserole

Step 1: Preheat and Prepare

  • Preheat your oven to 350°F (175°C).
  • Grease a 9×13 inch baking dish or casserole pan.

Step 2: Prepare the Bacon and Chicken

  1. Cook the Bacon: In a skillet, cook bacon until it’s crispy. Once done, let it cool on paper towels and crumble it.
  2. Shred the Chicken: If you’re using rotisserie chicken, shred it into bite-sized pieces.

If you’re a fan of bacon in casseroles, try our Ultimate Bacon Potato Casserole for another delicious option.

Step 3: Mix the Ingredients

In a large mixing bowl, combine:

  • Shredded chicken
  • Crumbled bacon
  • 1 cup shredded cheese
  • Ranch seasoning
  • Cream of chicken soup

Stir until the ingredients are well combined and creamy.

Step 4: Assemble the Casserole

  • Layer the Mixture: Spread the chicken mixture evenly in the prepared baking dish.
  • Add Tater Tots: Arrange the tater tots in a single layer over the top of the chicken mixture.

Step 5: Bake the Casserole

  • Place the dish in the preheated oven and bake for 35–40 minutes, or until the tater tots are golden and crispy.
  • During the last 10 minutes, sprinkle extra cheese on top if desired and return to the oven until the cheese is melted.

For another easy-to-make casserole, consider our Easy Breakfast Casserole which makes a great option for brunch gatherings.

Step 6: Garnish and Serve

  • Garnish with chopped green onions or parsley if desired.
  • Serve hot and enjoy the delicious blend of flavors in every bite.

Customizing Your Chicken Bacon Ranch Tater Tot Casserole

This recipe is incredibly versatile. Here are some variations you can try:

  • Add Veggies: Consider adding peas, corn, or bell peppers for extra texture and nutrients.
  • Spicy Kick: Add diced jalapeños or a sprinkle of red pepper flakes to bring some heat to the dish.
  • Cheese Variations: Experiment with Monterey Jack, mozzarella, or pepper jack cheese for a twist in flavor.

For more customization ideas, check out our Dorito Chicken Casserole, which features a similar creamy base with a unique crunchy topping.

Tips for the Best Chicken Bacon Ranch Tater Tot Casserole

Follow these tips to ensure your casserole turns out perfectly every time:

  • Crispy Bacon: Cook the bacon until fully crispy before adding to the casserole; this prevents it from becoming soggy.
  • Even Layering: Arrange the tater tots in a single layer to ensure they bake evenly and turn golden brown.
  • Quality Ranch Seasoning: Use high-quality ranch seasoning or make your own for the best flavor.

External Resource: To make homemade ranch seasoning, visit Epicurious for a simple recipe that enhances flavor without additives.

Serving Suggestions

This hearty casserole pairs well with light side dishes to balance its richness:

  • Green Salad: A crisp green salad with vinaigrette complements the creamy casserole.
  • Steamed Vegetables: Broccoli or green beans make great, nutritious sides.
  • Garlic Bread: For those who enjoy extra carbs, serve with garlic bread for a filling meal.

Looking for another easy side dish? Try our Loaded Potato Skins for a delicious snack that pairs well with any main dish.

FAQs

  1. Can I make this casserole ahead of time?
    • Yes, you can assemble the casserole a day in advance, cover it, and refrigerate. Bake it as directed when ready to serve.
  2. Can I use frozen chicken?
    • It’s best to thaw and cook the chicken beforehand. Rotisserie chicken works especially well for this recipe.
  3. Can I freeze Chicken Bacon Ranch Tater Tot Casserole?
    • Yes, freeze after assembling but before baking. Thaw in the fridge overnight before baking.
  4. Can I make this in a slow cooker?
    • Yes, layer the ingredients in a slow cooker and cook on low for 4–5 hours. Be aware that the tater tots won’t be as crispy.

Internal Link Opportunity: For more tips on freezing casseroles, check out our Easy Breakfast Casserole for additional storage ideas.

Nutritional Information and Serving Size

This is an approximate nutritional breakdown per serving:

  • Calories: 400 per serving
  • Fats: 25g
  • Carbohydrates: 30g
  • Protein: 20g

Suggested Serving Size: This casserole is rich and filling, so one 9×13 inch dish serves about 6–8 people.

Wrapping Up: Why You Should Make Chicken Bacon Ranch Tater Tot Casserole

This Chicken Bacon Ranch Tater Tot Casserole brings comfort and flavor to the dinner table, making it ideal for any family meal or gathering. The combination of creamy ranch, crispy bacon, and golden tater tots makes this dish truly irresistible.

For another satisfying and easy-to-make casserole, explore our Chicken Pot Pie Casserole, a delicious choice for a cozy dinner at home.

Elegant White Chocolate Pistachio Cake: Perfectly Creamy and Nutty

white chocolate cake, pistachio dessert, creamy pistachio cake, nutty cake recipe, pistachio white chocolate cake

Elegant White Chocolate Pistachio Cake: A Nutty, Creamy Delight

If you’re on the hunt for an exquisite dessert that will impress everyone, this Elegant White Chocolate Pistachio Cake is your go-to choice. With the luxurious combination of creamy white chocolate and the unique nuttiness of pistachios, this cake delivers both flavor and elegance. Perfect for special events, this cake’s beautiful green and white hues add a sophisticated touch to any table setting.

For a complementary nutty flavor, try our Pecan Pie Balls, which make a great addition to any dessert spread.

Why White Chocolate and Pistachio Make a Perfect Match

The pairing of white chocolate and pistachios creates a delicious and well-balanced cake:

  • Rich and Creamy Texture: White chocolate provides a smooth, sweet flavor that melts perfectly into the cake.
  • Nutty Crunch: Pistachios add both a subtle crunch and a sophisticated nutty taste.
  • Aesthetic Appeal: The natural green of pistachios against the creamy white of the cake is visually stunning.

For another visually appealing dessert with a nutty twist, check out our Gone to Heaven Chocolate Pie, which balances layers of rich chocolate and creamy filling.

Ingredients for White Chocolate Pistachio Cake

To make this delightful cake, you’ll need the following ingredients:

  • White Chocolate: For a creamy, smooth sweetness.
  • Pistachios: Use both ground pistachios for the batter and chopped ones for garnish.
  • Butter and Sugar: Provides moisture and richness.
  • Eggs: Adds structure and stability to the cake.
  • Flour and Baking Powder: Helps create a light, fluffy texture.
  • Milk or Heavy Cream: Adds smoothness to the batter.
  • Vanilla Extract: Enhances the flavors of white chocolate and pistachios.

For more tips on baking with chocolate, visit How to Bake with White Chocolate for expert guidance on melting and incorporating chocolate into your recipes.

Step-by-Step Guide to Making White Chocolate Pistachio Cake

Step 1: Prepare the Pistachio and White Chocolate Cake Batter

  1. Cream the Butter and Sugar: Beat until light and fluffy.
  2. Add Eggs and Vanilla Extract: Mix in the eggs one at a time, then add the vanilla.
  3. Incorporate Flour and Baking Powder: Alternate with milk or heavy cream for a smooth batter.
  4. Add Ground Pistachios and White Chocolate: Fold in carefully for an even distribution of flavor.

Step 2: Bake the Cake Layers

  1. Divide the Batter: Pour into prepared pans, dividing the batter evenly.
  2. Bake Until Set: Bake at 350°F for about 25–30 minutes or until a toothpick inserted into the center comes out clean.

For those looking for more nutty desserts, try our Blue Ribbon Blueberry Coffee Cake, a fruity twist that pairs wonderfully with pistachio flavors.

Step 3: Make the White Chocolate Frosting

  1. Melt White Chocolate: Allow it to cool slightly before adding it to the frosting mixture.
  2. Beat Butter and Powdered Sugar: Cream until light and fluffy, then mix in the white chocolate for a smooth frosting.

For an alternative frosting, consider our Mascarpone and Berry Cream, which adds a tangy contrast to the sweetness of the cake.

Step 4: Assemble and Decorate

  1. Layer the Cake: Place one layer on a cake stand, add frosting, and repeat with the remaining layer.
  2. Decorate with Pistachios and White Chocolate Shavings: Adds texture and a touch of elegance.

Customizing Your White Chocolate Pistachio Cake

This cake can be adapted to fit a variety of tastes and dietary needs:

  • Add a Raspberry Filling: Raspberries provide a tart contrast to the white chocolate.
  • Experiment with Different Nut Varieties: Use almonds or hazelnuts for a different flavor profile.
  • Consider a Gluten-Free Option: Substitute regular flour with a gluten-free baking blend.

For another customizable cake, check out our Ultimate Chocolate Cake for ideas on adding different flavor layers.

Tips for Perfecting White Chocolate Pistachio Cake

  1. Use High-Quality White Chocolate: Real white chocolate with cocoa butter provides the best flavor and texture.
  2. Opt for Fresh Pistachios: Freshly shelled pistachios enhance both flavor and texture.
  3. Avoid Overmixing: Mixing too much can result in a dense cake; mix just until ingredients are combined.

For more tips on baking with nuts, refer to Tips on Baking with Nuts from Serious Eats.

Serving Suggestions for White Chocolate Pistachio Cake

Serve this cake with thoughtful garnishes and accompaniments to make it even more elegant:

  • Top with Fresh Raspberries: The tartness complements the richness of the cake.
  • Drizzle with White Chocolate Ganache: Adds a glossy, professional touch.
  • Serve with Lightly Sweetened Whipped Cream: Balances the sweetness and enhances the flavors.

For more ideas on enhancing your presentation, check out our Ultimate Cheese and Charcuterie Guide, which includes tips on arranging visually appealing platters.

Frequently Asked Questions (FAQs)

  1. Can I make this cake gluten-free?
    • Yes, simply replace the flour with a gluten-free blend.
  2. Is it okay to use salted pistachios?
    • Yes, but reduce the salt in the recipe to balance flavors.
  3. How should I store leftovers?
    • Store in an airtight container in the fridge for up to three days.
  4. Can I prepare this cake in advance?
    • Yes, bake the layers a day ahead and frost before serving.

Internal Link Opportunity: For more unique flavor combinations, try our Raspberry Lemon Bars, which pairs a bright citrus flavor with a crumbly crust.

Nutritional Information and Portion Suggestions

This cake is rich and satisfying, making it perfect for special occasions:

  • Calories: Approximately 450 per slice.
  • Fats: 30g
  • Carbohydrates: 40g
  • Protein: 6g

Suggested Serving Size: This cake serves about 10-12 people, making it ideal for gatherings.

Final Thoughts: Why You Should Try White Chocolate Pistachio Cake

The Elegant White Chocolate Pistachio Cake is a stunning dessert that combines the luxurious flavor of white chocolate with the unique taste of pistachios. It’s perfect for celebrations and guaranteed to impress with both its flavor and appearance.

For another impressive dessert, consider our Salted Caramel Apple Cheesecake, which also brings elegance to any occasion.

Stunning Raspberry Pistachio Cheesecake: Creamy, Fruity, and Nutty Perfection

raspberry swirl cheesecake, pistachio cheesecake, fruity nutty cheesecake, raspberry nut cheesecake, creamy raspberry dessert

Stunning Raspberry Pistachio Cheesecake: Creamy, Fruity, and Nutty Perfection

If you’re looking to make an unforgettable dessert that balances creamy cheesecake with tart raspberries and crunchy pistachios, this Stunning Raspberry Pistachio Cheesecake is the ideal choice. This dessert not only tastes incredible but also makes a beautiful presentation at gatherings. With layers of color and texture, this cheesecake will captivate any crowd.

For more fruit-inspired desserts, try our Raspberry Lemon Bars with Shortbread Crust, a refreshing treat perfect for warm days.

Why Raspberry and Pistachio Are a Match Made in Dessert Heaven

The combination of raspberry and pistachio in a cheesecake offers a delightful contrast of flavors and textures:

  • Creamy and Nutty: Pistachios bring a subtle earthiness that complements the creamy base of the cheesecake.
  • Bright and Fruity: Fresh raspberries add a pop of tartness, balancing the richness.
  • Aesthetically Pleasing: The green pistachios and red raspberries create a visually appealing dessert.

For another nutty dessert idea, explore our Pecan Pie Balls, perfect for bite-sized indulgence.

Key Ingredients in Raspberry Pistachio Cheesecake

This cheesecake relies on a few key ingredients to achieve its balanced flavor and smooth texture:

  • Cream Cheese: The main ingredient, offering the rich and creamy base.
  • Pistachios: Adds a nutty flavor and unique crunch, either in the crust, filling, or as a topping.
  • Fresh Raspberries: Brightens the flavor profile with a tart, fruity kick.
  • Graham Cracker Crust: A traditional base that adds texture and depth.
  • Heavy Cream: Ensures a smooth, creamy filling.
  • Lemon Zest and Vanilla Extract: Adds freshness and depth to complement the fruit and nuts.

Step-by-Step Guide to Making Raspberry Pistachio Cheesecake

Step 1: Prepare the Pistachio Graham Cracker Crust

  1. Crush and Combine: Blend graham cracker crumbs with crushed pistachios and melted butter.
  2. Press into Pan: Press the mixture into a springform pan and bake for a few minutes to set.
  3. Cool the Crust: Let the crust cool completely before adding the filling.

Tip: For those interested in a no-bake option, check out our No-Bake Banana Pudding Cheesecake recipe for inspiration.

Step 2: Prepare the Cheesecake Filling

  1. Blend the Cream Cheese and Sugar: Beat cream cheese and sugar until smooth.
  2. Add Vanilla, Lemon Zest, and Heavy Cream: Incorporate vanilla, lemon zest, and heavy cream, beating until well-blended.
  3. Pour Filling Over Crust: Pour the creamy mixture over the cooled crust, smoothing it with a spatula.

Step 3: Create the Raspberry Swirl

  1. Make Raspberry Sauce: In a saucepan, combine fresh raspberries with a small amount of sugar and cook until it forms a thick sauce.
  2. Swirl the Sauce: Drop spoonfuls of raspberry sauce onto the cheesecake and swirl gently with a toothpick.

For more layering and swirling techniques, see How to Achieve Beautiful Swirls in Cheesecakes, a guide that ensures beautiful results every time.

Step 4: Bake and Chill the Cheesecake

  1. Bake: Place the cheesecake in the oven at a low temperature, using a water bath to prevent cracking.
  2. Cool and Chill: Allow the cheesecake to cool, then refrigerate for at least 4 hours or overnight to fully set.

Internal Link Opportunity: If you enjoy rich cheesecakes, try our Heavenly Peanut Butter and Jelly Cheesecake, which is another decadent dessert.

Customizing Your Raspberry Pistachio Cheesecake

This cheesecake is versatile and can be adapted based on your preferences:

  • Try Different Nuts: Use almonds or hazelnuts instead of pistachios for a unique twist.
  • Berry Variations: Swap raspberries for strawberries, blackberries, or blueberries.
  • No-Bake Option: To make it no-bake, omit the eggs and use gelatin to set the filling.

For a creative, nut-based twist, explore our Gone to Heaven Chocolate Pie, which combines chocolate and nuts in a delicious dessert.

Tips for the Perfect Cheesecake

Achieving a perfect cheesecake texture requires a few simple techniques:

  • Use Room Temperature Ingredients: This ensures a smooth, lump-free filling.
  • Avoid Overmixing: Too much air in the batter can cause cracks.
  • Use a Water Bath: Maintains moisture and prevents the top from cracking.

For more expert tips on making cheesecakes, visit Serious Eats’ Guide to Perfect Cheesecakes.

Serving Suggestions for Raspberry Pistachio Cheesecake

Presentation can elevate the dessert experience. Here are some serving ideas:

  • Top with Extra Pistachios and Raspberries: Adds texture and visual appeal.
  • Drizzle with Raspberry Sauce: A thin drizzle of sauce enhances the fruitiness.
  • Serve with Fresh Whipped Cream: Complements the rich flavors.

For more presentation tips, check our Ultimate Cheese and Charcuterie Guide, which offers ideas on arranging visually appealing spreads.

Frequently Asked Questions (FAQs)

  1. Can I make this cheesecake in advance?
    • Yes, it’s best made a day ahead to allow the flavors to meld.
  2. Can I freeze Raspberry Pistachio Cheesecake?
    • Yes, wrap slices in plastic wrap and store them in an airtight container for up to 3 months.
  3. Can I use frozen raspberries?
    • Yes, but make sure to thaw and drain them to avoid excess moisture.
  4. What’s the best way to prevent cracks?
    • Use a water bath, don’t overmix, and avoid opening the oven door frequently.

Internal Link Opportunity: For more fruity dessert ideas, try our Strawberry Freezer Pie, another vibrant option.

Nutritional Information and Portion Control

This dessert is rich, so portion sizes should be moderate:

  • Calories: Approximately 400 per slice.
  • Fats: 25g
  • Carbohydrates: 30g
  • Protein: 7g

Suggested Serving Size: One cheesecake serves about 10–12 people, ideal for gatherings.

Wrapping Up: Why You Should Try Raspberry Pistachio Cheesecake

The Stunning Raspberry Pistachio Cheesecake combines the tartness of raspberries with the creaminess of cheesecake and the crunch of pistachios. This dessert is visually appealing, rich, and perfect for special occasions. Enjoy making this recipe for an impressive dessert that’s sure to be a hit!

For those who enjoy layered desserts, try our Salted Caramel Apple Cheesecake with Apple Roses, which is both beautiful and delicious.

Heavenly No-Bake German Chocolate Cheesecake: Easy, Decadent, and Delicious

German chocolate cheesecake, no-bake chocolate cheesecake, coconut pecan cheesecake, easy no-bake dessert, German chocolate cake cheesecake

Heavenly No-Bake German Chocolate Cheesecake: A Decadent Dessert Without the Oven

Looking for a rich and indulgent dessert that combines the flavors of German chocolate cake with the creamy texture of cheesecake? This Heavenly No-Bake German Chocolate Cheesecake is your answer. With layers of creamy chocolate, a crunchy crust, and a decadent coconut-pecan topping, this dessert is easy to make and perfect for any occasion.

For those interested in no-bake desserts, you might also enjoy our Easy No-Bake Banana Split Cheesecake, another creamy, layered treat.

Why No-Bake German Chocolate Cheesecake is the Perfect Choice

This cheesecake is a delightful twist on the classic German chocolate cake, merging the beloved flavors of coconut, chocolate, and pecans in a no-bake format. Here’s why it stands out:

  • Easy Preparation: No need to turn on the oven! Perfect for summer or when you want a quick dessert.
  • Rich Flavors: Combines the indulgence of chocolate with the sweetness of coconut and caramelized pecans.
  • Ideal for Gatherings: This cheesecake is visually stunning and always a crowd-pleaser.

For more chocolate-based desserts, consider our Gone to Heaven Chocolate Pie for another decadent option.

Essential Ingredients for No-Bake German Chocolate Cheesecake

Chocolate Cookie Crust

The crust provides a crunchy contrast to the creamy filling, balancing the textures:

  • Chocolate Cookie Crumbs: For a rich, chocolatey base.
  • Butter: Binds the crumbs together and adds richness.

Cheesecake Filling

The filling is smooth, creamy, and chocolatey, thanks to the following ingredients:

  • Cream Cheese: Provides the cheesecake’s signature texture and tang.
  • Sweetened Condensed Milk: Adds sweetness and creaminess.
  • Melted Chocolate: Ensures a deep chocolate flavor.
  • Vanilla Extract: Enhances the overall flavor.

Coconut-Pecan Topping

This topping brings the essence of German chocolate cake with a sweet and nutty layer:

  • Shredded Coconut: Adds texture and sweetness.
  • Chopped Pecans: For crunch and a nutty flavor.
  • Butter and Brown Sugar: Caramelizes the coconut and pecans for a delicious finish.

For more nutty dessert ideas, check out our Pecan Pie Balls, which are also perfect for special occasions.

Step-by-Step Guide to Making Heavenly No-Bake German Chocolate Cheesecake

Step 1: Prepare the Chocolate Cookie Crust

  1. Combine Ingredients: Mix chocolate cookie crumbs with melted butter until well combined.
  2. Press into Pan: Press the crumb mixture firmly into the bottom of a springform pan to form the crust.
  3. Chill the Crust: Place the crust in the refrigerator to set while you prepare the filling.

Step 2: Make the Cheesecake Filling

  1. Blend Cream Cheese and Condensed Milk: Beat the cream cheese and sweetened condensed milk until smooth.
  2. Add Melted Chocolate and Vanilla: Pour in the melted chocolate and vanilla extract, mixing until fully incorporated.
  3. Pour Filling Over Crust: Spread the filling evenly over the chilled crust.

For more tips on no-bake desserts, visit Serious Eats’ Guide to Perfect No-Bake Desserts.

Step 3: Prepare the Coconut-Pecan Topping

  1. Cook Topping: In a saucepan, combine butter, brown sugar, shredded coconut, and chopped pecans. Stir continuously over low heat until the mixture thickens.
  2. Cool Slightly: Allow the topping to cool slightly before spreading it over the cheesecake.

Step 4: Chill the Cheesecake

  1. Refrigerate: Place the cheesecake in the fridge for at least 4 hours, or overnight, to allow the flavors to meld and the filling to firm up.
  2. Decorate and Serve: Just before serving, you can drizzle melted chocolate over the top for added visual appeal.

Related Recipe: If you love the combination of coconut and chocolate, our Salted Caramel Apple Cheesecake with Apple Roses is another show-stopping dessert.

Customizing Your No-Bake German Chocolate Cheesecake

  • Nut Variations: Swap pecans with walnuts or almonds for a different flavor.
  • Dark Chocolate: Use dark chocolate instead of milk chocolate for a deeper, less sweet flavor.
  • Gluten-Free Crust: Use gluten-free chocolate cookies if needed.

For more customizable dessert ideas, try our Ultimate Peanut Butter Pie, which is as flexible as it is delicious.

Tips for the Perfect No-Bake Cheesecake

Creating a perfect no-bake cheesecake requires some careful techniques:

  • Room Temperature Ingredients: Ensures a smooth, lump-free filling.
  • Proper Chilling Time: Allow enough time for the cheesecake to set for the best texture.
  • Using Quality Chocolate: High-quality chocolate melts better and provides a richer taste.

For more guidance on perfecting your cheesecake, refer to King Arthur Baking’s Cheesecake Tips.

Serving Suggestions and Presentation Ideas

Make your cheesecake stand out with these presentation tips:

  • Garnish with Shredded Coconut and Chopped Pecans: For an extra touch that complements the flavors.
  • Drizzle with Chocolate Sauce: Adds both flavor and visual appeal.
  • Serve with Fresh Whipped Cream: Balances the richness of the cheesecake.

For more serving ideas, visit our Ultimate Cheese and Charcuterie Guide for ways to elevate your dessert displays.

Frequently Asked Questions (FAQs)

  1. Can I make this cheesecake in advance?
    • Yes, this cheesecake can be made 1-2 days in advance and stored in the fridge until ready to serve.
  2. How should I store leftovers?
    • Cover tightly and refrigerate for up to five days. Freezing is also an option for longer storage.
  3. Can I make this cheesecake gluten-free?
    • Yes, use gluten-free chocolate cookies for the crust.
  4. Can I freeze this cheesecake?
    • Absolutely. Wrap each slice individually and freeze for up to three months. Thaw in the fridge overnight before serving.
  5. Can I use a different topping?
    • Yes, you can experiment with a chocolate ganache or a caramel drizzle if you prefer.

Internal Link Opportunity: For more cheesecake variations, check out our Blue Ribbon Blueberry Coffee Cake, which offers another fruity twist.

Nutritional Information and Portion Suggestions

This cheesecake is rich and indulgent, so serving sizes should be mindful.

  • Calories: Approximately 450 per slice.
  • Carbohydrates: About 35g
  • Fats: 30g
  • Protein: 6g

Suggested Serving Size: A standard cheesecake can serve around 10-12 slices, making it ideal for sharing.

Wrapping Up: Why You’ll Love No-Bake German Chocolate Cheesecake

This Heavenly No-Bake German Chocolate Cheesecake combines the best of both worlds – rich chocolate, coconut, and pecans in a creamy cheesecake format without any baking required. It’s easy, indulgent, and guaranteed to impress at any gathering.

If you’re looking for another luxurious dessert to try, consider our Gone to Heaven Chocolate Pie, a chocolate lover’s dream.

White Chocolate Blueberry Cheesecake: A Decadent Dessert with a Fruity Twist

blueberry swirl cheesecake, white chocolate dessert, creamy blueberry cheesecake, fruity cheesecake, white chocolate berry cheesecake

White Chocolate Blueberry Cheesecake: The Perfect Indulgent Dessert

If you’re looking for a dessert that combines creamy, rich flavors with the fresh tartness of blueberries, then White Chocolate Blueberry Cheesecake is the perfect choice. This decadent treat brings together the sweetness of white chocolate, the tang of blueberries, and the smooth texture of cheesecake for an unforgettable experience. It’s ideal for special occasions, gatherings, or just when you want to indulge.

For a similarly elegant dessert, explore our Salted Caramel Apple Cheesecake with Apple Roses, which also combines fruit and cheesecake in a visually stunning way.

Why White Chocolate and Blueberries Make the Perfect Combination

The combination of white chocolate and blueberries is one of richness and contrast. Here’s why this pairing works so well in a cheesecake:

  • Sweetness and Tartness: White chocolate is sweet and creamy, which balances perfectly with the slightly tart blueberries.
  • Creamy Texture: The creaminess of white chocolate enhances the overall smooth texture of the cheesecake.
  • Elegant Presentation: Blueberry swirls add visual appeal, making the cheesecake look as good as it tastes.

For more fruit-inspired desserts, you might enjoy our Raspberry Lemon Bars with Shortbread Crust, which also balances sweetness with tang.

Essential Ingredients for White Chocolate Blueberry Cheesecake

The key to making a fantastic White Chocolate Blueberry Cheesecake is selecting quality ingredients and balancing them perfectly.

  • Cream Cheese: The main ingredient, providing the classic cheesecake flavor and creamy texture.
  • White Chocolate: Adds sweetness and richness.
  • Blueberries: Fresh or frozen, they bring a natural tartness and vibrant color.
  • Graham Cracker Crust: Offers a crunchy base that complements the creamy filling.
  • Heavy Cream: Enhances the cheesecake’s richness.
  • Lemon Juice and Zest: Adds brightness and helps balance the sweetness.

Tip: Use fresh blueberries when they’re in season for the best flavor and color.

Step-by-Step Recipe for White Chocolate Blueberry Cheesecake

Step 1: Prepare the Graham Cracker Crust

  1. Combine Crust Ingredients: Mix graham cracker crumbs, melted butter, and a bit of sugar.
  2. Press into Pan: Use a springform pan and press the crust mixture firmly into the bottom.
  3. Bake: Bake briefly to set the crust.

Related Recipe: Our Easy No-Bake Banana Split Cheesecake also uses a graham cracker crust, ideal for those who enjoy classic cheesecake bases.

Step 2: Make the White Chocolate Cheesecake Filling

  1. Melt the White Chocolate: Gently melt the white chocolate in a double boiler, stirring until smooth.
  2. Mix Cream Cheese and Sugar: In a separate bowl, blend softened cream cheese and sugar until creamy.
  3. Combine Ingredients: Slowly add the melted white chocolate and heavy cream to the cream cheese mixture, blending until smooth.

Step 3: Prepare the Blueberry Swirl

  1. Cook the Blueberries: In a saucepan, combine blueberries, a bit of sugar, and lemon juice. Cook until the berries soften and the sauce thickens.
  2. Create the Swirl: Pour half the cheesecake filling into the crust, then add dollops of blueberry sauce. Swirl with a toothpick to create a marbled effect, then pour the remaining filling and repeat the swirl.

Pro Tip: Swirling carefully ensures that the blueberry sauce doesn’t overpower the white chocolate but adds a balanced flavor and design.

Step 4: Bake the Cheesecake

  1. Water Bath: Place the springform pan in a larger baking dish and fill it with hot water halfway up the sides of the pan. This prevents cracks and ensures even baking.
  2. Bake: Bake at a low temperature for about an hour, or until the edges are set but the center still jiggles slightly.

For more tips on baking with water baths, check out How to Avoid Cracks in Cheesecake, which provides a comprehensive guide to ensuring a smooth texture.

Step 5: Cool and Chill

  • Cooling: Allow the cheesecake to cool at room temperature for at least an hour before refrigerating.
  • Chilling: Refrigerate for a minimum of four hours or overnight to let the flavors meld and the texture set.

Customizing Your White Chocolate Blueberry Cheesecake

One of the best things about cheesecake is its versatility. Here are a few ways you can customize this recipe:

  • Swap Blueberries for Raspberries: For a different flavor, use raspberries instead of blueberries.
  • Chocolate Variations: Try dark or milk chocolate instead of white chocolate for a unique twist.
  • Alternative Crusts: Replace the graham crackers with Oreo cookies or gingersnap cookies for a different base.

For a creative chocolate twist, try our Ultimate Peanut Butter Pie, another decadent dessert with rich flavors.

Tips for Baking the Perfect Cheesecake

Achieving a perfect cheesecake texture requires some finesse. Here are some tips:

  • Room Temperature Ingredients: Using room-temperature ingredients helps create a smooth, lump-free batter.
  • Avoid Overmixing: Overmixing can incorporate too much air, leading to cracks.
  • Using a Water Bath: This keeps the baking environment moist, preventing the cheesecake from drying out.

Serving Ideas for White Chocolate Blueberry Cheesecake

A beautifully presented cheesecake can make an impressive dessert for any occasion.

  • Garnish with Fresh Blueberries: Top the cheesecake with fresh blueberries for added color.
  • Drizzle with White Chocolate Ganache: Melted white chocolate drizzle adds a touch of elegance.
  • Serve with Fresh Whipped Cream: Whipped cream provides a light contrast to the rich cheesecake.

If you enjoy pairing desserts, check out our Ultimate Cheese and Charcuterie Guide for more ideas on creating beautiful spreads for gatherings.

Frequently Asked Questions (FAQs)

  1. Can I make this cheesecake without a springform pan?
    • Yes, but a springform pan is recommended for easy removal. Alternatively, line a cake pan with parchment paper.
  2. Can I use frozen blueberries?
    • Yes, thaw them first and drain excess liquid to avoid a runny blueberry swirl.
  3. Can I make this cheesecake ahead of time?
    • Absolutely, it’s even better after a day in the fridge as the flavors develop.
  4. How should I store leftover cheesecake?
    • Wrap tightly and refrigerate for up to five days, or freeze for up to three months.
  5. Can I freeze this cheesecake?
    • Yes, slice and wrap each piece in plastic wrap, then foil. Thaw in the fridge overnight before serving.

Internal Link Opportunity: For a no-bake cheesecake option, see our No-Bake Pumpkin Cheesecake, which is perfect for fall gatherings.

Nutritional Information and Portion Sizes

White Chocolate Blueberry Cheesecake is a rich dessert, so moderation is key.

  • Calories: Approximately 400 per slice.
  • Carbohydrates: Around 30g
  • Fats: 25g
  • Proteins: 6g

Suggested Serving Size: One cheesecake serves about 10–12 people, making it perfect for a small gathering.

Wrapping Up: Why You Should Try White Chocolate Blueberry Cheesecake

The White Chocolate Blueberry Cheesecake combines sweet, tangy, and creamy elements into a dessert that’s sure to impress. Its beautiful swirls, luxurious texture, and balanced flavors make it ideal for any celebration. Whether you’re a seasoned baker or a novice, this cheesecake is a delightful project with a delicious payoff.

For those looking to add more indulgent desserts to their repertoire, try our Heavenly Peanut Butter Cheesecake, which is rich, creamy, and perfect for peanut butter lovers.