Angel Chicken Rice: Creamy One-Pan Meal for Effortless Comfort

creamy chicken and rice, easy chicken casserole, angel chicken pasta, one-pan chicken dinner, comforting chicken bake

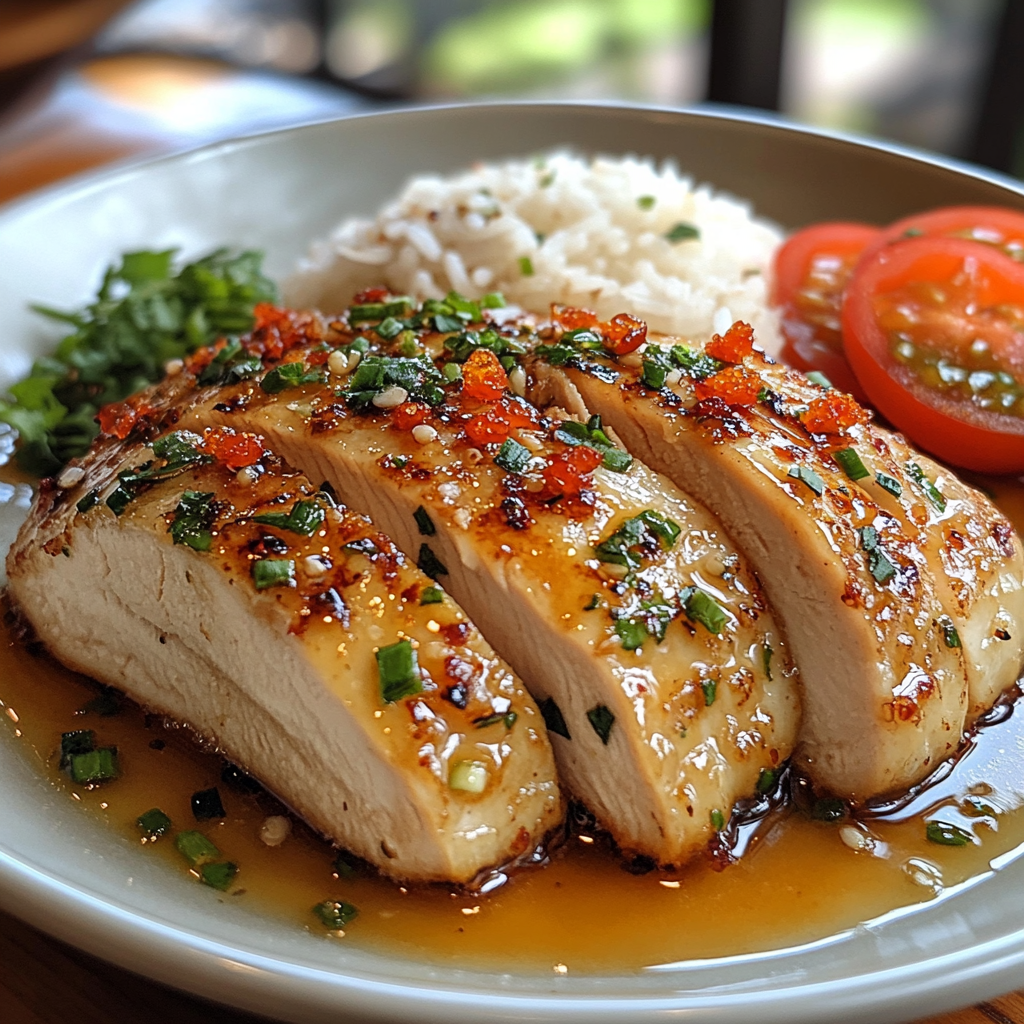
Angel Chicken Rice: A Creamy, One-Pan Dinner for Comfort and Ease

Angel Chicken Rice is a comforting, creamy dish that combines tender chicken, rice, and a rich sauce with hints of ranch or Italian flavors. It’s a go-to recipe for busy weeknights or family gatherings due to its ease and delicious flavor. Pair it with our comforting Crockpot Potato Soup with Hashbrowns for a warming, hearty meal.


Essential Ingredients for Angel Chicken Rice

Here’s what you’ll need for this one-pan delight:

  • Chicken Breasts or Thighs: For tender, juicy chicken.
  • Cream Cheese: Adds richness and creaminess to the sauce.
  • Cream of Chicken Soup: Thickens and flavors the sauce.
  • Angel Hair Pasta or Rice: Provides texture and substance.
  • Ranch or Italian Dressing Mix: Brings a zesty flavor to the dish.
  • Optional Additions: Mushrooms, fresh herbs, or shredded cheese for extra flavor.

For other creamy chicken flavors, try our Slow Cooker Chicken and Gravy over Noodles—a perfect option for those who love creamy dishes.

Ingredient Tips and Substitutions

  • Chicken Alternatives: Use thighs for a juicier texture.
  • Rice or Pasta Choice: Swap in parboiled rice or any pasta, adjusting the liquid if needed.
  • Optional Vegetables: Add mushrooms or spinach for additional nutrients and color.

Preparing the Ingredients

  1. Prepare the Chicken: Season chicken breasts or thighs lightly with salt and pepper.
  2. Mix the Sauce: In a bowl, combine cream cheese, cream of chicken soup, and the seasoning mix.
  3. Cook the Rice or Pasta (if necessary): For quicker assembly, pre-cook the rice or pasta.

Pro Tip: Searing the chicken before baking enhances the flavor.


Layering and Baking

  1. Assemble the Dish: Spread rice or pasta at the base, layer chicken, and pour the sauce mixture on top.
  2. Add Toppings (Optional): Sprinkle cheese, herbs, or add vegetables.
  3. Bake in the Oven: Cover tightly with foil and bake at 350°F for 30-40 minutes.

This method creates a creamy, flavorful dish that’s perfect for busy families.


Flavor Variations and Customizations

To add your twist to Angel Chicken Rice, try these flavor ideas:

  • Herbed Angel Chicken Rice: Add thyme or rosemary for a fragrant twist.
  • Garlic and Parmesan Variation: Stir in minced garlic and sprinkle with Parmesan.
  • Spicy Angel Chicken: Add red pepper flakes or a splash of hot sauce for heat.
  • Vegetable-Rich Version: Incorporate broccoli, bell peppers, or spinach.

If you’re a fan of cheesy dishes, you may also like our Ultimate Cheesy Ranch Chicken, which offers a similar creamy, cheesy flavor.


Serving Suggestions and Presentation Tips

Serve Angel Chicken Rice with simple sides or garnish for a complete meal:

  • Green Salad: A fresh salad pairs well with this creamy dish.
  • Garlic Bread: Adds a satisfying crunch and complements the flavors.
  • Roasted Vegetables: Pair with steamed or roasted veggies for a nutritious side.

For other comfort food options, consider our Ultimate Cheesy Ranch Chicken as a complementary dish.


Storage, Freezing, and Reheating Tips

  1. Refrigerating Leftovers: Store in an airtight container for up to 3 days.
  2. Freezing Instructions: Wrap individual portions in plastic wrap and freeze for later.
  3. Reheating: Reheat in the oven at 325°F, adding broth if needed to retain moisture.

Tip: Reheating with a splash of broth keeps the dish creamy.


FAQs About Angel Chicken Rice

Q: Can I use other types of pasta or rice?
Yes, any pasta or rice will work; adjust cooking times and liquid if necessary.

Q: How do I avoid curdling in the sauce?
Ensure ingredients are at room temperature, and bake at a moderate temperature.

Q: Can I make this dairy-free?
Try using a dairy-free cream cheese and soup alternative.

Q: Can I add vegetables to this dish?
Absolutely! Mushrooms, spinach, or bell peppers add texture and flavor.

Q: Do I need to pre-cook the pasta or rice?
Pre-cooking can help, but instant rice or pasta works without pre-cooking.


Conclusion

Angel Chicken Rice is an easy, creamy, and satisfying meal that’s perfect for family dinners. For other comforting chicken recipes, check out our Ultimate Cheesy Ranch Chicken, another crowd-pleaser that’s rich and delicious.

Chicken Bacon Ranch Stuffed Bread: The Ultimate Cheesy, Savory Treat

bacon ranch stuffed bread, cheesy stuffed bread, savory stuffed bread, chicken bacon bread recipe, ranch chicken stuffed loaf

Chicken Bacon Ranch Stuffed Bread: The Ultimate Savory Delight

Chicken Bacon Ranch Stuffed Bread combines the irresistible flavors of creamy ranch, smoky bacon, and tender chicken, all packed into a crusty bread loaf. Perfect as a party appetizer, game-day snack, or a comforting main dish, this stuffed bread is easy to prepare and makes a savory, crowd-pleasing treat.

For an extra cheesy side, consider serving this with our Cheesy Bacon Jalapeño Corn Dip, which complements the stuffed bread perfectly.


Ingredients for Chicken Bacon Ranch Stuffed Bread

To prepare this savory stuffed bread, gather the following ingredients:

  • Bread Loaf: Choose French or Italian bread for a sturdy structure.
  • Cooked Chicken: Shredded or diced, for a hearty filling.
  • Bacon: Cooked to a crispy texture, adding a smoky flavor.
  • Cream Cheese: Softened for easy mixing and a creamy texture.
  • Ranch Dressing: Adds flavor and binds the filling.
  • Shredded Cheese: Use cheddar, mozzarella, or a blend for a gooey, cheesy center.
  • Optional: Fresh chives, garlic powder, or green onions for extra flavor.

If you enjoy bacon in bread, try our Savory Bacon Bread, a delicious option for bacon lovers.

Ingredient Tips and Substitutions

  • Bread Choice: Use sourdough or Italian bread for different textures and flavors.
  • Cheese Variations: Mix cheddar with Monterey Jack or mozzarella for a melty finish.
  • Extra Heat: Add diced jalapeños or hot sauce for a spicy twist.

Preparing the Ingredients

  1. Cook and Shred the Chicken: Prepare cooked chicken by shredding or dicing it.
  2. Cook the Bacon: Ensure the bacon is crispy for a pleasant texture in the bread.
  3. Mix the Filling: Combine softened cream cheese, ranch dressing, shredded cheese, and bacon in a large bowl. Stir in cooked chicken until fully mixed.

For a similar flavor combination, you might also enjoy our Ultimate Cheesy Ranch Chicken, another comforting dish with a cheesy, ranch-infused taste.


Assembling the Stuffed Bread

  1. Prepare the Bread: Cut a large rectangle out of the top of the bread loaf and hollow out the inside to create a cavity.
  2. Add the Filling: Spoon the chicken bacon ranch mixture evenly into the hollowed-out bread loaf.
  3. Top with Extra Cheese: Sprinkle a bit more shredded cheese and bacon on top for added flavor and presentation.

This preparation method ensures each slice has a balanced, flavorful bite.


Baking the Stuffed Bread

  • Oven Temperature: Preheat to 350°F (175°C).
  • Baking Time: Bake for 20-25 minutes, or until the cheese is melted and bubbly.
  • Optional Broil: For a crispier top, broil the bread for 2-3 minutes at the end.

Baking transforms the bread into a crusty, melty, and savory masterpiece that’s sure to satisfy.


Flavor Variations and Customizations

To add variety to the Chicken Bacon Ranch Stuffed Bread, try these twists:

  • Spicy Jalapeño Ranch: Add chopped jalapeños and a dash of hot sauce for heat.
  • Herb and Garlic: Stir in minced garlic and fresh herbs like rosemary for a more aromatic flavor.
  • Cheddar and Mozzarella Mix: Blend different cheeses for a gooey, stringy texture.
  • Vegetarian Version: Replace chicken with sautéed mushrooms or artichoke hearts for a veggie-friendly version.

Each variation adds a unique flavor profile, perfect for different occasions.


Serving Suggestions and Presentation Tips

Chicken Bacon Ranch Stuffed Bread is best served warm and sliced for easy sharing. Here are some serving ideas:

  • Appetizer Tray: Arrange slices on a platter with a garnish of fresh herbs.
  • Side Dish: Serve with a light salad or vegetable sticks for balance.
  • Dipping Sauces: Pair with ranch or marinara sauce for added flavor.

For more dipping ideas, check out our Cheesy Bacon Jalapeño Corn Dip, which makes a delicious complement.


Storage and Reheating Tips

To make the most of leftovers, here’s how to store and reheat Chicken Bacon Ranch Stuffed Bread:

  • Refrigerate: Wrap in foil and store in the refrigerator for up to 3 days.
  • Freeze: Wrap the unbaked bread in plastic wrap, then foil, and freeze for up to a month.
  • Reheat: Reheat in a 325°F oven until warm to maintain the bread’s texture.

These steps ensure you can enjoy this savory stuffed bread even after the first serving.


FAQs About Chicken Bacon Ranch Stuffed Bread

Q: Can I make this with store-bought rotisserie chicken?
Yes, rotisserie chicken works perfectly and saves time.

Q: Can I use different types of bread?
Absolutely! French or Italian loaves work well, but sourdough adds extra flavor.

Q: How do I keep the bread from getting soggy?
Ensure the filling isn’t too wet, and use a thicker bread that can hold the filling.

Q: Can I add vegetables to the filling?
Yes, chopped bell peppers, spinach, or mushrooms make tasty additions.

Q: How can I make it gluten-free?
Use a gluten-free loaf, or serve the filling as a dip with gluten-free crackers.


Conclusion

Chicken Bacon Ranch Stuffed Bread is a flavorful, filling dish that’s easy to make and perfect for sharing. Whether it’s a holiday appetizer, game-day snack, or family dinner, this savory stuffed bread is sure to impress. For other bacon-infused recipes, try our Savory Bacon Bread or add a bit of spice with our Ultimate Cheesy Ranch Chicken.

Pineapple Christmas Balls: Easy No-Bake Holiday Treat with Tropical Flavor

pineapple coconut balls, no-bake Christmas dessert, holiday pineapple treats, tropical Christmas balls, pineapple holiday bites

Pineapple Christmas Balls: A Tropical, No-Bake Holiday Treat

Pineapple Christmas Balls are a tropical twist on holiday treats, bringing the sweet flavor of pineapple into a creamy, no-bake dessert that’s easy to make. Perfect for holiday parties, gift baskets, or even a light dessert option, these bite-sized delights are as fun to make as they are to eat.

For another pineapple dessert, try our Delightful Mini Pineapple Upside Down Cakes, a favorite for holiday gatherings.


Ingredients for Pineapple Christmas Balls

Creating these no-bake treats is simple, requiring just a few essential ingredients:

  • Crushed Pineapple: Canned and well-drained for sweetness and texture.
  • Cream Cheese: Adds creaminess and helps hold the balls together.
  • Shredded Coconut: For tropical flavor and texture.
  • Graham Cracker Crumbs: Provides structure and a touch of sweetness.
  • Optional: Pineapple-flavored gelatin powder for extra color and flavor, or powdered sugar to adjust sweetness.

For a similar tropical treat with a spicy kick, consider our Spicy Pineapple Jalapeno Chutney, a bold addition to any holiday spread.


Preparing the Ingredients

  1. Drain the Pineapple: Press out as much liquid as possible to prevent the mixture from becoming too soft.
  2. Soften the Cream Cheese: Leave it at room temperature for easier mixing.
  3. Combine the Ingredients: In a large mixing bowl, combine cream cheese, drained pineapple, and half of the coconut.
  4. Add Graham Cracker Crumbs: Stir in enough graham cracker crumbs until the mixture holds its shape.

Pro Tip: Adding a tablespoon of pineapple-flavored gelatin powder enhances the pineapple flavor and adds a festive color.


Forming and Chilling the Balls

  1. Roll the Mixture into Balls: Use a small cookie scoop or tablespoon to form evenly sized balls.
  2. Coat in Coconut or Graham Cracker Crumbs: Roll each ball in shredded coconut or graham cracker crumbs for a festive, textured finish.
  3. Chill the Balls: Refrigerate for at least 1 hour to firm up.

Chilling helps the balls hold their shape, making them easier to serve and enjoy.


Creative Variations of Pineapple Christmas Balls

Explore these fun variations to add a unique twist to the classic recipe:

  • Chocolate-Dipped Pineapple Balls: Dip the balls halfway in melted chocolate for a delicious contrast.
  • Nutty Pineapple Balls: Roll the balls in crushed nuts like pecans or almonds for added crunch.
  • Pineapple Rum Balls: Add a teaspoon of rum extract for an adult-friendly flavor.
  • Reduced-Sugar Version: Use unsweetened coconut and omit any additional sugar.

For another easy, no-bake treat, check out our No-Bake Banana Pudding Cheesecake, a perfect dessert for holiday entertaining.


Serving Suggestions and Presentation Tips

Pineapple Christmas Balls make for a delightful addition to any holiday dessert table. Here are some presentation ideas:

  • Festive Tray: Arrange on a decorative holiday tray with sprigs of greenery for a seasonal touch.
  • Mini Cupcake Liners: Place each ball in a small cupcake liner for easy serving.
  • Garnish with Fresh Fruit: Surround with fresh berries or kiwi slices for a colorful display.
  • Gift Idea: Package in holiday-themed boxes or bags for a thoughtful edible gift.

Storage and Freezing Tips

These no-bake treats are perfect for making ahead and storing:

  • Refrigerate: Store in an airtight container in the fridge for up to a week.
  • Freezing: Freeze on a baking sheet, then transfer to a freezer-safe container for up to 2 months.
  • Thawing: Thaw in the fridge for a few hours before serving.

Tip: Freezing makes these treats easy to prepare ahead of time, ensuring you’re ready for any holiday gathering.


FAQs About Pineapple Christmas Balls

Q: Can I use fresh pineapple instead of canned?
Yes, but be sure to finely chop and thoroughly drain the pineapple to avoid excess moisture.

Q: How do I make these less sweet?
Opt for unsweetened coconut and reduce any additional sugar or powdered sugar in the recipe.

Q: Are these gluten-free?
Yes, as long as you use gluten-free graham cracker crumbs or omit them entirely.

Q: Do I need to chill them before serving?
Chilling is essential to firm up the balls and enhance their flavor.

Q: Can I add food coloring for a festive look?
Absolutely! A few drops of red or green food coloring can make them look even more festive.


Conclusion

Pineapple Christmas Balls are a delightful holiday treat that’s easy to make and versatile enough for any gathering. With the perfect balance of sweet and tropical flavors, these no-bake treats are sure to become a holiday favorite. For more tropical-inspired holiday recipes, explore our Delightful Mini Pineapple Upside Down Cakes or enjoy the spicy-sweet notes of Spicy Pineapple Jalapeno Chutney.

Crockpot Angel Chicken: Creamy, Comforting, and Easy Slow-Cooked Dinner

slow cooker angel chicken, creamy crockpot chicken, angel chicken recipe, easy crockpot dinner, slow-cooked chicken recipe, creamy angel chicken

Crockpot Angel Chicken: The Ultimate Creamy Comfort Dish

Crockpot Angel Chicken is a dreamy, creamy slow-cooked chicken dish that combines tender chicken breasts with rich, savory ingredients like cream cheese, Italian dressing mix, and a touch of butter. Perfect for weeknight dinners, family gatherings, or even potlucks, this easy-to-make meal offers a satisfying comfort food experience with minimal effort.

For an additional comforting side, try our Crockpot Potato Soup with Hashbrowns, a warm and hearty pairing.


Ingredients for Crockpot Angel Chicken

To make this dish, gather the following simple ingredients:

  • Chicken Breasts: Boneless and skinless for easy cooking.
  • Cream Cheese: Adds a smooth, creamy texture.
  • Cream of Chicken Soup: Forms the base of the sauce.
  • Italian Dressing Mix: Enhances the flavor with a blend of herbs and spices.
  • Butter: Adds richness.
  • Optional Add-Ins: Mushrooms, garlic, or parsley for extra flavor.

For more slow-cooked pasta inspiration, check out our Slow Cooker Baked Ziti, a similarly easy and satisfying dish.

Ingredient Variations and Substitutions

  • Low-Fat Option: Substitute low-fat cream cheese and soup.
  • Vegetarian Alternative: Replace chicken with mushrooms and add vegetable broth.
  • Herbed Variation: Add fresh rosemary or thyme for an aromatic twist.

Preparing the Ingredients

  1. Prepare the Chicken: Trim any excess fat and season lightly with salt and pepper.
  2. Mix the Sauce: In a bowl, combine cream cheese, cream of chicken soup, Italian dressing mix, and butter.
  3. Optional Sauté: For extra flavor, sauté mushrooms and garlic in butter before adding them to the crockpot.

Pro Tip: Room temperature cream cheese blends more easily with the other ingredients.


Layering the Ingredients in the Crockpot

  1. Layer the Chicken: Place chicken at the bottom of the crockpot.
  2. Add the Sauce: Pour the cream cheese mixture over the chicken.
  3. Optional Toppings: Sprinkle mushrooms or garlic on top for additional flavor.

This layering helps the chicken cook evenly, absorbing the flavors for maximum tenderness.


Cooking Times and Settings

  • Low Setting: Cook on low for 6-7 hours for tender, juicy chicken.
  • High Setting: For a quicker option, cook on high for 3-4 hours.
  • Checking Doneness: Chicken is ready when it reaches an internal temperature of 165°F.

If you’re interested in other slow-cooker recipes, try our Slow Cooker Baked Ziti, a pasta favorite that cooks beautifully in a crockpot.


Serving Suggestions

Crockpot Angel Chicken is versatile and pairs well with various sides:

  • Serve Over Pasta: Angel hair pasta is a classic pairing.
  • Rice or Mashed Potatoes: For an alternative base, serve over rice or mashed potatoes.
  • Side of Veggies: Steamed vegetables like broccoli or green beans balance the richness of the dish.
  • Bread Option: Garlic bread or dinner rolls are perfect for soaking up the creamy sauce.

For more creamy side options, consider Momma’s Creamy Baked Macaroni and Cheese, a dish that complements angel chicken beautifully.


Popular Variations of Crockpot Angel Chicken

This recipe can be easily customized to suit different tastes:

  • Herb and Garlic Angel Chicken: Add fresh herbs like basil or rosemary and minced garlic.
  • Spicy Angel Chicken: Add red pepper flakes or a splash of hot sauce for a kick.
  • Cheesy Angel Chicken: Stir in shredded mozzarella or Parmesan cheese for extra creaminess.
  • Mushroom and Spinach Angel Chicken: Add sliced mushrooms and baby spinach for a vegetable-rich option.

Each variation adds a new twist, making it easy to enjoy this dish in various ways.


Storage and Reheating Tips

Crockpot Angel Chicken stores and reheats well, making it a great option for leftovers:

  • Refrigerating: Store in an airtight container in the fridge for up to 3 days.
  • Freezing: Portion out the chicken and sauce, then freeze for up to 2 months.
  • Reheating: Warm in the oven at 350°F or on the stovetop until hot, stirring occasionally to maintain a creamy consistency.

FAQs About Crockpot Angel Chicken

Q: Can I use frozen chicken?
Yes, but it may increase cooking time. For best results, thaw chicken first.

Q: Can I make this dish dairy-free?
Yes, use dairy-free cream cheese and a substitute for butter.

Q: What if the sauce is too thick?
Thin it out with a splash of milk or chicken broth.

Q: How do I prevent the cream cheese from curdling?
Keep the temperature consistent, and don’t add cold cream cheese directly to the crockpot.

Q: Can I use a different soup base?
Yes, cream of mushroom or celery soup can be used as alternatives.


Conclusion

Crockpot Angel Chicken is a comforting, creamy dish that’s both easy to prepare and rich in flavor. With endless customization options, it’s a recipe you’ll return to again and again. Enjoy it with pasta, rice, or your favorite vegetables for a meal that’s sure to satisfy. For more crockpot ideas, explore Crockpot Potato Soup or Momma’s Creamy Mac and Cheese, two other comforting classics.

Perfect Stuffing Balls Recipe: A Holiday Favorite for Crispy, Flavorful Bites

holiday stuffing balls, crispy stuffing bites, savory stuffing balls, easy stuffing balls recipe, classic stuffing balls, Thanksgiving stuffing balls

Stuffing Balls: A Fun and Flavorful Twist on Traditional Stuffing

Stuffing balls are an exciting take on classic stuffing, offering the same rich flavors in a fun, easy-to-serve form. Perfect for Thanksgiving, Christmas, or any meal that calls for comfort food, stuffing balls have become a favorite on holiday tables. Unlike traditional stuffing, which is often served in large dishes, stuffing balls make for an attractive, portioned side that’s both easy to serve and enjoy.

To try a similar recipe, check out our Perfect Homemade Stuffing Balls, a beloved version that pairs well with various main dishes.


Ingredients for Making Stuffing Balls

Creating delicious stuffing balls starts with fresh, high-quality ingredients:

  • Bread: White or whole wheat bread, dried out for better absorption of flavors.
  • Butter: Adds richness to the flavor profile.
  • Aromatics: Onion, celery, and fresh herbs like sage and thyme.
  • Eggs: Help bind the mixture for well-formed stuffing balls.
  • Broth: Chicken or vegetable broth for added moisture and flavor.
  • Optional Add-Ins: Sausage, dried cranberries, or nuts for unique variations.

For another comforting side dish option, consider our My Mom’s Perfect Thanksgiving Stuffing Recipe, an excellent pairing for holiday meals.

Ingredient Substitutions and Variations

  • Gluten-Free: Use gluten-free bread to create gluten-free stuffing balls.
  • Vegetarian: Use vegetable broth and omit sausage for a vegetarian version.
  • Cheesy Twist: Add shredded cheese for a rich, savory stuffing ball.

Preparing the Ingredients

  1. Dry Out the Bread: Cut bread into cubes and leave it out to dry for at least a few hours.
  2. Chop the Aromatics: Finely dice onions and celery for even distribution in each bite.
  3. Sauté Aromatics: Cook onions and celery in butter until soft, enhancing their flavor.
  4. Mix the Ingredients: In a large bowl, combine bread cubes, aromatics, eggs, herbs, and broth.

Pro Tip: Make sure the bread is well-coated with broth but not overly soggy.


Shaping and Forming Stuffing Balls

Once the ingredients are mixed, it’s time to form the stuffing balls:

  1. Shape the Mixture: Use your hands or an ice cream scoop to form evenly-sized balls.
  2. Place on Baking Sheet: Arrange the balls on a parchment-lined baking sheet for easy cleanup.
  3. Optional Fillings: For a surprise center, add a small piece of sausage or cheese inside each ball.

Cooking Methods for Stuffing Balls

Stuffing balls can be cooked in several ways depending on your preference for texture and flavor:

  1. Oven-Baked: Bake at 350°F for 25-30 minutes until golden brown. This method creates a crispy exterior.
  2. Air Fryer: Cook in the air fryer at 375°F for about 15 minutes for a faster, evenly cooked result.
  3. Stovetop Searing: Sear on the stovetop for a crispy outside, then finish in the oven for a fully cooked interior.

For a similar slow-cooked flavor, try our Easy Crock Pot Stuffing, perfect for those who love a hands-off approach to cooking stuffing.


Popular Variations of Stuffing Balls

Explore these creative twists on traditional stuffing balls to suit your taste preferences:

  • Savory Sausage Stuffing Balls: Add crumbled sausage for a heartier, more flavorful stuffing.
  • Herb and Cheese Stuffing Balls: Add shredded cheddar or Parmesan for a cheesy take on stuffing.
  • Sweet and Savory: Add dried cranberries or diced apples for a festive, slightly sweet variation.

For a different take on stuffing, our My Mom’s Perfect Thanksgiving Stuffing Recipe offers a traditional recipe that complements stuffing balls as part of a holiday spread.


Serving Suggestions for Stuffing Balls

Stuffing balls can be enjoyed as a side dish or appetizer. Here are some ways to serve them:

  • Holiday Platter: Serve alongside turkey, mashed potatoes, and cranberry sauce for a classic holiday spread.
  • Appetizer: Arrange on a serving platter with toothpicks for a bite-sized appetizer.
  • Topped with Gravy: Serve with a drizzle of gravy for extra flavor.

Storage, Freezing, and Reheating Tips

Stuffing balls are perfect for make-ahead meals or holiday prep. Here’s how to store them:

  • Refrigerate: Store in an airtight container in the fridge for up to 3 days.
  • Freezing: Freeze unbaked stuffing balls on a baking sheet, then transfer to a freezer-safe container.
  • Reheating: Reheat in the oven at 350°F for about 10 minutes to maintain crispiness.

FAQs About Stuffing Balls

Q: Can I make stuffing balls ahead of time?
Yes, prepare them a day ahead and store them in the fridge until ready to bake.

Q: Can I make stuffing balls gluten-free?
Yes, simply use gluten-free bread and ensure that all other ingredients are gluten-free.

Q: Can I add other fillings?
Absolutely! Add-ins like sausage, cheese, or cranberries work well.

Q: Do I have to bake them, or can I cook them on the stovetop?
You can start them on the stovetop to sear, then finish in the oven for the best results.


Conclusion

Stuffing balls are a delightful and versatile addition to any meal, especially during the holidays. With their crispy exterior and flavorful interior, these bite-sized stuffing portions offer a fun twist on a classic dish. Whether you’re serving them as a side dish, appetizer, or unique holiday treat, stuffing balls are sure to be a hit.

Explore more stuffing options with our Perfect Homemade Stuffing Balls or try a traditional approach with My Mom’s Perfect Thanksgiving Stuffing Recipe for a variety of stuffing ideas that will please any crowd.