Gingerbread Pancakes: A Warm and Spiced Holiday Breakfast

spiced pancakes, holiday breakfast recipes, gingerbread-flavored pancakes, Christmas pancakes, festive pancakes, molasses pancakes

Gingerbread Pancakes: A Festive Breakfast Treat

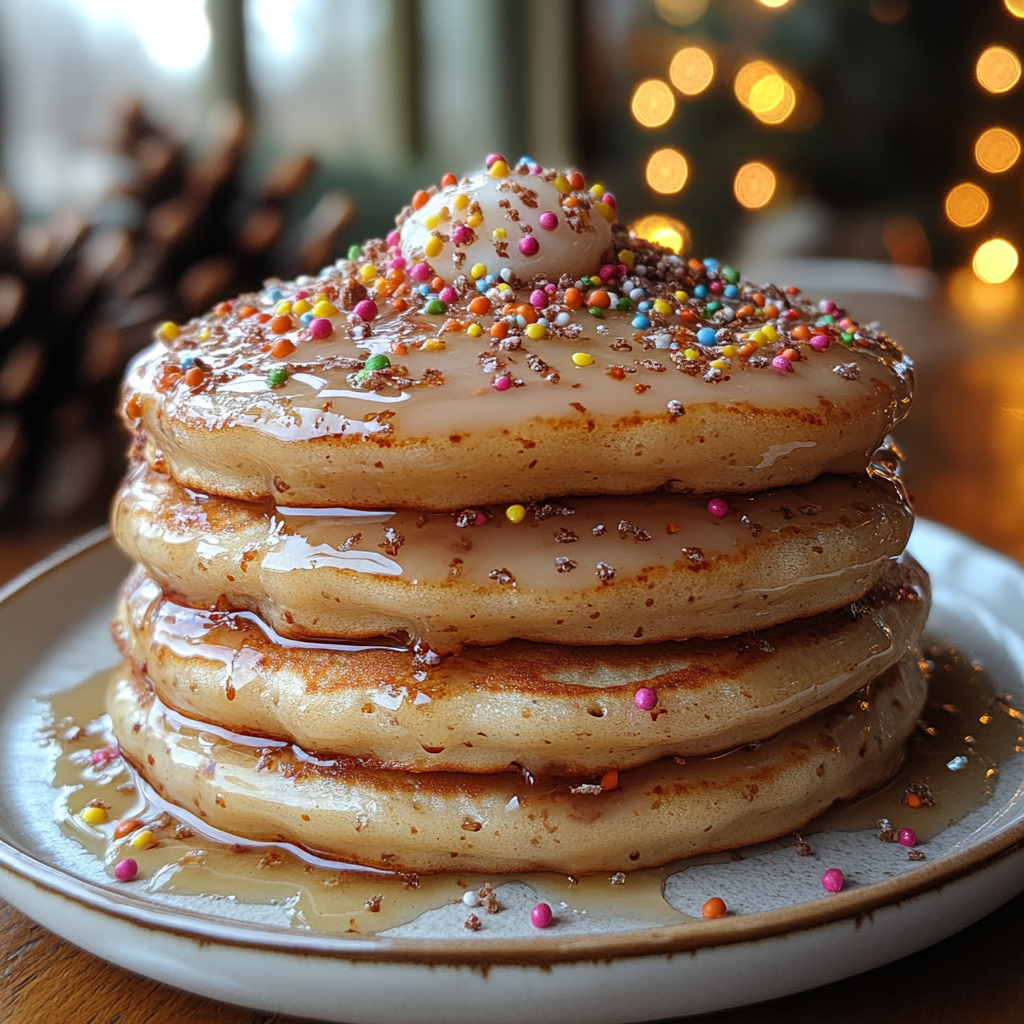
The warm, spiced aroma of gingerbread pancakes is a delightful way to embrace the holiday season. Combining the festive flavors of molasses, cinnamon, and ginger with the fluffy texture of pancakes, this dish is perfect for cozy breakfasts or festive brunches. Whether you’re hosting a holiday gathering or simply craving a special breakfast, gingerbread pancakes are a surefire way to add joy to your table.


Why Gingerbread Pancakes Are Perfect for the Holidays

Gingerbread pancakes are cherished for their:

  • Festive Flavors: The combination of warm spices and molasses evokes holiday nostalgia.
  • Versatility: Serve them as-is, or dress them up with whipped cream, powdered sugar, or syrup.
  • Ease of Preparation: A simple recipe that delivers impressive results.

For more seasonal breakfast ideas, explore Sheetpan Pancakes: A Simple Breakfast Delight.


Ingredients for Gingerbread Pancakes

Core Ingredients

  • Wet Ingredients:
    • 1 egg
    • ¼ cup molasses
    • 1 ½ cups water or milk
    • 1 teaspoon vanilla extract
  • Dry Ingredients:
    • 1 ½ cups all-purpose flour
    • 1 teaspoon baking powder
    • ½ teaspoon baking soda
    • 1 teaspoon ground ginger
    • 1 teaspoon cinnamon
    • ¼ teaspoon nutmeg
    • A pinch of salt

Step-by-Step Instructions

1. Preparing the Batter

  1. In a large mixing bowl, whisk together the dry ingredients: flour, baking powder, baking soda, and spices.
  2. In a separate bowl, beat the egg and mix in the molasses, water, and vanilla extract.
  3. Gradually incorporate the wet ingredients into the dry mixture, whisking until smooth. Avoid overmixing.

2. Cooking the Pancakes

  1. Heat a lightly greased griddle or non-stick pan over medium heat.
  2. Pour ¼ cup of batter onto the hot griddle for each pancake.
  3. Cook until bubbles form on the surface and the edges look set. Flip and cook until the other side is golden brown.

Serving Suggestions and Variations

Serving Ideas

  • Top with whipped cream, powdered sugar, or a drizzle of maple syrup.
  • Pair with hot beverages like spiced tea, coffee, or hot chocolate.

Creative Variations

  • Chocolate Gingerbread Pancakes: Add ½ cup of chocolate chips to the batter.
  • Nutty Pancakes: Fold in ¼ cup of chopped pecans or walnuts.
  • Gluten-Free Pancakes: Substitute all-purpose flour with a gluten-free blend.

Check out Pancake Muffins: A Delightful Morning Surprise for another creative breakfast idea.


Storage and Reheating Tips

  • Storage: Allow pancakes to cool completely before storing them in an airtight container. Refrigerate for up to 3 days.
  • Freezing: Stack pancakes with parchment paper between layers and freeze for up to 2 months.
  • Reheating: Warm pancakes in the microwave for 20–30 seconds or on a griddle over low heat.

FAQs About Gingerbread Pancakes

1. Can I Use Blackstrap Molasses?

Yes, but it has a more robust flavor compared to regular molasses. Use sparingly if you’re new to it.

2. How Can I Make These Vegan?

Replace the egg with a flaxseed egg (1 tablespoon flaxseed meal + 2.5 tablespoons water) and use plant-based milk.

3. Can I Prepare the Batter Ahead of Time?

Yes, store the batter in the fridge for up to 24 hours. Stir well before using.

4. What’s the Secret to Fluffy Pancakes?

Avoid overmixing the batter and let it rest for 5–10 minutes before cooking.

5. What Syrups Pair Well with Gingerbread Pancakes?

Try maple syrup, vanilla syrup, or a spiced caramel drizzle.


Internal Linking Opportunities

Enhance the reader’s experience with these related recipes:


Why You’ll Love Gingerbread Pancakes

These gingerbread pancakes bring festive cheer to the breakfast table with their warm spices and fluffy texture. Easy to make and endlessly adaptable, they’re perfect for holiday mornings or cozy weekends. Pair them with your favorite toppings and enjoy a breakfast that feels like a celebration.

For more delicious recipes, visit ExoRecipes.com.

Pumpkin Snickerdoodle Brownies: A Perfect Fall Dessert

pumpkin spice brownies, cinnamon pumpkin bars, snickerdoodle brownies with pumpkin, fall-inspired brownies, pumpkin dessert bars

Pumpkin Snickerdoodle Brownies: The Perfect Fall Dessert

Pumpkin and cinnamon come together in a harmonious blend in Pumpkin Snickerdoodle Brownies. These treats are ideal for crisp fall days, combining the chewy texture of brownies with the warm, spiced flavors of pumpkin and snickerdoodles. Whether you’re preparing for a holiday gathering or looking for a cozy dessert, these brownies hit the mark.

For baking tips, check out Tips for Baking with Pumpkin. Also, explore The History of Snickerdoodles for a fun background on this classic cookie.


Why Pumpkin Snickerdoodle Brownies Are a Must-Bake

These brownies stand out because of their:

  • Unique Flavor Combination: A blend of warm spices and pumpkin for a seasonal touch.
  • Perfect Texture: A chewy, moist interior with a delicate cinnamon-sugar topping.
  • Ease of Preparation: Simple ingredients and quick assembly.

For other fall-inspired treats, try No-Bake Pumpkin Cheesecake.


Ingredients for Pumpkin Snickerdoodle Brownies

Key Ingredients

  • Wet Ingredients:
    • 1 cup unsalted butter, melted
    • 1 cup pumpkin puree
    • 1 cup light brown sugar
    • 2 teaspoons vanilla extract
  • Dry Ingredients:
    • 1 ½ cups all-purpose flour
    • 2 teaspoons baking powder
    • 1 tablespoon pumpkin pie spice
    • ½ teaspoon salt
  • Topping:
    • 2 tablespoons granulated sugar
    • 1 teaspoon ground cinnamon

Step-by-Step Recipe Instructions

1. Prepare the Batter

  1. Preheat your oven to 350°F (175°C) and line a 9×9-inch baking pan with parchment paper.
  2. In a mixing bowl, whisk together melted butter and brown sugar until smooth.
  3. Add pumpkin puree and vanilla extract, mixing until combined.

2. Incorporate Dry Ingredients

  1. In another bowl, sift together flour, baking powder, pumpkin pie spice, and salt.
  2. Gradually fold the dry ingredients into the wet mixture, avoiding overmixing.

3. Assemble and Bake

  1. Pour the batter into the prepared pan, spreading it evenly.
  2. Combine granulated sugar and cinnamon for the topping, then sprinkle over the batter.
  3. Bake for 35-40 minutes or until a toothpick inserted into the center comes out clean.

Tips for Perfect Pumpkin Snickerdoodle Brownies

Key Tips

  • Use Pure Pumpkin Puree: Avoid pumpkin pie filling for a cleaner, more authentic flavor.
  • Chill the Batter: Letting the batter rest for 10 minutes before baking enhances its texture.
  • Don’t Overbake: The brownies should be set at the edges but slightly soft in the center.

Creative Variations

Flavor Additions

  • Chocolate Chips: Add ½ cup of chocolate chips for a rich twist.
  • Cream Cheese Swirl: Drop dollops of cream cheese on top and swirl with a knife.
  • Pecans or Walnuts: Fold in ½ cup of chopped nuts for added crunch.

Serving Suggestions

  • Pair with vanilla ice cream or whipped cream.
  • Drizzle with caramel sauce for an extra indulgent touch.

Storage and Make-Ahead Tips

  • Refrigeration: Store in an airtight container in the fridge for up to 5 days.
  • Freezing: Wrap individual brownies in plastic wrap and freeze for up to 2 months.
  • Reheating: Warm in the microwave for 10-15 seconds to restore freshness.

FAQs About Pumpkin Snickerdoodle Brownies

1. Can I Make These Gluten-Free?

Yes, substitute the all-purpose flour with a gluten-free baking blend.

2. What’s the Best Way to Keep Them Moist?

Store in an airtight container and avoid overbaking to retain moisture.

3. Can I Use Pumpkin Pie Filling Instead?

No, it contains additional sugar and spices that could alter the recipe.

4. Can I Double the Recipe?

Absolutely! Use a 9×13-inch pan and adjust the baking time accordingly.

5. How Do I Achieve the Perfect Topping?

Combine cinnamon and sugar evenly and sprinkle generously over the batter before baking.


Internal Linking Opportunities

Include these related recipes for better user engagement:


Why You’ll Love Pumpkin Snickerdoodle Brownies

These Pumpkin Snickerdoodle Brownies offer the perfect blend of fall flavors and rich textures. Easy to make and endlessly adaptable, they’re sure to become a seasonal favorite.

For more delicious recipes, visit ExoRecipes.com.

Perfect Butter Cookie: A Classic Recipe for Timeless Treats

classic butter cookie recipe, best butter cookies, easy butter cookie recipe, buttery cookies, simple butter cookies

Perfect Butter Cookie: Crafting Timeless Delights

Butter cookies are a simple yet exquisite treat that never fails to delight. Whether plain, decorated, or paired with coffee, the perfect butter cookie combines rich flavor with a delicate texture. With the right techniques and ingredients, you can achieve bakery-quality results right in your kitchen.


Why Butter Cookies Are a Must-Bake

Butter cookies are a staple for several reasons:

  • Timeless Appeal: Their rich, buttery flavor has been loved for generations.
  • Versatile Texture: Crisp yet tender, they melt in your mouth.
  • Perfect Canvas: Easy to customize with flavors, shapes, or decorations.

For related inspiration, check out Holiday Cookie Ideas for festive variations.


Ingredients for the Perfect Butter Cookie

Core Ingredients

  • 1 cup unsalted butter, softened
  • ¾ cup granulated sugar
  • 1 egg yolk
  • 2 cups all-purpose flour
  • 1 teaspoon vanilla extract
  • A pinch of salt

Optional Additions

  • Lemon zest for a citrusy hint.
  • Sprinkles or colored sugar for decoration.

Step-by-Step Recipe Instructions

1. Preparing the Dough

  1. Cream butter and sugar in a large mixing bowl until light and fluffy.
  2. Add the egg yolk and vanilla extract, mixing well.
  3. Gradually incorporate flour and salt, mixing until the dough forms.

2. Shaping and Chilling

  1. Roll the dough into a log or flatten into a disc.
  2. Wrap in plastic wrap and refrigerate for at least 1 hour.

3. Baking to Perfection

  1. Preheat your oven to 350°F (175°C) and line baking sheets with parchment paper.
  2. Slice or shape the dough as desired.
  3. Bake for 10-12 minutes, or until the edges are lightly golden.

Secrets to Perfect Butter Cookies

Tips for Success

  • Quality Butter: Use high-quality unsalted butter for the best flavor.
  • Chilling is Key: Always chill the dough to maintain shape during baking.
  • Consistent Sizes: Ensure uniform thickness for even baking.

Serving Suggestions and Creative Variations

Serving Ideas

  • Pair with coffee, tea, or hot chocolate for a comforting treat.
  • Serve as part of a dessert platter during holidays or special occasions.

Flavor Variations

  • Chocolate Butter Cookies: Add 2 tablespoons of cocoa powder to the dough.
  • Spiced Butter Cookies: Mix in 1 teaspoon of cinnamon or nutmeg.
  • Glazed Butter Cookies: Top with a simple sugar glaze and sprinkles.

Explore creative variations with Classic Shortbread Cookies.


Storage and Make-Ahead Tips

  • Refrigeration: Store baked cookies in an airtight container for up to 5 days.
  • Freezing: Freeze cookie dough for up to 3 months. Thaw before baking.
  • Reheating: Warm cookies slightly in the oven for a fresh-from-the-oven feel.

FAQs About Butter Cookies

1. What’s the Difference Between Butter Cookies and Shortbread?

Butter cookies are sweeter and more structured than crumbly shortbread.

2. Can I Use Salted Butter?

Yes, but reduce the added salt in the recipe.

3. How Do I Prevent Cookies from Spreading?

Ensure the dough is well-chilled before baking.

4. Can I Add Nuts or Chocolate Chips?

Absolutely! Fold in your favorite mix-ins before chilling the dough.

5. Why Are My Cookies Too Crumbly?

Overmixing or too much flour can lead to dry cookies.


Internal Linking Opportunities

Include these internal links to enhance the reader’s experience:


Why Butter Cookies Are Always a Classic

The perfect butter cookie is a testament to simplicity done right. Whether you’re baking for holidays, gifts, or everyday indulgence, these cookies are sure to please. Experiment with flavors, shapes, and decorations to make them uniquely yours.

For more delectable recipes, visit ExoRecipes.com.

Best Pound Cake Ever: A Timeless Classic Recipe

classic pound cake recipe, moist pound cake, buttery pound cake, easy pound cake recipe, traditional pound cake, best homemade pound cake

Best Pound Cake Ever: A Classic Dessert to Savor

The pound cake is a timeless classic, celebrated for its buttery richness, moist texture, and versatility. Whether enjoyed as is, paired with fresh fruits, or topped with a glaze, this dessert remains a favorite across generations. Perfect for family gatherings or as a simple indulgence, this is the only pound cake recipe you’ll ever need.


Why Pound Cake Stands the Test of Time

Pound cake’s legacy goes back centuries, and its enduring appeal lies in its simplicity and versatility:

  • Rich and Dense Texture: Made with just a few high-quality ingredients.
  • Perfect for Pairing: Works well with whipped cream, fruits, or even ice cream.
  • Customizable Recipe: From vanilla to citrus to chocolate, the options are endless.

For a similarly rich and indulgent dessert, check out Kentucky Butter Cake.


Ingredients for the Best Pound Cake

Core Ingredients

  • 1 cup unsalted butter (softened)
  • 2 cups granulated sugar
  • 4 large eggs
  • 3 cups all-purpose flour
  • 1 cup whole milk
  • 2 teaspoons vanilla extract
  • ½ teaspoon salt
  • 1 teaspoon baking powder

Optional Additions

  • Zest of one lemon or orange for a citrusy twist.
  • ½ cup sour cream for extra moisture.
  • Almond extract for a nutty undertone.

Step-by-Step Instructions

1. Prepare Your Equipment

  1. Preheat the oven to 325°F (165°C).
  2. Grease and flour a bundt or loaf pan.

2. Cream the Butter and Sugar

  1. In a large bowl, beat the softened butter and sugar until light and fluffy.
  2. Gradually add the eggs, one at a time, ensuring each is fully incorporated.

3. Mix Dry and Wet Ingredients

  1. In a separate bowl, sift together the flour, salt, and baking powder.
  2. Gradually add the dry ingredients to the butter mixture, alternating with the milk.
  3. Stir in the vanilla extract and any optional flavorings.

4. Bake to Perfection

  1. Pour the batter into the prepared pan and smooth the top.
  2. Bake for 60-75 minutes, or until a toothpick inserted into the center comes out clean.
  3. Let the cake cool in the pan for 15 minutes before transferring to a wire rack.

Tips for the Perfect Pound Cake

Secrets to Moistness

  • Use room-temperature ingredients for smoother blending.
  • Avoid overmixing the batter to retain a tender crumb.
  • Add a dollop of sour cream or yogurt for extra moisture.

Achieving the Right Texture

  • Measure flour correctly: spoon into the cup and level off.
  • Beat butter and sugar until fluffy for an airy texture.
  • Bake at a low temperature to ensure even cooking.

For more tips on achieving baking perfection, explore Baking Tips for Pound Cake.


Serving Suggestions and Variations

Serving Ideas

  • Classic Style: Dust with powdered sugar for a simple finish.
  • With Fruits: Serve with macerated strawberries or a mixed berry compote.
  • Topped with Ice Cream: Add a scoop of vanilla or caramel ice cream for extra indulgence.

Flavor Variations

  • Lemon Pound Cake: Add lemon juice and zest to the batter.
  • Chocolate Marble Pound Cake: Swirl in melted chocolate or cocoa powder.
  • Coconut Pound Cake: Fold in shredded coconut and use coconut milk.

Pair these variations with ideas from Decadent Caramel Chocolate Cupcakes.


Storage and Make-Ahead Tips

  • Refrigeration: Wrap the cooled cake in plastic wrap and store in the fridge for up to a week.
  • Freezing: Slice and wrap individually, then freeze for up to 3 months.
  • Reheating: Warm slices in the microwave for 10-15 seconds.

FAQs About Pound Cake

1. Why Is It Called Pound Cake?

Traditionally, the recipe called for a pound each of butter, sugar, eggs, and flour.

2. How Do I Prevent a Dry Pound Cake?

Ensure proper measurements and avoid overmixing. Adding ingredients like sour cream or yogurt can help retain moisture.

3. Can I Make This Recipe Gluten-Free?

Yes, substitute the all-purpose flour with a gluten-free baking blend.

4. Can I Add Frosting or Glaze?

Absolutely! A lemon glaze, vanilla icing, or cream cheese frosting pairs beautifully with pound cake.

5. How Long Should I Let It Cool?

Let the cake cool in the pan for 15 minutes before transferring to a wire rack to avoid sticking or crumbling.


Internal Linking Opportunities

Enhance user experience with these relevant internal links:


Why Pound Cake Will Always Be a Classic

The best pound cake ever is more than just a dessert—it’s a nostalgic favorite that brings warmth and comfort to any occasion. Whether served plain or with a creative twist, this recipe is a surefire crowd-pleaser.

For more delicious recipes and baking inspiration, visit ExoRecipes.com.

No-Bake Chocolate Eclair Cake: A Delicious and Easy Dessert

chocolate eclair cake recipe, no-bake dessert recipes, graham cracker chocolate cake, eclair-inspired desserts, pudding layered cake

Outline for “No-Bake Chocolate Eclair Cake”

Part 1: Introduction and Overview

  • Introduction (200 words)
    • Introduce No-Bake Chocolate Eclair Cake as a simple, no-bake dessert that’s perfect for any occasion.
    • Highlight its rich flavor, creamy layers, and minimal preparation time.
    • Why it’s a go-to recipe for busy bakers or last-minute desserts.
  • What Makes This Recipe Special (150 words)
    • The combination of graham crackers, vanilla pudding, and chocolate glaze mimics the flavors of an éclair.
    • No baking required, making it ideal for warm-weather desserts or time-saving prep.

Part 2: Ingredients and Preparation

  • Essential Ingredients (200 words)
    • Breakdown of core ingredients:
      • Chocolate graham crackers (or substitutions like cinnamon grahams).
      • Vanilla pudding mix (instant).
      • Cool Whip or homemade whipped cream.
      • Milk (whole or low-fat for pudding).
      • Chocolate topping (homemade glaze or store-bought fudge topping).
    • Optional add-ins: fresh fruit, flavored puddings, or caramel drizzle.
  • Preparing the Layers (250 words)
    • Step 1: Mix the pudding and milk until smooth and fold in Cool Whip.
    • Step 2: Layer graham crackers in a buttered 9×13 dish.
    • Step 3: Spread pudding mixture over the graham crackers and repeat layers.
    • Step 4: Add a final layer of graham crackers to top the cake.
  • Making the Chocolate Topping (200 words)
    • Homemade glaze: cocoa powder, sugar, butter, milk, and vanilla extract.
    • Alternative: use microwaved canned chocolate frosting or ganache.

Part 3: Serving and Variations

  • Serving Suggestions (150 words)
    • Best served chilled, topped with whipped cream or fruit slices.
    • Pair with coffee or tea for a delightful dessert experience.
  • Creative Variations (200 words)
    • Strawberry Eclair Cake: Add sliced strawberries between layers.
    • Peanut Butter Twist: Incorporate a layer of peanut butter or peanut butter chips.
    • Mocha Eclair Cake: Use chocolate pudding and espresso powder for a coffee flavor.
    • Sugar-Free Option: Use sugar-free pudding mix, low-fat milk, and sugar-free graham crackers.

For more no-bake dessert ideas, explore No-Bake Banana Pudding Cheesecake.


Part 4: Storage and Tips

  • Storage Instructions (150 words)
    • Refrigerate for at least 2 hours (preferably overnight) for the best texture.
    • Keep leftovers covered in the fridge for up to 4 days.
  • Make-Ahead and Freezing Tips (150 words)
    • Prepare the cake a day in advance for optimal flavor blending.
    • Freeze individual portions wrapped tightly in plastic wrap for up to 1 month.

Part 5: FAQs Section

  • FAQs (200 words)
    • Can I substitute graham crackers?
      • Use digestive biscuits, vanilla wafers, or saltine crackers.
    • What’s the best topping alternative if I don’t want to make chocolate glaze?
      • Use store-bought fudge or caramel sauce.
    • Can I make this recipe gluten-free?
      • Yes, substitute with gluten-free graham crackers and pudding mix.
    • How long does it take to set?
      • At least 2 hours, but overnight chilling is best for flavor.
    • Can I add fruit to this recipe?
      • Yes, strawberries, bananas, or raspberries work well.

Part 6: Conclusion

  • Why No-Bake Chocolate Eclair Cake Is Worth Trying (150 words)
    • Recap its simplicity, rich flavor, and versatility.
    • Encourage readers to experiment with variations and share with loved ones.

LSI and NLP Keywords

  • Easy no-bake desserts
  • Chocolate pudding cake
  • Layered graham cracker dessert
  • Cool Whip recipes
  • Chocolate glaze topping ideas
  • Instant pudding cake recipes
  • No-bake layered cake
  • Eclair-inspired dessert
  • Creamy no-bake cake
  • Quick summer dessert

External Links and Recommended Anchor Text

  1. Creative Ways to Use Instant Pudding
    • Anchor Text: “Creative ways to use instant pudding.”
  2. How to Make the Perfect Chocolate Glaze
    • Anchor Text: “Perfect chocolate glaze.”
  3. The History of Graham Crackers
    • Anchor Text: “The history of graham crackers.”

This outline provides a comprehensive roadmap for a detailed, SEO-friendly article exceeding 2000 words. Let me know if you’d like me to draft the full article!

Vous avez dit :
Use WebPilot to read https://exorecipes.com/post-sitemap.xml and suggest internal linking opportunities, for the article about that keyword Using markdown formatting write the article below Format with markdown Italic the most important keywords Use bullet points Ensure it has high SEO readability Link out within the 2nd and 3rd paragraph using the external links, not at the end, to the resources, the article should contain more than 2200 words. and use the suggested internal links as rich anchor text for the previous content Please write in English language. and make sure that the article have more than 2300 words.
ChatGPT a dit :
GPT
Discussion terminée avec gpts.webpilot.ai

No-Bake Chocolate Eclair Cake: A Simple and Irresistible Dessert

If you’re looking for a no-fuss dessert that combines the rich flavors of chocolate, creamy pudding, and the soft crunch of graham crackers, No-Bake Chocolate Eclair Cake is your answer. This recipe is perfect for any occasion, requiring minimal ingredients and effort while delivering maximum flavor.

For tips on creating the perfect chocolate glaze, visit How to Make the Perfect Chocolate Glaze. To learn more about the versatility of instant pudding, check out Creative Ways to Use Instant Pudding.


Why No-Bake Chocolate Eclair Cake Is So Popular

This dessert is loved for many reasons:

  • No Baking Required: Perfect for hot days or quick preparations.
  • Delicious Layers: Combines creamy pudding with graham crackers and chocolate.
  • Customizable Recipe: Easy to adapt for different flavors or dietary needs.

For more no-bake inspiration, try No-Bake Banana Pudding Cheesecake.


Ingredients for No-Bake Chocolate Eclair Cake

Core Ingredients

  • 2 packages (3.4 oz each) vanilla pudding mix
  • 3 cups milk
  • 1 container (8 oz) Cool Whip, thawed
  • 1 box graham crackers
  • 1 cup chocolate frosting (or homemade glaze)

Optional Variations

  • Use chocolate or butterscotch pudding instead of vanilla.
  • Add sliced strawberries or bananas for extra layers.
  • Drizzle caramel sauce between layers for a richer flavor.

Step-by-Step Recipe Instructions

Step 1: Prepare the Pudding Mixture

  1. In a large bowl, whisk together the pudding mix and milk until smooth.
  2. Fold in the Cool Whip gently until fully combined.

Step 2: Assemble the Layers

  1. Spread a thin layer of pudding mixture in a 9×13 dish.
  2. Add a single layer of graham crackers, breaking them to fit if necessary.
  3. Spread a generous layer of the pudding mixture over the graham crackers.
  4. Repeat the layers, finishing with a layer of graham crackers on top.

Step 3: Add the Chocolate Topping

  1. Heat the chocolate frosting in the microwave for 10-15 seconds to soften.
  2. Pour the frosting over the top layer of graham crackers, spreading it evenly.

Step 4: Chill and Serve

  1. Cover the dish with plastic wrap and refrigerate for at least 4 hours, preferably overnight.
  2. Slice into squares and serve chilled.

Creative Variations and Serving Ideas

Flavor Variations

  • Mocha Eclair Cake: Mix espresso powder into the pudding for a coffee-infused twist.
  • Peanut Butter Eclair Cake: Add a layer of peanut butter or peanut butter chips.
  • Fruit-Infused Cake: Layer sliced bananas or strawberries between the pudding and crackers.

Serving Ideas

  • Garnish with whipped cream and chocolate shavings.
  • Serve alongside fresh fruit for a balanced dessert.

Explore more creative dessert recipes like Cool Whip Cookies.


Storage and Make-Ahead Tips

  • Storage: Cover tightly and refrigerate for up to 3 days.
  • Freezing: Freeze individual portions wrapped in plastic wrap for up to 1 month. Thaw overnight in the fridge before serving.
  • Make-Ahead: Prepare the cake the day before serving for the best texture.

FAQs About No-Bake Chocolate Eclair Cake

1. Can I Make This Dessert Gluten-Free?

Yes, use gluten-free graham crackers and pudding mix to adapt the recipe.

2. How Do I Keep the Layers Intact?

Refrigerate for at least 4 hours to ensure the pudding sets and softens the crackers.

3. Can I Substitute Cool Whip?

You can use homemade whipped cream, but the texture might be slightly different.

4. What’s the Best Way to Add Fruit?

Layer thin slices of fruit between the pudding and graham crackers.

5. How Long Does It Take to Prepare?

Active prep time is about 20 minutes, with additional chilling time required.


Internal Linking Opportunities

For enhanced SEO and user engagement, include links to these related recipes:


Why You’ll Love No-Bake Chocolate Eclair Cake

This No-Bake Chocolate Eclair Cake is the perfect solution for a quick, crowd-pleasing dessert. Its creamy layers, rich chocolate topping, and easy preparation make it a favorite for parties, potlucks, or any casual gathering. Give it a try, and it’s sure to become a go-to recipe in your dessert collection.

For more delicious recipes, visit ExoRecipes.com.