Classic Lemon Cheesecake: A Creamy and Zesty Dessert

zesty lemon cheesecake, creamy citrus cheesecake, easy lemon cheesecake recipe, lemon dessert, classic cheesecake with lemon

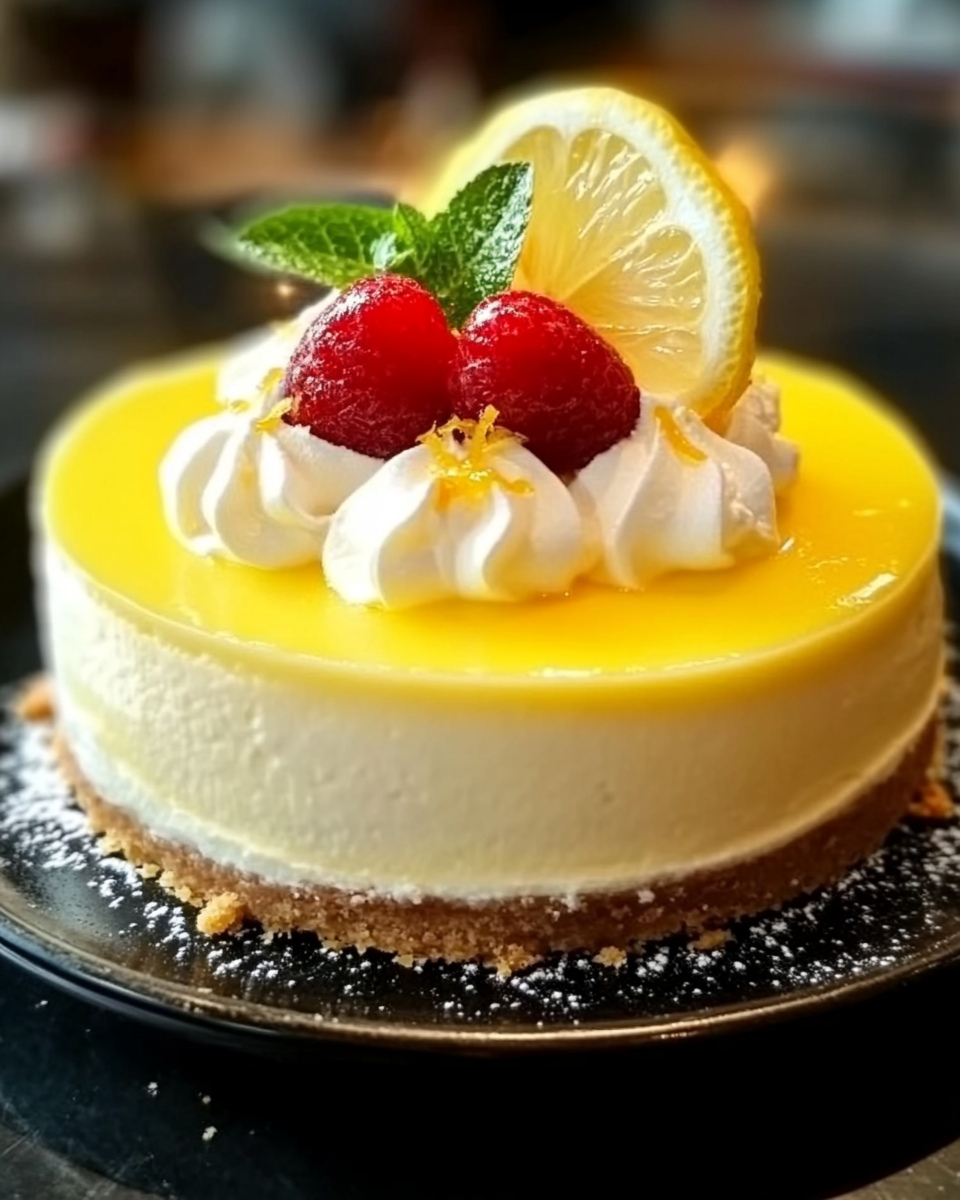
Lemon Cheesecake: A Creamy and Citrusy Delight

Create a luscious Lemon Cheesecake with a zesty burst of citrus and a creamy texture that melts in your mouth. This dessert is perfect for summer gatherings or as a refreshing treat anytime.


Ingredients for Lemon Cheesecake

Crust

  • 2 cups graham cracker crumbs
  • 1/4 cup sugar
  • 1/2 cup unsalted butter, melted

Filling

  • 24 oz cream cheese, softened
  • 1 cup granulated sugar
  • 3 large eggs
  • 1/3 cup fresh lemon juice
  • 2 tablespoons lemon zest
  • 1/2 cup heavy cream

Optional Toppings

  • Lemon curd
  • Whipped cream
  • Candied lemon slices

For more dessert inspiration, explore Mini Pineapple Coconut Milk Cheesecakes.


Step-by-Step Recipe for Lemon Cheesecake

1. Prepare the Crust

  1. Combine graham cracker crumbs, sugar, and melted butter in a bowl.
  2. Press the mixture into the bottom of a springform pan.
  3. Bake at 350°F (175°C) for 10 minutes, then let it cool.

2. Make the Filling

  1. Beat cream cheese and sugar until smooth.
  2. Add eggs one at a time, mixing well after each addition.
  3. Stir in lemon juice, zest, and heavy cream until fully incorporated.

3. Assemble and Bake

  1. Pour the filling over the crust.
  2. Bake at 325°F (160°C) for 50–60 minutes in a water bath to prevent cracking.
  3. Let the cheesecake cool completely before refrigerating for at least 4 hours.

Tips for the Perfect Lemon Cheesecake

  • Use fresh lemon juice for the best flavor.
  • Avoid overmixing to prevent cracks.
  • Cool gradually to maintain a smooth texture.

Pair this dessert with Homemade Pizza Sticks for a complete dinner and dessert combo.


FAQs About Lemon Cheesecake

1. Can I use bottled lemon juice?

Fresh lemon juice is recommended for the best flavor, but bottled juice works in a pinch.

2. How do I prevent the cheesecake from cracking?

Bake in a water bath and avoid overmixing the filling.

3. Can I freeze Lemon Cheesecake?

Yes, wrap it tightly and freeze for up to 3 months. Thaw in the fridge before serving.

4. What’s the best way to store leftovers?

Store in an airtight container in the refrigerator for up to 5 days.

For a no-bake variation, try No-Bake Pumpkin Cheesecake.


Serving Suggestions for Lemon Cheesecake

  • Top with fresh berries for a burst of flavor.
  • Pair with iced tea or a chilled lemonade for a refreshing treat.
  • Garnish with mint leaves for a pop of color.

Explore more citrus delights like Two-Ingredient Lemon Pie Filling.


Internal Linking Opportunities

  1. Mini Pineapple Coconut Milk Cheesecakes
  2. No-Bake Pumpkin Cheesecake
  3. Two-Ingredient Lemon Pie Filling

Frostbite Blue Christmas Cocoa: A Magical Holiday Drink

blue Christmas cocoa, holiday blue cocoa recipe, frosty blue cocoa, festive winter drinks, blue hot chocolate

Frostbite Blue Christmas Cocoa: A Magical Winter Treat

Create a cozy and whimsical drink with Frostbite Blue Christmas Cocoa. This festive and colorful beverage is perfect for holiday parties, family gatherings, or a quiet night by the fire.


Ingredients for Frostbite Blue Christmas Cocoa

Core Ingredients

  • White chocolate chips for a creamy base.
  • Milk (whole milk or a dairy-free alternative like almond milk).
  • Blue food coloring for the iconic frosty hue.
  • Vanilla extract to enhance the sweetness.

Optional Garnishes

  • Whipped cream for a snowy topping.
  • Edible glitter or blue sprinkles for a magical touch.
  • Crushed peppermint candies for a festive crunch.

For more comforting beverages, explore The Ultimate Comfort Food Crockpot Potato Soup with Hashbrowns.


Step-by-Step Guide to Frostbite Blue Christmas Cocoa

1. Preparing the Base

  • Heat milk in a saucepan over medium heat, stirring frequently.
  • Add white chocolate chips and stir until fully melted.

2. Adding the Frostbite Blue

  • Stir in vanilla extract and blue food coloring, drop by drop, until the desired shade is achieved.

3. Serving

  • Pour the cocoa into mugs.
  • Top with whipped cream and garnish with glitter or sprinkles.

Pair this drink with Homemade Pizza Sticks for a cozy holiday evening.


Creative Variations

  • Frozen Frostbite Cocoa: Blend the cooled drink with ice for a chilled version.
  • Spiked Blue Cocoa: Add a splash of white rum or peppermint schnapps for an adult twist.
  • Vegan Option: Use almond milk and vegan white chocolate.

Discover more warm treats like Slow Cooker Chicken and Gravy.


FAQs About Frostbite Blue Christmas Cocoa

1. Can I use regular chocolate?

White chocolate is essential for the frosty blue color, but you can experiment with milk chocolate for a different taste.

2. What’s the best way to reheat leftovers?

Gently reheat on the stove or microwave in short intervals, stirring to prevent separation.

3. Is it safe for kids?

Absolutely! Just omit any alcoholic ingredients.

4. Can I make it in advance?

Yes, prepare the base and store it in the fridge. Reheat before serving and add garnishes.


Why You’ll Love Frostbite Blue Christmas Cocoa

  • A visually stunning drink perfect for the holiday season.
  • Easy to customize with endless variations.
  • A guaranteed hit at parties and family gatherings.

Suggested Internal Links

  1. The Ultimate Comfort Food Crockpot Potato Soup with Hashbrowns
  2. Homemade Pizza Sticks
  3. Slow Cooker Chicken and Gravy

Cheesy Bacon Fried Pickles: The Ultimate Crispy and Savory Snack

bacon-wrapped pickles, fried pickles with cheese, cheesy pickle appetizers, crispy bacon snacks, keto fried pickles

Cheesy Bacon Fried Pickles: A Flavorful Crunch

Crispy, savory, and packed with the irresistible flavors of bacon and cheese, Cheesy Bacon Fried Pickles are the ultimate appetizer or snack. This recipe is perfect for parties, game days, or when you’re craving something indulgent yet easy to prepare.


Ingredients You’ll Need for Cheesy Bacon Fried Pickles

Core Ingredients

  • Pickles: Dill pickle slices or spears, well-drained.
  • Cheese: Shredded cheddar or mozzarella for a gooey center.
  • Bacon: Thick-cut slices that wrap securely around the pickles.
  • Breadcrumbs: Panko or regular breadcrumbs for an extra crunch.

Optional Additions

  • Cream cheese for a creamy layer.
  • Spices like cayenne or smoked paprika for added heat.

For more cheesy inspirations, check out The Ultimate Cheesy Ranch Chicken on ExoRecipes.


Step-by-Step Guide to Making Cheesy Bacon Fried Pickles

1. Preparing the Pickles

  • Pat the pickles dry with paper towels to remove excess moisture. This helps the batter stick and prevents splattering during frying.

2. Wrapping with Bacon and Cheese

  • Spread a small amount of cream cheese (optional) on each pickle.
  • Wrap each pickle slice with shredded cheese and secure with a strip of bacon.

3. Breading and Frying

  • Dredge the wrapped pickles in flour, then dip in egg wash, and coat with breadcrumbs.
  • Fry in hot oil until golden brown and crispy. For a healthier option, bake them at 400°F for 20–25 minutes.

4. Serving Suggestions

  • Serve hot with dipping sauces like ranch, spicy mayo, or marinara.

Pair these with Crispy Fried Cheesecake Bites for a decadent snack platter.


Creative Variations of Cheesy Bacon Fried Pickles

  • Keto-Friendly: Skip the breadcrumbs and use almond flour for coating.
  • Spicy Version: Add jalapeño slices or spicy cheese inside the pickle.
  • Air Fryer Method: Cook in an air fryer at 375°F for 12–15 minutes for a lighter alternative.

Explore more finger food recipes like Cheesy Bacon Jalapeño Corn Dip for your next gathering.


Tips for Perfect Fried Pickles

  • Dry the Pickles: Ensure pickles are completely dry before wrapping to prevent sogginess.
  • Use Toothpicks: Secure the bacon tightly to avoid unwrapping during frying.
  • Small Batches: Fry in small batches to maintain consistent oil temperature.

FAQs About Cheesy Bacon Fried Pickles

1. Can I bake these instead of frying?
Yes, bake them at 400°F for 20–25 minutes, turning halfway for even crisping.

2. Are they keto-friendly?
They can be keto-friendly if you skip the breadcrumbs and use almond flour or grated Parmesan for the coating.

3. What other cheese works well?
Pepper jack adds a spicy kick, while Gouda gives a smoky flavor.

4. Can I make them ahead of time?
Yes, prepare and refrigerate them uncooked for up to 24 hours. Fry or bake just before serving.


Why You’ll Love Cheesy Bacon Fried Pickles

  • Easy to Make: Simple ingredients and quick preparation.
  • Customizable: Adapt to keto, gluten-free, or spicy variations.
  • Crowd-Pleaser: Perfect for parties, game nights, or any casual gathering.

Suggested Internal Links

  1. The Ultimate Cheesy Ranch Chicken: For another cheesy, savory dish.
  2. Crispy Fried Cheesecake Bites: A sweet counterpart to balance the saltiness.
  3. Cheesy Bacon Jalapeño Corn Dip: A complementary dip to pair with fried pickles.

Conclusion

Cheesy Bacon Fried Pickles are a delicious blend of crispy bacon, gooey cheese, and tangy pickles. They’re easy to customize and perfect for any occasion. Try this recipe and elevate your snack game today!

Easy Spinach Lasagna: A Healthy and Delicious Comfort Food Recipe

spinach lasagna recipe, vegetarian lasagna, ricotta spinach pasta bake, healthy lasagna recipe, quick spinach lasagna, cheesy vegetable lasagna

Easy Spinach Lasagna: A Comforting Vegetarian Delight

Spinach lasagna offers a healthy twist on the classic lasagna recipe, packed with nutrients and bold flavors. This guide will walk you through the process of making a simple, yet satisfying Easy Spinach Lasagna for weeknight dinners or special occasions.


Ingredients for Easy Spinach Lasagna

Core Ingredients

  • Lasagna Noodles: Oven-ready or boiled, your choice.
  • Spinach: Fresh or frozen, thawed and drained.
  • Cheese: Ricotta, mozzarella, and Parmesan.
  • Marinara Sauce: Store-bought or homemade.
  • Eggs: Used to bind the ricotta mixture.

Optional Additions

  • Mushrooms for extra umami.
  • Zucchini slices for added nutrition.
  • Plant-based cheese for a vegan option.

For more lasagna inspiration, explore Slow-Cooker Magic: Crockpot Baked Ziti.


Step-by-Step Guide to Making Easy Spinach Lasagna

1. Preparing the Ingredients

  • Boil lasagna noodles or use oven-ready sheets for convenience.
  • If using fresh spinach, sauté it briefly to remove excess moisture.

2. Preparing the Ricotta Mixture

  • Combine ricotta, eggs, Parmesan, salt, pepper, and a pinch of nutmeg in a bowl.

3. Layering the Lasagna

  • Start with a thin layer of marinara sauce in a baking dish.
  • Add layers in this order:
    1. Noodles
    2. Ricotta-spinach mixture
    3. Marinara sauce
    4. Shredded mozzarella
  • Repeat until all ingredients are used, ending with a cheese layer.

4. Baking the Lasagna

  • Cover with foil and bake at 375°F (190°C) for 25 minutes.
  • Remove foil and bake for another 15 minutes until bubbly and golden.

Why Spinach Lasagna is a Must-Try Dish

1. Health Benefits

  • Packed with iron, calcium, and vitamins from spinach.
  • Lower in fat compared to meat-based lasagna.

2. Quick and Versatile

  • Perfect for meal preps.
  • Easily adaptable to gluten-free or vegan diets.

3. Cost-Effective

  • Simple ingredients available at any grocery store.

Creative Variations of Spinach Lasagna

  • Gluten-Free: Replace noodles with zucchini slices.
  • Protein Boost: Add tofu crumbles or ground turkey.
  • Spicy Twist: Sprinkle red chili flakes in the marinara.

Explore complementary dishes like Dorito Chicken Casserole to pair with lasagna.


Tips for Perfect Spinach Lasagna

  • Always drain spinach thoroughly to prevent soggy lasagna.
  • Let the lasagna rest for 10 minutes before cutting for clean slices.
  • Use high-quality marinara for the best flavor.

Serving and Storing Tips

Serving Suggestions

  • Pair with garlic bread or a crisp side salad.
  • Garnish with fresh basil leaves for a restaurant-quality presentation.

Storing Instructions

  • Refrigerate leftovers for up to 4 days in an airtight container.
  • Freeze portions for up to 3 months and reheat in the oven.

FAQs About Easy Spinach Lasagna

1. Can I make spinach lasagna ahead of time?
Yes, assemble and refrigerate it for up to 24 hours before baking.

2. What’s the best cheese substitute for ricotta?
Cottage cheese or silken tofu works well as a substitute.

3. How do I prevent watery lasagna?
Drain spinach and use a thicker marinara sauce.

4. Can I add meat to this recipe?
Absolutely! Ground chicken, turkey, or plant-based crumbles are great options.


Internal Linking Opportunities

  1. Slow-Cooker Magic: Crockpot Baked Ziti: Another layered pasta dish perfect for weeknight dinners.
  2. Dorito Chicken Casserole: A hearty casserole dish to pair with your lasagna.
  3. Creamy Garlic Parmesan Chicken: A creamy main dish to complement spinach lasagna.

Conclusion

Easy Spinach Lasagna combines the comforting appeal of traditional lasagna with the health benefits of spinach. Whether you’re feeding a crowd or preparing meals for the week, this recipe is a winner. Try it today and enjoy a wholesome, satisfying dish that’s sure to become a family favorite!

Cabbage Fat-Burning Soup: The Ultimate Detox Recipe for Healthy Weight Loss

cabbage soup diet, fat-burning detox soup, weight-loss cabbage soup, healthy cabbage recipes, low-calorie vegetable soup, detox vegetable soup

Cabbage Fat-Burning Soup: Your Guide to a Healthier You

Cabbage Fat-Burning Soup is a time-tested favorite for detoxing, shedding a few pounds, and boosting nutrition. This guide provides an in-depth look at how to prepare, customize, and maximize the benefits of this classic recipe.


Ingredients for Cabbage Fat-Burning Soup

Core Ingredients

  • Cabbage: Shredded green or white cabbage forms the bulk of this soup.
  • Vegetables: Celery, carrots, bell peppers, and onions for flavor and texture.
  • Tomatoes: Use canned or fresh for a tangy base.
  • Broth: Opt for low-sodium vegetable or chicken broth.

Optional Additions

  • Zucchini or spinach for added nutrients.
  • Lean proteins like chicken or tofu for a balanced meal.

For inspiration, check out Haluski: Cabbage and Noodles Comfort Food Recipe.


How to Make Cabbage Fat-Burning Soup

1. Preparing the Ingredients

  • Chop all vegetables into bite-sized pieces.
  • Mince garlic and dice onions for aromatics.

2. Cooking the Soup

  • Step 1: Sauté onions and garlic in olive oil until fragrant.
  • Step 2: Add carrots, celery, and bell peppers; cook for 5 minutes.
  • Step 3: Stir in shredded cabbage and diced tomatoes.
  • Step 4: Pour in the broth, season with herbs and spices, and simmer for 30–40 minutes.

3. Adjusting for Taste

  • Add salt, pepper, and a splash of lemon juice for brightness.

For similar vegetable-forward dishes, explore Grandma’s Cabbage Burgers.


Benefits of Cabbage Fat-Burning Soup

  • Supports Weight Loss: Low in calories but filling due to high fiber content.
  • Detoxifies the Body: Packed with antioxidants and hydration.
  • Boosts Immunity: Rich in vitamins C and K.
  • Budget-Friendly: Uses affordable, readily available ingredients.

Creative Variations

  • Spicy Cabbage Soup: Add chili flakes or hot sauce for a kick.
  • Creamy Twist: Blend a portion of the soup with cashews for creaminess.
  • Asian-Inspired: Add soy sauce, ginger, and sesame oil for a flavor twist.

For a heartier meal, serve alongside Slow-Cooker Cabbage, Sausage, and Potatoes.


Tips for Perfect Cabbage Soup

  • Use fresh vegetables for maximum flavor and nutrition.
  • Avoid overcooking the cabbage to maintain its crunch.
  • Store in the refrigerator for up to five days; freeze for longer storage.

FAQs About Cabbage Fat-Burning Soup

1. How does cabbage soup help with weight loss?
Cabbage soup is low-calorie and high-fiber, which helps you feel full while reducing calorie intake.

2. Can I eat cabbage soup every day?
Yes, but ensure variety in your diet to meet all nutritional needs.

3. What’s the best way to store cabbage soup?
Refrigerate in an airtight container for up to 5 days or freeze for up to 3 months.

4. Can I use red cabbage instead of green?
Absolutely, it provides a slightly sweeter flavor and vibrant color.


Internal Linking Opportunities


Conclusion

Cabbage Fat-Burning Soup is a nutritious, delicious, and versatile recipe that’s perfect for detoxing or simply adding more vegetables to your diet. Its affordability and ease of preparation make it a go-to for busy weeks and health-focused meal plans.