Cauliflower & Broccoli Salad: A Crunchy and Nutritious Recipe

broccoli cauliflower salad, healthy vegetable salad, broccoli salad with dressing, creamy broccoli and cauliflower salad, low-carb vegetable salad, broccoli cauliflower side dish

Cauliflower & Broccoli Salad: A Fresh and Nutritious Side Dish

Introduction

Cauliflower & Broccoli Salad is a versatile, colorful dish that combines the crunchiness of fresh vegetables with a creamy and tangy dressing. Whether you’re hosting a barbecue, attending a potluck, or looking for a healthy side dish, this salad is a perfect choice.

For other refreshing salads, try Apple Cranberry Walnut Salad Recipe for a fruity twist on leafy greens.


Why Choose Cauliflower & Broccoli Salad?

  1. Packed with Nutrition
    • Rich in vitamins C and K, antioxidants, and dietary fiber.
    • Low in carbohydrates, making it a keto-friendly option.
  2. Easy to Prepare
    • Requires minimal cooking and preparation time.
    • Suitable for meal prep as it stays fresh in the fridge.

Pair it with Garlic Rosemary Steak and Potatoes Skillet for a complete and balanced meal.


Ingredients for Cauliflower & Broccoli Salad

Core Ingredients

  • Vegetables: Fresh cauliflower and broccoli florets, diced red onion.
  • Dressing: Mayonnaise, apple cider vinegar, sugar or sweetener.
  • Add-ins: Crispy bacon bits, shredded cheese, dried cranberries.

Optional Ingredients

  • Sunflower seeds for added crunch.
  • Chopped nuts like almonds or pecans for a nutty flavor.

Substitutions

  • Greek yogurt for a lighter dressing alternative.
  • Turkey bacon for a healthier bacon option.

Step-by-Step Instructions

1. Prepare the Vegetables

  • Rinse and chop the broccoli and cauliflower into bite-sized florets.
  • Dice the red onion finely.

2. Cook and Crumble Bacon

  • Fry bacon until crispy and crumble after cooling.

3. Mix the Dressing

  • Combine mayonnaise, apple cider vinegar, and sugar in a bowl.
  • Whisk until smooth and creamy.

4. Combine the Ingredients

  • Toss vegetables, bacon, and cranberries in a large bowl.
  • Pour the dressing over the mixture and stir to coat evenly.

5. Chill and Serve

  • Cover and refrigerate for at least an hour to let the flavors meld.
  • Garnish with sunflower seeds or shredded cheese before serving.

Creative Variations

  1. Keto-Friendly Version
    • Skip the cranberries and add avocado chunks for healthy fats.
  2. Fruity Variation
    • Mix in chopped apples or grapes for a sweet contrast.
  3. Spicy Twist
    • Add diced jalapeños or red pepper flakes to the dressing for a kick.
  4. Vegan Adaptation
    • Use vegan mayonnaise and replace bacon with smoked almonds.

FAQs About Cauliflower & Broccoli Salad

1. Can I Make This Salad Ahead of Time?

Yes, this salad is even better when made ahead and refrigerated for a few hours.

2. How Long Does It Last in the Refrigerator?

It can last up to five days in an airtight container.

3. Can I Use Frozen Vegetables?

Fresh vegetables are recommended for crunch, but frozen ones can be used if thawed and patted dry.

4. What Other Dressings Can I Use?

A tangy vinaigrette or Greek yogurt-based dressing works well.

5. How Can I Make It Allergy-Friendly?

Omit nuts and ensure the dressing is free from allergens like dairy or gluten.


Serving Suggestions


Internal Linking Opportunities


Conclusion

Cauliflower & Broccoli Salad is an easy, nutritious, and versatile dish that can be customized to suit any dietary preference. Perfect for potlucks, family dinners, or meal prep, it’s a must-try recipe for vegetable lovers. For more salad ideas, explore Apple Cranberry Walnut Salad Recipe to diversify your menu.

Ham and Cheese Crescent Rolls: A Quick and Delicious Recipe

cheesy crescent rolls, ham crescent roll recipe, savory crescent roll ideas, crescent roll snacks, ham and cheese appetizer, quick crescent roll recipe

Ham and Cheese Crescent Rolls: A Delicious and Easy Recipe

Introduction

Ham and Cheese Crescent Rolls are a simple yet delicious way to enjoy a savory treat that’s perfect for snacks, appetizers, or quick meals. These rolls combine flaky crescent dough, savory ham, and melted cheese to create a dish that’s hard to resist.

For other crescent roll-inspired ideas, check out Revolutionizing Weeknight Dinners: The Crescent Roll Pizza Phenomenon for a creative twist on classic dough recipes.


Why Ham and Cheese Crescent Rolls are Perfect for Any Occasion

  1. Quick and Easy to Prepare
    • Minimal ingredients and prep time make it a go-to recipe for busy schedules.
  2. Versatile and Customizable
    • Ideal for breakfast, lunch, or dinner.
    • Easily adaptable with different fillings and flavors.

Pair them with Ham and Potato Casserole for a hearty meal.


Ingredients for Ham and Cheese Crescent Rolls

Core Ingredients

  • Crescent roll dough
  • Thinly sliced ham
  • Cheese slices (cheddar, Swiss, or provolone)

Optional Add-Ins

  • Honey mustard or mayonnaise for a tangy kick
  • Chopped herbs like parsley or chives

Substitutions

  • Turkey slices or vegetarian ham for a dietary alternative
  • Vegan cheese for a plant-based version

Step-by-Step Instructions

1. Preparation

  • Preheat the oven to 350°F (175°C).
  • Line a baking sheet with parchment paper.

2. Assembly

  • Roll out crescent dough and separate into triangles.
  • Layer ham and cheese on each triangle.
  • Roll tightly from the wide end to the tip.

3. Baking

  • Arrange on the baking sheet and brush with egg wash.
  • Bake for 15-18 minutes or until golden brown.

4. Serving

  • Let cool slightly before serving with your favorite dips, like honey mustard or marinara sauce.

Creative Variations

  1. Breakfast Crescent Rolls
    • Add scrambled eggs and bacon for a hearty morning meal.
  2. Italian-Inspired Rolls
    • Use prosciutto and mozzarella, and brush with garlic butter.
  3. Vegetarian Option
    • Replace ham with sautéed mushrooms or roasted vegetables.
  4. Holiday Crescent Wreath
    • Arrange the rolls in a circular pattern for festive gatherings.

FAQs About Ham and Cheese Crescent Rolls

Can These Be Made Ahead?

Yes, prepare them up to 24 hours in advance and refrigerate until ready to bake.

What’s the Best Cheese for Crescent Rolls?

Swiss, cheddar, and provolone are great options, but feel free to experiment.

Can I Freeze Them?

Absolutely! Freeze uncooked rolls on a tray, then transfer to a freezer bag. Bake directly from frozen, adding 2-3 minutes to the baking time.

How Do I Prevent Over-Browning?

Cover with foil during the last few minutes of baking if needed.


Serving Suggestions


Internal Linking Opportunities


Conclusion

Ham and Cheese Crescent Rolls are a quick, versatile, and delicious recipe suitable for any occasion. Whether for a snack, appetizer, or meal, they deliver in both taste and convenience. Try pairing them with other comforting dishes like Ham and Potato Casserole to elevate your dining experience.

Sizzling Surf & Turf with Fresh Herb Chimichurri: A Perfect Dinner Recipe

surf and turf with chimichurri, steak and shrimp recipe, surf and turf dinner, grilled steak and shrimp, herb chimichurri sauce recipe, steak and seafood platter

Sizzling Surf & Turf with Fresh Herb Chimichurri

Introduction

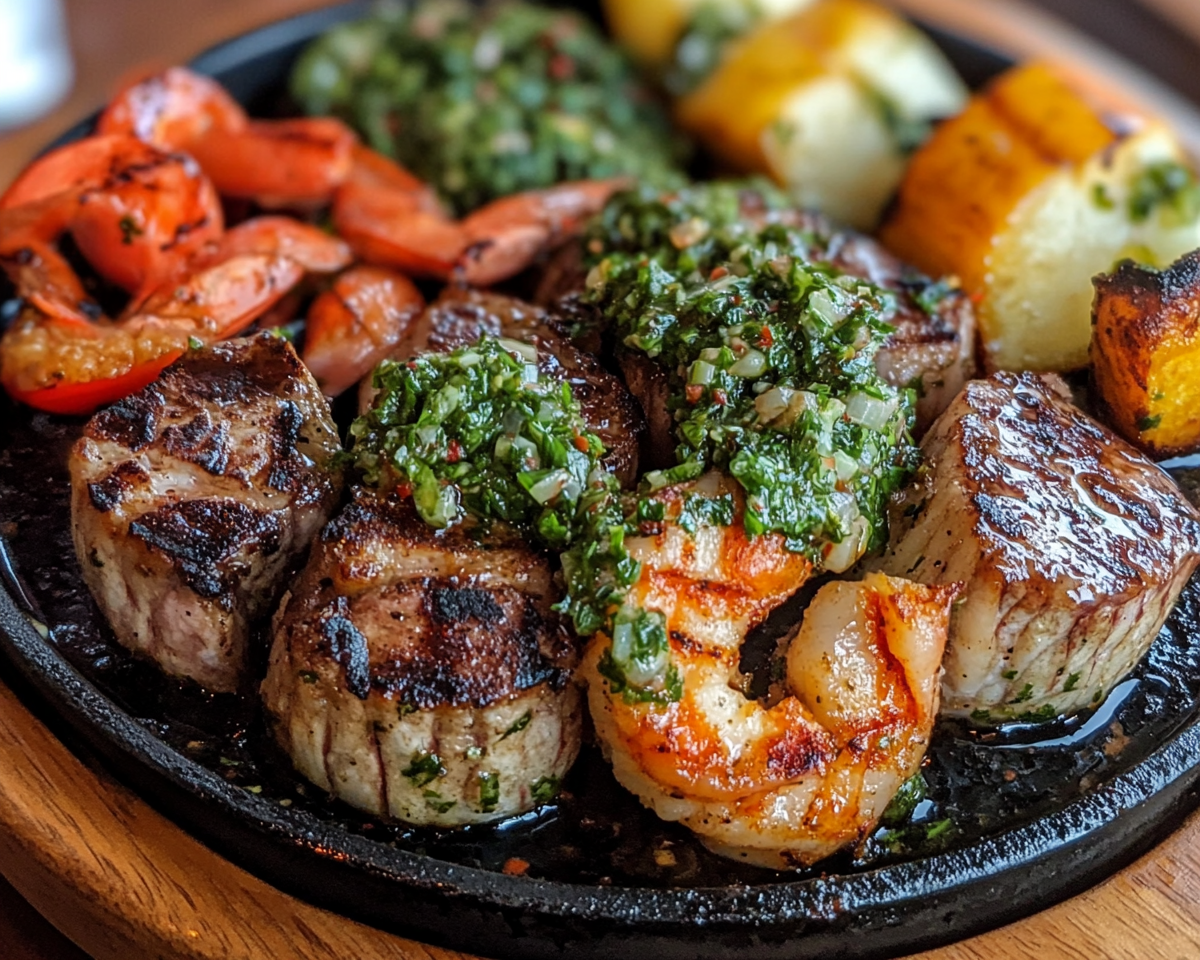
The Sizzling Surf & Turf with Fresh Herb Chimichurri is a gourmet dish that combines the best of land and sea with a vibrant, tangy sauce that enhances every bite. This recipe brings together juicy steak, succulent shrimp, and a zesty chimichurri sauce, making it perfect for special occasions or when you want to impress.

For tips on cooking the perfect steak, check out Perfect Ribeye Steak Recipe to master your grilling or pan-searing skills.


Why This Recipe is a Showstopper

  1. Perfect Flavor Balance
    • The steak’s rich umami flavor complements the shrimp’s light, sweet profile.
    • Chimichurri sauce brings a burst of freshness with its herbs and acidity.
  2. Ideal for Any Occasion
    • Great for celebrations or a luxurious weeknight dinner.
    • Flexible enough to adapt to personal preferences.

Pair it with a side of Garlic Rosemary Steak and Potatoes Skillet for a complete and satisfying meal.


Ingredients

For the Surf & Turf

  • Steak: Ribeye, sirloin, or filet mignon.
  • Shrimp: Large, peeled, and deveined.
  • Olive oil, salt, and pepper.

For the Fresh Herb Chimichurri

  • Fresh parsley and cilantro
  • Garlic cloves
  • Olive oil
  • Red wine vinegar
  • Salt, pepper, and red pepper flakes (optional)

Optional Additions

  • Lemon zest or smoked paprika for added depth in the chimichurri.
  • Scallops or lobster tails as alternatives to shrimp.

Step-by-Step Instructions

1. Prepare the Chimichurri

  • Combine parsley, cilantro, garlic, olive oil, and red wine vinegar in a blender or mix by hand.
  • Adjust seasoning to taste with salt, pepper, and red pepper flakes.

2. Prepare the Steak

  • Season steaks generously with olive oil, salt, and pepper.
  • Let them rest at room temperature for 30 minutes.

3. Cook the Steak

  • Heat a cast-iron skillet or grill to high heat.
  • Sear steaks to your desired doneness (medium rare: 135°F).
  • Rest for 5 minutes before slicing.

4. Prepare the Shrimp

  • Toss shrimp in olive oil, salt, and pepper.
  • Cook in the same skillet or grill until pink and opaque.

5. Assemble and Serve

  • Arrange sliced steak and shrimp on a platter.
  • Drizzle generously with chimichurri sauce.

Serving Suggestions


FAQs

  1. What is Surf & Turf?
    • A dish combining seafood (surf) and steak (turf), often served with a rich sauce.
  2. Can I Make Chimichurri Ahead of Time?
    • Yes, prepare it a day in advance to enhance the flavors.
  3. What’s the Best Steak Cut for This Recipe?
    • Ribeye or filet mignon for their tenderness and flavor.
  4. Can I Use Frozen Shrimp?
    • Yes, thaw them fully and pat dry before cooking.
  5. What Are Good Sides for Surf & Turf?
    • Garlic mashed potatoes, roasted vegetables, or Caesar salad.

Internal Linking Opportunities


Conclusion

Sizzling Surf & Turf with Fresh Herb Chimichurri is a celebration of bold flavors and luxurious textures. The pairing of juicy steak, tender shrimp, and vibrant chimichurri creates a dish that’s both elegant and approachable. Whether you’re hosting a dinner party or enjoying a special meal at home, this recipe is sure to impress.

Cheesecake Brownies: A Decadent Dessert Recipe

fudgy cheesecake brownies, layered cheesecake brownies, brownie cheesecake bars, chocolate cheesecake squares, marble cheesecake brownies, easy cheesecake brownie recipe

Cheesecake Brownies: The Ultimate Dessert Duo

Introduction

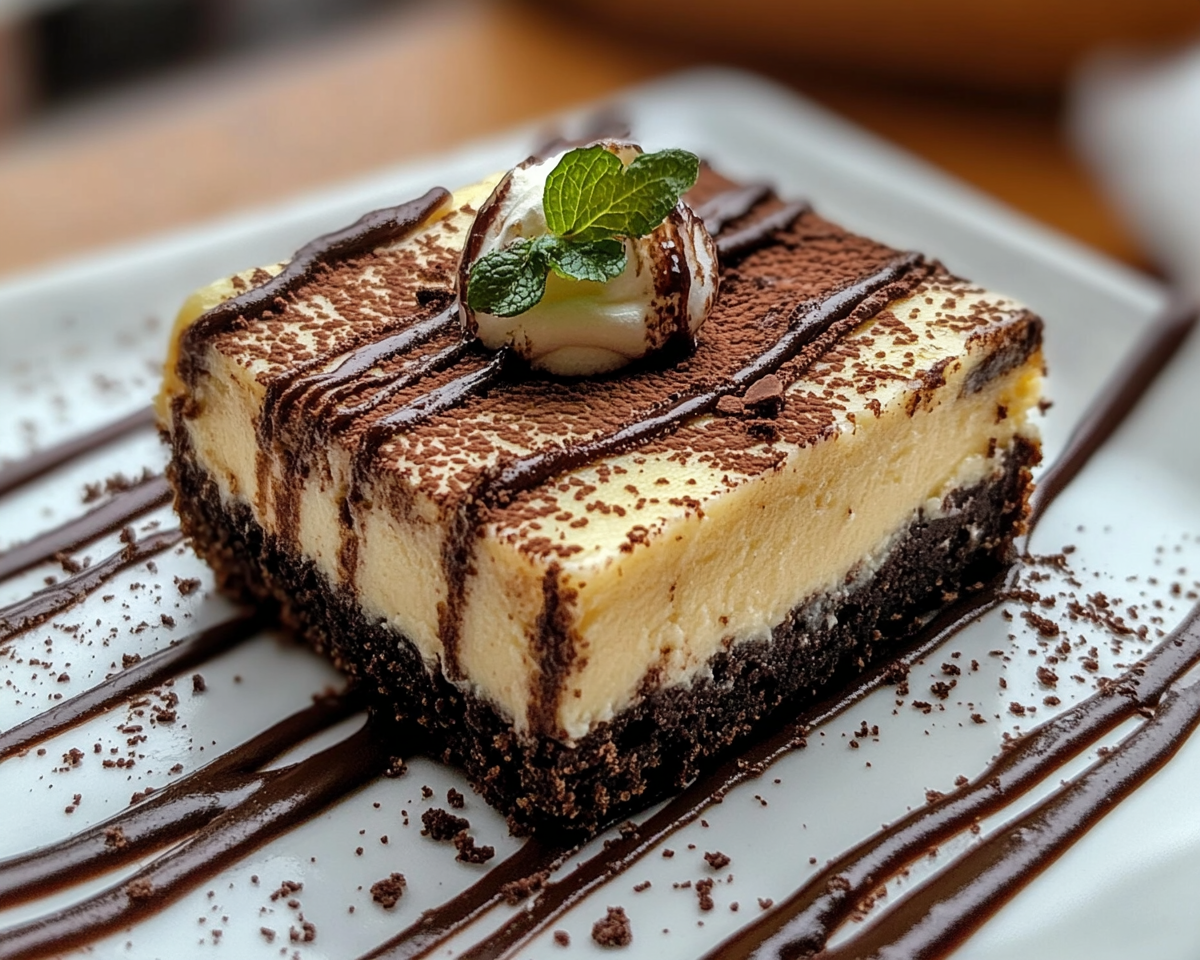
Cheesecake brownies are a delightful fusion of fudgy brownies and creamy cheesecake, creating a dessert that’s rich, flavorful, and visually stunning. Perfect for any occasion, this treat is a guaranteed hit at parties, potlucks, or as a luxurious after-dinner indulgence.

For more cheesecake-inspired recipes, explore Mini Pineapple Coconut Milk Cheesecakes Recipe for a tropical twist on a classic dessert.


What Makes Cheesecake Brownies Special?

  • A Perfect Hybrid Dessert: Combines the deep chocolatey richness of brownies with the smooth, tangy creaminess of cheesecake.
  • Visual Appeal: The swirled layers make it as beautiful as it is delicious.
  • Versatility: Easy to customize with additional flavors or toppings.

To expand your dessert repertoire, check out Raspberry Cheesecake Brownie Bites Recipe for a bite-sized variation.


Ingredients for Cheesecake Brownies

For the Brownie Base

  • Unsalted butter
  • Sugar
  • Cocoa powder
  • Eggs
  • Flour

For the Cheesecake Layer

  • Cream cheese (softened)
  • Sugar
  • Egg
  • Vanilla extract

Optional Add-Ins

  • Swirls of raspberry or caramel
  • Chopped nuts or chocolate chips for texture

Substitutions

  • Gluten-free flour for those with dietary restrictions
  • Dairy-free cream cheese for a lactose-free version

Step-by-Step Baking Instructions

1. Prepare the Brownie Layer

  • Melt butter and whisk in cocoa powder and sugar.
  • Add eggs one at a time, followed by flour, and mix until smooth.
  • Spread evenly in a lined baking pan.

2. Prepare the Cheesecake Mixture

  • Beat cream cheese, sugar, vanilla, and egg until smooth and creamy.
  • Spread over the brownie base or dollop and swirl for a marbled effect.

3. Bake and Cool

  • Bake at 350°F (175°C) for 30-35 minutes or until the cheesecake layer is set.
  • Cool completely before slicing to ensure clean edges.

Creative Variations

  1. Raspberry Cheesecake Brownies
    • Add a swirl of raspberry puree to the cheesecake layer.
  2. Triple Chocolate Cheesecake Brownies
    • Mix white and dark chocolate chips into the batter.
  3. Peanut Butter Cheesecake Brownies
    • Add a layer of peanut butter between the brownie and cheesecake.
  4. Gluten-Free Cheesecake Brownies
    • Replace flour with a gluten-free mix for the brownie base.

FAQs

How Long Do Cheesecake Brownies Last?

Store in an airtight container in the refrigerator for up to five days.

Can I Freeze Them?

Yes, wrap individual slices in plastic wrap and freeze for up to a month.

Why Did My Cheesecake Layer Crack?

Overmixing or baking at too high a temperature can cause cracks. Bake at a consistent, lower heat.

What’s the Best Way to Cut Cheesecake Brownies?

Chill them first and use a clean, sharp knife, wiping between cuts.

Can I Use Boxed Brownie Mix?

Absolutely! This simplifies the recipe without sacrificing flavor.


Serving Suggestions

  • Serve with a dollop of whipped cream or a drizzle of caramel sauce.
  • Pair with coffee or hot cocoa for an indulgent treat.

Internal Linking Opportunities


Conclusion

Cheesecake brownies are a versatile, indulgent dessert that combines the best of two worlds: fudgy brownies and creamy cheesecake. Whether you’re baking for a casual treat or a special occasion, these brownies will impress everyone at the table.

Brownie Bottom Mini Cheesecake: A Decadent Dessert in Every Bite

mini cheesecake brownies, brownie cheesecake cups, mini dessert recipe, chocolate cheesecake bites, bite-sized cheesecake, layered brownie cheesecake

Brownie Bottom Mini Cheesecake: A Bite-Sized Indulgence

Introduction

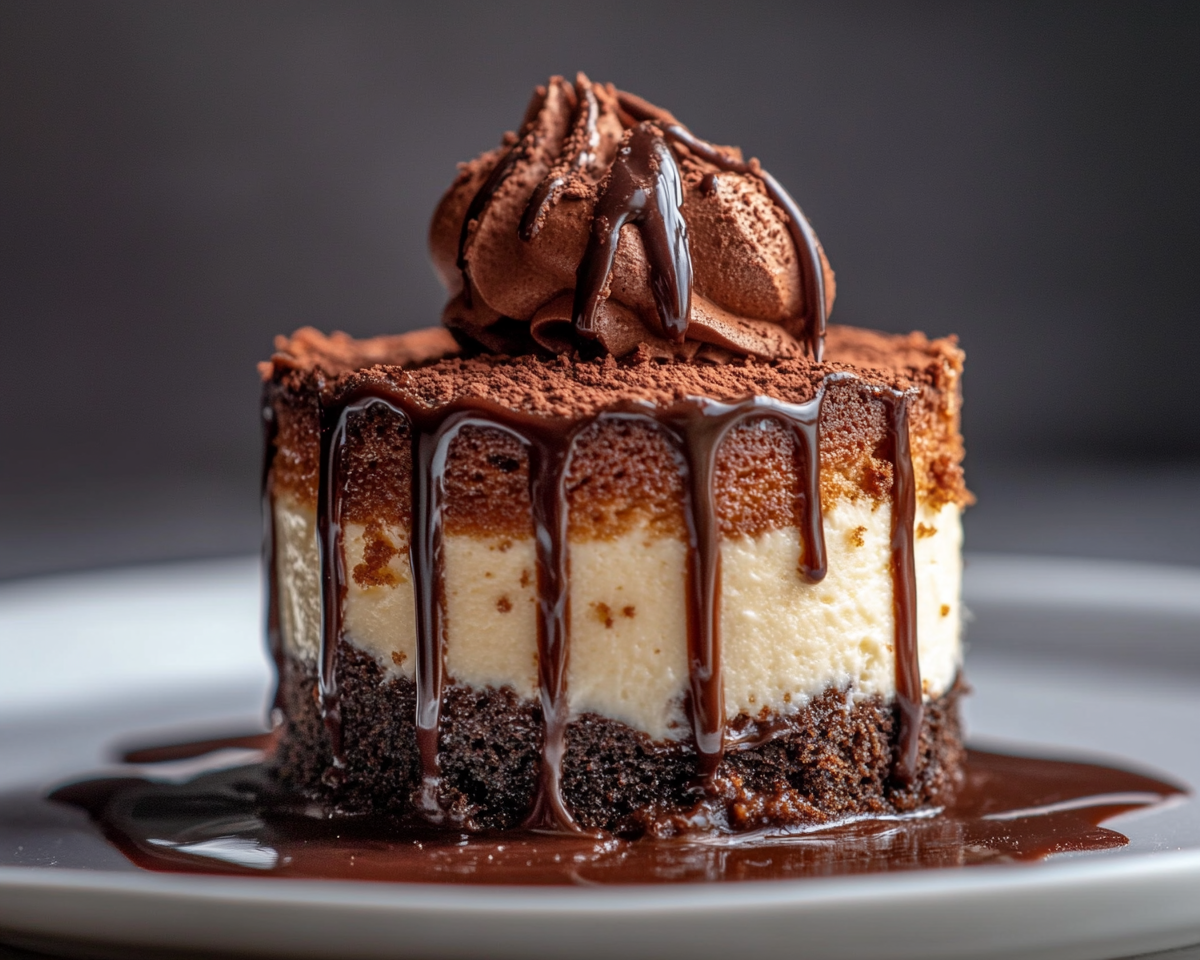
The Brownie Bottom Mini Cheesecake is the perfect dessert for any occasion, combining the rich, fudgy texture of brownies with the creamy decadence of cheesecake. Whether it’s a holiday, birthday party, or casual dinner gathering, this dessert’s irresistible combination makes it a crowd-pleaser.

For a similar layered dessert experience, explore Raspberry Cheesecake Brownie Bites Recipe for another mini dessert idea that blends fruit and chocolate.


Why Brownie Bottom Mini Cheesecakes Are Perfect

  • Convenience: Individual servings eliminate the need for slicing.
  • Richness in Every Bite: Combines two universally loved desserts—brownies and cheesecake.
  • Versatility: Ideal for parties, potlucks, or an after-dinner treat.

Pair this recipe with other indulgent treats like Mini Pineapple Coconut Milk Cheesecakes for a variety of flavors at your dessert table.


Ingredients Needed for Brownie Bottom Mini Cheesecakes

For the Brownie Base

  • Unsalted butter
  • Granulated sugar
  • Cocoa powder
  • Eggs
  • All-purpose flour

For the Cheesecake Layer

  • Cream cheese (softened)
  • Granulated sugar
  • Vanilla extract
  • Eggs
  • Heavy cream

Optional Add-Ins

  • Chopped nuts or mini chocolate chips in the brownie layer.
  • Fruit compote or caramel drizzle for topping.

Step-by-Step Instructions

1. Prepare the Brownie Base

  • Melt butter and whisk with cocoa powder and sugar.
  • Add eggs one at a time, then fold in flour.
  • Divide the batter evenly among lined muffin tins.

2. Make the Cheesecake Filling

  • Beat cream cheese and sugar until smooth.
  • Add vanilla and eggs, followed by heavy cream, and blend until silky.

3. Assemble and Bake

  • Spoon cheesecake batter on top of the brownie base in each tin.
  • Bake at 325°F (160°C) for 20-25 minutes or until the cheesecake is set.

Variations to Try

  1. Triple Chocolate Delight
    • Use chocolate chips in both layers and top with ganache.
  2. Berry Cheesecake Minis
    • Add a swirl of raspberry or strawberry compote to the cheesecake layer.
  3. Nutty Caramel Cheesecakes
    • Sprinkle chopped pecans and drizzle caramel sauce over the top.
  4. Gluten-Free Option
    • Replace all-purpose flour with almond or gluten-free flour in the brownie base.

FAQs

Can I Use a Boxed Brownie Mix?

Yes, follow package instructions for preparation and portion into muffin tins.

How Long Do They Last?

Store in an airtight container in the refrigerator for up to five days.

Can These Be Frozen?

Absolutely! Wrap individually and freeze for up to one month.

What’s the Best Way to Prevent Cracking in Cheesecake?

Avoid overmixing the cheesecake batter and bake at a lower temperature.

How Do I Decorate These for Special Occasions?

Top with whipped cream, fresh berries, or edible glitter for festive flair.


Internal Linking Opportunities


Conclusion

Brownie Bottom Mini Cheesecakes are the ultimate combination of two beloved desserts, offering a fudgy brownie base with a creamy cheesecake topping. Perfect for any occasion, these bite-sized treats are both indulgent and versatile.