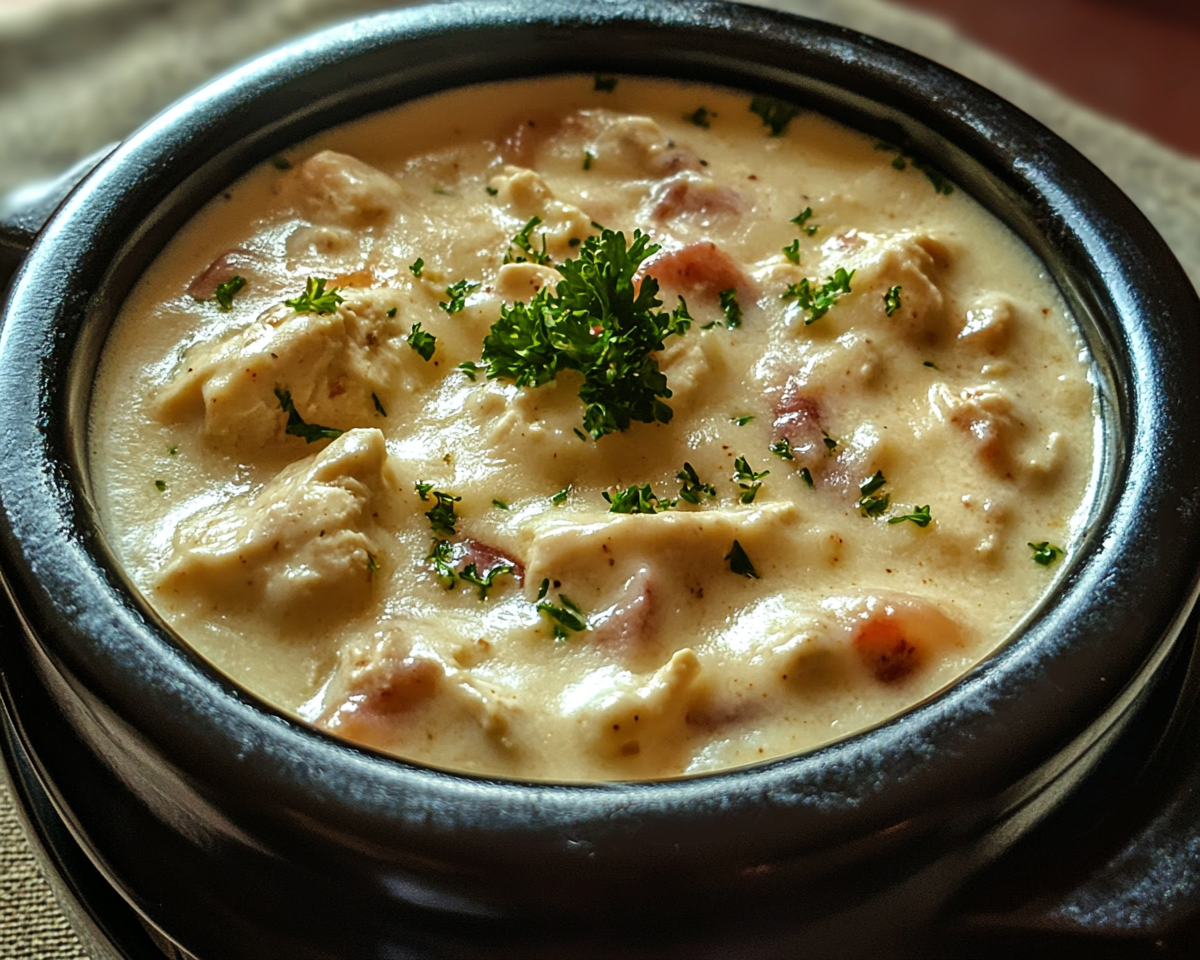
Creamy Crockpot Cream Cheese Chicken Chili Recipe

slow cooker chicken chili, creamy chicken chili recipe, crockpot chili with cream cheese, easy chicken chili recipe, chicken and bean chili

Crockpot Cream Cheese Chicken Chili Recipe

Crockpot Cream Cheese Chicken Chili is a hearty, creamy, and flavorful dish that’s perfect for busy weeknights or family gatherings. The combination of tender shredded chicken, cream cheese, beans, and spices creates an irresistible meal that’s both comforting and satisfying. What makes this recipe truly exceptional is its simplicity — it’s a fix-it-and-forget-it meal that anyone can make.


Why Choose a Crockpot for Chicken Chili?

Using a slow cooker not only enhances the flavors of the ingredients but also allows for hands-free cooking. You can assemble everything in the morning, let it cook throughout the day, and return to a delicious, ready-to-serve dinner. For more on why slow cooking is so beneficial, check out Why Crockpot Meals Are a Game-Changer.


Ingredients You’ll Need

Here’s what you’ll need to create this dish:

  • Protein: 2–3 chicken breasts (boneless and skinless).
  • Creaminess: 1 block of cream cheese (8 oz).
  • Canned Goods:
    • 1 can black beans (drained and rinsed).
    • 1 can white beans.
    • 1 can corn (undrained).
    • 1 can Rotel (diced tomatoes with green chilies, undrained).
  • Seasonings:
    • 1 packet ranch dressing mix.
    • 1 tsp cumin.
    • 1 tbsp chili powder.
    • 1 tsp onion powder.

Step-by-Step Instructions

1. Prepare the Crockpot

  • Spray the crockpot with non-stick cooking spray for easy cleanup.
  • Place the chicken breasts at the bottom of the crockpot.

2. Layer the Ingredients

  • Add the black beans, white beans, and corn over the chicken.
  • Pour in the can of Rotel.
  • Sprinkle the ranch dressing mix, cumin, chili powder, and onion powder over the ingredients.
  • Top it all off with the block of cream cheese.

3. Cook the Chili

  • Cover the crockpot with a lid and cook:
    • On low: 6–8 hours.
    • On high: 4–6 hours.

4. Shred the Chicken

  • After cooking, use two forks to shred the chicken directly in the crockpot.
  • Stir everything together until the cream cheese is fully melted and incorporated.

Serving Suggestions

  • Serve your chili in bowls with:
    • Shredded cheese.
    • Sour cream.
    • Fresh cilantro.
  • Pair it with tortilla chips, crusty bread, or steamed rice for a complete meal.

For a similar comfort food experience, explore this Crockpot Potato Soup Recipe.


Creative Variations

Spicy Kick

  • Add sliced jalapeños or a dash of cayenne pepper for heat.

Vegetarian Option

  • Swap chicken for jackfruit or chickpeas and use plant-based cream cheese.

Keto-Friendly

  • Reduce the beans and increase the chicken content to make it low-carb.

Frequently Asked Questions

Can I use frozen chicken?

Yes, but you’ll need to adjust the cooking time and ensure the chicken reaches a safe internal temperature.

How do I store leftovers?

Refrigerate leftovers in an airtight container for up to 4 days. You can also freeze it for up to 3 months.

What are some dairy-free alternatives?

Use dairy-free cream cheese or coconut cream for a similar texture.

Can I double the recipe?

Yes, ensure your crockpot is large enough to accommodate the additional ingredients.


Nutritional Highlights

This chili is packed with protein, fiber, and flavor. Beans and tomatoes provide essential nutrients like potassium and vitamin C, while cream cheese adds a luscious texture.


Internal Linking Opportunities


Conclusion

Crockpot Cream Cheese Chicken Chili is a versatile, delicious, and easy-to-make recipe that’s sure to become a family favorite. Its creamy texture and bold flavors make it perfect for any occasion. Give this recipe a try, and don’t hesitate to customize it with your favorite toppings and variations!
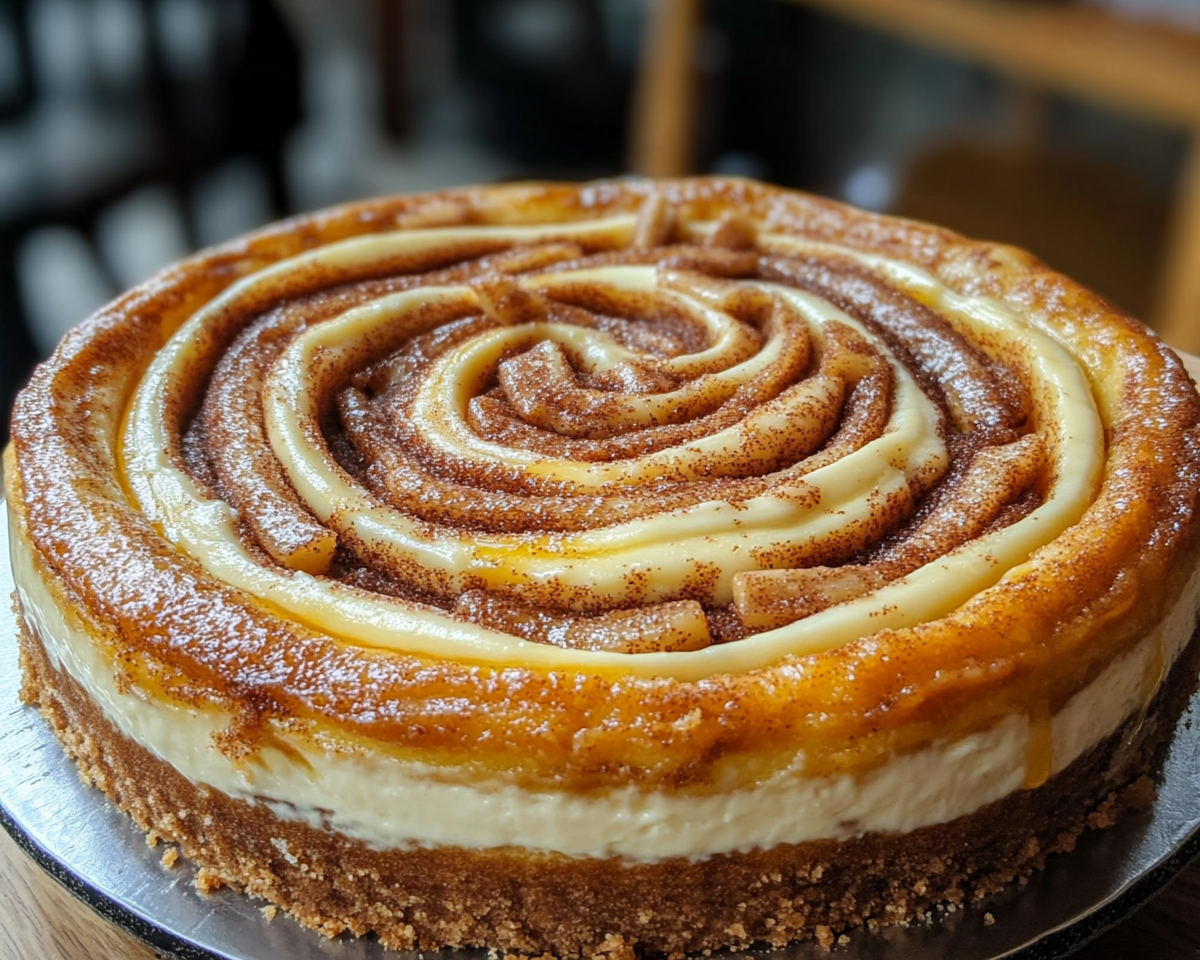
The Ultimate Guide to Cinnamon Roll Honeybun Cheesecake Recipe

cinnamon roll cheesecake, honeybun cheesecake recipe, spiced cheesecake dessert, cinnamon swirl cheesecake, creamy cinnamon dessert

Cinnamon Roll Honeybun Cheesecake: The Ultimate Dessert Fusion

The Cinnamon Roll Honeybun Cheesecake is a decadent dessert that brings together the rich, creamy texture of cheesecake with the warm, spiced flavor of cinnamon rolls and the sweet allure of honeybuns. This indulgent treat is perfect for holidays, brunch gatherings, or whenever you need a dessert that stands out.


Why This Dessert Stands Out

In a world filled with unique desserts, Cinnamon Roll Honeybun Cheesecake is a showstopper for several reasons:

  • Flavor Depth: The combination of a smooth cheesecake filling with cinnamon swirls creates a harmonious balance of sweetness and spice.
  • Visual Appeal: The cinnamon swirls and honeybun glaze make it as beautiful as it is delicious.
  • Versatility: Whether it’s for a holiday feast or a casual get-together, this dessert fits every occasion.

For more insights into the history of cheesecake, you can explore The History of Cheesecake.


Recipe Overview

Ingredients

To recreate this masterpiece, you’ll need:

For the Crust:

  • 1 ½ cups graham cracker crumbs
  • ¼ cup granulated sugar
  • ½ cup melted butter

For the Cinnamon Roll Swirl:

  • ½ cup brown sugar
  • 2 tbsp ground cinnamon
  • ¼ cup unsalted butter, melted

For the Cheesecake Filling:

  • 16 oz cream cheese, softened
  • 1 cup granulated sugar
  • 3 large eggs
  • 1 tsp vanilla extract
  • 1 cup sour cream
  • 1 cup heavy cream

For the Honeybun Glaze:

  • ½ cup powdered sugar
  • 2 tbsp milk
  • 1 tsp vanilla extract

Step-by-Step Preparation

1. Make the Crust

  • Preheat the oven to 325°F.
  • Mix graham cracker crumbs, sugar, and melted butter.
  • Press the mixture into a springform pan and set aside.

2. Prepare the Cheesecake Batter

  • Blend cream cheese and sugar until creamy.
  • Add eggs one at a time, followed by sour cream and heavy cream.
  • Avoid overmixing to prevent cracks.

3. Create the Cinnamon Swirl

  • Combine brown sugar and cinnamon, then mix in melted butter.
  • Layer half the cheesecake batter, add cinnamon dollops, and swirl with a knife.

4. Bake and Cool

  • Bake for 60-70 minutes or until edges are set and the center jiggles slightly.
  • Cool gradually in the oven before refrigerating overnight.

5. Finish with the Honeybun Glaze

  • Whisk powdered sugar, milk, and vanilla.
  • Drizzle over the chilled cheesecake before serving.

For additional inspiration, check out these baking tips on Top Cheesecake Baking Tips.


Pairings and Serving Suggestions

  • Pair with a steaming cup of coffee or tea to balance its richness.
  • For an extra indulgence, serve with whipped cream or vanilla ice cream.

Creative Variations

  1. Apple Cinnamon Cheesecake
    • Add a layer of cinnamon-sugar-coated apple slices over the crust.
  2. Nutty Delight
    • Incorporate chopped pecans into the cinnamon swirl for added texture.
  3. Pumpkin Spice Twist
    • Mix pumpkin puree and pumpkin spice into the batter for a fall-inspired dessert.

Internal Linking Opportunities

While you’re perfecting your Cinnamon Roll Honeybun Cheesecake, consider exploring related recipes like Kentucky Butter Cake for more southern-inspired dessert ideas. Additionally, delve into the secrets of crafting delightful Air Fryer Cinnamon Roll Bites.


Health Benefits and Nutritional Notes

Though indulgent, this dessert includes:

  • Cinnamon: Known for its antioxidants and anti-inflammatory properties.
  • Calcium: From cream cheese and sour cream, essential for bone health.

For healthier substitutions, use Greek yogurt in place of sour cream or opt for a reduced-fat cream cheese.


FAQs

Can I Make This Dessert Ahead of Time?

Yes, it’s best prepared a day ahead to allow flavors to meld.

What’s the Best Way to Prevent Cracks?

  • Use room-temperature ingredients.
  • Avoid overmixing the batter.
  • Cool gradually in the oven.

How Should I Store Leftovers?

Store in an airtight container in the refrigerator for up to 5 days. It also freezes well without the glaze.


Conclusion

The Cinnamon Roll Honeybun Cheesecake is not just a dessert; it’s a sensory experience. With its creamy texture, warm cinnamon flavors, and sweet glaze, it’s a recipe you’ll return to again and again. Perfect for both beginners and seasoned bakers, this cheesecake is a guaranteed crowd-pleaser. Try it today and experience the magic of this unforgettable dessert fusion!

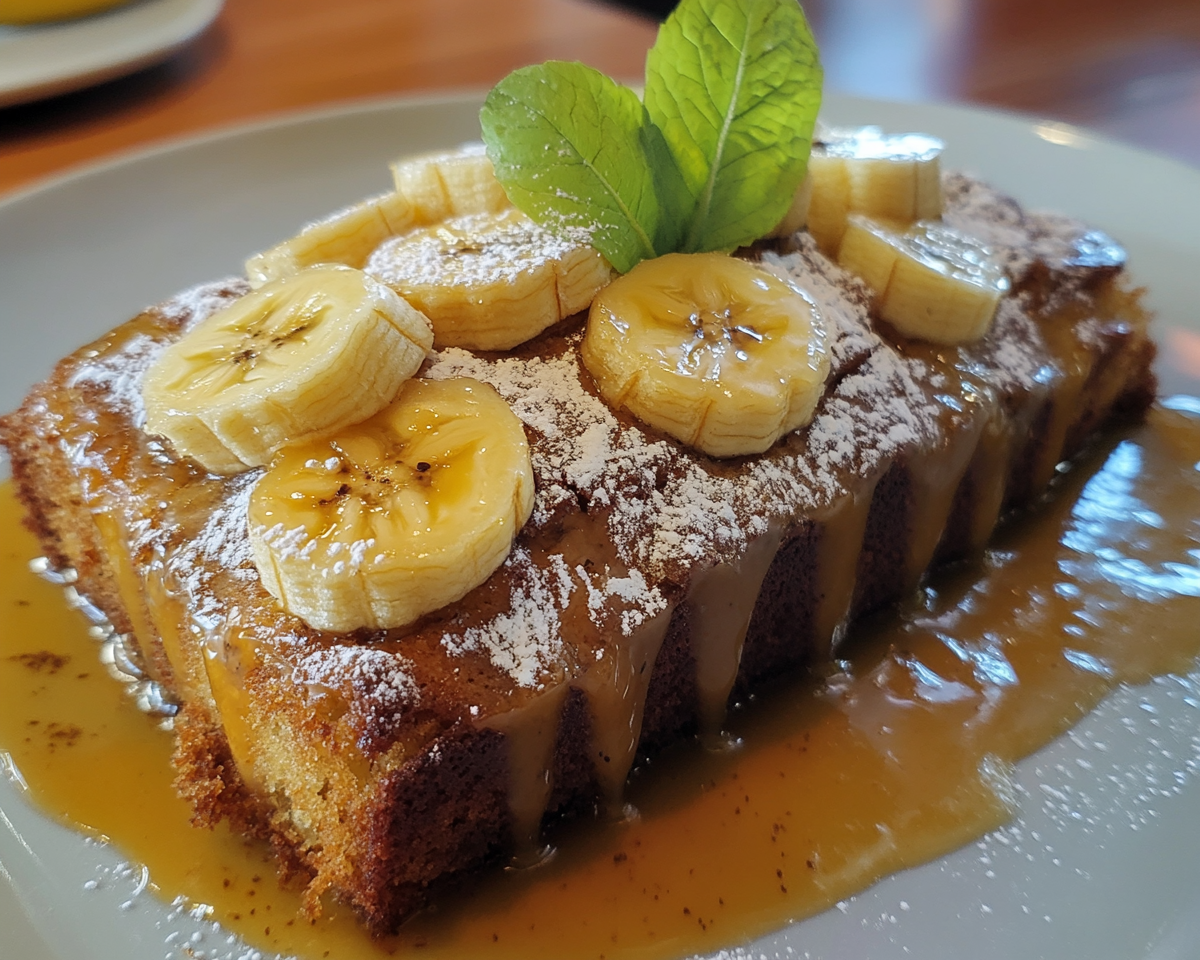
Banana Bread Cake: A Sweet Fusion of Comfort and Elegance

Banana Bread Cake

Banana Bread Cake: A Fusion of Comfort and Elegance

Introduction
Banana Bread Cake combines the comforting flavors of banana bread with the light, airy texture of a cake. This recipe is perfect for casual gatherings, brunches, or as a dessert to enjoy with a cup of coffee. Explore expert tips for banana bread in How to Make the Perfect Banana Bread, or learn why ripe bananas are essential with The Benefits of Ripe Bananas in Baking.


Ingredients for Banana Bread Cake

Core Ingredients:

  • Ripe bananas (the riper, the sweeter)
  • All-purpose flour
  • Sugar or alternative sweeteners
  • Butter or oil
  • Eggs
  • Baking soda and baking powder
  • Vanilla extract and optional cinnamon

Optional Add-ins:

  • Chopped walnuts or pecans for crunch
  • Chocolate chips for added sweetness
  • Cream cheese for frosting

Step-by-Step Instructions

1. Preparing the Ingredients

  • Mash bananas until smooth.
  • Measure dry and wet ingredients accurately for consistent results.

2. Mixing the Batter

  • Cream butter and sugar until light and fluffy.
  • Add eggs and vanilla, then fold in mashed bananas.
  • Gradually mix in dry ingredients until combined.

3. Baking the Cake

  • Preheat the oven to 350°F.
  • Pour batter into a greased or parchment-lined pan.
  • Bake for 40–50 minutes or until a toothpick inserted comes out clean.

4. Cooling and Frosting

  • Let the cake cool before frosting to avoid melting.
  • Cream cheese frosting or a simple glaze pairs beautifully with this cake.

Creative Variations

  • Gluten-Free Banana Bread Cake: Use almond or coconut flour.
  • Vegan Version: Replace eggs with flaxseed meal or applesauce.
  • Chocolate Lover’s Delight: Mix cocoa powder into the batter and add chocolate chips.

FAQs

Q: Can I freeze Banana Bread Cake?
A: Yes, wrap the cake tightly in plastic wrap and store in the freezer for up to 3 months.

Q: How do I make it dairy-free?
A: Use coconut oil or dairy-free butter and omit cream cheese frosting.

Q: Can I use frozen bananas?
A: Absolutely, thaw them first and drain any excess liquid.

Q: How do I store leftovers?
A: Store in an airtight container at room temperature for 2–3 days or in the fridge for up to a week.


Internal Linking Opportunities


Tips for Success

  • Use overripe bananas for the best flavor and natural sweetness.
  • Avoid overmixing the batter to maintain a tender crumb.
  • Let the cake cool completely before slicing to avoid crumbling.

Serving Suggestions

  • Pair with coffee or tea for a delightful afternoon snack.
  • Serve with a dollop of whipped cream or a scoop of vanilla ice cream for dessert.
  • Sprinkle with powdered sugar for a simple yet elegant finish.

Conclusion

Banana Bread Cake is the perfect fusion of dense banana bread and light, fluffy cake. Its versatility and ease of preparation make it a go-to recipe for any occasion. Let me know if you’d like further refinements or other creative dessert ideas!

Shepherd’s Pie Soup: A Hearty Twist on a Classic Comfort Dish

Comfort food soup, ground meat and potato soup, hearty winter soup, mashed potato soup, Shepherd’s Pie-inspired recipe

Shepherd’s Pie Soup: A Comforting Twist on a Classic Dish

Introduction
Shepherd’s Pie Soup is a warm, hearty, and satisfying meal that takes inspiration from the traditional Shepherd’s Pie. This soup combines tender vegetables, flavorful ground meat, and creamy potatoes in a brothy twist. For more tips on creating hearty comfort foods, check out How to Make Hearty Soups. If you’re exploring the nutritional benefits of lamb, visit Health Benefits of Lamb.


Ingredients for Shepherd’s Pie Soup

For the Soup Base:

  • Ground lamb or beef
  • Onion, garlic, celery, and carrots
  • Peas and corn for added sweetness
  • Chicken or beef stock
  • Tomato paste and Worcestershire sauce

For the Potato Layer:

  • Yukon Gold or russet potatoes, mashed
  • Butter, cream, and optional shredded cheddar cheese

Optional garnishes: fresh parsley or a dollop of sour cream.


Step-by-Step Instructions

1. Preparing the Ingredients

  • Dice vegetables into small, even pieces for uniform cooking.
  • Brown ground meat in a large pot until fully cooked.

2. Building the Soup Base

  • Sauté onion, garlic, and celery in the same pot.
  • Stir in tomato paste and deglaze with Worcestershire sauce.
  • Add stock, meat, and vegetables, bringing to a gentle simmer.

3. Making Creamy Mashed Potatoes

  • Boil potatoes until fork-tender, then mash with butter and cream.
  • Stir in shredded cheese for added richness.

4. Finishing the Soup

  • Stir the mashed potatoes into the soup for a creamy texture.
  • Adjust seasoning with salt, pepper, and optional thyme or rosemary.

Creative Variations

  • Vegetarian Shepherd’s Pie Soup: Replace meat with lentils or plant-based protein.
  • Gluten-Free Option: Ensure Worcestershire sauce and stock are gluten-free.
  • Spicy Kick: Add chili flakes or smoked paprika for heat.

FAQs

Q: Can I freeze Shepherd’s Pie Soup?
A: Yes, cool the soup completely, then freeze in airtight containers for up to 3 months.

Q: How do I reheat leftovers?
A: Gently warm on the stove, adding a splash of stock if the soup thickens too much.

Q: Can I use sweet potatoes instead of regular potatoes?
A: Absolutely, sweet potatoes provide a unique flavor twist.

Q: What sides pair well with this soup?
A: Serve with crusty bread or a fresh green salad.


Internal Linking Opportunities


Tips for Success

  • Use a mix of Yukon Gold and russet potatoes for the best mashed potato texture.
  • Brown the meat thoroughly to enhance the soup’s depth of flavor.
  • Allow the soup to simmer gently for at least 20 minutes to meld flavors.

Serving Suggestions

  • Garnish with fresh herbs and serve with warm dinner rolls.
  • Pair with a side dish like Garlic Bacon Kale for a balanced meal.

Conclusion

Shepherd’s Pie Soup is a hearty, delicious dish that captures the essence of a classic comfort food in a warm bowl of soup. With its creamy potatoes, savory broth, and tender vegetables, it’s sure to become a family favorite. Let me know if you’d like further refinements or additional recipe ideas!

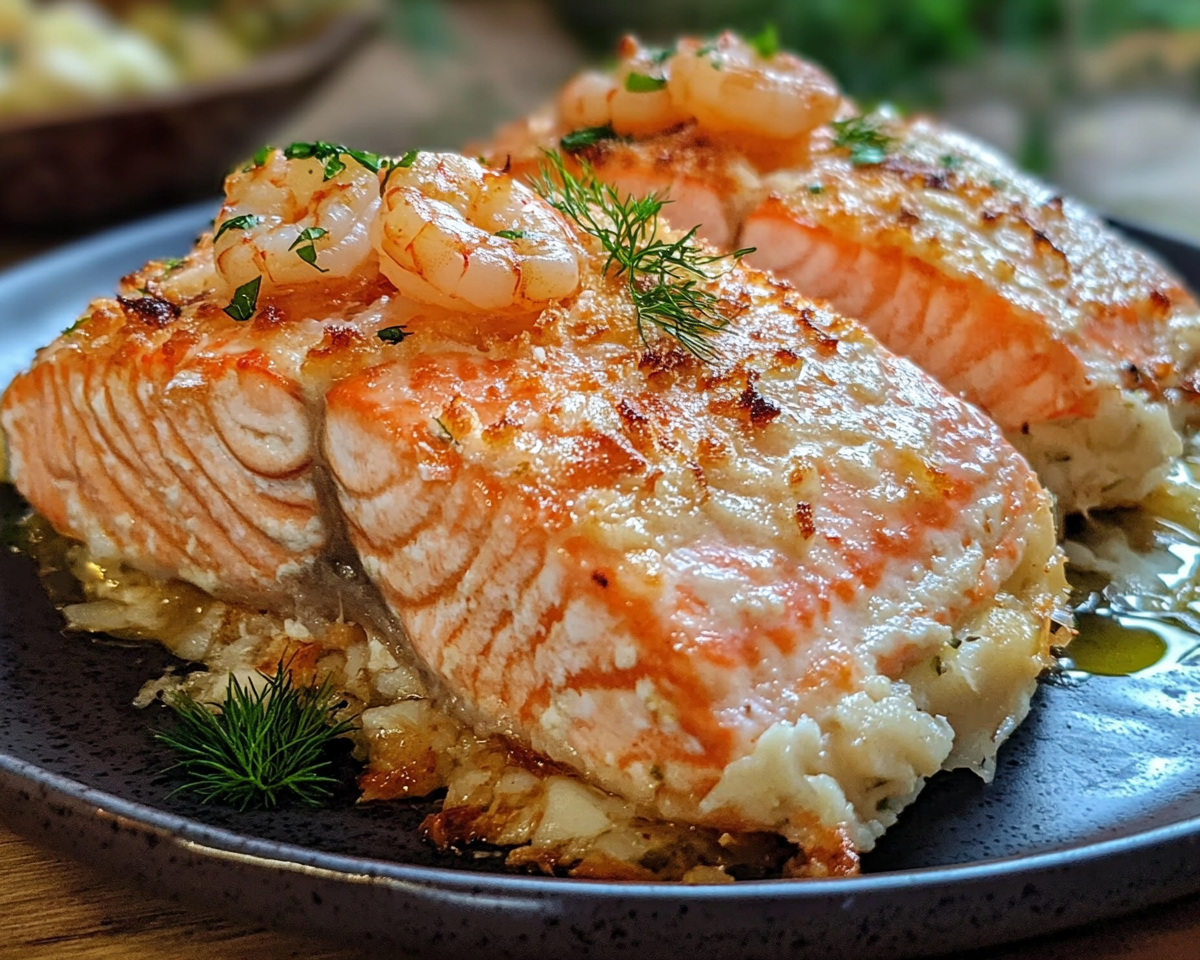
Elegant Crab and Shrimp Stuffed Salmon: A Gourmet Seafood Delight

Stuffed salmon recipe, crab and shrimp filling for salmon, seafood stuffed salmon, gourmet stuffed fish, salmon with seafood stuffing

Elegant Crab and Shrimp Stuffed Salmon: A Gourmet Seafood Delight

Introduction
The Elegant Crab and Shrimp Stuffed Salmon is a luxurious dish that combines the richness of salmon with a flavorful seafood stuffing of crab and shrimp. This recipe is perfect for impressing guests or enjoying a gourmet meal at home. For tips on cooking salmon, visit How to Cook Salmon Perfectly. Discover the health benefits of seafood with Health Benefits of Seafood.


Ingredients for Crab and Shrimp Stuffed Salmon

For the Salmon:

  • Salmon fillets with pockets cut for stuffing
  • Olive oil, garlic, lemon juice, and parsley for marinating

For the Seafood Stuffing:

  • Crab meat (fresh or canned)
  • Cooked shrimp, chopped
  • Cream cheese, softened
  • Breadcrumbs (regular or gluten-free)
  • Garlic, lemon zest, parsley, and optional Old Bay seasoning

Step-by-Step Instructions

1. Preparing the Salmon

  • Rinse and pat dry salmon fillets.
  • Create a pocket in each fillet, ensuring not to cut through.

2. Making the Stuffing

  • In a bowl, mix crab, shrimp, cream cheese, breadcrumbs, garlic, and lemon zest.
  • Add seasoning to taste and ensure a moist but firm consistency.

3. Stuffing and Marinating the Salmon

  • Fill the salmon pockets with the prepared stuffing.
  • Secure with toothpicks if needed.
  • Marinate salmon in olive oil, garlic, and lemon juice for at least 30 minutes.

4. Cooking the Stuffed Salmon

  • Baking: Place the stuffed fillets on a baking sheet, drizzle with olive oil, and bake at 375°F for 20–25 minutes.
  • Grilling: Preheat the grill and cook over medium heat, flipping carefully.
  • Pan-Searing and Baking Combo: Sear salmon until golden, then finish in the oven.

Creative Variations

  • Cajun Style: Add Cajun seasoning and hot sauce to the stuffing.
  • Mediterranean Flavor: Incorporate feta cheese, sun-dried tomatoes, and olives.
  • Vegan Alternative: Substitute crab and shrimp with a plant-based protein mix.

FAQs

Q: Can I prepare this dish in advance?
A: Yes, assemble the salmon and store it covered in the fridge for up to 24 hours before cooking.

Q: How do I know when the salmon is cooked?
A: Use a meat thermometer; salmon should reach an internal temperature of 145°F.

Q: Can I use canned seafood for the stuffing?
A: Yes, ensure it’s well-drained for the best texture and flavor.

Q: What sides pair well with this dish?
A: Roasted vegetables, wild rice, or creamy mashed potatoes.


Internal Linking Opportunities


Tips for Success

  • Use fresh seafood for the best flavor and texture.
  • Don’t overstuff the salmon to ensure even cooking.
  • Let the salmon rest for a few minutes before serving to retain juices.

Serving Suggestions

  • Pair with a side salad, lemon butter asparagus, or wild rice pilaf.
  • Drizzle with a garlic cream sauce or a lemon butter reduction for extra flavor.

Explore complementary recipes on ExoRecipes, such as Savory Bacon Bread and Slow Cooker Baked Ziti.


Conclusion

The Elegant Crab and Shrimp Stuffed Salmon is a restaurant-quality dish that’s surprisingly easy to prepare at home. Its rich flavors and gourmet presentation make it ideal for any special occasion. Let me know if you’d like further refinements or additional recipe ideas!