Chicken Bacon Ranch Pinwheels: A Flavor-Packed Party Favorite

bacon ranch pinwheel wraps, chicken bacon tortilla roll-ups, ranch chicken appetizers, party pinwheel recipe, bacon chicken ranch wraps

Chicken Bacon Ranch Pinwheels: A Crowd-Pleasing Favorite

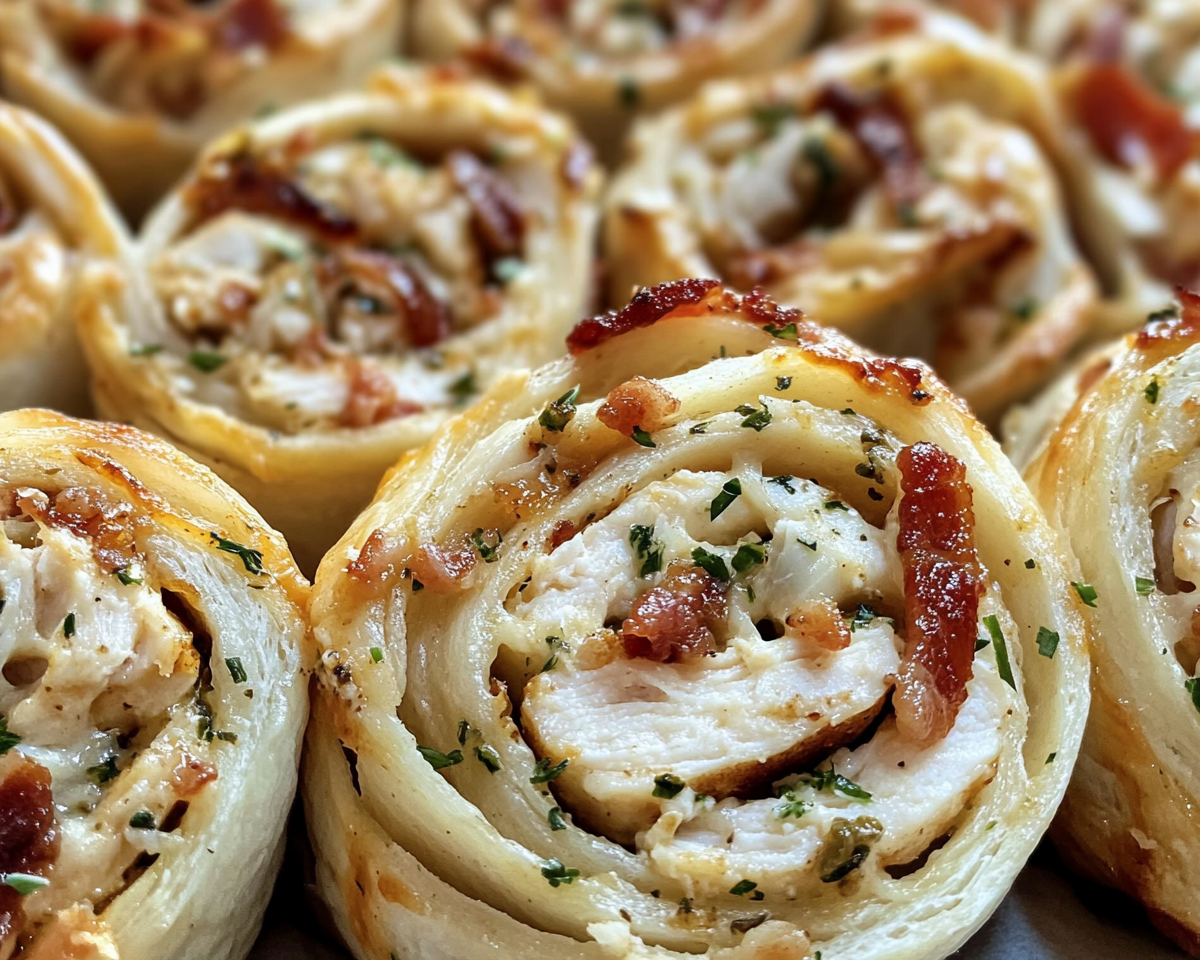
Chicken Bacon Ranch Pinwheels are the ultimate appetizer or snack for parties, picnics, and casual gatherings. Packed with the savory flavors of chicken, crispy bacon, and creamy ranch dressing, these pinwheels are easy to make and always a hit.

For another delicious bite-sized treat, explore Easy Apple Cheesecake Tacos or spice things up with Buffalo Chicken Mac and Cheese.


Why You’ll Love This Recipe

  • Simple to Make: Requires minimal preparation with everyday ingredients.
  • Versatile: Perfect for parties, potlucks, or school lunches.
  • Customizable: Adjust the flavors and ingredients to suit your preferences.

For other crowd-pleasers, try the Decadent Caramel Chocolate Cupcakes or Ultimate Loaded Sweet Potato Nachos.


Ingredients for Chicken Bacon Ranch Pinwheels

Main Ingredients:

  • 2 cups cooked chicken, shredded or diced.
  • 8 oz cream cheese, softened.
  • 1 packet ranch seasoning mix.
  • 1 cup shredded cheddar cheese.
  • 8 slices cooked bacon, crumbled.

For the Wraps:

  • 4 large flour tortillas.

Optional Additions:

  • Diced green onions or chives for garnish.
  • Sliced jalapeños for a spicy kick.

Step-by-Step Instructions

1. Prepare the Filling

  • In a mixing bowl, combine softened cream cheese and ranch seasoning until smooth.
  • Fold in shredded chicken, cheddar cheese, and crumbled bacon.

2. Assemble the Pinwheels

  • Spread the filling evenly across each tortilla, leaving a small border.
  • Roll each tortilla tightly, ensuring the filling is secured.

3. Chill and Slice

  • Wrap each roll in plastic wrap and refrigerate for at least 30 minutes.
  • Slice the rolls into 1-inch pinwheels using a sharp knife.

Creative Variations

  • Buffalo Ranch Pinwheels: Add a drizzle of buffalo sauce to the filling for a spicy twist.
  • Vegetarian Option: Swap chicken and bacon with diced bell peppers, spinach, and black beans.
  • Gluten-Free Alternative: Use gluten-free tortillas or lettuce leaves.

Tips for Perfect Pinwheels

  • Use Room-Temperature Tortillas: Prevents cracking during rolling.
  • Chill Before Slicing: Ensures clean and uniform cuts.
  • Customize to Taste: Experiment with different cheeses or herbs.

FAQs About Chicken Bacon Ranch Pinwheels

1. Can I make these pinwheels ahead of time?

Yes, prepare them up to 24 hours in advance and store in the refrigerator.

2. How do I prevent the pinwheels from unrolling?

Wrap them tightly in plastic wrap before chilling.

3. Can I serve these warm?

While traditionally served cold, they can be baked for a few minutes to serve warm.

4. What’s the best way to store leftovers?

Keep in an airtight container in the fridge for up to 3 days.


Internal Linking Opportunities


Conclusion

Chicken Bacon Ranch Pinwheels are an easy, delicious, and versatile recipe that’s perfect for any occasion. Whether you’re hosting a party or preparing a quick snack, these pinwheels are guaranteed to please. Whip up a batch today and enjoy their savory, satisfying flavors!
Black Forest Cheesecake Delight: A Decadent Cherry-Chocolate Dessert

cherry chocolate cheesecake, Black Forest dessert, chocolate cherry cheesecake, creamy Black Forest cheesecake, Black Forest-inspired cheesecake

Black Forest Cheesecake Delight: A Decadent Cherry-Chocolate Dessert

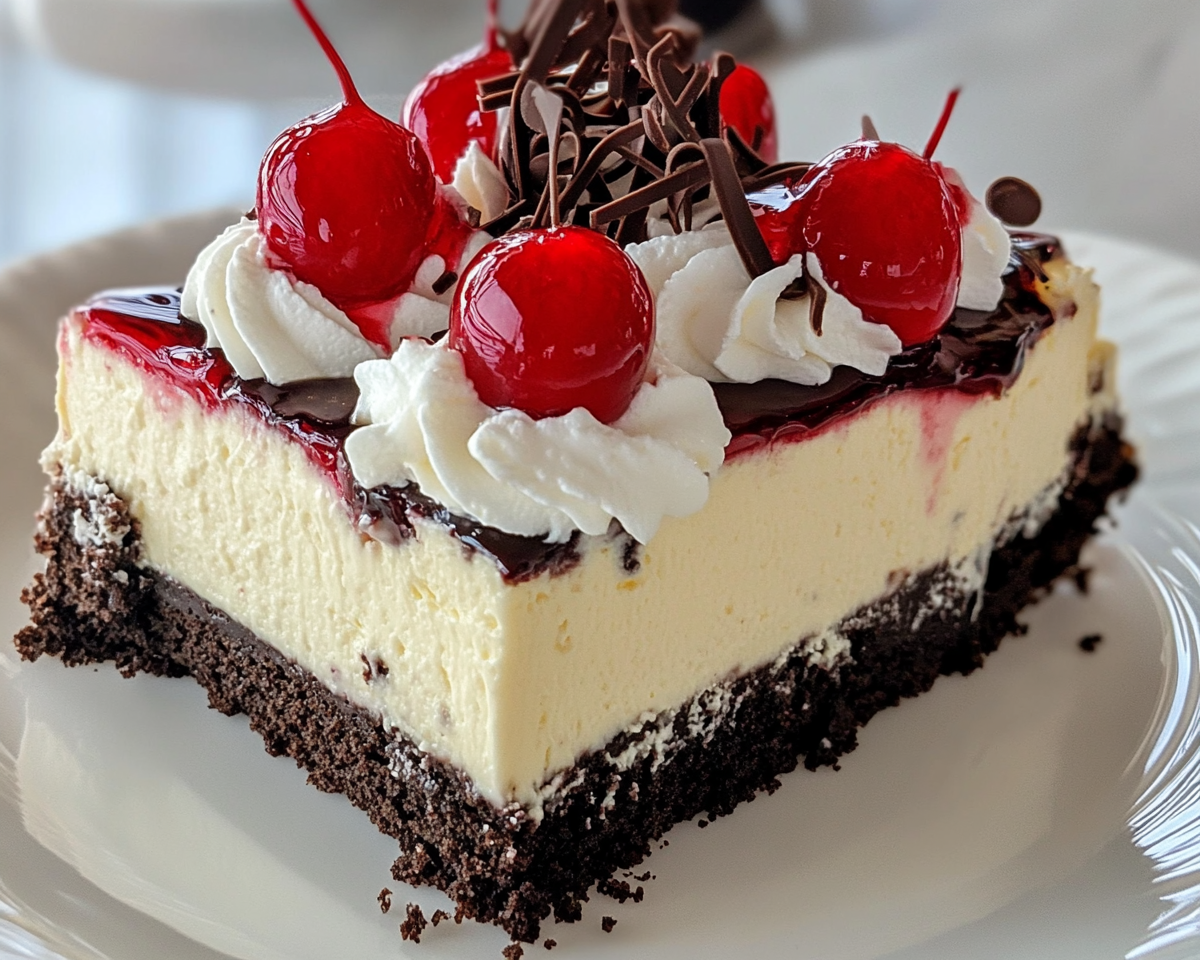
Black Forest Cheesecake Delight is an irresistible combination of creamy chocolate cheesecake, luscious cherry topping, and a crisp chocolate crust. This dessert takes the essence of the classic Black Forest cake and transforms it into a rich, velvety cheesecake that’s perfect for any special occasion.

For a twist on traditional desserts, try Easy Apple Cheesecake Tacos or Cinnamon Roll Cookies with Cream Cheese Drizzle.


Why You’ll Love This Recipe

  • Elegant and Delicious: Combines the iconic flavors of chocolate and cherries in a creamy cheesecake format.
  • Perfect for Celebrations: Ideal for holidays, birthdays, or dinner parties.
  • Customizable: Easy to adapt with different toppings or flavors.

Check out No-Bake Banana Split Cheesecake for a refreshing no-bake dessert.


Ingredients for Black Forest Cheesecake Delight

Crust:

  • 1 cup chocolate cookie crumbs.
  • 3 tbsp unsalted butter, melted.

Filling:

  • 16 oz cream cheese, softened.
  • ¾ cup granulated sugar.
  • 2 large eggs.
  • 6 oz semi-sweet chocolate, melted and cooled.
  • ½ tsp almond extract.

Topping:

  • 1 can (21 oz) cherry pie filling.
  • 1 cup whipped topping or fresh whipped cream.

Step-by-Step Instructions

1. Prepare the Crust

  • Combine chocolate cookie crumbs and melted butter.
  • Press into the bottom of a 9-inch springform pan.
  • Bake at 350°F for 10 minutes and cool.

2. Make the Cheesecake Filling

  • Beat cream cheese and sugar until smooth.
  • Add eggs one at a time, mixing well.
  • Stir in melted chocolate and almond extract.

3. Bake the Cheesecake

  • Pour filling into the crust and bake at 350°F for 45–50 minutes.
  • Let cool completely before refrigerating for at least 4 hours.

4. Add the Topping

  • Spread cherry pie filling over the chilled cheesecake.
  • Garnish with whipped topping or chocolate shavings.

Variations and Tips

  • Ganache Layer: Add a layer of chocolate ganache between the cheesecake and cherry topping for extra richness.
  • Fresh Cherry Topping: Replace pie filling with fresh cherries cooked with sugar and cornstarch.
  • Alcoholic Touch: Add kirsch (cherry brandy) for a boozy kick.

Explore Kentucky Butter Cake for another indulgent dessert.


FAQs About Black Forest Cheesecake Delight

1. Can I use a store-bought crust?

Yes, a pre-made crust works, but homemade provides a better texture and flavor.

2. How do I prevent cracks in my cheesecake?

Use room-temperature ingredients and avoid overmixing to reduce air bubbles.

3. Can I freeze this cheesecake?

Yes, freeze the cheesecake without the topping. Add the topping after thawing.

4. What’s the best way to store leftovers?

Keep refrigerated in an airtight container for up to 5 days.


Internal Linking Opportunities


Conclusion

Black Forest Cheesecake Delight is a show-stopping dessert that’s surprisingly easy to make. With its rich chocolate filling and tangy cherry topping, it’s bound to impress at any gathering. Whip up this delectable cheesecake today and enjoy a slice of pure indulgence!

Maraschino Cherry Chocolate Chip Cookies: A Chewy and Festive Treat

cherry chocolate chip cookies, pink cherry cookies, chocolate chip cookies with cherries, maraschino cherry desserts, festive holiday cookies

Maraschino Cherry Chocolate Chip Cookies: A Sweet, Chewy Delight

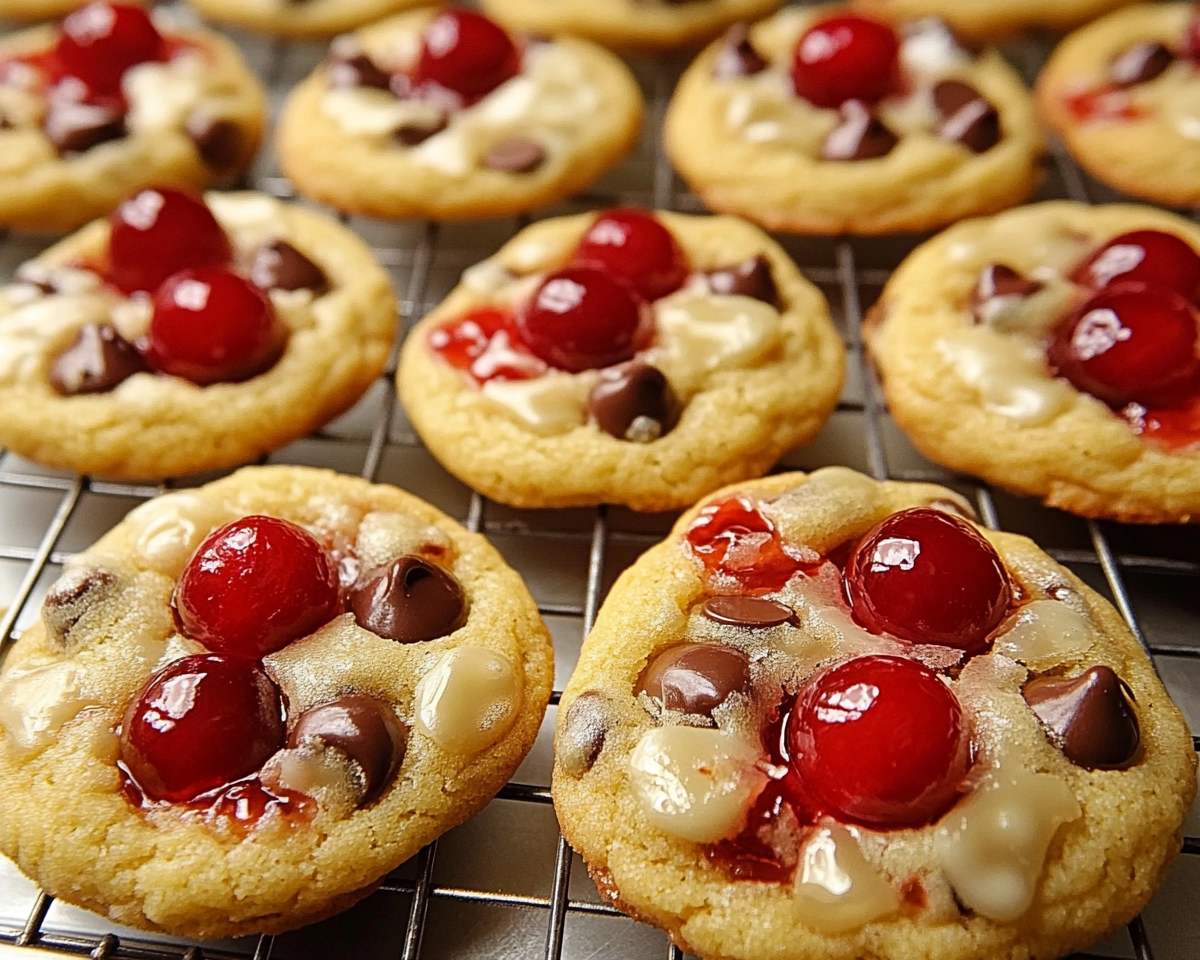
Maraschino Cherry Chocolate Chip Cookies are a festive and flavorful treat that combines the tartness of cherries with the richness of chocolate. Perfect for holidays, celebrations, or simply satisfying a sweet tooth, these cookies are as visually appealing as they are delicious.

For more cookie inspirations, explore Cinnamon Roll Cookies with Cream Cheese Drizzle or indulge in Decadent Caramel Chocolate Cupcakes.


Why You’ll Love This Recipe

  • Perfectly Balanced Flavor: The sweetness of maraschino cherries pairs beautifully with semi-sweet chocolate.
  • Festive Appearance: Vibrant pink dough and chocolate chips make these cookies stand out.
  • Simple Preparation: Easy to make with minimal ingredients and steps.

For a fruity twist, try the Raspberry Shortbread with White Chocolate Drizzle.


Ingredients for Maraschino Cherry Chocolate Chip Cookies

Wet Ingredients:

  • ½ cup unsalted butter, softened.
  • ¾ cup light brown sugar.
  • 1 large egg.
  • 1 tsp vanilla extract, ⅛ tsp almond extract.

Dry Ingredients:

  • 1½ cups all-purpose flour.
  • ½ tsp baking soda, ¼ tsp salt.

Add-Ins:

  • ¾ cup maraschino cherries, drained and finely chopped.
  • ¾ cup semi-sweet chocolate chips.

Step-by-Step Instructions

1. Prepare the Dough

  • Cream the butter and sugar until light and fluffy.
  • Mix in egg, vanilla, almond extract, and a touch of pink gel food coloring for vibrancy.
  • Gradually incorporate the dry ingredients until just combined.

2. Fold in the Cherries and Chocolate

  • Pat cherries dry to avoid excess moisture.
  • Gently fold in chopped cherries and chocolate chips.

3. Shape and Bake

  • Preheat oven to 350°F.
  • Scoop dough into 1½-inch balls and place them on a lined baking sheet.
  • Bake for 14–16 minutes, or until edges are lightly golden.
  • Cool on the baking sheet for 5 minutes before transferring to a wire rack.

Creative Variations

  • Dark Chocolate Cherry: Use dark chocolate chips for an intense flavor.
  • Nutty Option: Add chopped pecans or almonds for texture.
  • Gluten-Free Alternative: Substitute with a gluten-free flour blend.

Explore additional unique recipes like Cool Whip Cookies for simple yet delicious desserts.


Tips for Perfect Cookies

  • Drain Cherries Properly: Excess liquid can make the dough too sticky.
  • Even Baking: Space cookies evenly on the sheet to prevent spreading.
  • Enhance the Presentation: Press a few chocolate chips on top of each cookie before baking.

FAQs About Maraschino Cherry Chocolate Chip Cookies

1. Can I use fresh cherries instead of maraschino?

Yes, pit and chop fresh cherries, but ensure they’re thoroughly dried to prevent sogginess.

2. How should I store these cookies?

Store in an airtight container at room temperature for up to 5 days.

3. Can I freeze the dough?

Absolutely. Scoop dough balls onto a tray, freeze until solid, then store in a freezer-safe bag.

4. Why are my cookies spreading too much?

Chill the dough for 30 minutes before baking to reduce spreading.


Internal Linking Opportunities


Conclusion

Maraschino Cherry Chocolate Chip Cookies are the perfect blend of tart and sweet, offering a pop of color and flavor in every bite. With their vibrant appearance and chewy texture, they’re sure to be a hit at any gathering. Bake a batch today and enjoy a delightful twist on classic chocolate chip cookies!

Boston Cream Pie Cupcakes: A Delicious Twist on a Classic Dessert

cream-filled cupcakes, chocolate ganache cupcakes, vanilla cupcakes with pastry cream, mini Boston cream pie, elegant dessert cupcakes

Boston Cream Pie Cupcakes: A Modern Twist on a Classic Dessert

Boston Cream Pie Cupcakes bring the rich flavors of the classic pie into a portable, bite-sized treat. Combining moist vanilla cupcakes, creamy pastry filling, and a decadent chocolate ganache topping, this recipe is perfect for parties, birthdays, or simply indulging your sweet tooth.

For more elegant dessert options, try Kentucky Butter Cake or explore the flavors of Raspberry Shortbread with White Chocolate Drizzle.


Why You’ll Love This Recipe

  • Classic Flavors: Brings together vanilla, chocolate, and cream in a unique way.
  • Elegant Presentation: Perfect for gatherings or gifting.
  • Customizable: Add your favorite toppings or flavor twists.

Looking for another sweet treat? Check out Decadent Caramel Chocolate Cupcakes.


Ingredients for Boston Cream Pie Cupcakes

For the Cupcakes:

  • 6 tbsp unsalted butter, softened.
  • ¾ cup granulated sugar.
  • 2 large eggs.
  • 1 tsp vanilla extract.
  • 1½ cups all-purpose flour.
  • 1½ tsp baking powder, ½ tsp salt.
  • ½ cup milk.

For the Pastry Cream:

  • 2 large egg yolks.
  • ½ cup sugar.
  • 1 tbsp cornstarch.
  • 1 cup whole milk.
  • 1 tsp vanilla extract.

For the Chocolate Ganache:

  • 8 oz semi-sweet chocolate.
  • ½ cup heavy cream.

Step-by-Step Instructions

1. Bake the Cupcakes

  • Preheat oven to 350°F and line a cupcake tin with liners.
  • Cream butter and sugar, then mix in eggs and vanilla. Gradually add dry ingredients alternating with milk.
  • Fill liners two-thirds full and bake for 15–18 minutes.

2. Make the Pastry Cream

  • Whisk egg yolks, sugar, and cornstarch in a saucepan.
  • Gradually add warm milk while whisking, and cook over medium heat until thickened.
  • Stir in vanilla and cool.

3. Prepare the Ganache

  • Heat heavy cream and pour over chopped chocolate.
  • Stir until smooth and let cool to room temperature.

4. Assemble the Cupcakes

  • Core the center of each cupcake and fill with pastry cream.
  • Spread or pipe ganache over the top.

Variations and Tips

  • Chocolate Overload: Use chocolate cupcakes as the base.
  • Citrus Twist: Add lemon zest to the pastry cream for a tangy flavor.
  • Nutty Surprise: Sprinkle crushed nuts over the ganache for extra crunch.

For more tips on decorating cupcakes, explore Easy Cupcake Toppings.


FAQs About Boston Cream Pie Cupcakes

1. Can I make these cupcakes ahead of time?

Yes, store them in the refrigerator and bring them to room temperature before serving.

2. Can I freeze these cupcakes?

Freeze unfrosted cupcakes and assemble fresh for best results.

3. How long will these cupcakes last?

Keep in an airtight container in the fridge for up to 3 days.

4. Can I use store-bought pudding instead of pastry cream?

Yes, but the flavor and texture of homemade pastry cream are superior.


Internal Linking Opportunities


Conclusion

Boston Cream Pie Cupcakes are a delightful and elegant way to enjoy the flavors of the classic dessert in a portable format. With moist cupcakes, creamy filling, and a chocolate topping, they’re sure to impress at any event. Bake a batch today and elevate your dessert game!

Garlic Parmesan Chicken and Potatoes: A Simple One-Pan Dinner

one-pan chicken and potatoes, Parmesan chicken with potatoes, garlic chicken skillet recipe, creamy garlic Parmesan chicken, roasted chicken and potatoes

Garlic Parmesan Chicken and Potatoes: A Flavorful One-Pan Wonder

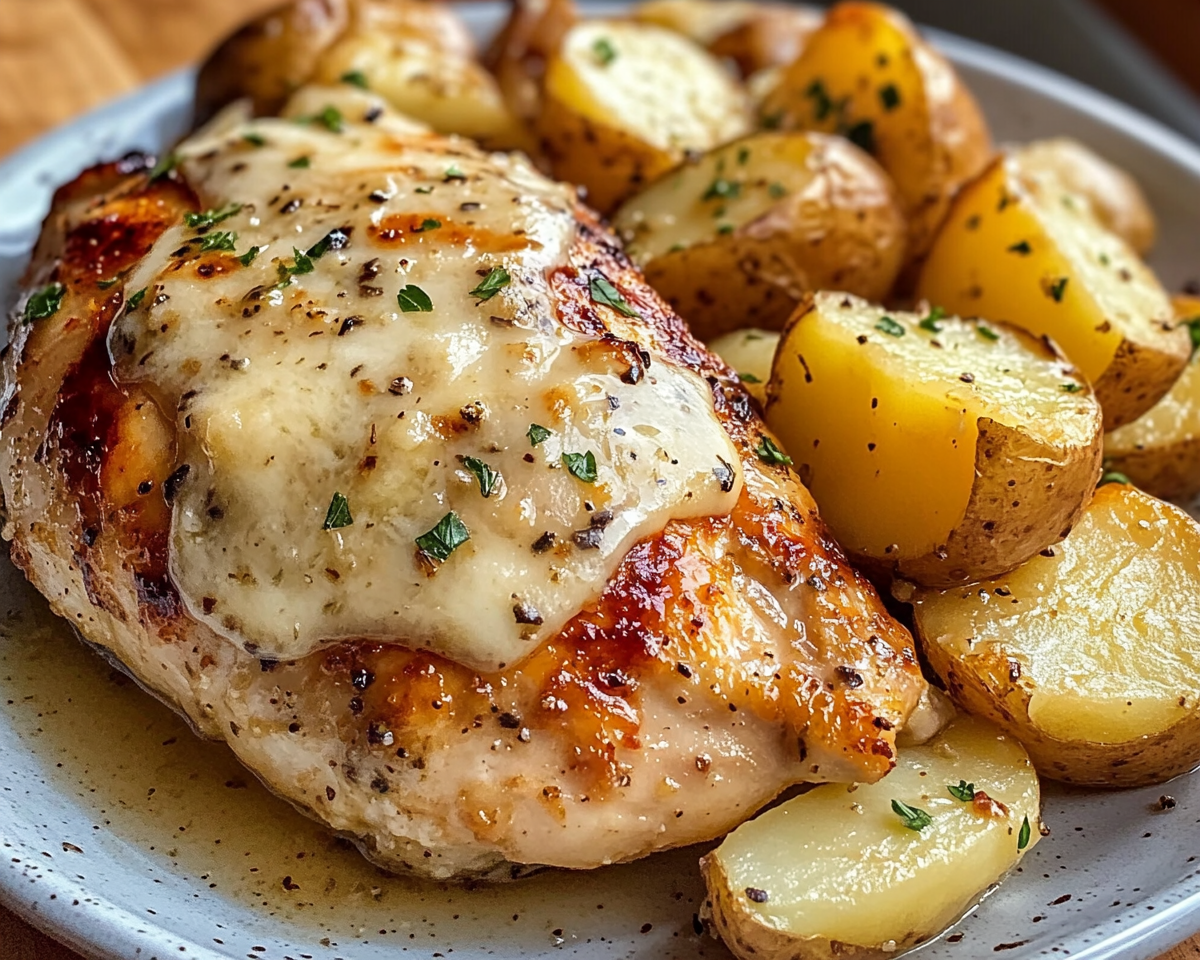
Garlic Parmesan Chicken and Potatoes is a perfect recipe for those who love comforting meals with minimal effort. With crispy potatoes, tender chicken, and a rich garlic Parmesan sauce, this dish checks all the boxes for a hearty and flavorful dinner.

For more comforting one-pan meals, explore Crockpot Ranch Chicken and Potatoes or Garlic Rosemary Steak and Potatoes Skillet.


Why You’ll Love This Recipe

  • One-Pan Simplicity: Easy prep and quick cleanup.
  • Crowd-Pleasing Flavors: Combines the savory goodness of garlic, Parmesan, and perfectly roasted potatoes.
  • Customizable: Add your favorite vegetables or spices to make it your own.

For a vegetarian twist, try Greek-Style Lemon Roasted Potatoes.


Ingredients for Garlic Parmesan Chicken and Potatoes

For the Chicken:

  • 2 large chicken breasts, cubed.
  • ½ tsp each salt and pepper.
  • 1 tsp Italian seasoning.

For the Potatoes:

  • 4–5 medium Yukon Gold or red potatoes, cubed.
  • 2 tbsp olive oil.
  • ½ tsp garlic powder.

For the Garlic Parmesan Sauce:

  • 2 tbsp minced garlic.
  • ½ cup heavy cream.
  • ½ cup grated Parmesan cheese.
  • 1 tbsp unsalted butter.

Step-by-Step Instructions

1. Prep the Ingredients

  • Preheat the oven to 425°F and line a baking sheet with parchment paper.
  • Toss potatoes with olive oil, garlic powder, salt, and pepper.

2. Cook the Potatoes

  • Spread the seasoned potatoes on the prepared baking sheet.
  • Roast for 20–25 minutes, turning once, until golden and crispy.

3. Sear the Chicken

  • Heat a skillet over medium-high heat and add the seasoned chicken.
  • Cook until golden brown and fully cooked through.

4. Prepare the Sauce

  • Melt butter in the skillet and sauté minced garlic until fragrant.
  • Add heavy cream and Parmesan cheese, stirring until smooth.

5. Combine and Serve

  • Add the roasted potatoes to the skillet with the chicken and sauce.
  • Toss to coat evenly and garnish with parsley.

Variations and Tips

  • Add Vegetables: Incorporate broccoli, zucchini, or carrots for added nutrition.
  • Make It Spicy: Sprinkle red pepper flakes or cayenne for a kick.
  • Cheesy Upgrade: Top with shredded mozzarella before broiling for a gooey finish.

For more dinner inspiration, check out No-Peek Beef Tips.


FAQs About Garlic Parmesan Chicken and Potatoes

1. Can I use chicken thighs instead of breasts?

Yes, boneless thighs work perfectly for this recipe and add extra juiciness.

2. How do I store leftovers?

Place leftovers in an airtight container and refrigerate for up to 3 days.

3. Can I make this dish ahead of time?

You can prep the potatoes and sauce in advance. Combine and reheat before serving.

4. What’s the best way to reheat?

Reheat in a skillet over low heat to maintain the texture and flavor.


Internal Linking Opportunities


Conclusion

Garlic Parmesan Chicken and Potatoes is an ideal recipe for busy nights when you want a satisfying meal without much effort. Packed with bold flavors and simple ingredients, this dish is sure to become a family favorite. Add it to your recipe rotation today and enjoy the magic of one-pan cooking!