Cranberry Brie Crescent Rolls: A Sweet and Savory Appetizer

cranberry and Brie appetizers, holiday crescent rolls, Brie and cranberry bites, crescent roll appetizers, baked Brie recipes, cranberry recipes, sweet and savory appetizers

Cranberry Brie Crescent Rolls: A Perfect Appetizer for Any Occasion

Sweet, tangy cranberries combined with creamy Brie wrapped in flaky crescent rolls create the perfect holiday or party appetizer. Cranberry Brie Crescent Rolls are a crowd-pleaser that balances elegance and simplicity. Whether you’re hosting a festive dinner or preparing quick snacks, this recipe is guaranteed to impress.

For more crescent roll-inspired recipes, check out Revolutionizing Weeknight Dinners: The Crescent Roll Pizza Phenomenon, which offers another creative use for this versatile dough.


Why Cranberry Brie Crescent Rolls?

These crescent rolls offer a blend of sweet and savory flavors that make them stand out from traditional appetizers.

  • Quick Preparation: Ready in less than 30 minutes, perfect for last-minute gatherings.
  • Customizable Ingredients: Easy to adapt with different fillings, from apricot preserves to spicy chutneys.
  • Holiday Appeal: The cranberries and Brie complement festive menus beautifully.

Pair these rolls with dishes like Rediscovering Comfort: Sour Cream and French Fried Onion Pork Chops for a balanced meal featuring hearty mains and light starters.


Ingredients for Cranberry Brie Crescent Rolls

Essential Ingredients:

  • Crescent Roll Dough: Store-bought for convenience or homemade for a personal touch.
  • Brie Cheese: Soft, creamy Brie works best for its meltability and flavor.
  • Cranberry Sauce: Use homemade or canned for a tangy, sweet filling.
  • Optional Additions: Chopped nuts (walnuts or pecans), a drizzle of honey, or a pinch of fresh rosemary.

Tips for Selecting Ingredients:

  • Choose high-quality Brie for better texture and flavor.
  • Homemade cranberry sauce with orange zest elevates the dish.
  • Use parchment paper to prevent sticking and ensure even baking.

Step-by-Step Recipe Instructions

Preparation:

  1. Preheat the Oven: Set it to 375°F (190°C). Line a baking sheet with parchment paper.
  2. Prepare the Brie: Cut into small, even pieces for easy assembly.
  3. Roll Out Dough: Unroll crescent roll dough and separate into triangles.

Assembly:

  1. Place a dollop of cranberry sauce near the base of each triangle.
  2. Add a piece of Brie on top of the cranberry sauce.
  3. Roll the dough starting at the wider end, ensuring the filling is secure.

Baking:

  • Arrange rolls on the prepared baking sheet.
  • Bake for 10-12 minutes or until golden brown.
  • Cool slightly before serving for optimal flavor.

For additional baking tips, visit Perfect Ribeye Steak Recipe to learn how precise cooking enhances every dish.


Pro Tips for Perfect Cranberry Brie Crescent Rolls

  • Prevent Leaking: Avoid overfilling the dough to keep the cranberry sauce from spilling out.
  • Enhance Flavor: Add a sprinkle of sea salt or a dash of cayenne pepper for a savory kick.
  • Serve Warm: Keep rolls warm in a low oven until ready to serve.

Creative Variations

Savory Additions:

  • Use goat cheese instead of Brie for a tangy flavor.
  • Replace cranberry sauce with fig jam for a Mediterranean twist.

Sweet Alternatives:

  • Add a drizzle of honey or a sprinkle of cinnamon sugar for a dessert-style roll.

Dietary Adaptations:

  • Opt for gluten-free crescent dough for dietary restrictions.
  • Use vegan Brie alternatives and fruit compote for a plant-based version.

For another versatile recipe idea, explore Sheet Pan Pancakes: A Simple Breakfast Delight, which also offers customizable options.


FAQs About Cranberry Brie Crescent Rolls

1. Can I prepare these rolls ahead of time?

Yes, assemble the rolls up to 24 hours in advance and refrigerate. Bake them fresh for the best results.

2. What can I use instead of Brie cheese?

Camembert, cream cheese, or even gouda are great substitutes.

3. Are these rolls freezer-friendly?

Yes, freeze unbaked rolls on a tray until firm, then transfer to a freezer bag. Bake from frozen, adding 5-7 minutes to the cooking time.

4. How do I reheat leftovers?

Warm them in a 300°F oven for 5-10 minutes to restore their crispy texture.


Serving Suggestions

  • Pair with sparkling wine or champagne for a festive touch.
  • Serve alongside a charcuterie board featuring cured meats and fresh fruit.
  • Garnish with fresh rosemary sprigs or a light dusting of powdered sugar for presentation.

Internal Linking Opportunities

To enhance user engagement, consider linking to these related articles:


External Resources

  1. Anchor Text: “Tips for Perfect Appetizers”
    URL: https://www.foodnetwork.com/
  2. Anchor Text: “The Nutritional Benefits of Brie”
    URL: https://www.healthline.com/
  3. Anchor Text: “Creative Uses for Crescent Roll Dough”
    URL: https://www.pillsbury.com/

Conclusion

Sweet and tangy Cranberry Brie Crescent Rolls are a simple yet elegant appetizer perfect for any occasion. With their quick preparation and versatile variations, these rolls are sure to become a go-to recipe in your repertoire. Whether you’re hosting a festive gathering or craving a delicious snack, these rolls deliver in flavor, texture, and presentation.


Parmesan Baked Pork Chops: Crispy, Cheesy, and Easy to Make

crispy pork chops, Parmesan crusted pork, baked pork chop recipe, cheesy pork chops, easy pork chop recipe, oven baked pork chops, Parmesan pork chops

Parmesan Baked Pork Chops: A Crispy and Cheesy Dinner Favorite

Parmesan Baked Pork Chops are a versatile dish that combines a crispy, cheesy coating with juicy, tender pork. Whether you’re preparing a quick weeknight meal or hosting a dinner party, this recipe delivers on flavor and simplicity. With a few pantry staples and some baking magic, you can create a meal that’s sure to impress.

For a hearty and comforting pairing, serve these pork chops with a side of Slow Cooker Magic: Baked Ziti, a recipe that’s as easy as it is satisfying.


Why Parmesan Baked Pork Chops Are a Must-Try

  • Healthier Option: Baking the pork chops keeps the fat content low compared to frying while maintaining the crispy texture.
  • Flavor Explosion: The Parmesan crust, seasoned with garlic powder and herbs, locks in a rich, savory taste.
  • Quick and Easy: Minimal prep time and simple steps make this a stress-free recipe.

Pair these chops with a fresh arugula salad or a side of Sheet Pan Pancakes for an unexpected twist to your meal planning.


Key Ingredients for Parmesan Baked Pork Chops

Essential Ingredients:

  • Pork Chops: Choose bone-in or boneless chops, about 1-inch thick. Bone-in provides more flavor, while boneless is easier to handle.
  • Parmesan Cheese: Freshly grated Parmesan ensures a melt-in-your-mouth crust.
  • Bread Crumbs: Use Italian-seasoned or panko for a light, crispy texture.
  • Spices: Garlic powder, black pepper, paprika, and a hint of cayenne for a subtle kick.
  • Olive Oil or Butter: Helps the coating adhere to the chops and adds richness.

Optional Additions:

  • Fresh Herbs: Parsley, rosemary, or thyme for added aroma.
  • Alternative Coatings: Almond flour or crushed pork rinds for a low-carb version.

For another flavorful pork recipe, check out Rediscovering Comfort: Sour Cream and French Fried Onion Pork Chops.


Step-by-Step Instructions for Perfect Pork Chops

Preparation:

  1. Preheat the oven to 400°F (200°C). Line a baking sheet with parchment paper or lightly grease it.
  2. Pat the pork chops dry with a paper towel to ensure the coating sticks.
  3. Season the chops with salt, pepper, and paprika on both sides.

Making the Parmesan Coating:

  • In a shallow dish, combine bread crumbs, freshly grated Parmesan cheese, garlic powder, and parsley.
  • Use olive oil or melted butter in another dish for dipping.

Coating and Baking:

  1. Dip each chop in the olive oil, ensuring both sides are coated.
  2. Press the chops into the Parmesan mixture, coating evenly.
  3. Place the chops on the baking sheet and bake for 20-25 minutes. Use a meat thermometer to check that the internal temperature reaches 145°F (63°C).

For extra crispiness, broil the chops for 2-3 minutes at the end of the baking time.


Pro Tips for Crispy Parmesan Baked Pork Chops

  • Use Fresh Parmesan: Pre-grated cheese often contains anti-caking agents, which can affect the texture.
  • Don’t Skip Resting: Let the pork chops rest for 5 minutes after baking to retain juices.
  • Avoid Overbaking: Use a thermometer to ensure the perfect doneness without drying out the meat.

Explore additional tips for achieving perfectly cooked dishes in Perfect Ribeye Steak Recipe, which focuses on retaining juiciness and flavor.


Delicious Variations and Adaptations

Low-Carb Option

  • Replace bread crumbs with almond flour or finely crushed pork rinds for a keto-friendly version.

Spicy Parmesan Chops

  • Add chili flakes or cayenne pepper to the Parmesan mixture for a kick of heat.

Herb-Crusted Pork Chops

  • Mix fresh rosemary and thyme into the bread crumb mixture for a fragrant crust.

Nutritional Benefits of Parmesan Baked Pork Chops

  • High in Protein: Pork chops are an excellent source of lean protein, aiding muscle repair and growth.
  • Rich in Calcium: Parmesan cheese contributes to strong bones and teeth.
  • Lower in Fat: Baking, rather than frying, reduces the overall fat content.

Serving Suggestions

  • Classic Pairings: Garlic mashed potatoes, roasted Brussels sprouts, or steamed green beans.
  • Gourmet Additions: Serve with a drizzle of balsamic glaze or lemon butter sauce for a luxurious finish.
  • Wine Pairings: A crisp white wine like Sauvignon Blanc or a light red such as Pinot Noir complements the dish beautifully.

FAQs About Parmesan Baked Pork Chops

  1. What is the best type of pork chop for this recipe?
    Thick-cut chops work best as they stay juicy during baking.
  2. Can I prepare this recipe ahead of time?
    Yes, you can coat the chops and store them in the fridge for up to 24 hours before baking.
  3. What should I do if the coating doesn’t stick?
    Pat the pork chops dry thoroughly before dipping them in oil or butter.
  4. Can I freeze leftovers?
    Yes, store cooked chops in an airtight container in the freezer for up to 2 months.
  5. Is there a gluten-free version of this recipe?
    Use gluten-free bread crumbs or almond flour for a gluten-free adaptation.

Internal Linking Opportunities

Enhance the user experience by incorporating links to these recipes:


External Links for Enhanced Readability

  1. Anchor Text: “Guide to Safe Pork Cooking Temperatures”
    URL: https://www.foodsafety.gov/
    Purpose: Educate readers on proper pork cooking practices.
  2. Anchor Text: “Wine Pairing for Pork Recipes”
    URL: https://www.winefolly.com/
    Purpose: Help readers choose the best wine to complement the dish.
  3. Anchor Text: “Health Benefits of Parmesan Cheese”
    URL: https://www.healthline.com/
    Purpose: Provide insight into the nutritional advantages of Parmesan.

Conclusion

Parmesan Baked Pork Chops are the perfect blend of crispy, cheesy, and tender, making them a go-to recipe for any occasion. With minimal prep time and endless pairing options, this dish is a delicious and practical addition to your recipe rotation. Whether you’re catering to a family dinner or hosting guests, this recipe guarantees a crowd-pleasing experience.

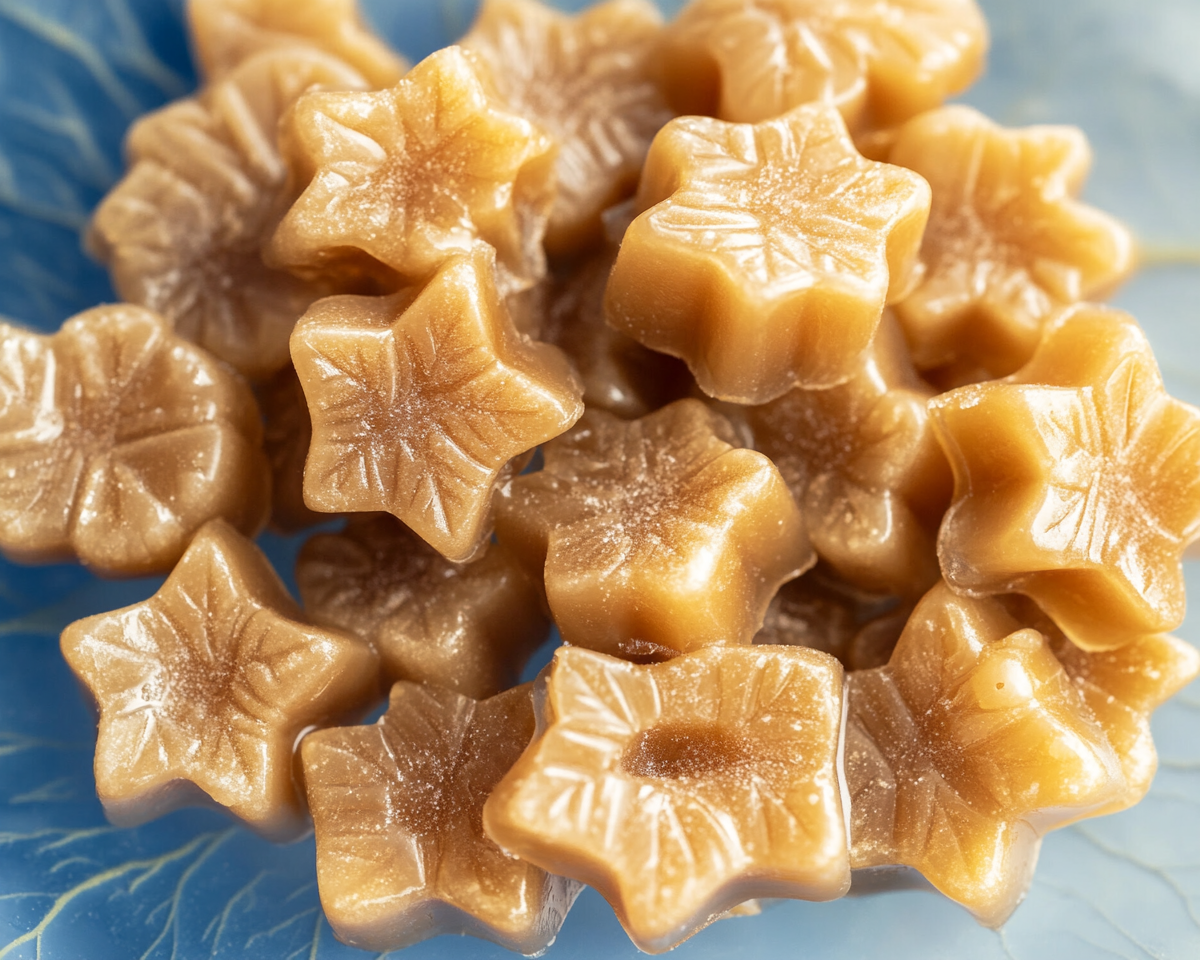
Maple Syrup Candies: A Simple Recipe for Sweet Perfection

homemade maple candies, pure maple syrup treats, maple sugar candy recipe, how to make maple candy, traditional maple candies, boiled maple syrup sweets

Maple Syrup Candies: A Sweet, Natural Treat

Maple syrup candies are a quintessential treat, cherished for their rich, natural sweetness and melt-in-your-mouth texture. Rooted in the traditions of North America, these candies are a celebration of pure maple syrup and its cultural significance.

Explore other dessert ideas like Homemade Pecan Pie Recipe for indulgent inspirations from ExoRecipes.


Why Maple Syrup Candies Are Special

These candies are not only delicious but also represent the essence of sustainability and natural ingredients. The simplicity of the recipe allows the rich, caramel-like flavor of pure maple syrup to shine through, creating a timeless confection.

For a twist on classic desserts, try Kentucky Butter Cake, a Southern comfort food favorite.


Ingredients and Tools for Maple Syrup Candies

Ingredients

  • Pure Maple Syrup: Grade A or B works best for its depth of flavor.
  • Butter or Neutral Oil: To grease molds or parchment paper.
  • Optional Additions: Chopped nuts, sea salt, or a splash of vanilla extract.

Tools

  • Candy Thermometer: Ensures precision for the perfect texture.
  • Heavy-Bottomed Saucepan: Even heat distribution prevents burning.
  • Silicone Molds or Parchment Paper: For shaping and cooling the candies.

Step-by-Step Recipe for Maple Syrup Candies

1. Heating the Syrup

  • Pour maple syrup into a heavy-bottomed saucepan.
  • Heat over medium-high heat, stirring occasionally to prevent sticking.

2. Reaching the Right Temperature

  • Use a candy thermometer to track the temperature. Heat until the syrup reaches 235°F-240°F (soft-ball stage).

3. Cooling and Stirring

  • Remove the syrup from heat and let it cool slightly.
  • Stir continuously until the syrup thickens and lightens in color.

4. Shaping the Candies

  • Quickly pour the syrup into molds or onto a parchment-lined tray.
  • Allow the candies to set before removing them from the molds.

Creative Variations for Maple Syrup Candies

1. Infused Maple Candies

  • Add cinnamon, nutmeg, or vanilla extract for a spiced flavor profile.
  • Try peppermint oil for a festive twist.

2. Textural Additions

  • Incorporate crushed nuts like pecans or almonds for crunch.
  • Sprinkle sea salt for a salted caramel-like flavor.

3. Maple Lollipops

  • Pour the syrup into lollipop molds and insert sticks for a unique presentation.

Serving and Pairing Ideas

  • Standalone Treat: Enjoy as a natural, bite-sized dessert.
  • Gourmet Pairing: Serve with coffee, tea, or hot cocoa for a cozy snack.
  • Dessert Garnish: Use candies to decorate cakes, cupcakes, or ice cream.

For a decadent pairing, check out Salted Caramel Rice Krispie Treats.


Troubleshooting and FAQs

Common Issues

  • Grainy Texture: Ensure consistent stirring during cooling.
  • Soft Candies: Verify the syrup reaches the correct temperature before removing from heat.
  • Sticky Molds: Grease molds thoroughly to prevent sticking.

FAQs

  1. Can I use pancake syrup?
    • No, only pure maple syrup will yield the desired texture and flavor.
  2. How should I store the candies?
    • Store in an airtight container at room temperature for up to two weeks.
  3. What’s the best grade of maple syrup for candies?
    • Grade A dark or amber syrup provides a robust flavor.

Internal Linking Suggestions

To provide additional value, link to these related recipes from ExoRecipes:


Cultural Significance of Maple Syrup Candies

These candies are deeply rooted in North American traditions, particularly in Canada and the northeastern United States. They are often featured at maple syrup festivals and fairs, celebrating the art of maple syrup production and its historical significance.

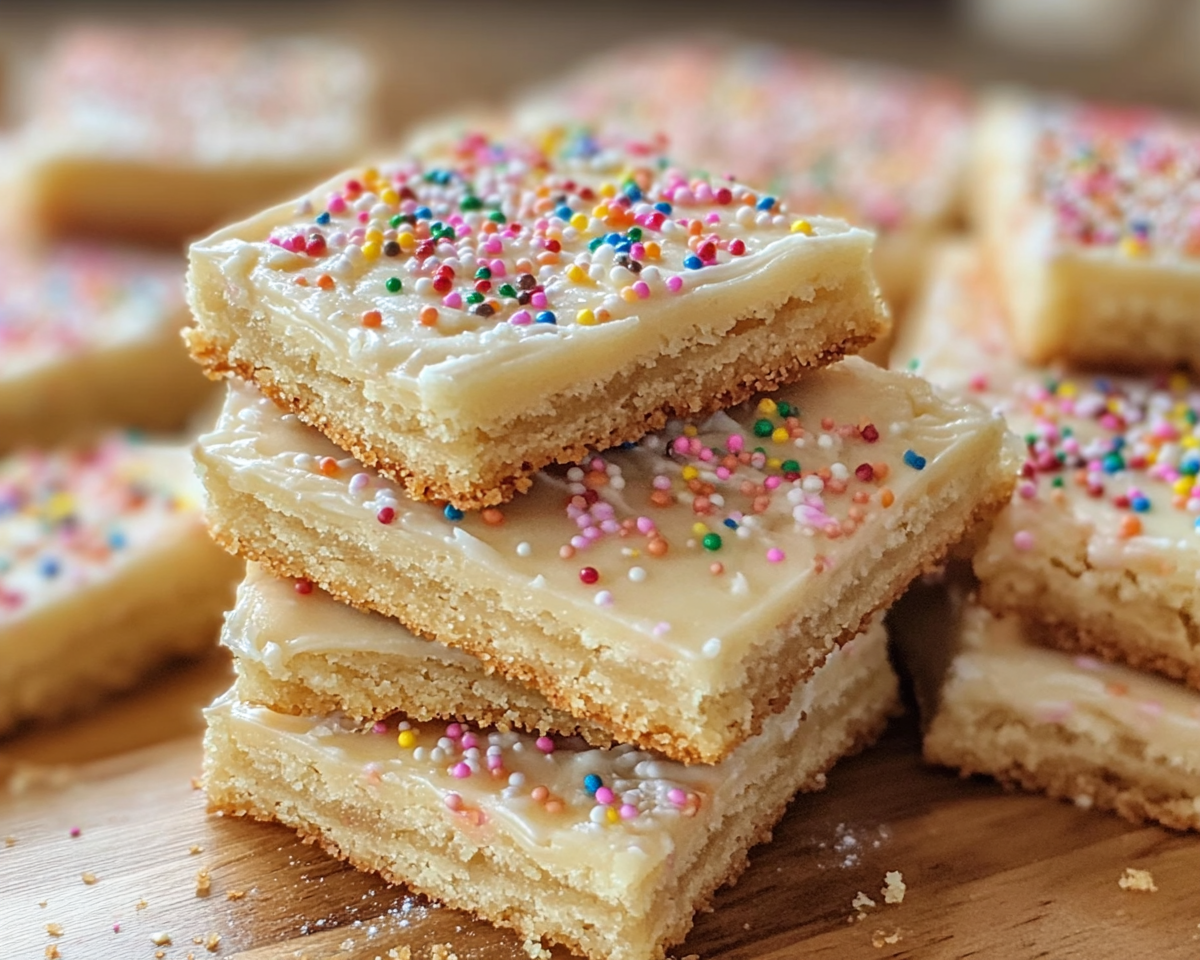
Soft and Chewy Sugar Cookie Bars: Easy Recipe for Any Occasion

easy sugar cookie bars, frosted cookie bars, chewy cookie dessert, best sugar cookie recipe, holiday sugar cookie bars, buttercream frosted cookie bars, quick dessert bars

Sugar Cookie Bars: The Ultimate Sweet Treat

Sugar cookie bars are an irresistible dessert option for anyone looking to create a buttery, chewy delight without the fuss of rolling out individual cookies. These bars combine simplicity, flavor, and versatility, making them perfect for holidays, parties, or a quick weekday treat.

Discover other delicious cookie recipes, such as Pistachio Shortbread Cookies or Peanut Butter Blossoms, to expand your dessert repertoire.


Why You’ll Love Sugar Cookie Bars

Sugar cookie bars are the ultimate time-saver when it comes to baking cookies. Unlike traditional sugar cookies, which require rolling and cutting, these bars come together in a single pan, making them ideal for busy bakers or large gatherings.

For more effortless dessert ideas, check out Mom’s Lemon Cream Pie for a creamy, tangy alternative.


Ingredients for Sugar Cookie Bars

The Dough

  • Butter: Room temperature unsalted butter creates a rich, tender texture.
  • Granulated Sugar: The foundation of a sweet and classic sugar cookie flavor.
  • Vanilla Extract: Enhances the buttery flavor of the cookie base.
  • All-Purpose Flour: Ensures a sturdy, chewy bar.
  • Eggs: Adds structure and moisture to the dough.

The Frosting

  • Powdered Sugar: A key ingredient for a smooth frosting.
  • Milk or Heavy Cream: Helps achieve the perfect frosting consistency.
  • Food Coloring: Optional, but perfect for themed or festive occasions.

Step-by-Step Recipe for Sugar Cookie Bars

1. Preparing the Dough

  • Preheat the oven to 350°F (175°C) and grease a 9×13-inch pan.
  • In a large mixing bowl, cream butter and sugar until fluffy.
  • Gradually add eggs, vanilla extract, and dry ingredients. Mix until combined.

2. Baking the Bars

  • Press the dough evenly into the prepared pan.
  • Bake for 20-25 minutes, or until the edges are slightly golden.
  • Let the bars cool completely in the pan to ensure they’re firm enough for frosting.

3. Adding the Frosting

  • Cream butter and powdered sugar together. Add milk slowly until desired consistency is reached.
  • Spread frosting evenly across the cooled bars and decorate with sprinkles.

Creative Variations

Holiday-Themed Sugar Cookie Bars

  • Use red and green sprinkles or colored frosting for Christmas.
  • Add pastel shades for Easter celebrations.

Flavor Enhancements

  • Add almond extract or lemon zest to the dough for a unique flavor.
  • Incorporate white chocolate chips or crushed peppermint candy into the batter.

Healthier Options

  • Swap all-purpose flour for a gluten-free baking mix.
  • Use natural sweeteners like coconut sugar.

Serving and Storage Tips

Serving

  • Slice bars into even squares or rectangles for easy serving.
  • Pair with coffee, tea, or a cold glass of milk for the ultimate dessert experience.

Storage

  • Room Temperature: Store in an airtight container for up to 4 days.
  • Freezing: Freeze unfrosted bars for up to 3 months; frost after thawing.

Troubleshooting Tips

  • Dry Bars: Ensure proper measurement of ingredients and avoid overbaking.
  • Sticky Dough: Chill the dough for 20 minutes before pressing into the pan.
  • Melting Frosting: Always cool the bars completely before frosting.

FAQs

1. Can I make sugar cookie bars ahead of time?

Yes! Bake the bars a day in advance, store unfrosted, and add the frosting before serving.

2. Can I freeze sugar cookie bars?

Absolutely. Wrap the bars tightly in plastic wrap and store in an airtight container before freezing.

3. How do I make these bars festive?

Use food coloring in the frosting or seasonal sprinkles to match any occasion.


Suggested Internal Links

Here are some relevant links from ExoRecipes to enrich your experience:

  1. Pistachio Shortbread Cookies – A nutty, buttery alternative.
  2. Peanut Butter Blossoms – Perfect for peanut butter lovers.
  3. Mom’s Lemon Cream Pie – A creamy, tangy dessert that complements sugar cookie bars.

Eggs Benedict Casserole: An Easy Brunch Recipe for Any Occasion

Benedict casserole recipe, breakfast casserole with eggs, easy eggs Benedict casserole, brunch casserole ideas, hollandaise casserole recipe, baked eggs Benedict dish, overnight breakfast casserole

Eggs Benedict Casserole: A Crowd-Pleasing Brunch Recipe

Eggs Benedict Casserole combines all the flavors of the classic brunch dish in an easy-to-make, family-friendly format. Whether you’re hosting a holiday breakfast or looking for a weekend treat, this casserole simplifies preparation while delivering gourmet taste.

For tips on creating perfectly cooked brunch dishes, explore The Best Overnight French Toast Casserole Recipe on ExoRecipes.


Why Make Eggs Benedict Casserole?

This dish is a must-try because:

  • It eliminates the hassle of poaching individual eggs.
  • It’s ideal for serving large groups, from holiday breakfasts to family brunches.
  • Customizable options make it versatile for various dietary needs.

Learn about another family-friendly breakfast idea with Easy Breakfast Casserole, which combines classic ingredients for a hearty meal.


Ingredients You’ll Need

For the Base

  • English Muffins: Use classic or gluten-free options.
  • Canadian Bacon or Ham: Adds a savory, smoky touch.
  • Egg Mixture: A custard-like mix of eggs, milk, and seasonings.

For the Topping

  • Hollandaise Sauce: Choose homemade for authenticity or a high-quality store-bought version.
  • Fresh Herbs: Parsley or chives for garnish.

Optional add-ins include spinach, mushrooms, or smoked salmon for an elevated twist.


Tools and Equipment

  • A 9×13-inch casserole dish for even baking.
  • Mixing bowls for preparing the egg mixture.
  • Whisk or blender for smooth hollandaise sauce.

Step-by-Step Recipe

1. Preparing the Base

  • Toast English muffins lightly for a sturdy foundation.
  • Arrange muffin pieces and Canadian bacon in the casserole dish.

2. Mixing the Egg Mixture

  • Whisk eggs, milk, salt, and pepper until combined.
  • Pour over the layered muffins and bacon, ensuring even distribution.

3. Baking the Casserole

  • Cover with foil and bake at 350°F for 30 minutes.
  • Remove foil and bake for an additional 15-20 minutes until the top is golden.

Topping with Hollandaise Sauce

Classic Hollandaise Method

  1. Whisk egg yolks, lemon juice, and butter over low heat.
  2. Continue whisking until the sauce thickens.

Blender Hollandaise (Quick Option)

  1. Blend egg yolks and lemon juice while slowly adding melted butter.
  2. Adjust seasoning with salt and pepper.

Serving Suggestions

  • Garnish with freshly chopped parsley or chives.
  • Pair with roasted potatoes or a light fruit salad.
  • Drizzle extra hollandaise sauce on individual servings for added indulgence.

Creative Variations

  • Vegetarian: Replace Canadian bacon with sautéed mushrooms and spinach.
  • Seafood Twist: Incorporate smoked salmon or crab meat.
  • Gluten-Free: Use gluten-free muffins or bread.

Discover more casserole ideas, like Dorito Chicken Casserole, for unique spins on traditional dishes.


Storage and Reheating Tips

  • Store leftovers in an airtight container in the refrigerator for up to 3 days.
  • Reheat in the oven at 300°F to maintain texture.
  • Avoid microwaving hollandaise sauce as it may separate.

FAQs About Eggs Benedict Casserole

1. Can I Make This Dish Ahead of Time?

Yes! Assemble the casserole the night before and bake fresh in the morning.

2. What’s the Best Way to Reheat It?

Reheat in the oven at a low temperature to retain its creamy consistency.

3. Can I Use Other Types of Bread?

Absolutely! Croissants or sourdough add a rich, buttery flavor.


Internal Linking Opportunities

These links enhance reader engagement and guide them to related recipes.