Irresistible Blueberry Cheesecake Swirl Cookies: The Ultimate Easy Dessert Recipe

Easy Blueberry Cheesecake Swirl Cookie Recipe: A Delightful Treat

⚖️
Difficulty
Easy

⏲️
Prep Time
15 mins

🕒
Cook Time
12 mins

⏱️
Total Time
27 mins

🍽️
Servings
24 cookies

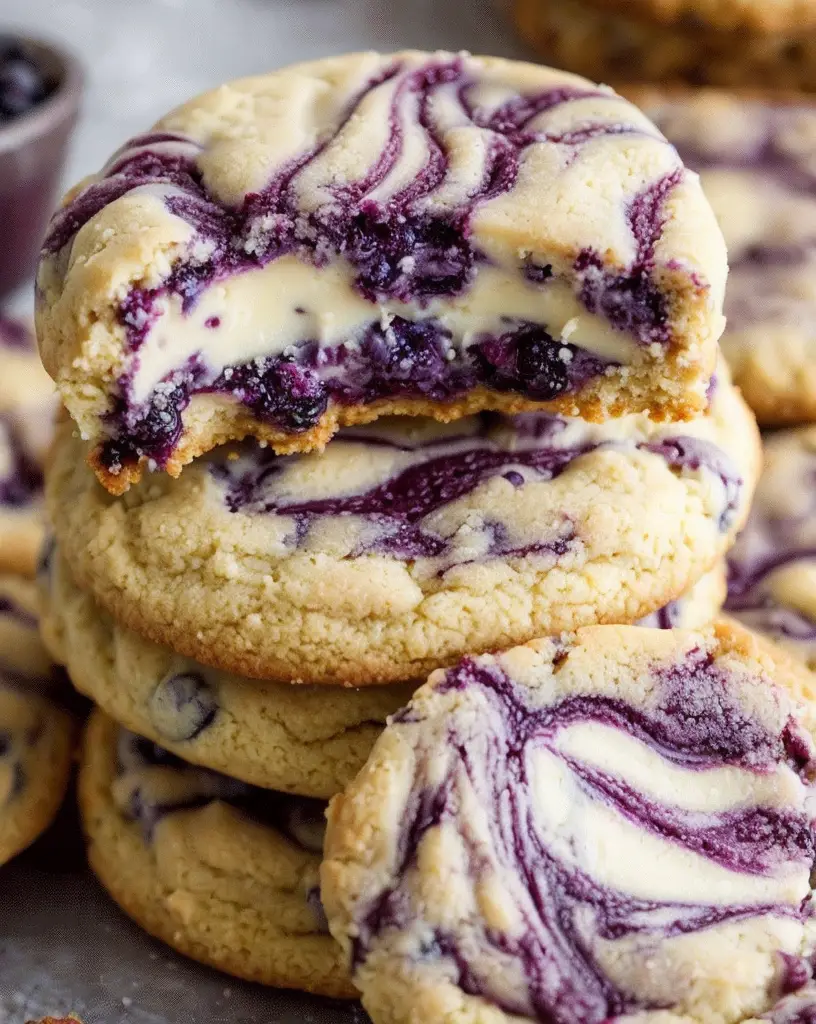
Satisfy your sweet tooth with this delightful Easy Blueberry Cheesecake Swirl Cookie Recipe. These cookies combine the rich creaminess of cheesecake with the burst of fruity blueberries — a match made in dessert heaven. Imagine sinking your teeth into a soft, chewy cookie that’s packed with flavorful swirls of blueberry, perfectly complementing a cheesecake base. It’s an irresistible treat for any occasion, combining classic flavors in a new and exciting way.

Creating the magic of blueberry cheesecake in cookie form is easier than you might think! This recipe simplifies the cheesecake-making process and infuses it directly into scrumptious cookies. Not only is it a fun twist on traditional cheesecake, but it also offers the convenience of being a finger food — a perfect snack or dessert addition for a potluck or family gathering. With a preparation time of just under half an hour, this is one of those delightful recipes you’ll turn to time and again for an easy sweet fix.

Quick Recipe Highlights

  • Flavor Profile: Enjoy a creamy cheesecake taste with the sweet yet tangy burst of blueberries in every bite.
  • Texture: These cookies boast a soft, chewy texture contrasted by the slight crispiness of the edges.
  • Aroma: You’ll notice a rich vanilla scent with a hint of fresh blueberries as the cookies bake.
  • Visual Appeal: The vibrant purple-blue swirl within a golden cookie makes for a captivating dessert plate.
  • Skill Level Needed: Designed to be an easy recipe, it’s suitable for both novice and experienced bakers alike.
  • Special Equipment: Requires a hand mixer or stand mixer for best results in achieving the cheesecake texture.

Recipe Overview

  • Difficulty Level: Thanks to straightforward instructions and familiar techniques, this is classified as an easy recipe.
  • Category: Perfect as a sweet treat, snack, or dessert — particularly appealing for small social gatherings.
  • Cuisine: Primarily influenced by American baking traditions, drawing on both classic cookie and cheesecake recipes.
  • Cost: An affordable indulgence, the ingredients are cost-effective and commonly found in most kitchens.
  • Season: Best enjoyed in the summer when blueberries are ripe, but equally accessible all year round with frozen berries.
  • Occasion: Versatile for any occasion, be it a birthday celebration, holiday treat, or simple weekend bake.

Why You’ll Love This Recipe

If you’re a cheesecake lover, these cookies offer all the taste appeal without the need for an elaborate setup. They combine the decadence of cheesecake with the convenience of a cookie, creating an unexpected yet delightful treat. The rich, creamy texture juxtaposed with bursts of fruity flavor leaves your taste buds deeply satisfied. And for those fond of visually appealing foods, the vibrant swirls within these cookies make for a delightful presentation.

Convenience is one of the major benefits of this Easy Blueberry Cheesecake Swirl Cookie Recipe. Unlike traditional baking methods for cheesecake, which can be time-consuming and slightly finicky, these cookies streamline the process into quick and simple steps. A mix-and-go approach ensures less time in the kitchen and more time enjoying delicious treats with loved ones.

Nutritionally, these cookies strike a balance. The use of blueberries not only enhances flavor but also introduces beneficial antioxidants into your diet. While indulgent, each cookie can fit into a balanced eating plan, ensuring you’re treating yourself without overindulgence. Their portion-controlled nature allows for a sweet end to a meal without it being overwhelming.

Beyond their flavor, these cookies act as a conversation starter at any gathering. Sharing the ingenuity and simplicity behind these cheesecake-inspired cookies often prompts awe and encourages other baking enthusiasts to step outside of traditional dessert recipes. Guests and hosts alike relish the novelty and comfort blended in each bite.

Finally, cost-effectiveness cannot be overlooked. With ingredients that offer multi-use potential in different recipes, your investment in creating these cookies translates into both immediate satisfaction and future culinary projects. Even better, homemade versions often outshine store-bought options in freshness and quality, providing value beyond monetary savings.

Historical Background and Cultural Significance

This delightful cookie combines elements of both cookie and cheesecake, two desserts with rich historical backgrounds. Cheesecake, with origins tracing back to ancient Greece, was a delicacy served to Olympic athletes. Over centuries, its creamy texture and adaptable flavor profiles spread across cultures, leading to the modern iterations we love today, including the popular New York-style cheesecake.

Culturally, cheesecake represents indulgence and celebration, making these cookies a symbol of fusion between casual snacking and celebratory desserts. By incorporating the traditional elements of cheesecake into a cookie, this recipe honors its heritage while creating something fresh and innovative, bridging generations of dessert lovers in a bite-sized form.

In terms of evolution, these cookies capture the creativity of modern baking, where elements of cherished recipes are reimagined to suit contemporary tastes and convenience. The move from complex, time-intensive baking, to more accessible and straightforward recipes, reflects broader culinary trends where flavor combinations are continuously explored and cherished.

Across different regions, cheesecake recipes adapt to local ingredients and palates. The blueberry inclusion pays homage to American summer fruits, representing the recipe’s cultural adaptation. In refrigerated or baked forms, such desserts offer consistent delight across regions, now reimagined as these easy cookies, making joyfully lighter work of a well-loved classic.

Ingredient Deep Dive

Blueberries serve as the star ingredient in this recipe, recognized not only for their vibrant color and flavor but also their impressive antioxidant content. Historically, these berries have been a dietary staple among Native American tribes and continue to flavor various desserts globally. When selecting blueberries, opt for plump, firm ones with a consistent blue color.

Their storage is simple: keep them refrigerated to extend freshness, and rinse just before use. If fresh berries are unavailable, frozen alternatives are an excellent substitution, maintaining quality and flavor when blueberries are out of season. They add not just taste but a visual element that enlivens any dessert plate.

A key component, cream cheese provides the rich, dairy foundation of these cookies, offering the smooth consistency characteristic of cheesecake. Since its commercial production in the U.S. in the late 19th century, it has become integral to countless dessert recipes. Opt for full-fat versions for the creamiest texture, and keep it refrigerated until use.

When it comes to storage, cream cheese retains its quality when kept cold, with any unused portions stored back promptly. Its high-fat content allows it to freeze reasonably well, though it’s best used fresh for optimal texture. If dairy-free adaptations are desired, consider cultured coconut cream or cashew-based options for a vegan alternative.

Common Mistakes to Avoid

  • Skipping moisture control: Ensure blueberries are fully dried after rinsing to prevent soggy dough.
  • Overmixing the batter: Overworking the dough can lead to tough cookies rather than the desired soft texture.
  • Incorrect ingredient temperatures: Allow cream cheese to soften at room temperature for smoother mixing.
  • Insufficient swirling technique: A gentle swirl creates vibrant, visible blueberry streams within the cookies.
  • Baking time misjudgment: Keep an eye on the timer — overbaking will dry out the cookies.
  • Improper cookie spacing: Ensure space between cookies on the baking sheet to allow for even expansion.
  • Using the wrong sugar type: Stick to the recipe’s specified sugar for correct sweetness and texture.
  • Lack of proper measuring: Accurate measurement of ingredients, particularly flour, ensures consistency.
  • Skipping cooling rack: Allow cookies to cool on a wire rack to prevent sogginess.
  • Not chilling dough: If dough feels overly soft, a quick chill can make it more manageable.

Essential Techniques

Mastering the swirl technique ensures the tangled dance of blueberries within your dough. This visual and flavorful pattern is achieved by gently folding the blueberry mixture through the prepared dough to create streaks. Overzealous swirling can blend the colors too much, losing the marbled effect that’s not only attractive but also offers pockets of intense blueberry flavor.

Another key technique is the creaming method, where sugar is beaten with softened cream cheese to create a fluffy mixture. Properly creaming the ingredients incorporates air into the batter, providing structure and softness in the final baked cookies. The right texture is a delicate balance of maintaining the creaminess of the cheesecake while ensuring the cookie retains its structural integrity.

The incorporation of blueberries requires gentle hands to maintain the integrity of each berry. Crushing blueberries releases juice prematurely, which can alter the cookie’s texture and baking result. To achieve this, fold the berries into the dough with minimal pressure until evenly distributed across the mixture.

Observing the baking process also plays into the success of these cookies. While recipes give estimated times, slight variations in ovens mean keeping a keen eye on cookies as they approach the end of their bake time to prevent over-browning. The desired finish is slightly golden, particularly on the edges, giving way to a soft interior.

Pro Tips for Perfect Easy Blueberry Cheesecake Swirl Cookies

To enhance blueberry flavor, consider adding a touch of lemon zest to the dough. It accentuates the berry’s natural tartness and complements the richness of the cheesecake element. Balancing these flavors is key to a well-rounded cookie profile.

For uniform cookies, scoop dough with a consistent-sized tool, such as a tablespoon or a small ice cream scoop. This ensures even baking and a professional appearance, crucial for presentations.

Chilling the dough before baking, even briefly, can help firm up the texture, making it easier to work with, especially in warmer climates. Slightly firmer dough allows for easier handling and shaping.

If aiming for a more intricate swirl, reserve part of the blueberry mix for a post-scooping drizzle over each cookie. Lightly swirl with a skewer or toothpick to enhance the visual marbling before the bake for a dynamic presentation.

Incorporating a teaspoon of cornstarch into the berry mixture can prevent excess moisture, particularly when using frozen berries. This prevents the cookies from becoming too wet as they bake, while the cornstarch itself has no noticeable texture or taste once integrated.

For a richer color, use frozen blueberries. As they thaw in the dough, they release more juice, producing a naturally intense swirl without any artificial coloring, giving your cookies a stunning marbled finish.

Adjust the level of sweetness by experimenting with different types of sugar. A small amount of brown sugar can impart a deeper, more caramelized flavor, complementing the cream cheese base beautifully.

Variations and Adaptations

For a regional twist, consider replacing blueberries with locally available fruits, crafting variations like raspberry cheesecake swirl cookies or a tropical mango marbled version. These regional variations not only offer distinct flavors but also highlight local produce, making each bake special and unique to its geographical context.

Seasonal ingredients can also replace blueberries, allowing you to adapt this recipe throughout the year. Think cranberry swirls in winter or cherry infusions in spring, providing seasonal whimsy and highlighting fresh produce year-round.

Dietary modifications are simple to implement. For a gluten-free adaptation, use a 1:1 gluten-free flour blend, while maintaining the same measurements and method. To create a dairy-free version, experiment with plant-based cream cheese alternatives and coconut oil instead of butter.

Introducing flavor variations is straightforward. A touch of almond extract can transform the profile of these cookies by adding a deep, nutty aroma without overpowering the classic blueberry cheesecake combination.

For texture alternatives, consider incorporating crushed nuts, such as pecans or walnuts, for added crunch. This contrast can elevate each bite and introduce nutty undertones that pair beautifully with the main flavors.

Presentation alternatives like sandwiching two cookies with a cream cheese filling provide a playful twist, turning them into an exciting dessert selection perfect for children’s parties or creative gifting options.

Serving and Presentation Guide

Opulent plating elevates the enjoyment of these cookies. Present them stacked on a cake stand or scattered elegantly on a decorative plate, highlighting the marbled blueberry swirl. This makes them instantly more inviting and transforms everyday treats into a conversation piece.

Garnishing with a dusting of powdered sugar enhances their appearance, adding a touch of class and a slight sweetness, which pairs seamlessly with the natural tartness of blueberries. If you prefer a burst of additional color, delicate edible flowers can add an artistic flair without overshadowing taste.

Traditional accompaniments like a scoop of vanilla ice cream or a spoonful of sour cream on the side add creaminess and elevate the overall sensory experience. These elements are beautifully refreshing when paired with warm cookies straight from the oven.

For modern serving suggestions, try skewering these cookies alongside fresh fruit chunks or chocolate pieces. This creative presentation inspires intrigue, especially useful for children’s parties or casual gatherings.

Be mindful of temperature considerations when serving. These cookies are best enjoyed at room temperature, allowing their creamy interiors to fully soften for maximum flavor release, maintaining their delightful chewiness.

Control portions easily by pre-slicing dough into evenly spaced discs. This approach not only influences baking times but also ensures caloric and nutritional awareness for each serving, keeping balance in mind for every delightful indulgence.

Wine and Beverage Pairing

Pairing options for these cookies are versatile, enhancing the overall eating experience. A light, fruity rosé or a crisp Riesling pairs delightfully, with their acidity complementing the rich cream cheese and sweet blueberries, cutting through any richness and enhancing the flavors.

Non-alcoholic alternatives like a berry-infused iced tea or a simple lemon water can cleanse the palate, accentuating each cookie’s flavor profile. For a classic touch, a glass of fresh milk always complements baked goods splendidly, particularly appealing to younger taste buds.

Coffee enthusiasts might consider pairing these cookies with a mild roast, which harmonizes well with the sweetness without overpowering subtle flavors. A gently brewed tea, like chamomile or white tea, offers a mellow backdrop, letting the cookies take center stage.

For optimal enjoyment, serve beverages slightly chilled or room temperature, ensuring they provide a refreshing counterbalance to the soft, chewy texture of the cookies. Whether lightly chilled wines or room-temperature brews, mindful pairing heightens enjoyment.

Tailor serving suggestions to the occasion — a sophisticated gathering might lean towards the elegance of wine pairing, while casual brunches offer more freedom with coffee or tea collaborations, enriching social experiences centered around delightful desserts.

Storage and Shelf Life

Ensuring the cookies maintain their delicious taste and texture involves correct storage methods. Store in an airtight container at room temperature for up to three days to retain freshness. Refrigerate for extended shelf life, up to a week, though the texture may become slightly firmer.

For longer preservation, consider freezing the cookies soon after cooling. Place in a single layer on a baking sheet to freeze until solid, then transfer to a resealable bag or airtight container, allowing them to stay fresh for up to three months and ensuring easy access for future cravings.

Storage containers should provide a full seal to prevent the cookies from becoming stale or absorbing ambient odors, which can detract from their natural flavors. Proper container choice plays a crucial role in maintaining the delightful freshness encapsulated in each bite.

Signs of spoilage include a loss of freshness, staleness, or an off flavor, which indicates they are past their prime. However, diligent storage practices ensure their delightful taste remains an option for days to come, prolonging the joy these cookies provide.

Reheating is simple — a few seconds in the microwave reclaims the soft, warm characteristics reminiscent of freshly-baked cookies. A gentle touch ensures they do not overheat, maintaining their best texture and flavor profile consistently.

Freeze-unbaked dough discs can be an efficient method for quick future baking sessions, preserving them in separate layers using parchment paper. This makes advancing plans straightforward, providing nearly instant cookie satisfaction when desires strike.

Make Ahead Strategies

To simplify preparation, dough can be prepared in advance, refrigerated for up to two days or frozen for even extended periods, requiring only slight adaptation for a seamless make-ahead approach. This saves-time on busy days, providing a quicker transition from dough to delicious cookies.

Between steps, refrigerate the dough to maintain its integrity, especially after the swirling or folding process. A brief chill firms the dough, ensuring easier handling and preserving the marbled blueberry cheesecake effect.

Quality is enhanced using alternative storage solutions. Dividing the dough into smaller batches allows manageable portion sizes during subsequent assembly. Label individual batches for quick reference, keeping everything organized.

Assembled cookies, unbaked, can be stored individually wrapped or arranged with slight spacing in airtight containers. This whole-process flexibility ensures accommodating shifting schedules without sacrificing quality.

Reheating pre-baked cookies involves gentle warming techniques, just enough to restore their moist, chewy characteristics. This recreates the allure of freshly baked results even when cookies have been prepared well in advance.

To maintain freshness post-bake, introduce fresh elements like a quick berry zest glaze or sprinkle before serving. Homemade touches alongside make-ahead techniques ensure those fresh flavors shine when it’s time to enjoy.

Scaling Instructions

Adjusting recipe quantities becomes straightforward using simple calculations for halving or doubling the recipe to meet specific needs. Proportional scaling preserves the integrity of the flavors and texture while adjusting for different quantities.

Equipment modifications might include larger mixing bowls or scaling oven space management by using multiple baking sheets when accommodating larger batches. These minor adjustments ensure seamless transitions across differing scales of production.

Modifying baking times slightly may be necessary, checking for the familiar golden hue, especially when changing batch sizes. Observing these visual cues assures consistency despite scaling up or down, offering reliability across variations.

When storing larger batches, distribute cookies evenly for long-term preservation, allowing for ample airflow around storage containers and ensuring optimal freshness throughout the batch.

For smaller quantities, pay attention to ingredient fractions, especially when measuring more significant components like flour or sugar, ensuring maintained balance in taste and structure.

Efficiency-enhancing tips include pre-measured ingredients for larger-scale improvements, facilitating smooth operations even with increased volumes. These practices make feeding a crowd or conserving resources equally practical endeavors.

Nutritional Deep Dive

Exploring the nutritional profile reveals a thoughtful balance of macronutrients. Carbohydrates are prominent, attributed mainly to sugar and flour, providing energy alongside moderate fats from cream cheese for satiety.

Micronutrient analysis showcases notable vitamin C from blueberries alongside trace minerals beneficial to balanced intake. These contribute positively despite the indulgent appeal of this dessert, aligning flavor with potential health benefits.

Health benefits lightly skew towards enhanced fruit-based antioxidants from blueberries, contributing additional value beyond traditional cookie considerations. This small nutritional boost champions thoughtful ingredient inclusion.

Awareness of dietary considerations safeguards individual needs, making dietary adjustments feasible while preserving enjoyment of traditional flavors, supported by ingredient substitution guidance.

Portion control mitigates overconsumption, tailoring consumption to align with nutritional goals. Clear understanding of individual cookie calorie counts assists nutritional planning without eschewing these delightful treats.

Weight management is facilitated through balance, integrating occasional indulgences thoughtfully alongside everyday dietary routines, affirming that enjoyable treats need not compromise nutritional intentions.

Dietary Adaptations

Creating a gluten-free version involves replacing standard flour with a gluten-free blend, allowing those with gluten sensitivities to enjoy both flavor and texture without compromise, capacitating broader enjoyment.

For a dairy-free approach, substitute with plant-based cream cheese and vegan butter alternatives, maintaining structural integrity while accommodating lactose intolerance or dietary preferences within the same delicious cookie framework.

Vegan adaptations require a nuanced touch, replacing cream cheese and butter with vegan counterparts, and altering egg components using flaxseed or chia seed alternatives. Such changes firmly accommodate a full plant-based lifestyle without forsaking flavor.

A low-carb approach pivots towards almond or coconut flour, reducing carbohydrate content while adhering to keto or low-carb principles. Collaborative adjustments help adapt these cherished cookies while tailoring dietary needs.

Paleo and low-FODMAP adjustments emphasize an adaptive response, accommodating additional dietary parameters through strategic ingredient selection, aligning these cookies with various lifestyle approaches while keeping essence intact.

Specific diets are welcomed with targeted interventions, recognizing widely varied dietary landscapes. Each thoughtful modification opens inclusive avenues, allowing more people to enjoy the creative synthesis of cheesecake and cookies.

Troubleshooting Guide

Achieving the desired soft texture entails controlled ingredient temperatures and avoiding overbaking. Slight underbaking maintains chewiness, essential to rich, delectable results.

Poor flavor balance can be adjusted through refined sugar-salt ratios and added zest, ensuring the desired sweetness and burst of tangy blueberries complement the cookies harmonously.

Temperature problems dissipate with proper chilling between steps, keeping dough manageable and optimizing oven results. Attention to temperature guides prevents unwanted spread or drying.

Equipment challenges diminish through proper preparation, with correctly sized tools ensuring consistent cookie forms, facilitated by a well-organized work zone promoting swift adjustments.

Ingredient substitutions are visually distinct yet remain cohesive, maintaining texture alongside integrity while varying dietary or flavor needs.

Timing concerns resolve through vigilant observations, cross-checking with recipe guidelines and key visual cues to ensure cookies retain soft centers and golden tops without compromise.

Recipe Success Stories

Many in the community have embraced this tasty adventure, sharing their decorative and flavorful outcomes via social media. Enthusiastic responses highlight ease of preparation, an encouraging gateway to achieving baking success with impactful results.

Readers have offered creative adaptation spins, sharing impressive anecdotes involving revamped flavors and appealing visuals, underscoring the adaptability and versatile nature this recipe delivers.

Variations involving seasonal fruits or switched extracts from readers showcase successful individualization, proving the ease and flexibility of the essential recipe base, fostering joy in each unique creation.

Photographic essays created by readers beautifully document the journey of producing these cookies, revealing step-by-step transformations and final plated temptations. Photography aids community understanding while visually demonstrating shared achievement satisfaction.

Suggestions from readers bring nuances that refine techniques or broaden flavor horizons within this cherished recipe, illustrating collective engagement where shared experiences enrich the communal baking journey.

Frequently Asked Questions

Q: Can I use frozen blueberries for this recipe?
A: Yes, frozen blueberries work well. Thaw and drain excess liquid first. They may add a deeper hue and slightly adjust moisture.

Q: How do I store unbaked dough?
A: Refrigerate it for up to two days or freeze individual dough balls on parchment. Thaw briefly before baking.

Q: What substitutes work for cream cheese?
A: Vegan cream cheese or thick Greek yogurt can substitute, keeping allergy considerations in mind while retaining flavor.

Q: Can these cookies be made sugar-free?
A: Replace sugar with a suitable sweetener like Stevia or Erythritol, adjusting for texture differences in sweetness balance.

Q: Are there variations for nut-infused versions?
A: Incorporate finely chopped nuts into dough or use them as a topping for added crunch and flavor depth.

Q: What’s the best way to achieve photogenic swirls?
A: Gently fold blueberries into dough or drizzle on top after dough is portioned—use a fork to swirl lightly, ensuring vivid marbling.

Q: Best method for reheating stored cookies?
A: Microwave briefly, 5–10 seconds each, ensuring soft centers and warmth akin to freshly baked enjoyment.

Q: How do I handle sticky dough issues?
A: Chill dough if sticky, making it more manageable and less prone to undesirable spread during baking.

Q: Can I modify the recipe for different fruits?
A: Certainly, substitute favorite fruits, like strawberries or cherries, adapting sugar levels to match different sweetness.

Q: What’s the primary cause of baking inconsistencies?
A: Variability often results from uneven oven heating or inaccurate ingredient measurement. Address these with reliable tools.

Q: How can I enhance cheesecake flavor?
A: Blend in a touch of sour cream to heighten flavors and mimic authentic cheesecake nuances within the cookie base.

Q: Will these cookies work as a bar alternative?
A: Bake dough in a square pan instead, adjusting time, and enjoy as blueberry cheesecake bars, cutting into desired portions post-bake.

Additional Resources

Delve into related recipes that complement your journey into blended cheesecake treats, where lemon bars or raspberry swirl cookies might offer further inspiration for flavorful exploration.

Explore technique guides for honing your folding and swirling skills, ensuring vibrant, even spreads enhance your baking satisfaction and visual results within cheesecake cookie creations.

Ingredient information links highlight valuable insights into selecting quality blueberries and cream cheese, accounting for flavor and texture optimality in a myriad of applications.

Equip yourself with recommended tool guidance tailored to enhancing results with proper measuring utensils, reliable mixers, and baking trays ensuring consistent, delightful execution.

Consider seasonal variations, where suggestions foster adaptive ingredients across distinct climates, extending the joy of these cookies beyond fixed seasons into a welcomed year-round favorite.

Join the Conversation

Share your Easy Blueberry Cheesecake Swirl Cookie creations across social media platforms. Use photography tips to capture each elegant swirl and post-reception delight. Community engagement thrives through shared recipes and lively variations that celebrate unique twists alongside collective experiences.

Contribute to recipe reviews, offering fresh ideas or minor adjustments as part of our communal knowledge exchange. Such feedback allows others to benefit from successful adaptations, highlighting shared expertise among fellow bakers.

Engaging in reader comments unveils new perspectives and recommendations, drawing from a wider network’s experiences, which brings fresh insight into this timeless cookie delight. Being part of an active dessert-loving network broadens the palate and enriches the joy of baking.

The Recipe

Easy Blueberry Cheesecake Swirl Cookies

Serves: 24 cookies

Prep Time: 15 mins

Cook Time: 12 mins

Total Time: 27 mins

Kitchen Equipment Needed

  • Mixing bowls
  • Hand mixer or stand mixer
  • Baking sheet
  • Parchment paper
  • Cookie scoop
  • Cooling rack

Ingredients

  • 1 cup cream cheese, softened
  • 1/2 cup butter, softened
  • 1 cup granulated sugar
  • 1 large egg
  • 1 teaspoon vanilla extract
  • 1/2 teaspoon salt
  • 1/2 teaspoon baking powder
  • 2 cups all-purpose flour
  • 1 cup fresh or frozen blueberries
  • 1 tablespoon granulated sugar (for blueberry mixture)

Directions

  1. Preheat the oven to 350°F (175°C). Line baking sheets with parchment paper.
  2. In a mixing bowl, beat cream cheese and butter together until smooth and creamy.
  3. Add sugar and continue to mix until the mixture is light and fluffy.
  4. Beat in egg and vanilla extract, mixing well until combined.
  5. In another bowl, whisk together flour, salt, and baking powder. Gradually add to the cream cheese mixture, blending until just combined.
  6. In a small bowl, mix blueberries with 1 tablespoon of sugar. Gently fold into the dough to create streaks.
  7. Using a cookie scoop, drop dough onto prepared baking sheets, slightly spacing them apart.
  8. Bake for 10-12 minutes, or until edges are lightly golden. Allow cookies to cool on a wire rack.

Recipe Notes

  • For a citrus twist, add 1 teaspoon of lemon zest to the dough.
  • Store cookies in an airtight container at room temperature for up to three days.
  • Frozen blueberries may require a slightly longer baking time.
Amish Onion Cake: A Savory Delight for Every Occasion

Amish onion bread, savory onion cake, caramelized onion bake, Amish onion pie, buttery onion dish

Amish Onion Cake: A Savory Tradition with a Heartwarming Twist

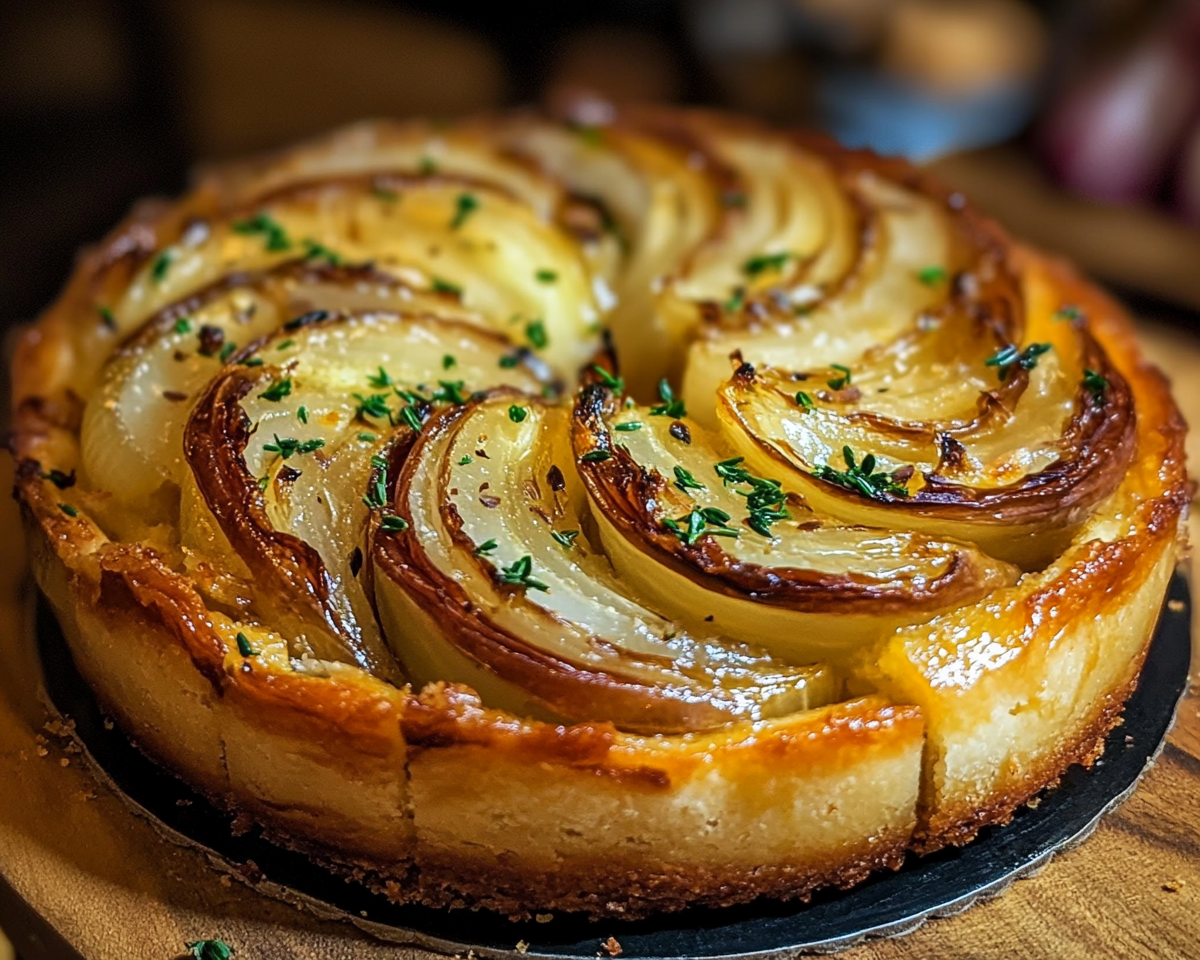
The Amish Onion Cake is a recipe that captures the essence of simple, flavorful cooking passed down through generations. Its rich, buttery layers filled with caramelized onions make it the perfect dish for gatherings, potlucks, or a cozy family dinner.

What Makes Amish Onion Cake Unique?

The hallmark of this dish lies in its simplicity. Drawing from traditional Amish cuisine, this cake combines pantry staples like flour, onions, and butter to create a rustic yet indulgent treat. Pair it with hearty meals like Homemade Chicken and Dumplings for an authentic homestyle experience.


Ingredients You’ll Need

  • 2 cups all-purpose flour
  • 1 large onion, finely sliced
  • 1/2 cup unsalted butter, melted
  • 1 tsp baking powder
  • Salt and pepper to taste
  • Fresh herbs for garnish (optional)

Step-by-Step Instructions

1. Prepare the Onion Mixture

  • Sauté thinly sliced onions in a pan with butter until golden brown and fragrant.
  • Season with salt and pepper.

2. Make the Batter

  • In a large bowl, mix flour, baking powder, and a pinch of salt. Gradually add the melted butter, stirring until a soft dough forms.

3. Assemble and Bake

  • Spread half of the batter in a greased baking dish. Layer the caramelized onions evenly on top. Cover with the remaining batter.
  • Bake at 375°F for 30-35 minutes, or until golden brown.

Perfect Pairings

Pairing Amish Onion Cake with complementary dishes can elevate any meal. Consider serving it with Crockpot Ranch Chicken and Potatoes or balancing its savory profile with a sweet dessert like Kentucky Butter Cake.


Why You’ll Love This Recipe

  • Easy to Prepare: Simple ingredients and minimal prep make this recipe accessible for cooks of all levels.
  • Versatile: Enjoy as a side dish, appetizer, or snack.
  • Rich Flavor: The caramelized onions add a depth of flavor that pairs beautifully with a variety of dishes.

FAQs About Amish Onion Cake

Can I use other types of onions?

Absolutely! Sweet onions, red onions, or even shallots can be used for a different flavor profile.

How long does Amish Onion Cake keep?

Stored in an airtight container, it can last up to 3 days in the refrigerator.

Can I make this recipe gluten-free?

Yes, substitute the all-purpose flour with a gluten-free baking mix. Adjust the liquid quantity if needed.


Pro Tips for Perfect Onion Cake

  • Choose high-quality butter for a rich, authentic taste.
  • Add a sprinkle of fresh herbs like thyme or parsley for extra aroma.
  • For a crispy crust, brush the top layer with melted butter before baking.

Conclusion

Amish Onion Cake is more than just a dish—it’s a testament to the beauty of simple ingredients transformed into something extraordinary. Whether you’re hosting a dinner party or seeking comfort food on a chilly evening, this savory cake is sure to impress.

Irresistible Bacon Mushroom Swiss Cheese Meatloaf Recipe for Dinner

Bacon Mushroom Swiss Cheese Meatloaf: A Comforting Delight

⚖️
Difficulty
Medium

⏲️
Prep Time
20 mins

🕒
Cook Time
60 mins

⏱️
Total Time
80 mins

🍽️
Servings
8

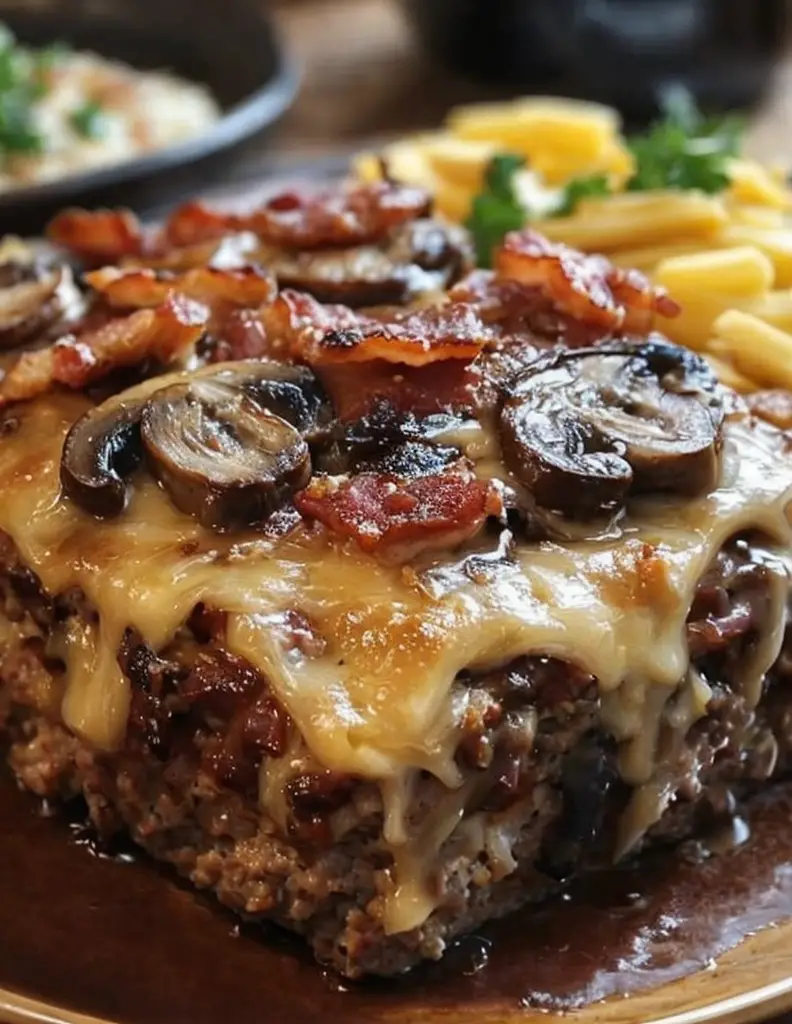
Crafted with love, our Bacon Mushroom Swiss Cheese Meatloaf brings together the rich flavors of smoky bacon, earthy mushrooms, and creamy Swiss cheese. This meatloaf is a family favorite, balancing savory and cheesy elements with a delicate texture that melts in your mouth. The aroma of sizzling bacon combined with the satisfying bite of perfectly cooked meatloaf creates a comforting meal that warms both the heart and the soul, making it a go-to dish for any occasion.

The uniqueness of this Bacon Mushroom Swiss Cheese Meatloaf lies in its blend of ingredients that transform a classic meatloaf into a gourmet experience. As the dish bakes, the natural juices bind the flavors of the bacon and mushrooms, creating a sumptuous dinner centerpiece that pleases both the eyes and the palate. With its golden-brown crust and gooey cheese filling, this meatloaf promises satisfaction with every slice.

Packed with nutrients and flavor, our meatloaf is perfect for a family gathering or a special treat on a quiet weekend night. It offers an irresistible combination of textures—from the tender meat and creamy cheese to the crispness of bacon, each bite is a medley of delight. Easy to prepare and deeply soul-satisfying, this meatloaf earns its place as a staple in your recipe collection.

Quick Recipe Highlights

  • Flavor Profile: This meatloaf delivers a harmonious mix of smoked bacon, umami mushrooms, and creamy Swiss cheese, ensuring a memorable savory experience.
  • Texture: Featuring a tender interior with chunks of bacon and mushrooms, it offers both a soft bite and a satisfying chew.
  • Aroma: Enjoy the tantalizing smell of crispy bacon and earthy mushrooms as it wafts through your kitchen.
  • Visual Appeal: The golden crust and melted cheese offer a visual delight, complemented by the rustic charm of mushrooms and bacon bits.
  • Skill Level Needed: Moderate culinary skills are required, involving frying, mixing, and baking techniques.
  • Special Equipment: A loaf pan and a sauté pan are essential for achieving the perfect texture and flavor development.

Recipe Overview

  • Difficulty Level: This recipe is perfect for intermediate cooks who are comfortable with frying ingredients and managing baking times.
  • Category: Ideal as a comforting main dish, this meatloaf fits perfectly into dinner or lunch menus.
  • Cuisine: Inspired by classic American comfort food, with hints of European cheese and meat-style enhancements.
  • Cost: Approximate cost ranges from $15 to $20, depending on the quality and source of ingredients like bacon and Swiss cheese.
  • Season: Enjoy this dish year-round, with its hearty flavors being especially delightful during the cooler months.
  • Occasion: Perfect for family meals, casual gatherings, or potlucks where comforting classics are cherished.

Why You’ll Love This Recipe

Bacon Mushroom Swiss Cheese Meatloaf is a testament to texture and taste, offering layers upon layers of rich, umami flavors. Each portion delivers a burst of smoky bacon intertwined with tender mushrooms and the comforting creaminess of Swiss cheese, inviting everyone back for seconds.

This recipe’s convenience makes it a standout. With straightforward preparation steps and minimal equipment, it’s easy to bring this dish together on a laid-back evening. The succinct cooking process and common ingredients allow you to plan and prepare this comfort food without hassle, giving you more time to savor the experience.

While inherently rich, this meatloaf has nutritional perks when prepared with lean beef. Mushrooms contribute valuable vitamins and minerals, while Swiss cheese adds calcium, making it a relatively balanced meal choice. Tailor it to suit your diet by adjusting the ingredients and exploring leaner alternatives to fit nutritional needs.

Not only is this meatloaf perfect for family dinners, but it’s also a welcome centerpiece for entertaining guests. It pairs beautifully with a variety of sides, like mashed potatoes or seasonal greens. Once shared, it’s a recipe likely to spark conversations and create lasting memories, enhancing any social occasion with its comforting essence.

In terms of cost, Bacon Mushroom Swiss Cheese Meatloaf proves to be economical, offering a hearty meal from reasonably priced ingredients that serve multiple people. Many components also often exist as pantry or fridge staples, ensuring frequent, budget-friendly meal options through simple adjustments or bulk purchases when items go on sale.

Historical Background and Cultural Significance

The history of meatloaf can be traced back to ancient Roman times, where meat patties were blended with bread and wine. Over centuries, this staple food evolved into a popular dish in European and American cuisines, appreciated for its flexibility and affordability, particularly during tough economic times.

In American culture, meatloaf gained popularity during the Great Depression. Its adaptability allowed home cooks to stretch family meals with inexpensive fillers like breadcrumbs, while offering nutritious sustenance. Regional variations began to emerge, with ingredients adjusted to local tastes and available products.

The integration of bacon, mushrooms, and Swiss cheese is a modern twist that elevates the traditional meatloaf. This blend takes advantage of the smokiness of cured meats and the creaminess inherent in Swiss cheese, reflecting contemporary tastes that crave rich comfort food combined with gourmet elements.

Today, meatloaf remains a quintessential American dish, celebrated for its homeliness and culinary versatility. From coast to coast, it is prepared with distinct regional spins, reflecting both cultural heritage and modern influences that continue to shape its ingredients and flavor profile.

Ingredient Deep Dive

Bacon, beyond its smoky flavor, holds a deep cultural significance in American cuisine. It’s often associated with the comforting scent of breakfast or as a companion in hearty meals. Nutritionally, bacon provides protein and essential fats but requires moderated use due to its high salt and fat content.

Mushrooms, rich in B vitamins and antioxidants, have been cultivated globally as both food and medicine. When selecting mushrooms, opt for fresh, firm textures and an earthy smell. They easily spoil, so store in the fridge inside a breathable bag and consume quickly.

Swiss cheese, known for its nutty and mild flavor, traces cultural roots to Swiss cultures, enjoying widespread use in dishes worldwide. Packed with calcium, it benefits bone health, making it a valuable protein source that also adds delicious creaminess to recipes.

Common Mistakes to Avoid

  • Over-mixing the meat can lead to a dense texture. Mix just until combined for the best results.
  • Skipping the sauté step with mushrooms and onions can result in underdeveloped flavors.
  • Forgetting to let the meatloaf rest post-baking may cause it to crumble when sliced.
  • Not seasoning adequately may make the meatloaf bland. Ensure a balanced seasoning with salt and pepper.
  • Using overly lean meat can lead to dryness. Aim for a balance with some fat content for moisture.
  • Not incorporating a binder like eggs can cause the meatloaf to fall apart.
  • Cooking at too high a temperature may result in a burnt exterior and undercooked center.
  • Failing to cover the meatloaf during cooking can lead to excessive drying.
  • Using a non-ventilating pan may trap steam, affecting texture.
  • Underestimating cooking time can lead to a raw interior. Use a thermometer to ensure doneness.

Essential Techniques

Proper sautéing of bacon and mushrooms is essential for intensified flavors. Cook these ingredients until they release their moisture and begin to caramelize, a process that heightens both smokiness and umami, anchoring the meatloaf’s taste profile.

Gently combining the meat mixture is vital to maintain tenderness. Overworking compresses the proteins, creating a dense final product. Use your hands to achieve a light blend, ensuring all ingredients are incorporated without compacting the mixture too tightly.

Ensuring that the meatloaf is shaped evenly and compactly helps it hold its form while baking. Uneven distribution can lead to uneven cooking, resulting in areas of the loaf being over- or undercooked, therefore shaping is critical to success.

Pro Tips for Perfect Bacon Mushroom Swiss Cheese Meatloaf

For a juicier meatloaf, consider adding a touch of milk or broth to the mixture. This extra moisture is absorbed during cooking, resulting in a more succulent finish.

Always rest your meatloaf after baking. This ensures the juices redistribute throughout the loaf, preventing it from falling apart when slicing, while also enriching flavor integration.

Add grated cheese to the mixture for even more cheesy richness throughout. It melds seamlessly during baking, bringing the Swiss flavor into every bite.

Prepare a glaze with ketchup or barbecue sauce for the top of the meatloaf to infuse additional flavor depth and create an attractive, glossy finish post-bake.

Consider using a loaf pan liner to facilitate seamless removal and cleaning, while creating a smoother shape and easier serving experience.

To impart even more flavor, experiment with adding finely chopped herbs such as parsley or thyme, providing a fresh and aromatic contrast to the smoky, savory base notes.

Variations and Adaptations

Embrace regional variations by incorporating other cheeses like cheddar or gruyere for altered flavor profiles. Each cheese brings unique characteristics from sharpness to nuttiness, impacting the overall taste.

Seasonal adaptations abound with this meatloaf. Incorporate seasonal vegetables like bell peppers or carrots for bursts of color and flavor, making different adaptations suitable for any time of year.

For dietary modifications, substitutes like turkey or chicken can be used instead of beef for a lighter option. While changes like these can affect texture and taste, the core methodology remains applicable.

Consider swapping bread crumbs for alternatives like almond flour or oats to create gluten-free adaptations. These changes can alter both binding and texture, requiring slight adjustments to ingredient proportions.

If a more refined presentation is desired, use individual ramekins for portion-controlled meatloaves. They provide elegant plating and personalized servings, suitable for upscale dinners without losing homey appeal.

Serving and Presentation Guide

When plating, elevate the meatloaf by slicing it cleanly and presenting it over a base of mashed potatoes or polenta, adding height and visual interest to the dish.

Creative garnishing using fresh herbs or microgreens provides a pop of color and freshness, which enriches both flavor and presentation, making it more inviting on the plate.

Accompany with side dishes such as roasted vegetables or a crisp salad for complementary taste and texture contrasts, balancing the hearty meatloaf with lighter, fresher elements.

Modern serving suggestions might include pairing smaller portions with sliders or atop savory waffles, reinventing classic pairings with innovative twists that bring forth new culinary experiences.

Temperature is key; ensure your meatloaf is served warm, as the cheese remains melty, enhancing both texture and taste. Carefully reheated portions retain most of their original integrity and appeal.

Control portion sizes with calculated slices, considering the richness of the ingredients. Each person might enjoy one moderate portion to fully appreciate the depth of flavor without overindulgence.

Wine and Beverage Pairing

Pair this meatloaf with a robust red wine such as Cabernet Sauvignon or Merlot. Their bold flavors complement the savory bacon and umami, creating a harmonious dining experience.

For non-alcoholic alternatives, try a full-bodied iced tea or sparkling water with a touch of citrus. Their refreshing qualities provide a palate cleanse between bites, enhancing enjoyment of the meal.

Coffee or tea pairings may include a rich black coffee or a bold English breakfast tea. Both offer earthiness and an aromatic complement that enriches the meal experience.

Providing beverages at the right temperature is crucial, with wines decanted to breathe and teas served hot or cold, each releasing aromas and flavors that elevate the culinary experience.

Serve wine in appropriate glassware to enhance aromatics, using larger goblets to capture the essence, while keeping non-alcoholic options in similar fashioned glassware so as not to differentiate the experience.

Storage and Shelf Life

Store leftover meatloaf in an airtight container in the refrigerator, where it should remain fresh for up to 3-4 days. Ensure slices are separated by parchment to prevent sticking and enhance preservation.

Temperature is key; refrigerator temperatures should be maintained below 40°F. For extended shelf life, consider freezing portions in vacuum-sealed bags for up to three months.

Signs of spoilage include off-odors, discoloration, or slimy textures; any such changes warrant discarding. Regularly check stored portions to ensure optimal quality maintenance.

To reheat, use a moderate oven temperature of about 350°F, allowing thorough warming without drying out. Cover with foil to keep moisture within and restore the original flavor profile.

When freezing, consider slicing prior to storage for easy portioning. Defrost refrigerated portions overnight before reheating to maintain texture and moisture balance.

Make Ahead Strategies

Prepare components such as bacon and mushroom mixtures ahead of time. This allows the flavors to develop and saves time during final assembly, providing convenience on the cooking day.

Once assembled, uncooked meatloaf can be stored in the fridge for a day, or frozen for later use, allowing flexibility in meal planning. Adapt carefully timed steps to ensure fresh quality upon reheating.

Assess quality impact when storing in advance—over-stored components may lose freshness. Adjust seasoning slightly after prolonged storage to counteract any flavor loss during inactive periods.

When assembling, consider leaving out more volatile ingredients like cheese until ready to bake, optimizing both flavor and texture in the final cooked dish.

Reheat leftovers gently, using a low oven setting. Incorporate fresh elements like herbs or garnishes just before serving to reinvigorate flavors and maintain exciting visual presentation.

Scaling Instructions

To scale down, halve the recipe for a smaller batch. Adjust baking times slightly, starting checks earlier to accommodate thinner layers.

When scaling up, doubling ingredients is straightforward, but consideration of pan size and oven space is crucial. Allow sufficient air circulation around larger pans to ensure even cooking.

For larger batches, prep multiple loaf pans and rotate positions in the oven to ensure even heat distribution. Observe carefully to prevent uneven browning at edges versus center portions.

Up-scaled portions require adjusted timing, typically adding 10-15 minutes to ensure center doneness. Use a meat thermometer to verify internal temperature, aiming for 160°F for a perfectly cooked loaf.

Storage considerations include dividing larger portions into multiple containers to maintain freshness post-cooking. Label thoroughly for clear identification when freezing for future use.

Nutritional Deep Dive

A single serving offers an appealing balance of macronutrients: rich in protein from beef and cheese, providing energy and satiation.

Micronutrients include vitamin D, zinc, and iron from mushrooms, contributing to bone and immune health, essential considerations within varied diets and meal planning.

Dietary considerations guide preparations for optimal health benefits, with potential modifications to suit sodium, fat, or carbohydrate-specific needs according to personal dietary goals.

Portion analysis helps manage balanced consumption, particularly if paired with nutrient-dense sides like greens—an approach focusing on full meal rounds rather than isolated component assessment.

Weight management tips suggest portion control and mindful ingredient choices, keeping in view potential calorie impact from richer meats and cheeses, often mitigated by balance with leaner options.

Dietary Adaptations

For gluten-free adaptations, replace breadcrumbs with crushed gluten-free oats, binding the meat without altering core flavors or textures significantly.

Dairy-free considerations include omitting cheese or substituting treated cheese alternatives that melt well, preserving creamy texture while accommodating intolerance needs.

Vegan alternatives could involve plant-based substitutes like lentils or legumes, binding agents like flaxseed, and omitting meat entirely, crafting a comparable yet cruelty-free dish.

Low-carb versions benefit from pork rinds or cheese crisps in place of breadcrumbs, ideal for ketogenic lifestyles seeking minimal carbohydrate impact without sacrificing depth of flavor.

Paleo-friendly alternatives rely on almond flour and omitting processed meats like bacon, aligning with whole-food eating patterns in line with ancestral dietary principles.

Low-FODMAP adaption ensures onion and mushroom minimization or substitution, enhancing digestive comfort without significant reduction in beloved flavors.

Troubleshooting Guide

Texture issues often arise from incorrect meat handling. Overprocessing can create toughness; consider lighter mixing or using higher-fat content meat for naturally juicier results.

Flavor balance may suffer if insufficiently seasoned. Adjusts should include salt to enhance umami, and pepper for bite, always tasting and refining before final assembly.

Temperature problems often reflect improper baking conditions. Ensuring preheating and steady oven operation is essential—use an oven thermometer for calibration accuracy.

Equipment challenges regarding pan sizes affect how evenly meatloaf cooks. Adapt surfaces and adjust positioning for optimal heat distribution across loaf.

Ingredient substitutions require careful consideration. Interruptions may affect results—consult equivalency charts and adjust proportions for consistency with recipe integrity.

Timing concerns should prioritize incremental checking; cooking at a lower temperature for longer may ensure even doneness, preventing raw interiors and burnt exteriors.

Recipe Success Stories

Our readers have celebrated the versatility of this meatloaf. With countless variations, it has inspired culinary creativity, introducing elements from cheddar accents to spicy jalapeno infusions.

Adaptation stories highlight lactose-free versions with nutritional yeast, ensuring flavorful success without compromising creamy textures, a notable approach for those managing intolerance.

Reader-suggested substitutions include ground turkey and diced apple for an unexpected sweet spin, offering delightful new dimensions to our established recipe.

Photo tips recommend capturing the dish fresh and vibrant, focusing on depth, with close-up angles that showcase the inviting textures—an ideal practice leading to visually stunning results.

Engagement with the community is key; shared iterations and experiences on social media platforms have resulted in creative, supportive exchanges among enthusiasts and experts.

Frequently Asked Questions

Can I freeze the meatloaf before cooking?

Yes, the prepared meatloaf can be frozen before baking. Wrap tightly in plastic wrap and foil to maintain freshness, and thaw in the refrigerator before cooking.

What’s the best way to reheat leftover meatloaf?

The best method is to reheat slices gently in a low oven at 350°F, covered in foil to retain moisture, or microwaved under a damp paper towel to prevent drying.

How do I prevent my meatloaf from falling apart?

Ensure proper binding by using adequate eggs and breadcrumbs. Avoid over-mixing and let the loaf rest after baking to allow it to firm up before slicing.

Can I use turkey instead of beef?

Yes, ground turkey can be substituted for beef. It creates a lighter, leaner version but might require additional seasonings to compensate for the subtle difference in taste.

Why is my meatloaf dry?

Dry meatloaf results from overly lean meat or overcooking. Opt for a higher fat content for moistness, and monitor cook time carefully to avoid overbaking.

Is Swiss cheese necessary?

While Swiss cheese adds unique flavor, it can be replaced with other melting cheeses, such as cheddar or mozzarella, to suit personal preferences or dietary restrictions.

How do I keep the top of my meatloaf from drying out?

Applying a glaze like ketchup or barbecue sauce on top before baking prevents drying, providing moisture and additional flavor to enhance the overall appeal.

What’s the ideal internal temperature for meatloaf?

The ideal internal temperature is around 160°F, ensuring the meat is cooked safely without losing tenderness, layered by precise timing consideration.

Can I add vegetables to the meatloaf?

Yes, finely diced vegetables can be added to enhance flavor and nutrition, ensuring they’re sautéed or blanched first to prevent excess moisture from affecting the texture.

How do I know when my meatloaf is done?

A thermometer confirming 160°F internally guarantees doneness. Additionally, a firm surface and juices running clear at slice testing indicate readiness for serving.

Additional Resources

Explore related recipes such as our Classic Meatloaf or Lean Turkey Meatloaf, offering further insights into variations and complementary customization suggestions.

Technique guides include detailed step-by-step tutorials on proper sautéing and optimal baking practices, ensuring flavorful perfection with ease.

Ingredient information delves deeper into cheese options, offering pairings and flavor profiles to suit a range of culinary preferences and dietary requirements.

Equipment recommendations outline key tools like loaf pans and thermometers, promoting successful recipes through informed, practical kitchen investments.

Seasonal variations highlight shifts and adaptations suitable throughout the year, ensuring year-round enjoyment with elements reflecting available produce and trends.

Join the Conversation

Your thoughts are invaluable! Share your meatloaf experiences on social media, employing photography tips to showcase the recipe’s enticing warmth visually.

Engage in recipe reviews, offering insights and personal tweaks that may inspire fellow cooks, nurturing a community of shared culinary passion and collaboration.

Discover creative variations and adaptations, sharing personal successes and regional twists that expand horizons and enrich our collective food experience.

The discussion on engaging platforms like forums or comment sections encourages lively exchange, supporting knowledge growth and innovation in accessible, enjoyable ways.

Your participation enlivens the culinary conversation, making each creation a meaningful shared endeavor. Join us in celebrating the comforting joy of homemade meatloaf today.

The Recipe

Bacon Mushroom Swiss Cheese Meatloaf

Serves: 8

Prep Time: 20 mins

Cook Time: 60 mins

Total Time: 80 mins

Kitchen Equipment Needed

  • Loaf pan
  • Sauté pan
  • Mixing bowl
  • Spatula
  • Meat thermometer

Ingredients

  • 1 lb ground beef
  • 1/2 lb bacon, chopped
  • 1 cup mushrooms, finely chopped
  • 1 cup Swiss cheese, grated
  • 1/2 cup breadcrumbs
  • 2 eggs
  • 1 tsp salt
  • 1/2 tsp black pepper
  • 1 small onion, diced
  • 2 cloves garlic, minced
  • 1 tbsp Worcestershire sauce

Directions

  1. Preheat your oven to 350°F (175°C).
  2. In a sauté pan over medium heat, cook the bacon until crisp. Remove and set aside.
  3. In the same pan, add mushrooms and onions; sauté until soft. Add garlic and cook for another minute.
  4. In a large mixing bowl, combine beef, sautéed vegetables, bacon, breadcrumbs, cheese, eggs, salt, pepper, and Worcestershire sauce. Mix gently until combined.
  5. Transfer the mixture into a loaf pan, pressing lightly to shape evenly.
  6. Bake for 60 minutes, or until the internal temperature reaches 160°F (70°C).
  7. Allow the meatloaf to rest for 10 minutes before slicing and serving.

Recipe Notes

  • Adjust seasoning to taste preferences.
  • Substitute other cheeses if Swiss is unavailable.
  • For a spicier version, add diced jalapeños.

Perfect Pumpkin Bars with Cream Cheese Frosting: A Fall Favorite

Pumpkin dessert bars, cream cheese frosting recipes, fall pumpkin treats, easy pumpkin bars, spiced pumpkin bars

Pumpkin Bars with Cream Cheese Frosting: A Delicious Fall Treat

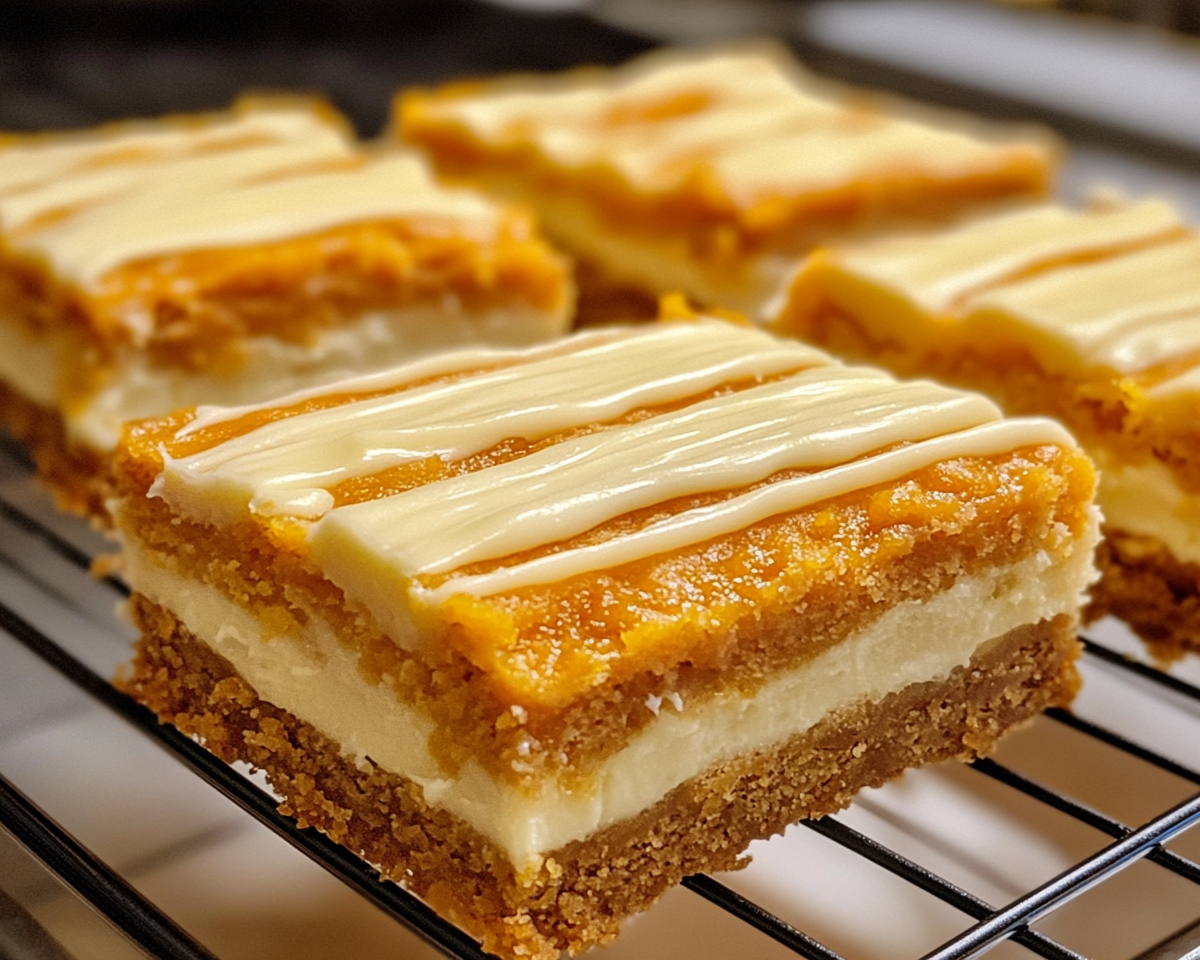
Pumpkin Bars with Cream Cheese Frosting combine the flavors of fall with a creamy, luscious topping that elevates every bite. Perfect for seasonal gatherings or an everyday treat, these bars strike a balance between spice and sweetness.

Why Pumpkin Bars are a Must-Try

Pumpkin bars are the quintessential fall dessert, combining the warmth of pumpkin spice with the richness of cream cheese frosting. For fans of classic autumn flavors, they are a delightful alternative to pumpkin pie.

Learn about other autumn desserts like hearty Chicken Chili to complement your fall table.


Ingredients You’ll Need

Making pumpkin bars is simple and requires a mix of pantry staples and fresh ingredients:

  • Pumpkin Puree: Ensure you use pure pumpkin puree, not pie filling.
  • Spices: Cinnamon, nutmeg, and cloves are the backbone of the flavor.
  • Butter: Adds richness to the batter and frosting.
  • Cream Cheese: The star ingredient for a creamy frosting.
  • Sugar: Granulated sugar for the bars and powdered sugar for the frosting.
  • Eggs: For structure and moisture.

Step-by-Step Instructions

1. Preparing the Batter

  • Preheat the oven to 350°F.
  • Combine your dry ingredients (flour, baking soda, and spices).
  • Mix wet ingredients in another bowl and slowly incorporate them into the dry mixture.

For a similar rich texture, check out the Kentucky Butter Cake recipe.

2. Baking the Bars

  • Spread the batter evenly in a greased pan.
  • Bake for 25–30 minutes or until a toothpick comes out clean.
  • Allow the bars to cool before applying the frosting.

3. Making the Cream Cheese Frosting

  • Beat cream cheese and butter until fluffy.
  • Gradually add powdered sugar and vanilla extract.

Discover other recipes with cream cheese, like the Salted Caramel Apple Cheesecake.


Tips for Perfect Pumpkin Bars

  • Use room-temperature ingredients for smoother mixing.
  • Don’t overmix the batter; this can lead to dense bars.
  • Ensure the bars are completely cooled before frosting to avoid a runny mess.

Serving Suggestions

  • Garnish with a sprinkle of cinnamon or crushed pecans for added texture.
  • Pair with a warm beverage like spiced apple cider or pumpkin spice latte.

FAQs

1. Can I make these bars gluten-free?

Yes, substitute all-purpose flour with a gluten-free baking mix for similar results.

2. How should I store pumpkin bars?

Store them in an airtight container in the refrigerator for up to a week.

3. Can I freeze pumpkin bars?

Yes, freeze unfrosted bars for up to three months. Thaw and frost when ready to serve.


Internal Linking Opportunities

To enhance navigation and user engagement, consider linking to the following:

  1. Embracing Autumn: A Bowl of Hearty Chicken Chili – Anchor: “other autumn desserts.”
  2. Kentucky Butter Cake: A Slice of Southern Comfort – Anchor: “rich texture.”
  3. Salted Caramel Apple Cheesecake with Apple Roses – Anchor: “recipes with cream cheese.”

Explore More Pumpkin Recipes

Pumpkin lovers can dive into these related recipes:

  • Pumpkin Spice Latte Cookies
  • No-Bake Pumpkin Cheesecake
  • Pumpkin Pie Smoothie


Perfect M&M Cookies: The Ultimate Guide to Colorful, Chewy Goodness

candy-coated cookies, chocolate chip M&M cookies, colorful cookies recipe, chewy M&M cookies, homemade M&M cookies

Article: M&M Cookies

Internal Linking Opportunities

After analyzing the provided sitemap, here are potential internal linking opportunities for the article on M&M Cookies:

  1. Related Recipes and Themes:
  2. Dessert Inspiration:
  3. Baking Techniques:

Markdown Article: M&M Cookies

The Ultimate Guide to Baking Perfect M&M Cookies

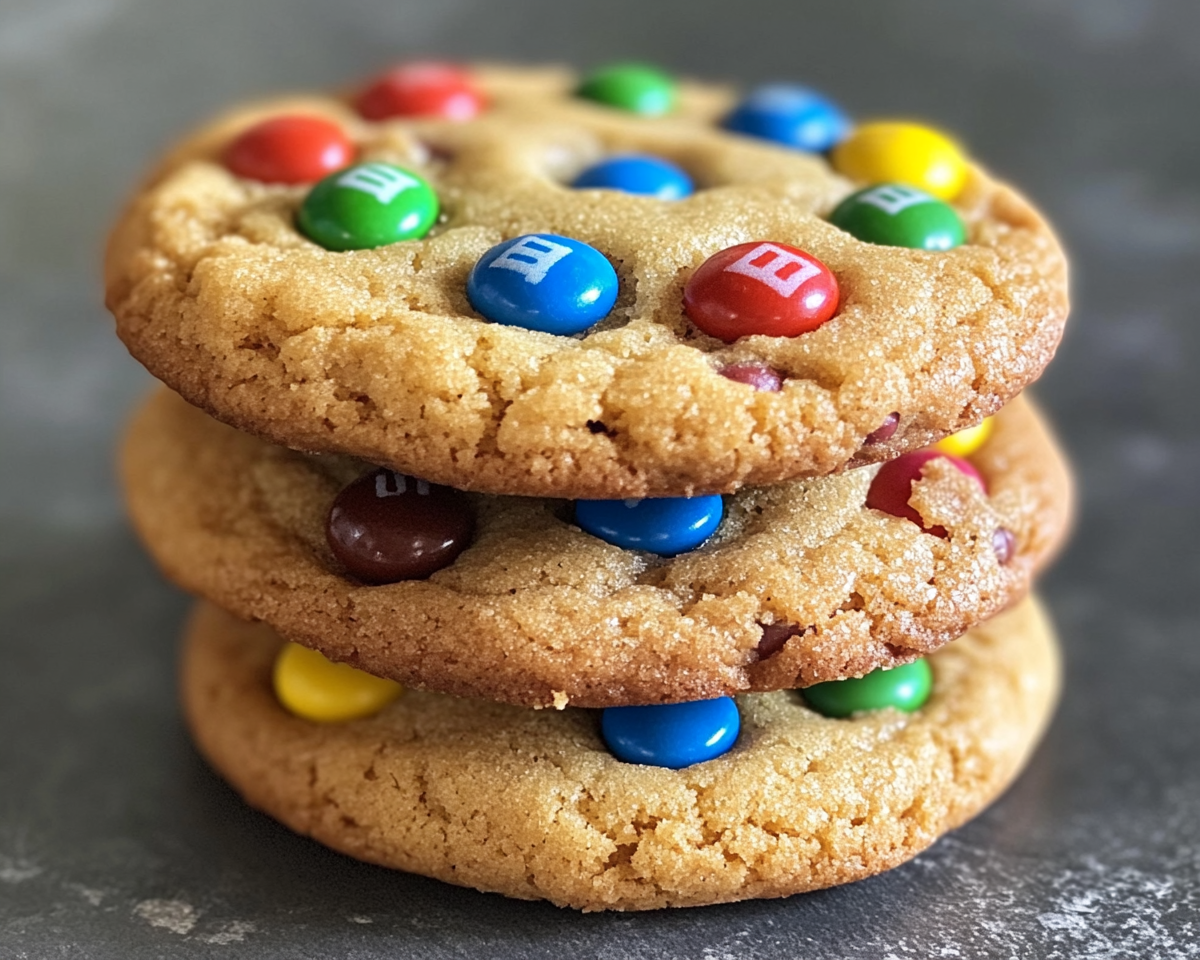
M&M Cookies are a timeless classic, combining the rich, buttery texture of traditional cookies with the colorful crunch of M&M candies. Whether for holidays, parties, or everyday indulgence, these cookies are a delightful treat for all ages.


Why M&M Cookies Are So Popular

  • Universal Appeal: Loved by kids and adults alike.
  • Visual Delight: Vibrant M&M candies add a festive touch.
  • Customizable: Adaptable to dietary preferences and ingredient variations.

Pro Tip: Incorporate Chocolate Magic Shell Yogurt Cup for a unique, chocolatey dip.


Ingredients: A Perfect Balance

Core Ingredients

  • All-purpose flour
  • Baking soda
  • Unsalted butter
  • Granulated sugar and brown sugar
  • Large eggs
  • Vanilla extract
  • M&M candies

Discover More: Explore Crafting the Ultimate Thick Homemade Chocolate Chip Cookies for mastering texture and thickness.

Optional Add-Ons

  • Chopped nuts for crunch.
  • White chocolate chips for added sweetness.
  • Peanut butter for a rich, nutty twist.

Step-by-Step Baking Instructions

1. Prepare the Dough (10 minutes)

  • Whisk dry ingredients: flour, baking soda, and a pinch of salt.
  • Cream together butter and sugars for a smooth, creamy consistency.
  • Blend in eggs and vanilla extract until fully combined.

2. Fold in the Goodness (5 minutes)

  • Gradually incorporate the dry mixture into the wet.
  • Gently mix in M&M candies to ensure even distribution.

Helpful Read: Get creative with Reese’s Pieces Chocolate Chip Cookie Bars.

3. Baking Time (15 minutes)

  • Preheat oven to 350°F (175°C).
  • Scoop dough onto baking sheets lined with parchment paper.
  • Bake for 10–12 minutes until golden brown.

Tips for Perfect M&M Cookies

  1. Chill the Dough: Prevents spreading and ensures thick cookies.
  2. Use Room Temperature Ingredients: Enhances mixing and consistency.
  3. Extra M&M Candies: Add a few on top of each dough ball before baking.

Variations to Explore

  • Holiday-Themed M&M Cookies: Use red and green candies for Christmas.
  • Gluten-Free M&M Cookies: Substitute with almond flour.
  • Double Chocolate M&M Cookies: Add cocoa powder to the dough.

FAQs

1. Can I Freeze M&M Cookie Dough?

Yes, freeze dough in pre-portioned scoops for up to 3 months. Bake directly from frozen, adding 1–2 minutes to the baking time.

2. How Do I Prevent Cookies from Spreading?

Ensure the dough is chilled, and avoid over-greasing the baking sheet.

3. Can I Use Mini M&Ms?

Absolutely! Mini M&Ms distribute more evenly and add a fun twist.


Serving Suggestions


Storage Tips

  • Room Temperature: Store in an airtight container for up to 1 week.
  • Freezing Baked Cookies: Freeze in a sealed bag for up to 3 months.

Final Thoughts

M&M Cookies are a crowd-pleasing treat that combines nostalgia with versatility. Whether enjoyed warm out of the oven or as part of a dessert buffet, their charm is undeniable.

Explore More: Check out Decadent Caramel Chocolate Cupcakes for complementary dessert ideas.