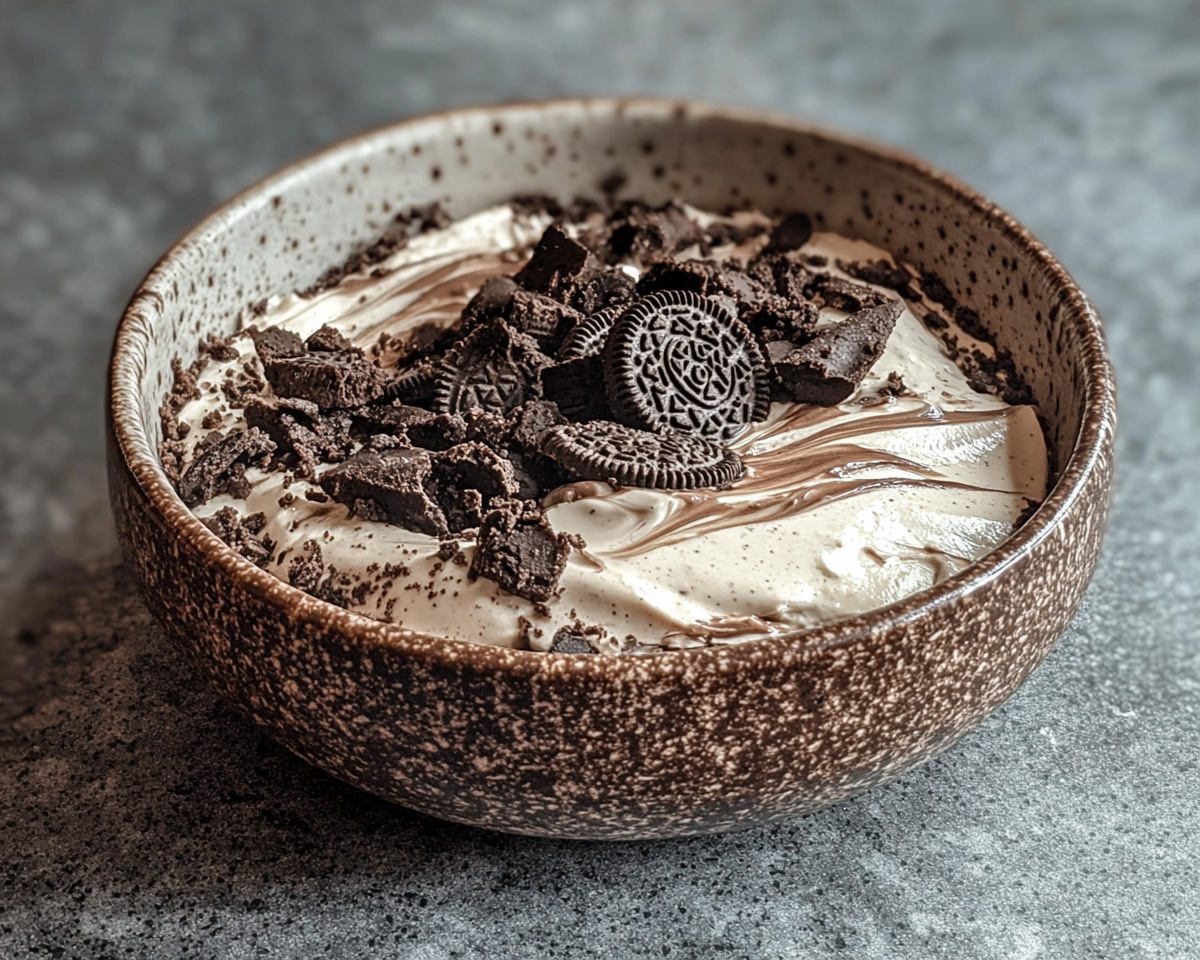
No-Bake Oreo Mud Pie: A Decadent and Easy Dessert Recipe
No-Bake Oreo Mud Pie: The Ultimate Indulgent Dessert
Introduction
The No-Bake Oreo Mud Pie is a decadent dessert loved for its rich layers and creamy textures. This effortless recipe combines a crunchy Oreo crust, velvety chocolate filling, and luscious whipped topping to create a treat perfect for any occasion. With no oven required, it’s a go-to for quick and impressive desserts.
Why Choose No-Bake Oreo Mud Pie?
Simplicity and Convenience
This dessert is ideal for anyone seeking a hassle-free recipe without sacrificing flavor. The no-bake process ensures ease, while its rich, chocolatey layers make it a guaranteed hit.
The layers can be customized to include flavors like coffee or caramel, making it a versatile choice for family gatherings or potlucks. Discover how layering enhances desserts at How to Layer Desserts.
Ingredients for the Perfect Mud Pie
Oreo Crust:
24 Oreo cookies, finely crushed
½ cup melted butter
Chocolate Filling:
1 package (6 oz) chocolate pudding mix
3 cups cold milk
Whipped Topping:
1 container (16 oz) Cool Whip or whipped cream
Optional Add-ons:
Chocolate chips, gummy worms, or hot fudge for extra indulgence.
Step-by-Step Recipe for No-Bake Oreo Mud Pie
Preparation
Create the Crust: Combine crushed Oreos with melted butter and press firmly into a pie dish. Chill for 15 minutes.
Prepare the Filling: Whisk together pudding mix and milk until smooth, then pour over the crust.
Add the Topping: Spread whipped topping over the pudding layer.
Chill: Refrigerate for at least 2 hours before serving.
Tips for Success
Firm Crust: Use a measuring cup to press the Oreo mixture firmly into the dish.
Smooth Layers: Chill each layer slightly before adding the next to maintain structure.
Customize Flavors: Experiment with coffee-flavored pudding or caramel drizzle for added depth.
The No-Bake Oreo Mud Pie is a versatile, crowd-pleasing dessert that’s as easy to prepare as it is delicious. With endless customization options, this no-fuss recipe is perfect for every occasion. Try it today and watch it become a favorite in your dessert repertoire!
Delicious Asian Chicken Lettuce Wraps: A Fresh and Flavorful Delight
Flavorful Asian Chicken Lettuce Wraps: A Culinary Delight
⚖️
Difficulty
Easy
⏲️
Prep Time
20 mins
🕒
Cook Time
15 mins
⏱️
Total Time
35 mins
🍽️
Servings
4
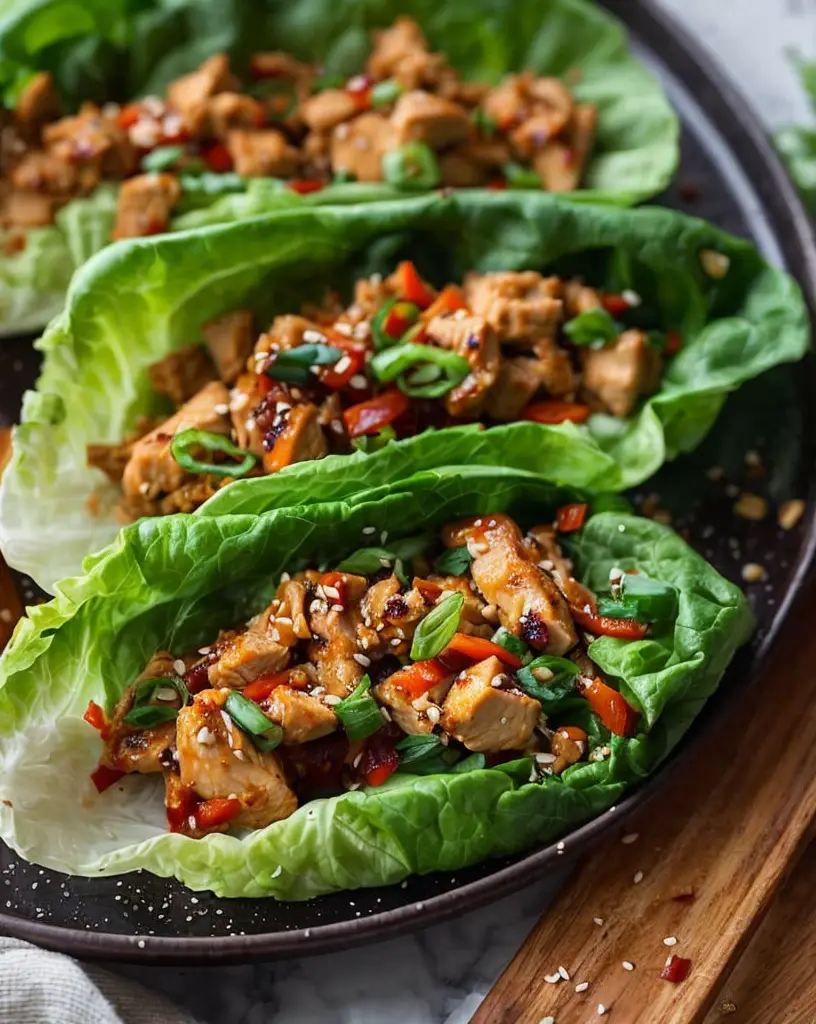
Welcome to an aromatic culinary adventure with our Flavorful Asian Chicken Lettuce Wraps. This delightful dish tantalizes the taste buds with a perfect blend of savory and sweet flavors, wrapped in crisp, refreshing lettuce leaves. It’s an exciting fusion of textures and tastes that hits all the right notes, making it an ideal choice for both casual weeknight dinners and sophisticated parties. The succulent chicken filling paired with crunchy vegetables creates a dance of flavors that’s both healthy and satisfying. Experience the robust aromas and vibrant presentation as you dive into this exquisite, easy-to-make recipe.
Quick Recipe Highlights
Flavor Profile: A delightful fusion of umami and sweetness, highlighted by soy sauce, ginger, and a hint of garlic.
Texture: The tender chicken and crunchy vegetables offer a satisfying contrast, wrapped in crisp lettuce leaves.
Aroma: Rich aromatic notes of ginger and garlic permeate the air, creating an inviting environment before the first bite.
Visual Appeal: Vibrant greens and earthy tones create a colorful, appetizing presentation that serves as a feast for the eyes.
Skill Level Needed: Designed for all cooking levels, this recipe involves basic sautéing and easy assembly.
Special Equipment: No special tools required, just your standard kitchen skillet and a good knife.
Recipe Overview
Difficulty Level: The ease of preparation and simple cooking steps make this an accessible dish for beginner cooks while offering enough flavor complexity for experienced chefs.
Category: Perfect as a main course or an appetizer, these wraps fit seamlessly into any Asian-inspired meal setting.
Cuisine: Rooted in Asian cooking techniques, this recipe draws influence from diverse culinary traditions, merging familiar flavors into an innovative dish.
Cost: Utilizing common ingredients, this recipe is budget-friendly, making it an affordable yet gourmet choice.
Season: Best enjoyed in warmer months when fresh lettuce is in season, offering a refreshing palate cleanser amid heavier dishes.
Occasion: Great for family dinners, casual gatherings, or festive occasions, bringing elegance and variety to any meal.
Why You’ll Love This Recipe
The Flavorful Asian Chicken Lettuce Wraps captivate with their irresistible taste and satisfying texture. Each bite delivers tender chicken with a crunchy vegetable medley, enhanced by a well-balanced soy and ginger dressing. This recipe is incredibly convenient, requiring minimal prep time and equipment, making it perfect for weeknight dinners. Additionally, it’s rich in proteins and fresh vegetables, offering a nutritious alternative to high-carb meals. These wraps are also crowd-pleasers, making them an excellent choice for entertaining guests. Lastly, the accessibility of ingredients and their cost-effectiveness ensure this dish suits any budget, all while delivering restaurant-quality flavors.
Historical Background and Cultural Significance
This dish finds its roots in traditional Asian cuisine, representing a minimalist, healthy approach to cooking with a focus on freshness and balance. Lettuce wraps have long been a staple in various Asian regions, celebrated for their simplicity and adaptability. Historically, these wraps symbolized a convergence of flavor and convenience—ideal for serving quick, nutritious meals. Over time, the dish evolved, allowing for a multitude of regional adaptations and enhancements, making it a popular choice in both street stalls and high-end restaurants worldwide. Today, it’s embraced globally, cherished for its cultural diversity and culinary versatility.
Ingredient Deep Dive
Chicken, central to these wraps, is revered for its lean protein content and adaptability across cuisines. Choose fresh, boneless chicken breasts for optimal tenderness and flavor absorption. Ginger and garlic, staple aromatics in Asian cooking, provide depth and warmth to the dish. Perfectly handled, these ingredients transform simple meals into gourmet experiences. Opt for fresh ginger and garlic to achieve maximum flavor impact. Soy sauce offers saltiness and umami, enhancing each bite’s complexity. For substitutions, tamari or coconut aminos provide comparable taste profiles for gluten-free alternatives. Store soy sauce in a cool, dark place to maintain its robust essence.
Common Mistakes to Avoid
Overcooking the chicken can result in a dry texture. Watch it closely to retain its natural juices.
Under-seasoning could lead to blandness, so be sure to taste the filling and adjust the seasoning as needed.
Using wilted lettuce impart an unappealing texture—opt for fresh, crisp leaves for the best experience.
Chopping vegetables too coarsely disables uniform bite-sized assembly; ensure consistency in size for an even spread of flavors.
Skipping the marination step could deprive the chicken of depth of flavor, so allow sufficient time for marination.
Forgetting to drain excess moisture can cause soggy wraps; aim for a drier mixture for crisp results.
Adding too much filling prevents proper wrapping, so measure each portion accordingly for neat rolled wraps.
Storing assembled wraps in the fridge leads to wilted lettuce. Instead, keep components separate until serving.
Essential Techniques
Sautéing is crucial, as it locks in chicken juices while building flavor. Master this by using a hot skillet, ensuring the chicken isn’t overcrowded, facilitating even cooking. Another key technique involves creating the perfect balance of flavors: taste the chicken mix and adjust for acidity, sweetness, or salt to achieve harmony. Visual cues like caramelization deepen the flavor profile, indicating readiness. Finally, assembling the wraps requires gentle but firm handling to avoid tearing the delicate lettuce leaves and ensuring they can hold their delicious contents securely.
Pro Tips for Perfect Flavorful Asian Chicken Lettuce Wraps
For superior flavor, allow the chicken to marinate for at least 30 minutes. To maintain the lettuce’s crunch, keep it refrigerated until assembly. Add a splash of lime juice just before serving to elevate freshness. When sautéing, ensure the pan is preheated to achieve an ideal sear on the chicken. Try using a variety of lettuce types like butter or iceberg for different textures. If available, consider adding water chestnuts for an additional crunch element. Experiment with hot sauce or chili flakes for a hint of spice that complements the inherent sweetness and umami of the dish.
Variations and Adaptations
Regional variations include adding peanuts or cashews for extra nuttiness. For a seasonal twist, incorporate grated carrots or cucumber slices in warmer months. Dietary modifications may involve swapping chicken with tofu or tempeh for a vegan option. To vary flavors, try different marinades, such as teriyaki or hoisin sauce. Texture modifications can include adding rice noodles for extra bulk. Presentation alternatives involve serving the filling in small bowls, allowing guests to create their wraps, promoting an interactive dining experience. These modifications let you tailor the recipe to personal preferences or dietary needs.
Serving and Presentation Guide
For sophisticated plating, arrange wraps on a large serving platter with dipping sauces like soy or sweet chili on the side. Garnish with scallions, sesame seeds, or red chili slices for added flair. Serve alongside traditional accompaniments like shrimp crackers or steamed buns for an authentic touch. Consider modern serving suggestions such as using fresh herbs like mint or cilantro for aromatic upliftment. To ensure the best consumption experience, maintain ingredients at optimal temperature and offer portion control advice for guests, ensuring an elegant, fuss-free meal.
Wine and Beverage Pairing
Pair these lettuce wraps with a light, aromatic white wine such as Riesling or Sauvignon Blanc that complements the dish’s freshness without overpowering its subtle flavors. For non-alcoholic alternatives, a chilled jasmine tea or lemon-infused sparkling water would enhance the palate’s cleansing effect. For additional warmth, green tea, with its earthy notes, pairs delightfully well. Ensure beverages are served chilled where applicable to match the coolness of the lettuce and engage guests’ senses through a well-balanced meal. These thoughtful pairings elevate the dining experience, leaving a lasting impression.
Storage and Shelf Life
To store components separately, keep cooked chicken in an airtight container for up to three days, ensuring refrigeration below 40°F. Lettuce should be washed, dried, and stored in a sealed plastic bag with a paper towel to maintain freshness. Look for signs of spoilage, such as off-odors or discoloration, to gauge freshness before recombining. Reheating should be gentle, preferably using a microwave or stovetop, to prevent overcooking. While freezing is possible, fresh wraps offer superior texture, so approach freezing with the understanding that lettuce may lose its crispness.
Make Ahead Strategies
Prepare components ahead by marinating chicken overnight and chopping vegetables in advance, storing them in separate zip-lock bags. To maintain peak freshness, keep all ingredients refrigerated until assembly. Assess how pre-prepped elements retain quality to avoid degradation. As you approach serving time, warm the filling before combining with fresh elements like lettuce. Reheating should be minimal; the dish is best enjoyed with freshly assembled wraps. Add condiments or garnishes at the last moment to maintain vibrancy, creating a seamless culinary experience without compromising flavors.
Scaling Instructions
To scale this recipe, ingredients can be halved, doubled, or tripled without losing integrity. For halving, focus on keeping proportionality in seasoning. Doubling involves ensuring ample cooking equipment like larger skillets to prevent overcrowding during sautéing. Timing adjustments require careful monitoring as larger quantities may need extended sautéing to maintain flavor balance. Storage considerations include using larger containers or dividing batches to ensure freshness. Scaled recipes maintain their delicious appeal while offering flexibility for intimate dinners or larger gatherings, catering to diverse dining needs.
Nutritional Deep Dive
These lettuce wraps provide a macro breakdown rich in lean protein from chicken, coupled with dietary fibers from fresh vegetables. The soy sauce adds sodium, contributing to the savory taste, while ginger offers anti-inflammatory and antioxidant properties. With low carb counts, the dish is suitable for those managing weight or adhering to low-calorie diets. Each portion serves as a healthful, balanced meal, encouraging nutritious meal planning while satisfying various dietary considerations. Overall, this recipe presents itself as a culinary delight without compromising nutritional values, appealing to health-conscious individuals.
Dietary Adaptations
For gluten-free diets, substitute soy sauce with tamari or coconut aminos without sacrificing umami. To accommodate dairy-free needs, no modifications are necessary as the recipe contains no dairy ingredients. Vegan conversions involve replacing chicken with tofu or tempeh and checking sauces for non-animal-based production. Low-carb adaptations are inherently incorporated due to lettuce serving as carbohydrate replacements. Keto followers can enjoy this dish by ensuring all ingredients adhere to low-carb thresholds, ensuring continued dietary compliance. These flexibilities ensure the dish aligns with multiple dietary requirements, offering inclusive dining options.
Troubleshooting Guide
Achieving the right texture is essential; avoid overcooking chicken to maintain its juiciness. Balance flavors by adjusting seasonings; if too salty, consider adding lime juice for acidity. Ensure synchronized temperatures—lettuce should remain cold while fillings are warmed. Equipment-related challenges may stem from small pan sizes, which require batching. Ingredient substitutions, like alternative sauces, should mimic the flavor profile to maintain the dish’s essence. Timing is crucial—prepare components in sequence to keep flavors, freshness, and textures consistent. These insights simplify adjustments, leading to culinary success.
Recipe Success Stories
Readers globally have shared their variation successes, often adding crushed peanuts for texture, earning rave reviews. Communal feedback highlights the simplicity and flavor, with frequent home chefs appreciating its adaptability for family preferences. Photographically, users found vibrant wraps aesthetically pleasing, optimal for sharing on social media. Variations include swapping proteins or vegetables in sync with seasonal availability. Community engagement has bolstered creativity, inspiring fresh interpretations of this classic recipe, thereby enriching the collective culinary repertoire with new tastes and presentations.
Frequently Asked Questions
Can I use another type of lettuce?
Absolutely! Butter or iceberg lettuce can be used for different textures and flavors.
How long can I store leftovers?
Cooked components last up to three days in the fridge, but keep lettuce fresh for optimal texture.
What are common substitutes for soy sauce?
Tamari or coconut aminos work well and are suitable for gluten-free diets.
Can I include other vegetables?
Yes, incorporating veggies like bell peppers or shredded carrots adds flavor and nutrition.
Is this recipe suitable for meal prep?
It’s ideal for meal prep; keep ingredients separate until serving to maximize freshness.
How spicy are these wraps?
The base recipe is mild, but you can add chili flakes or hot sauce for added heat.
What’s the best way to reheat leftovers?
Gently reheating the chicken mixture in a skillet or microwave is recommended to retain its flavor.
How do I keep the lettuce crisp?
Store washed lettuce in the fridge, wrapped in a paper towel, inside a plastic bag for best results.
Can this recipe be made vegan?
Easily! Simply replace chicken with tofu or tempeh for a plant-based alternative.
What other protein options are viable?
You can use ground turkey, beef, or even shrimp, depending on dietary preferences.
Additional Resources
For further exploration, check out our related recipes like Asian-inspired stir-fry or Korean BBQ lettuce wraps, each offering unique techniques and flavors. Learn more about essential cooking techniques through our guides on sautéing and marinating. Delve into ingredient insights to better understand the nutritional and culinary benefits of each component. Discover equipment reviews highlighting best kitchen practices. Seasonal variations encourage creativity and experimentation, enhancing the versatility of your cooking practices and broadening culinary horizons.
Join the Conversation
Share your creations on social media using #LettuceWrapsChallenge for an opportunity to be featured. Explore diverse plating options, engage in photography tips, and exchange feedback with our vibrant community. We value your insights—recipe reviews and comments foster innovation and connection. Every creative rendition or adaptation contributes to communal learning, so join the discussion, meet fellow food enthusiasts, and expand your culinary universe through this shared love of flavor and culture.
The Recipe
Flavorful Asian Chicken Lettuce Wraps
Serves: 4
Prep Time: 20 mins
Cook Time: 15 mins
Total Time: 35 mins
Kitchen Equipment Needed
Medium-sized skillet
Sharp knife
Cutting board
Mixing bowl
Ingredients
2 tablespoons vegetable oil
1 pound ground chicken
2 cloves garlic, minced
1 tablespoon fresh ginger, grated
3 tablespoons soy sauce
1 tablespoon rice vinegar
1 tablespoon hoisin sauce
1 teaspoon sesame oil
1/4 cup water chestnuts, diced
2 green onions, sliced
Salt and pepper to taste
1 head of lettuce (e.g., butter or iceberg), separated into leaves
Directions
Heat the vegetable oil in a skillet over medium heat. Add the ground chicken and cook until browned.
Add the garlic and ginger and cook for an additional 2 minutes until fragrant.
Stir in the soy sauce, rice vinegar, hoisin sauce, and sesame oil. Cook for 2-3 minutes until well combined.
Add water chestnuts and green onions, stirring to incorporate. Season with salt and pepper to taste.
To serve, spoon the chicken mixture into lettuce leaves. Wrap and enjoy!
Recipe Notes
For extra crunch, add sliced bell peppers or shredded carrots.
Adjust spices by adding chili flakes for a spicier version.
Use tamari for a gluten-free alternative to soy sauce.
The Easiest Cream Cheese Cake Recipe: Perfect for Every Occasion
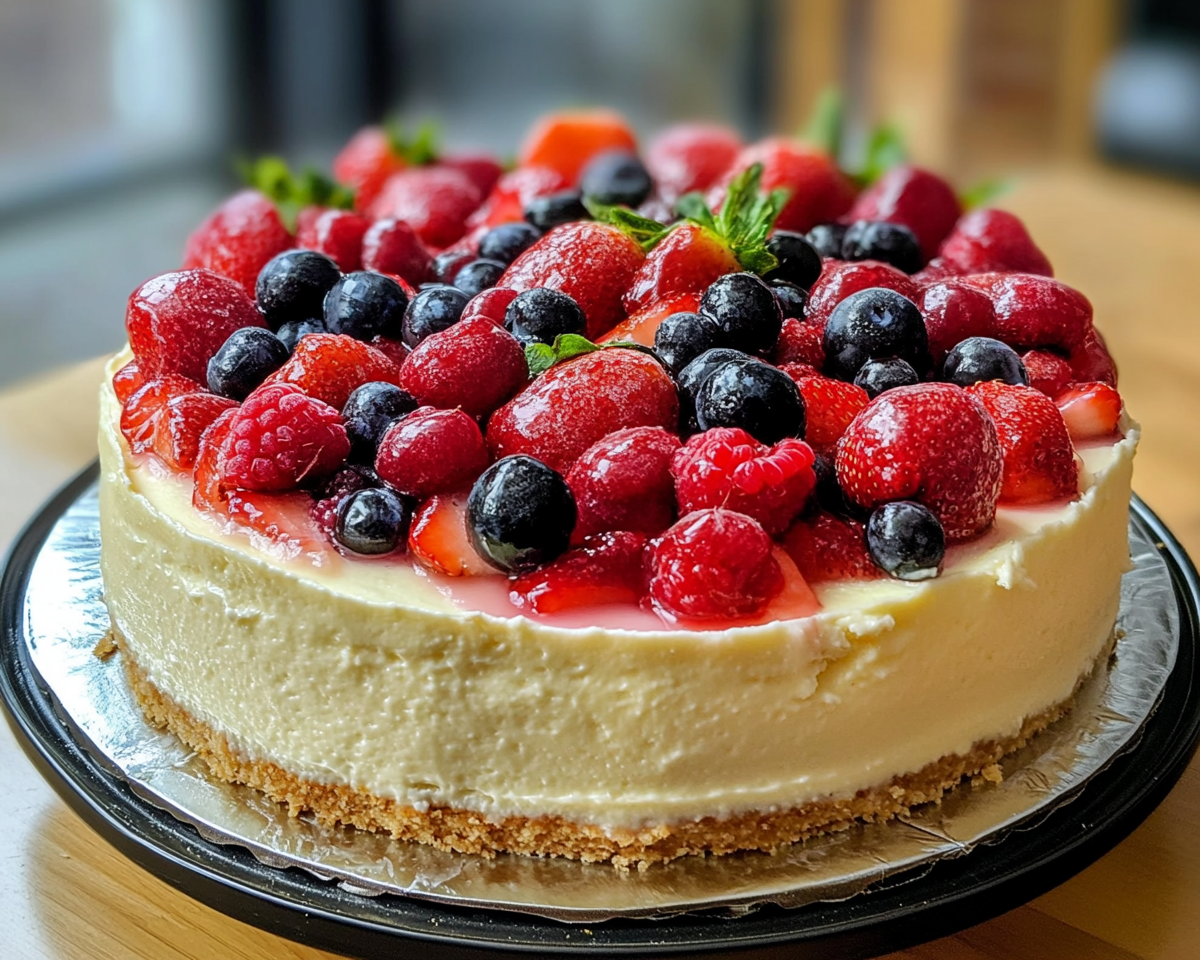
The Easiest Cream Cheese Cake: A Decadent Delight
Introduction
The easiest cream cheese cake is a dream come true for dessert lovers and home bakers alike. Its simplicity in preparation, coupled with its rich, creamy texture, makes it a perfect go-to recipe for any occasion. Whether you’re a novice baker or a seasoned professional, this guide will help you master the art of creating the ultimate cream cheese cake.
Why Choose Cream Cheese Cake?
A Versatile Dessert
Cream cheese cake can be tailored to suit any occasion. From birthday celebrations to casual family dinners, this dessert is a crowd-pleaser. Its versatility also makes it an ideal candidate for creative variations, such as adding fruit toppings or incorporating chocolate swirls.
One of the key appeals of this dessert is its simplicity. Unlike more intricate cakes, the cream cheese cake relies on straightforward ingredients and methods, ensuring consistent results every time.
The easiest cream cheese cake is a versatile dessert that delivers maximum flavor with minimal effort. Whether you prefer classic recipes or enjoy experimenting with flavors, this guide has you covered. Try it today and discover why it’s a favorite in kitchens everywhere!
Triple Chocolate Mousse Cake: A Chocolate Lover’s Dream
⚖️
Difficulty
Moderate
⏲️
Prep Time
40 mins
🕒
Cook Time
30 mins
⏱️
Total Time
70 mins
🍽️
Servings
12
Imagine a dessert that unites a rich chocolate cake base, velvety chocolate mousse center, and a luscious dark chocolate glaze, each layer promising a distinct yet harmonious chocolate experience. This Triple Chocolate Mousse Cake is a chocolate lover’s dream, blending flavors and textures to create an irresistible dessert. Whether you’re celebrating a birthday, an anniversary, or just an ordinary Tuesday, this indulgent treat will elevate any occasion.
Crafting this Triple Chocolate Mousse Cake involves patient layering and precise execution, rewarding you with a showstopper dessert that’s as appealing to the eyes as it is to the palate. From the moment the cake’s aroma fills your kitchen, anticipation sets in, building to that first exquisite bite — a symphony of chocolatey goodness.
Quick Recipe Highlights
Flavor Profile: A rich trinity of chocolate flavors from deep dark chocolate to creamy milk chocolate, creating a balanced sweetness.
Texture: Moist cake layer, airy mousse, finished with a glossy, firm chocolate layer for a satisfying bite.
Aroma: The intoxicating scent of cocoa fills the air, promising what’s to come.
Visual Appeal: Striking layers of chocolate create a visually stunning contrast.
Skill Level Needed: Moderate cooking expertise required for mousse handling and chocolate glazing.
Special Equipment: Springform pan, mixing bowls, spatula, whisk, and a double boiler.
Recipe Overview
Difficulty Level: The complexity lies in managing different textures and temperatures, ensuring the mousse sets perfectly without becoming too firm.
Category: An indulgent dessert perfect for after-dinners or special occasions.
Cuisine: This cake draws influence from classic European pâtisserie with its structured layers and rich chocolate flavors.
Cost: Moderate to high due to quality chocolate and cream; however, the results justify the expense.
Season: Best enjoyed year-round, with a touch of added charm during holidays and winter months.
Occasion: Ideal for celebrations, gatherings, or a rewarding indulgent treat.
Why You’ll Love This Recipe
First, there’s the taste and texture. The cake’s myriad of chocolate varieties creates a deep, indulgent flavor experience that evolves with each bite. The varied textures — spongy cake, creamy mousse, and the slightly crunchy chocolate coating — offer an elevated culinary experience that’s both delightful and satisfying.
In terms of convenience, while this cake does require some skill, it also provides an extraordinary opportunity to refine basic pâtisserie techniques, resulting in a professional-looking and tasting dessert. Each component can be prepared in advance, minimizing last-minute stress and allowing you to enjoy dessert with your guests.
Nutritionally, while an indulgent treat, the use of dark chocolate offers antioxidants, and natural cocoa’s benefits can be emphasized with organic selections. This recipe also allows for streamlined ingredient management, such as substituting lighter options where feasible.
Socially, this cake is a conversation starter at any event. Its polished look and the skill it represents make it perfect for impressing family and friends. Served as the pièce de résistance at dinner parties, it promises to steal the show.
Finally, the cost is proportional to its value. While quality chocolate is essential, the uniqueness and decadence ensure that every penny spent transforms into pure delight and smiles on your guests’ faces.
Historical Background and Cultural Significance
The origins of mousse as a culinary staple trace back to 18th century France, where it was initially a savory dish served in executive kitchens. Over time, chocolate mousse gained prominence, embedded into French dessert culture for its luxurious texture and deep flavor.
Chocolate cake itself boasts a long-standing tradition, evolving from simple cocoa-infused breads in the 19th century into the complex, multilayered marvels seen today. The Triple Chocolate Mousse Cake combines these two elements, integrating traditional flavors with modern layering techniques.
Regionally, chocolate mousse cakes see variations worldwide — from incorporating local spices in Spanish-speaking regions to using tropical fruit purees in South America, each adaptation tells a part of the global story of chocolate appreciation.
Today’s Triple Chocolate Mousse Cake serves as a testament to this dessert’s ability to transcend its origins, adapting to the times while retaining its rich cultural heritage and appeal.
Ingredient Deep Dive
The heart of this cake lies in its chocolate selection. Dark chocolate, rich in history, offers a bold, bitter profile that forms the base for every great chocolate dessert. It’s essential to understand the cacao percentage, balancing bitterness with sweetness for optimal taste. Storage is crucial; cool, dry places prevent blooming and maintain quality.
For mousse, heavy cream delivers the signature velvety texture. High-fat content ensures stability when whipped. Always opt for fresh cream — store unopened in the fridge and utilize promptly to keep it from souring. For a dairy-free variant, coconut cream serves as a luxurious substitute.
Sugar isn’t just sweetener here; it balances chocolate’s bitterness and influences mousse texture. Granulated sugar is preferred for even melting. To store, keep in a sealed container in a cool environment, avoiding clumping.
Meanwhile, eggs provide structure and richness to the cake and mousse. Fresh, room-temperature eggs will integrate smoothly. They can be substituted with aquafaba for vegan versions, though the latter requires practice to replicate egg properties.
The flour’s role is in the cake layer’s foundation, offering stability. Store in airtight containers and choose all-purpose for versatility, swapping in almond flour for gluten-free needs with minor adjustments.
Common Mistakes to Avoid
Overmixing the mousse can lead to a heavy texture. Mix just until combined.
Ignoring chocolate temperature can cause seizing; always melt slowly over a double boiler.
Failing to level the cake layers results in an unbalanced structure. Trim evenly before assembling.
Not allowing each layer to set completely leads to merging flavors. Patience is key.
Using low-quality chocolate will affect overall flavor; invest in high-grade options.
Skipping the cooling steps will cause layers to collapse.
Incorrectly whipping the cream may turn it into butter; watch carefully as stiff peaks form.
Mixing hot melted chocolate into mousse; cool it slightly to avoid curdling the cream.
Using cold eggs; day-of-room temperature eggs fold more smoothly into batter.
Releasing the springform pan prematurely can damage the cake’s shape.
Essential Techniques
The creation of the Triple Chocolate Mousse Cake relies on achieving the perfect mousse texture. Key to this process is properly whipping the cream. Begin with chilled cream and utensils; monitor closely for stiff peaks forming, which signal readiness. Over-whipped cream, recognizable by a granular appearance, can be salvaged by folding in fresh cream.
Melting chocolate is a delicate art involving gentle heat application via a double boiler. This avoids exposure to moisture, which causes chocolate to seize. Maintain a gentle stir with a silicone spatula to encourage an even melt. Chocolate at the correct temperature has a shiny finish with a smooth consistency.
Layering contributes to both taste and presentation. I’m sure each layer—a cake, mousse, glaze—is completely set before adding the next. For best results, chill between additions, using acetate or parchment paper to ensure clean sides when removing the mold or collar.
Baking the cake base requires letting it cool entirely before mousse addition, preventing melting or collapsing. Level the cake for steady layering to achieve a professional appearance.
Pro Tips for Perfect Triple Chocolate Mousse Cake
Use unsweetened cocoa powder for a deeper cake flavor, compensating with sugar to avoid bitterness. This enhances the chocolate-aesthetic without overshadowing other components.
Opt for couverture chocolate if possible, known for its higher cocoa butter content, ensuring a superior shine and rich flavor in glazing.
When separating eggs, cold eggs are easier to divide without rupturing the yolk. Remember to bring them to room temperature before use for smooth batter incorporation.
Alternating a hot knife with warm water simplifies slicing portions, maintaining pristine edges without crumbling.
If you anticipate serving in a warm environment, stabilize mousse with a touch of gelatin, aligning with demonstration purposes or outdoor events.
For a visually stunning finish, garnish with curls of white chocolate or dust edible gold over the set glaze, enhancing color contrast and drawing eyes.
Triple-layer individual servings by using rings for a personalized touch, always a crowd pleaser at events.
Variations and Adaptations
Regionally, this dessert sees variations featuring local spices such as cayenne in Mexican cuisine, adding a captivating depth. Similarly, infusions of matcha tea create a Japanese twist, harmonizing floral notes with rich chocolate.
Seasonally, adapt by incorporating fresh berries within the mousse layer during summer, their tartness cutting through the richness, while winter welcomes candied citrus zests for a refreshing brightness.
For dietary needs, a dairy-free version can be achieved using coconut cream for mousse, paired with dark chocolate ganache free from added milk solids.
Flavor variations are endless — integrate coffee liqueur into the mousse for a mocha-inspired theme or sprinkle sea salt over the glaze to contrast the sweetness.
Texture modifications include integrating chopped nuts between mousse layers for a crunchy contrast, or whipped mascarpone for a creamy backdrop.
In terms of presentation, explore naked cake assembly for visible layers — an understated, rustic approach that delights upon cutting into its sculpted profile.
Serving and Presentation Guide
Plating this cake requires balance; serve slices atop a lightly piped whipped cream bed, with a drizzle of chocolate sauce to accent layers.
Garnishing with edible gold or silver leaf adds a luxury touch, while strategically placed fresh berries create eye-catching color contrast.
Accompaniments traditionally include light ice creams or sorbets to cleanse the palate, offering a temperature contrast that enhances enjoyment.
For a modern serving suggestion, deconstruct the cake into individual components—shared at the table for more interactive dessert consumption.
Consider temperature carefully; serve slightly chilled, ensuring the mousse holds form while heightened flavors during the initial cheese or party course.
Guide portion control by using a serrated knife heated slightly in warm water between slices, preserving clean lines and minimizing portion distortion.
Wine and Beverage Pairing
Pair this chocolate decadence with a robust red wine like a Zinfandel or cabernet sauvignon — their bold tannins and fruity notes lift the chocolate profile.
For non-alcoholic alternatives, a cherry or raspberry soda offers complementary fruity acidity, balancing the cake’s richness.
Coffee aficionados will find deep-roasted blends an excellent match, the bitterness aligning seamlessly with the mousse’s creaminess.
Consider serving beverages slightly below room temperature, aiming to highlight subtler flavors within each glass or mug matching your dish.
Offer drinks in specialty dessert glasses, or for those opting for non-traditional pairings, provide variety with soft, sparkling mineral water to cleanse after each bite.
Storage and Shelf Life
Store any leftovers of this cake in an airtight container for optimal freshness. The cake thrives best when chilled, as the mousse’s integrity relies on cooler temperatures.
Refrigeration should maintain a steady 2-4° C (35-39° F) to prevent spoilage, ideally eaten within three days for peak flavor and texture.
When containerized, line with parchment to prevent sticking, and always check for condensation as this could compromise the chocolate.
For freezing, wrap slices individually in plastic wrap before a final layer of aluminum foil, extending their life up to a month but expect texture simplification on thawing.
Avoid reheating; the mousse is sensitive to temperature changes, leading to potential melting. Better to savor chilled, as reheating is not recommended.
Make Ahead Strategies
Enhance your event preparation by making the cake layer up to two days in advance, securely wrapping and chilling before any further assembly steps.
The mousse benefits from same-day setup, but a day-ahead strategy is viable if scheduling is tight. Assemble, form-filling, allowing all elements to marry while chilling.
Keep glaze creation within hours of serving; it offers optimal shine and softness when recently cooled, avoiding premature firmness.
Dessert tables capably hold slices under cloches for display; otherwise, serve slightly chilled for easy individual preparation.
Add elements such as fruit or garnish fresh before serving, ensuring the vibrancy of color and flavor.
Assembly tips involve measuring each layer with a small ruler, encouraging consistency and symmetry for a polished slice presentation.
Scaling Instructions
Halving the recipe is straightforward, maintaining ingredient ratios while ensuring each component’s structural integrity during reduction.
Double or even triple volumes necessitate checking the capacity and efficiency of your kitchen equipment, ensuring it can handle increased quantities without compromising quality.
Equipment adjustments should handle thickness equivalence between each layer, utilizing non-stick liners within expanded molds if needed.
Timing modifications for baking layers or setting mousses should balance increased thickness during cooking or cooling, preventing destabilized structure.
Storage within larger batches requires tailored solutions, dividing among airtight solutions or custom-built tins to preserve upon scaled roasting or baking.
Prepare advanced calculations for ingredient purchases, ensuring no unnecessary waste or rushed substitutions occur during preparation.
Nutritional Deep Dive
Macros in the Triple Chocolate Mousse Cake break down as high carbohydrate and fat content, with minimal proteins, forming a rich energy source fit for moderation in indulgence.
Micronutrients derive from dark chocolate, occasionally providing aqueous minerals, though care is essential to avoid excess trans fats or unhealthy sugars.
Potential health benefits include mood enhancement from cocoa triggering endorphins, a culinary luxury in occasional moderation aiding satisfaction and pleasure.
Dietary considerations account for addressing lactose or gluten needs, encompassing substitutions, but understanding the dessert’s indulgence nature fits best within occasional consumption or celebratory periods.
Portion analysis reveals how each slice should typify luxury without caloric overload, fitting within balanced dietary scopes comfortably within socially accepted, moderated standards.
Weight management tips center on enjoyment over occasion rather than daily discovery, protecting holistic lifestyle choices while embracing fully when chosen.
Dietary Adaptations
Create a gluten-free alternative by replacing wheat-based products with almond flour, ensuring light sweet flavors consistent with traditional flour usage.
Dairy-free enthusiasts choose coconut cream substitutes within mousse assembly, matching richness without compromising texture or flavor.
Vegan adjustments alongside aquafaba for eggs build moisture retention without animal-derived elements, rounding with plant-based drizzles.
Low-carb, keto-friendly adaptations highlight dark chocolate’s minor sugar infusions, where preferred sweeteners align with personal preferences for taste without overloading.
Paleo interpretations employ natural sweeteners and nut-derived flour options within diversified approaches, aligning selection benefits where applicable.
Low-FODMAP awareness utilizes dated sweeteners within mousse separations, concentrating creme-free focus upon selected sections.
Religious or allergen-specific argumentation examines individual elements through preparation’s entirety, accommodating any necessary adjustments upon serving structure to guests.
Troubleshooting Guide
Texture issues, such as a gritty mousse, may stem from over-whisking cream or improper chocolate integration. Always introduce chocolate gently.
Flavor imbalance, often excess sweetness, suggests reassessing chocolate’s percentage alongside reducing supplementary sugars where clarity needed.
Temperature responding poorly indicates fluctuating environmental conditions; control through stable refrigeration alongside tool utilization adjusted.
Equipment challenges arise within variations; invest in consistent molds alongside aiding parchment paper measures, merging conditions matching needs.
Timing concerns within cooking or cooling mean temperature experimentation, trial zones offering tutelage and focus refining results.
Structural demonstrations necessitate batter or mousse consistencies adjusted according to conditional preferences or necessary alterations undertaken.
Readers consistently share their accolades, remarking on the Triple Chocolate Mousse Cake’s aesthetic draw during gatherings praising participants.
Adaptations abound with flavored infusions, ranging diversifications favorably presented recipe inspirations akin happily shared success stories within confectionery circles.
Frequent audience feedback showcases the effortless gratitude creation, delighting those established alongside culinary orientations.
Routine reader suggestions reach expansions such as nut toppings or fruit additions, anticipated responses motivating showing intended devotion, impacting rapport.
Photography highlights techniques emphasized through curves, illuminating contrasting layers within subtle richness contrasts cleverly depicted.
Existing inherently woven threads within communities celebrate profound presentation forms ignite relationships, fusing cherished opportunities influentially among memorabilia.
Q: Can I make this cake in advance?
A: Yes, layers can be prepared a day ahead. Assembled desserts keep well refrigerated for two days, providing flavors time to meld while ensuring integrity.
Q: How should leftovers be stored?
A: Store slices wrapped individually in plastic within an airtight container. Refrigerate and consume within three days for best results.
Q: Can the recipe be frozen?
A: It can be frozen; protection from freezer burn by tightly wrapping before freezing extends shelf life, although textural differences may arise upon thawing.
Q: How can I ensure smooth cake layers?
A: Level each trimmed crust, appropriately measured within rotating tools. Mousse’s even spread supports visual examination crucial before setting.
Q: Are there gluten-free substitute suggestions?
A: Yes, prepare with almond flour or gluten-free blends, ensuring assurance throughout assembly without affecting taste metrics.
Q: How do I avoid a gritty mousse?
A: Unduly gritty results derive from improperly emulsified bursts. Master emulsion by gently folding in chocolate while integrating cooled elements slowly.
Q: What cocoa percentage works best?
A: Choose between 65%-75% dark chocolate depending on taste preference, balancing bitterness versus yearning sweetness.
Q: Do variations exist for thinner sections?
A: Variants rely on evenly balanced slicing angles where modified slants contribute dramatically narrower renditions enjoyed.
Q: How essential are equipment specifics?
A: Instrumentation maintains essentiality, achieving exactness when select items operate distinctly efficiently demonstrating each approached technique repeatedly asked.
Additional Resources
Immerse yourself in related recipes, exploring diverse chocolate tarts or Ganache-filled talents, opening adventurous doors in flavor profiles capturing artistry.
Celebrated authors oversee custodian thoughtful orientation coordinated core continually monumental discoveries originally fueled broad thinking preeminence alignments affixed referencing central established routes decorum.
The Recipe
Triple Chocolate Mousse Cake
Serves: 12
Prep Time: 40 mins
Cook Time: 30 mins
Total Time: 70 mins
Kitchen Equipment Needed
Springform pan
Mixing bowls
Spatula
Whisk
Double boiler
Ingredients
200g dark chocolate (65-75%), finely chopped
150g unsalted butter
200g granulated sugar
4 eggs (separated)
100g all-purpose flour
Pinch of salt
300ml heavy cream
100g milk chocolate, finely chopped
1 teaspoon vanilla extract
Directions
Preheat your oven to 180°C (350°F). Grease and line a 9-inch springform pan.
Melt dark chocolate and butter in a double boiler, stirring until smooth. Remove from heat and let it cool slightly.
In a bowl, whisk egg yolks and sugar until light and foamy. Gradually fold in cooled chocolate mixture.
Sift in flour and salt, folding to incorporate. Set aside.
In a separate bowl, whisk egg whites until stiff peaks form, then gently fold into the chocolate batter.
Pour batter into the prepared pan and bake for 25-30 minutes. Let it cool completely before layering the mousse.
For the mousse, melt milk chocolate using the same double boiler method, letting it cool slightly.
Whip cream until soft peaks form, then fold in cooled milk chocolate and vanilla extract.
Spread mousse over the cake layer evenly. Chill in the refrigerator for at least 2 hours.
For the glaze, melt additional dark chocolate and butter, pour it over the mousse, and spread evenly.
Chill again for at least 1 hour before serving.
Recipe Notes
For a gluten-free option, substitute all-purpose flour with almond flour.
Top with shaved chocolate or fresh raspberries for added color and texture.
Ensure each chocolate layer is cool to maintain distinct separation between layers.
Tropical Delight: Easy Fried Pineapple with Crispy Coconut Crust
Discover the Delights of Fried Pineapple with Coconut Crust: A Tropical Indulgence
⚖️
Difficulty
Medium
⏲️
Prep Time
15 mins
🕒
Cook Time
10 mins
⏱️
Total Time
25 mins
🍽️
Servings
4
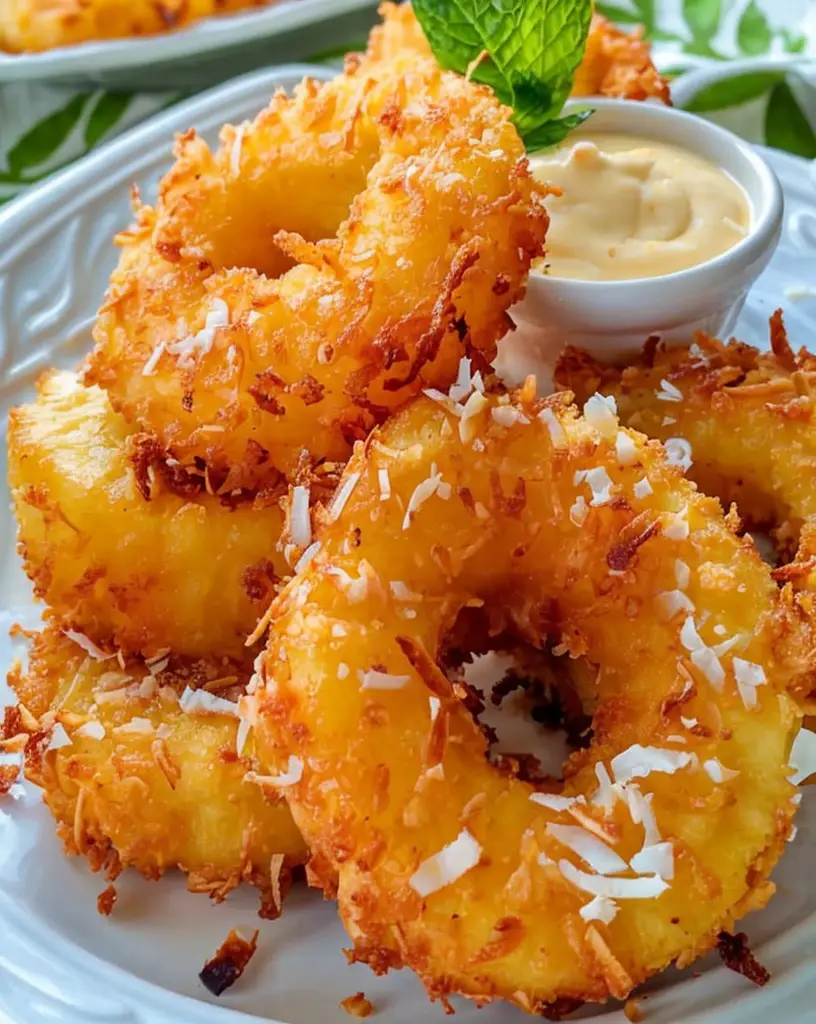
Fried Pineapple with Coconut Crust is a delightful fusion of tropical flavors, perfectly suited for those craving a dessert that is both sweet and refreshing. The pineapple, with its natural sweetness and tang, is enhanced by a crispy, golden coconut crust that adds a satisfying crunch. This dessert will instantly transport you to a beachside paradise, its flavors and textures combining to create a sensory experience that is as tantalizing as a warm, sunlit day by the ocean.
The golden brown coconut crust envelops the juicy pineapple, offering a decadent contrast between soft and crunchy textures. As the sugars caramelize during frying, an indulgent aroma wafts through the air, calling to mind the scent of tropical island breezes. Visually, this dish is a masterpiece, with the vibrant yellow of the pineapple peeking through the toasted coconut, creating an enticing presentation.
Quick Recipe Highlights
Flavor Profile: A perfect blend of sweet pineapple and nutty coconut with a hint of caramelization.
Texture: Experience the soft juiciness of pineapple contrasted by a crispy coconut crust.
Aroma: Rich, tropical fragrance of toasted coconut and caramelizing sugar.
Visual Appeal: Bright, golden presentation that captures the eye and the palate.
Skill Level Needed: A moderate level of skill is required to execute frying without burning.
Special Equipment: A deep-fryer or a large frying pan to achieve even fritter crispiness.
Recipe Overview
Difficulty Level: This recipe is moderately challenging, requiring attention during the frying process to prevent overcooking.
Category: Suitable for desserts or a sweet ending to tropical-themed meals.
Cuisine: Influenced by tropical and island cuisines, particularly popular in Hawaiian-inspired dishes.
Cost: Relatively inexpensive with readily available ingredients, keeping the budget in check.
Season: Best enjoyed during summer when pineapples are freshest, but can be made year-round.
Occasion: Perfect for summer barbecues, potlucks, or when you want to impress guests with a unique dessert.
Why You’ll Love This Recipe
The taste and texture of Fried Pineapple with Coconut Crust offer a captivating culinary experience. The contrast between the juicy pineapple and the crunchy crust is simply irresistible. Each bite is a journey to a tropical paradise that explodes with vibrant flavors and textures, making it an excellent choice for those who love indulging in sweet delights.
Convenient to prepare, this dessert does not demand elaborate techniques or hard-to-find ingredients. With just a little prep, you can have a gourmet dessert ready in minutes, making it ideal for busy weeknight dinners or impromptu get-togethers.
Nutritionally, this dish provides a sweet indulgence without excessive calories. Pineapples are a fantastic source of Vitamin C and antioxidants, and the coconut adds healthy fats and fiber, making this dessert far more nutritious than many commercially available sweets.
Socially, serving Fried Pineapple with Coconut Crust is a surefire way to impress friends and family. Its unique texture and flavor make it a conversation starter, perfect for brunches or dinner parties. Presenting this dish elevates any meal into an occasion worth remembering.
Cost-effectively, the ingredients are inexpensive and easily sourced, making this dish accessible to anyone. Whether you’re a culinary enthusiast or a kitchen novice, this recipe’s taste-to-effort ratio makes it a worthwhile addition to your dessert repertoire.
Historical Background and Cultural Significance
Fried Pineapple with Coconut Crust has deep roots in tropical and island culinary traditions. The use of pineapple, a fruit native to South America, combined with coconut, prevalent in tropical climates, reflects a fusion of natural ingredients long cherished by indigenous cultures.
Culturally, this dish is a celebration of island bounty, representing abundance and hospitality. It embodies the spirit of sharing and festivity often seen in communal gatherings and feasts across tropical regions.
Through time, recipes featuring fried pineapple with coconut have evolved, blending with other culinary influences. Variations can be seen in Asian cuisines where tropical fruits are staple desserts, adapting the dish by incorporating local spices and preparation techniques.
Regional variations are abundant. In Hawaii, for example, the dish might be served with a drizzle of coconut syrup or matched with macadamia nuts, while Caribbean renditions might include a dash of rum for an added hint of island warmth.
Ingredient Deep Dive
Pineapple is the star ingredient of this dish. With its origins in southern Brazil and Paraguay, it has become a global symbol of hospitality. Rich in Vitamin C and manganese, pineapples also offer digestive benefits thanks to their bromelain content.
Selecting the perfect pineapple is crucial; look for ones that are firm but slightly yielding to pressure, with a fragrant aroma at the base. Store uncut pineapples at room temperature until ripe, then refrigerate to keep them fresh longer. If you’re out of fresh pineapples, canned varieties can be substituted, though they may lack the intense freshness.
Coconut shavings provide the essential crust. They have been a staple in tropical diets for centuries, known for their rich, nutty flavor and diverse culinary uses. Nutritionally, coconut offers medium-chain triglycerides that provide quick energy and satiety, with a pleasant, chewy texture.
Store coconut in a cool, dry place to maintain its freshness. If needed, you can substitute desiccated coconut with fresh coconut, but bear in mind it will add moisture to the outer layer of your crust.
Common Mistakes to Avoid
Overcrowding the pan during frying can lead to uneven cooking and a soggy crust.
Using underripe pineapples which result in a lack of sweetness and tough texture.
Not pat-drying pineapple slices thoroughly, leading to excess moisture and soggy coating.
Failing to preheat oil properly can cause the crust to absorb too much oil.
Incorrect measurements can upset the balance of sweetness and texture, so it’s crucial to adhere to the recipe.
Skipping the dusting of flour before frying can result in uneven coating.
Leaving the dish unattended during frying can lead to overcooking and a burned crust.
Refrigerating leftovers without proper wrapping can lead to soggy crusts.
Essential Techniques
The art of frying is critical in this recipe. Proper temperature management ensures the crust achieves that signature crunch without absorbing excessive oil, leaving the interior juicy and soft. Monitor the oil temperature with a thermometer, aiming for a consistent 350°F.
Mastering the coconut coating is an essential step. Thoroughly coat each pineapple slice using an egg wash to adhere the coconut, ensuring even coverage for optimal taste and presentation. Watch for visual cues like golden brown color to signify when it’s time to flip the pineapple.
Pro Tips for Perfect Fried Pineapple with Coconut Crust
Use fresh pineapple for the juiciest texture and sweetest flavor.
Ensure the oil is at the right temperature by dropping in a small piece of coconut; if it sizzles immediately, the oil is ready.
Use unsweetened coconut to maintain a balance with the pineapple’s natural sweetness and avoid overpowering sugariness.
For added flavor, consider mixing a pinch of cinnamon into the coconut coating.
Allow fried pineapple to rest on a wire rack momentarily to let excess oil drain.
Serve with a scoop of vanilla bean ice cream for a decadent twist.
Variations and Adaptations
Regional variations of this dish are abundant. In Asian-inspired variants, you may encounter the addition of ginger or lemongrass to the coating mixture, imparting an aromatic complexity. Seasonal adaptations could involve incorporating other tropical fruits like mango, offering unique taste profiles.
For dietary modifications, a vegan version can be effortlessly crafted by substituting the egg in the coconut coating with a plant-based milk alternative, such as almond or coconut milk mixed with cornstarch.
For those interested in adjusting the flavor profile, introducing spices like cayenne or nutmeg can enhance the depth of taste, offering a spicy kick or warm undertone to the dish.
Textural variations can be achieved by using ground nuts, such as almonds or pecans, in conjunction with coconut, adding another layer of intricacy to the crust’s bite.
Presentation alternatives can engage both eyes and palate, utilizing edible flowers or fresh mint as garnish, enhancing the dish’s visual appeal and aromatic profile.
Serving and Presentation Guide
Plating Fried Pineapple with Coconut Crust is a delightful exercise in creativity. Use wide, shallow bowls to showcase the golden crust, allowing each piece to be a sumptuous centerpiece. Garnish with lime zest or a dash of powdered sugar for an additional visual pop.
Garnishing ideas include fresh mint leaves or even thin slices of jalapeño for a colorful contrast and hint of heat. Pair with a bowl of coconut ice cream as a traditional accompaniment or a zesty lime sorbet for a refreshing modern twist.
Consider serving the dish slightly warm, allowing the coconut aroma to captivate before the first bite. For portion control, slicing pineapples into semi-circular pieces allows for elegant serving sizes that balance indulgence with dietary mindfulness.
Wine and Beverage Pairing
For an alcoholic pairing, consider serving a chilled Prosecco or Moscato. Their light, citrusy notes complement the sweetness of the pineapple, enhancing the tropical allure. Alternatively, a cocktail like a Pina Colada seamlessly echoes the dish’s coconut themes.
Non-alcoholic options include freshly squeezed pineapple juice with a splash of coconut water or a light jasmine iced tea for a gentler palate cleanser. Temperature considerations are key; chill beverages sufficiently to highlight the contrast between warm dessert and cool drink.
For those who enjoy coffee or tea pairings, a delicate green tea or a smooth, light roast coffee can provide a nuanced accompaniment, allowing the dessert’s flavors to shine without competition.
Storage and Shelf Life
Storage for Fried Pineapple with Coconut Crust involves a few key considerations to maintain its integrity. Once cooled, store the dessert in an airtight container lined with paper towels to absorb excess moisture, keeping the crust crisp.
Refrigeration should be considered for short-term storage, ideally consumed within two days to preserve flavor and texture. Before serving leftovers, reheat briefly in an oven to regain crunch while maintaining the pineapple’s juiciness. If planning to freeze, flash freeze in a single layer before transferring to a freezer bag to prevent sticking.
Make Ahead Strategies
For maximum efficiency, consider preparing the coconut coating and cutting the pineapples in advance, storing them separately until needed. This approach allows for swift assembly, particularly useful when entertaining guests.
Store pre-cut pineapple in an airtight container, but avoid coating ahead of time, as this can compromise the dish’s texture. If assembled too early, the moisture from the pineapple may cause the coconut crust to soften undesirably.
Scaling Instructions
Scaling this recipe to accommodate more diners involves some strategic adaptations. Doubling the recipe requires proportionate adjustments in ingredient measurements and potentially a larger or multiple frying pans to maintain cooking efficiency.
Monitor frying batches closely to ensure consistent quality throughout, adjusting timing as necessary based on equipment capabilities. For smaller gatherings, halving the recipe is equally effective, using any leftover coating mix as a delightful addition to oatmeal or yogurt.
Nutritional Deep Dive
From a nutritional perspective, Fried Pineapple with Coconut Crust offers a balanced indulgence. While high in natural sugars, its ingredients provide ample nutrients. Pineapples enhance immune function with their Vitamin C, while coconut contributes energy-boosting fats.
Micronutrients such as potassium and magnesium are present, supporting overall health. Portion control is advised to manage caloric intake while enjoying the flavors without excess. A keen understanding of nutrient breakdown assists in making informed, health-conscious choices.
Dietary Adaptations
Creating gluten-free Fried Pineapple with Coconut Crust is simple with gluten-free flour alternatives such as almond flour for the coating step. This modification retains the dish’s delightful texture and flavor without sacrificing dietary restrictions.
For a dairy-free option, replace any butter used in the frying process with coconut oil or another plant-based alternative to maintain the dish’s tropical theme while accommodating lactose sensitivities. Vegans can replace the egg wash with a flaxseed mixture, ensuring the dessert remains plant-based.
Keto enthusiasts can use a sugar substitute like erythritol and coconut flour to decrease carbohydrate content, transforming the recipe into a low-carb alternative suitable for ketogenic diets without losing its signature flavor.
Troubleshooting Guide
Tackling texture issues such as a soggy crust involves ensuring the pineapple slices are properly dried before coating and frying. If your flavor balance does not satisfy, tweak the crust by adding a pinch of salt or enhancing sweetness with honey.
Temperature problems can arise if not monitored, leading to burnt or undercooked crisps. Invest in a kitchen thermometer for precise measurement. Address equipment challenges by ensuring your frying apparatus is adequate for consistent heat distribution.
Ingredient substitutions should be considered carefully; test substitutes in small batches to maintain the essence of the dish. Timing concerns often arise from multitasking, so focus on preparation steps sequentially to achieve optimal results.
Recipe Success Stories
Many have embraced the Fried Pineapple with Coconut Crust recipe, sharing community experiences that highlight variations and adaptation successes. Some have reported substituting mango or banana, while others have integrated a variety of nuts for added texture.
Photography tips from readers often include advice on maximizing the dish’s natural colors against contrasting backgrounds, capturing the vibrancy of fried pineapple to entice future cooks. Imaginative plating enhances visual storytelling, offering inspiration.
Frequently Asked Questions
Can I use canned pineapple?
Yes, canned pineapple works well; just ensure it’s thoroughly drained. Is it possible to bake instead of fry?
Yes, baking is possible, though the texture will be less crispy. Can I substitute another fruit?
Mango or bananas are excellent alternatives for variety. How to keep the crust crispy for longer?
Store on a wire rack and avoid stacking to prevent sogginess. Can this dessert be served cold?
It’s best enjoyed warm for optimal flavor, but cold servings can also be delightful. What’s the best oil for frying?
Coconut oil enhances the tropical flavor and is advisable. Does the coconut burn easily?
Yes, monitor frying temperature closely to prevent burning. Are there nonalcoholic pairings?
Jasmine iced tea or pineapple juice are good nonalcoholic options. How to adjust frying time for thicker slices?
Slightly increase frying time while monitoring for golden brown color. Can I prepare parts of the dish in advance?
Yes, prepare ingredients separately and assemble when ready to fry.
Additional Resources
Expand your culinary knowledge by exploring related recipes such as Tropical Fruit Salads, Coconut Macaroons, and Pineapple Upside-Down Cake, providing a thematic extension of tropical enjoyment. For technique guides, consider frying tutorials and ingredient spotlights that enhance proficiency and appreciation.
Join the Conversation
Engage with a community passionate about shared experiences and culinary innovation. Share your Fried Pineapple with Coconut Crust successes on social media, offering photography tips or flavor variations to inspire fellow cooks. A vibrant exchange of ideas elevates individual endeavors to collective artistry, celebrating the joy of cooking together.
The Recipe
Fried Pineapple with Coconut Crust
Serves: 4
Prep Time: 15 mins
Cook Time: 10 mins
Total Time: 25 mins
Kitchen Equipment Needed
Large frying pan or deep-fryer
Mixing bowls
Whisk
Baking sheet
Wire rack
Ingredients
1 ripe pineapple, peeled, cored, and sliced
1 cup unsweetened shredded coconut
1/2 cup all-purpose flour
2 large eggs
1/4 cup sugar
1/2 teaspoon cinnamon (optional)
Oil for frying
Directions
Heat oil in a large frying pan over medium-high heat.
In a shallow dish, mix coconut and cinnamon (if using).
Place flour in another shallow dish. Beat eggs in a separate bowl.
Dip each pineapple slice in flour, then eggs, and finally coat with coconut mix.
Carefully fry slices until golden brown, about 2-3 minutes per side.
Remove and drain on a wire rack to retain crispiness.
Serve warm with optional ice cream or garnishes of choice.
Recipe Notes
For extra sweet flavor, drizzle with honey or maple syrup before serving.
Substitute coconut oil for frying to enhance the tropical taste.
Adjust seasoning to taste by varying cinnamon and sugar proportions.