Mini Pineapple Condensed Coconut Milk Cheesecakes: A Tropical Delight
Indulge in the tropical flavors with our delectable Mini Pineapple Condensed Coconut Milk Cheesecakes. Perfectly sized for individual enjoyment, these cheesecakes capture the aromatic sweetness of fresh pineapple, harmonizing beautifully with the rich undertones of condensed coconut milk. The creamy filling sits atop a perfectly crunchy crust, adding a delightful texture to each bite. Ideal for parties, picnics, or an exotic dessert after dinner, these mini cheesecakes promise to transport your taste buds to a tropical paradise.
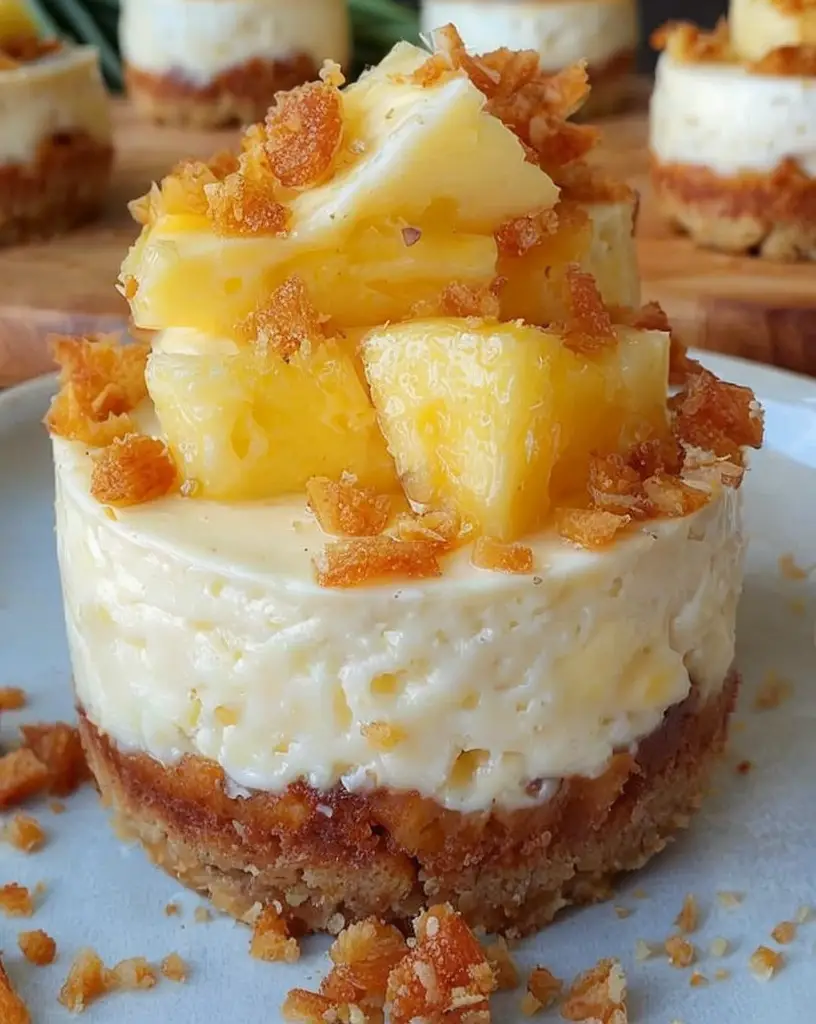
The allure of Mini Pineapple Condensed Coconut Milk Cheesecakes lies not only in their taste but also in their eye-catching presentation. Each mini cheesecake boasts a golden hue, speckled with vibrant pieces of pineapple, topping a delicate crust that complements the luscious filling. The integration of creamy coconut milk introduces a subtle nutty aroma that is further elevated by the sweetness of pineapple, creating an irresistible dessert perfect for any occasion. Whether you’re hosting a brunch or looking for a sweet escape, these mini delights are sure to captivate your senses.
Quick Recipe Highlights
- Flavor Profile: A tropical medley of sweet pineapple and nutty coconut evokes a lush, exotic island vibe in every bite.
- Texture: The smooth, creamy filling contrasts beautifully with the crisp, buttery crust, creating a delightful experience for the senses.
- Aroma: Notes of fresh pineapple and caramelized coconut create an irresistible aromatic allure that enhances the cheesecakes’ delicate flavors.
- Visual Appeal: These charming mini cheesecakes feature a gleaming golden finish, dotted with luscious pineapple chunks, making them a delightful centerpiece dessert.
- Skill Level Needed: Requires basic baking knowledge, such as cheesecakesetting and crust preparation, suitable for home bakers with medium experience.
- Special Equipment: A muffin tin, food processor, and mixer are essential for the ideal crust creation and achieving a smooth, creamy cheesecake texture.
Recipe Overview
- Difficulty Level: This recipe is relatively straightforward with basic baking techniques, yet attention to detail and careful handling are needed for the ideal texture.
- Category: Perfectly suited for desserts and sweet treats, these cheesecakes make an indulgent addition to any dessert spread.
- Cuisine: Inspired by tropical Caribbean flavors, this dessert brings together the exotic taste of pineapple and coconut in a classic cheesecake form.
- Cost: Ingredients are generally accessible and affordable, with an approximate cost of $15–$20 for a batch of 12 cheesecakes.
- Season: Best enjoyed during warmer months when fresh pineapple is in season, though canned options provide flexibility year-round.
- Occasion: Ideal for special gatherings like BBQs, summer parties, or simply as a delightful treat for pineapple and coconut lovers.
Why You’ll Love This Recipe
The luxurious texture and the perfect blend of sweet pineapple and rich coconut make these Mini Cheesecakes quite appealing. The creamy filling contrasts beautifully with the crispy crust, creating a symphony of textures that linger on the palate. Each bite offers an exotic yet comforting taste experience that combines beloved classic flavors in a modern way.
Conveniently prepared in individual portions, these cheesecakes are a breeze to serve and enjoy without the fuss of slicing and plating. Perfectly portioned for on-the-go treats or as crowd-pleasing desserts at home gatherings, their easy preparation and brief bake time allow for seamless inclusion in any meal plan.
In terms of nutrition, these cheesecakes strike a balance between indulgence and well-being. The inclusion of coconut milk contributes beneficial fats while pineapple provides a source of vitamin C and antioxidants. Modifications can cater to various dietary preferences, maintaining deliciousness without compromising dietary goals.
Social aspects enhance their allure; these mini delights are showstoppers at any party. Their individual sizes make them excellent for sharing, evoking camaraderie and enjoyment among guests. Perfectly portable, they are suited for picnics, barbecues, or intimate luncheons.
Lastly, the cost-effectiveness of this dessert recipe cannot be understated. Using common ingredients with pantry staples, it’s easy on the pocket while offering gourmet-level taste. Availability of canned ingredients ensures year-round access, making them an accessible baking option, ready to impress for any occasion.
Historical Background and Cultural Significance
Cheesecakes have a rich history dating back to ancient Greece, where they were served to athletes as a source of energy. Over the centuries, cheesecakes have evolved, taking on regional influences from around the world. The introduction of cream cheese in America in the 19th century reshaped their popularity and texture, making them a beloved dessert globally.
The fusion of tropical elements like pineapple and coconut reflects the cultural exchanges of the Caribbean region. Pineapple, a symbol of hospitality, aligns perfectly with the communal essence of Caribbean culinary traditions. The use of coconut, both as a flavor and economic staple in tropical agriculture, represents sustainability and resourcefulness within these communities.
Throughout time, the evolution of mini cheesecakes complements modern lifestyles, offering a twist on a traditional favorite. These adaptations highlight innovation, allowing bakers to create personal portions to satisfy individual cravings. The embracing of regional ingredients showcases the adaptability and richness of cheesecake-making traditions.
Variations across regions emphasize cultural heritage, where each version of cheesecake reflects the regional palate. In tropical climates, the natural pairing with pineapple and coconut becomes an iconic combination. These local innovations bring cultural vibrancy to classic recipes, highlighting the multicultural identity within culinary arts.
Ingredient Deep Dive
Fresh Pineapple is crucial for tropical fragrance and flavor. Dating back to the extravagant feasts of past European courts, its cultural significance grew tied to hospitality and luxury. Nutritionally, it provides essential vitamins like vitamin C and manganese, which support immunity and metabolism. When selecting, choose pineapples with bright, fresh-green leaves and a tropical scent at the base. Store at room temperature before cutting or refrigerate cut pieces in airtight containers. Canned pineapple can substitute but lacks the fresh aroma intensity.
Condensed Coconut Milk adds creamy richness, deriving from coconut’s widespread use in tropical cuisines. Its nutritional profile is rich in lauric acid and medium-chain triglycerides, often linked to improved metabolism and heart health. Opt for creamy, well-mixed varieties with minimal ingredients. Store unopened cans in cool areas, and refrigerate leftovers in airtight containers once opened. For substitutions, regular condensed milk can be used, although it sacrifices some of the distinctive nutty notes.
Common Mistakes to Avoid
- Overmixing the batter can lead to a dense cheesecake. Mix only until ingredients are combined smoothly.
- Using low-fat substitutes in the batter should be avoided to maintain the custardy consistency.
- Failing to scrape down bowl sides during mixing can cause unevenness in texture and flavor.
- Undercooking or overbaking can affect the creamy quality. Bake until edges set but centers jog slightly.
- Skipping the water bath often results in cracks due to uneven baking temperatures.
- Not chilling the cheesecakes adequately before serving compromises their firm texture.
- Ignoring the crust can lead to a soggy base; pre-bake it to retain its structure.
- Rushing through cooling steps invites cracking; allow slow cooling for texture preservation.
Essential Techniques
A crucial technique is the water bath, which ensures even baking and prevents cracking with its-moisture protective environment. Mastering the water bath involves wrapping the pan securely in foil and placing it within a larger pan with hot water, avoiding water sauteeing direct batter contact. This provides a gradual heat exposure crucial for cheesecakes’ delicate custard texture. Visual success cues include firm set edges with a gentle jiggle at the center without visible cracks.
Pro Tips for Perfect Mini Cheesecakes
For best results, ensure all ingredients, particularly eggs and cream cheese, are at room temperature to blend smoothly into an even batter. Chilling not only firms up the final texture but also heightens flavor melding, making an overnight chill preferred. Limiting the oven door opening during baking prevents temperature fluctuations leading to possible cracks. For a crunchier crust, consider adding finely crushed nuts or grated coconut for additional texture layers. To enhance pineapple flavor, consider lightly caramelizing fresh pieces before mixing them into the batter. If desired, fresh lime zest can be added to the batter for extra citrusy zing, complementing pineapple notes.
Variations and Adaptations
Regional variations include Mexican variations that might integrate spices like cinnamon and cardamom, contributing a comforting warmth. Seasonally, incorporate mango chunks in summers or cranberries in winter for a festive twist. For dietary modifications, plant-based cream cheese and non-dairy yogurt can transform this into a vegan-friendly treat without sacrificing creaminess. Experiment with flavor by introducing passionfruit or guava concentrates for a tropical flavor elevation.
Serving and Presentation Guide
Serve with a simple dusting of powdered sugar or decorative slices of fresh pineapple to emphasize their tropical nature. Placing a dollop of freshly whipped coconut cream on top can add height and visual appeal. Traditional accompaniments may include sweet coconut shavings, while mango puree can be drizzled for a pop of color and tantalizing tropical flavor depth. Ensure these cheesecakes are refrigerated and served cold for optimum enjoyment.
Wine and Beverage Pairing
Perfect wine pairings include a chilled late-harvest Riesling or Moscato, which denser sweetness complements the tropical notes beautifully. For non-alcoholic alternatives, consider a zesty ginger ale or tropical fruit punch that mirrors pineapple’s bright qualities. Alternatively, fresh jasmine tea offsets the coconut and pineapple richness, delivering a refreshing balance. Serve both wines and beverages thoroughly chilled for an optimal pairing experience.
Storage and Shelf Life
Refrigerate in airtight containers, maintaining freshness for up to five days. Freezing is also an option, wrapping cheesecakes individually to protect against drying, suitable for up to two months. When thawing, leave them in the refrigerator overnight to preserve their delicate textures. Always monitor for signs like off scents or textures indicating spoilage. Reheating isn’t recommended as texture alterations usually result.
Make Ahead Strategies
You can make the cheesecakes ahead, as they benefit from chilling and firming overnight. Complete the crust and batter steps separately, storing them until ready to assemble before baking. For larger batches, divide preparation over a two-day period, completing baking and chilling a day in advance. Maintain a clean presentation by assembling serving elements like whipped toppings and citrus zest shortly before serving, ensuring freshness.
Scaling Instructions
Halving the recipe is straightforward, though be aware of reduced baking times due to smaller volumes. For doubling, consider using multiple baking sheets and rotating halfway for even cooking. Adjust equipment such as additional muffin tins to accommodate increased quantities. Timing may require slight adjustments; always check doneness based on visual cues over prescribed times. Ensure any leftovers are stored with appropriate care to maintain the quality.
Nutritional Deep Dive
These mini cheesecakes contain balanced macronutrients across fats and proteins due to coconut milk and cream cheese. Microanalysis highlights vitamin C from pineapple and medium-chain triglycerides promoting heart health from coconut milk. The portion moderation maintains palatability within varied diet structures; enjoying them within a balanced dessert rotation aligns with general health guidelines.
Dietary Adaptations
To accommodate gluten-free needs, utilize almond flour or gluten-free graham crackers for a wonderful crust without gluten. For dairy-free versions, opt for plant-based cream cheese alternatives and coconut oil in place of butter. Vegan adaptions might include substitutes for eggs using flaxseed meal or commercial egg replacers and plant-based yogurt. These stacks effortlessly into existing frameworks of Paleo or keto diets with minor ingredient interventions respecting each dietary guideline.
Troubleshooting Guide
Texture issues like curdling might arise from extreme heat; ensure slow mixing and use of room temperature ingredients. Flavor can deviate if the pineapple isn’t ripe, leading to less natural sweetness; balance acidity with additional sweeteners if needed. Temperature fluctuations during baking can influence evenness; monitor oven stability with calibrated thermometers. If lacking specific equipment, consistent improvisation with homemade cookie cutting devices may suffice.
Recipe Success Stories
Community feedback praises the versatility of this recipe, with adaptations such as passionfruit infusions adding delightful tang. Readers commend the ease of ingredient sourcing, offering customization steps for individual preferences. Photography suggestions include garnishing with edible flowers for a captivating shot, enhancing texture contrast visually. Variations shared include spiced versions imparting aromatic depth, inviting further experimentation exploration within culinary creativity.
Frequently Asked Questions
How do I prevent cheesecakes from cracking? Use a water bath and avoid rapid temperature changes, contributing to smooth, crack-free surfaces.
How long should I chill the cheesecakes? For best results, chill for at least 4 hours, or overnight, to allow complete setting, enhancing flavor integration.
Can I freeze these cheesecakes? Absolutely, when wrapped securely, these freeze well and provide convenient ready-made desserts for future enjoyment.
What if I don’t have a muffin pan? Adaptations with silicone muffin liners on trays or mini cheesecake pans can offer stability for structure without binders.
Is fresh or canned coconut milk better? Indulgence depends largely on texture; use what’s accessible, prioritizing high-quality selections to improve outcomes.
Are there low-sugar options? Unrefined sweeteners or sugar substitutes can modulate sweetness levels aligned with dietary objectives.
What’s the best coconut milk brand? Choose creamy, well-rated brands with minimal additives for smooth integration, ensuring even texture distribution.
Can I add other fruits? Yes, fruits like mango or passionfruit complement these flavors well, enhancing theme continuity with vibrant alternatives.
Is a springform pan better? While traditional, the muffin tins maintain neat individual servings, focusing more on raw volumes impacts texture.
Additional Resources
Explore related recipes like Tropical Tartlets or Coconut Macaroons for further culinary adventures in similar genres. Technique guides offer advice on cheesecake water baths, ensuring smooth baking progress. Ingredient information dive includes ripening pineapple tips, syncing optimal timing with peak conditions. Equipment recommendations extend selectively as quality muffin tins or household multipurpose processors adaptable across tasks. Seasonal variations include winter spiciness with chai blends, promoting comfort during cooler months through enticing surprise enhancements.
Join the Conversation
Engage with fellow bakers by sharing your outcomes on social media using the hashtag #TropicalCheesecakeCreations. Capture the golden finishes of your mini cheesecakes through natural lighting for mouthwatering imagery. Share empowering hints or recipe reviews in the comment section to inspire tweaks with the community. Get creative with flavor profiles and photograph your unique interpretations, inviting audiences to explore into new taste territories enriched with joy.
The Recipe
Mini Pineapple Condensed Coconut Milk Cheesecakes
Serves: 12
Prep Time: 25 mins
Cook Time: 35 mins
Total Time: 60 mins
Kitchen Equipment Needed
- Muffin Tin
- Food Processor
- Electric Mixer
- Mixing Bowls
- Spoon/Spatula
- Aluminum Foil
Ingredients
- 1 cup graham cracker crumbs
- 3 tbsp melted butter
- 1 1/2 cups cream cheese, softened
- 1/2 cup condensed coconut milk
- 1/2 cup fresh pineapple, finely chopped
- 1/4 cup sugar
- 2 large eggs
- 1 tsp vanilla extract
- Pinch of salt
Directions
- Preheat the oven to 325°F (163°C). Line a muffin tin with paper liners.
- In a bowl, mix graham cracker crumbs with melted butter until closely packed damp sand consistency is achieved.
- Press 1 tablespoon of the crumb mixture into the bottom of each muffin cup to form a base.
- Bake the crusts for 5 minutes and allow them to cool while preparing the filling.
- In a large bowl, beat cream cheese until smooth. Gradually add sugar and mix until incorporated.
- Add eggs one at a time, blending gently to maintain a smooth mixture.
- Mix in vanilla extract, condensed coconut milk, and a pinch of salt until just combined.
- Fold in chopped pineapple, avoiding overmixing to maintain texture consistency.
- Fill prepared muffin cups with cream cheese filling, nearly up to the rim.
- Bake the cheesecakes for 25-30 minutes, until edges are set and centers still exhibit a slight jiggle.
- Let cool in a pan on a wire rack before refrigerating for at least 4 hours.
- Serve chilled, garnished with extra pineapple pieces or coconut flakes if desired.
Recipe Notes
- Ensure all ingredients are at room temperature for deeper integration.
- Customize sweetness levels by adjusting sugar or using alternative sweeteners.
- For intense pineapple flavor, choose fully ripe specimens with firm and fragrant indicators.