Twice Baked Potato Casserole: The Ultimate Comfort Food Recipe
Twice Baked Potato Casserole: The Perfect Comfort Food
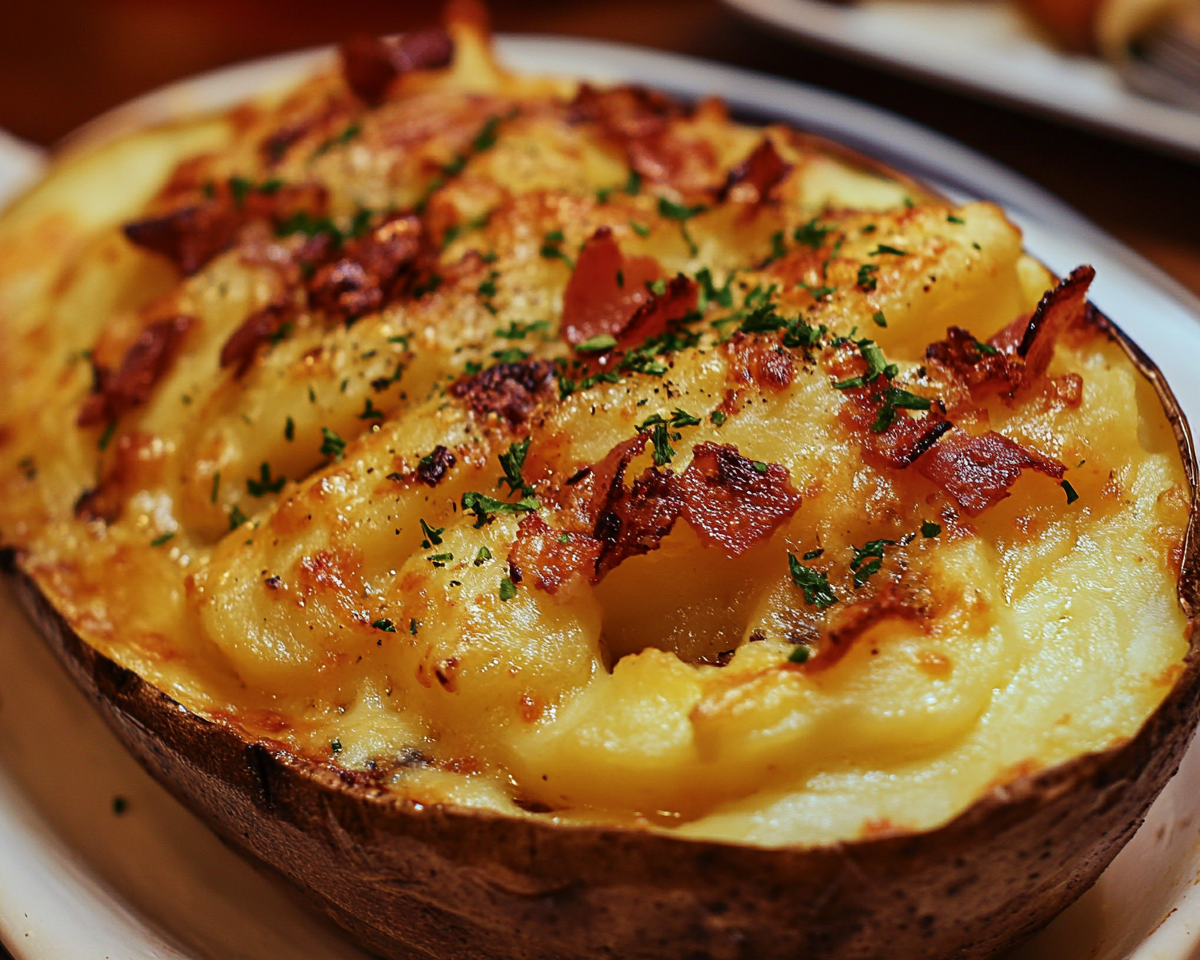
Twice baked potato casserole is the ultimate combination of creamy, cheesy, and savory flavors. This crowd-pleasing dish transforms the traditional baked potato into a rich, hearty casserole perfect for family dinners, potlucks, or holiday gatherings. Easy to prepare and endlessly customizable, this dish deserves a spot in every home cook’s repertoire.
Twice baked potato casserole is the epitome of comfort food, combining creamy mashed potatoes, melted cheese, and crispy bacon into one irresistible dish. Perfect for any occasion, this casserole is both versatile and easy to customize. Give this recipe a try, and enjoy its hearty, satisfying flavors with family and friends.
Easy Shrimp Ceviche: A Refreshing and Simple Recipe
Easy Shrimp Ceviche: A Refreshing and Flavorful Recipe
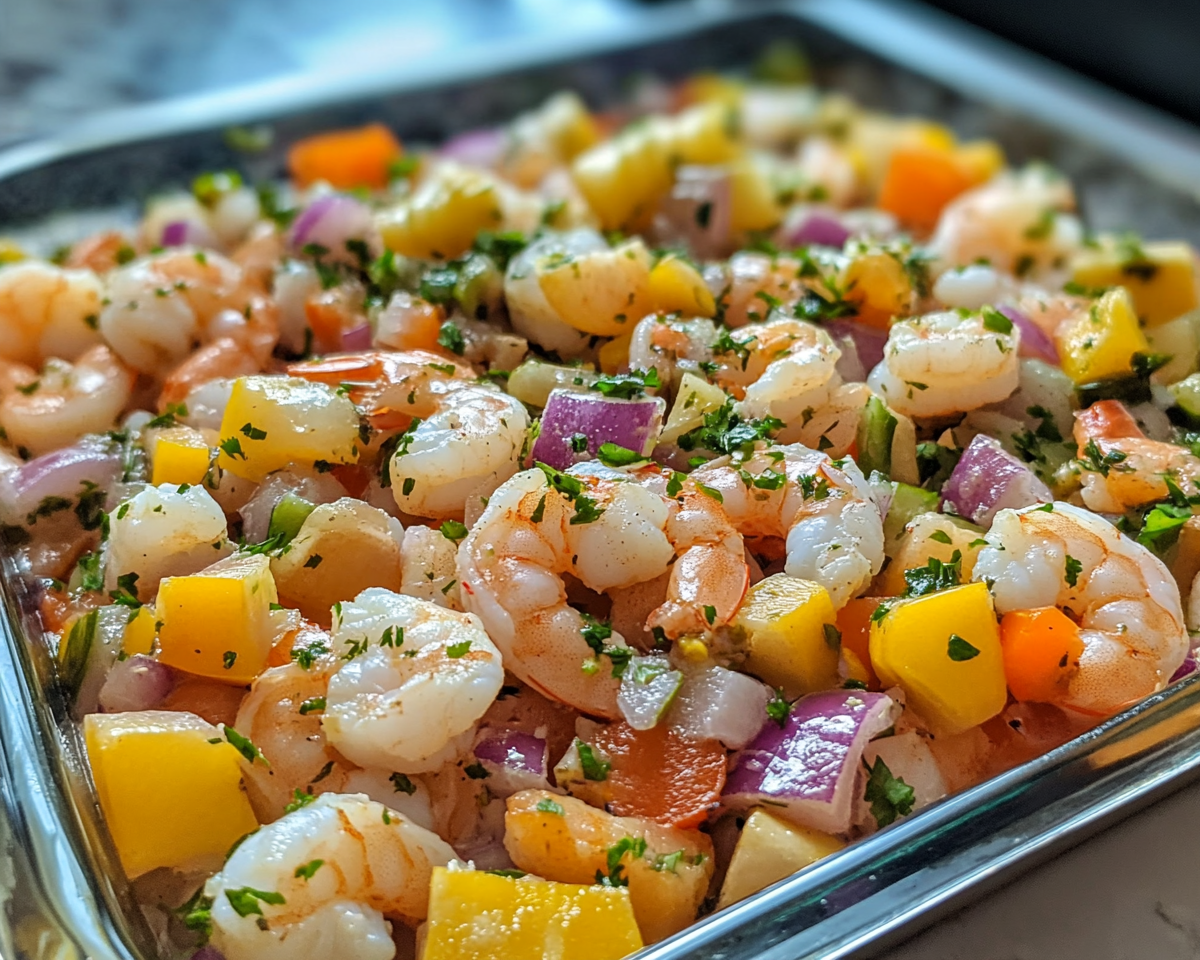
Shrimp ceviche is a quick and easy way to enjoy the vibrant flavors of citrus-marinated seafood, combined with fresh vegetables and herbs. This dish, rooted in Latin American culinary traditions, offers a refreshing and healthy option for appetizers or light meals. Whether for a summer gathering or a quick snack, shrimp ceviche is both satisfying and simple to prepare.
Easy Shrimp Ceviche is a versatile and flavorful dish that brings together the best of fresh ingredients and bold flavors. Perfect for any occasion, this recipe is quick to prepare and offers endless customization options. Enjoy it with your favorite sides and beverages for a delightful culinary experience.
Pasta Pomodoro: A Simple and Authentic Italian Recipe
Pasta Pomodoro: The Ultimate Simple and Delicious Italian Dish
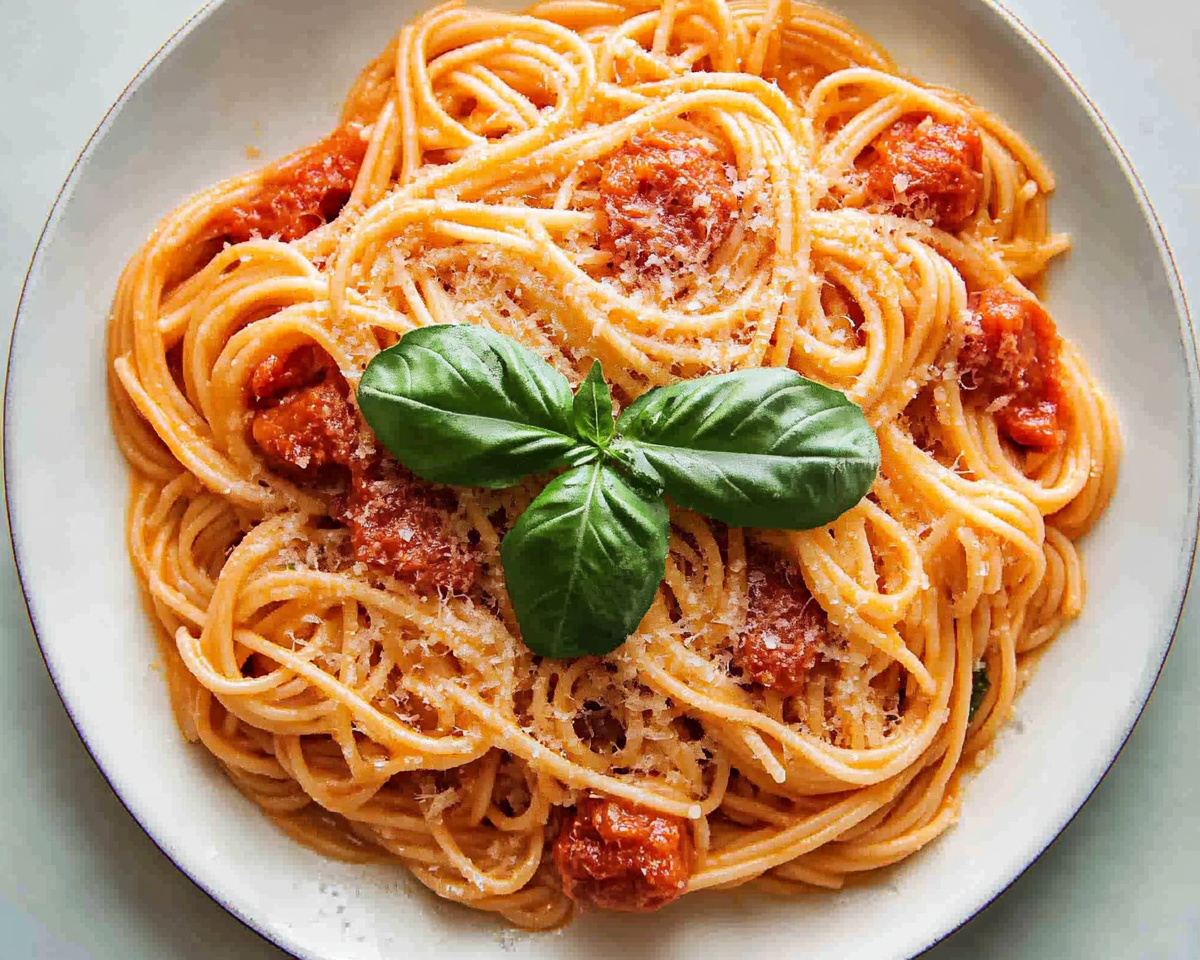
Pasta Pomodoro is a culinary masterpiece of simplicity, combining fresh tomatoes, fragrant basil, and al dente pasta into a dish that’s easy to prepare yet bursting with flavor. This recipe pays homage to the heart of Italian cooking, emphasizing fresh, high-quality ingredients that make every bite a delight. It’s a perfect choice for a quick family dinner or an elegant meal for guests.
Pasta Pomodoro is a testament to the beauty of simplicity in cooking. Its fresh ingredients, quick preparation, and delightful flavors make it a go-to dish for any occasion. Whether you stick to the classic recipe or experiment with variations, this Italian favorite will never disappoint.
Irresistible Garlic Butter Baked Scallops for a Gourmet Experience
Garlic Butter Baked Scallops: A Delectable Seafood Delight
⚖️
Difficulty
Easy
⏲️
Prep Time
15 mins
🕒
Cook Time
10 mins
⏱️
Total Time
25 mins
🍽️
Servings
4
Treat yourself and your family to the savory goodness of Garlic Butter Baked Scallops. This delightful seafood dish combines the rich flavors of garlic and butter to enhance the succulent taste of fresh scallops. Imagine digging into a plate where each bite bursts with oceanic freshness enveloped in a buttery, garlicky coating that melts in your mouth. The easy preparation makes this an ideal choice for both weeknight dinners and special occasions alike.
Scallops, revered for their tender texture and mild sweetness, are a seafood lover’s dream. When baked in the oven, these little treasures turn a beautiful golden brown, offering a crisp exterior that gives way to a melt-in-your-mouth center. Not only do they taste sublime, but their elegant appearance also makes them a showstopper at any dining table. Whether you’re a novice cook or a seasoned chef, this Garlic Butter Baked Scallops recipe is simple yet sophisticated enough to impress all your guests.
Quick Recipe Highlights
Flavor Profile: These baked scallops boast a luxurious combination of buttery richness, enhanced by the aromatic zing of garlic.
Texture: Enjoy the satisfying contrast of a slightly crispy exterior with the delicate, tender interior of perfectly cooked scallops.
Aroma: The inviting fragrance of garlic butter fills the room, promising a meal that’s both comforting and sophisticated.
Visual Appeal: Their golden crust paired with parsley garnish makes these scallops as visually appealing as they are delicious.
Skill Level Needed: This recipe is approachable for beginners, offering straightforward steps that result in a gourmet dish.
Special Equipment: A baking dish and a broiler are all you need to create this seafood masterpiece.
Recipe Overview
Difficulty Level: The simplicity of this dish lies in its quick preparation and minimal ingredients, suitable for cooks of all levels.
Category: Perfect as an appetizer or a main course, these scallops are a versatile addition to any meal plan.
Cuisine: Rooted in European culinary traditions, this recipe brings classic flavors to your modern kitchen.
Cost: While scallops are a premium ingredient, this dish delivers restaurant-quality at a fraction of the dining-out price.
Season: Best enjoyed year-round, though peak Scallop seasons in autumn and winter ensure the freshest catch.
Occasion: Ideal for everything from weeknight dinners to holiday feasts, these scallops are sure to impress.
Why You’ll Love This Recipe
Experience a taste sensation with every bite of these Garlic Butter Baked Scallops. The taste is unmatched, with the natural sweetness of scallops coming alive through the concert of garlic and butter. The recipe maintains the delicate texture of scallops—firm yet tender, offering an indulgent mouthfeel. For seafood enthusiasts, it’s a taste of the ocean in a few bites, expertly balanced with rich and savory elements that never overpower.
Say goodbye to culinary stress. This recipe brings ease to your kitchen, requiring a mere 25 minutes to prepare and cook. The convenience is in the simplicity—minimal chopping, no complicated techniques, and a few basic ingredients pack an impressive flavor punch. Rest easy knowing you can whip up a gourmet-seeming meal with minimal effort.
In addition to its taste and simplicity, this dish offers nutritional benefits. Scallops are a low-calorie source of protein, rich in omega-3 fatty acids and vitamin B12, supporting heart and brain health. Pairing them with buttery garlic provides a satisfying meal without excessive calories, aligning with a balanced diet.
Beyond the individual experience, these scallops become a shared delight. They make a tantalizing appetizer or a refined main dish that garners rave reviews at dinner parties. Their mouthwatering aroma and elegant presentation spark conversations and elevate your entertaining game.
Bring the luxury of dining out into your home without breaking the bank. Scallops are a cost-effective choice for creating a high-end dining experience at home. Buy them in bulk or when they’re on sale to save money while still treating yourself to a culinary indulgence.
Historical Background and Cultural Significance
Scallops have been cherished as a delicacy for centuries. In ancient coastal communities, these bivalves were a staple due to their ease of collection and nutritious value. They were often bartered and traded, playing a crucial role in the sustenance economies along the Atlantic and Pacific coasts.
In global cuisine, scallops are revered for their delicate flavor. The French, with their love for refinement, have mastered scallops in classic dishes such as Coquilles Saint-Jacques. Meanwhile, Italians favor them in pasta dishes, and the Japanese enjoy them raw in sushi, showcasing the ingredient’s versatility.
Through time, scallops have seen an evolution in preparation techniques, evolving from open-fire cooking to sophisticated baking methods. Today, with appliances like broilers, achieving the perfect texture and flavor of scallops is easier than ever, reflecting advancements in culinary technology.
Regional variations showcase the unique characteristics of local waters. Scallops from Maine exude a sweeter taste, while those from Japan offer a firmer texture. These differences highlight the interplay between nature’s bounty and cultural culinary practices.
Ingredient Deep Dive
Key to the flavor, garlic has been a staple in kitchens worldwide, renowned for its aromatic allure and its use throughout history in various medicinal and culinary applications. Its savory profile melds flawlessly with butter, bolstering the umami punch of seafood dishes. Garlic’s role in this recipe extends beyond taste—its aroma invites diners to the table with mouthwatering anticipation.
Butter, the next essential ingredient, has long held a luxurious status in culinary circles. It acts as both a flavor enhancer and a vital binding agent, contributing richness and depth to the scallops. When melted and infused with garlic, it wraps around the scallops, providing a luscious, silky mouthfeel.
Scallops themselves stand out for their tender sweetness and high-quality protein content. To choose the best, opt for dry-packed scallops with a fresh sea smell and firm texture. Once home, store them in the coldest part of your fridge and use them promptly to maintain optimal freshness. If unavailable, shrimp or firm white fish can substitute, although the unique texture of scallops is unmatched.
Common Mistakes to Avoid
Avoid overcooking. Scallops only need a brief time under heat. When overcooked, they become rubbery instead of tender.
Make sure your scallops are dry before baking. Pat them with a paper towel to absorb excess moisture, enhancing the browning process.
Don’t skimp on seasoning. Properly salt and pepper the scallops before cooking to draw out their natural flavors.
Use quality ingredients. Fresh garlic and real butter make a noticeable difference in the dish’s flavor.
Avoid crowding the baking dish. Scallops need space for even cooking and to achieve a proper crust.
Ensure your oven is preheated to the correct temperature to guarantee even cooking throughout.
Don’t rush the broiling. Allow the dish to sit briefly under the broiler for additional browning.
Avoid heavy sauces that overshadow the scallops’ delicate flavor. Let their natural taste shine with simple seasoning and butter.
Essential Techniques
Understanding why browning is essential brings your cooking game to the next level. Achieving a crispy edge while keeping the interior tender is key for a textural feast. Master browning by drying scallops thoroughly and ensuring good contact with the baking surface until a golden crust is achieved.
Balancing garlic’s boldness is also crucial. When garlic overpowers a dish, its presence becomes a distraction. A precise mince and gentle sauté in butter ensures a balanced interplay, coaxing out sweetness and mellowing its potency, resulting in a perfect harmony of flavors.
Pro Tips for Perfect Garlic Butter Baked Scallops
Enhance your dish by finishing with a squeeze of fresh lemon juice. It cuts through the richness and adds a burst of freshness, elevating the flavors without overpowering them.
Consider the quality of your elements. Opt for grass-fed butter and fresh, locally sourced scallops when possible, as fresh ingredients form the base of exquisite cooking.
Maintain scallops’ temperature integrity. Allow them to come to room temperature before cooking, which promotes even cooking and retains internal juiciness.
Don’t skip the resting period. Allowing the dish to sit briefly after baking lets flavors meld and achieve the best serving temperature for an optimal tasting experience.
Incorporate herbs like thyme or parsley, either freshly chopped on top before serving or in the garlic-butter mix, for extra depth and color.
Pay attention to presentation. Plate scallops in an attractive pattern, sprinkle with fresh herbs, and drizzle any remaining pan sauce on top to boost visual appeal.
Variations and Adaptations
Regional variations offer room for creativity. Incorporate local spices or citrus zest into the garlic butter for a personalized touch, infusing familiar flavors into a timeless dish.
Adapt the recipe seasonally by timing your garnish choices. In spring, fresh herbs and young greens celebrate the renewal of the season. Autumn might see heartier accompaniments like roasted root vegetables.
For dietary modifications, substitute butter with olive oil for a dairy-free version, and integrate gluten-free sides to accompany, maintaining the recipe’s core essence while diversifying its accessibility.
Serving and Presentation Guide
Consider a series of small plates where scallops act as a luxurious starter, each portion artfully presented with a light garnish of microgreens or a citrus wedge for added vibrancy.
Garnishing with zest from the reserved lemon, alongside freshly cracked pepper, heightens visual appeal and enriches tasting profiles. Classic parsley sprigs or dill fronds finish with a touch of elegance.
The introduction of crusty bread as a traditional accompaniment offers a hearty texture contrast, encouraging diners to soak up every drop of savory sauce.
Wine and Beverage Pairing
A chilled glass of crisp Chardonnay or Sauvignon Blanc perfectly complements the scallops, matching their richness with vibrant acidity. These wines’ citrus and oaky notes weave seamlessly with the garlic butter sauce.
For those abstaining from alcohol, consider a sparkling mineral water with a lemon slice to offer a palate-cleansing sip between bites, fostering freshness throughout the meal experience.
Storage and Shelf Life
Use an airtight container to refrigerate leftovers promptly, keeping them viable for up to two days. Scallops lose their delicate flavor over extended storage, so enjoy them sooner rather than later.
Reheat gently on low heat, maintaining texture integrity and avoiding rubbery results. Always check for spoilage signs before consumption, such as off-odors or slimy textures.
If freezing, place scallops in a single layer on a baking sheet until frozen, then transfer to a bag for longer storage, retaining quality better than a bulk freeze.
Make Ahead Strategies
Adopt a prep timeline to streamline your cooking process. Chop garlic and prepare the baking dish as the scallops reach room temperature, shaving minutes off your cook time.
Proper storage between steps, particularly keeping scallops cold while prepping other ingredients, ensures freshness without sacrificing quality.
For best results, assemble and bake just before serving, retaining the texture and flavor that could diminish during lengthy hold times. Add fresh elements right before serving to bolster flavor and visual appeal.
Scaling Instructions
Scaling this dish to suit more or fewer servings is seamless. When adjusting the quantity, ensure the baking dish size accommodates scallops in a single layer to preserve desired texture outcomes.
Equipment adjustments might involve using multiple baking dishes for larger quantities or reducing the broiler time due to different sized dishes’ heat conductivities.
Nutritional Deep Dive
Scallops’ macros include approximately 20 grams of protein per serving, supporting muscle maintenance and growth, while their fat content remains low, making them an excellent choice for lean, nutritional meals.
These shellfish exceed in vitamin B12, magnesium, and phosphorus. They also supply omega-3s, underpinning cardiovascular wellness and cognitive function.
Dietary Adaptations
Modify this scallop dish to fit a keto diet by using grass-fed butter exclusively and complementing with low-carb, high-fat side dishes. For a gluten-free meal, choose naturally GF sides like rice or quinoa.
To cater to a paleo palate, substitute with ghee instead of butter. This modification maintains the richness without the dairy proteins, aligning with paleo principles.
Troubleshooting Guide
Combat excessive chewiness by ensuring scallops are not overcooked; err on the side of slight translucency, as residual heat continues cooking post-oven.
Balance flavor by tasting the garlic butter before applying, adjusting salt and pepper to harmonize the buttery richness and highlight scallops naturally.
If oven browning proves uneven, reposition scallops during baking for consistent exposure, or utilize a broiler at an adjusted height for fine-tuning finishes.
Recipe Success Stories
Feedback flourishes when you serve these Garlic Butter Baked Scallops. Variations like adding crushed red pepper flakes offer a touch of heat, exciting adventurous taste buds without detouring the dish’s classic roots.
Community inputs often circulate, suggesting alternatives for vegetarians using mushrooms with similar flavoring, referring to them affectionately as “Neptune’s shelves,” drawing on shared culinary enthusiasm.
Frequently Asked Questions
Q: Can I use frozen scallops for this recipe?
A: Yes, frozen scallops work well if properly thawed beforehand. Ensure they’re dried thoroughly to prevent excess moisture affecting the texture.
Q: What’s the best way to thaw scallops?
A: Thaw frozen scallops overnight in the refrigerator for even defrosting. Avoid room temperature thawing to maintain freshness and food safety standards.
Q: Can I substitute the garlic with something less pungent?
A: Shallots or chives serve as excellent options for a milder flavor, retaining the aromatic benefits without overwhelming the palate.
Q: How can I tell if scallops are fresh?
A: Fresh scallops typically exhibit a mild ocean scent with none of the ammonia smell indicative of spoilage; their texture should be firm yet moist.
Q: Why are my scallops rubbery?
A: Overcooked scallops tend to become rubbery. Correct heat timing by adhering closely to recipe instructions and monitoring them closely.
Q: Are there non-dairy options for the butter?
A: Olive oil or coconut oil can replace butter to achieve a similar sauce consistency, appealing to lactose-intolerant or dairy-free diners.
Q: Do shell-on scallops require extra preparation?
A: Yes, shell-on scallops need to be shucked with a delicate knife, being careful to discard the muscle which can be fibrous and less desirable.
Q: How do I store leftover garlic butter?
A: Refrigerate leftover garlic butter in an airtight container for up to a week, using as needed to enhance future dishes with its rich flavor.
Q: Can I marinate scallops beforehand?
A: While it’s unnecessary, a brief marinade in lemon or lime juice elevates them with subtle citrus notes, complementing the butter sauce.
Q: Are there vegetarian alternatives to scallops?
A: Thick slices of king oyster mushrooms replicate scallops’ texture well when pan-seared, keeping the seasoning profile similar for continuity.
Additional Resources
Explore pairing techniques through related recipes like our Lemon Herb Seared Scallops, which adopt similar ingredients for a zestier outcome.
Examine technique guides that delve deeper into mastering seafood preparations and the science of achieving ideal Maillard reactions through browning.
Join the Conversation
Share your experiences and adaptations of Garlic Butter Baked Scallops on our social platforms. Engage with fellow seafood enthusiasts by posting pictures and commentary under our communal hashtag, garnering feedback and accolades for your culinary endeavors.
The Recipe
Garlic Butter Baked Scallops
Serves: 4
Prep Time: 15 mins
Cook Time: 10 mins
Total Time: 25 mins
Kitchen Equipment Needed
Baking dish
Mixing bowls
Broiler
Sharp knife
Garlic press
Ingredients
1 pound sea scallops
1/4 cup unsalted butter, melted
3 cloves garlic, minced
1 tablespoon lemon juice
1/4 teaspoon salt
1/4 teaspoon black pepper
2 tablespoons freshly chopped parsley
1/4 cup grated parmesan cheese
Directions
Preheat your broiler. Rinse the scallops and pat dry with paper towels to remove excess moisture.
In a mixing bowl, combine the melted butter, minced garlic, lemon juice, salt, and pepper.
Arrange scallops in a baking dish, ensuring they are in a single layer. Drizzle the garlic butter mixture over them evenly.
Sprinkle grated parmesan cheese over the top of the scallops.
Broil in the oven for 6-8 minutes until the scallops are opaque and the cheese is golden brown.
Garnish with freshly chopped parsley before serving.
Recipe Notes
Ensure scallops are as dry as possible for a better crust.
Substitute olive oil for a different flavor dimension and dairy-free option.
Try adding a pinch of red pepper flakes for a subtle kick.
Best Baked Chicken and Rice Casserole: A Comfort Food Classic
Best Baked Chicken and Rice Casserole: A Comfort Food Masterpiece
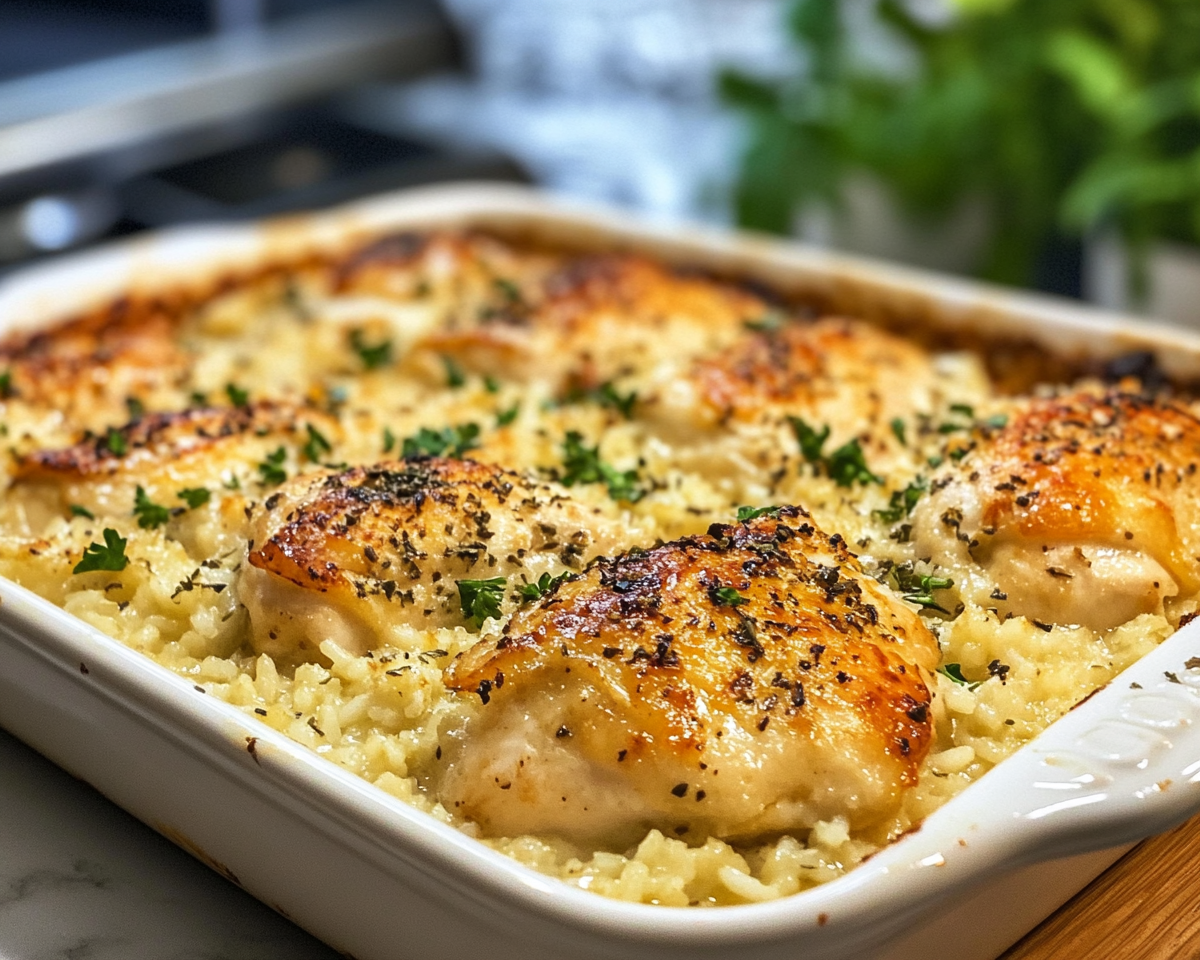
Baked chicken and rice casserole is a timeless dish, combining tender chicken, creamy rice, and savory flavors into one hearty meal. This recipe brings out the best in simple ingredients, making it ideal for family dinners or potlucks. The one-pan convenience adds to its charm, ensuring easy preparation and cleanup.
Baked chicken and rice casserole is a delicious, satisfying meal that combines rich flavors with easy preparation. Its versatility allows endless variations, making it a go-to recipe for any occasion. Experiment with your favorite ingredients and enjoy the comfort of this timeless dish.