Mississippi Pot Roast: The Ultimate Comfort Food Recipe

Slow cooker pot roast, Southern pot roast, crockpot beef roast, tangy pot roast recipe, pepperoncini pot roast, au jus beef roast

Mississippi Pot Roast: A Comfort Food Classic

Introduction

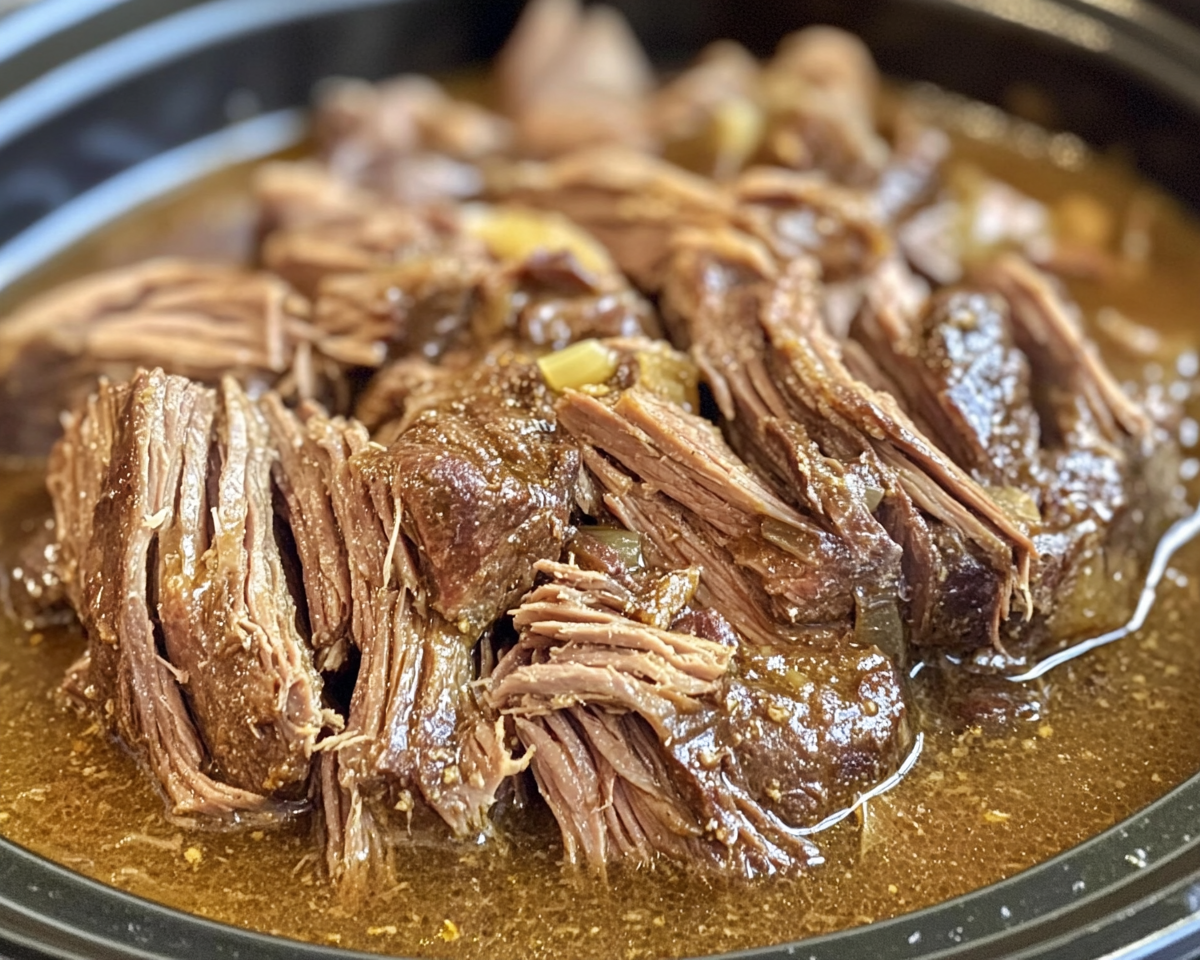
The Mississippi Pot Roast is a household staple known for its tender, savory, and slightly tangy flavor. It’s easy to prepare and delivers a hearty meal with minimal effort. This slow-cooked dish is a testament to the power of simple ingredients coming together in harmony.

For other comforting slow cooker meals, explore recipes like Slow Cooker Chicken and Gravy Over Noodles or Family Favorite Slow-Cooked Pot Roast.


Ingredients and Preparation

Core Ingredients

  • Beef Chuck Roast: The star of the dish, selected for its marbling and tenderness.
  • Seasonings: A packet of ranch seasoning and au jus mix for rich flavor.
  • Butter: Adds creaminess and depth.
  • Pepperoncini Peppers: Infuse tanginess and a hint of spice.

Additional Ingredients for Variations

  • Garlic cloves, onions, or fresh herbs to enhance the flavor.
  • Vegetables like carrots and potatoes for a complete meal.

Step-by-Step Instructions

1. Preparing the Ingredients

  • Trim any excess fat from the beef chuck roast.
  • Layer the roast at the bottom of your slow cooker.

2. Adding the Seasoning Layers

  • Sprinkle ranch and au jus mixes over the roast.
  • Place butter on top, followed by pepperoncini peppers.

3. Cooking

  • Cover and cook on low for 6-8 hours or on high for 4-5 hours.
  • Shred the meat and mix with the sauce before serving.

For a twist on classic recipes, try No Peek Beef Tips.


Creative Variations

Healthier Option

  • Use reduced-sodium mixes and replace butter with olive oil.

Spicy Kick

  • Add red pepper flakes or spicy pepperoncini.

Protein Substitutes

  • Replace beef with pork shoulder or chicken thighs for a different take.

Serving Suggestions

  • Pair with mashed potatoes, egg noodles, or rice.
  • Serve alongside roasted vegetables or a fresh salad.
  • Use leftovers for sandwiches or tacos, like Mississippi Pot Roast Tacos.

FAQs

1. How can I store leftovers?

Store in an airtight container in the fridge for up to four days or freeze for up to three months.

2. Can I make this recipe in an Instant Pot?

Yes, use the pressure cook setting for about 1.5 hours.

3. What if I don’t have pepperoncini?

Substitute with banana peppers or omit entirely.


Internal Linking Opportunities

  1. Slow Cooker Chicken and Gravy Over Noodles: Ideal for showcasing similar slow-cooked meals.
  2. No Peek Beef Tips: Highlights another comforting beef recipe.
  3. Mississippi Pot Roast Tacos: A creative use for leftovers.

Conclusion

The Mississippi Pot Roast is a testament to the simplicity and comfort of home-cooked meals. With just a handful of ingredients, this dish transforms into a rich and flavorful feast. Customize it to your liking and enjoy the taste of Southern comfort.

Ultimate 7 Layer Dip: A Crowd-Pleasing Party Appetizer

Seven-layer dip, layered Mexican dip, party dip recipe, taco-inspired dip, creamy bean dip, appetizer ideas, easy layered appetizer

Ultimate 7 Layer Dip: The Perfect Party Appetizer

Introduction

The Ultimate 7 Layer Dip is a versatile, flavorful appetizer that has become a party favorite across households. This dish combines creamy, tangy, and crunchy elements to create a show-stopping centerpiece for any occasion. Whether it’s game day, a casual gathering, or a potluck, this layered dip is guaranteed to impress.

For additional game day snacks, consider pairing this dip with Cheesy Bacon Jalapeño Corn Dip or Mexican Street Corn Dip.


Ingredients and Tools

Core Ingredients

  • Layer 1: Refried beans mixed with taco seasoning for a spicy, savory base.
  • Layer 2: Whipped cream cheese blended with sour cream.
  • Layer 3: Guacamole for a fresh, zesty layer.
  • Layer 4: Chunky salsa or diced tomatoes for a tangy kick.
  • Layer 5: Shredded lettuce for crispness.
  • Layer 6: Shredded Mexican cheese blend.
  • Layer 7: Sliced black olives and green onions for garnish.

Tools Needed

  • A large serving dish (glass for visual appeal).
  • Mixing bowls and a spatula for layering.
  • Airtight container for storage.

Step-by-Step Recipe

1. Preparing the Base Layers

  • Spread refried beans evenly at the bottom of the serving dish.
  • Whip cream cheese with sour cream and spread over the bean layer.

2. Adding the Fresh and Tangy Layers

  • Spoon guacamole over the cream cheese layer.
  • Add chunky salsa or diced tomatoes for vibrant flavor.

3. Finishing Touches

  • Top with shredded lettuce, cheese, and olives.
  • Sprinkle chopped green onions and cilantro for garnish.

For similar recipes, explore Ultimate Taco Casserole.


Creative Variations

1. Low-Calorie Version

  • Use low-fat cream cheese and sour cream.
  • Replace refried beans with black beans for a healthier option.

2. Vegan Option

  • Substitute cream cheese with vegan alternatives.
  • Use plant-based cheese and vegan refried beans.

3. Spicy Kick

  • Add jalapeños or habanero salsa for heat.
  • Sprinkle chili powder or cayenne on top.

Serving Suggestions

  • Pair with tortilla chips, pita bread, or veggie sticks.
  • Serve as a topping for tacos or burritos.
  • Present in a clear dish for a visual feast.

For more appetizers, check out Dorito Taco Salad.


FAQs

1. How can I store leftover dip?

  • Store in an airtight container in the fridge for up to 3 days.

2. Can I make this dip ahead of time?

  • Prepare up to 24 hours in advance, but add fresh toppings just before serving.

3. What are some garnish ideas?

  • Try fresh cilantro, diced jalapeños, or lime zest.

4. Can I freeze 7 layer dip?

  • Freezing is not recommended as the texture may change.

Internal Linking Opportunities

  1. Suggest Cheesy Bacon Jalapeño Corn Dip for a similar crowd-pleasing appetizer.
  2. Link to Mexican Street Corn Dip for a complementary dish.
  3. Recommend Ultimate Taco Casserole for a hearty main course pairing.

Conclusion

The Ultimate 7 Layer Dip is a versatile and crowd-pleasing recipe that can be tailored to suit any occasion or dietary preference. With its colorful layers and bold flavors, this dish is sure to be the star of your next gathering. For more inspired dishes, explore Mexican Street Corn Dip or Dorito Taco Salad.

Copycat Olive Garden Salad Dressing: Easy Homemade Recipe

Homemade Olive Garden dressing, Italian salad dressing recipe, creamy salad dressing, copycat restaurant salad dressing, DIY Olive Garden salad dressing

Copycat Olive Garden Salad Dressing: Homemade Perfection

Introduction

The Copycat Olive Garden Salad Dressing brings the beloved restaurant flavors to your table, allowing you to enjoy the tangy, creamy goodness in your own home. Whether paired with fresh greens or used as a dip or marinade, this dressing is a versatile addition to your culinary repertoire. To complement your meal, consider serving it alongside recipes like Perfect Pasta Salad with Olive Garden Dressing or Ultimate Pasta Salad: A Symphony of Flavors.


Ingredients and Preparation

Key Ingredients

  • Base: Extra virgin olive oil and mayonnaise for creaminess.
  • Tang: White vinegar and lemon juice.
  • Flavor Enhancers: Garlic salt, Italian seasoning, and fresh Parmesan cheese.
  • Sweetness: A touch of light corn syrup balances the tanginess.

Tools Needed

  • Whisk and mixing bowl for blending ingredients.
  • Airtight container for storing the dressing.

Step-by-Step Recipe

1. Making the Dressing

  • Combine olive oil, mayonnaise, white vinegar, and lemon juice in a bowl.
  • Add seasonings and grated Parmesan.
  • Whisk until smooth and creamy.

2. Assembling the Salad

  • Use fresh Romaine and iceberg lettuce, tomatoes, red onions, olives, and pepperoncini.
  • Toss with croutons and drizzle with the homemade dressing.

For more salad ideas, check out Fresh Summer Melon Prosciutto Salad.


Creative Variations

  • Low-Fat Dressing: Substitute mayonnaise with low-fat yogurt.
  • Vegan Option: Use vegan mayonnaise and nutritional yeast instead of Parmesan.
  • Spicy Twist: Add red pepper flakes or a dash of hot sauce.

FAQs

Frequently Asked Questions

  1. Can I use a blender to make the dressing?
    Yes, blending ensures a smoother texture.
  2. How long does this dressing last?
    Store in the refrigerator for up to a week.
  3. What pairs well with this dressing?
    Try it with grilled vegetables, pasta salad, or as a dip for breadsticks.

Internal Linking Opportunities

  1. Link to Perfect Pasta Salad with Olive Garden Dressing to inspire versatile uses for the dressing.
  2. Recommend Fresh Summer Melon Prosciutto Salad as a refreshing side.
  3. Suggest Ultimate Pasta Salad: A Symphony of Flavors for a complementary dish.

Conclusion

Recreating Copycat Olive Garden Salad Dressing at home is an easy way to elevate your meals with minimal effort. This recipe not only saves time and money but also delivers restaurant-quality flavor. Pair it with fresh salads or use it in creative dishes to impress your family and guests alike.

Pecan Pie Bark: Easy and Irresistible Holiday Treat

Caramel pecan bark, pecan candy bark, easy holiday dessert, nutty toffee bark, sweet pecan snack, pecan pie candy

Pecan Pie Bark: A Holiday Delight

Introduction

The Pecan Pie Bark is a delicious twist on the classic pecan pie, perfect for those seeking a simpler yet equally indulgent dessert. With its crunchy base, caramelized pecan topping, and optional chocolate drizzle, this treat is ideal for festive gatherings or as a thoughtful edible gift. For more caramel-inspired desserts, explore Salted Caramel Rice Krispie Treats.


Ingredients and Tools

Core Ingredients

  • Base: Saltine crackers or graham crackers create a crisp foundation.
  • Caramel Layer: Butter and brown sugar form the sweet, sticky layer.
  • Topping: Toasted pecans for crunch and richness.

Optional Additions

  • Chocolate chips for a decadent drizzle.
  • Sea salt to balance the sweetness.

Tools Needed

  • Baking sheet lined with parchment paper.
  • Saucepan for preparing the caramel.
  • Offset spatula to spread the topping evenly.

Step-by-Step Guide

1. Preparing the Base

  • Line a baking sheet with parchment paper.
  • Arrange crackers tightly in a single layer.

2. Creating the Caramel

  • Melt butter in a saucepan over medium heat.
  • Stir in brown sugar and bring the mixture to a boil, cooking until smooth and bubbly.

3. Assembling the Bark

  • Pour the caramel evenly over the crackers.
  • Sprinkle toasted pecans generously on top.
  • Optionally, drizzle melted chocolate after cooling.

For similar recipes with caramel elements, try the Caramel Apple Dump Cake.


Creative Variations

Chocolate-Lovers Bark

  • Layer white and dark chocolate after the caramel sets.

Nut-Free Version

  • Substitute pecans with sunflower or pumpkin seeds for a nut-free alternative.

Spiced Delight

  • Add cinnamon and nutmeg to the caramel mixture for a warm, festive flavor.

Serving and Storing

Serving Suggestions

  • Pair with coffee, tea, or mulled wine for a cozy treat.
  • Crumble over ice cream for an indulgent topping.

Storage Tips

  • Store in an airtight container at room temperature for up to a week.
  • For longer shelf life, refrigerate for up to two weeks.

FAQs

Frequently Asked Questions

  1. Can I use graham crackers instead of saltines?
    Yes, graham crackers provide a sweeter, softer base.
  2. What’s the best way to toast pecans?
    Bake them at 350°F for 5–7 minutes, stirring occasionally.
  3. Can I make this dairy-free?
    Substitute butter with vegan butter and use dairy-free chocolate chips.

Internal Linking Opportunities

  1. Suggest Homemade Pecan Pie as a traditional dessert alternative.
  2. Recommend Homemade Apple Dumplings for a fruity dessert option.
  3. Link to Salted Caramel Rice Krispie Treats for another caramel-based snack.

Conclusion

The Pecan Pie Bark is a versatile and crowd-pleasing dessert that’s easy to make and customize. Whether as a festive centerpiece, a quick snack, or a gift for loved ones, it’s bound to become a holiday favorite. Pair it with recipes like Homemade Apple Dumplings or Caramel Apple Dump Cake for a complete dessert spread.

Slow Cooker Smothered Pork Chops: Easy Comfort Food Recipe

Crockpot smothered pork chops, pork chops in gravy, creamy pork chop recipe, slow-cooked pork dinner, easy smothered pork chops recipe

Slow Cooker Smothered Pork Chops: A Comfort Food Classic

The Slow Cooker Smothered Pork Chops recipe combines tender, juicy pork chops with a creamy, flavorful gravy for a soul-warming meal. Perfect for busy days or family dinners, this dish is a simple yet hearty option that requires minimal effort but delivers maximum flavor.

For a complete meal, pair this recipe with side dishes like Southern Green Beans with Bacon or Perfect Mashed Potatoes.


Ingredients and Preparation

Core Ingredients

  • Pork Chops: Thick-cut bone-in or boneless chops work well.
  • Cream of Mushroom Soup: Forms the base of the gravy.
  • Beef Broth: Enhances the depth of flavor.
  • Garlic, Onion, and Paprika: Add aromatic and savory notes.

Optional Add-Ins

  • Bacon Bits: For a smoky flavor.
  • Fresh Thyme: Adds a hint of earthiness.

Step-by-Step Cooking Guide

1. Preparing the Pork Chops

  • Season with salt, pepper, and paprika.
  • Brown chops in a skillet to seal in the juices.

2. Layering in the Slow Cooker

  • Place pork chops, onion slices, and gravy ingredients in the slow cooker.
  • Cook on low for 5–7 hours or until the chops are tender.

3. Final Touches

  • Add a cornstarch slurry in the last 30 minutes to thicken the gravy.

Serving Suggestions

  • Serve over mashed potatoes, egg noodles, or rice to soak up the flavorful gravy.
  • Complement with side dishes like Southern Cornbread or steamed green beans.

Variations and Tips

Variations

  • Low-Carb Version: Substitute the soup with a keto-friendly cream sauce.
  • Spicy Twist: Add a pinch of cayenne or chili flakes to the gravy.

Tips

  • Use a slow cooker liner for easy cleanup.
  • Always brown the chops for enhanced flavor.

FAQs

Common Questions

  1. Can I use boneless chops? Yes, but reduce the cooking time slightly.
  2. What can I use instead of cream of mushroom soup? Cream of chicken or a homemade roux works well.
  3. How do I store leftovers? Refrigerate in an airtight container for up to 4 days.

Internal Linking Opportunities


Conclusion

Slow Cooker Smothered Pork Chops are a family favorite that combines convenience with comforting flavors. With tender meat and a rich gravy, this dish is perfect for both weeknight meals and special occasions. Try pairing it with complementary sides like mashed potatoes or green beans for a complete and satisfying dinner.