Valentine’s Day Red Velvet Cake Balls: Easy and Delicious Treats

red velvet dessert, Valentine's Day desserts, cake ball recipe, red velvet truffles, bite-sized Valentine treats, romantic dessert ideas, easy red velvet treats

Valentine’s Day Red Velvet Cake Balls

Valentine’s Day calls for desserts that are both delightful and visually stunning. Red Velvet Cake Balls are the perfect treat, combining the rich flavor of red velvet cake with the convenience of bite-sized portions. These treats are easy to make, customizable, and make for an excellent gift or centerpiece for a romantic dinner.

For more creative Valentine’s Day recipe ideas, check out creative dessert decorations.


Why Choose Red Velvet Cake Balls?

These bite-sized desserts offer several advantages over traditional cakes:

  • Portability: Easy to share and store.
  • Customizable: Decorate them with sprinkles, edible glitter, or chocolate drizzle.
  • Perfect for Gifting: Wrap them up in decorative packaging for a thoughtful Valentine’s Day gift.

Learn more about how to make your desserts shine with tips from this master chocolate tempering guide.


Ingredients for Red Velvet Cake Balls

For the Cake Base:

  • Red velvet cake mix (or a homemade recipe)
  • Eggs, oil, and water (as needed by the mix)

For the Filling:

  • Cream cheese frosting (store-bought or homemade)

For the Coating:

  • White chocolate or candy melts
  • Red, white, and pink sprinkles (optional)

Optional Ingredients:

  • Vanilla extract for added flavor
  • Food-grade glitter for a festive touch

Equipment You’ll Need

  • Mixing Bowls: For combining ingredients.
  • Baking Pan: To bake the cake base.
  • Cookie Scoop: For uniform cake balls.
  • Dipping Tools: Skewers or forks for coating.
  • Parchment Paper: To prevent sticking.

Step-by-Step Recipe

1. Bake the Red Velvet Cake

  • Preheat your oven to 350°F (175°C).
  • Mix the cake ingredients and bake as per the instructions.
  • Allow the cake to cool completely before crumbling.

2. Prepare the Cake Balls

  • Crumble the cooled cake into fine pieces.
  • Mix in the cream cheese frosting until the texture is moldable.
  • Use a cookie scoop to form small, uniform balls.

3. Chill the Cake Balls

  • Place the balls on a parchment-lined tray.
  • Refrigerate for at least 30 minutes to firm up.

4. Coat and Decorate

  • Melt white chocolate or candy melts in a double boiler or microwave.
  • Dip each chilled ball into the chocolate, ensuring an even coat.
  • Decorate with sprinkles or drizzle additional chocolate on top.

Variations and Creative Twists

  • Chocolate Coating: Use milk or dark chocolate for a richer taste.
  • Flavored Fillings: Mix in peanut butter or Nutella with the frosting.
  • Vegan Option: Use a plant-based cake mix and frosting.

For other bite-sized dessert ideas, explore crispy fried cheesecake bites.


Tips for Success

  • Chill Time: Ensure the cake balls are thoroughly chilled before coating to prevent crumbling.
  • Even Coating: Use dipping tools to achieve a smooth finish.
  • Storage: Store in an airtight container in the fridge for up to a week.

Gifting Ideas

  • Package the cake balls in decorative boxes or cellophane bags.
  • Add a handwritten note for a personal touch.
  • Use festive ribbons to tie everything together.

FAQs

1. Can I make these ahead of time?

Yes, they can be stored in the refrigerator for up to a week.

2. How do I prevent the coating from cracking?

Ensure the balls and coating are at similar temperatures.

3. Can I use homemade red velvet cake?

Absolutely! Homemade cake adds a personal touch.

4. Can I freeze them?

Yes, freeze the cake balls without the coating for up to three months.


Internal Linking Opportunities

Here are relevant internal links for context-rich anchor text:


Conclusion

Valentine’s Day Red Velvet Cake Balls are a delightful way to show your love through baking. They’re easy, customizable, and perfect for sharing. Try them this Valentine’s Day and make your celebration even sweeter!


Andes Mint Cheesecakes: Decadent Mint-Chocolate Dessert Recipe

mint chocolate cheesecake, Andes mints dessert, mint cheesecake recipe, chocolate mint dessert, homemade cheesecake with Andes mints

Andes Mint Cheesecakes: A Comprehensive Guide


Andes Mint Cheesecakes are the ultimate indulgence for any dessert lover. Combining the creamy richness of cheesecake with the refreshing minty flavor of Andes chocolates, this recipe is perfect for holidays, special occasions, or just satisfying a chocolate craving.

If you’re new to making cheesecakes, take inspiration from the ultimate cheesecake baking guide. It’s a great resource to ensure your dessert turns out perfectly.

For those interested in the origin of this delicious mint chocolate treat, you might enjoy the history of Andes mints, which showcases their journey as a dessert staple.


Why Make Andes Mint Cheesecakes?

Making Andes Mint Cheesecakes at home allows you to control every ingredient, ensuring a healthier and more satisfying dessert. You can customize the recipe, make it gluten-free, or even adjust the sweetness to your liking. Plus, there’s nothing like serving a dessert that’s both visually stunning and irresistibly delicious.

For more decorating ideas, check out these creative dessert decorations to elevate your cheesecake presentation.


Ingredients for Andes Mint Cheesecakes

Cheesecake Base

  • Cream cheese (softened)
  • Granulated sugar
  • Large eggs
  • Vanilla extract

Mint Chocolate Layer

  • Andes mints (chopped)
  • Dark chocolate (melted)
  • Heavy cream

Optional Toppings

  • Whipped cream
  • Extra Andes mints (whole or chopped)
  • Chocolate drizzle

Equipment Needed

  • Springform Pan: Ideal for baking full-size cheesecakes.
  • Electric Mixer: Ensures a smooth, lump-free filling.
  • Double Boiler or Microwave: Perfect for melting chocolate.
  • Cooling Rack: Prevents cracking by allowing even cooling.

Step-by-Step Recipe for Andes Mint Cheesecakes

1. Preparing the Crust

  • Crush chocolate sandwich cookies or graham crackers.
  • Mix crumbs with melted butter and press into the pan.
  • Chill the crust for 15 minutes before baking.

2. Making the Cheesecake Filling

  • Beat softened cream cheese and sugar until smooth.
  • Add eggs one at a time, mixing gently.
  • Fold in melted Andes mints for a minty twist.

3. Baking the Cheesecake

  • Preheat the oven to 325°F.
  • Pour the filling onto the crust and smooth the top.
  • Use a water bath to prevent cracks and bake for 50-60 minutes.

4. Cooling and Chilling

  • Turn off the oven and leave the cheesecake inside with the door ajar for 1 hour.
  • Chill in the refrigerator for at least 4 hours or overnight.

Variations of Andes Mint Cheesecakes

  • Mini Cheesecakes: Use a muffin tin for individual servings.
  • Cheesecake Bars: Bake in a square pan and cut into bars for easy serving.
  • Gluten-Free Option: Swap out the crust for a gluten-free cookie alternative.

For another delicious dessert idea, explore mini pineapple coconut milk cheesecakes on ExoRecipes.


Tips for a Perfect Cheesecake

  • Always use room-temperature ingredients for a smooth batter.
  • Avoid overmixing the filling to prevent air bubbles.
  • Use a water bath to keep the cheesecake moist and crack-free.

If you’re experimenting with other cheesecake flavors, consider this no-bake pumpkin cheesecake recipe for a seasonal twist.


Serving and Storing

  • Serving: Garnish with whipped cream, chocolate shavings, and whole Andes mints for a stunning presentation.
  • Storing: Keep refrigerated for up to 5 days or freeze slices for up to 2 months.

For reheating tips or more storage-friendly desserts, refer to easy no-bake banana split cheesecake.


FAQs

  1. Can I substitute Andes mints with another mint chocolate?
    Yes, you can use peppermint bark or other mint-flavored chocolates.
  2. How do I prevent my cheesecake from cracking?
    Use a water bath and avoid overbaking.
  3. Can I make a no-bake version of this cheesecake?
    Absolutely! Substitute the filling with a no-bake cheesecake mix and let it set in the fridge.
  4. How do I add extra mint flavor?
    Add a few drops of mint extract to the filling.

Internal Linking Opportunities


Conclusion

Andes Mint Cheesecakes are a show-stopping dessert that combines the rich creaminess of cheesecake with the refreshing zing of mint chocolate. Whether for a holiday table or a casual gathering, this recipe is sure to impress. Try it today and make it your signature dessert!

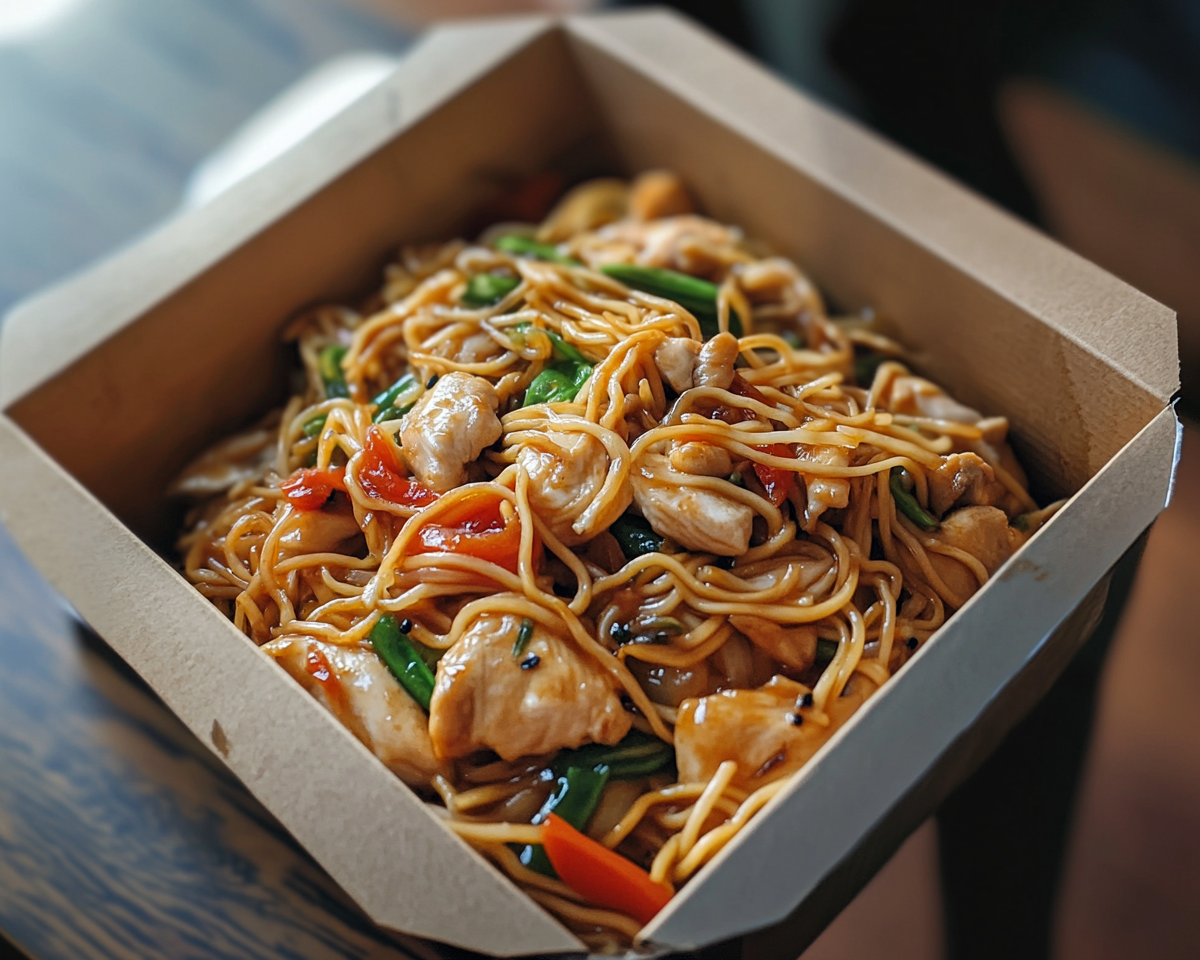
Homemade Chicken Lo Mein: Perfect Takeout-Style Recipe You’ll Love

homemade lo mein, easy chicken lo mein recipe, takeout-style noodles, stir-fried chicken noodles, quick lo mein dinner

Chicken Lo Mein – Homemade Takeout Style


Chicken Lo Mein is a delicious, versatile, and quick-to-make dish that combines stir-fried noodles, succulent chicken, and fresh vegetables. This homemade version ensures you can replicate the irresistible flavors of your favorite takeout with healthier, customizable options.


What is Chicken Lo Mein?

Chicken Lo Mein is a staple in Chinese-American cuisine, blending egg noodles with stir-fried vegetables, tender chicken, and a savory soy-based sauce. Unlike Chow Mein, which is often crispy, Lo Mein noodles are soft, offering a delightful chewy texture.

Enhance your cooking with this guide to Asian cooking techniques.


Benefits of Homemade Lo Mein

  • Healthier Ingredients: Control oil, salt, and sauce levels for a healthier dish.
  • Customizable Options: Add your favorite vegetables or use alternative proteins like tofu.
  • Cost-Effective: Save money by making this takeout classic at home.

For a deeper understanding of noodle culture, check out this history of Chinese noodles.


Ingredients Needed

Essentials

  • Chicken breast or thighs
  • Fresh or frozen egg noodles
  • Assorted vegetables: bell peppers, carrots, broccoli
  • Soy sauce, sesame oil, oyster sauce

Optional

  • Chili paste for spice
  • Hoisin sauce for added sweetness

How to Prepare Chicken Lo Mein at Home

Step 1: Cook the Noodles

  1. Boil the egg noodles until tender.
  2. Drain and toss with sesame oil to prevent sticking.

Step 2: Prepare the Chicken

  1. Cut chicken into bite-sized pieces.
  2. Marinate with soy sauce, garlic, and ginger for 15 minutes.

Step 3: Stir-Fry the Vegetables

  1. Heat oil in a wok or large skillet.
  2. Add vegetables, cooking until crisp-tender.

Step 4: Combine and Serve

  1. Toss the cooked noodles, chicken, and sauce in the wok.
  2. Stir-fry until heated through.
  3. Garnish with sesame seeds and scallions.

Sauce Secrets for Authentic Flavor

Creating the perfect Lo Mein sauce is the key to success. Here’s a simple recipe:

  • 4 tbsp soy sauce
  • 2 tbsp oyster sauce
  • 1 tsp sugar
  • 1 tsp sesame oil
  • Mix thoroughly before adding to the stir-fry.

Avoid overly sweet sauces; balance flavors for that authentic taste.


Variations of Chicken Lo Mein

  • Vegetarian: Replace chicken with tofu or mushrooms.
  • Spicy: Add chili oil or red pepper flakes.
  • Gluten-Free: Use rice noodles and tamari sauce.

Serving and Storage Tips

  • Serving: Pair with a light soup or spring rolls.
  • Storage: Refrigerate leftovers for up to 3 days. Reheat with a splash of water to refresh the sauce.

FAQs about Chicken Lo Mein

  1. What are the best noodles for Lo Mein?
    • Use fresh egg noodles for the best texture.
  2. Can I substitute proteins?
    • Yes, shrimp, beef, or tofu work wonderfully.
  3. How do I make it healthier?
    • Use less oil, increase vegetables, and choose low-sodium soy sauce.

Suggested Internal Links for Contextual Richness

Use these pages as anchor points within the article:


Conclusion

Homemade Chicken Lo Mein is more than just a quick dinner; it’s a culinary adventure that bridges the gap between convenience and health. With the right ingredients and techniques, you can recreate this takeout favorite with ease.

So, roll up your sleeves and give it a try today. Share your experience and let your kitchen become the new favorite takeout spot!

How to Make the Best Orange Creamsicle Jell-O Shots for Your Party

creamsicle gelatin shots, orange jello shot recipe, party dessert shots, creamsicle-inspired shots, easy jello shots

Suggested Internal Linking Opportunities for “Orange Creamsicle Jell-O Shots”

Potential Internal Links:


Article: Orange Creamsicle Jell-O Shots

Introduction

Orange Creamsicle Jell-O Shots are the ultimate party treat combining vibrant flavors with a nostalgic twist. These shots are not only easy to make but also perfect for any celebration. From summer get-togethers to holiday parties, they will steal the spotlight on any dessert table.


Why Choose Orange Creamsicle Jell-O Shots?

  • They’re simple and quick to prepare.
  • Require minimal ingredients, making them budget-friendly.
  • Offer a perfect balance of citrusy tang and creamy goodness.

Related Inspiration: Check out our Orange Creamsicle-inspired beverages for a similar flavor experience.


Ingredients Needed

  • Orange-flavored gelatin mix
  • Whipped cream-flavored vodka
  • Sweetened condensed milk
  • Hot water and cold water
  • Optional toppings: whipped cream, orange zest

Step-by-Step Preparation

  1. Prepare the Base: Dissolve orange gelatin in hot water, stir until fully dissolved.
  2. Mix Liquids: Add cold water and vodka to achieve the right consistency.
  3. Combine with Cream: Stir in sweetened condensed milk for a creamy texture.
  4. Pour and Set: Pour the mixture into shot glasses and refrigerate for at least 2 hours.
  5. Garnish and Serve: Top with whipped cream and orange zest for extra flair.

Tips for the Perfect Jell-O Shots

  • Use silicone molds for easy removal.
  • Experiment with flavors by substituting whipped vodka with coconut or vanilla.
  • Serve immediately after garnishing for the freshest presentation.

Serving Ideas

  • Theme Parties: Add food coloring to match the party theme.
  • Cocktail Pairings: Pair with light cocktails for a balanced flavor profile.
  • Dessert Platters: Include alongside no-bake desserts for variety.

Variations to Try

  1. Creamsicle Cubes: Make bite-sized cubes instead of shots.
  2. Non-Alcoholic Version: Replace vodka with orange soda for a kid-friendly treat.
  3. Layered Shots: Add a white gelatin layer for a visually appealing twist.

FAQs About Orange Creamsicle Jell-O Shots

Q: How long do they last in the fridge?
A: Up to 3 days when covered properly.

Q: Can I use different gelatin flavors?
A: Yes! Experiment with lemon or lime for a citrus blend.

Q: Can I make a dairy-free version?
A: Swap sweetened condensed milk with coconut cream.


Final Thoughts

These Orange Creamsicle Jell-O Shots are a crowd-pleaser, sure to impress guests with their delightful flavor and simplicity. For more fun treats, try pairing them with appetizers like perfect pairings for gatherings.

Crack Chicken Soup: A Creamy and Flavorful Comfort Food Recipe

creamy chicken soup, ranch chicken soup, chicken bacon soup, cheesy chicken soup, comfort food soup, hearty chicken soup, keto chicken soup

Crack Chicken Soup: The Ultimate Comfort Dish for Every Occasion

Nothing beats the creamy, flavorful embrace of Crack Chicken Soup. Perfectly seasoned with ranch spices, smoky bacon, and tender chicken, this dish satisfies cravings while being incredibly easy to prepare. Whether you’re hosting family gatherings, warming up on chilly evenings, or simply indulging in comfort food, this soup is sure to delight.


Ingredients for Crack Chicken Soup

Core Ingredients:

  • Shredded chicken: Pre-cooked or rotisserie chicken works perfectly.
  • Cream cheese: Adds richness and creaminess.
  • Chicken broth: Provides the soup base and adjustable consistency.
  • Ranch seasoning mix: Infuses the soup with its signature flavor.
  • Bacon bits: Smoky and crispy, offering both texture and taste.
  • Cheddar cheese: Enhances the soup’s cheesy goodness.

Optional Additions:

  • Diced vegetables (carrots, celery, or bell peppers).
  • Heavy cream for a thicker consistency.
  • Fresh herbs like parsley or chives for garnish.

Step-by-Step Instructions

1. Prepare the Ingredients

Begin by cooking and shredding the chicken if not already prepped. Fry the bacon until crispy and crumble it into bits.

2. Make the Creamy Base

  • In a slow cooker, add cream cheese, chicken broth, and ranch seasoning. Whisk until smooth.
  • Pro Tip: For added depth, sauté diced onions and garlic and include them in this step.

3. Add the Chicken and Bacon

Mix in the shredded chicken and bacon bits, stirring to ensure even distribution. For a kick of spice, consider adding a teaspoon of red chili flakes or diced jalapeños.

4. Simmer to Perfection

Cover the slow cooker and set it to low for 4-6 hours or high for 2-3 hours. Stir occasionally to prevent sticking.

5. Finish and Serve

Once done, stir in shredded cheddar cheese until melted. Serve hot with crusty bread, crackers, or a side salad.


Tips for Perfect Crack Chicken Soup

  • Balance the Saltiness: Bacon, cheese, and ranch mix are naturally salty. Adjust seasoning towards the end.
  • Consistency Tweaks: Add extra broth for a thinner soup or stir in heavy cream for added richness.
  • Storage: Keep leftovers in an airtight container for up to 3 days in the fridge.

Variations of Crack Chicken Soup

  1. Low-Carb Version
    Substitute potatoes with cauliflower florets to keep it keto-friendly.
  2. Vegetarian Alternative
    Replace chicken with tofu or mushrooms and use vegetable broth.
  3. Spicy Edition
    Add diced jalapeños or a few drops of hot sauce for heat lovers.

Pairing Suggestions for Crack Chicken Soup

  • Side Dishes:
    • Garlic breadsticks
    • Fresh garden salad
    • Roasted Brussels sprouts
  • Drinks:
    • A crisp white wine like Sauvignon Blanc
    • Sparkling water with lemon

FAQs About Crack Chicken Soup

Can I freeze Crack Chicken Soup?

Yes! Freeze it in an airtight container for up to 3 months. Thaw overnight and reheat on the stovetop, adding fresh cream cheese for optimal texture.

What can I use instead of cream cheese?

Heavy cream or Greek yogurt are good substitutes, though they slightly alter the flavor.

Can I make this on the stovetop?

Absolutely. Use a large pot to simmer the ingredients over medium heat for about 30-40 minutes.


External Resources to Enhance Your Recipe


Internal Linking Opportunities

Related Recipes from ExoRecipes:

  1. “Slow Cooker Chicken and Gravy Over Noodles”
  2. “Crockpot Potato Soup with Hashbrowns”
  3. “Chicken Bacon Ranch Potatoes”

Why Crack Chicken Soup Is a Must-Try

Crack Chicken Soup combines hearty, creamy flavors with smoky undertones of bacon, making it a family favorite. Whether you’re meal prepping, hosting, or simply looking for a quick comfort food fix, this soup checks all the boxes. Its versatility, ease of preparation, and crowd-pleasing appeal solidify its spot as a kitchen staple.