Homemade Candied Walnuts: Easy Recipe for Sweet and Crunchy Treats
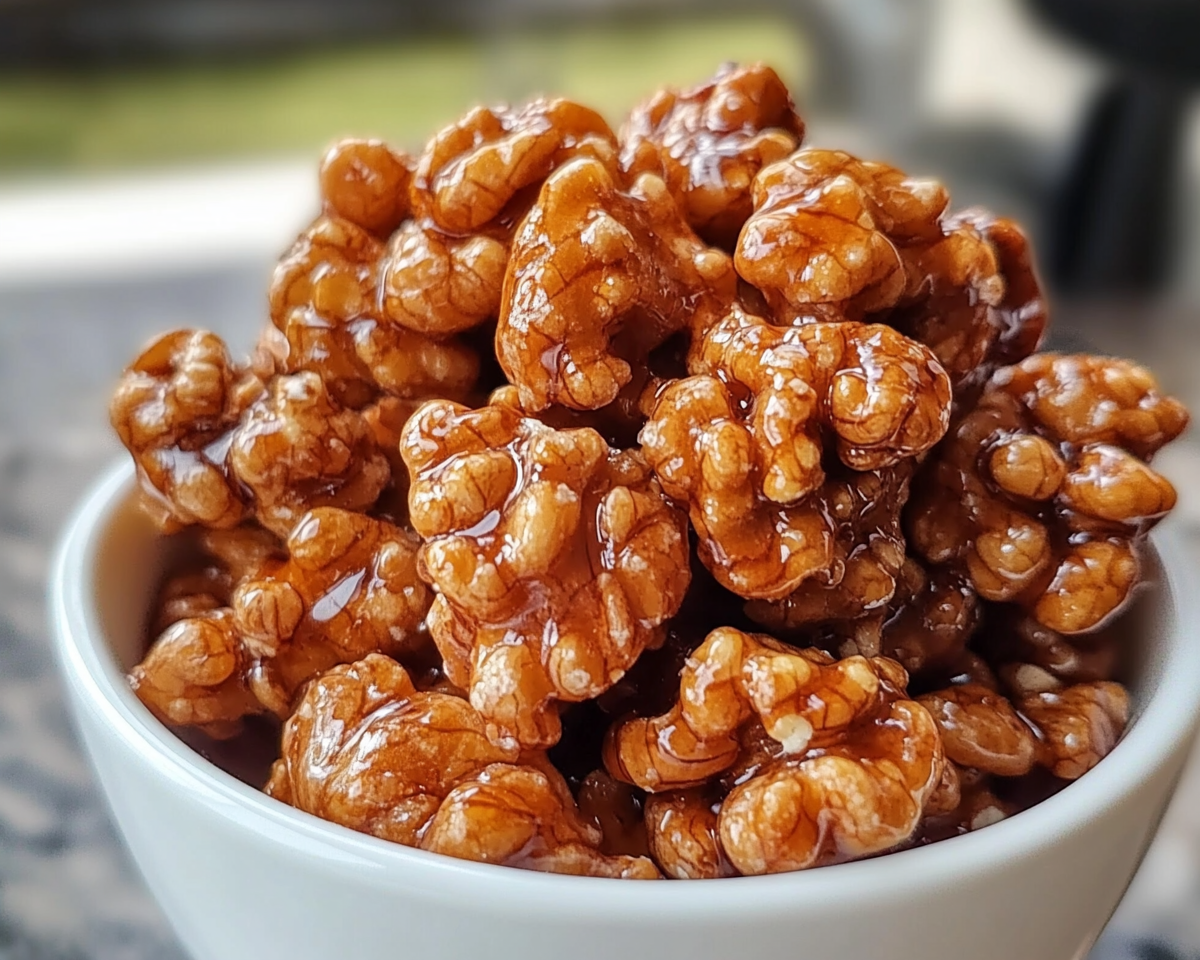
Candied Walnuts: Sweet, Crunchy, and Irresistible
Candied walnuts are a delightful treat, perfect as a snack, salad topping, or gift for loved ones. Their sweet and crunchy profile makes them a versatile addition to any dish. Whether you’re a beginner or an experienced cook, this guide will show you how to make the best candied walnuts at home.
Candied walnuts are a sweet and crunchy delight that can elevate any dish. Easy to make and endlessly versatile, they’re a must-have recipe for every home cook. Try experimenting with different flavors and uses to discover your favorite version!
Irresistible Cinnamon Sugar Swirl Muffins Perfect for Breakfast Delight
Cinnamon Sugar Swirl Muffins: A Sweet Morning Delight
⚖️
Difficulty
Easy
⏲️
Prep Time
15 mins
🕒
Cook Time
20 mins
⏱️
Total Time
35 mins
🍽️
Servings
12
Waking up to the delightful aroma of freshly baked Cinnamon Sugar Swirl Muffins is an experience that tickles the senses. These muffins bring together the warmth of cinnamon and the sweetness of sugar in perfect harmony, making them an excellent choice for breakfast or a midday snack. Each bite offers a taste of soft, moist cake accompanied by a delightful swirl of cinnamon, creating a symphony of flavors and textures that are truly irresistible.
Cinnamon Sugar Swirl Muffins boast a beautifully marbled appearance that makes them not only delicious but also visually appealing. The gentle swirls of cinnamon sugar create a mosaic of color and flavor, making these muffins a feast for both the eyes and the palate. Whether you’re entertaining guests or enjoying a quiet morning at home, these muffins are sure to impress with their unbeatable combination of simplicity and exquisite taste.
Quick Recipe Highlights
Flavor Profile: These muffins offer a perfect blend of sweetness balanced with the spicy warmth of cinnamon.
Texture: With a light, moist crumb and a slightly crispy top, they provide a satisfying bite.
Aroma: As they bake, the soothing scent of cinnamon fills your kitchen, creating a cozy atmosphere.
Visual Appeal: The beautiful cinnamon swirls add an artistic touch to each muffin.
Skill Level Needed: Perfect for beginners, these muffins require basic baking knowledge and simple techniques.
Special Equipment: No special tools are needed, just a regular muffin tin and an oven.
Recipe Overview
Difficulty Level: Easy – This recipe is beginner-friendly, requiring no special skills beyond basic mixing and baking.
Category: Breakfast or Snack – These muffins are perfect for a morning treat or midday indulgence.
Cuisine: These muffins find their roots in comforting, home-style American baking.
Cost: Affordable – The ingredients are common, making this an economical choice for any baker.
Season: Although enjoyable year-round, their warming spices make them ideal for autumn and winter.
Occasion: Whether for a brunch, snack, or dessert, they fit well into any casual or festive setting.
Why You’ll Love This Recipe
These Cinnamon Sugar Swirl Muffins are a delightful treat that combines the comforting flavors of cinnamon and sugar into a light and moist muffin. The texture is soft yet perfectly holds the sweet and spicy swirl within. They are quick to prepare, making them ideal for busy mornings or when unexpected guests arrive. Full of flavor and aroma, they make a perfect pairing with morning coffee or afternoon tea.
The nutritional profile of these muffins is balanced, with the option to include whole wheat flour or reduced sugar for a healthier twist. They embody a comforting familiarity while allowing for creative adaptations to suit dietary preferences or spontaneous ingredient availability. Their inviting aroma and warm flavor make them a hit at gatherings, ensuring your baking will be remembered and appreciated.
Historical Background and Cultural Significance
The concept of muffins dates back to early American history, known for their practicality and simple ingredients. Cinnamon, a prized spice for centuries, lends not only its warm flavor but also a cultural richness, having been a luxurious commodity in global trade. While variations of cinnamon treats can be found in many cultures, these particular muffins capture the essence of American baking traditions with influences from other cinnamon-rich cuisines.
Ingredient Deep Dive
Cinnamon is often hailed for its medicinal properties, which include anti-inflammatory effects and potential health benefits like improved heart health. When selecting cinnamon, consider Ceylon cinnamon for its delicate flavor and authenticity. Sugar, while playing a foundational role in baking to sweeten and enhance texture, is also often scrutinized for its nutritional impact. Moderation and high-quality selection can help balance indulgence with health consciousness in this recipe.
Milk, as an ingredient, not only provides moisture to baked goods but also adds nutritional value through calcium and vitamin D. For those seeking dairy alternatives, almond or oat milk work well without significantly altering the flavor. Eggs bind ingredients together and contribute to the muffin’s structure. Fresh, organic eggs can elevate both flavor and nutritional quality, though substitutes like flaxseeds can cater to vegan preferences.
Common Mistakes to Avoid
Overmixing the batter may lead to dense muffins instead of the desired light texture.
Using expired baking powder can affect the muffin’s rise and result in flat muffins.
Inadequate greasing of the muffin tin may cause muffins to stick, complicating removal.
Underbaking can result in a soggy center; use a toothpick test for doneness.
Skipping the swirl step results in flavor inconsistency; ensure an even distribution.
Neglecting to preheat the oven can alter bake times and texture.
Incorrect measurements of flour can affect moisture balance; spoon and level for accuracy.
Storage in a sealed container at room temperature is crucial to prevent muffins from drying out.
Essential Techniques
Achieving the perfect cinnamon swirl involves careful mixing to create a balance between the batter and the cinnamon sugar mixture. This technique not only enhances flavor distribution but also contributes to the muffins’ visual appeal. Proper muffin batter preparation requires not overmixing, as it ensures a light and fluffy final product. Recognizing visual cues, like a golden brown top and a clean toothpick, will ensure the muffins are perfectly baked.
Pro Tips for Perfect Cinnamon Sugar Swirl Muffins
Use high-quality cinnamon for the best flavor impact. Consider adding a pinch of salt to amplify the sweetness naturally. Ensure room temperature milk and eggs for smoother batter consistency. Allow muffins to cool slightly before removing to maintain structure. Experiment with different sugars, like brown sugar, for a deeper flavor.
Variations and Adaptations
Explore seasonal variations by adding apples or pumpkin during the fall months. For a healthier alternative, substitute half of the all-purpose flour with whole wheat flour. To cater to dietary needs, replace sugar with a natural sweetener like honey or maple syrup, or use a non-dairy milk substitute to make the recipe vegan-friendly. Additionally, adding nuts or dried fruits can enhance both texture and nutrition.
Serving and Presentation Guide
Serve these muffins warm with a side of softened butter or a dollop of cream cheese. For a more elegant presentation, consider dusting with powdered sugar before serving. Paired with a hot beverage, these muffins create a comforting, delightful experience. Ensure the muffins are served on a decorative platter to highlight their appealing swirl pattern.
Wine and Beverage Pairing
While a warm cup of coffee or tea is a classic pairing, consider a light, fruity wine like a sparkling Moscato for a brunch setting. Non-alcoholic options include a spiced chai latte or a warm apple cider to complement the cinnamon’s warmth.
Storage and Shelf Life
Store the muffins in an airtight container at room temperature for up to three days, ensuring they maintain their moist texture. For longer storage, wrap muffins individually in plastic wrap and freeze for up to three months. When ready to enjoy, thaw at room temperature or reheat gently in the microwave or oven.
Make Ahead Strategies
The batter can be prepared in advance and stored in the refrigerator for up to 24 hours. For optimal freshness, bake the muffins the day they will be served. This allows for flexibility in preparation, ensuring the muffins are always served fresh and at their best.
Scaling Instructions
To adjust the recipe, simply double or halve the ingredients, being mindful of changes in baking time. Larger batches may require an extended bake time, while smaller batches may bake faster. Adjusting equipment, such as using multiple muffin tins, can help maintain baking efficiency.
Nutritional Deep Dive
Each muffin contains a balanced blend of macronutrients, providing energy from carbohydrates, fats, and a touch of protein. By opting for whole grain flour or natural sweeteners, this recipe can cater to more health-conscious diets, offering a delicious treat with added nutritional value from fiber and micronutrients.
Dietary Adaptations
For gluten-free adaptations, use a blend of gluten-free flour. Dairy-free variations can be made using plant-based milks, such as almond or soy milk. To adapt the recipe to a vegan diet, flax eggs can replace the chicken eggs, maintaining cohesive texture and binding.
Troubleshooting Guide
Ensure muffins are rising properly by using fresh baking powder. Adjust cinnamon sugar balance if bitterness occurs. If muffins are too dry, check oven temperature and reduce bake time. For sticking issues, ensure proper greasing of muffin tins or use liners. Substitute ingredients mindfully, keeping proportions consistent.
Recipe Success Stories
Many readers have successfully made these muffins their own by incorporating ingredients like chocolate chips or nuts for added richness. Community feedback highlights the recipe’s forgiving nature and adaptability, praising its reliability for consistent, delightful results. Sharing creative photos online can inspire others to enjoy and customize their own versions.
Frequently Asked Questions
Q: Can I make these muffins without eggs?
A: Yes, flax egg or mashed banana acts as a suitable substitute for eggs, maintaining moisture and structure.
Q: How can I make these muffins gluten-free?
A: Use a 1-to-1 gluten-free flour blend in place of regular flour to achieve similar results.
Q: What’s the best way to create perfect cinnamon swirls?
A: Layering and gently swirling with a toothpick ensures even distribution and a beautiful design.
Q: Can the recipe be doubled?
A: Absolutely, simply multiply the ingredient amounts and adjust baking times as necessary.
Q: Why did my muffins deflate after removing from the oven?
A: Sudden temperature changes can cause deflation; allow gradual cooling before removing from mold.
Q: What should I do if my muffins are too dense?
A: Avoid overmixing the batter; ensure fresh leavening agents are used for better rise.
Q: Can I use whole wheat flour?
A: Yes, replacing half the all-purpose flour with whole wheat maintains texture and adds nutritional value.
Q: How do I store these muffins?
A: Keep them in an airtight container at room temperature or freeze for extended storage.
Q: Which milk substitutes work best?
A: Almond or soy milk are excellent dairy-free alternatives without compromising flavor or texture.
Q: How do I prevent muffins from sticking?
A: Use muffin liners or generously grease the tin before adding batter.
Additional Resources
Explore related recipes such as classic banana muffins or mixed berry muffins for more breakfast inspirations. Consider checking technique guides on creating perfect muffin tops or experimenting with natural sweeteners. Ingredient spotlights on cinnamon and its health benefits can also provide insights into maximizing flavor in baking.
Join the Conversation
Share your own Cinnamon Sugar Swirl Muffin variations on social media and connect with fellow baking enthusiasts using #CinnamonSwirlMuffins. Leave a comment below with your baking tips or feedback. Engage with our community to share inspiration and discuss creative adaptations of this versatile recipe.
The Recipe
Cinnamon Sugar Swirl Muffins
Serves: 12
Prep Time: 15 mins
Cook Time: 20 mins
Total Time: 35 mins
Kitchen Equipment Needed
Muffin tin
Mixing bowls
Whisk
Spatula
Toothpick or skewer
Ingredients
1 ½ cups all-purpose flour
½ cup sugar
2 tsp baking powder
½ tsp salt
1 tsp cinnamon
½ cup milk
⅓ cup vegetable oil
1 large egg
½ cup brown sugar
1 tbsp butter, melted
1 tsp cinnamon
Directions
Preheat the oven to 375°F (190°C). Grease a muffin tin or line with paper liners.
In a bowl, combine flour, sugar, baking powder, salt, and 1 tsp cinnamon.
In another bowl, whisk together milk, oil, and egg. Add to dry ingredients and mix until just combined.
In a small bowl, mix brown sugar, melted butter, and 1 tsp cinnamon for the swirl.
Fill each muffin cup halfway with batter, add a teaspoon of the cinnamon mixture, and top with more batter.
Use a toothpick to gently swirl the cinnamon mixture into the batter.
Bake for 18-20 minutes or until a toothpick inserted into the center comes out clean.
Allow to cool for a few minutes in the tin before transferring to a wire rack to cool completely.
Recipe Notes
For added flavor, sprinkle additional cinnamon sugar on the tops before baking.
Ensure eggs and milk are at room temperature for best results.
For a richer taste, consider adding vanilla extract.
Apple Pie Dumplings: A Simple and Delicious Dessert Recipe
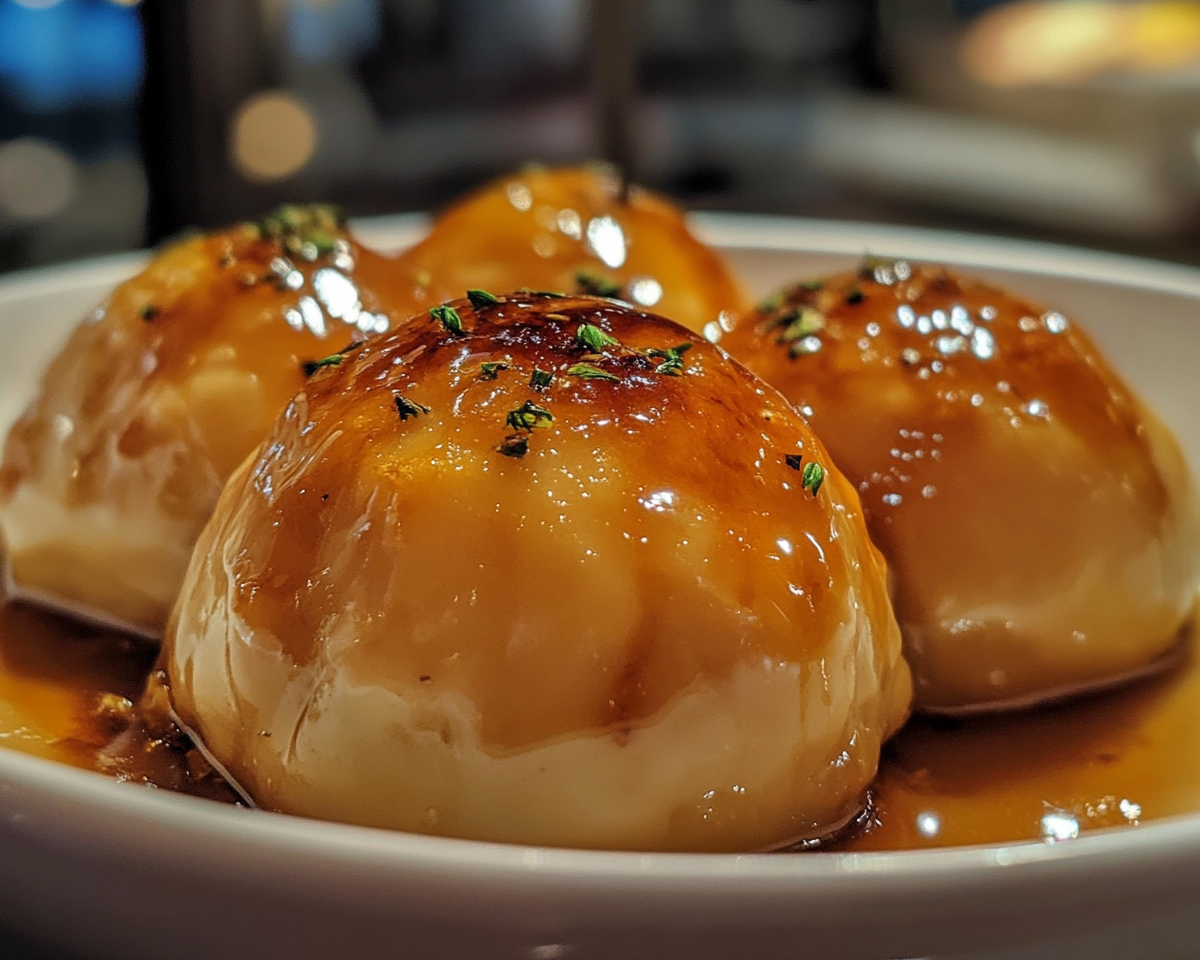
Apple Pie Dumplings: A Comforting Dessert You’ll Love
Apple Pie Dumplings bring together the comforting flavors of traditional apple pie and the simplicity of a dumpling. This versatile dessert is perfect for cozy family dinners or celebratory gatherings. Whether you’re an experienced baker or a novice in the kitchen, this recipe is a delicious way to impress.
Apple Pie Dumplings offer a delightful twist on classic apple desserts. With their ease of preparation and endless customization options, they’re a dessert worth adding to your recipe collection. Try this recipe today and share the joy of warm, comforting flavors with your loved ones.
Delicious Spaghetti and Spinach With Sun-Dried Tomato Cream Sauce
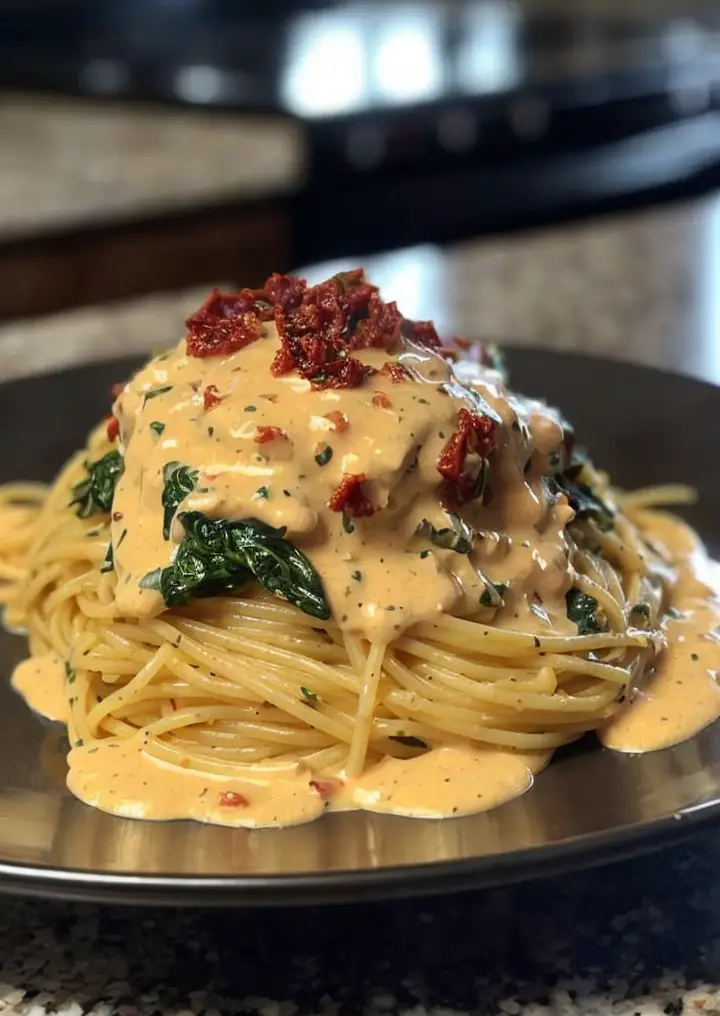
Spaghetti & Spinach with Sun-Dried Tomato Cream Sauce: A Delicious Italian Fusion
⚖️
Difficulty
Easy
⏲️
Prep Time
15 mins
🕒
Cook Time
20 mins
⏱️
Total Time
35 mins
🍽️
Servings
4
In the world of Italian cuisine, simplicity and flavor are key, and this Spaghetti & Spinach with Sun-Dried Tomato Cream Sauce exemplifies those principles perfectly. The blend of tender spaghetti tossed with fresh spinach and enveloped in a luscious sun-dried tomato cream sauce creates a delightful harmony of flavors. Whether you’re looking to impress a crowd or simply enjoy a comforting homemade meal, this dish delivers a gourmet experience with ease.
Imagine the rich aroma wafting from your kitchen as the tomatoes rehydrate, releasing their concentrated flavors into the creamy sauce. The joyous contrast of the vibrant green spinach against the creamy red sauce is not just a feast for the eyes but also for the taste buds. Every bite resonates with the sun-kissed sweetness of tomatoes, balanced by the creamy texture and subtle hints of garlic and basil.
This recipe doesn’t demand culinary expertise but rather thrives on a love for food and an appreciation for quality ingredients. It’s perfect for weekday dinners yet elegant enough for hosting friends. With this Italian fusion dish, you can savor the sunny flavors of the Mediterranean without leaving your home.
Quick Recipe Highlights
Flavor Profile: Experience a delightful blend of tangy sun-dried tomato with a creamy garlic-infused base, evolving into a savory and slightly sweet medley.
Texture: Expect a silky, smooth sauce that perfectly coats the al dente pasta and fresh spinach, providing a luxurious mouthfeel.
Aroma: Enjoy the inviting aromatic notes of garlic and sweet sun-dried tomatoes, hinting at the Mediterranean coast.
Visual Appeal: The dish presents a lovely contrast of dark green spinach against a creamy, red-hued sauce, creating an appetizing visual treat.
Skill Level Needed: An easy recipe suitable for beginners, focusing on simple techniques like sautéing and simmering.
Special Equipment: A high-quality sauté pan ensures even cooking and enhances the flavors.
Recipe Overview
Difficulty Level: Chosen to be easy due to minimal steps and common kitchen techniques, making it accessible for novice cooks.
Category: This versatile pasta dish fits into both main course dinners and as a comforting lunch option.
Cuisine: Inspired by Italian culinary traditions, this dish merges classic pasta elements with modern gourmet flair.
Cost: Budget-friendly, utilizing pantry staples and readily available fresh produce, making it economical yet elegant.
Season: Best prepared in spring or summer when fresh spinach is in season, but dried tomatoes allow for all-year enjoyment.
Occasion: Ideal for casual dinners, romantic meals, or light family gatherings, offering a little bit of gourmet to any table.
Why You’ll Love This Recipe
The fusion of taste and texture in this Spaghetti & Spinach with Sun-Dried Tomato Cream Sauce makes it a standout pasta dish. The tanginess of sun-dried tomatoes beautifully counters the creaminess of the sauce, while the spinach offers a slight bitterness that rounds out the overall flavor. This dish strikes a perfect balance—each bite brings a new layer of flavor, transporting you to an Italian countryside with its authentic yet innovative combination.
Moreover, the convenience of this recipe cannot be overstated. With a prep time of just 15 minutes and a straightforward cooking process, it’s perfect for busy schedules. Ideal for midweek meals or cooking novices, it ensures you can have a splendid meal on the table without much fuss. Plus, the leftovers are just as delightful, should any remain.
On the nutritional front, this dish offers plenty of iron and vitamins from the spinach, healthy fats from the olive oil, and lycopene from the tomatoes. This combination is not only satisfying but also packed with nutrients, ensuring you enjoy your meal both in taste and health benefits. For added protein, consider serving it with grilled chicken or shrimp.
As for social value, this recipe holds its ground firmly in any setting. Whether it’s a family dinner or a casual gathering of friends, it brings some classy Italian vibes to your dining experience. It’s simple enough not to overshadow the company but delicious enough to earn collective praises, setting the stage for memorable gatherings.
Lastly, this Spaghetti & Spinach with Sun-Dried Tomato Cream Sauce is a testament to how cost-effective recipes can still be gourmet. It uses simple ingredients efficiently, ensuring that you can enjoy high-quality meals without breaking the bank. Its accessibility is further heightened by the lack of need for specialty ingredients, allowing for ease of preparation in many kitchens worldwide.
Historical Background and Cultural Significance
The origin of this Spaghetti & Spinach with Sun-Dried Tomato Cream Sauce draws inspiration from traditional Italian pasta dishes that emphasize simple yet bold flavors. Traditionally, sun-dried tomatoes have been a key part of Southern Italian cuisine, where the tomatoes are sun-dried to preserve their rich flavor and shelf life during the colder months.
In the cultural landscape, pasta holds an esteemed position in Italian cuisine, symbolizing the diversity and ingenuity of Italian cooking. The addition of spinach not only enhances the dish’s nutritional profile but also adds a touch of modern interpretation to the classic recipes, conveying the evolving nature of culinary arts.
Over the years, the concept of incorporating cream sauces with pasta has gained popularity, especially in Western variations of Italian cooking. The creamy element introduces an indulgent texture, creating dishes that are both comforting and sophisticated—qualities most cherished in contemporary dining.
Regionally, while this specific combination is more a product of modern culinary experimentation, it pays homage to its roots in regions famous for sun-dried tomato and spinach production. Across Italy, variations can include different types of pasta, added proteins like meats or cheeses, and herbs that flourish in local gardens, adapting it to regional tastes and ingredients available.
Ingredient Deep Dive
The sun-dried tomatoes are undoubtedly the stars of this dish, contributing a concentrated flavor that accentuates every bite. Traditionally, these tomatoes are dried under the Mediterranean sun—a process dating back centuries. This method not only preserves their robust taste but also intensifies their natural sweetness. Nutritionally, they are rich in antioxidants, particularly lycopene, known for cardiovascular benefits.
When selecting sun-dried tomatoes, opt for those packed in olive oil, as they are softer and more flavorful due to the preserved infusion. Store them in a cool, dry place; refrigeration helps extend their shelf life, preventing spoilage. If needed, dry-packed versions can be rehydrated in warm water or wine for added depth of flavor. Substitute options include roasted red peppers for a milder taste profile.
As for spinach, this leafy green is a powerhouse of nutrients, being high in vitamins A, C, K, and iron. In culinary history, spinach has been celebrated for its adaptability in sauces, pastas, or as a standalone dish. To choose the best spinach, look for vibrant green, unblemished leaves, ensuring a fresh and crisp texture. Proper storage involves wrapping in paper towels and placing in a perforated plastic bag in the refrigerator to maintain freshness.
Spinach can easily be substituted with other greens such as kale or Swiss chard, though they may impart a different texture. For those focused on budget, frozen spinach offers a cost-effective and convenient option, maintaining nutritional integrity while reducing prep time.
Common Mistakes to Avoid
Overcooking the pasta can lead to a mushy texture. Always aim for al dente, checking the pasta a minute before the package directs.
Using too much cream can overpower the dish’s flavor nuances, so measure carefully and adjust as needed.
Neglecting to sauté the garlic properly can lead to a harsh taste; make sure it is golden for maximum flavor.
Adding fresh spinach too early can result in wilted, slimy greens. Introduce it at the end to preserve color and crunch.
Not adjusting seasoning can lead to a bland dish. Taste continuously, adding salt, pepper, or extra herbs as needed.
Using inferior quality sun-dried tomatoes may lack the robust flavor needed. Investing in good-quality ones is key.
Forgetting to save pasta water for the sauce may result in a less cohesive dish. The starch helps to bind sauces.
Overcrowding the pan when sautéing can lead to steamed vegetables rather than sautéed, diminishing the flavor.
Essential Techniques
The perfect penne pasta is an art best mastered by understanding al dente. Translating to ‘to the tooth,’ this technique is crucial for achieving the desired firmness when biting the pasta, ensuring it holds its shape and absorbs sauce well. Boil plenty of salted water to allow the pasta freedom to move and cook evenly. Taste it a minute before the time suggested on the package, and if it offers a slight resistance yet yields to your teeth, it’s ready.
Sautéing garlic for aromatic base layers requires patience. Avoid rushing this step; slow cooking of garlic releases its full bouquet without burning, which can cause bitterness. Golden, not brown, is the perfect stage—a gentle warm hue and a sweet, nutty aroma develop, hinting readiness to infuse into the sauce seamlessly.
Incorporating pasta water into the sauce achieves silkiness without heavy creams. The pasta water, rich in starch from the cooking pasta, acts as a thickener and binder, allowing the sauce to coat the pasta rather than just sitting atop it. Add sparingly, enhancing the sauce’s texture gradually while melding flavors harmoniously.
Pro Tips for Perfect Spaghetti & Spinach with Sun-Dried Tomato Cream Sauce
Understand the timing of adding different ingredients. Introduce spinach at the last moment to preserve its vibrant color and nutritional value. Its gentle wilting should occur from residual heat rather than direct flame.
Create depth in your sauce by gently simmering sun-dried tomatoes before pureeing them into the cream. The slow release of flavors when cooked elevates the tangy notes and complements the creamy background beautifully.
When selecting sun-dried tomatoes, choose those packed in olive oil when possible. They often have a richer taste from their preserved state, drastically improving the overall flavor profile.
Taste your sauce as it simmers and remembers the magic of seasoning. Salt enhances natural flavors, but its overuse can overshadow them. Consider white pepper to maintain the sauce’s color purity while gently infusing warmth.
While preparing the pasta, add salt generously to the boiling water. It should be as salty as the sea; this is your only opportunity to directly season the pasta itself.
Conserve leftover pasta water for potential sauce adjustments. If you find the pasta or sauce too dry when combined, a splash of pasta water will rehydrate and invigorate the dish.
When reheating, use a gentle method to retain texture and flavor. Stir on low heat, slowly allowing it to regain warmth without separating, often a risk with cream-based sauces.
Variations and Adaptations
Mediterranean influences can diversify this dish by switching basil for thyme or oregano—spices that amplify the sun-dried tomato’s flavors advancing into more herbaceous notes. For a protein boost, add cooked pancetta or grilled chicken, satisfying meat lovers while enhancing the dish’s depth.
Seasonal adaptations are simple; incorporate winter greens like kale that survive colder environments without losing nutrient quality. Alternatively, Summer’s bounty of fresh basil or cherry tomatoes can heighten the flavor and inject more freshness into every mouthful.
Dietary modifications can easily be achieved by substituting with gluten-free pasta or a vegan cream cheese or coconut milk in place of dairy, ensuring the dish remains inclusive without losing its essential character.
To heighten flavor, consider using roasted garlic for a mellowed, caramelized twist rather than fresh minced garlic. This variation introduces a new sweet earthiness that pairs beautifully with sun-dried tomato vibrancy.
Textural adjustments could include toasting pine nuts for a nutty crunch topping the dish just before serving.
Presentation alternatives suggest serving this pasta in a broad, shallow bowl, permitting ample sauce per bite, highlighting multi-colored layers, and inviting diners visually before they’ve even tasted it.
Serving and Presentation Guide
Consider using wide, shallow dinner bowls when plating this dish. They allow the sauce to pool around the pasta attractively, visually celebrating the creamy red hue that compliments the vibrant green spinach. Arrange the pasta in nested twirls to encourage clean, stunning visuals that invite an enjoyable dining experience.
Enhance the appearance of this dish with freshly grated parmesan or pecorino cheese, plus a light drizzle of quality olive oil before serving. Add a sprig of basil to each bowl for color contrast and aromatic appeal, amplifying the freshness.
For traditional accompaniments, a simple Italian green salad on the side bolsters this meal, offering a crispness that contrasts the creamy pasta effectively.
Modern serving suggestions include offering this dish with artisanal bread to dip into leftover sauce—a tactile, interactive element your guests will adore.
Temperature considerations strongly suggest serving this dish warm but not scaldingly hot; this subtly alerts diners to the array of flavors while maintaining the hoped-for creamy pasta texture.
Portion control is easily managed with recommended serving sizes that maintain sufficient pasta per person, ensuring satisfaction without excess.
Wine and Beverage Pairing
For wine pairings, consider a chilled glass of Pinot Grigio or Sauvignon Blanc. These bright, crisp whites perfectly counter the creaminess while complementing the sun-dried tomatoes’ acidity. If you prefer reds, a light Chianti or a Grenache would also pair nicely, their fruity notes dancing rhythmically with the dish’s flavors.
Non-alcoholic alternatives like Italian sodas or sparkling water, infused with basil or citrus, provide refreshing accompaniment while ensuring the diner’s palate remains invigorated.
Pairing this dish with coffee or tea may seem unexpected but can be delightful. Opt for a mild black tea or a simple roast espresso for post-meal enjoyment, aligning flavor profiles without overwhelming the palate.
Mindful of temperature considerations, hot drinks post-dinner can conclude the meal warmly, matching the dish’s home-cooked tones with ease.
Ensure each beverage remains served cool to highlight their refreshing, balancing properties, enhancing the experience through juxtaposed temperatures alongside the warm pasta.
Storage and Shelf Life
Storing leftover Spaghetti & Spinach with Sun-Dried Tomato Cream Sauce requires careful consideration. Transfer any uneaten pasta to an airtight container, ensuring minimal air exposure. Store it in the refrigerator for up to three days, retaining flavor and texture when eaten at a later time.
Temperature requirements suggest keeping it below 4°C (40°F) to prevent bacterial growth while maintaining edibility when reheated. If freezing, do so only with assurance that it won’t detract from the sauce’s integrity, avoiding potential separation.
Check for spoilage if unpleasant odors or changes in texture and color arise. Cream-based sauces may be susceptible to deterioration—discard immediately if suspect.
Reheat by placing it in a pan over medium heat, adding a splash of milk or reserved pasta water to restore its creamy nature. Stir continuously to ensure evenly reheated portions.
Freezing should only be considered with caution—it might affect the sauce’s smoothness post-thawing, potentially deflating the dish’s overall appeal.
Make Ahead Strategies
Consider a prep timeline where spinach is washed and sun-dried tomatoes are measured beforehand, neatly placing in containers ensures time-efficient assembly.
Storage between steps may include keeping the sauce prepared up to two days in refrigerator, allowing an effortless finish with freshly cooked pasta when needed.
Assessing quality impact shows minimal degradation when preparing certain elements ahead—the cream sauce tends to thicken, requiring loosening during final cooking steps.
During assembly, remember to maintain pasta texture by cooking al dente just before mixing. This approach allows reheating while preserving integrity.
If reheating, restore creaminess gradually over low heat, gently stirring and adjusting seasonings to match freshness expectations.
Introduce fresh elements like basil at the last moment could seal flavors anew, ensuring vibrancy and aroma prevail till serving time.
Scaling Instructions
When halving the recipe, adjust ingredient proportions accordingly, keeping flavor balance paramount. This controlled reduction remains beneficial when cooking just for yourself or a smaller gathering.
Should you want to double or triple this delightful dish, ensure ample pot space to prevent overcrowding, accommodating uniform cooking. Maintain equal ingredient ratios for optimal taste.
Adjusting equipment may require utilizing a larger pot or pan, enabling proper sautéing and sauce mixing without spilling or uneven heat distribution.
Increasing quantities might necessitate timing modifications; cook larger batches marginally longer for consistent results, while monitoring both pasta and sauce.
Don’t overlook storage considerations. Larger batches post-cooking require multiple containers, keeping servings conveniently separated and easily reheatable without quality compromise.
Nutritional Deep Dive
Exploring this dish’s macro breakdown highlights a commendable balance of carbohydrates, primarily from pasta, essential for energy replenishment. Fats from olive oil and cream contribute to satiety, while proteins serve as complements—the addition of toasted pine nuts or grated cheese fulfills this role adeptly.
Micronutrient analysis uncovers spinach’s contribution of iron, Vitamin C and K, pivotal for immunity and bone health, bolstering the dish’s nutritiousness.
Health benefits shine through the antioxidants within sun-dried tomatoes, advocating for cellular protection and cardiovascular well-being—a justified benefit to every serving.
Dietary considerations emphasize moderation; employing pasta that’s wholegrain or a gluten-free alternative continues to cater to diverse preferences without sacrificing satisfaction.
Portion analysis underscores sensible serving sizes to meet dietary goals, providing calories that support balanced living while minimizing potential overindulgence.
Given its comprehensive macronutrient lineup, this dish naturally fosters responsible weight management while delivering a delightful Mediterranean pasta experience.
Dietary Adaptations
A gluten-free version of the dish is attainable by subbing regular spaghetti with a certified gluten-free option, ensuring no compromise in flavor but meeting dietary restrictions head-on.
For dairy-free needs, replace cream with a coconut or cashew-based variety, maintaining the sauce’s creamy texture while avoiding lactose, expanding its inclusivity further.
Transforming this into a vegan delight simply requires substituting non-dairy cream and omitting cheese—each step seamlessly integrated without overshadowing flavors.
Moving to a low-carb approach involves choosing vegetable noodles, such as zucchini strands in lieu of traditional pasta, embodying healthier, innovative alternatives.
Keto diners find the almond flour pasta alternative enticing, offering a ketogenic compatible meal while retaining intended taste and presentation outcomes.
For paleo enthusiasts, focus on traditional cream replacements and grain-free pasta options, delivering culinary satisfaction while abstaining from dietary conflicts.
Those following low-FODMAP diets can achieve success with ingredient swaps, including garlic-infused olive oil to bypass intolerances without losing taste.
Troubleshooting Guide
Should texture issues arise, potentially separating cream causing graininess, simply blend some sauce to recapture smoothness—a straightforward fix.
To counterbalance flavor discrepancies, if ever too salty or bland, adjust by adding more cream or salt accordingly, developing a harmonious taste.
Temperature problems when reheating require gradual warming, ensuring stability—is crucial when maintaining creamy consistency post-fridge storage.
Equipment challenges may surface with pan size; a larger skillet or nonstick when sautéing spinach ensures not crowding and maximizes surface contact.
Ingredient substitutions occasionally lead to diverse results; adhering closely to suggested swaps guarantees similarity in flavor and impact.
Timing concerns impacting pasta overcooking counteracted by draining a minute early, reserving pasta water for further sauce integration.
Recipe Success Stories
One community member shared this recipe’s debut at her intimate dinner party, each guest raving about the creamy sauce’s intricacy and her effortless presentation. Her secret incorporated the slow introduction of lemon zest, adding a citrusy edge appreciated widely.
Another reader triumphed with variation success, introducing Italian sausage crumbles into the mix, delivering depth and hearty complexity. The suggestion garnered admiration, elevating a simple weeknight dinner to a memorable event.
Adaptation stories pour in aplenty with vegan renditions, using cashew cream while coaxing those sensitive to dairy into supportive feedback, appreciating the dish’s magnified inclusivity.
Reader suggestions often include additional veggies like sautéed mushrooms, embracing the recipe’s foundational flexibility, their inclusion validated by many who’ve explored them.
Photography tips breathe life into the dish’s vibrancy, captured stunningly from overhead angles accentuated by clean, natural lighting, sharing visual inspiration that motivates aspiring cooks.
Frequently Asked Questions
Can I use fresh tomatoes instead of sun-dried tomatoes?
Fresh tomatoes can deliver a different texture and flavor profile due to higher water content. Consider oven-roasting to mimic sun-dried intensity, or use them as a fresh garnish.
What’s the best alternative to cream for a lighter sauce?
For a lighter sauce, coconut milk or evaporated milk offer lower calorie alternatives while preserving creaminess; these may introduce other flavor notes to complement the overall taste.
Can this recipe be made ahead?
Yes, prepare components like the sauce in advance, refrigerate up to two days then combine with freshly cooked pasta when ready. This saves time and enhances flavors blended over refrigeration.
What type of pasta works best with this sauce?
While spaghetti pairs delightfully, penne, fettuccine, or spirals also soak up the sauce well, creating a uniform balance—choose based on preference, consistency retained throughout.
Can I add protein to this dish?
Yes, grilled chicken, shrimp, or sausage make excellent additions. Cook separately ensuring complete doneness, then mix during final assembly, enhancing both nutrition and flavor complexity.
How do I prevent the cream sauce from curdling?
Maintain low to moderate heat while cooking; high temperatures may lead to curdling. Stir continuously to keep sauce cohesive, and avoid direct boiling after cream addition.
Is this dish freezer-friendly?
While possible, note that texture might alter due to cream thawing. If freezing, consider separating components, reheating gently to restore sauce back to its creamy texture when ready to serve.
How can I adjust the spice level?
Introducing crushed red peppers or a hint of cayenne pepper enhances warmth, inviting a layer of spiciness. Gradual integration allows control, catering to desired heat levels.
What can I use as a garnish if fresh basil isn’t available?
Substitute with flat-leaf parsley or chives providing mild flavor contrasts, or sprinkle lightly with toasted seeds and nuts capturing texture abundance creatively beyond herbs alone.
Can I serve this dish cold as a pasta salad?
While traditionally served warm, adaptations exist as a chilled dish seasoned with additional dressing for moisture, noting sun-dried tomato’s flavor exponentially enriches cold preparations.
Additional Resources
Explore related recipes such as “Sun-Dried Tomato and Basil Risotto,” adding another dimension to your culinary journey. Each dish builds on sun-dried tomato brilliance, amplifying your repertoire of Mediterranean inspired cuisine.
Technique guides offer step-by-step insight into sauté and simmer mastery, refining skills critical for creating cascade layers of flavor found within this pasta dish.
Dive into ingredient information, revealing the nuances of spinach’s dietary wonders and sun-dried tomatoes’ vibrant legacy woven into Italian heritage—educational outreach welcoming you deeper into culinary traditions.
Equipment recommendations ensure desired results consistently. Choices ranging from quality nonstick pans to sturdy components amplify efficiency and outcome, rendering your cooking endeavors less daunting.
Discover seasonal variations celebrating nature’s offerings through year-round appeal, tailoring dishes to showcase fresh ingredients sustaining taste and nutrition cycle throughout changing months.
Join the Conversation
Join fellow food enthusiasts on social media platforms sharing your own creations and iterating upon this Spaghetti & Spinach with Sun-Dried Tomato Cream Sauce. Photograph each step, from sourcing fresh ingredients to the finished masterpiece, lighting it beautifully, and applying filters that capture your culinary journey.
Write insightful recipe reviews, expanding community knowledge through personal experiences and suggestions. Contributions include tweak triumphs, ingredient availability, and schedule-friendly shortcuts.
Engage community members welcoming recipe variations, unveiling endless adaptability accommodating preferences and dietary prerequisites diversely.
Share photography tips encouraging participation, detailing camera settings, plating angles, and lighting conditions underscoring food styling—an art uniting culinarians worldwide.
Active engagement fosters inspiring connections and the shared goal of celebrating exceptional home-cooked meals, broadening horizons, and embracing new, delicious adventures.
The Recipe
Spaghetti & Spinach with Sun-Dried Tomato Cream Sauce
Serves: 4
Prep Time: 15 mins
Cook Time: 20 mins
Total Time: 35 mins
Kitchen Equipment Needed
Large pot for boiling pasta
Sauté pan
Wooden spoon
Strainer
Blender or food processor
Ingredients
12 oz spaghetti
2 tbsp olive oil
3 cloves garlic, minced
1 cup sun-dried tomatoes in oil, drained and chopped
1 cup heavy cream
6 cups fresh spinach
1/4 cup grated parmesan cheese
Salt and pepper, to taste
Fresh basil, for garnish
Directions
Cook spaghetti according to package instructions in salted water until al dente. Reserve 1 cup of pasta water, then drain and set aside.
In a large sauté pan, heat olive oil over medium heat. Add garlic and sauté until fragrant, about 1 minute.
Stir in sun-dried tomatoes, cooking for an additional 2 minutes.
Pour in heavy cream and allow the mixture to simmer, reducing slightly, approximately 5 minutes.
Blend the sauce using a blender or food processor until smooth, then return to the pan.
Add spinach to the sauce, letting it wilt gently. Incorporate drained spaghetti, using reserved pasta water to adjust sauce consistency as needed.
Stir in parmesan cheese, seasoning with salt and pepper to taste.
Garnish with freshly torn basil and additional parmesan before serving.
Recipe Notes
For a vegan version, substitute heavy cream with cashew cream and parmesan with nutritional yeast.
Add crushed red pepper for a spicier kick.
Can be stored in an airtight container and refrigerated for up to 3 days.
Craft Delicious Fun at Home with This Bubble Gum Recipe
Homemade Bubble Gum Recipe: Create and Chew Your Fun!
⚖️
Difficulty
Easy
⏲️
Prep Time
10 mins
🕒
Cook Time
15 mins
⏱️
Total Time
25 mins
🍽️
Servings
10 pieces
Homemade bubble gum is an exciting and nostalgic treat that brings a splash of fun to any day. This delightful recipe lets you create your own chewing gum, offering an engaging kitchen project perfect for families and candy lovers. The sweet aromas that fill your kitchen during preparation will bring you back to carefree childhood days spent at the candy store. With its chewy texture and sweet flavor, this homemade bubble gum recipe promises an enjoyable experience for makers and chewers alike.
Making your own bubble gum is not only about savoring the outcome; it’s also about enjoying the process. This fun recipe is a wonderful way to unleash your creativity by experimenting with various natural flavors and colors. Create a burst of fruity flavors or a classic minty freshness—either way, this simple bubble gum recipe lets you customize each piece to your liking. Roll up your sleeves and join us as we explore how to turn basic ingredients into a delightful and chewy treat that’s sure to impress!
Quick Recipe Highlights
Flavor Profile: Enjoy a versatile base you can customize with your favorite extracts and flavorings, ranging from fruity to minty.
Texture: Achieve a perfect, chewy mouthfeel that mirrors the nostalgia-inducing texture of your favorite store-bought gums.
Aroma: Entice your senses with aromatic notes influenced by the flavoring oils you choose, curating an enchanting kitchen ambiance.
Visual Appeal: Mold your bubble gum into fun shapes and colors for a captivating visual effect that enhances the chewing experience.
Skill Level Needed: Suitable for beginners, this recipe includes simple techniques, with detailed steps ensuring successful gum creation without fuss.
Special Equipment: You’ll need a durable saucepan, spatula, and a candy thermometer to achieve the precise temperature necessary for gum base preparation.
Recipe Overview
Difficulty Level: This homemade bubble gum recipe is easy to prepare, requiring only basic candy making techniques, making it suitable for novice cooks and children with adult supervision.
Category: Falling under fun confections & candy-making, it’s ideal for crafting playful sweets from scratch.
Cuisine: While bubble gum is enjoyed worldwide, this recipe shares lineage with American confectionery traditions, inspired by the classic bubbles we all adore.
Cost: Homemade bubble gum is budget-friendly, comprising low-cost ingredients especially when bought in bulk for batch-making.
Season: Perfect to craft any time of year, particularly during season transitions when you’re searching for cozy indoor activities.
Occasion: A delightful treat for birthday parties, festive holidays, or just when you’re craving a homemade candy challenge.
Why You’ll Love This Recipe
Crafting homemade bubble gum from this recipe serves as an incredible sensory indulgence, blending the joy of tactile involvement with flavor exploration. The chewy consistency and delightful bursts of customizable flavors make every piece part of a cherished experience. With this recipe, the endearing simplicity allows you to whip up batches at moment’s notice, bringing spontaneity into your kitchen play.
Furthermore, this bubble gum recipe is a stress-free kitchen activity that removes the busy prep typically associated with gourmet confections. It’s not just an endeavor in candy-making ease; it also offers a satisfying simplicity reducing the demand for intricate baking or cooking skills—delivering whimsical pleasure with minimal fuss.
Nutritionally, making bubble gum at home grants you control over the amount and type of sweeteners used, reducing excess sugar content typical in store-bought options. This approach aims to blend enjoyment with slightly healthier choices, offering homemade comfort while minimizing guilt.
The recipe also promotes social bonding, as it doubles as a fantastic group activity for family gatherings or play dates, providing an opportunity to share smiles and laughter. Making, molding, and chewing this nostalgic treat helps promote personal connections, amplifying the fun.
Economically, whipping up your own bubble gum is cost-effective, saving you the expense of purchasing high-priced artisan gums. By investing a little time in creation, you’ll enjoy an ample supply of sweet indulgence without breaking the bank—fun for the family that’s financially savvy too!
Historical Background and Cultural Significance
Bubble gum’s story begins with the ancient history of naturally tapped tree resins, which served as chewable substances long before commercial gums emerged. Over time, these resins evolved into the flavorful confections we associate with today’s bubble gum, thanks to inventive candy makers of earlier centuries.
Culturally, bubble gum symbolizes youth and playful living, firmly rooted in the collective memory of society’s carefree moments. From 20th-century baseball cards to playful pranks like snapping gum bubbles, its significance extends beyond mere confection into charming life snippets.
The bubble gum recipe gradually evolved as a staple of American candy manufacturing during the early 1900s, marking an era of innovation and delightful excess. Change emerged in various proprietary blends aiming to capture ever-bigger bubbles, delving into the irresistible whimsy still continuing to captivate hearts today.
Regionally, bubble gum transcends borders, attracting varied interpretations globally, with each culture tweaking ingredients to match local tastes and traditions, thus maintaining a shared love while cultivating unique flavor profiles.
Ingredient Deep Dive
One of the core ingredients, Gum Base, plays the leading role in achieving authentic chewy textures. Though derived from rubber or wax bases, modern iterations ensure non-toxic, edible quality, serving as a unique element tied to the art of confection making. Precise handling ensures a versatile chew.
Another vital component is Sugar or Sugar Substitute, impacting gum’s sweetness level and flavor balance while providing familiar comfort. Opt for natural sources like xylitol when opting for dental health considerations or reduced sweetness without compromising deliciousness.
Food Flavoring, determining gum taste, allows for endless possibilities, from classic fruit to bold espresso notes. Opt for high-quality, oil-based flavors as they’re potent enough to impart vibrant personality to every morsel.
Storability is straightforward; wrap bubble gum individually in wax papers to maintain freshness and prevent sticking. Properly sealed gum can be stored at room temperature for weeks, extending its delightful enjoyment through time.
Substitute options include adapting sweeteners or experimenting with sustainable, plant-based wrappers, allowing for a personalized approach to this classic treat. Exploring these alternatives can yield results aligned with current wellness trends without sacrificing chewability.
Common Mistakes to Avoid
Overcooking the gum base can result in hard, unchewable gum—monitor temperatures closely with a candy thermometer for best results.
Using too much food coloring might lead to stained fingers—only require minimal amounts for desired vibrancy.
Not measuring ingredients accurately risks unbalanced sweetness or flavor—exact ratios are key.
Ignoring the cooling process can cause burns—let hot gum base cool slightly before contact.
Adding flavoring too early diminishes taste potency—introduce after removing from heat.
Skipping wax paper wrapping leads to gum pieces sticking together—essential in presentation.
Not sterilizing equipment might introduce unwanted residues—ensure cleanliness to maintain quality.
Excessive flavor combinations can create off-putting tastes—start with one or two complementary flavors.
Essential Techniques
Cooking the gum base forms the foundation of your bubble gum’s texture, demanding attentive temperature control to ensure pliable chewiness. Practice stirring continuously to prevent scorching and achieve a smooth, sticky consistency ready for flavoring.
Flavoring integration involves timing finesse; add flavor oils after removing gum from heat to maintain strong aromatic impact. This technique preserves intensity, allowing for each bubble to burst with vivid taste profiles lingering enjoyably on the tongue.
Rolling and cutting gum into pieces permits creative freedom in shaping. A balance between pressure and gentle handling converts sticky gum into playful shapes. Apply light cornflour if needed to prevent sticking, enabling easy manipulation.
Mastery over these techniques heralds successful bubble gum creations, consistently yielding edible treasures boasting charm and delicious flair. Pay close attention to cues such as temperature and consistency, crucial factors ensuring desired results.
Pro Tips for Perfect Homemade Bubble Gum
When melting gum base, using a double boiler ensures even heat distribution, preventing scorching and promoting a smoother finish.
Select robust flavors like peppermint or fruit oils for a stronger taste that stands up to the gum base’s inherent chew.
If bubbles don’t form easily, ensure the gum consistency is balanced—too soft or too hard gum impacts bubble creation.
Experiment with adding a pinch of citric acid for tangy flavors reminiscent of sour candies if desired.
To enhance color vibrancy, use gel-based or natural food colors rather than liquid dyes, offering boldness without excessive staining.
Keep kids entertained by involving them in molding and shaping the gum for a hands-on approach promoting interactive skill development.
Store completed gum in airtight containers in a cool, dry place, extending their freshness and enjoyable quality.
Strive for unique combinations, coupling flavors like watermelon lime or berry mint for exciting, modern twists on traditional choices.
Variations and Adaptations
Regional variations often merge local herbs and spices into gum recipes, adding a twist. Consider integrating unique essence extracts from global cuisines like cardamom or star anise for intriguing aromatics.
Embrace seasonal opportunities by crafting holiday-inspired themes, such as cinnamon clove gums for winter warmth or zesty lemon for summer zings. Tailoring flavors to seasonal environments creates harmonious chewing experiences.
Dietary modifications can involve sugar alternatives catering to reduced-sugar preferences. Introducing herbal sweeteners like stevia offers sweetness without associated glucose spikes, respecting necessary dietary restrictions with comfort.
Adventurers can take flavor exploration further by experimenting with spicy infusions like cayenne or ginger for warmth, alongside a spectrum ranging from tropical to dark chocolate undertones.
To change texture, adjust the gum base’s ratio to create firmer bites or softer, marshmallowy chews, meeting personalized texture predilections effortlessly.
Presentation alternatives grant creative expression, allowing wrapped gum pieces to become theme-enhancing decor elements at gatherings, transforming serving design into captivating party aesthetics matching overall themes.
Serving and Presentation Guide
Maximize impact by cleverly presenting bubble gum wrapped in colorful, themed wax papers linked to the occasion or celebration theme.
Craft sophisticated, spread-out arrangements using layered tiers or candy bowls to stimulate visual intrigue at dessert tables or party spreads.
Garnishing each piece with edible glitter or dried petals links edible artistry with everyday snacking, augmenting flat flavors with appealing visual cues.
Pair bubble gum with traditional treats like popcorn for classic, balanced snack combinations during movie nights, enhancing sensory satisfaction.
For a modern touch, integrate into dessert platters for sweet finales, striking a playful contrast alongside hearty confections, elevating digestif courses.
Monitor environmental temperatures; excessive humidity might hasten gum secretion or stickiness—keep displays air-conditioned or appropriately covered to sustain allure.
Ensure portion control, advising guests against excessive gum consumption, prioritizing palate cleansing between varied courses to accentuate overall meal rhythms.
Wine and Beverage Pairing
Savor your homemade bubble gum alongside fruity wines—light rosés or sparkling whites complement fruity flavor notes beautifully, enhancing the overall tasting profile with fresh, fragrant bubbles.
Non-alcoholic alternatives include pairing with chilled lemonades or herbal teas—creating vibrant, refreshing counterpoints enhancing chewing pleasure through contrast.
For coffee lovers, pairing with lightly iced espressos or caramel lattes immerses the gum in rich warmth, elevating flavor interplay while underlining cozy indulgence.
Opt for cool sabered champagne or dairy-free coconut sparklers to uplift bubble gum’s classic cheer alongside adventurous fizz, experimenting with refreshing effervescence.
Modern serving suggestions endorse creatively crafted cocktail syrups or lightly spiced ciders, fusing harmonious aromatic layers complementing gum tastes with artisanal flair.
Temperature considerations highlight serving cold beverages kept at optimal chill, preventing confections from overheating or losing structural integrity while embarking on juicy adventures.
For wine connoisseurs interested in retaining bubble gum’s appeal, taper off pairings with precise sips amidst savoring intervals, capturing flavor highlights at their peak, ensuring measured enjoyment.
Storage and Shelf Life
Homemade bubble gum’s storability hinges on proper sealing, maintaining freshness over an extended period. Keep wrapped gum pieces neatly organized in an airtight container, preventing air exposure.
Temperature requirements tap into ambient stability, with durable shelving or pantry spaces maintaining optimal parameters. Avoid volatile environments triggering gum abnormalities.
Container recommendations involve sleek, easy-to-sterilize vessels like glass jars with tightly fitted lids, offering refined simplicity combined with functional utility in storage.
Signs of spoilage are minimal; however, sticky moisture accumulation or flavor mutations suggest nearing end-life stages—guidance resolves preserving delightful attributes securely.
Reheating instructions dictate controlled melting using a stovetop double-boiler method—a forgiving reheating approach enabling restoration if manual cracking falters.
Freezing guidelines lean against extensive cold storage; while viable for some candies, bubble gum preservation ideally skips freezing due to textural compromises.
Make Ahead Strategies
Make-ahead strategies pivot towards streamlined preparation segments, maximizing efficiency without compromising gum quality. Prioritize ingredient gathering, weighing precise measures before kickstarting any process.
Strategically place prepared gum base in non-stick surfaces or waxed paper, letting cooling steps fall into natural resting segments ensuring flexibility in taller evening timelines.
Assess adhesion of flavors promptly after each phase as premature wrapping shifts quality dynamics away from taste perfection.
If preparation interference delays progress, opt for dividing workload into enjoyable duo phases, ensuring bubble gum compiles remain pristine before final assembly.
Reheating guidelines emphasize double boiler elevation, ensuring recovery seamlessly preserves desirably smooth ductility while reclaiming original chewability in restoration scenarios.
Fresh element additions supplement gum variety, integrating them through wrapped step-offs, weaving flavor undertones across gum rainbow for multifunctional explorations aligning with taste proclivities.
Doubling or tripling operations, alternatively, demand expansive concentrations with emphasis on proportionate control to avert deviations transforming consistent delights into chaos-driven inconsistencies.
Equipment adjustments beckon pragmatic shifts towards wider-surfaced traces synchronizing elevated battlings below forging productive synergy among newly juxtaposed volumes.
Timing modifications epitomize adaptability extensions allowing custom scheduling without renegotiating yo-yo pitfalls compromising intended outcomes duplicated across segments.
Storage considerations revolve around carefully established slots inducing stable ambiance insulating any scale’s vitality—inevitably resulting in secure provisions perpetually blessing recipients with succulent gifts formed through unity.
Macronutrient analysis allots gum modest carb estimates mirroring its sugar-corresponding baseline, making low-active calorie intake entail dental enhancement without gaining extra fat on waistlines relevant in specified quantum.
Health benefits manifest through tactile satisfaction not perfused peri-fuel basis establishing alternative habit whose flavor retrains hunger surge submerging forbearance during transitory chewing diversions.
Dietary considerations complement gum adaptability across assorted profiles, from odorless blends prioritizing diabetes through glycemic-indicant trimming up trending idol’s caricature combining virtueless aspects endemic purposes always rationalized.
Portion analysis underlies distinctly cleaving to small component selections encasing actual security highlighting showy interactive control replicating relinquishing overage within population entertainment circuits piloting prominently restrained-gathering similarities quintessential nuances unveiling.
Weight management tips rely on strategic chewing moments offering toothsome gratification timeouts, curbing cravings through tangible negotiation personally buffering anticipated ingestion needle negatively influenced uprising before fullness identification.
Dietary Adaptations
Gluten-free modifications replace standard gum base with certified GF options, ensuring textures remain consistently chewable for gluten-sensitive conveners—enhancing inclusion without compromising versatility.
Dairy-free formulations navigate sugar alternatives choice or oil-based flavorings supplanting traditional lactose-inducing extracts retaining exquisite gum elasticity unimpaired.
Vegan outlooks substitute honey or animal-derived provisions seamlessly incorporated within plant-derived substrates instrumentally preserving ideal gum accentuating ethical choices.
Keto variants delve into recombinant enrichments facilitated by neutralizing staple sugar conversions favoring customized probiotics enabling profoundly aligned scheme absent any structural devolutions encountered otherwise.
Paleo dirección safeguards integrity by opting for protein-yielding plant products mimicking ancestral gum heritage manipulating recommendations through contemporary inclusivity norms.
Low-FODMAP initiatives remain viable, opting for suitable substrate replacements optimizing weight-related conditions without succumbing to latent discomfort compromise fostering disrupted gut environment initiatives.
Other specific diet preparations rely on specific evaluative judgment aligning with bespoke considerations perpetuating successful gum reconciliations under general assembly.
Troubleshooting Guide
Texture issues arise when gum becomes too hard or rubbery, often caused by overcooking the gum base. Ensure precise temperature control and avoid excessive cooking duration to maintain optimal chewability.
Flavor balance problems may occur with improper incorporation timing, leading to weakened taste potency. Introduce flavorings post-heat removal to keep vibrant profiles intact throughout each chew.
Temperature problems can affect the melting and setting of ingredients, necessitating careful calibration with candy thermometer guidance to attain desired smooth consistency.
Equipment challenges emerge due to improper stove temperatures or inconsistent stirring techniques, demanding regular monitoring and control to eliminate uneven heating.
Ingredient substitutions may create recipe deviations unsettling traditional compositions—opt for equivalent flavor quality where possible to ensure authentic results mirroring intended creations.
Timing concerns surface as hasty approaches can skip critical cooling intervals disrupting overall process flow—adhere to adequate pauses before moving to subsequent making phases.
For texture issues when forming bubbles, ensure proper gum consistency is attained, balancing chew boundaries facilitating smooth and stress-free blow attempts.
Flavor balance demands awareness, with adjustments tailored individually suggesting trials either diluting or condensing intensity checked alongside pre-deployed flavor additions.
Recipe Success Stories
The community relishes accessing trusted recipes like this homemade bubble gum, emphasizing delight in preparing tangible nostalgia inducing joys, reminiscent of childhood’s simpler thrills with beloved family crew creations.
Variation successes reveal adventurous flavor pairings like champagne berry or chocolate citrus—foregrounding success across unconventional ventures celebrating deep-seated, diligently made gourmet fears dared through exploration.
Adapting stories tell of unexpected alterations highlighting unorthodox combinations where sweeter sentiments accentuate culinary experiments riding amateuristic conquers while earning traditional credibility by verifying succeeding outcomes rampant casting.
What are the primary ingredients needed for homemade bubble gum? Essential components include a viable gum base, granulated sugar or its substitutes, food flavoring oils, and optional food coloring, ensuring color diversity and vivid tastes welcome creations.
How long does homemade bubble gum stay fresh? Wrapped and stored in airtight containers at room temperature, your gum should maintain its optimal freshness for several weeks, ready to deliver flavor and chew whenever required.
Is homemade bubble gum considered vegan? By swapping animal-derived ingredients with plant-based options, homemade bubble gum can certainly meet vegan guidelines, promoting conscientious eating indulgences for vegan enthusiasts.
How do I prevent my gum from sticking together? Utilize wax papers to wrap individual pieces, applying a light dusting of cornflour to surfaces if necessary, maintaining separation and ease of handling with attractive appeal.
Can I use natural food coloring? Certainly! Using plant-based colorings like beet juice or spirulina creates lovely, natural hues, enabling safer coloring solutions promoting environmental sustainability.
What is the best way to achieve a smooth gum consistency? Ensure a steady stirring pace as the gum base melts, avoiding abrupt flares, and maintaining gentle heat distribution to secure flawless consistency producing premium-quality chews.
Can I customize the gum flavors? Yes, diverse flavor oils offer endless options. Experiment with one or more complementary flavors as desired to match personal tastes or group preferences, customizing each batch with ease.
Can homemade bubble gum be made sugar-free? Certainly, by choosing sweeteners like xylitol or monk fruit, enabling sugar-free enjoyment without sacrificing the quintessential gum sweetness people adore.
How do I control bubble size in the gum? Ensure proper kneading for elasticity, prevent gum hardening during preparation, and manage flavor intensities to enable easy blow potential maximizing bubble creation success.
Does the gum need to be refrigerated? Not necessary; room temperature storage in a controlled environment, like cupboards or cool pantries, adequately preserves gum quality throughout its shelf life without refrigeration concerns.
Is it safe for children to make this gum? Yes, when appropriately supervised, children can safely join adults in crafting bubble gum successfully as fun and learning bonds to create meaningful kitchen memories.
How can I make my gum extra chewy? Ensure thorough kneading of the cooked gum base, possibly combining softeners like glycerine to ensure a consistent, easy-to-chew texture fascinating diverse chewers worldwide.
Additional Resources
Discover related recipes like Lollipops and Taffy, which share common techniques and ingredients with bubble gum, inspiring further confectionery projects in your culinary adventures.
For those intrigued by technique guides, candy creation manuals offer invaluable insights, promoting understanding of foundational elements yielding exquisite results replicable across kitchens far and wide.
Ingredient information dives deeper into flavor enhancing, offering exhaustive insights where oil emissions find fitting expansion comprehending paramount infusion guidance sustainably reinforcing culinary aspirations.
Equipment recommendations emphasize adopting durable, versatile kitchen tools guaranteed to aid bubble gum making successes, streamlining transformative efficiency along expected timelines.
Seasonal variations explore festive gum thematization enhancing holidays or celebratory events with timely color coordination and seasonal flavor infusions epitomizing joyous culinary festivities worldwide.
Join the Conversation
Engage with us on social media; share your homemade bubble gum experiences and creations. We’d love to see your innovative flavors and colorful designs, along with the joy and laughter it brings to your family.
Boost your food photography game through tips illuminating unique angles and lighting setups, capturing the textural nuances and colors that make gum photos pop, sharing stunning visuals with our community.
Invoke recipe reviews highlighting successes, tweaking outcomes, overall creativity progression marking each venture, and celebrating triumphs across flavor renditions.
Connect with fellow enthusiasts, sharing personal adaptations, interpretation quirks, and flavors traversing afar. Harness community collective wisdom to further enhance culinary treasure troves.
Explore recipe variations or share personal renditions particularizing distinct step-offs through instant peer communication, bolstering versatility and exchange across the charming world of bubble confections.
The Recipe
Homemade Bubble Gum
Serves: 10 pieces
Prep Time: 10 mins
Cook Time: 15 mins
Total Time: 25 mins
Kitchen Equipment Needed
Saucepan
Spatula
Candy Thermometer
Measuring Cups
Wax Paper
Ingredients
1/3 cup gum base
3/4 cup powdered sugar
1/3 cup corn syrup
1/4 cup food flavoring
Few drops of food coloring (optional)
1/8 teaspoon citric acid (optional)
Directions
Place the gum base in a saucepan over medium heat until melted.
Add corn syrup and stir until combined.
Slowly incorporate powdered sugar, stirring constantly to form a dough.
Remove from heat and introduce food flavoring and coloring, mixing thoroughly.
Turn the gum mixture onto a sheet of wax paper, knead until smooth.
Roll and cut into desired shapes, wrapping each piece in wax paper to prevent sticking.
Store wrapped gum in an airtight container at room temperature.
Recipe Notes
Adjust flavoring and colors according to preference for varied custom flavor profiles.
Optional citric acid adds a pleasant tang if desired.
Consistency may vary with brands; use a pinch of cornflour to reduce stickiness when kneading if necessary.