Delicious Garlic Herb Grilled Lobster Tails Recipe to Impress

Garlic Herb Grilled Lobster Tails: A Irresistible Seafood Delight

⚖️
Difficulty
Moderate

⏲️
Prep Time
15 mins

🕒
Cook Time
10 mins

⏱️
Total Time
25 mins

🍽️
Servings
2

Indulging in Garlic Herb Grilled Lobster Tails is an experience that captivates the senses, elevating any meal into a luxurious affair. The succulent lobster meat, tender and juicy, pairs effortlessly with a rich blend of garlic and fresh herbs that infuse each bite with an irresistible flavor. Whether you’re celebrating a special occasion or simply treating yourself after a long week, this dish promises to impress with its gourmet appeal and simplicity.

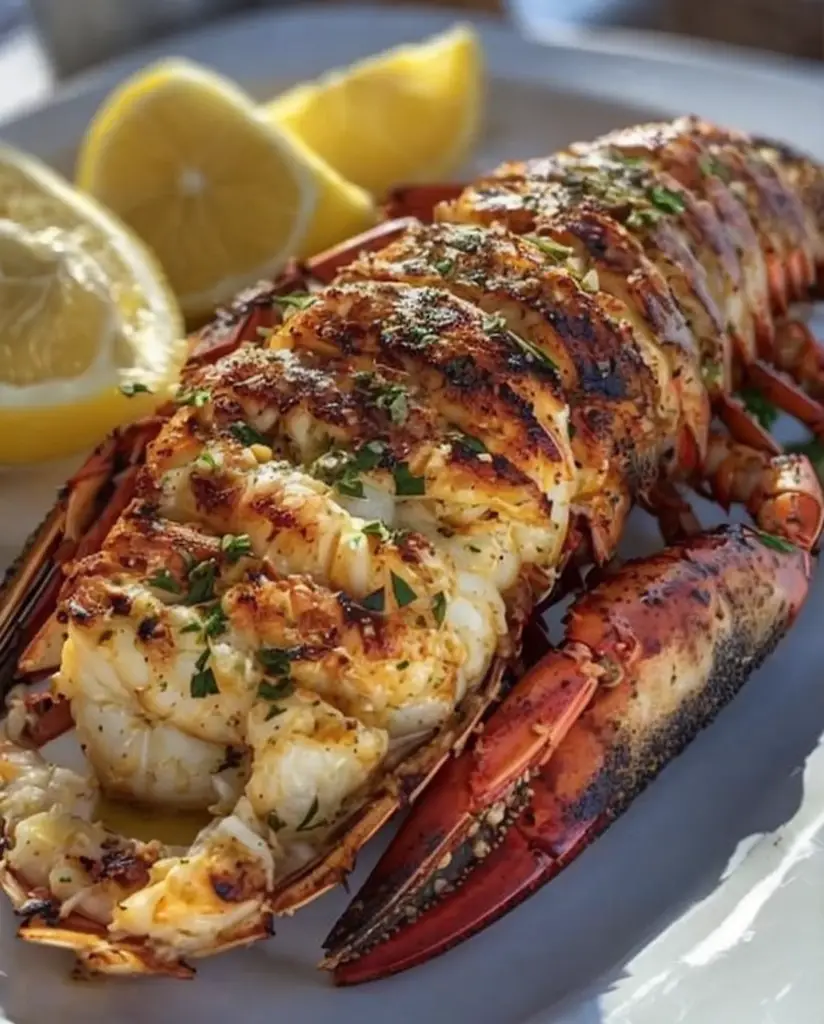
As the lobsters sizzle on the grill, their delightful aroma wafts through the air, heralding a culinary masterpiece. The preparation involves minimal effort, making it perfect for home cooks looking to achieve restaurant-quality seafood without the fuss. The vibrant colors of the lobster tails against the backdrop of the grill create an inviting visual that is guaranteed to make mouths water before the first bite is taken.

Quick Recipe Highlights

  • Flavor Profile: A harmonious blend of garlic, herbaceous goodness, and the sweet natural flavor of fresh lobster.
  • Texture: Firm yet tender lobster meat that is perfectly cooked, delivering a satisfying bite.
  • Aroma: Rich garlic notes intermingled with the fresh scent of parsley and lemon zest fill the air.
  • Visual Appeal: Golden-brown grilled lobster tails glistening with a drizzle of garlic herb butter.
  • Skill Level Needed: Requires basic grilling skills, great for both novice and experienced cooks.
  • Special Equipment: A grill or grill pan, tongs for handling hot seafood, and a basting brush for butter application.

Recipe Overview

  • Difficulty Level: This recipe falls under a moderate difficulty level, primarily because it requires careful timing to avoid overcooking the lobster.
  • Category: Ideal as a main dish for seafood lovers, perfect for summer barbecues or cozy dinners.
  • Cuisine: Influenced by coastal seafood traditions, particularly from regions where lobster is a prized delicacy.
  • Cost: While lobster can be a bit on the expensive side, the recipe calls for just a few ingredients, making it a worthwhile investment for a special meal.
  • Season: Best enjoyed during warmer months when grilling outdoors becomes a joyous activity.
  • Occasion: Perfect for celebrations, date nights, or impressing guests at a dinner party.

Why You’ll Love This Recipe

The taste and texture of Garlic Herb Grilled Lobster Tails are a marriage of elegance and indulgence. The sweetness of the lobster meat contrasts beautifully with the added richness of garlic and herbs, creating a mouthwatering experience that defines seafood dining. Each bite reveals tender meat that literally melts in your mouth, showcasing the quality of fresh ingredients.

In addition to its incredible taste, this recipe is remarkably convenient. With just 15 minutes of preparation and another 10 minutes on the grill, you can create a gourmet dish that requires minimal fuss. This makes it a great option for weekday dinners or impromptu gatherings with friends, allowing you to cook something memorable without the need for extensive preparation.

Nutritionally speaking, lobster is a lean protein, providing essential vitamins and minerals while being low in calories. This makes Garlic Herb Grilled Lobster Tails not only a delicious choice but also a healthy one, fitting perfectly into various dietary lifestyles. It offers a plethora of nutrients like omega-3 fatty acids, boosting both heart health and brain function.

Moreover, this recipe shines in social settings. Its visually stunning presentation in vibrant colors adds charm to any table setting, inviting conversation and shared enjoyment among guests. The experience of grilling together can also foster a sense of community, making it a favorite for gatherings.

Cost-effectively, while lobster may seem like a luxury, this recipe makes two generous servings. When you consider the quality of the meal, the price per serving becomes quite reasonable, especially for an upscale experience you can recreate at home without breaking the bank.

Historical Background and Cultural Significance

The origin of lobster as a culinary delicacy dates back centuries. Once considered food for the poor, it has transformed into a gourmet treasure that graces fine dining establishments and festive celebrations alike. This evolution represents not just changes in taste preferences but an interesting interplay between culture and economics in the culinary world.

Culturally, lobster holds a significant place, particularly in coastal communities where fishing is a way of life. Traditions around catching and preparing lobster have been passed down through generations, often accompanied by family gatherings and community events, resulting in resilient local ties and shared memories centered around food.

As recipes for preparing lobster have evolved, so too have techniques for cooking it. From boiling to grilling, the rise of grilling lobster tails has led to a more casual and enjoyable way of cooking this otherwise luxury ingredient. The popularity of grilling lobster tails further reflects the broader acceptance of relaxed, outdoor dining experiences.

Regional variations abound in the ways lobster is prepared and served. For instance, the Garlic Herb Grilled Lobster Tails recipe encapsulates influences from both New England and Mediterranean cuisines, showcasing garlic and herbs that elevate the natural flavors of the shellfish while honoring regional culinary practices.

Ingredient Deep Dive

  • Lobster Tails: Lobster is steeped in history as a delicacy, with roots tracing back to coastal North America. It is rich in protein and low in fat, making it a healthy option for seafood lovers. When selecting lobster tails, look for those that are firm and have a fresh ocean scent. Store them in the coldest part of the fridge or freeze them for longer preservation. If fresh lobster is unavailable, frozen tails are a viable alternative that can offer similar taste with proper preparation.
  • Garlic: Garlic is a culinary staple across many cultures, laden with a history of medicinal benefits. It contains essential vitamins and minerals, contributing to overall health. When using fresh garlic, select firm bulbs, and store them in a cool, dry place away from sunlight. For substitutions, garlic powder or granulated garlic can be employed, though fresh garlic is recommended for its bold flavor.
  • Fresh Herbs (e.g., parsley): Herbs have been used for their flavor and health benefits since ancient times. Parsley, in particular, is rich in antioxidants and can enhance digestion. Choose vibrant, fresh parsley with no signs of wilting. For storage, keep herbs in water like a bouquet or wrapped in a damp paper towel to maintain freshness. Alternatives like coriander or basil can add unique flavors but may alter the recipe’s spirit.

Common Mistakes to Avoid

  • Overcooking the lobster tails – This can lead to tough, rubbery meat. Always keep an eye on the cooking time.
  • Not using enough seasoning – Lobster has a mild flavor that benefits from robust seasonings. Consider liberal use of salt and garlic.
  • Using frozen lobster without thawing – Always fully thaw frozen lobster tails before grilling to ensure even cooking.
  • Neglecting to baste – Skipping the butter basting step can lead to dry lobster. Basting keeps the meat moist and flavorful.
  • Grilling at too high a temperature – Too much heat can cause the outside to burn while the inside remains undercooked. Moderate heat is key.
  • Not checking for doneness – Use an instant-read thermometer to check that the internal temperature reaches 140°F.
  • Using dull knives for prep – A sharp knife will make cutting lobster tails easier and safer. Ensure your tools are in good condition.
  • Skipping the marinade – Marinating the lobster enriches flavor. Don’t rush this step for better results.

Essential Techniques

Mastering the art of grilling lobster tails begins with understanding how to properly split the tail. Using sharp kitchen shears, cut through the top shell from end to end, but avoid cutting all the way through. This allows the meat to be gently pulled out while maintaining its shape during cooking.

Basting is another crucial technique to perfect for enhancing flavor. Mix melted butter with minced garlic and herbs, and use a brush to generously apply this mixture during grilling. Look for visual cues like a golden-brown color on the shell and a slight opacity in the meat for perfect doneness.

Pro Tips for Perfect Garlic Herb Grilled Lobster Tails

1. Always ensure your grill grates are clean and well-oiled before placing the lobster tails, to prevent sticking and ensure even cooking.
2. Experiment with different herb combinations such as thyme or dill to customize the flavor profile according to preference.
3. Consider adding a splash of lemon juice in the garlic butter for a zesty twist that complements the sweet flavor of lobster.
4. For extra presentation, grill lemon halves alongside the lobster tails and serve them together, allowing guests to squeeze fresh juice over the dish.
5. Always let the lobster rest for a few minutes after grilling, allowing juices to redistribute before serving.
6. If your grill has hot spots, rotating the lobster tails during cooking will ensure even exposure to the heat.
7. Pair lobster tails with a simple side salad to keep the meal light and refreshing.
8. Reach for a high-quality seafood or grill thermometer to guarantee perfectly cooked lobster every time.

Variations and Adaptations

One popular variation of grilled lobster tails incorporates a spicy twist, utilizing chili flakes or a drizzle of sriracha in the garlic butter. This adds a kick that can elevate the dish for those who enjoy heat.

Seasonal adaptations can include the use of fresh summer herbs like basil or mint when they are at their peak, offering a refreshing herbal contrast. Alternatively, winter adaptations might involve rich spices such as paprika and cumin for a warming flavor profile.

For those with dietary restrictions, consider swapping out garlic and butter for a vegan substitute. The use of nutritional yeast can add a cheesy, umami flavor without using animal products.

Texture modifications can also be achieved by opting for poached lobster tails before grilling. This method keeps the lobster moist and tender while allowing it to absorb other flavors before finishing on the grill.

Lastly, for presentations, consider stacking the lobster tails with grilled vegetables or serving them on a bed of aromatic rice to enhance both aesthetics and flavor.

Serving and Presentation Guide

When plating Garlic Herb Grilled Lobster Tails, draw inspiration from restaurant style. Arrange the tails cut-side up for visual impact, and drizzle the remaining garlic herb butter over and around the tails.

You can enhance the dish’s allure by adding garnishes such as freshly chopped herbs or edible flowers. For a pop of color, serve with bright lemon wedges that also allow guests to customize their flavor with fresh citrus.

Traditionally, grilled corn or a light salad pairs beautifully with lobster, providing crisp contrast to the tender seafood. When serving, be mindful of temperature, ensuring the dish remains warm for enjoyment without compromising the flavor.

Portion control becomes essential with rich dishes like these, so consider serving one lobster tail per person alongside small portions of sides, allowing room for a varied meal experience.

Wine and Beverage Pairing

Grilled lobster pairs exquisitely with white wines such as Chardonnay or Sauvignon Blanc. Their crisp acidity complements the richness of the butter and lobster, creating a harmonious balance in flavor.

For non-alcoholic options, consider sparkling water infused with citrus. This can refresh the palate without overpowering the seafood. Similarly, a light iced tea with lemon serves as an excellent counterpart to this dish.

If you wish to elevate the pairing experience, consider serving a light, herbal tea after the meal, assisting digestion while providing a soothing end to a delicious dining experience.

Storage and Shelf Life

Proper storage is critical for maintaining the quality of leftover Garlic Herb Grilled Lobster Tails. Store cooked lobster tails in an airtight container in the refrigerator, where they should remain safe for up to three days.

When it comes to freezing, raw lobster tails can last up to six months when properly sealed. Cooked lobster is best consumed fresh but can be frozen for up to three months. To avoid freezer burn, wrap each tail tightly in plastic wrap before placing them in a freezer-safe bag.

Reheating is best done gently, avoiding high temperatures that can lead to dryness. Consider lightly warming them in a skillet over low heat or in a microwave for short bursts of time.

Make Ahead Strategies

For those wanting to prepare ahead of time, consider marinating the lobster tails in the garlic herb butter a few hours beforehand. This allows the flavors to meld beautifully, enhancing taste when cooked.

If you prefer to minimize prep time on the day of the event, clean and split the lobster tails in advance, storing them in the refrigerator until you are ready to grill.

The emphasis should be on maintaining quality, so avoid assembling the dish completely until closer to serving time. This helps to preserve the freshness of the ingredients and ensures a stunning final presentation.

Concluding cooking just before serving is ideal, allowing the lobster tails to be served fresh off the grill, maximizing both flavor and texture for your guests.

Scaling Instructions

Scaling this recipe up or down can be done easily by adjusting the number of lobster tails. For example, if doubling, follow the same measurements for garlic butter and herbs to maintain flavor balance.

Equipment adjustments might be necessary for larger quantities. Consider using a larger grill or cooking in batches if your grill space is limited to ensure even cooking.

For timing modifications, keep an eye on cooking times as multiple tails can impact heat distribution. Using a thermometer for doneness is especially helpful when scaling recipes.

When scaling down, leftover lobster can be repurposed into other dishes, such as pasta or salads, ensuring nothing goes to waste.

Nutritional Deep Dive

From a nutritional perspective, lobster is a powerhouse of essential nutrients. Each serving of lobster tail offers a healthy dose of protein, enabling muscle repair and maintenance, while remaining low in saturated fat compared to other meats.

Additionally, lobster is rich in vital minerals like selenium and zinc, both of which play crucial roles in immune function and supporting cell metabolism. The dish also delivers ample B vitamins, which are important for energy production.

Monitoring portion sizes allows for an indulgent experience while still keeping calorie counts reasonable, making lobster an excellent centerpiece for any meal. When balanced with fresh side dishes, this recipe fits seamlessly into a healthy lifestyle.

For those mindful of dietary tracking, opting for reduced butter or incorporating more herbs can enhance flavor without significantly increasing calories, making this dish both satisfying and nurturing.

Dietary Adaptations

For those following a gluten-free lifestyle, this recipe is inherently suitable as it contains no gluten-based ingredients; however, always check any additional sauces or garnishes used.

For a dairy-free version, substitute traditional butter with a vegan alternative such as olive oil or coconut oil. This maintains the sumptuous flavor of the dish while catering to lactose-free diets.

Keto enthusiasts will appreciate the low carbohydrate count in lobster and can freely enjoy this dish while complementing it with low-carb vegetables for a filling meal.

If adapting for a low-FODMAP diet, limit garlic or substitute it with garlic-infused olive oil, providing a similar flavor profile without the digestive impact.

Lastly, those pursuing paleo diets will find this recipe fitting, as it emphasizes whole ingredients and excludes processed components, allowing for hearty nourishment in every bite.

Troubleshooting Guide

If your lobster tails produce an unappealing texture, it might indicate overcooking. Always refer to cooking times and use a thermometer for accuracy; lobster should be opaque and firm but not rubbery.

If the flavors seem unbalanced, consider seasoning adjustments after tasting. A sprinkle of salt or a dash of lemon juice can brighten the dish significantly, elevating overall flavors.

Temperature problems can result with uneven cooking; ensure your grill is preheated, and remember to rotate the tails if cooking multiple at once to avoid hot spots.

In cases where grilling equipment struggles, consider transferring to a broiler, allowing for a direct heat source that can yield quick results similar to grilling.

If you’re facing ingredient shortcomings, substitutions can often be seamlessly integrated; for example, fresh herbs can be replaced with dried options, recognizing that flavor intensity differs and adjusting quantities accordingly.

Recipe Success Stories

Community feedback often highlights moments of success when attempting Garlic Herb Grilled Lobster Tails. Many home cooks have expressed joy at utilizing this recipe for memorable occasions like anniversaries or birthdays, where the dish became the highlight.

Adaptation stories speak volumes about the versatility of the recipe. Several readers shared experiences of modifying the seasoning to adapt to personal preferences or exploring unique sauce pairings that bring out different flavor notes.

Suggestions from readers have included adding their favorite spice blends or herbs into the marinade, showcasing how flexible this recipe can be while still delivering exceptional taste.

Photography tips from the community emphasize the appeal of vibrant garnishes; utilizing colorful herbs or lemon can create stunning presentation, drawing attention to your culinary creation that could rival restaurant dishes.

Frequently Asked Questions

1. Can I use frozen lobster tails for this recipe?

Yes, frozen lobster tails can be used. Just make sure to fully thaw them before cooking to ensure even grilling and maintain the desired texture.

2. How do I know when lobster tails are done cooking?

The best way to determine if lobster is done is by checking the internal temperature, which should reach 140°F. Additionally, the meat should be opaque and firm.

3. Is it possible to make Garlic Herb Grilled Lobster Tails in the oven?

Absolutely! If grilling isn’t an option, you can broil the lobster tails in the oven. Just ensure you keep a close eye on them to prevent overcooking.

4. What sides pair well with lobster tails?

Light salads, grilled vegetables, or buttery corn on the cob are perfect sides that complement the richness of lobster tails beautifully.

5. Can I prepare the marinade ahead of time?

Yes! The garlic herb butter can be prepared in advance. Store it in the refrigerator for up to a week or freeze it for longer-term use.

6. How should I store leftover grilled lobster?

Store leftover lobster in an airtight container in the fridge for up to three days. For longer storage, you can freeze it for up to three months.

7. Can I grill lobster tails without splitting them?

While it’s more challenging to grill them whole, you can. However, splitting them allows the flavors to penetrate and results in a more enjoyable dining experience.

8. How can I enhance the flavor of grilled lobster tails?

You can enhance the flavor by experimenting with additional spices, herbs, or even citrus peels in your marinade for a vibrant twist.

9. What should I look for when buying fresh lobster tails?

Opt for lobster tails that are firm to the touch, with a clean ocean scent. Avoid any that are soft or have a strong, foul smell.

10. Can I make this dish in advance?

While it’s best enjoyed fresh, you can prep the lobster tails and refrigerate them with the marinade, cooking them just before serving to preserve optimal flavor and texture.

Additional Resources

If you are intrigued by Garlic Herb Grilled Lobster Tails, you might also enjoy related recipes such as classic shrimp scampi or a zesty seafood paella. For technique guides, consider resources on perfecting grilling methods or mastering marinades, as both can significantly elevate your culinary skills. Duration and consistency in preparation are key themes, reminding you to invest in quality equipment that enhances your cooking experience, particularly for high-quality seafood. Don’t forget to explore seasonal variations, taking advantage of seasonal produce to complement the richness of your seafood dishes.

Join the Conversation

We want to hear from you! Share your experiences, variations, and photography tips after trying out the Garlic Herb Grilled Lobster Tails. Engage with fellow food lovers in the comments section below and help inspire others through your story. Your reviews and suggestions play a vital role in creating a community passionate about great food. Let’s continue to explore the delightful world of gourmet recipes together!

The Recipe

Garlic Herb Grilled Lobster Tails

Serves: 2

Prep Time: 15 mins

Cook Time: 10 mins

Total Time: 25 mins

Kitchen Equipment Needed

  • Grill or grill pan
  • Sharp kitchen shears
  • Basting brush
  • Instant-read thermometer
  • Airtight storage containers

Ingredients

  • 2 lobster tails
  • 4 tablespoons unsalted butter
  • 4 cloves garlic, minced
  • 2 tablespoons fresh parsley, chopped
  • 1 tablespoon lemon juice
  • Salt and pepper to taste

Directions

  1. Preheat the grill to medium heat.
  2. Using sharp kitchen shears, carefully split the top of the lobster tails to expose the meat.
  3. In a small saucepan, melt the butter and mix in minced garlic, fresh parsley, lemon juice, salt, and pepper.
  4. Brush the garlic herb butter generously over the lobster meat.
  5. Place the lobster tails shell-side down on the grill, cooking for about 10 minutes while occasionally basting with the garlic herb butter.
  6. Once the lobster meat is opaque and the internal temperature reaches 140°F, remove from the grill.
  7. Let rest for a few minutes before serving with additional lemon wedges.

Recipe Notes

  • Experiment with different herbs to customize the flavor profile.
  • For a spicier dish, add red pepper flakes to the butter mixture.
  • Squeeze fresh lemon juice over the lobster just before serving for an extra zing.

Cabbage Fat-Burning Soup Recipe: A Healthy and Easy Detox Meal

detox cabbage soup, fat-burning cabbage soup recipe, healthy cabbage soup, cabbage diet soup, weight-loss cabbage soup, low-calorie cabbage soup

Article: Cabbage Fat-Burning Soup: A Healthy and Nourishing Detox Recipe


Introduction to Cabbage Fat-Burning Soup

Cabbage Fat-Burning Soup is a flavorful, nutrient-rich dish celebrated for its role in quick weight loss and detox diets. Packed with low-calorie vegetables, this soup helps you feel full while providing essential nutrients. It’s a cornerstone of the popular Cabbage Soup Diet and a favorite for those looking to cleanse their system naturally.

For a heartier alternative, explore Slow Cooker Cabbage, Sausage, and Potatoes, a satisfying one-pot meal that pairs perfectly with this detox plan.


Why Choose Cabbage Fat-Burning Soup?

  • Weight Loss Benefits: Aiding calorie control through high-volume, low-calorie servings.
  • Detox Properties: Cabbage is rich in antioxidants that support liver detoxification.
  • Cost-Effective and Easy to Make: Using inexpensive, everyday ingredients.

For a rich and creamy variation, check out Creamy Potato Soup, which offers comfort without compromising taste.


Ingredients and Tools for the Perfect Soup

Essential Ingredients

  • Cabbage: The nutrient-dense star of the recipe.
  • Vegetables: Onions, celery, carrots, and bell peppers add flavor and texture.
  • Base: Use low-sodium vegetable or chicken broth.
  • Spices: Garlic, paprika, and black pepper enhance the taste.

Optional Additions

  • Protein sources like beans or shredded chicken.
  • Herbs like parsley or cilantro for garnish.

Tools You’ll Need

  • A large stockpot or Dutch oven.
  • Knife and chopping board for prepping vegetables.
  • Ladle and airtight containers for storage.

Step-by-Step Recipe

Ingredients:

  • 1 medium cabbage, shredded
  • 2 onions, chopped
  • 2 carrots, sliced
  • 2 celery stalks, diced
  • 1 bell pepper, chopped
  • 4 cups vegetable or chicken broth
  • 1 can diced tomatoes
  • 1 tsp garlic powder
  • 1 tsp paprika
  • Salt and pepper to taste

Instructions:

  1. Sauté onions and garlic in a stockpot until fragrant.
  2. Add cabbage and other vegetables, stirring to combine.
  3. Pour in broth and diced tomatoes. Bring to a boil, then simmer for 30 minutes.
  4. Adjust seasoning and serve hot.

Health Benefits of Cabbage Soup

1. Nutrient-Dense and Low-Calorie

  • High in fiber for digestion and satiety.
  • Rich in vitamins C and K, promoting immunity and bone health.

2. Supports Detoxification

  • Antioxidants in cabbage help reduce oxidative stress.
  • Hydrating properties aid in flushing out toxins.

3. Easy on the Digestive System

  • Simple ingredients that are gentle on the stomach.
  • Aids in regulating bowel movements due to high fiber content.

Creative Variations of Cabbage Soup

1. Protein-Packed Version

  • Add shredded chicken, turkey, or tofu for a protein boost.

2. Spicy Cabbage Soup

  • Incorporate chili flakes or sriracha for a fiery kick.

3. Mediterranean Twist

  • Add olives, spinach, and oregano for a Mediterranean-inspired flavor.

Delicious Pairings and Serving Suggestions

  • Pairings: Serve with Homemade Garlic Bread or a simple side salad.
  • Toppings: Add a dollop of Greek yogurt or a sprinkle of Parmesan for added richness.
  • Storage: Refrigerate for up to 5 days or freeze in portions for up to 3 months.

FAQs About Cabbage Fat-Burning Soup

1. Can I make this soup in a slow cooker?
Yes, combine all ingredients in a slow cooker and cook on low for 6-8 hours.

2. How long can I store this soup?
It keeps well in the fridge for up to 5 days and in the freezer for up to 3 months.

3. Can I replace cabbage with other greens?
While cabbage is the best choice, kale or spinach can be used for variation.

4. Is this soup suitable for vegans?
Absolutely, as long as vegetable broth is used.

5. What if my soup tastes bland?
Adjust seasoning with salt, pepper, or spices like paprika and cumin.


Internal Linking Opportunities


Conclusion

Cabbage Fat-Burning Soup is a versatile, easy-to-make recipe perfect for detoxing, weight loss, or adding vegetables to your diet. Whether you enjoy it as a standalone meal or pair it with complementary dishes, this soup is a delicious way to nourish your body while supporting your health goals.

Delicious Braised Oxtails with Garlic Mashed Potatoes and More

Braised Oxtails with Garlic Mashed Potatoes and Roasted Asparagus: A Soulful Culinary Journey

⚖️
Difficulty
Intermediate

⏲️
Prep Time
20 mins

🕒
Cook Time
3 hrs 30 mins

⏱️
Total Time
3 hrs 50 mins

🍽️
Servings
4

Indulge in the rich flavors of Braised Oxtails with Garlic Mashed Potatoes, Roasted Asparagus, and a delightful twist of Shrimp & Grits. This dish promises a heartwarming tapestry of textures and tastes that evoke feelings of comfort and satisfaction. Braised oxtails, slow-cooked to tender perfection, are elevated by their savory braising liquid infused with aromatic spices. Paired with creamy garlic mashed potatoes, it creates a balance of indulgence and comfort that’s perfect for family gatherings or cozy dinners.

The vibrant crunch of roasted asparagus adds a fresh contrast, while the creamy consistency of shrimp and grits introduces a Southern twist to your culinary experience. The amalgamation of flavors from these dishes has a way of bringing people together around the table, where every bite tells a story of tradition and warmth. From sourcing the freshest ingredients to the patient cooking process, every step of creating this meal is a passion project that culminates in a truly memorable dining experience.

Quick Recipe Highlights

  • Flavor Profile: Earthy tones from oxtails combined with a creamy garlic flavor in the mashed potatoes.
  • Texture: The oxtails melt in your mouth, while the mashed potatoes offer a velvety smoothness, contrasted by crisp asparagus.
  • Aroma: Inviting scents of garlic and herbs waft as the oxtails braise, creating a beautifully layered aroma.
  • Visual Appeal: The dish is a colorful palette – deep brown oxtails against the creamy white potatoes and bright green asparagus.
  • Skill Level Needed: Requires some culinary skill to ensure perfect braising and mastering the creaminess of the potatoes.
  • Special Equipment: Braising pot or Dutch oven, high-quality pots for boiling, and a mixer for the potatoes.

Recipe Overview

  • Difficulty Level: This recipe is classified as intermediate, as it requires attention to detail during the braising process and timing of dish components.
  • Category: This dish falls under main courses, perfect for family dinners or special occasions when you want to impress.
  • Cuisine: Drawing inspiration from Southern comfort food, this recipe reflects a rich culinary heritage focused on hearty flavors.
  • Cost: While the oxtails may be a bit more expensive, the overall dish remains cost-effective with simple, accessible ingredients.
  • Season: Best enjoyed during fall and winter months, when hearty meals are most comforting.
  • Occasion: Ideal for gatherings, holiday feasts, or special celebrations, this dish helps create lasting memories with loved ones.

Why You’ll Love This Recipe

The satisfying taste and texture of braised oxtails lend themselves to a truly enjoyable dining experience. This dish showcases the rich umami flavor that makes oxtails a beloved choice for many culinary enthusiasts. As they braise, the connective tissues break down, creating a dish that is not only flavorful but also tender and juicy – a must-try for meat lovers.

Beyond its taste, the convenience of preparing garlic mashed potatoes alongside the oxtails is a time-saver. There’s no need to manage multiple dishes! The creamy potatoes absorb the flavorful braising liquid, enhancing their taste. Furthermore, the quick preparation of roasted asparagus ensures the meal comes together with ease.

In terms of nutrition, braised oxtails are rich in collagen and gelatin, providing health benefits for joints. Meanwhile, the garlic mashed potatoes offer a good source of carbohydrates, essential for energy. Roasted asparagus contributes vitamins and minerals, making this dish not only hearty but also nourishing.

When entertaining, this recipe shines as it presents beautifully on the table. Guests will appreciate the variety and the flavors available, promoting conversation and shared enjoyment. More than just a meal, it fosters a warm, inviting atmosphere ideal for gatherings.

Lastly, considering cost-effectiveness, this dish uses budget-friendly ingredients while treating your palate to a gourmet experience. The oxtails, widely available, offer immense flavor for a reasonable price, making it accessible for various home cooks eager to delve into gourmet cooking without breaking the bank.

Historical Background and Cultural Significance

This dish’s origins trace back to the culinary traditions of various cultures, where oxtails were regarded as a flavorful cut, often slow-cooked to maximize tenderness. In many households, braising became a beloved method to create deep flavors with minimal effort, reflecting a philosophy that good food results from patience.

The cultural significance of oxtails can be traced through various cuisines, particularly in African, Caribbean, and Southern American cooking. Each culture embraces the ingredient in unique ways, showcasing its adaptability while maintaining its heritage and importance in celebratory meals.

Over time, the preparation of oxtails evolved as chefs found novel ways to serve and showcase them, leading to dishes like oxtail stew or braised variants that highlight their rich flavor. These adaptations reflect shifting tastes while preserving the essence of traditional cooking methods.

Today, regional variations exist, each with its signature touches, including spices and accompaniments. The classic combination of oxtails with hearty sides like mashed potatoes remains universally loved, maintaining its place in family meals across generations.

Ingredient Deep Dive

Oxtails: Historically, oxtails were considered a cut for the frugal. Now, they’re celebrated for their unique flavor and texture, rich in collagen, making them a choice cut for slow cooking. When selecting oxtails, look for well-marbled pieces that will tenderize beautifully. Store them in the coldest part of your fridge, ideally used within two days of purchase, or freeze for longer storage. If unavailable, beef shanks can serve as a substitution, providing a similar rich flavor.

Garlic: This aromatic has been revered not just for flavor but for its medicinal properties. Rich in antioxidants and vitamins, garlic has a profound impact on health. Look for firm, unbruised bulbs when shopping and store them in a cool, dry place. For recipes, consider fresh garlic whenever possible; however, garlic powder can substitute in a pinch.

Potatoes: A staple in many cuisines, potatoes offer versatility and comfort. Opt for starchy varieties like Russets or Yukon Golds for creamy mashed potatoes, while ensuring they are firm and blemish-free during selection. Store them in a dark, cool place for longevity. If necessary, sweet potatoes can be an interesting twist on the classic preparation.

Asparagus: Known for its seasonal availability, asparagus is lauded for its bright-green hue and crisp texture. This vegetable is rich in vitamins A, C, E, and K. Look for straight, firm stalks that are vibrant in color. Store them upright in water in the refrigerator. Substitutions for asparagus include green beans or broccoli, which can offer different textures while complementing the dish.

Common Mistakes to Avoid

  • Not braising long enough: Ensure oxtails are tender by allowing for extended cooking times.
  • Overcooking garlic: Adding garlic too early can result in a bitter flavor; consider adding it at the right moment.
  • Rushing the potato prep: Properly drying your boiled potatoes before mashing will enhance creaminess.
  • Skipping seasoning layers: Building flavor takes time; season throughout the cooking process for depth.
  • Ignoring the importance of fat: Including enough fat while cooking will add richness to your dish.
  • Undercooking asparagus: To achieve perfect crispness, avoid under-roasting; it should have a tender-crisp texture.
  • Using cold ingredients: For creamy mashed potatoes, ensure butter and cream are at room temperature before mixing.
  • Not tasting as you cook: Regular tasting allows you to adjust flavors to your liking.
  • Choosing the wrong cooking vessel: An appropriate pot or pan facilitates even cooking; avoid overcrowding.
  • Neglecting rests: Allowing meat to rest post-cooking enhances the distribution of juices.

Essential Techniques

Braising: Braising is critical for developing the deep, rich flavor of oxtails. It combines wet and dry cooking methods, using low heat over several hours. Mastering the timing and liquid ratio ensures the best results, avoiding dryness or undercooked meat. Look for that visual cue of tenderness, with the meat falling off the bone.

Mashing Potatoes: The technique of mashing potatoes is straightforward yet vital for achieving a creaminess that complements the dish. Using a potato ricer or a masher yields the best texture, while slow incorporation of warm butter and cream ensures a smooth finish. Avoid over-mixing to prevent gummy potatoes.

Pro Tips for Perfect Braised Oxtails

1. For enhanced flavor, brown the oxtails in batches to prevent overcrowding, ensuring they caramelize evenly.

2. Use a mix of stock and wine for your braising liquid to deepen the bouquet of flavors.

3. A bouquet garni can add herbaceous notes; tie together thyme, bay leaves, and parsley for easy removal.

4. Regularly skim off fat from the braising liquid to maintain a cleaner flavor profile.

5. Plan ahead; braised dishes often taste better the next day as flavors meld and develop further.

6. Balance out the salt seasoning throughout the cooking stages for optimum flavor without overwhelming the dish.

7. Pair your oxtails with complementary sides like garlic bread to soak up the flavorful juices.

8. For a final touch, finish with a squeeze of fresh lemon juice right before serving for brightness.

Variations and Adaptations

For regional variations, consider using spices characteristic of different cultures, such as adding red pepper flakes for a spicy kick or using Asian-inspired soy sauce and sesame oil to enhance the oxtails. Seasonal adaptations could involve featuring root vegetables in the mashed potatoes, offering an autumnal touch. In terms of dietary modifications, the recipe can easily be adapted by using low-fat cream for a lightened version. Alternatively, flavor variations can include different herbs and spices, creating diverse culinary experiences. Presentation alternatives such as using a rustic wooden board can elevate serving styles, inviting a homely yet sophisticated feel.

Serving and Presentation Guide

When plating, create height with the oxtails, arranging them artfully beside a generous scoop of mashed potatoes. Garnish roasted asparagus with a sprinkle of sea salt and cracked pepper for added flavor. Consider drizzling a rich, glossy sauce over the oxtails for an appealing finish. Presentation can be enhanced with colorful garnishes such as fresh herbs or microgreens, adding a modern touch. Ensure all components are served warm for optimal enjoyment. For portion control, consider serving alongside a fresh salad to balance the meal while keeping serving sizes in check.

Wine and Beverage Pairing

When it comes to wine pairings, a full-bodied red like a Cabernet Sauvignon or Malbec complements the rich flavors of oxtails beautifully. For a lighter option, consider a robust white wine like Chardonnay to balance the dish’s richness. Non-alcoholic alternatives could include sparkling water infused with citrus for a refreshing contrast. If you enjoy caffeinated beverages, a strong coffee pairs surprisingly well with the earthiness of the oxtails, making for an interesting dining experience.

Storage and Shelf Life

For optimal storage, cool the braised oxtails to room temperature before transferring them to airtight containers to prevent spoilage. Refrigerate for up to 3 days, or freeze for up to 3 months if making in advance. When reheating, slowly heat on the stove with a splash of broth to retain moisture. Signs of spoilage to watch for include off smells and texture changes. Always take caution and ensure food safety standards are met when handling leftovers.

Make Ahead Strategies

To maximize convenience, braise the oxtails a day in advance. This not only saves time but allows the flavors to develop extensively. Store the cooked oxtails in their braising liquid to keep them moist. When preparing garlic mashed potatoes, you can boil and mash them ahead of time, then warm with a touch of cream and butter before serving. For the asparagus, slice and prepare your garnishing elements a few hours prior for minimal day-of hassle. Ensure you reheat everything gently to maintain quality.

Scaling Instructions

Halving the recipe is simple; adjust ingredients accordingly while ensuring the same cooking times. To double or triple the recipe, consider using larger pots or multiple cookers to accommodate everything without compromising the cooking process. For doubling, keep an eye on seasoning levels as this may need adjusting. Adjust cooking times slightly as larger quantities require longer or more attention to avoid uneven cooking. Be mindful of storage, as larger portions may lead to less air exposure.

Nutritional Deep Dive

Braising oxtails offers a unique nutritional profile rich in collagen and protein, supporting both muscle recovery and joint health. The macro breakdown reveals a strong protein component from the meat, complemented by carbohydrates from the mashed potatoes. Micronutrient analysis shows ample potassium and vitamin C contributed by the asparagus. This dish can be a great addition to balanced diets, but moderation is key due to higher fat content. Managing portion sizes can assist in maintaining a healthy meal routine.

Dietary Adaptations

This recipe can be easily adjusted to fit various dietary needs. A vegan adaptation could substitute oxtails with a hearty portobello mushroom stew, adapting the braising method. For gluten-free diets, traditional ingredients work perfectly as they contain no gluten. Dairy-free individuals can swap regular cream with nut milk or coconut cream for the mashed potatoes. Low-carb adaptations could feature mashed cauliflower instead of potatoes, while ensuring the dishes remain rich and flavorful. These considerations ensure anyone can enjoy a version of this comforting meal.

Troubleshooting Guide

For texture issues, like tough oxtails, ensure they are braised sufficiently—cooking longer at low temperatures is key. If flavors feel off, balancing with additional salt or acidity may be beneficial. For inconsistent cooking temperatures, use a quality pot to maintain even heat distribution, avoiding hotspots. Should ingredient substitutions lead to flavor imbalances, consider enhancing the spices or aromatics to compensate. Lastly, if timing is a concern, preparing fewer elements or pre-preparing can alleviate rush while enriching the experience.

Recipe Success Stories

Community feedback often highlights the great adaptability of this recipe. Readers have successfully incorporated variations, such as Asian-inspired flavors, garnering excitement from family members. Adaptation stories showcase how families use local ingredients to create unique twists, making the dish their own. Suggestions from readers often include specific pairings or accompanying sides that elevate the meal even further. For photography enthusiasts, showcasing this dish in colorful plates has become a popular trend that channels its gourmet appeal.

Frequently Asked Questions

Can I use other cuts of beef for this recipe? Yes, you can substitute oxtails with cuts like brisket or beef shanks, which will still yield robust flavors but may have slight textural differences.

How do I store leftovers? Allow your leftovers to cool to room temperature, then transfer them to airtight containers. They can be stored in the fridge for about 3 days or frozen for up to 3 months.

Can I substitute garlic with other flavors? Absolutely! While garlic adds a unique flavor, other aromatics like shallots or leeks can be great alternatives.

How can I thicken the braising liquid? For a thicker sauce, you can add a cornstarch slurry towards the end of cooking or reduce the braising liquid over medium heat to concentrate flavors.

Can this recipe be prepared in advance? Yes! Preparing oxtails a day ahead allows flavors to deepen as they sit, enhancing the overall taste.

What sides pair best with braised oxtails? Common pairings include creamy mashed potatoes, polenta, or even roasted vegetables that balance the rich flavors of the dish.

How can I enhance the flavor of the mashed potatoes? Infusing your potatoes with herbs or utilizing roasted garlic instead of raw can provide an elevated taste.

Is this dish family-friendly? Yes, it’s an ideal family dish as it’s comforting and flavorful, appealing to a wide range of palates.

What’s the best way to check the doneness of oxtails? Oxtails are done when they are fork-tender, meaning the meat should easily pull away from the bone.

Can I use a slow cooker for this recipe? Definitely! Braising in a slow cooker will help tenderize the meat beautifully – just make sure to sear the oxtails first for maximum flavor.

Additional Resources

For those interested in furthering their cooking skills, consider exploring related recipes such as Beef Bourguignon or Short Ribs, which emphasize similar cooking techniques. Additionally, our technique guides on braising and mashing can bolster your confidence in the kitchen. For ingredient insights, check out our resource on selecting quality meats and produce that’s readily available. Lastly, seasonal variations offer ideas for adapting the dish according to what’s fresh.

Join the Conversation

We encourage you to share your kitchen experiences and variations of this recipe on social media! Your photographs and reviews not only inspire others but also create a community around shared culinary adventures. Feel free to reach out with suggestions, as we love seeing how everyone puts their spin on these beloved dishes, engaging and learning together throughout our cooking journeys.

The Recipe

Braised Oxtails

Serves: 4

Prep Time: 20 mins

Cook Time: 3 hrs 30 mins

Total Time: 3 hrs 50 mins

Kitchen Equipment Needed

  • Braising pot or Dutch oven
  • Pot for boiling potatoes
  • Hand mixer or potato ricer
  • Heat-resistant spatula

Ingredients

  • 2 lbs oxtails
  • 1 onion, chopped
  • 4 cloves garlic, minced
  • 2 cups beef stock
  • 1 cup dry red wine
  • 1 tbsp tomato paste
  • 2 bay leaves
  • 1 tsp thyme
  • Salt and pepper to taste
  • 2 lbs potatoes, peeled and chopped
  • ½ cup cream
  • ½ cup butter
  • 1 lb asparagus, trimmed
  • Olive oil, for drizzling
  • Optional: shrimp for serving with grits

Directions

  1. Preheat your oven to 350°F (175°C).
  2. In a braising pot, heat oil over medium-high heat. Brown the oxtails on all sides and set aside.
  3. Add the chopped onion and garlic to the pot and sauté until translucent.
  4. Stir in the tomato paste and cook for an additional minute before adding wine to deglaze the pot.
  5. Return the oxtails to the pot, add stock, bay leaves, thyme, salt, and pepper.
  6. Cover and transfer to the oven. Braise for 3 hours or until tender.
  7. Meanwhile, boil the potatoes until fork-tender, drain them, and mash with butter, cream, salt, and pepper.
  8. To roast asparagus, drizzle with olive oil, season with salt, and bake in the oven for the last 15 minutes of braising.
  9. To serve, plate the oxtails on a mound of mashed potatoes, with roasted asparagus on the side. Enjoy!

Recipe Notes

  • For added flavor, marinate the oxtails overnight with herbs and spices of your choice.
  • Feel free to add root vegetables to the braising liquid for extra substance and flavor.
  • Garnish with fresh parsley for an appealing presentation.
  • Experiment with different wines for varied flavor profiles.

Delicious Herb-Crusted Roast Lamb with Lemon and Potatoes Recipe

Herb-Crusted Roast Lamb with Lemon and Potatoes: A Flavorful Feast

⚖️
Difficulty
Medium

⏲️
Prep Time
15 mins

🕒
Cook Time
1 hour 30 mins

⏱️
Total Time
1 hour 45 mins

🍽️
Servings
4-6

Discover the tantalizing flavors of our Herb-Crusted Roast Lamb with Lemon and Potatoes recipe. This dish marries tender lamb with a zesty herb crust, offering an aromatic experience that excites the palate. The juicy meat, perfectly seasoned with fresh herbs and zesty lemon, complements the golden, crisp potatoes, creating a harmonious balance of taste and texture. Perfect for a family gathering or a festive occasion, this recipe will leave your guests impressed and craving more.

With every bite, you’ll experience the depth of flavors achieved through the careful selection of herbs—like rosemary and thyme—that are sprinkled generously over the lamb. Roast lamb has long been a celebrated dish around the world, representing comfort and tradition. Pairing it with roasted potatoes brings the meal together, ensuring it is as satisfying to the eyes as it is to the palate. Let’s delve into the details of preparing this exquisite dish.

Quick Recipe Highlights

  • Flavor Profile: The herb-crusted lamb offers a savory and aromatic experience, enhanced by the citrus brightness of lemon.
  • Texture: Indulge in the tender, juicy lamb juxtaposed with the crispy, buttery potatoes for a delightful mouthfeel.
  • Aroma: The fragrant combination of fresh herbs and roasting lamb fills your kitchen with an irresistible scent.
  • Visual Appeal: A golden-brown crust on the lamb adds a beautiful contrast to the vibrant green herbs and the fluffy potatoes.
  • Skill Level Needed: While the recipe has a few steps, the cooking techniques are manageable for home cooks.
  • Special Equipment: A roasting pan and meat thermometer ensure perfect cooking results.

Recipe Overview

  • Difficulty Level: This roast lamb recipe sits at a medium difficulty, perfect for cooks who are a bit adventurous or looking to refine their skills.
  • Category: Suitable for dinner parties or holiday gatherings, this dish stands out as a centerpiece, delivering joy and satisfaction.
  • Cuisine: The origins of this recipe lie in Mediterranean cuisine, where lamb is a star ingredient, often paired with fresh herbs and citrus.
  • Cost: With manageable cost, the primary ingredients are accessible, making it a smart choice for special occasions.
  • Season: Roasted lamb is especially beloved during spring and Easter celebrations, symbolizing renewal and feast.
  • Occasion: Ideal for Sunday dinners or festive celebrations, impress your guests with this elegant dish.

Why You’ll Love This Recipe

This herb-crusted roast lamb delivers a mouthwatering taste and luxurious texture that you and your guests will cherish. The marination process allows flavors to penetrate deeply into the meat, elevating every bite. The lamb’s tenderness, complemented by the crispy potatoes, creates a dining experience that tantalizes the senses.

Another reason to love this recipe is its convenience. The prep time is minimal, allowing for a stress-free cooking experience. While the lamb roasts, you can easily prepare side dishes or set the table, making it a well-rounded option for home chefs.

Nutritionally, lamb is a fantastic source of protein and essential vitamins and minerals, such as B12, zinc, and iron. Pairing with hearty potatoes ensures you have a filling and satisfying meal without sacrificing nutrition.

This dish shines in social settings, perfect for bringing people together. Sharing a roast lamb meal fosters warmth and connection, often accompanied by delightful discussions and laughter around the table.

Cost-effectiveness is also key. Utilizing a single protein source and straightforward ingredients makes this recipe budget-friendly, despite its gourmet flair. Impress family and friends without breaking the bank!

Historical Background and Cultural Significance

The history of roasting lamb dates back centuries, with roots in Ancient civilizations where lamb was considered a delicacy. Many cultures recognize the lamb as a symbol of prosperity and abundance, often served during significant celebrations.

Culturally, lamb holds a revered spot in Mediterranean cuisine, reflecting rich traditions of pastoral life where sheep farming flourished. In many countries, including Greece and Italy, lamb plays a prominent role in holiday feasts and family gatherings.

This recipe’s evolution showcases how culinary traditions adapt over time. Initially simple, roasting techniques have evolved to incorporate various herbs and flavors, enhancing the taste and presentation of the dish.

Regional variations abound, with countries putting their unique spins on roast lamb. From fragrant Moroccan spices to herbaceous Italian styles, each culture brings something special, celebrating the versatility of this beloved meat.

Ingredient Deep Dive

Lamb: A foundational ingredient, lamb is rich in flavor and provides numerous health benefits including high protein content and vital nutrients like iron and zinc. When selecting lamb, look for cuts that are firm with a deep red color, and store it properly in the refrigerator or freezer to maintain freshness. Substitutions for lamb could include beef or chicken, but these will yield different flavor profiles.

Herbs: Fresh herbs like rosemary and thyme complement the lamb beautifully, providing aromatic qualities. These herbs have long been celebrated for their medicinal benefits, offering anti-inflammatory properties. When choosing herbs, opt for vibrant, fresh leaves and store them in the refrigerator. For substitutions, dried herbs can be used, but reduce the quantity as they are more concentrated in flavor.

Potatoes: Potatoes serve as a classic side to absorb the flavors of the lamb. They are rich in potassium and carbohydrates, making them satisfying. For the best results, select firm potatoes and store them in a cool, dark place. Sweet potatoes can be a great alternative, adding a health twist and natural sweetness to the meal.

Lemon: The addition of lemon elevates the dish with its zesty brightness, enhancing flavor. Lemons are packed with vitamin C and antioxidants, promoting overall health. Choose bright yellow lemons with firm skin for optimal freshness. Such citrus can be effectively replaced with other tart fruits like limes or oranges for a different flavor profile.

Common Mistakes to Avoid

  • Not seasoning the lamb adequately can lead to a bland dish. Always season well ahead of cooking to ensure flavor permeates the meat.
  • Overcooking the lamb results in a tough texture. Use a meat thermometer to check for doneness, aiming for an internal temperature of 145°F for medium-rare.
  • Using dried herbs instead of fresh can dull the flavor. Fresh herbs bring a vibrant quality to the dish; if using dried, adjust the quantities.
  • Failing to rest the lamb after cooking leads to juices running out. Resting allows the juices to redistribute within the meat.
  • Not preheating the oven adequately can affect the cooking time and final result. Always ensure your oven is properly preheated to the desired temperature.
  • Piling potatoes on top of the lamb prevents even cooking. Arrange them around the meat for even roasting.
  • Skipping the marinating step can lead to a less flavorful experience. Marinating brings depth and richness to the dish.
  • Using the wrong cut of lamb can result in a less desirable texture. Opt for cuts suitable for roasting, like leg or rack of lamb.
  • Cooking potatoes without proper oil can lead to sticking. A light coating of oil ensures a crispy exterior.
  • Not cleaning your herbs properly can lead to unwanted grit. Always rinse and dry fresh herbs before using them.

Essential Techniques

Marinating: This technique is crucial as it allows the meat to absorb flavors, enhancing the taste. Aim to marinate the lamb for at least an hour, or ideally overnight. Avoid overly acidic marinades, as they can break down the meat’s fibers too much.

Roasting: Proper roasting brings out the lamb’s natural flavors. To master this, establish the right oven temperature and ensure even cooking by rotating the pan as needed. Keep an eye on the visual cues; the crust should be golden brown.

Seasoning: Effective seasoning is key to maximizing flavor. A mix of kosher salt and fresh herbs creates a delicious crust. Be generous, as this not only flavors the meat but enhances overall dish presentation.

Resting: Post-cooking, resting the lamb before carving allows juices to redistribute, ensuring a moist final product. Aim for a rest period of 10-15 minutes. Cover loosely with foil to keep it warm without steaming.

Pro Tips for Perfect Herb-Crusted Roast Lamb with Lemon and Potatoes

1. Use a high-quality cut of lamb for the best flavor and texture; choose fresh cuts from a reliable butcher.

2. Adjust the herb mixture based on personal preferences; try adding mint for a fresh pop.

3. Pre-squeeze the lemons before cooking to enhance the amount of juice released when baking.

4. For an extra crispy potato texture, parboil them before roasting; this helps to create edges that brown beautifully.

5. Consider using a dry rub of spices if you prefer a different flavor profile—smoked paprika or cumin can add depth.

6. Keep the skin on your potatoes for added nutrients and texture; they’ll become crispier in the oven.

7. Serve with a homemade gravy or jus to elevate the dining experience further.

8. Pair the meal with seasonal vegetables for a complete, well-rounded plate.

Variations and Adaptations

Consider regional variations such as Greek-style lamb, seasoned with oregano and served with tzatziki. For seasonal adaptations, incorporate root vegetables in fall or spring vegetables like asparagus for freshness. Dietary modifications can include using a herb crust that is gluten-free, or employing substitutions for those who lean vegetarian.

Flavor variations can also be achieved by experimenting with different herbs or adding a spicy element, like chili flakes, to the crust. For those who prefer a softer texture, consider wrapping the roast in parchment paper during cooking, allowing for more moisture retention. Presentation alternatives, such as serving on a bed of sautéed greens, can elevate the dish visually.

Serving and Presentation Guide

Plating can be executed elegantly by slicing the lamb into thick, juicy pieces and artfully arranging them on a serving dish, surrounded by the roasted potatoes. Garnishing with fresh herbs or lemon wedges can enhance the visual appeal significantly. Traditional accompaniments like mint sauce or gravy add layers of flavor, while modern serving suggestions may include a light salad on the side.

Consider temperature when serving; ensure the lamb remains warm without overcooking. Portion control is essential, so use a sharp knife for clean cuts and even portions, ensuring all guests receive a share of both lamb and potatoes.

Wine and Beverage Pairing

When it comes to wine pairings, a robust red wine, such as a Cabernet Sauvignon or a Syrah, complements the rich flavors of the herb-crusted roast lamb superbly. For white wine enthusiasts, a Chardonnay with oak undertones can provide a delightful contrast. Offering non-alcoholic alternatives like sparkling water with lemon creates a refreshing palate cleanser.

For a lovely end to the meal, consider pairing with a strong coffee or a light herbal tea, subtly hinting at the flavors present in the dish while keeping the experience cohesive.

Storage and Shelf Life

To ensure longevity, store leftover lamb in an airtight container in the refrigerator. It can typically last for 3-4 days before showing signs of spoilage, such as off-smells or discolorations. For longer storage, consider freezing the lamb for up to 3 months. When reheating, use a low temperature to prevent drying out, and be sure to add a splash of broth to retain moisture.

Make Ahead Strategies

You can marinate the lamb up to 24 hours in advance, allowing the flavors to deeply infuse the meat. The potatoes can be prepped by washing and chopping them the day before, keeping them submerged in water to avoid browning. Assemble all other ingredients in advance, so everything is ready to go when you’re prepared to cook.

Scaling Instructions

Halving the recipe is simple; simply reduce each ingredient’s quantity accordingly. For those looking to serve a larger group, doubling or even tripling the recipe requires careful monitoring of both cooking times and oven space. Ensure equipment like roasting pans are appropriately sized, and make adjustments to cooking times while keeping an eye on doneness.

Nutritional Deep Dive

This dish offers a balanced macro breakdown, providing a healthy source of protein from the lamb, complemented by the carbohydrates from the potatoes. The vitamin and mineral content, particularly from the lemon and herbs, enhances the dish’s overall health benefits, including digestive support from dietary fiber.

Dietary Adaptations

For gluten-free enthusiasts, this recipe naturally fits into the diet as no grains are utilized. Dairy-free options can be maintained by avoiding creamy sauces or sides. For those seeking a low-carb twist, consider substituting potatoes with cauliflower alternatives while keeping the lamb as the star of the plate. Each specific diet can enjoy a delightful, satisfying meal without compromising on flavor.

Troubleshooting Guide

If texture issues arise, such as a tough lamb, ensure that the cut is appropriate for roasting, and that resting time is applied post-cooking. If flavor becomes imbalanced, consider adding finishing salt or a squeeze of lemon juice to brighten the dish. For temperature challenges, consistent use of a thermometer will help in achieving the desired doneness without overcooking.

Recipe Success Stories

Community feedback has shown how well this dish resonates during gatherings, with several sharing encouragement from loved ones after preparing it. Adapting the recipe to fit personal taste preferences often leads to delightful variations, with readers noting how their unique twists brought new life to this classic dish.

Frequently Asked Questions

How do I know when the lamb is done? The best way to determine doneness is through a meat thermometer. Aim for an internal temperature of 145°F for medium-rare. Allow the meat to rest for about 10 minutes before cutting to retain juices.

Can I prepare this dish in advance? Yes! You can marinate the lamb a day ahead. However, it’s recommended to roast it fresh on the day of serving for the best texture and flavor.

What if I can’t find fresh herbs? Dried herbs can be used as a substitute; however, reduce the amount by approximately one-third, as they are more concentrated.

What sides pair well with this dish? Besides roasted potatoes, vegetables like green beans, asparagus, or a fresh salad can create a well-rounded meal.

Can I substitute another meat? Yes, you can substitute lamb with chicken or beef, but do adjust the cooking time according to the cut used.

How do I store leftovers? Place leftover lamb in an airtight container and refrigerate for 3-4 days. For longer storage, you may freeze it for up to 3 months.

Is there a vegetarian version of this dish? A vegetarian version can be created by using roasted vegetables like eggplant or a plant-based meat alternative, seasoned similarly with herbs.

How can I make the potatoes extra crispy? Pre-boiling the potatoes before roasting can create a crispy exterior. Ensure they’re well-oiled and spaced out on the baking tray for optimal roasting.

What wine pairs best with this meal? A robust red wine, such as Cabernet Sauvignon, complements the rich flavors of lamb beautifully. Meanwhile, a crisp white wine can provide a refreshing contrast.

Can I use a slow cooker for this recipe? While traditional methods yield excellent results, adapting this meal for a slow cooker is feasible. Cook on low for 6-8 hours for melt-in-your-mouth lamb.

Additional Resources

For those inspired by this dish, consider exploring related recipes that highlight seasonal ingredients or focus on roasting techniques. Technique guides on marinating or herb selection can enhance your skills further, while equipment recommendations can make your cooking adventures even smoother.

Join the Conversation

Share your culinary creations online! Tag us on social media with your photography tips, variations you’ve tried, and your personal take on the recipe. Engaging with our community brings added joy as we all discover new flavors together. Your feedback and recipe reviews inspire us to create more delicious dishes for you to enjoy.

The Recipe

Herb-Crusted Roast Lamb with Lemon and Potatoes

Serves: 4-6

Prep Time: 15 mins

Cook Time: 1 hour 30 mins

Total Time: 1 hour 45 mins

Kitchen Equipment Needed

  • Roasting pan
  • Meat thermometer
  • Sharp knife
  • Mixing bowl
  • Citrus juicer (optional)

Ingredients

  • 1 boneless leg of lamb (3-4 pounds)
  • 1/4 cup olive oil
  • 2 tablespoons fresh rosemary, chopped
  • 2 tablespoons fresh thyme, chopped
  • 3 cloves garlic, minced
  • Juice and zest of 1 lemon
  • Salt and pepper, to taste
  • 2 pounds potatoes, cut into wedges
  • 1 teaspoon paprika (optional)

Directions

  1. Preheat your oven to 375°F (190°C).
  2. In a mixing bowl, combine olive oil, chopped herbs, minced garlic, lemon juice, lemon zest, salt, and pepper to create the marinade.
  3. Rub the marinade all over the lamb, ensuring it coats evenly. Let the lamb sit at room temperature for 30 minutes.
  4. While the lamb is marinating, prepare the potatoes by tossing them with olive oil, salt, pepper, and paprika if using.
  5. Place the lamb in a roasting pan and arrange the potatoes around it.
  6. Roast for approximately 1 hour and 30 minutes, or until it reaches your desired doneness.
  7. Remove the lamb from the oven, cover it with foil, and let it rest for 10-15 minutes before slicing.
  8. Serve the lamb with the roasted potatoes and enjoy!

Recipe Notes

  • For extra flavor, consider adding a splash of white wine to the roasting pan.
  • The recipe can be adjusted to include seasonal vegetables; feel free to add carrots or onions alongside the potatoes.
  • This dish pairs well with a side of minted yogurt or a robust gravy for added richness.

Elevate Your Dinner with Million Dollar Roast Beef Tenderloin

Million Dollar Roast Beef Tenderloin: The Ultimate Holiday Showstopper

⚖️
Difficulty
Intermediate

⏲️
Prep Time
30 mins

🕒
Cook Time
45 mins

⏱️
Total Time
75 mins

🍽️
Servings
8 servings

Welcome to the world of culinary excellence with our Million Dollar Roast Beef Tenderloin recipe! This luxurious dish combines the richness of perfectly cooked beef tenderloin with a mouthwatering herb butter glaze that will transport your taste buds to gourmet paradise. Ideal for festive seasons or special occasions, this tenderloin is the epitome of comfort and elegance on a plate. Loved by both meat lovers and those seeking a classic yet sophisticated centerpiece, this recipe is sure to shine at your dinner table.

With its enticing aroma of garlic, rosemary, and thyme, our Million Dollar Roast Beef Tenderloin brings warmth and charm to any gathering. Picture succulent slices of tender beef adorned with a golden, herb-infused crust, creating not only a feast for the palate but also a stunning visual appeal. Whether you’re hosting a holiday dinner or a casual family gathering, this roast will undoubtedly steal the show and make you the star of your kitchen.

Quick Recipe Highlights

  • Flavor Profile: Rich and savory beef with herbaceous notes of rosemary and thyme.
  • Texture: Exceptionally tender, melting in your mouth with a crispy exterior.
  • Aroma: Inviting scent of roasted garlic and fresh herbs fills the air.
  • Visual Appeal: Beautifully browned crust with juicy, pink interiors.
  • Skill Level Needed: Requires basic roasting techniques but offers room for finesse.
  • Special Equipment: A quality roasting pan and meat thermometer for perfect cooking.

Recipe Overview

  • Difficulty Level: This recipe is categorized as intermediate due to the precision needed in cooking the beef tenderloin perfectly.
  • Category: A main course that fits perfectly for holiday meals, family gatherings, or special celebrations.
  • Cuisine: Rooted in classic American cuisine, with French influences through the herb butter creation.
  • Cost: Pricey due to the cost of beef tenderloin, but worth the investment for special occasions.
  • Season: Ideal for fall and winter gatherings, including Thanksgiving and Christmas.
  • Occasion: Perfect for holiday dinners, anniversaries, or any celebration requiring a show-stopping centerpiece.

Why You’ll Love This Recipe

The taste of Million Dollar Roast Beef Tenderloin speaks volumes, boasting a rich flavor that is further enhanced by the herb butter. The beef is incredibly tender, ensuring that each bite is a delightful experience. With the golden, crispy crust enveloping the juicy interior, your palate will savor the combination of textures, making it an unforgettable dish.

This roast is not just about flavor—it’s about convenience, too! With the right preparation and a little patience, you can achieve restaurant-quality results in your own kitchen. Preparing this roast allows you to spend more time with your guests instead of being tied to the stove. A simple side of roasted vegetables or a fresh salad pairs beautifully, keeping your meal balanced and delicious.

From a nutritional standpoint, beef tenderloin is a lean cut packed with protein, iron, vitamins, and minerals essential for a balanced diet. It’s low in saturated fat compared to other beef cuts, making it a more health-conscious choice for meat lovers without sacrificing taste or satisfaction.

When it comes to social gatherings, nothing quite captures everyone’s attention like a beautifully prepared roast. This Million Dollar Roast Beef Tenderloin serves as a delightful conversation starter, inviting your guests to share their favorite culinary moments while satisfying their taste buds.

Finally, considering the overall cost, this dish is a worthwhile investment. While the initial price may seem high, think of the incredible experiences and cherished memories created around the table. Serving a dish of this caliber can turn an ordinary meal into an extraordinary occasion.

Historical Background and Cultural Significance

The tradition of serving roast beef dates back centuries, and the tenderloin cut has long been regarded as a symbol of luxury in households around the world. Originating in England, this noble cut was often reserved for special occasions and celebrations, highlighting its prized status among various beef cuts.

Throughout its history, roast beef has represented comfort and abundance in Western dining culture. It has often been incorporated into the tradition of Sunday roasts, which enjoyed by families and friends, showcasing not only culinary skill but also a chance for communal gatherings.

The adaptation of the tenderloin roast into modern cuisine has evolved as chefs seek to elevate its flavor profile. Incorporating diverse herbs and spices reflects the union of culinary traditions, allowing the roast to appeal to contemporary palates while respecting its rich heritage.

Regional variations also contribute to the cultural significance of this dish; for instance, the use of different marinades or accompanying sauces reflects local tastes and culinary styles across different countries, honoring the original dish’s legacy while infusing it with modern flair.

Ingredient Deep Dive

Beef Tenderloin: This exquisite cut of meat is highly revered for its tenderness and leanness. Sourced from the loin part of the cow, it’s crucial to select a well-marbled piece, ensuring flavor and juiciness. Nutritionally, it is rich in protein and iron, and when properly stored, it can be kept refrigerated for several days or frozen for longer periods.

Cooking with high-quality beef tenderloin can elevate your dish, while the way it is butchered can also affect the final taste. If unavailable, alternatives include sirloin or ribeye, though they will differ in tenderness and flavor.

Herbs and Garlic: Fresh herbs like rosemary and thyme are essential for creating a fragrant crust on the roast. Not only do they add aromatic qualities, but their health benefits—such as anti-inflammatory properties—are well-known. Similar herbs can be substituted, but fresh is always recommended for optimal flavor.

Common Mistakes to Avoid

  • Not bringing the meat to room temperature before cooking can lead to uneven cooking.
  • Overcooking the beef will result in a tough texture. Always use a meat thermometer to ensure the desired doneness.
  • Skipping the resting phase after cooking causes juices to escape, leading to a drier roast.
  • Inadequate seasoning will not enhance the beef’s natural flavors, so be generous with the salt and herbs.
  • Piling vegetables in the roasting pan without enough space can create steaming instead of roasting.
  • Failing to preheat the oven properly can alter the final texture and cooking times.
  • Using low-quality meat can ruin the dish; always choose high-quality beef for the best results.
  • Not basting the roast during cooking can lead to a dry exterior and less flavor.
  • Overstuffing the roasting pan can lead to uneven cooking; only add side vegetables if there’s ample space.
  • Failing to slice the roast across the grain can lead to tough, chewy pieces.

Essential Techniques

Proper Seasoning: Seasoning is key to enhancing the flavor of the beef. Generously salting the meat before cooking allows for a crust to form, locking in juices. To master this technique, remember to season both the exterior and any crevices of the cut to achieve uniform flavor. Watch for the meat becoming slightly tacky to the touch, which indicates the salt has begun to penetrate.

Basting: Basting is critical during the roast to ensure moisture and flavor. Using a basting spoon or syringe, periodically spoon the drippings from the pan over the meat. Signs it’s done effectively include a golden color and aromatic fragrance. Avoid opening the oven door too frequently, as this can lower the temperature and impact cooking time.

Pro Tips for Perfect Million Dollar Roast Beef Tenderloin

1. Allow your beef tenderloin to rest at least 15 minutes after cooking before slicing; this ensures the juices redistribute within the meat.

2. For an enhanced flavor, marinate the roast overnight with garlic, herbs, and olive oil.

3. Use a sharp knife to ensure clean slices for an impressive presentation.

4. If your roast is smaller, adjust the cooking time accordingly, as smaller pieces cook faster.

5. Create a flavorful gravy from the pan drippings to serve alongside the roast.

6. Always consider using a reliable meat thermometer; the ideal internal temperature should be around 135°F for medium-rare.

7. If available, finish your roast with a quick sear on the stovetop for an added level of flavor.

8. Letting the roast sit in the oven after it’s done cooking can help build up the flavor through residual heat.

Variations and Adaptations

For those who love regional flavors, consider adding local spices or rubs to the beef tenderloin, like Cajun seasoning for a spicy kick or an herb de Provence mix for a French flair. Seasonal adaptations can include cranberries or orange zest in the herb butter during the fall and winter months, giving the roast a holiday twist.

Dietary modifications can be made by opting for a leaner cut such as pork tenderloin for a lighter version, serving it with a similar herb crust. For a vegetarian twist, try creating a stuffed portobello mushroom cap with the same herbs and accompaniments, providing the bold flavor of the tenderloin without meat.

Serving and Presentation Guide

When plating, slice your roast thinly and fanned out on a white platter to accentuate the rich color of the beef. Garnishing with freshly chopped herbs or microgreens can elevate the visual appeal, while serving alongside seasonal vegetables gives your presentation a pop of color.

Consider serving with a sauce in a separate bowl for those who prefer additional flavor, and ensure that each piece of roast is garnished beautifully. Temperature considerations are important—serve the roast warm, but not overly hot to avoid cooking the meat’s interior further when served.

Wine and Beverage Pairing

For wine pairings, a robust red wine like Cabernet Sauvignon or a Merlot complements the richness of the beef beautifully. Alternatively, a well-crafted Pinot Noir can balance out the meal without overpowering the delicate flavors. For non-alcoholic options, consider serving sparkling water with fresh citrus slices, or a sophisticated cranberry juice cocktail to match the meal’s elegance.

Storage and Shelf Life

The storage methods for leftover roast include wrapping it tightly in aluminum foil or plastic wrap and placing it in an airtight container in the fridge, where it can last up to 3-4 days. For longer storage, consider freezing slices, ensuring that they are sealed well to prevent freezer burn. Always check for signs of spoilage, including any discoloration or off-putting smells before reheating.

Make Ahead Strategies

To prepare ahead of time, consider marinating your beef tenderloin the night before to deepen the flavors. Slicing vegetables can also be done in advance, ensuring minimal prep work on the day of serving. Assemble any sauces or herb butter ahead of time as well; they can be stored in the fridge for easy access before cooking your roast. When ready to serve, ensure the roast is reheated gently to maintain its juicy texture.

Scaling Instructions

If you need to halve the recipe, ensure you have an appropriate-sized cut of meat to maintain moisture and flavor. Doubling or tripling may require adjustments in cooking time, as well as a larger roasting pan; always use the internal temperature as a guide for doneness rather than time alone.

Nutritional Deep Dive

A typical serving of Beef Tenderloin contains around 300 calories, with significant protein content (approximately 40 grams per serving), which is crucial for muscle maintenance and overall health. The cut is also a good source of iron, important for energy production, and B vitamins which are essential for metabolic processes. Remember that portion control is key when enjoying rich meals like this, to maintain a balanced diet.

Dietary Adaptations

This roast can be adapted to fit various dietary needs. For gluten-free individuals, be sure to check that any sauces used are certified gluten-free. Dairy-free alternatives can include non-dairy butter for the herb blend, while keeping the flavor profile intact.

Troubleshooting Guide

If you encounter texture issues with your roast, typically undercooking or overcooking can cause problems. For undercooked meat, return it to the oven until the proper internal temperature is reached. Conversely, if the roast has been overcooked, slicing it thinly can help mitigate the toughness.

Recipe Success Stories

Feedback from the community about this Million Dollar Roast Beef Tenderloin has emphasized its status as a center-stage dish at family gatherings and events. Many have shared their adaptations, including creative herb blends or unique flours for an added kick. Photographic success stories celebrating the dish’s beauty continually inspire others to try their hand at this luxurious recipe.

Frequently Asked Questions

What cut of beef is best for a tenderloin roast?
Beef tenderloin is the ideal cut for this recipe due to its tenderness and mild flavor, but alternatives like ribeye can work as well for those seeking a richer taste.

How do I know when my beef tenderloin is perfectly cooked?
The best way to check for doneness is through a meat thermometer. Aim for 135°F for medium-rare, or 145°F for medium.

Can I make this roast ahead of time?
Yes! You can marinate the roast the night before and store it in the fridge until you’re ready to cook it.

What should I serve with roast beef tenderloin?
Classic pairings include roasted vegetables, creamy mashed potatoes, or a fresh garden salad to balance the richness of the meat.

How can I store leftovers?
Store leftovers in an airtight container in the fridge for up to four days or freeze for longer preservation.

Can I use dried herbs instead of fresh?
While fresh herbs are recommended for the best flavor, dried herbs can work in a pinch—just use less, as they are more concentrated.

Is it necessary to let the meat rest after cooking?
Yes, allowing the meat to rest for 15-20 minutes helps the juices redistribute, enhancing moisture when sliced.

What if I don’t have a roasting pan?
You can use a regular baking sheet lined with high sides, just ensure that it is sturdy enough to hold the weight of the roast.

How can I tell if the roast has spoiled?
Check for any off odors, discoloration, or a tacky feel on the surface; these are signs it may no longer be safe to eat.

Can I substitute any ingredients?
Yes, you can make simple substitutions, such as using a different cut of meat or replacing herbs with similar flavor profiles.

Additional Resources

If you enjoyed this Million Dollar Roast Beef Tenderloin recipe, you may also like our recipes for perfect roast chicken, garlic mashed potatoes, and seasonal vegetables for complementary sides that elevate your meal. Additionally, we provide guides on essential cooking techniques and equipment recommendations, ensuring you are well-prepared for every culinary adventure.

Join the Conversation

We would love to see your own twists on this Million Dollar Roast Beef Tenderloin! Share your photographs on social media and join our community of cooking enthusiasts. We encourage feedback, recipe reviews, and variations that inspire others. Your experiences help shape our culinary journey together.

The Recipe

Million Dollar Roast Beef Tenderloin

Serves: 8 servings

Prep Time: 30 mins

Cook Time: 45 mins

Total Time: 75 mins

Kitchen Equipment Needed

  • Roasting pan
  • Meat thermometer
  • Sharp knife for slicing

Ingredients

  • 1 whole beef tenderloin (about 2-3 pounds)
  • 4 tablespoons olive oil
  • 3 cloves garlic, minced
  • 2 tablespoons fresh rosemary, finely chopped
  • 2 tablespoons fresh thyme, finely chopped
  • Salt and pepper to taste

Directions

  1. Preheat oven to 425°F (220°C).
  2. In a small bowl, mix olive oil, garlic, rosemary, thyme, salt, and pepper to create a herb paste.
  3. Rub the herb mixture all over the beef tenderloin, ensuring an even coating.
  4. Place the tenderloin on a rack in a roasting pan and roast in the preheated oven for approximately 45 minutes for medium-rare.
  5. Use a meat thermometer to check for doneness, aiming for 135°F (57°C).
  6. Remove from the oven and let the roast rest for at least 15-20 minutes before slicing.
  7. Slice against the grain and serve with pan drippings or your favorite sauce.

Recipe Notes

  • Feel free to add your favorite spices to the herb mix!
  • This dish pairs well with red wine for a complete dining experience.