Delicious No-Peek Chicken Casserole for Effortless Family Dinners

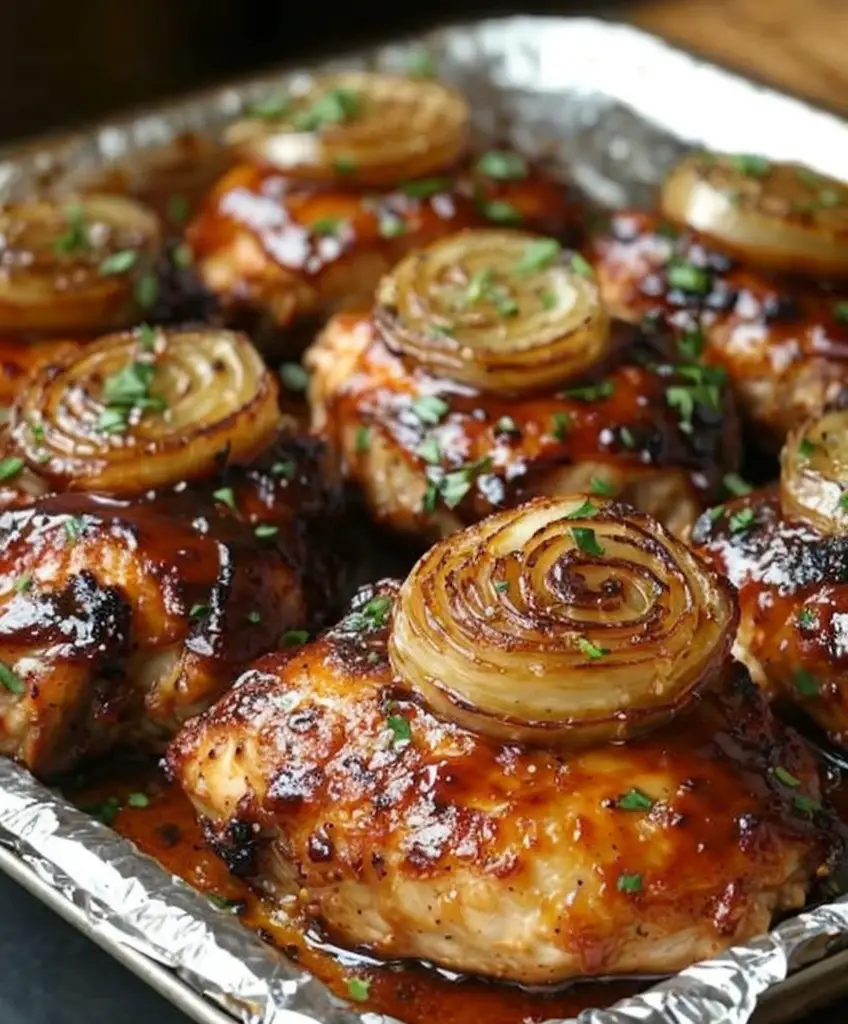
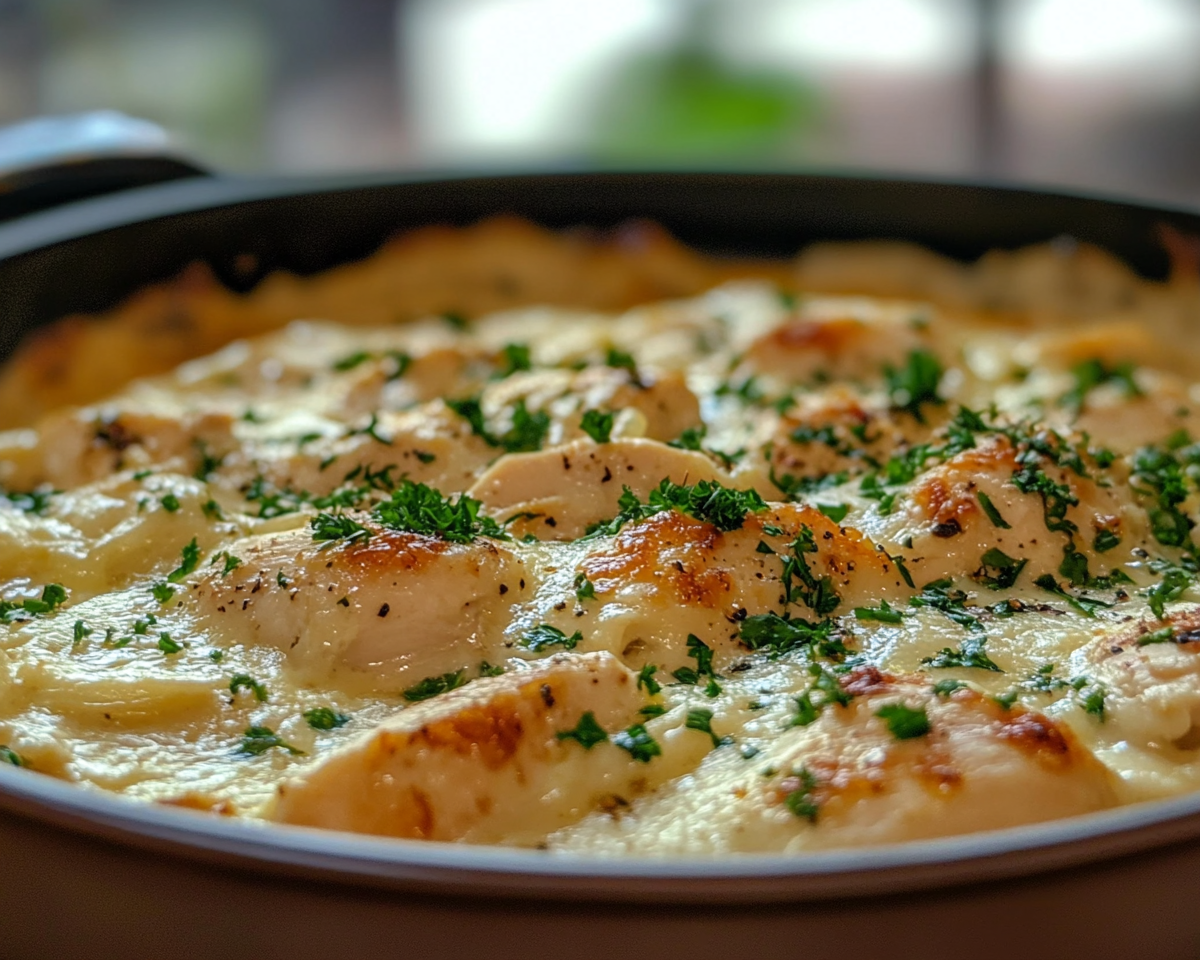
No-Peek Chicken Casserole: A Simple and Delicious Comfort Food

⚖️
Difficulty
Easy

⏲️
Prep Time
15 mins

🕒
Cook Time
60 mins

⏱️
Total Time
75 mins

🍽️
Servings
4-6

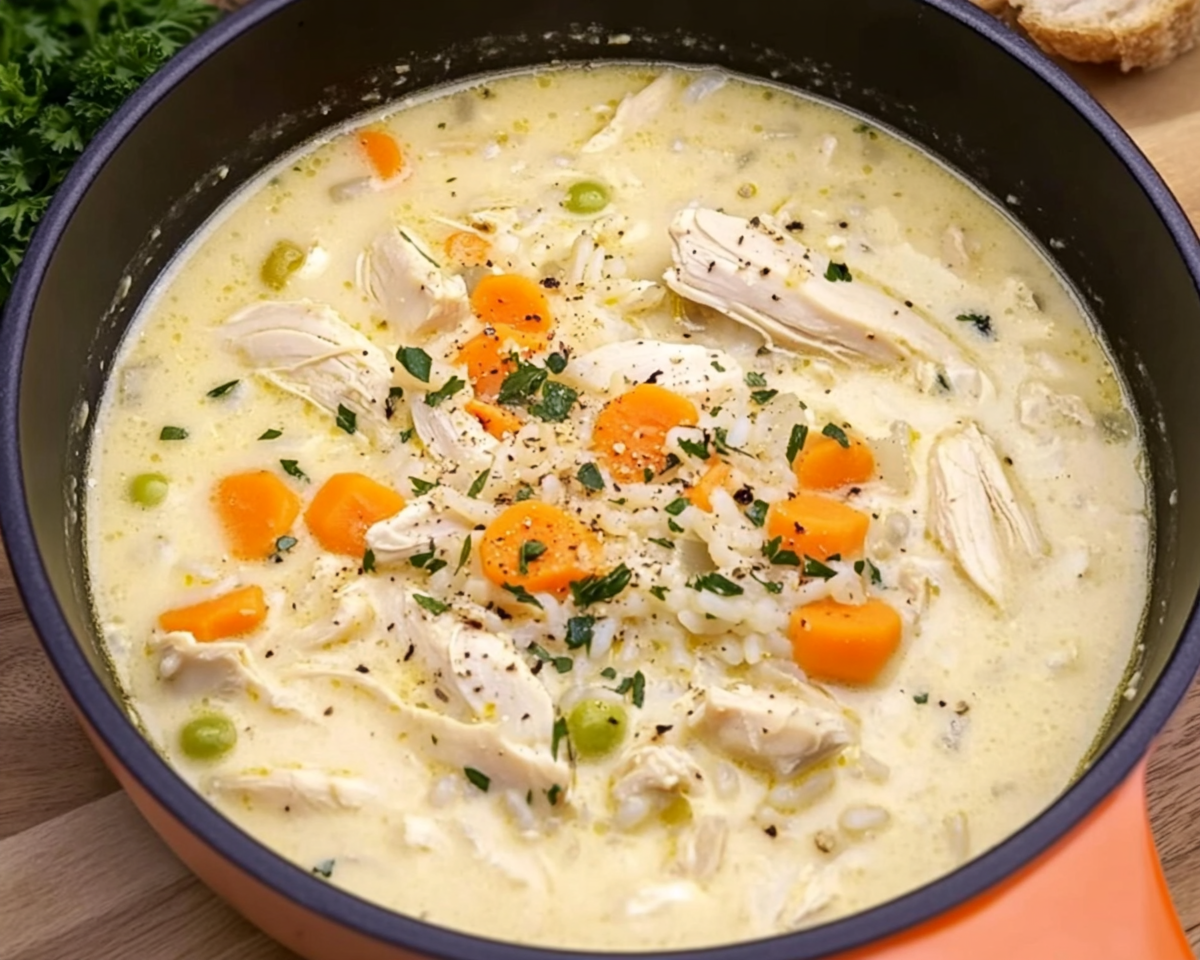
The No-Peek Chicken Casserole is a delightful dish that brings comfort and warmth to the dinner table, perfect for busy weeknights or family gatherings. Imagine tender chicken simmered with flavorful rice and a creamy sauce, all baked to perfection. The beauty of this recipe lies in its simplicity; just layer the ingredients, pop it in the oven, and let the magic happen without any peeking required! This casserole not only makes for a hearty meal but also offers a great way to bond with family over a delicious homemade feast.

The flavors meld beautifully during cooking, creating a rich and creamy texture that coats each bite. Each scoop reveals succulent pieces of chicken enveloped in perfectly cooked rice, making it a fulfilling dish that satisfies both the palate and the soul. Whether served alongside a fresh salad or on its own, this casserole is sure to become a family favorite, bringing smiles and warmth to every meal.

Quick Recipe Highlights

  • Flavor Profile: A savory blend of chicken, creamy soup, and fragrant rice creates a balanced taste that’s comforting and satisfying.
  • Texture: The casserole features a creamy exterior with tender chicken and fluffy rice, providing a delightful mouthfeel.
  • Aroma: As it bakes, expect an enticing aroma of garlic and herbs, filling your kitchen with warmth and comfort.
  • Visual Appeal: Golden tops and rich colors make this dish visually appealing, inviting everyone to dig in.
  • Skill Level Needed: This recipe is easy to prepare, requiring no prior cooking expertise—just a willingness to layer ingredients.
  • Special Equipment: A large baking dish or casserole dish is all you need for this straightforward recipe.

Recipe Overview

  • Difficulty Level: Easy. This casserole is perfect for beginner cooks and allows for flexibility during preparation.
  • Category: Main Dish. Ideal for family meals or potlucks, it serves as a complete dinner in one dish.
  • Cuisine: Comfort Food. This dish reflects classic American home-style cooking, with roots in hearty meals that warm the heart.
  • Cost: Budget-friendly. The ingredients used are affordable, making this casserole an economical choice for family dinners.
  • Season: Suitable for all year round. It’s always a hit regardless of the season, but particularly cozy in cooler months.
  • Occasion: Family gatherings, weeknight dinners, and potlucks. This versatile dish is perfect for any occasion that calls for comforting food.

Why You’ll Love This Recipe

This No-Peek Chicken Casserole is the epitome of comfort food, offering a perfect combination of taste and texture that will satisfy even the heartiest of appetites. The creamy sauce, combined with succulent chicken and fluffy rice, creates a mouthwatering experience that is both filling and delightful. Unlike other complicated recipes, this casserole simplifies meal prep without sacrificing flavor, allowing you to serve a wholesome dish without spending hours in the kitchen.

Moreover, it’s a dish that’s not only delicious but also packed with nutritional advantages; chicken is a great source of protein, while rice adds carbohydrates for energy. By incorporating a few vegetables, you can enhance the nutritional profile even further, making it a well-rounded meal option.

This casserole also shines when it comes to social settings, such as family gatherings or potlucks. It often becomes the centerpiece of conversations, where everyone shares their love for the dish and perhaps even their variations on the recipe. Cost-effectiveness is another incredible plus; with minimal ingredients required, feeding a family or group whilst keeping the budget low is easily achievable.

Ultimately, the No-Peek Chicken Casserole is a meal that not only satisfies hunger but also warms hearts, making it a go-to recipe for many home cooks.

Historical Background and Cultural Significance

The origins of casseroles can be traced back to times when food preservation was the primary challenge in the kitchen. The No-Peek Chicken Casserole is no exception, as it represents a culinary trend where utilizing leftovers and simple pantry staples became essential for efficient meal preparation. These one-dish meals quickly became popular in American households as they offered a convenient solution for busy families.

Over the decades, the casserole evolved from classic French recipes to an American staple, embodying an essence of home cooking that evokes nostalgia for many. Its adaptability allowed it to incorporate various regional flavors, making it a dish that every family could personalize.

As the years progressed, the casserole became a social dish, often featured at potlucks and gatherings. Its communal nature encourages sharing, and with each family adding a unique twist, the No-Peek Chicken Casserole became a beloved dish across different cultures.

Regional variations often include the addition of local spices or traditional ingredients, making it a versatile canvas for creativity. The dish’s simplicity and heartiness have cemented it as a timeless favorite that continues to gather families and friends around the dinner table.

Ingredient Deep Dive

Chicken: The main component of this casserole, chicken is not only a favorite protein source in various cuisines, but it is also a versatile ingredient that adapts well to different flavors. Opt for fresh or frozen chicken breast for the best taste. Nutritionally, chicken is high in protein and low in fat, making it a great option for muscle building and weight management. Additionally, ensure to store chicken in the refrigerator for a maximum of 2 days if fresh, or up to 6 months if frozen. For substitutions, consider turkey or plant-based proteins for a different twist.

Rice: As the backbone of the casserole, rice provides substance and aids in meal fulfillment. Brown rice offers a nutrient-dense alternative and adds a nuttier flavor, while white rice cooks up soft and fluffy. When selecting rice, go for whole grains whenever possible. For storage, keep rice in an airtight container to prolong its shelf life. If you want to switch things up, quinoa or couscous can serve as excellent alternatives.

Cream of Chicken Soup: This ingredient adds creaminess to the casserole while infusing it with rich flavor. While you can use store-bought soup, a homemade version can offer fresher taste and fewer preservatives. Look for low-sodium options for a healthier alternative. When storing, keep it sealed in the fridge, and use within a few days. If dairy is an issue, cream of mushroom or vegetable soup can also work beautifully here.

Common Mistakes to Avoid

  • Not Prepping Ingredients: Skipping the preparation process can lead to uneven cooking. Always prepare your vegetables and proteins beforehand.
  • Overcrowding the Casserole Dish: Too much food can lead to uneven cooking and longer bake times. Ensure your ingredients fit comfortably in your dish.
  • Peeking During Baking: Resist the urge to open the oven door. It releases heat and can disrupt cooking times.
  • Not Using Enough Liquid: Dry casserole can form if you don’t add sufficient moisture. Customize the soup or add extra broth as necessary.
  • Using Old Ingredients: Fresh ingredients yield the best flavor. Check expiration dates before preparing your dish.
  • Overcooking the Chicken: Chicken should be cooked through but still tender. Use a meat thermometer to ensure it doesn’t dry out.
  • Skipping Spices: Don’t forget to season generously! Herbs and spices elevate the dish’s flavor profile significantly.
  • Serving Without Letting It Rest: Giving the casserole a few minutes to settle helps with serving and enhances flavors.

Essential Techniques

– Layering: Layering ingredients helps create a balanced flavor profile. Start with the rice, then add the chicken and finally the soup to seal in moisture.
– Baking: Proper baking technique ensures even cooking, preventing burning at the top. Use a moderate oven temperature and cover with foil if browning too quickly.
– Tempering: If using frozen chicken, ensure to thaw it fully to prevent uneven cooking during the bake.

Pro Tips for Perfect No-Peek Chicken Casserole

1. Use broth instead of water for cooking the rice to enhance the flavor immensely.
2. Add a layer of your favorite vegetables, such as broccoli or bell peppers, to boost nutrition.
3. Consider garnishing with fresh herbs before serving for a pop of color and taste.
4. If you prefer crunch, sprinkle breadcrumbs or crushed crackers on top before baking.
5. For an added depth of flavor, include garlic or onion powder in your seasonings.
6. To reduce cooking time, pre-cook the rice slightly before adding it to the casserole.
7. Experiment with different creamy soups for unique flavor profiles.
8. Always allow the dish to rest for a few minutes once removed from the oven for easier serving.

Variations and Adaptations

The No-Peek Chicken Casserole can easily be adapted to suit personal tastes and seasonal preferences. For example, in the summer, you could incorporate seasonal vegetables like zucchini or corn. In colder months, adding root vegetables can provide an earthy flavor.

For those looking to make it a lighter option, consider using brown rice and lean chicken cuts. You can also create a gluten-free version by using gluten-free cream of chicken soup and ensuring all other ingredients are certified gluten-free.

Flavor variations are limitless; try adding different cheese types to the mix for a richer texture. To keep the dish fresh, serve it with a side of tangy salad for a balancing contrast.

Serving and Presentation Guide

Plating your No-Peek Chicken Casserole beautifully elevates the dining experience. Use a large spoon to serve and ensure an even distribution of chicken, rice, and sauce. Place it on a colorful dish for contrast, and consider garnishing with freshly chopped parsley or slices of lemon for brightness.

Traditional accompaniments enhance the meal; serve it alongside fresh bread or a simple green salad. Modern serving suggestions include personal portions in small baking dishes, which add flair and make for easier portion control.

Always keep in mind the serving temperature; the casserole tastes best when served warm, but ensure it has cooled slightly for safety.

Wine and Beverage Pairing

When selecting a beverage to pair with the No-Peek Chicken Casserole, consider a light white wine, such as Chardonnay or Sauvignon Blanc, which complements the savory flavors without overwhelming them. For a non-alcoholic alternative, a sparkling apple cider adds a refreshing touch that balances the dish’s creaminess.

For a more comforting beverage, a warm cup of herbal tea, like chamomile or mint, can round off the meal beautifully. Always serve drinks chilled to enhance the overall dining experience.

Storage and Shelf Life

To store leftover No-Peek Chicken Casserole, transfer it to an airtight container. It can be kept in the refrigerator for up to three days or frozen for up to three months. When reheating, ensure it warms through to a safe temperature.

Warning signs of spoilage include strange smells or changes in texture; never eat leftovers if any doubts arise about their freshness. When reheating, add a splash of broth or water to restore moisture and avoid drying.

Make Ahead Strategies

To streamline your cooking process, the No-Peek Chicken Casserole can be prepared ahead of time. Pre-cook the rice in advance and store it in the fridge until you’re ready to assemble.

Additionally, you can chop vegetables and season your chicken to save time. When filling your casserole dish, simply layer the ingredients as described and refrigerate it until you’re ready to bake.

For the best flavor and texture, aim to bake it within 1-2 days, but it can hold for longer in the fridge.

Scaling Instructions

Scaling up the No-Peek Chicken Casserole recipe for larger gatherings is straightforward. For doubling the recipe, ensure your baking dish is large enough to accommodate the extra volume.

Timing may vary slightly, so keep an eye on the dish, as it can take longer to cook through. When halving the recipe, consider using individual baking dishes for creative serving solutions that also reduce cooking time.

Remember to adjust cooking times accordingly and check for doneness with a meat thermometer to ensure safety.

Nutritional Deep Dive

A typical serving of No-Peek Chicken Casserole can provide a balanced macro breakdown of protein from the chicken, carbs from the rice, and fats from the creamy soup ingredients. Chicken offers essential nutrients including B vitamins and minerals, while rice serves as a great energy source.

The dish is customizable; by adding vegetables, you can increase fiber and vitamins significantly. If you want to modify for weight control, consider portion sizes and using leaner cuts of chicken to reduce overall calories.

For health-conscious individuals, substitutions such as brown rice will provide additional fiber and nutrients.

Dietary Adaptations

1. Gluten-free: Use gluten-free cream of chicken soup and ensure all ingredients are devoid of gluten.
2. Dairy-free: Substitute with plant-based creamy soups or make a thick sauce using nut milk and flour alternatives.
3. Vegan: Replace chicken with tofu or chickpeas and use vegetable broth with a non-dairy cream substitute.
4. Low-carb: Use cauliflower rice in place of regular rice to lower carbs significantly while maintaining volume.
5. Keto: Combine keto-friendly cream soups with cheese and chicken for a satisfying low-carb dish.
6. Paleo: Opt for non-processed ingredients, focusing on fresh vegetables and meats, avoiding traditional canned soups.
7. Low-FODMAP: Ensure ingredients are low in fermentable sugars and use broth for moisture.
8. Other specific diets: Tailor the recipe based on dietary needs by swapping ingredients accordingly.

Troubleshooting Guide

– Texture issues: If your casserole is too dry, consider adding more liquid in your next preparation. A splash of broth can enhance moisture.
– Flavor balance: If lacking flavor, add additional seasonings or salt gradually until satisfied with the taste.
– Temperature problems: If food isn’t cooking evenly, ensure your oven is calibrated correctly and rotate the dish midway.
– Equipment challenges: In case of a missing baking dish, any oven-safe dish can serve as a makeshift alternative, though its shape might alter cooking time.
– Ingredient substitutions: If you have to swap out an ingredient, seek similar textures and flavors to ensure the dish remains cohesive.
– Timing concerns: If short on time, consider pre-cooking components or using cook times to your advantage by preparing ahead.

Recipe Success Stories

Reader feedback on the No-Peek Chicken Casserole has been overwhelmingly positive, often sharing unique variations that personalize the dish. Many highlight how their family requests this comforting dish regularly, each time incorporating different vegetables and spices. Photography tips are popular amongst readers keen on showcasing their versions on social media, with many choosing to use vibrant garnishes.

Adaptation stories reveal how diverse the dish can be, from a spicy twist with jalapeños to a cheesy version with extra cheese on top, every family adds their flavor to make it unique. As community members share their successes, it forms a stronger bond over a shared love for this versatile casserole.

Frequently Asked Questions

Can I make the No-Peek Chicken Casserole ahead of time?

Absolutely! You can prepare it a day in advance, cover it tightly with plastic wrap, and store it in the refrigerator. When ready to cook, simply bake it without the need to thaw.

Is it possible to substitute rice in this casserole?

Yes, you can use quinoa, cauliflower rice, or any other grain of your choice. Just adjust cooking times as needed, as different grains have varying baking requirements.

What can I do if the casserole is too dry?

If your casserole comes out dry, try adding more liquid next time—such as broth or water—or cover with foil for part of the baking time to trap moisture.

Can I freeze the No-Peek Chicken Casserole?

This casserole freezes well, allowing you to enjoy it later. Just ensure it’s stored in an airtight container, and it can last in the freezer for up to three months.

Can I use leftover chicken for this recipe?

Absolutely! Using leftover chicken is a great way to repurpose it and save time. Just make sure to shred or dice it into small pieces before adding it to the casserole.

What types of vegetables can I add?

You can include any vegetables you like! Popular additions are peas, carrots, bell peppers, or green beans. Just ensure they’re chopped into small pieces for even cooking.

How can I make this dish healthier?

To create a healthier No-Peek Chicken Casserole, consider using brown rice instead of white, low-sodium soups, and loading it with plenty of fresh vegetables.

Can I make a dairy-free version of this casserole?

Yes! Substitute the cream of chicken soup with a dairy-free alternative or make your creamy sauce using coconut milk or dairy-free cream.

How do I reheat leftovers?

To reheat, simply place the casserole in the oven at 350°F (175°C) until warmed through, adding a splash of broth to prevent dryness. Alternatively, microwave individual portions for convenience.

What’s the best way to store leftovers?

Leftovers can be stored in an airtight container in the refrigerator for up to three days. Ensure to cool completely before sealing to maintain freshness.

Is there a vegetarian version of this casserole?

Yes! You can create a delicious vegetarian version by using vegetable broth, plant-based proteins like tofu or chickpeas, and vegetable-based cream soups instead of chicken.

Additional Resources

For more great recipes like No-Peek Chicken Casserole, check out our collection of comforting casseroles, and learn about techniques to master your cooking skills effectively. Explore ingredient profiles to get the most out of your cooking, and consider investing in quality kitchen equipment that can enhance your culinary creations. Discover seasonal variations that can help inspire your weekly meals, keeping your family excited about dinner.

Join the Conversation

We love hearing from our community! Share your No-Peek Chicken Casserole stories with us on social media, including tips for variations or unique ingredients you’ve tried. Your feedback enhances our recipe sharing and inspires other home cooks looking for that perfect comforting dish. Don’t hesitate to share your photography tips to help this recipe look as good as it tastes, and join our growing community of passionate home cooks exploring the joy of sharing meals together.

The Recipe

No-Peek Chicken Casserole

Serves: 4-6

Prep Time: 15 mins

Cook Time: 60 mins

Total Time: 75 mins

Kitchen Equipment Needed

  • Large casserole dish
  • Measuring cups and spoons
  • Mixing spoons
  • Cutting board
  • Knife

Ingredients

  • 1.5 lbs chicken breast, cubed
  • 1 cup uncooked long-grain white rice
  • 1 can cream of chicken soup
  • 1.5 cups chicken broth
  • 1 cup frozen mixed vegetables
  • 1 teaspoon garlic powder
  • Salt and pepper to taste

Directions

  1. Preheat your oven to 350°F (175°C).
  2. In a large casserole dish, layer the uncooked rice evenly at the bottom.
  3. Place the cubed chicken pieces on top of the rice.
  4. In a separate bowl, combine the cream of chicken soup and chicken broth. Mix well and pour it over the chicken and rice.
  5. Add the frozen vegetables and season with garlic powder, salt, and pepper.
  6. Cover the casserole dish with aluminum foil and bake in the preheated oven for 60 minutes.
  7. Remove foil and bake for an additional 10 minutes to allow it to brown slightly.
  8. Let it rest for a few minutes before serving.

Recipe Notes

  • Experiment with different vegetables for added nutrition or flavor.
  • Leftovers can be stored in an airtight container in the refrigerator for 3 days.
  • This recipe can be easily doubled for larger gatherings.

Delicious Baked Barbecue Chicken Thighs with Caramelized Onions Recipe

Baked Barbecue Chicken Thighs with Onions: A Flavorful Delight for Any Occasion

⚖️
Difficulty
Easy

⏲️
Prep Time
15 mins

🕒
Cook Time
45 mins

⏱️
Total Time
60 mins

🍽️
Servings
4

If you’re looking for a simple yet delicious dish that packs a punch of flavor, these Baked Barbecue Chicken Thighs with Onions are just what you need. The crispy skin contrasts beautifully with the tender, juicy meat, all combined with a homemade barbecue sauce that’s deeply satisfying. As the chicken bakes, the sweet and savory aroma fills your kitchen, tantalizing everyone in your home and making their mouths water in anticipation.

Perfect for weeknight dinners, family gatherings, or weekend cookouts, this dish combines a few basic ingredients to create something extraordinary. The caramelized onions serve not only as a bed for the chicken but also infuse their flavor throughout the dish, creating a harmonious blend. Serve these succulent thighs with a side of vegetable slaw or cornbread for a complete meal that is sure to impress.

Quick Recipe Highlights

  • Flavor Profile: Bold and tangy barbecue sauce meets savory chicken and sweet caramelized onions.
  • Texture: Enjoy a crispy skin with moist, tender meat and a slight crunch from the onions.
  • Aroma: A delightful combination of caramelized sugar and smoky barbecue fills the air.
  • Visual Appeal: The golden-brown chicken glistens with sauce, complemented by the vibrant color of the onions.
  • Skill Level Needed: Ideal for beginners but sure to impress experienced cooks.
  • Special Equipment: A baking dish and oven are all you need for this easy recipe.

Recipe Overview

  • Difficulty Level: This recipe is categorized as easy, making it perfect for novice cooks and a great way to build confidence in the kitchen.
  • Category: Main dish — great for family dinners or potlucks.
  • Cuisine: A classic American barbecue style, this dish is rooted in tradition, showcasing bold flavors.
  • Cost: An affordable dish that provides great value; chicken thighs and onions are budget-friendly ingredients.
  • Season: Enjoy year-round, but particularly during grilling season for those outdoor cookouts.
  • Occasion: Ideal for family dinners, game-day gatherings, and casual weeknight meals.

Why You’ll Love This Recipe

This Baked Barbecue Chicken Thighs with Onions is a dish you’ll fall in love with, thanks to its mouthwatering taste and inviting aroma. The perfectly balanced barbecue sauce enhances the natural flavors of the chicken, while the caramelized onions add depth, making each bite unforgettable. The ability to prepare this recipe quickly means you can spend more time savoring the meal and less time in the kitchen.

The convenience of this recipe is unmatched. With just a handful of ingredients that are easily available, you can whip up a delicious meal without complications. Additionally, the prep time is minimal, allowing you to focus on more important aspects, like enjoying time with family or friends while dinner is in the oven.

Nutritionally, chicken thighs offer a great source of protein, making this dish perfect for those looking to maintain a balanced diet. The addition of onions not only boosts the flavor but also provides vitamins and antioxidants. This dish can easily fit into a healthy eating plan when paired with fresh sides, ensuring you nourish your body without sacrificing flavor.

Socially, this dish is a crowd-pleaser, making it an excellent choice to share at gatherings. Its familiar flavors attract guests of all ages, and its ease of preparation ensures you spend less time cooking and more time enjoying the company of those you love.

Lastly, this recipe is cost-effective. Chicken thighs are often less expensive than other cuts of chicken, and their rich flavor combined with the onion’s natural sweetness provides a satisfying meal that doesn’t break the bank. You’ll be able to feed the family without stressing about the grocery bill.

Historical Background and Cultural Significance

Barbecue has deep roots in American cuisine, originating from various traditional cooking methods brought by Native Americans and later influenced by African and European cultures. The method of slow-cooking meat over an open flame has been a staple in American gatherings for centuries, celebrating the unification of flavors and families.

Regional variations of barbecue are abundant, with each area adopting its unique style and sauce. From tangy vinegar-based sauces in the Carolinas to the rich, sweet styles of Kansas City, barbecue chicken has evolved, showcasing the diverse palette of American flavors. The dish of Baked Barbecue Chicken Thighs with Onions honors this tradition while offering a comforting home-cooked twist that’s accessible for any home cook.

As barbecue culture continues to grow, its significance remains rooted in community and connection, often associated with social events, celebrations, and comfort food. Whether it’s a backyard cookout or a family dinner, the act of sharing a meal brings people together, enriching the culinary experience.

This dish mirrors the evolution of barbecue as it becomes more integrated into everyday meals, transforming once-complex recipes into simple yet flavorful options for busy lifestyles. Baked Barbecue Chicken Thighs with Onions embodies the essence of barbecue cooking: bringing joy and satisfaction to the table with minimal fuss.

Ingredient Deep Dive

  • Chicken Thighs: Considered a more flavorful cut compared to chicken breasts, thighs retain moisture well during cooking. Nutritionally, they provide healthy protein and iron. When selecting, look for organic options for better quality, and store in the refrigerator for up to two days or freeze for longer preservation. Substitutions can include chicken legs or breasts, although cooking times may vary.
  • Onions: Caramelized onions add sweetness and depth to the dish, essential for flavor development. Rich in vitamins, fiber, and antioxidants, onions also contribute to heart health. Choose firm, smooth-skinned onions, and store in a cool, dark place. If you need to substitute, shallots or leeks can provide a similar flavor, but with a milder profile.
  • Barbecue Sauce: A key ingredient that ties the dish together with flavor. Store-bought sauces can be convenient, but it’s easy to make your own with ketchup, vinegar, and spices. Nutritionally, watch for sugar content in commercial brands. Homemade options not only taste fresher but can be adjusted for sweetness and heat to your liking.

Common Mistakes to Avoid

  • Not marinating the chicken: Allowing the chicken to marinate will significantly enhance the flavors, so don’t skip this crucial step.
  • Using the wrong cooking temperature: Cooking at too high a temperature can burn the barbecue sauce, while too low might leave the chicken undercooked. Stick to a reliable temperature.
  • Overcooking the chicken: Check the internal temperature to avoid dry chicken. Aim for 165°F (74°C) for perfectly juicy thighs.
  • Neglecting the onion prep: Properly slicing the onions ensures even cooking and allows them to caramelize beautifully.
  • Not allowing the dish to rest: Letting the chicken rest a few minutes before serving retains juices and improves texture.
  • Skipping the baking dish: Using a proper baking dish helps trap juices and flavors, making the final dish more enjoyable.
  • Ignoring side dishes: Pairing your chicken with complementary sides enhances the overall meal experience.
  • Rushing the baking time: Patience is key; let the chicken cook through slowly to fully develop its flavors.

Essential Techniques

Marinating: Marinating the chicken thighs allows the flavors to penetrate deeper into the meat. Mix either store-bought or homemade barbecue sauce with seasoning, and allow the chicken to soak up these flavors for at least 30 minutes to a few hours. Avoid skipping this step for maximum flavor.

Caramelizing Onions: Slice onions thinly and cook them slowly over medium heat in a bit of oil. Patience is key here—allow the natural sugars to develop until they become soft and golden brown. This technique adds immense flavor depth to the dish.

Baking: Baking at a consistent temperature allows the chicken to cook evenly. Keep an eye on the internal temperature using a meat thermometer, which provides a visual cue when the meal is done.

Pro Tips for Perfect Baked Barbecue Chicken Thighs

  • For extra flavor, add a touch of smoked paprika to your marinade for a smoky depth.
  • Consider finishing the dish under the broiler for the last few minutes to achieve crispy skin.
  • Experiment with other flavor-enhancing ingredients like garlic or cayenne pepper in your barbecue sauce for a unique twist.
  • Let the chicken rest after baking to keep it juicy and flavorful.
  • When storing leftovers, separate the chicken from sauce to maintain quality.
  • Use high-quality barbecue sauce and experiment with regional varieties for different flavor profiles.
  • For a healthier option, skin the chicken before marinating—this will cut down on fat and calories.

Variations and Adaptations

  • Regional Variations: Try using Memphis-style barbecue sauce, or experiment with a peppery Texas sauce to switch things up.
  • Seasonal Adaptations: In the fall, incorporate roasted pumpkin or sweet potatoes for a heartier side.
  • Dietary Modifications: Opt for skinless chicken thighs or substitute turkey thighs for a leaner protein option.
  • Flavor Variations: Integrate flavors by adding chipotle peppers for a smoky, spicy kick.
  • Texture Modifications: Add vegetables like bell peppers or zucchini to the baking dish for added texture and nutrition.
  • Presentation Alternatives: Serve the chicken on a bed of herbs or with a sprinkle of fresh green onions for added color and flavor contrast.

Serving and Presentation Guide

  • Plating Techniques: Serve on a rustic wooden platter to enhance the barbecue experience.
  • Garnishing Ideas: Fresh parsley or cilantro can add a brilliant green contrast and freshness.
  • Traditional Accompaniments: Coleslaw and cornbread pair perfectly for a Southern-inspired meal.
  • Modern Serving Suggestions: For a contemporary twist, serve in bowls with a side of quinoa or brown rice.
  • Temperature Considerations: Serve the chicken warm to enjoy the full flavor experience; letting it cool can dull the taste.
  • Portion Control Tips: Offer sides to compliment a single serving of chicken, balancing the plate.

Wine and Beverage Pairing

  • Wine Pairings: Opt for a fruity Zinfandel or a light Pinot Noir that complements the barbecue without overwhelming it.
  • Non-alcoholic Alternatives: Sparkling water with a splash of lemon enhances the freshness of the meal.
  • Coffee/Tea Pairings: A lightly brewed iced tea with citrus notes can cleanse the palate between bites.
  • Temperature Considerations: Serve wine chilled and beverages at a refreshing temperature for the best enjoyment.
  • Serving Suggestions: Provide a mix of beverages to cater to guests’ preferences, balancing between alcoholic and non-alcoholic options.

Storage and Shelf Life

  • Storage Methods: Store leftovers in airtight containers in the refrigerator for up to 3 days.
  • Temperature Requirements: Always ensure food is cooled before sealing to avoid condensation.
  • Container Recommendations: Use glass containers for easy reheating and to maintain flavor integrity.
  • Signs of Spoilage: Always check for off smells or discoloration, as these indicate spoilage.
  • Reheating Instructions: Reheat in the oven for best results, ensuring the chicken reaches an internal temperature of 165°F (74°C).
  • Freezing Guidelines: You can freeze portions of the dish for up to 2 months. Thaw overnight in the refrigerator before reheating.

Make Ahead Strategies

  • Prep Timeline: Marinate the chicken the night before to allow the flavors to develop fully.
  • Storage Between Steps: Store sliced onions in the fridge covered in a bit of oil until you’re ready to cook.
  • Quality Impact Assessment: As flavors meld, allowing for marination overnight improves taste significantly.
  • Assembly Tips: Once marinated, you can assemble the dish quickly before baking, saving time on busy days.
  • Reheating Guidelines: To avoid nutrient loss, reheat only what’s needed efficiently.
  • Fresh Element Additions: Add fresh herbs or zesty lime before serving to brighten the dish.

Scaling Instructions

  • Halving the Recipe: For smaller gatherings, halve the ingredients, adjusting marinading times accordingly.
  • Doubling or Tripling: For larger crowds, ensure you have a baking dish large enough and consider cooking in batches.
  • Equipment Adjustments: Make sure your oven can accommodate the larger dish or use multiple sheet pans.
  • Timing Modifications: Expect slight changes in cooking time; use a thermometer to determine doneness.
  • Storage Considerations: When scaling, remember that leftovers can also be frozen efficiently.

Nutritional Deep Dive

  • Macro Breakdown: Each serving is high in protein, providing approximately 30 grams per portion, essential for muscle recovery.
  • Micronutrient Analysis: Chicken thighs are rich in iron and B vitamins, supporting energy production and metabolism.
  • Health Benefits: Onions add antioxidants and fiber, promoting heart health and digestion.
  • Dietary Considerations: This dish fits into a balanced diet when served with veggies; however, consider portion size for caloric intake.
  • Portion Analysis: Monitor serving sizes to keep meal prep within dietary goals while enjoying flavorful food.
  • Weight Management Tips: Balance richer meals with lighter sides to maintain overall dietary goals and wellness.

Dietary Adaptations

  • Gluten-free: Ensure your barbecue sauce is gluten-free; many brands offer options.
  • Dairy-free: This recipe is naturally dairy-free, so there are no concerns in that area.
  • Vegan: Substitute chicken with hearty vegetable options like eggplant or portobello mushrooms with a vegan barbecue sauce.
  • Low-carb: Serve with low-carb vegetables or salads to keep your meal light yet satisfying.
  • Keto: Keep the chicken as is but watch for high-carb sides; opt for non-starchy vegetables instead.
  • Paleo: This recipe fits nicely into a paleo diet; just ensure your barbecue sauce adheres to paleo principles.
  • Low-FODMAP: Reduce onion quantity as much as possible if you are following a low-FODMAP diet.
  • Other specific diets: Customize the ingredients to fit various dietary requirements by offering flexible alternatives to the sauce.

Troubleshooting Guide

  • Texture Issues: If the chicken is dry, consider cooking time and ensure it is not overcooked. Use a meat thermometer for accuracy.
  • Flavor Balance: If too tangy, add a pinch of sugar to your sauce blend for a more balanced taste.
  • Temperature Problems: Make sure you are preheating your oven completely before placing the dish inside.
  • Equipment Challenges: If you are having trouble with your oven temperature, consider using an oven thermometer to verify accuracy.
  • Ingredient Substitutions: If ingredients aren’t available, seek similar alternatives that can mimic the flavors needed.
  • Timing Concerns: If pressed for time, consider adjusting the cooking method to quicker alternatives like grilling.

Recipe Success Stories

  • Community feedback has been overwhelmingly positive, with many readers praising the ease of preparation and rich flavors.
  • Numerous variations have come from the community, where people shared their takes with different sauces and sides!
  • Adaptation stories highlight how readers have tweaked the recipe based on family preferences, making it a crowd-pleaser.
  • Suggestions on pairing it with various sides led to lively discussions and excitement for cooking together.
  • Photography tips have inspired others to capture their creations beautifully, facilitating sharing on social media.

Frequently Asked Questions

Can I use skinless chicken thighs?

Yes, you can use skinless chicken thighs if you prefer, but the skin adds flavor and moisture during cooking.

How long should I marinate the chicken?

Marinate for at least 30 minutes, but for best results, aim for 4 hours or overnight in the refrigerator.

What barbecue sauce do you recommend?

Feel free to use your favorite store-bought barbecue sauce or make your own to customize the flavors to your liking.

Can I cook this recipe on the grill?

Absolutely! This recipe can easily be adapted for the grill; just follow the same marinating and cooking directions.

What sides pair well with this dish?

Popular sides include coleslaw, corn on the cob, or roasted vegetables for a delightful balance to the meal.

How do I reheat leftovers?

Reheat the chicken in the oven at 350°F (175°C) until warmed through, about 15-20 minutes, to keep it juicy.

Can I use chicken breasts instead?

Yes, chicken breasts can be used, but adjust the cooking time since they may cook faster than thighs.

Is this recipe suitable for meal prep?

Yes, these baked barbecue chicken thighs store well and can be prepared in advance for multiple meals.

How spicy is the barbecue sauce?

The spiciness depends on the barbecue sauce you choose; you can adjust the heat by adding cayenne or chili powder.

What can I do if my chicken turns out dry?

If your chicken is dry, ensure you’re not overcooking it next time, and consider basting it with barbecue sauce during cooking.

Additional Resources

  • For more barbecue inspiration, check out our other chicken recipes and see how they compare!
  • Technique guides and videos are available for mastering marinating and baking techniques.
  • Ingredient information on choosing the best chicken cuts can elevate your cooking skills.
  • Equipment recommendations for baking help you get the best results from your kitchen.
  • Explore seasonal variations that can inspire unique flavor twists depending on the time of year.

Join the Conversation

We’d love to hear your thoughts on this recipe and your personal experiences! Share your photos on social media using the hashtag #BarbecueChickenThighs. Be sure to comment with feedback or any unique variations you’ve tried so we can all learn from each other. Community engagement is key to expanding our culinary horizons and ensuring each meal is a celebration of flavors!

The Recipe

Baked Barbecue Chicken Thighs with Onions

Serves: 4

Prep Time: 15 mins

Cook Time: 45 mins

Total Time: 60 mins

Kitchen Equipment Needed

  • Baking dish
  • Measuring cups and spoons
  • Mixing bowl
  • Meat thermometer

Ingredients

  • 4 chicken thighs, skin-on
  • 1 large onion, sliced
  • 1 cup barbecue sauce
  • 2 tablespoons olive oil
  • 1 teaspoon garlic powder
  • Salt and pepper to taste

Directions

  1. Preheat the oven to 375°F (190°C).
  2. In a mixing bowl, combine the barbecue sauce, olive oil, garlic powder, salt, and pepper.
  3. Marinate the chicken thighs in the sauce mixture for at least 30 minutes.
  4. Arrange the sliced onions in a baking dish and place the marinated chicken on top.
  5. Drizzle any remaining sauce over the chicken and onions.
  6. Bake in the preheated oven for 45 minutes or until the internal temperature reaches 165°F (74°C).
  7. Let rest for 5 minutes before serving.

Recipe Notes

  • You can use non-stick spray in the baking dish for easier cleanup.
  • Feel free to adjust the level of barbecue sauce based on your taste preferences.
  • For extra flavor, add in spices like paprika or cayenne pepper to your marinade.

Easy Chicken Alfredo: Quick, Creamy, and Delicious

chicken Alfredo recipe, creamy chicken pasta, quick chicken Alfredo, easy Alfredo sauce, chicken and pasta dinner, homemade chicken Alfredo

Easy Chicken Alfredo: A Quick and Creamy Classic


Introduction

Easy Chicken Alfredo is a creamy, indulgent dish perfect for a quick dinner or a comforting meal. This simplified version of the Italian-American classic combines tender chicken, creamy Alfredo sauce, and perfectly cooked pasta for a restaurant-quality meal at home.

For tips on creating silky Alfredo sauce, check “How to Make the Best Alfredo Sauce”.


Why This Recipe is Perfect

This recipe stands out for its simplicity, making it ideal for beginners or busy weeknights. With minimal ingredients and straightforward steps, it’s easy to whip up a delicious meal that feels gourmet. For more quick Alfredo recipes, visit “Easy Chicken Alfredo Recipe”.


Part 1: Ingredients and Preparation

Essential Ingredients

  • Pasta: Fettuccine or substitutes like penne.
  • Chicken: Boneless, skinless breasts or thighs, seasoned to perfection.
  • Sauce: Butter, heavy cream, freshly grated Parmesan, garlic, salt, and pepper.

Optional Additions

  • Spinach or mushrooms for added texture.
  • Fresh parsley for garnish.
  • A squeeze of lemon juice for brightness.

Kitchen Tools

  • Large skillet for sauce preparation.
  • Pot for boiling pasta.
  • Tongs and whisk for handling pasta and sauce.

Part 2: Cooking the Perfect Alfredo

Step-by-Step Instructions

  1. Prepare Chicken:
    • Season chicken with salt, pepper, and garlic powder.
    • Sear in a skillet over medium heat until golden and cooked through.
  2. Cook Pasta:
    • Boil pasta until al dente. Reserve ½ cup pasta water for the sauce.
  3. Make Alfredo Sauce:
    • Melt butter, add garlic, then stir in cream.
    • Gradually add Parmesan, whisking until smooth.
    • Adjust consistency with reserved pasta water if needed.
  4. Combine:
    • Toss cooked pasta and sliced chicken in the sauce.
    • Garnish with parsley and extra Parmesan.

Variations and Customizations

  • Vegetarian Option: Replace chicken with sautéed mushrooms or zucchini.
  • Seafood Alfredo: Use shrimp or scallops for a seafood twist.
  • Spicy Kick: Add a pinch of red chili flakes or Cajun seasoning.

Serving and Storage

Serving Suggestions

  • Pair with garlic bread and Caesar salad for a complete meal.
  • Top with fresh parsley and cracked black pepper for a burst of flavor.

Storage Tips

  • Store leftovers in an airtight container in the fridge for up to 3 days.
  • Reheat on low heat, adding a splash of milk to restore creaminess.

FAQs

  • Can I make this recipe ahead of time?
    Yes, but store the sauce and pasta separately for the best texture.
  • What’s the secret to creamy Alfredo sauce?
    Use fresh Parmesan and stir slowly over low heat.
  • Can I freeze Chicken Alfredo?
    Yes, freeze the sauce separately and add it to freshly cooked pasta when reheating.

Internal Linking Opportunities


Conclusion

This Easy Chicken Alfredo recipe is a game-changer for anyone looking to create a comforting, restaurant-quality meal in the comfort of their home. With its simple ingredients and easy steps, it’s a go-to for weeknights or special occasions. Let me know if further refinements or additional details are needed!

Sizzling Skillet Chicken Fajitas: A Tex-Mex Favorite Made Easy

chicken fajita recipe, skillet fajitas, Tex-Mex chicken, homemade fajitas, fajita skillet recipe, sizzling chicken fajitas, chicken fajitas in cast iron

Sizzling Skillet Chicken Fajitas: A Flavor-Packed Tex-Mex Delight


Introduction

Sizzling skillet chicken fajitas are the perfect way to bring the vibrant flavors of Tex-Mex cuisine into your home. With tender, marinated chicken, colorful bell peppers, and onions all cooked to perfection in a hot skillet, this dish is a feast for both the eyes and the palate. The sizzling presentation adds flair, making it ideal for family dinners or gatherings with friends.

For more tips on creating restaurant-style fajitas at home, visit “How to Make Restaurant-Style Fajitas”.


Why Skillet Cooking is Essential

Using a skillet, particularly a cast iron one, enhances the texture and flavor of your fajitas. The high heat ensures a perfect char on the chicken and vegetables, while retaining their juiciness. Additionally, the skillet’s ability to maintain heat creates that signature sizzle that makes fajitas unforgettable.

For more inspiration on sizzling skillet techniques, check “Skillet Chicken Fajitas”.


Part 1: Ingredients and Preparation

Core Ingredients

  • Protein: Chicken breasts or thighs, marinated for flavor.
  • Vegetables: Bell peppers (red, yellow, green), onions, and optional additions like zucchini.
  • Marinade: Lime juice, olive oil, minced garlic, cumin, chili powder, and smoked paprika.
  • Tortillas: Flour or corn, warmed for pliability.

Optional Additions

  • Fresh cilantro for garnish.
  • Guacamole, sour cream, and salsa as toppings.
  • Shredded cheese for extra richness.

Kitchen Tools

  • Cast iron skillet or heavy-bottomed pan.
  • Tongs for easy flipping.
  • Citrus juicer for fresh lime juice.

Part 2: Cooking the Perfect Fajitas

Step-by-Step Recipe

  1. Marinate the Chicken: Combine marinade ingredients in a bowl, coat chicken evenly, and refrigerate for at least 30 minutes.
  2. Prepare the Vegetables: Slice bell peppers and onions into thin strips.
  3. Cook the Chicken: Heat the skillet over medium-high heat, add chicken, and cook until charred and fully cooked. Remove and let rest.
  4. Sauté the Vegetables: In the same skillet, cook vegetables until slightly softened with a bit of char.
  5. Combine and Serve: Slice chicken, add back to the skillet with vegetables, and serve sizzling hot with tortillas and toppings.

Flavor Variations

  • Spicy Kick: Add sliced jalapeños or a sprinkle of cayenne pepper.
  • Herbaceous: Mix fresh cilantro into the marinade.
  • Vegetarian Option: Substitute chicken with portobello mushrooms or tofu.

Tips for Perfect Fajitas

  • Preheat the Skillet: Ensure the skillet is hot before adding ingredients for a good sear.
  • Avoid Overcrowding: Cook in batches if necessary to maintain high heat.
  • Slice Against the Grain: Slice chicken thinly against the grain for tenderness.

Part 3: Serving and Storage

Serving Suggestions

  • Pair with side dishes like Spanish rice, refried beans, or a fresh avocado salad.
  • Presentation tip: Serve directly in the skillet for maximum sizzle effect.

Storing and Reheating Leftovers

  • Store fajitas in airtight containers in the fridge for up to 3 days.
  • Reheat in a skillet over medium heat to maintain texture.

FAQs

  • Can I use pre-cooked chicken?
    Yes, but marinate it lightly to infuse flavor before reheating.
  • What type of skillet is best for fajitas?
    Cast iron skillets are ideal for heat retention and achieving a charred flavor.
  • Can I make these fajitas in advance?
    Prepare the chicken and vegetables separately, then combine and reheat just before serving.

Internal Linking Opportunities


Conclusion

Sizzling skillet chicken fajitas are a versatile and flavorful dish that’s as fun to prepare as it is to eat. With endless customization options and that iconic sizzle, they’re sure to become a family favorite. Whether you’re hosting a dinner party or just enjoying a cozy meal, this recipe delivers on flavor and presentation.

Creamy Chicken and Rice Soup: The Ultimate Comfort Food

chicken rice soup recipe, creamy chicken soup, hearty soup recipe, comfort food soup, chicken and rice soup

Creamy Chicken and Rice Soup: The Ultimate Comfort Dish


Introduction

Creamy chicken and rice soup is the epitome of comfort food, offering warmth, heartiness, and a creamy texture that soothes the soul. This dish is perfect for cold evenings, a nourishing lunch, or anytime you need a comforting bowl of goodness. Its balance of protein-rich chicken, tender rice, and creamy broth makes it both delicious and filling.

To explore variations of this classic, check out “Discover More Comfort Food Soups”.


Why Choose Creamy Chicken and Rice Soup?

This soup stands out for its combination of rich creaminess and hearty flavors. It’s versatile enough to suit dietary needs and can be adapted with various ingredients to match your preferences. Whether you cook it on the stovetop or in a slow cooker, the result is always comforting.

For health-conscious adaptations, check “How to Make Healthy Chicken Soups”.


Part 1: Ingredients and Preparation

Core Ingredients

  • Chicken: Use boneless, skinless breasts or thighs.
  • Rice: Long-grain white rice or wild rice blends work best.
  • Vegetables: Celery, carrots, and onions are traditional.
  • Broth and Cream: Chicken broth and heavy cream for richness.
  • Seasonings: Salt, pepper, garlic, and thyme.

Optional Additions

  • Mushrooms for earthiness.
  • Spinach or kale for added nutrients.
  • Bacon bits for a smoky touch.

Kitchen Tools

  • Large stockpot or Dutch oven.
  • Immersion blender (optional).
  • Ladle and serving bowls.

Part 2: Recipe and Techniques

Step-by-Step Recipe

  1. Prepare the Ingredients:
    • Dice chicken and vegetables into bite-sized pieces.
    • Rinse rice under cold water to remove excess starch.
  2. Cook the Base:
    • Heat oil in a stockpot and sauté vegetables until softened.
    • Add chicken and cook until browned.
  3. Simmer:
    • Pour in chicken broth and bring to a boil.
    • Stir in rice and seasonings, then reduce heat to a simmer.
  4. Finish with Cream:
    • Once rice is tender, add cream and stir well.
    • Adjust seasoning to taste.

For expert tips on balancing textures, see “Best Practices for Chicken and Rice Soups”.


Flavor Variations

  • Dairy-Free Version: Substitute cream with coconut milk or cashew cream.
  • Spicy Twist: Add red chili flakes or jalapeños.
  • Herb-Infused: Incorporate rosemary, basil, or parsley.

Part 3: Serving and Storage

Serving Suggestions

  • Accompaniments: Pair with crusty bread, garlic knots, or a fresh garden salad.
  • Toppings: Garnish with shredded cheese, parsley, or crispy onions.

Storage Tips

  • Refrigerate leftovers in an airtight container for up to 3 days.
  • Freeze soup without cream for up to 3 months; add cream when reheating.

FAQs

  • Can I make this soup gluten-free?
    Yes, use gluten-free broth and ensure all other ingredients are gluten-free.
  • What type of rice works best?
    Long-grain or jasmine rice are ideal for their texture and flavor.
  • Can I use leftover chicken?
    Absolutely! Rotisserie chicken or shredded leftovers save time.
  • How do I avoid mushy rice?
    Add rice toward the end of cooking and monitor closely.
  • Is this soup freezer-friendly?
    Yes, but avoid freezing with cream; add it fresh when reheating.

Internal Linking Opportunities


Conclusion

Creamy chicken and rice soup is a timeless recipe that combines ease of preparation with unmatched comfort and flavor. Whether you’re serving it as a family meal or a hearty starter, this soup is sure to please every palate. Experiment with variations, serve with your favorite sides, and enjoy the ultimate comfort food experience.