Delicious No-Bake Orange Creamsicle Truffles Recipe to Delight You

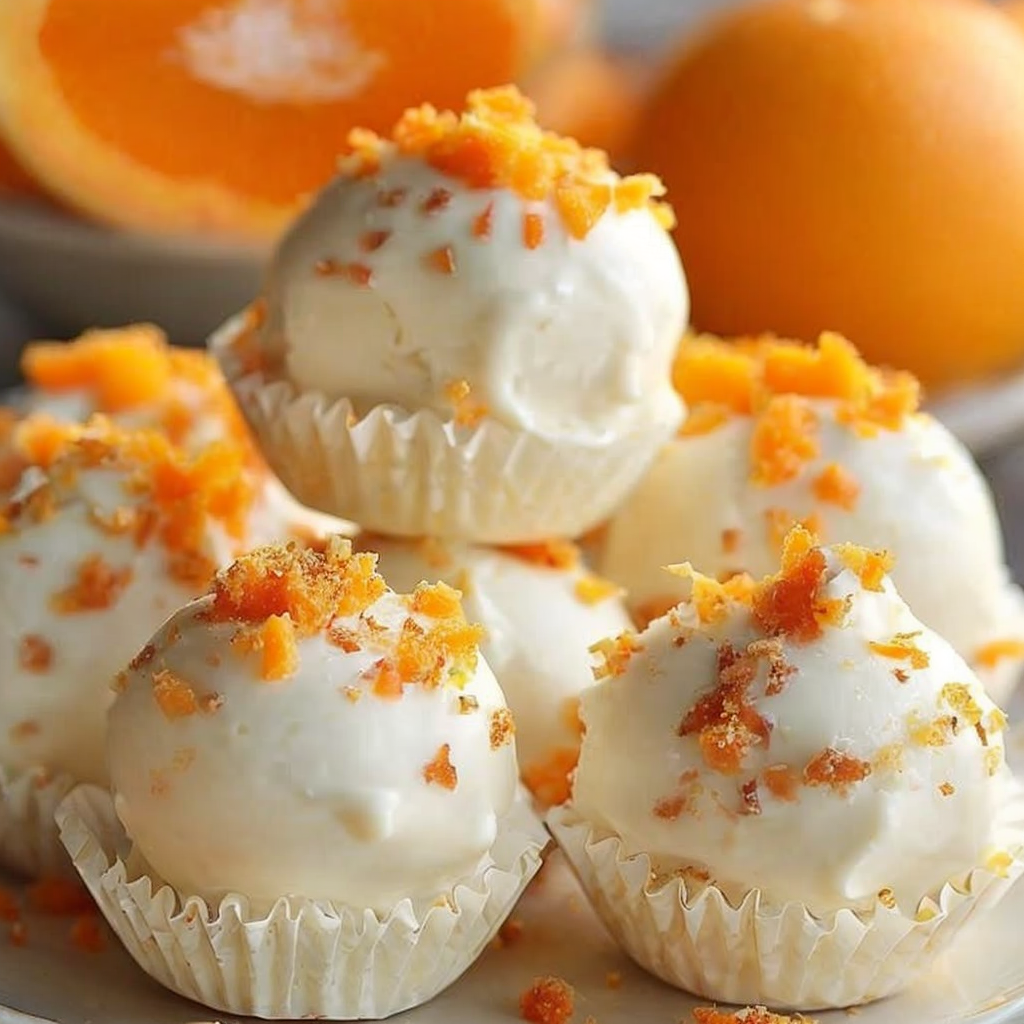
No-Bake Orange Creamsicle Truffles: A Delightful Treat for Everyone!

⚖️
Difficulty
Easy

⏲️
Prep Time
20 mins

🕒
Cook Time
0 mins

⏱️
Total Time
20 mins

🍽️
Servings
24 truffles

To indulge in a sweet, creamy delight without turning on the oven, these No-Bake Orange Creamsicle Truffles are the perfect solution. Inspired by the classic orange creamsicle treat, these truffles capture the essence of summer in each bite. With their refreshing citrus flavor and luscious creaminess, they’re a dessert that brings back memories of warm days and lazy afternoons, making them ideal for gatherings or simply as a delicious pick-me-up.

What makes these truffles truly special is the unique combination of orange zest, cream cheese, and white chocolate. The tangy notes from the orange zest beautifully balance the sweetness of the white chocolate, creating a flavor profile that is both vibrant and decadent. Whether you’re celebrating a special occasion or treating yourself to something sweet, these No-Bake Orange Creamsicle Truffles are sure to impress your taste buds and your guests.

Quick Recipe Highlights

  • Flavor Profile: These truffles feature a delightful blend of tangy orange and smooth cream, reminiscent of your favorite childhood treat.
  • Texture: The truffles have a creamy interior that melts in your mouth, surrounded by a silky white chocolate coating for a satisfying crunch.
  • Aroma: The fresh scent of zesty oranges combines with the sweet notes of chocolate, creating an irresistible aroma.
  • Visual Appeal: With their vibrant orange color and glossy white chocolate exterior, these truffles are as visually enticing as they are delicious.
  • Skill Level Needed: This easy recipe requires minimal cooking skills, making it perfect for beginner cooks or kids.
  • Special Equipment: You’ll need a mixing bowl, baking sheet, and parchment paper to prepare and chill these delightful treats.

Recipe Overview

  • Difficulty Level: This recipe is straightforward and requires no baking, making it accessible for cooks of all levels. You’ll only need to mix, chill, and roll!
  • Category: No-Bake Orange Creamsicle Truffles are a delightful dessert perfect for potlucks, parties, or a sweet treat after dinner.
  • Cuisine: This modern dessert pays homage to classic American nostalgia with a twist of citrus, offering a refreshing alternative to traditional chocolate truffles.
  • Cost: The cost to make these truffles is quite budget-friendly, primarily requiring cream cheese, white chocolate, and oranges.
  • Season: Enjoy these truffles year-round, but they are particularly refreshing during warm seasons like summer.
  • Occasion: These vibrant truffles are perfect for birthdays, summer parties, or even as a surprise for a loved one.

Why You’ll Love This Recipe

Indulging in these No-Bake Orange Creamsicle Truffles brings a unique taste and texture that’s hard to resist. The creamy filling, complemented by the fresh zing of orange, creates a perfect harmony between sweetness and tartness. Each bite is a burst of refreshing flavors that transport you back to cherished summer memories. The melting chocolate exterior adds an extra layer of indulgence, causing an irresistible explosion of flavor with every mouthful.

Convenience is another reason why these orange creamsicle truffles will become a staple in your dessert repertoire. The recipe requires no baking, making it quick and easy to prepare. Simply mix the ingredients, roll them into balls, and chill them. This fast approach saves time while delivering homemade quality that surpasses store-bought treats. Plus, they can be made ahead of time, allowing you to enjoy your own gathering without spending hours in the kitchen.

These truffles are also a fun and delicious option for those seeking a snack that’s a bit more nutritious. With cream cheese packed with protein and the freshness of oranges contributing vitamins, they offer a much better alternative to commercial candy. Plus, the white chocolate adds a touch of richness that can satisfy cravings without going overboard on calories when you’re enjoying just a few.

Socially, these No-Bake Orange Creamsicle Truffles are perfect for entertaining guests. They’re small, easy to serve, and grab, making them ideal finger food for parties. Compliments will abound, not just for their taste but also for their vibrant appearance – a lovely addition to any dessert table.

Finally, the cost-effectiveness of this recipe cannot be overstated. Utilizing basic ingredients like cream cheese and orange zest keeps it affordable without sacrificing flavor. In just 20 minutes, you can create a delightful dessert without breaking the bank, making these truffles an accessible indulgence for everyone.

Historical Background and Cultural Significance

The origin of the orange creamsicle can be traced back to the early 20th century when the idea of combining orange soda with creamy vanilla ice cream became a summer sensation. Known originally as the “Creamsicle”, this icy delight was first enjoyed by children and adults alike during warm weather, quickly becoming a fixture at ice cream trucks and summer outings. The popularity surged, making it a nostalgic treat that reminds many of carefree summer days.

Culturally, the orange creamsicle embodies the essence of American summers and the convenience of sweet treats on-the-go. This nostalgic dessert taps into a shared love for simple pleasures and has been part of countless family gatherings, tying memories to the enjoyment of food. Its significance extends beyond just a delectable dessert; it’s a symbol of summertime joy and childhood happiness.

Over the years, the creamsicle evolved from ice pops to various creations. The essence of citrus and cream remains prominent, and innovations brought forth desserts such as cakes, cookies, and, of course, truffles, allowing people to relive the creamy experience in new forms. These No-Bake Orange Creamsicle Truffles are a modern homage to this classic, transforming a cherished flavor into a delightful bite-sized treat.

Regional variations of orange-flavored treats exist, but none evoke nostalgia quite like the classic creamsicle. In some areas, you’ll find variations that incorporate different fruits or flavors, yet the charm of orange and cream remains unrivaled. These truffles showcase the beloved flavor combination while embracing creativity in the kitchen.

Ingredient Deep Dive

Cream Cheese
Cream cheese, a key ingredient in these truffles, has its roots in the United States, dating back to the late 19th century. Its creamy texture and mild flavor make it a versatile base for both savory and sweet dishes. Nutritionally, cream cheese offers protein and calcium, making it a rich addition to desserts. When selecting cream cheese, opt for full-fat varieties for optimal creaminess. To store, keep it in the refrigerator in its original packaging. If you need a dairy-free alternative, consider using vegan cream cheese.

White Chocolate
White chocolate, made from cocoa butter, sugar, and milk solids, is renowned for its creamy sweetness. It lacks cocoa solids, distinguishing it from traditional chocolate and yielding a rich, buttery taste. Nutritionally, it’s high in calories, so moderation is key. Look for high-quality white chocolate with cocoa butter as the first ingredient for the best flavor. Store it in a cool, dry place, and be sure to melt it gently for optimal texture. If you’re feeling adventurous, you can substitute with dark or milk chocolate for a different flavor profile.

Orange Zest
Orange zest, the outer peel of the fruit, carries intense citrus flavor and fragrant oils. Zest improves both the flavor and aroma of dishes, providing a bright freshness that elevates any dessert. Additionally, oranges are rich in vitamin C, fiber, and antioxidants. Choose organic oranges to avoid pesticide residues, and zest the fruit carefully to capture the bright flavor while avoiding the bitter white pith. Store zested oranges in the refrigerator, and feel free to use the remaining fruit for fresh juice or slices.

Common Mistakes to Avoid

  • Not measuring ingredients accurately: Accurate measurements are essential for the right texture and flavor. Use a kitchen scale for precision.
  • Using cold cream cheese: Make sure your cream cheese is at room temperature for easy mixing; otherwise, you may end up with lumps.
  • Overmelting the chocolate: Melting white chocolate too quickly can make it seize. Always melt slowly using a double boiler or microwave at low power.
  • Skipping the chilling step: Chilling the truffles for the recommended time allows them to set properly, ensuring the ideal consistency.
  • Roll the truffles too large: Keeping them small makes for easier eating and allows them to set more uniformly.
  • Not letting the chocolate cool: Ensure the melted chocolate is cool enough before dipping to prevent it from melting the truffles.
  • Ignoring the zest: Skipping the orange zest means missing out on essential flavor—don’t overlook it!
  • Improper storage: Failing to store the truffles correctly can lead to issues such as drying out or absorbing surrounding odors.
  • Rushing the process: Take your time while making and chilling—patience will yield better results.
  • Not considering flavor adjustments: Feel free to personalize the flavor by adding ingredients like almond extract or different citrus zests.

Essential Techniques

Mixing Ingredients
Properly mixing the cream cheese with the powdered sugar and orange zest is crucial for achieving a smooth and creamy filling. Make sure to use a sturdy mixing bowl and a mixer to get the ingredients well incorporated without any lumps. This technique ensures that each truffle has consistent flavor and texture. If you’re mixing by hand, use a spatula and take care to blend thoroughly.

Melting Chocolate
Melting chocolate requires careful attention. Use low heat and a double boiler or the microwave, checking frequently to prevent burning. The key is to melt it until smooth and glossy without overheating, which can cause it to seize. After melting, allow it to cool slightly before dipping the truffles, as this helps maintain their structure.

Chilling
Chilling the truffles after rolling them is essential. This step helps the truffles firm up, making them easier to dip in chocolate while maintaining their shape. Make sure to chill them in a single layer on a baking sheet lined with parchment paper to prevent them from sticking together.

Pro Tips for Perfect No-Bake Orange Creamsicle Truffles

1. Ensure all ingredients are at room temperature for the smoothest mixture, particularly the cream cheese.
2. Use fresh, organic oranges for zest to capture the best flavor and aroma in the truffles.
3. Experiment with flavored extracts like vanilla or almond to complement the orange zest for added depth.
4. Consider rolling the truffles in finely chopped nuts or shredded coconut for added texture and flavor.
5. To make flavor variations, try substituting part of the cream cheese with flavored yogurt.
6. Use a cookie scoop for uniform size and ease in forming the truffles.
7. For an eye-catching presentation, drizzle melted chocolate over the setting truffles for a decorative touch.
8. Always store the truffles in an airtight container in the fridge to maintain freshness.

Variations and Adaptations

For those wanting a twist on the traditional flavors, consider exploring regional variations. You can substitute orange zest with lemon or lime to create a citrus medley. Seasonal adaptations, such as incorporating pumpkin spice during fall, can also offer a festive touch. If you’re catering to dietary modifications, consider using dairy-free cream cheese and vegan chocolate to make this dessert suitable for vegan diets.

For flavor variations, including a bit of vanilla or almond extract can enhance the overall taste profile, while rolling the truffles in crushed graham crackers can mimic a classic s’mores flavor. If you prefer a crunchy texture, incorporate finely chopped nuts into the cream cheese mixture before rolling, or use flavored or colored chocolate coatings for a unique visual appeal.

Serving and Presentation Guide

Plating your No-Bake Orange Creamsicle Truffles can turn them into a stunning centerpiece. Consider using a tiered dessert stand for an elegant display, or arrange them on a simple white platter garnished with fresh mint leaves for a pop of color. To elevate the presentation, dust the truffles with powdered sugar or drizzle some extra melted chocolate over them before serving.

Explore garnishing ideas like candied orange peels for a gourmet feel. Traditional accompaniments like fresh fruit or a scoop of vanilla ice cream can provide a delightful contrast. Make sure to serve these truffles chilled for the best texture and refreshing taste. Lastly, portion control can be achieved through the use of mini cupcake liners for added flair.

Wine and Beverage Pairing

A delightful pairing for No-Bake Orange Creamsicle Truffles could be a sweet Moscato or a light dessert wine that complements the sweet citrus flavors. If you prefer a non-alcoholic option, serve with sparkling lemonade or an orange-infused herbal tea, which enhances the orange flavors in the truffles. For coffee enthusiasts, a light roast with hints of citrus or vanilla can create a wonderful balance. Ensure all drinks are chilled to maintain a refreshing experience aligned with the truffles’ cool nature.

Storage and Shelf Life

To keep your No-Bake Orange Creamsicle Truffles fresh, store them in an airtight container in the refrigerator, where they can last for up to one week. For longer storage, consider freezing the truffles; they will stay good for up to three months. Ensure they are spaced apart on a baking sheet before transferring to a container to prevent sticking. Check for signs of spoilage such as an off smell or changes in texture before consuming. When ready to enjoy frozen truffles, let them thaw in the refrigerator for a few hours.

Make Ahead Strategies

These truffles can be made well ahead of time, perfect for busy schedules! Prepare the filling and form the truffles, then chill them according to the recipe instructions. Store them in the refrigerator for up to 3 days before serving. For optimal flavor and texture, dip in chocolate just before serving to maintain their freshness and allure. If you’re adding any fresh toppings or finishes, do so just before serving to ensure they stay vibrant.

Scaling Instructions

If you’re looking to halve the recipe, simply reduce each ingredient by half without any noticeable difference. Doubling or tripling the recipe requires ensuring you have enough space for chilling and melting—in larger batches, use multiple trays. Adjust equipment as needed, and be mindful that chilling time may vary slightly with larger batches. Store any extras in the refrigerator or freezer as specified for optimum freshness.

Nutritional Deep Dive

In terms of macros, these No-Bake Orange Creamsicle Truffles are relatively high in fat due to the cream cheese and chocolate, contributing a rich and satisfying flavor. Each truffle can be around 60 calories, making them a convenient treat that’s still within a balanced diet when enjoyed in moderation. Micronutrient-wise, you’ll benefit from vitamin C from the oranges, alongside calcium and various other nutrients from cream cheese.

These truffles align well with diet considerations, particularly for those seeking a sweet treat without the fuss of baking. Portion control is essential, and enjoying one or two truffles can satisfy cravings while allowing you to indulge in the flavors guilt-free.

Dietary Adaptations

These No-Bake Orange Creamsicle Truffles can easily be adapted for various diets. For a gluten-free version, ensure each ingredient is certified gluten-free. For a dairy-free option, use vegan cream cheese and dairy-free chocolate, making them suitable for vegans. For a low-carb or keto approach, opt for cream cheese and erythritol sweeteners, ensuring you adjust the sweetness level to taste.

In terms of low-FODMAP diets, keep an eye on serving sizes of cream cheese, as smaller amounts can easily fit into this approach. Similarly, paleo enthusiasts can adjust the recipe by using raw cream cheese alternatives, keeping it clean and wholesome while retaining the essence of the dessert.

Troubleshooting Guide

If your truffles turn out too soft, ensure you’ve chilled them long enough before dipping to maintain their shape. For flavor balance, if the truffles are overly sweet, consider a pinch of salt or a splash of lemon juice to brighten them up. If your chocolate coating is not smooth, it could be that the chocolate was overheated—next time, try melting it slowly.

Equipment challenges can arise, especially if you don’t have a double boiler. In such cases, simply use a microwave in small increments, stirring frequently. For ingredient substitutions, if you find yourself out of cream cheese, a thick yogurt can work, but the taste may differ slightly. If your truffles are tough to chew, this may mean they haven’t been mixed enough or over-chilled; allow them to soften slightly at room temperature before serving.

Recipe Success Stories

Community feedback on these No-Bake Orange Creamsicle Truffles has been overwhelmingly positive. Many readers have applauded their delightful taste and ease of preparation, making them a favorite for potlucks and family gatherings. Variation successes include those who have incorporated different citrus flavors to fit personal preferences while keeping the original recipe intact.

Readers have also shared adaptation stories that highlight using leftovers creatively, be it using the truffles as a filling for cakes or blending them for a milkshake—showcasing just how versatile this treat can truly be. Photography tips suggest using natural light to capture the vibrant colors of the truffles, which can turn your blog into an eye-catching showcase for this mouthwatering dessert.

Frequently Asked Questions

1. Can I use regular chocolate instead of white chocolate? Yes! If you prefer dark or milk chocolate, feel free to substitute it; just keep in mind that this will change the overall flavor profile and sweetness of the truffles.

2. How do I know if the truffles are set properly? They should be firm to the touch, and you can gently press on one; it should hold its shape without being too soft or too hard.

3. Can I freeze the truffles? Absolutely! These truffles can be frozen for up to three months. Just ensure they are in an airtight container to prevent freezer burn.

4. How long do these truffles last in the fridge? Stored properly in an airtight container, they can last for up to a week in the refrigerator.

5. What can I substitute for cream cheese? You can use a vegan cream cheese or thick yogurt for a lighter option, though it may alter the flavor slightly.

6. How do I add more orange flavor? You can enhance the orange taste by mixing in some orange juice or additional zest into the filling or directly into the chocolate.

7. Are these truffles suitable for kids? Yes! They are a fun and tasty dessert that children will love helping to make.

8. What kind of chocolate should I use for dipping? Look for high-quality chocolate that has cocoa butter as the first ingredient for the best results.

9. Can I use store-bought orange zest? While it’s technically possible, fresh zest is recommended for the best flavor and aroma.

10. How can I make these dairy-free? Use dairy-free cream cheese and chocolate to create a vegan version of these truffles without compromising flavor.

Additional Resources

If you loved these No-Bake Orange Creamsicle Truffles, be sure to check out related recipes that feature citrus flavors or no-bake desserts. Explore technique guides that focus on melting chocolate perfectly or tips for creating truffles of various flavors. You may also want to delve into ingredient information on the nutritional benefits of using oranges in your cooking, helping you elevate other dishes with this zesty fruit.

Look for equipment recommendations to make your dessert-making experience more streamlined, and consider seasonal variations that incorporate fresh produce during the summer months for added creativity in your kitchen.

Join the Conversation

We’d love to hear your thoughts on these No-Bake Orange Creamsicle Truffles! Share your experiences on social media, tag your photography, and include your personal tips. Recipe reviews help build a community, so feel free to share any variations you’ve made or changes you’d recommend for anyone wishing to explore this delightful treat.

Join us in our journey of vibrant, delicious recipes and see how these orange truffles can add a twist to your dessert table. Together, let’s celebrate the love of food and the joy it brings into our lives!

The Recipe

No-Bake Orange Creamsicle Truffles

Serves: 24 truffles

Prep Time: 20 mins

Cook Time: 0 mins

Total Time: 20 mins

Kitchen Equipment Needed

  • Mixing bowl
  • Electric mixer or whisk
  • Baking sheet
  • Parchment paper
  • Double boiler or microwave-safe bowl
  • Cookie scoop (optional)

Ingredients

  • 8 oz cream cheese, softened
  • 1 cup powdered sugar
  • Zest of 1 large orange
  • 1 cup white chocolate chips
  • 2 tbsp orange juice
  • Optional: additional zest for garnish

Directions

  1. In a mixing bowl, combine softened cream cheese, powdered sugar, orange zest, and orange juice. Mix until smooth.
  2. Refrigerate the mixture for about 10 minutes to allow it to firm up slightly.
  3. Using a cookie scoop, form small balls from the mixture and place them on a baking sheet lined with parchment paper.
  4. Chill the balls in the refrigerator for another 30 minutes until firm.
  5. While the truffles are chilling, melt the white chocolate in a double boiler or microwave, stirring until smooth.
  6. Dip each truffle into the melted chocolate, coating evenly, and return them to the parchment-lined baking sheet.
  7. Allow the excess chocolate to drip back into the bowl and chill the truffles until the chocolate sets.
  8. Optional: once set, garnish with extra orange zest if desired.

Recipe Notes

  • Feel free to adjust sweetness by adding more or less powdered sugar.
  • You can use dairy-free cream cheese for a vegan version.
  • Experiment with different types of chocolate for varying flavors.

Irresistible Garlic Butter Chicken Bites Ready in Minutes

Garlic Butter Chicken Bites: A Flavorful Delight for Any Occasion

⚖️
Difficulty
Easy

⏲️
Prep Time
10 mins

🕒
Cook Time
15 mins

⏱️
Total Time
25 mins

🍽️
Servings
4 servings

Indulge in the savory experience of Garlic Butter Chicken Bites, where succulent chicken pieces are enveloped in a rich, buttery garlic sauce that adds a tantalizing flavor to every bite. These delightful morsels are not only delicious but incredibly easy to prepare, making them a perfect option for family dinners or casual get-togethers. From the moment you unveil this dish, the homespun aroma of garlic and herbs wafts through your kitchen, inviting everyone’s taste buds to the table.

This recipe is intricately designed to bring out the natural flavors of chicken while highlighting the wholesome ingredients that make it both satisfying and nutritious. The garlic butter blend creates a satisfying glaze as it drapes over the tender chicken, ensuring that each bite is bursting with flavor. Whether you’re serving these bites as an appetizer or as a main course paired with vegetables or rice, they are guaranteed to impress both family and friends.

Quick Recipe Highlights

  • Flavor Profile: The combination of garlic and butter creates a rich, savory sauce that complements the chicken beautifully, while fresh herbs add an aromatic touch.
  • Texture: These chicken bites are crispy on the outside while remaining tender and juicy on the inside, offering a delightful contrast.
  • Aroma: The fragrant infusion of garlic and melted butter fills your kitchen with an irresistible scent that draws people in.
  • Visual Appeal: Golden-brown chicken bites, glistening in garlic butter, offer an inviting and mouthwatering sight on any platter.
  • Skill Level Needed: This recipe is designed for cooks of all skill levels, as it involves straightforward steps that yield impressive results.
  • Special Equipment: A large skillet is essential for achieving the perfect sear and meld of flavors in this dish.

Recipe Overview

  • Difficulty Level: Garlic Butter Chicken Bites are categorized as easy due to their quick preparation and cooking times, making them accessible for beginner cooks while still appealing to seasoned chefs.
  • Category: These chicken bites fit perfectly into the appetizer or main course categories, serving well for both casual family dinners and festive gatherings.
  • Cuisine: Rooted in classic comfort food, this recipe draws inspiration from traditional garlic-infused dishes across various cuisines, enhancing the family dining experience.
  • Cost: With economical chicken and basic pantry staples, this recipe offers a low-cost meal option without sacrificing flavor.
  • Season: While these garlic butter bites can be enjoyed year-round, they are particularly delightful in cooler months, evoking warmth and coziness.
  • Occasion: Perfect for game nights, outdoor barbecues, or holiday celebrations, this dish offers versatility for any occasion.

Why You’ll Love This Recipe

Garlic Butter Chicken Bites offer a remarkable balance of taste and texture, making them stand out in any culinary repertoire. The infusion of garlic with butter envelops the chicken in luscious flavor, while the baking or frying ensures a delightful crunch that contrasts with the tender meat. You’ll find yourself reaching for more as each piece bursts with buttery goodness and garlicy zest.

Not only are these bites flavorful, but they are also incredibly convenient to prepare. With a straightforward recipe requiring minimal ingredients, you can assemble a tantalizing dish in under thirty minutes. Perfect for busy weeknights or impromptu gatherings, this recipe allows you to serve up gourmet flavor without a fuss.

Beyond comfort, this recipe presents nutritional advantages, providing a good source of protein while incorporating wholesome garlic, known for its health benefits. As a part of a balanced diet, these chicken bites can be enjoyed guilt-free and nourish both body and soul.

Socially, Garlic Butter Chicken Bites are fantastic for entertaining guests. Their bite-sized nature makes them ideal for sharing, and they can easily be enjoyed with a variety of dipping sauces or alongside fresh veggies. Sharing food enhances social connections, and these bites are bound to spark conversation.

Cost-effective and accessible, this recipe enables you to create a delicious meal without breaking the bank. With the simplicity of its ingredients and easy preparation, it’s a culinary delight that anyone can afford to indulge in regularly.

Historical Background and Cultural Significance

The origins of garlic butter as a flavor profile can be traced back to Mediterranean cuisine, where garlic flourishes in various traditional dishes. This pairing of garlic with fat, like butter or olive oil, serves to amplify taste and enhance the overall sensory experience of foods.

Garlic has remained an essential ingredient throughout history, holding significant cultural importance. It has been revered not only for its culinary applications but also for its medicinal properties in various cultures, often considered a superfood due to its health benefits.

The evolution of dishes using garlic and butter has led to myriad adaptations across cultures. Garlic Butter Chicken Bites represent a modern twist on classic roasts and sautés, showcasing how traditional flavors can be revisited in contemporary recipes.

Regional variations abound, with dishes incorporating local spices and herbs to personal touches in butter sauces, further enriching this culinary tradition. As different cultures embrace garlic butter in their kitchens, they enrich their culinary identity while celebrating its versatility.

Ingredient Deep Dive

Chicken is the star ingredient in this recipe, known for its versatility and popularity across countless cuisines. Historically, chicken has been domesticated and consumed by various cultures for centuries, providing an accessible protein that forms the backbone of many global dishes. Its nutritional benefits include being rich in protein, vitamins, and minerals like B12, contributing to a balanced diet.

When selecting chicken for this recipe, look for fresh cuts or organic options for the best flavor. Storage in the refrigerator is essential, and it is best used within a few days of purchase. For meal prep, you can freeze chicken for longer storage, ensuring it’s easily available for whenever you decide to whip up these delicious bites. In case you’re out of chicken, alternatives such as turkey or tofu can create different flavor profiles while maintaining a delicious, tender texture.

Butter, another key component, holds a historical importance in cooking, providing essential fats and flavor in many culinary traditions. It is significant for both its versatility and taste, lending an upscale feel to simple dishes. Butter contains vital nutrients, including calcium and vitamins A and D.

When choosing butter, opt for high-quality options, ideally unsalted for better flavor control in cooking. Store butter in a cool, dry place to maximize its freshness, and consider alternatives such as olive oil for a healthier approach without sacrificing flavor.

Garlic is another essential ingredient, lauded for its robust flavor and numerous health benefits. Used for centuries in various traditions, garlic has transcended culinary boundaries, bringing health and flavor to dishes worldwide. Its antiviral and anti-inflammatory properties have made garlic a staple support in traditional medicine.

When selecting garlic, choose firm, dry bulbs without any signs of sprouting. Store garlic in a well-ventilated area for optimal freshness, and consider using roasted garlic for a milder, sweeter flavor. Garlic powder can also be used as a time-saver, although fresh garlic is recommended for authentic flavor.

Common Mistakes to Avoid

  • Overcooking the chicken can lead to dry bites; cook until just done to maintain juiciness.
  • Under-seasoning is easy to do; ensure you season adequately throughout the cooking process.
  • Starting with cold ingredients can affect cooking time and texture; let chicken come to room temperature beforehand.
  • Not preheating the skillet can prevent proper browning; always ensure the pan is hot before adding ingredients.
  • Using too high of a heat can cause burning; moderate the temperature for even cooking.
  • Skipping the resting phase after cooking can result in loss of juices; let the chicken rest to retain moisture.
  • Forgetting fresh herbs can diminish flavor; always add fresh herbs at the right time for maximum benefit.
  • Lack of garnish can impact presentation; use fresh herbs or a squeeze of lemon for a vibrant finish.
  • Not pairing with a suitable side can leave your meal unbalanced; consider fresh vegetables or rice for a hearty meal.
  • Ignoring leftovers can lead to wasted food; store properly and reheat to enjoy again.

Essential Techniques

Searing adds depth and flavor to your Garlic Butter Chicken Bites. It’s important because the Maillard reaction creates caramelization, enhancing taste and texture. To master this, start with a hot skillet and leave the chicken undisturbed initially to achieve a golden-brown crust. Avoid crowding the pan, which can lower the temperature and impede browning. Visual cues include a sizzling sound and golden color indicating a proper sear.

Making garlic butter involves infusing butter with garlic for a vibrant flavor. This technique ensures even distribution of garlic flavor throughout your dish. To master this, melt butter gently and add minced garlic, cooking just until fragrant to prevent burning. Avoid overcooking the garlic, which can lead to bitterness. Look for a rich, buttery aroma and light golden garlic.

Pro Tips for Perfect Garlic Butter Chicken Bites

Start with high-quality ingredients for the best flavor, choosing fresh chicken and organic butter. Consider marinating the chicken in a mix of herbs overnight for extra depth of flavor. Use a mix of fresh and dried herbs for added complexity, balancing the brightness of fresh with the depth of dried spices. Optimize your pan for even cooking; a cast-iron skillet retains heat well, aiding in proper searing. Adjust garlic according to your taste; more garlic will yield a stronger flavor, while less will be milder. Serve immediately after cooking for the best texture and taste, as these bites are just as delightful fresh from the skillet.

Variations and Adaptations

Regional variations of Garlic Butter Chicken Bites can include adding local spices for a twist. In Indian cuisine, for example, spices like garam masala can intensify flavors. Seasonal adaptations may incorporate fresh, seasonal veggies sautéed alongside the chicken, adding colors and nutrition. Dietary modifications can be made by using tofu or tempeh for a vegetarian version, ensuring everyone can enjoy the flavor. For flavor variations, consider incorporating lemon zest or chili flakes for zest and heat. Experiment with texture modifications by applying a breadcrumb coating for an extra crunch before frying. Finally, presentation alternatives can elevate your dish by using colorful platters and garnishes that contrast well with the golden chicken bites.

Serving and Presentation Guide

Plating your Garlic Butter Chicken Bites creatively can elevate their appeal. Use a large, white platter to highlight the golden color of the chicken, placing bites artfully and garnishing with fresh parsley. Consider serving alongside dipping sauces like ranch or a tangy lemon aioli, providing added flavor dimensions. Traditionally, serve with a side salad for balance or rice to soak up the flavorful garlic butter sauce. For temperature considerations, the bites should be warm and fresh from the pan, enhancing their taste and texture.

Wine and Beverage Pairing

Choosing the right wine can enhance your dining experience with Garlic Butter Chicken Bites. A crisp Chardonnay or Sauvignon Blanc complements the buttery flavor well, balancing richness with brightness. For those preferring red, a light Pinot Noir can work effectively without overpowering the dish. Non-alcoholic alternatives like sparkling water with a splash of lemon add a refreshing zest. If you prefer a cozy touch, pairing with herbal tea can round out the meal beautifully.

Storage and Shelf Life

Storing leftover Garlic Butter Chicken Bites should be done in an airtight container, preferably in the refrigerator, where they can last for up to three days. Temperature is crucial; make sure they cool completely before sealing to avoid excess moisture. Use clear, microwave-safe containers for convenience in reheating. Signs of spoilage include an off smell or discoloration, indicating it’s best not to consume. To reheat, gently warm in the microwave or on the stovetop to retain the buttery richness. For extended storage, consider freezing; the bites can be frozen up to a month, then reheated directly from the freezer.

Make Ahead Strategies

Preparing Garlic Butter Chicken Bites in advance can streamline your cooking process. Practicing a prep timeline is crucial; marinate the chicken the night before for deeper flavors. You can also prepare the garlic butter in advance, storing it in the fridge until needed. Quality impact assessments indicate that pre-cooking the chicken slightly can save time; ensure it’s cooked only to a safe temperature. For assembly, keep cooked bites separate from the sauce until ready to serve for textural integrity. When reheating, consider adding fresh herbs or squeezing a bit of lemon for vibrancy.

Scaling Instructions

For scaling recipes, halving the amount of chicken and ingredients is straightforward, maintaining the same ratios. For doubling or tripling, ensure to spread out the cooking time; larger quantities require more space to cook evenly. Economical adjustments can also involve using larger utensils and pans to accommodate increased portions. Timing modifications may need adjustment based on your cookware size; larger batches might take longer. When storing, use multiple smaller containers for freezing to maintain quality during defrosting.

Nutritional Deep Dive

A macro breakdown of Garlic Butter Chicken Bites reveals a healthful balance: per serving, expect around 280 calories, primarily from protein and fats. A micronutrient analysis indicates the presence of B vitamins, critical for energy metabolism, alongside essential minerals like phosphorus and selenium, supporting various bodily functions. Health benefits include protein-rich nourishment ideal for muscle repair and energy, making them suitable for post-workout meals. Dietary should consider overall consumption; pairing them with fresh vegetables adds fiber and essential nutrients for a balanced meal. For weight management, be mindful of portion sizes to enjoy these bites without excess calories.

Dietary Adaptations

For gluten-free adaptations, ensure any added sauces or breading are certified gluten-free. For a dairy-free alternative, consider using olive oil instead of butter for a similar flavor profile. A vegan adaptation can substitute chicken for chickpeas or seitan, paired with a vegan butter substitute for a satisfying dish. Those on low-carb or keto diets may relish these bites, as they are protein-packed and low in carbohydrates. As for paleo diets, using grass-fed butter can align well with lifestyle choices. Lastly, low-FODMAP adaptations might benefit from using garlic-infused olive oil for flavor without the digestive repercussions of whole garlic.

Troubleshooting Guide

Texture issues can arise if chicken is overcooked, leading to dryness; always check that internal temperature reaches 165°F but remains tender. Flavor balance can be refined by adjusting salt levels to enhance the dish’s natural sweetness of garlic and richness of butter. Temperature problems during cooking can often be mitigated by ensuring your skillet is adequately preheated. Equipment challenges may emerge from using non-stick pans that don’t achieve a solid sear; consider investing in high-quality cookware. Ingredient substitutions might alter flavors; ensure you balance herbs and spices accordingly to maintain integrity. Timing concerns such as rushed cooking can lead to unevenly cooked bites; always give the dish the necessary time for even exposure.

Recipe Success Stories

Community feedback has highlighted the versatility of Garlic Butter Chicken Bites, with readers sharing their success stories. Adaptations have ranged from garlic butter variations to different protein sources, demonstrating the recipe’s flexibility. Enthusiasts have encouraged suggestions such as personal tweaks that have resonated well, fostering a sense of family connection around the table. Recommendations for photography tips, like presenting bites in dynamic settings, have resulted in visually enticing images, showcasing the dish’s appeal.

Frequently Asked Questions

Can I make Garlic Butter Chicken Bites ahead of time?
Yes, you can prepare the chicken and sauce ahead of time. Simply store them separately and combine before reheating to maintain texture and flavor.

What other meats can I use?
Besides chicken, you can use turkey, shrimp, or even firm tofu for a plant-based alternative, ensuring similar cooking times for best results.

Can I freeze the leftovers?
Absolutely! Store the bites in an airtight container and freeze for up to a month. Thaw and reheat gently before serving.

Are these bites spicy?
The recipe is not inherently spicy. However, you can add red pepper flakes or a pinch of cayenne for a spicy kick!

What sides pair well with Garlic Butter Chicken Bites?
Fresh salads, rice, or roasted vegetables complement the richness of the bites beautifully.

Can I use garlic powder instead of fresh garlic?
While fresh garlic is recommended for its vibrant flavor, garlic powder can be used in a pinch. Adjust quantities to taste.

How can I make these bites healthier?
Opt for skinless chicken or replace butter with olive oil to lower saturated fat content while maintaining delicious flavor.

Is this recipe suitable for kids?
Yes! The flavors are mild and kid-friendly.

How long do these chicken bites last in the fridge?
Properly stored, leftover chicken bites will last for up to three days in the refrigerator.

What wine goes best with garlic butter chicken?
A crisp Chardonnay or a light Pinot Noir complements the buttery richness well.

Can I use store-bought garlic butter?
You can, but making your own allows for control over seasonings and freshness, enhancing the overall flavor.

What herbs can I add for extra flavor?
Fresh herbs like parsley, thyme, or basil can be added to elevate the dish’s freshness and flavor profile.

Additional Resources

Explore related recipes to complement your Garlic Butter Chicken Bites, such as creamy garlic pasta or roasted vegetable sides. Learn more about cooking techniques that enhance flavor and texture for a well-rounded culinary experience. Deepen your understanding of nutritional ingredients that contribute to healthier dining choices. Consider equipment recommendations for achieving ideal results, from skillets to prep tools. Seasonal variations can also inspire you; utilize fresh herbs and vegetables to elevate your dish throughout the year.

Join the Conversation

We invite you to share your Garlic Butter Chicken Bites experiences on social media! Whether it’s feedback, photography tips, or your unique variations, your contributions create a beautiful community around shared recipes. Take part in ongoing discussions, and don’t hesitate to share how you made this dish your own; your insights help others explore new culinary adventures.

The Recipe

Garlic Butter Chicken Bites

Serves: 4 servings

Prep Time: 10 mins

Cook Time: 15 mins

Total Time: 25 mins

Kitchen Equipment Needed

  • Large skillet
  • Measuring spoons
  • Knife and cutting board
  • Mixing bowls
  • Spatula

Ingredients

  • 1.5 lbs chicken breast, cut into bite-sized pieces
  • 4 tbsp unsalted butter
  • 4 cloves garlic, minced
  • 1 tsp salt
  • 1/2 tsp black pepper
  • 1 tbsp fresh parsley, chopped (for garnish)
  • Optional: 1 tsp red pepper flakes for heat

Directions

  1. In a large skillet, melt butter over medium heat.
  2. Add minced garlic and sauté until fragrant, about 1 minute.
  3. Add chicken pieces to the skillet, seasoning with salt and pepper.
  4. Cook chicken, stirring occasionally until golden brown and cooked through, about 10-12 minutes.
  5. If using, add red pepper flakes towards the end of cooking for extra flavor.
  6. Garnish with parsley before serving and enjoy!

Recipe Notes

  • Feel free to adjust seasoning according to your taste preferences.
  • Try different herbs like thyme or rosemary for a unique twist.
  • Serve with a side of vegetables or over rice for a complete meal.

Tortellini Soup with Italian Sausage: Hearty and Delicious Comfort Food

Italian sausage soup with tortellini, creamy tortellini soup, sausage tortellini soup recipe, easy tortellini soup, hearty sausage soup, tortellini soup ideas

Tortellini Soup with Italian Sausage: A Hearty Comfort Dish

Introduction

Tortellini Soup with Italian Sausage is a soul-warming dish that combines the rich flavors of sausage, tender tortellini, and a flavorful broth. Whether creamy or tomato-based, this versatile soup is perfect for any season.

For more Italian-inspired recipes, explore Slow Cooker Magic: Unveiling the Ease of Crock Pot Baked Ziti or try Dorito Chicken Casserole: A Crunchy Twist on Comfort Food.


Why This Recipe is a Must-Try

This recipe is quick, customizable, and packed with hearty flavors. It can be adapted for dietary needs or enhanced with additional ingredients for a gourmet twist.


Ingredients

Core Components

  • Tortellini: Cheese-filled for creaminess or meat-filled for extra heartiness.
  • Italian Sausage: Mild, spicy, or sweet sausage for flavor variety.
  • Broth Base: Chicken, vegetable, or tomato-based.
  • Vegetables: Onions, carrots, celery, spinach, or kale.

Optional Add-Ins

  • Heavy cream for a creamy base.
  • Fresh herbs like parsley or basil.
  • Red pepper flakes for a hint of spice.

Step-by-Step Recipe

Preparation

  1. Remove sausage from casings and crumble.
  2. Chop vegetables finely for even cooking.

Cooking

  1. Sauté sausage until browned.
  2. Add aromatics and vegetables to build a flavorful base.
  3. Add broth and tortellini, simmering until tender.

Finishing Touches

  • Stir in cream or spinach, and season to taste.
  • Garnish with Parmesan and fresh herbs before serving.

Internal Linking Opportunities


FAQs About Tortellini Soup

1. Can I freeze this soup?
Yes, but freeze without the tortellini for the best texture when reheating.

2. What type of tortellini is best?
Cheese-filled tortellini pairs beautifully with creamy or tomato-based broths.

3. How do I make this soup spicier?
Use hot Italian sausage or add red pepper flakes.

4. How long can leftovers last?
Refrigerate in an airtight container for up to 3 days.


Conclusion

Tortellini Soup with Italian Sausage is a versatile and satisfying meal perfect for any occasion. Its rich flavors and hearty ingredients make it a family favorite. Pair it with a side of crusty bread, and you have the ultimate comfort food. Let me know if you need further enhancements to this recipe!

Authentic Pasta e Fagioli: A Timeless Italian Comfort Dish

Italian pasta and bean soup, authentic Italian soup, pasta e fagioli recipe, traditional pasta fagioli, hearty Italian comfort food, bean soup with pasta

Pasta e Fagioli: A Hearty Italian Classic

Introduction

Pasta e Fagioli, translating to “pasta and beans,” is a humble yet hearty Italian soup that exemplifies comfort food. Rooted in tradition, this dish has been cherished for its simplicity, affordability, and versatility.


Why This Recipe Stands Out

The combination of tender beans, perfectly cooked pasta, and aromatic broth makes this dish a go-to for any occasion. It’s nutritious, satisfying, and easily adaptable to dietary preferences.

For more Italian-inspired comfort foods, explore Slow Cooker Magic: Unveiling the Ease of Crock Pot Baked Ziti or indulge in Italian Stromboli: Rolling Up Comfort in Every Bite.


Ingredients

Core Components

  • Beans: Cannellini or navy beans, soaked or canned.
  • Pasta: Ditalini, elbow macaroni, or similar small shapes.
  • Broth: Vegetable or chicken stock for a flavorful base.
  • Aromatics: Onion, garlic, carrots, celery.
  • Herbs and Spices: Thyme, rosemary, parsley, salt, pepper.

Optional Add-Ins

  • Pancetta or bacon for a smoky touch.
  • Tomatoes for added depth.
  • Kale or spinach for extra nutrition.

Step-by-Step Recipe

  1. Preparing Ingredients:
    • Rinse beans, chop vegetables, and measure spices.
  2. Cooking the Base:
    • Sauté aromatics and pancetta for a flavor-packed foundation.
    • Add beans, broth, and herbs, then simmer until tender.
  3. Adding Pasta:
    • Cook pasta separately or in the soup for a thickened consistency.
    • Stir in fresh herbs and adjust seasoning before serving.

Internal Linking Opportunities


FAQs About Pasta e Fagioli

1. Can I freeze Pasta e Fagioli?
Yes, but cook the pasta fresh when reheating to avoid mushiness.

2. What’s the best pasta to use?
Small shapes like ditalini or macaroni work best.

3. Can I make it vegan?
Use vegetable stock and omit pancetta for a plant-based version.


Conclusion

Pasta e Fagioli is a timeless recipe that captures the essence of Italian home cooking. With endless customization options, it’s a dish that suits every palate and occasion. Let me know if you’d like further enhancements to this recipe!

Best Ever Quiche: The Perfect Recipe for Any Occasion

Flaky crust quiche, creamy quiche recipe, best quiche for brunch, easy quiche recipe, gourmet quiche, savory breakfast quiche

Best Ever Quiche: A Perfect Brunch Delight

Introduction

Quiche, with its buttery crust and creamy filling, is a classic dish that has become a brunch staple worldwide. This Best Ever Quiche recipe promises to elevate your cooking game with easy steps, creative variations, and foolproof tips.


Why This Quiche Recipe Stands Out

This recipe combines simplicity and elegance. Whether for a festive brunch or a cozy dinner, this quiche is versatile, customizable, and always satisfying.

For more comforting recipes, explore Slow Cooker Magic: Unveiling the Ease of Crock Pot Baked Ziti or try The Ultimate Comfort Food Crockpot Potato Soup with Hashbrowns.


Ingredients

Essential Components

  • Crust: Buttery pâte brisée or pre-made crust for convenience.
  • Custard Base: Eggs, cream, milk, and seasonings.
  • Fillings: Bacon, ham, cheese, spinach, or mushrooms.

Optional Add-Ins

  • Vegetables like bell peppers, zucchini, or asparagus.
  • Proteins like smoked salmon or turkey.

Step-by-Step Guide

  1. Making the Crust:
    • Use cold butter for a flaky texture.
    • Blind bake to avoid a soggy bottom.
  2. Preparing the Custard:
    • Whisk eggs, cream, and seasoning until smooth.
    • Adjust seasoning for fillings like smoked meats.
  3. Assembling and Baking:
    • Layer fillings evenly, pour custard, and bake at 375°F until set.

Internal Linking Opportunities


FAQs About Quiche

1. Can I freeze quiche?
Yes, freeze before or after baking for convenience.

2. How do I prevent a soggy crust?
Blind bake the crust and avoid overfilling.

3. Can I make it dairy-free?
Substitute with coconut cream or almond milk.


Conclusion

The Best Ever Quiche offers endless possibilities. With a flaky crust and a rich filling, it’s a guaranteed hit for any occasion. Experiment with flavors and share the joy of homemade quiche with loved ones!