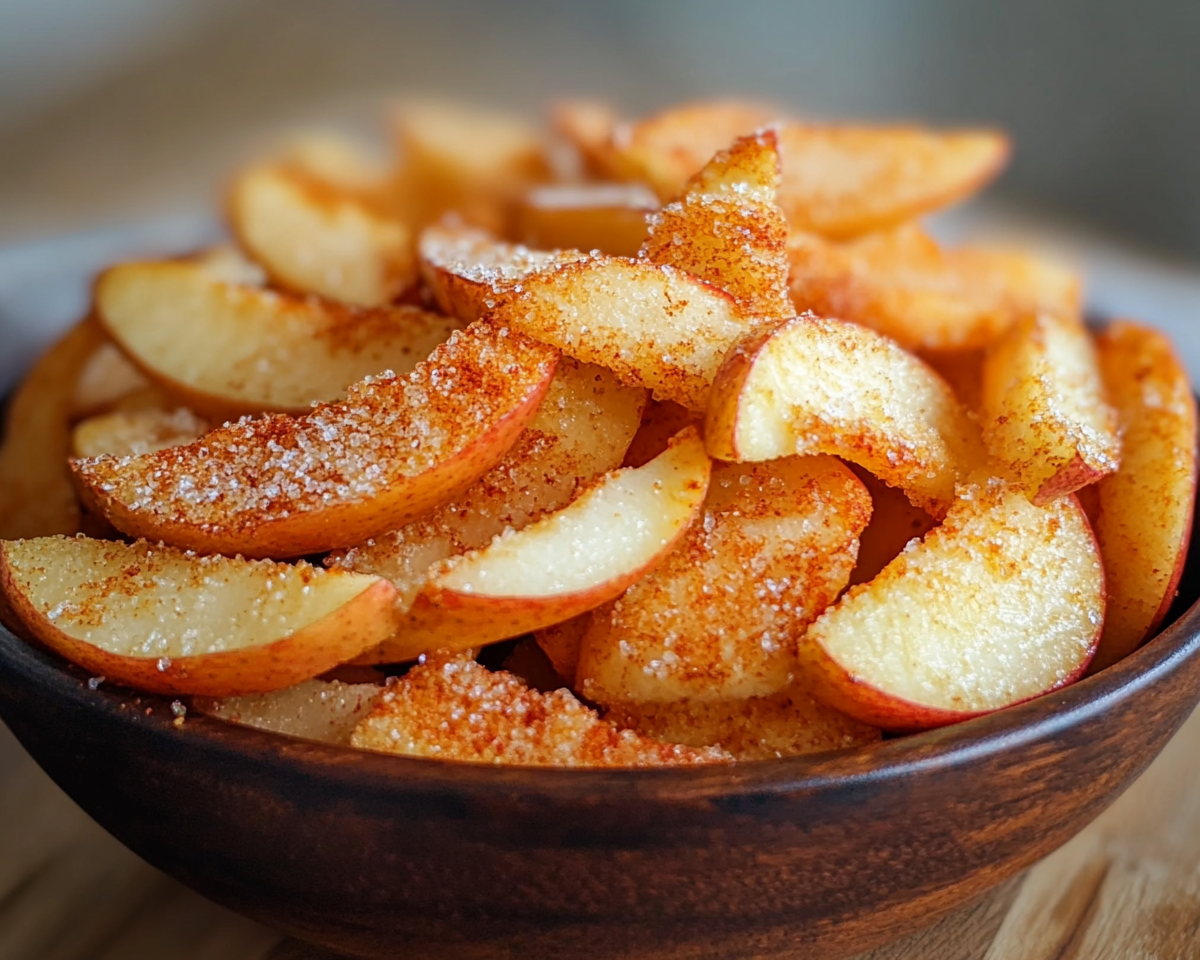
Crispy Air Fryer Apple Fries: A Healthy and Delicious Snack
Crispy Air Fryer Apple Fries: A Healthier, Crispy Treat
Introduction
Crispy Air Fryer Apple Fries are the ultimate combination of a healthy snack and a delicious dessert. Made with fresh apples, lightly coated in a cinnamon-sugar crust, and air-fried to perfection, this recipe ensures a satisfying crunch without the guilt of deep frying.
Crispy Air Fryer Apple Fries are the perfect blend of healthy and indulgent, providing a versatile option for snacks, desserts, or gatherings. Try different variations, explore creative dips, and enjoy this irresistible treat with your family or friends.
Delicious Ground Beef and Gravy Over Mashed Potatoes Recipe
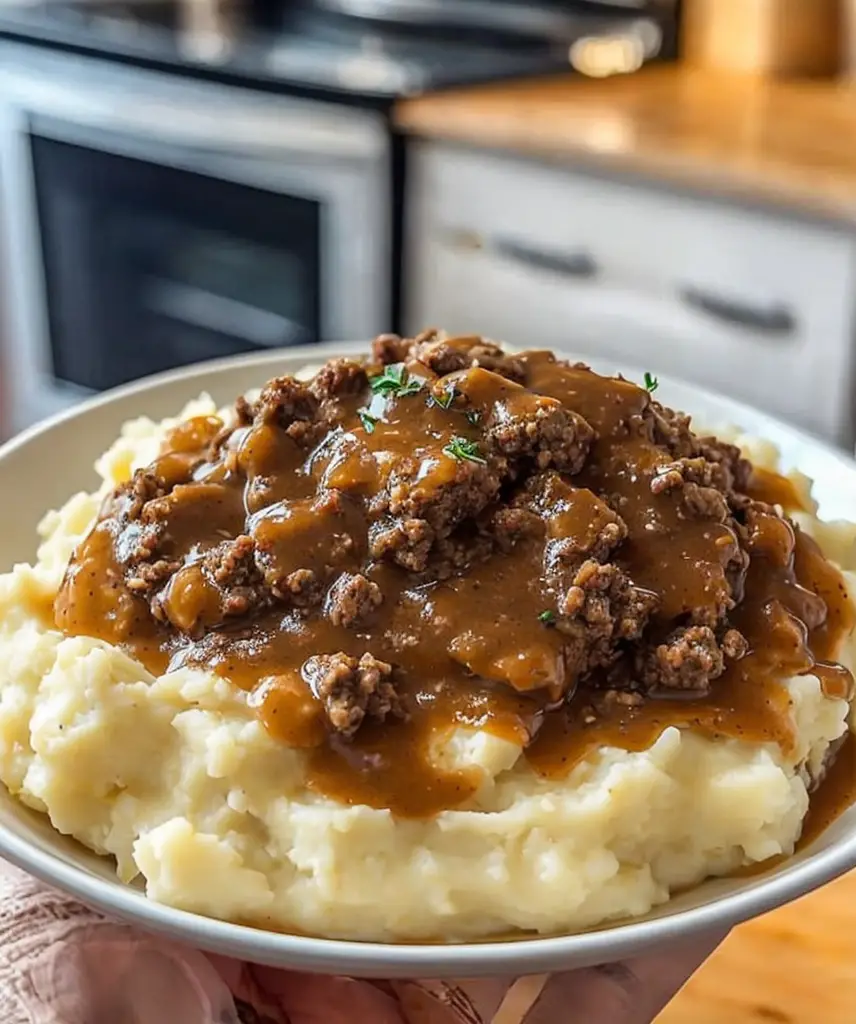
Ground Beef and Gravy Over Mashed Potatoes: A Comforting Family Favorite
⚖️
Difficulty
Easy
⏲️
Prep Time
15 mins
🕒
Cook Time
30 mins
⏱️
Total Time
45 mins
🍽️
Servings
4 servings
Ground Beef and Gravy Over Mashed Potatoes is the quintessential comfort food that warms hearts and satisfies appetites. This hearty dish combines the savory richness of ground beef and gravy poured over a mound of creamy, buttery mashed potatoes. The flavors meld together beautifully, creating a dish that’s not only filling but incredibly delightful. With its earthy notes and rich textures, this meal brings a sense of home to dinner tables, making it perfect for family gatherings or cozy weeknight dinners.
The appeal of this dish lies in its straightforward preparation and delectable taste. As the ground beef cooks, the aromatic blend of seasonings fills the kitchen with a welcoming scent. Each bite delivers a satisfying experience, contrasting the fluffy mashed potatoes with the thick, savory gravy. This warm, hearty dish is quickly becoming a staple in homes across generations, evoking memories of family meals and shared stories.
Quick Recipe Highlights
Flavor Profile: The combination of browned beef enhances the umami while the gravy adds a luscious coating that elevates the entire dish.
Texture: The soft, creamy mashed potatoes provide a perfect contrast to the thick and meaty gravy.
Aroma: Expect a tantalizing aroma of sautéed onions and herbs, mingling with the savory notes of the ground beef.
Visual Appeal: This dish is a feast for the eyes; the contrast between the golden gravy and fluffy white potatoes is appetizing.
Skill Level Needed: This recipe is beginner-friendly, requiring just a few essential cooking techniques.
Special Equipment: A large skillet and a pot for boiling potatoes are the main tools needed for preparation.
Recipe Overview
Difficulty Level: This recipe is easy to follow, making it suitable for novice cooks as well as experienced chefs. The steps are clear and direct, ensuring cooks can navigate without frustration.
Category: Ground Beef and Gravy Over Mashed Potatoes fits perfectly into the comfort food category, ideal for cozy dinners or family gatherings.
Cuisine: This recipe has roots in classic American cuisine, drawing inspiration from traditional meat and potato dishes found in many homes.
Cost: Preparing this dish is budget-friendly, making it accessible for families looking to gather around flavorful meals without breaking the bank.
Season: While delicious year-round, this dish is especially comforting in colder months when hearty meals are most craved.
Occasion: Perfect for casual weeknight dinners, family reunions, or even potlucks where satisfying and hearty dishes are appreciated.
Why You’ll Love This Recipe
Ground Beef and Gravy Over Mashed Potatoes appeals to your taste buds with its rich flavors and satisfying textures. The comforting taste of the beef mingling with the savory gravy creates a profound sense of satisfaction. Each mouthful reveals creamy potatoes that soak up the delicious gravy, ensuring no bite is ever dry or lacking in flavor. The perfect blend of seasonings elevates this meal, making it utterly irresistible for chicken lovers and meat enthusiasts alike.
Not only is this dish delicious, but it’s also extremely convenient to prepare. With a prep time of just 15 minutes and a cook time of 30 minutes, you’ll have a full meal ready in under an hour. This makes it ideal for busy nights when you still want to serve your family a homemade meal. Effortlessly bringing together staple pantry ingredients, this recipe makes it easy to whip up a flavorful dinner without extensive planning.
Nutritional advantages abound in this hearty meal. Ground beef is a great source of protein, essential for muscle growth and overall health. Paired with mashed potatoes, which are loaded with vitamins and minerals, this dish offers a balanced meal. The addition of gravy, while indulgent, provides warmth and comfort, making it a nourishing option for those chilly evenings.
Socially, Ground Beef and Gravy Over Mashed Potatoes serves as a wonderful centerpiece for family dinners. As people gather around the table, this dish invites conversation and connection, often drawing nostalgic stories and shared memories associated with similar comfort foods. Any gathering becomes more memorable when accompanied by such a satisfying meal, fostering bonds among friends and family.
Cost-effectiveness is another significant reason to love this dish. Utilizing inexpensive ingredients, you can create a hearty meal that feeds a family without excess spending. Each portion is filling, ensuring that everyone leaves the table satisfied, and no one has to worry about breaking the budget.
Historical Background and Cultural Significance
The origins of Ground Beef and Gravy Over Mashed Potatoes can be traced back to the heart of American cooking, where meat and potatoes have long served as staples. This dish developed as a response to both culinary practicality and cultural necessity, making the most of readily available ingredients. Historically, meals were designed to be hearty enough to sustain laborers and families, making ground beef an ideal option due to its affordability and versatility in cooking.
In American culture, this dish has become an emblem of home-cooked meals. It represents the traditions of gathering families around a table, particularly in the Midwest, where hearty meals are celebrated. The simplicity of the recipe allows for it to be passed down through generations, each adding their unique twist to the traditional elements.
Through the years, Ground Beef and Gravy Over Mashed Potatoes has evolved, with regional variations emerging to highlight local flavors and ingredients. In some areas, spices like paprika or savory herbs are added to enhance flavor, while others may top it with cheese or vegetables to diversify textures and tastes. These adaptations not only celebrate local culinary practices but also connect various communities through their shared love of comfort food.
Today, Ground Beef and Gravy Over Mashed Potatoes stands as a testament to the enduring appeal of comfort food in American households. Families continue to cherish this dish, often serving it at gatherings or during family nights, confirming its significance as a beloved meal that transcends generations.
Ingredient Deep Dive
Ground Beef
Ground beef is a staple protein in many households, lauded for its versatility and flavor. It typically comes from the chuck or round cuts of beef, which have a desirable fat content for cooking. The cultural significance lies in its long-standing presence in American cuisine, often featured in everything from burgers to meatloaves. Nutritionally, ground beef is rich in protein, iron, and B vitamins, essential for energy and muscle maintenance. When purchasing ground beef, look for an even red color and a firm texture. Store it in the fridge if you plan to use it within a day or two, or freeze it for longer storage. To substitute, try ground turkey or plant-based alternatives for lighter or vegan options.
Mashed Potatoes
Mashed potatoes have a notable place in comfort food lore, often associated with warmth and homeliness. Made from starchy potatoes that are cooked and mashed until creamy, they serve as a perfect base for rich gravies and saucy meat dishes like our recipe. From a nutritional standpoint, potatoes provide a good source of carbohydrates and dietary fiber, essential for energy. Look for firm potatoes, like Russets or Yukon Golds, for the best mashing results. Store peeled potatoes in water to prevent browning, while cooked mashed potatoes can be kept in the refrigerator for a few days. For substitutes, consider cauliflower mash for a lower-carb option or other root vegetables for varied flavors.
Common Mistakes to Avoid
Using low-fat ground beef can result in a dry texture. Aim for an 80/20 blend for ideal moisture and flavor.
Not seasoning the mashed potatoes adequately can lead to a bland flavor. Always taste and adjust seasoning for the best experience.
Overcooking the potatoes can make them gluey. Boil until fork-tender and avoid excessive mashing.
Not letting the meat brown properly can affect flavor. Take your time to brown the beef for a deeper, richer flavor.
Skipping the onion or garlic can lessen the dish’s complexity. Incorporate aromatics for added depth.
Pouring gravy over cold mashed potatoes can affect temperature. Serve hot for the best texture and flavor.
Using cold ingredients when making gravy can cause it to lump. Ensure ingredients are at room temperature for smooth consistency.
Not allowing the gravy to simmer can prevent it from thickening properly. Give it time to develop flavor and the right texture.
Neglecting to taste and adjust seasoning throughout the cooking process may lead to overlooked flavors.
Storing leftovers in a non-airtight container can cause the dish to spoil quickly. Use airtight containers for best storage practices.
Essential Techniques
The key technique in making delicious mashed potatoes lies in properly cooking the potatoes. Cooking them until just fork-tender ensures they remain fluffy rather than gummy. Drain them thoroughly after boiling to eliminate excess moisture before mashing.
When preparing the gravy, mastering the roux technique is essential. Start by mixing equal parts fat and flour, allowing it to cook briefly to eliminate the raw flour taste. Gradually whisk in liquid to prevent lumps, and simmer until thickened.
Pro Tips for Perfect Ground Beef and Gravy Over Mashed Potatoes
– Ensure ground beef is at room temperature before cooking for even browning.
– Use a potato ricer for the fluffiest mashed potatoes; this prevents lumps and maintains a smooth texture.
– For extra flavor, incorporate cream cheese or sour cream into the mashed potatoes for creaminess.
– Make the gravy ahead of time; it reheats well and allows for flavors to deepen.
– Consider adding sautéed mushrooms or bell peppers to the beef mixture for added depth and flavor.
– Use high-sodium broth instead of water for the gravy for an intensified taste.
– Always taste as you go—adjust seasoning for the best flavor balance.
– Serve with a sprinkle of chopped fresh parsley for a fresh touch and added color.
Variations and Adaptations
Ground Beef and Gravy Over Mashed Potatoes lends itself beautifully to variations tailored to individual preferences. Consider incorporating vegetables like peas or carrots into the gravy, adding nutritional value and vibrant color. A popular adaptation includes using ground turkey or chicken instead of beef for a lighter option while maintaining the essence of the dish.
For a seasonal twist, add pumpkin or grated squash into the mashed potatoes during the fall, enhancing the flavor profile. You could also experiment with different herbs and spices—roasted garlic or dill can lend fresh notes to the mashed potatoes, while smoked paprika can elevate the gravy.
Dietary modifications can be made without compromising flavor. Use dairy-free alternatives for those with lactose sensitivities or vegan meat substitutes for a plant-based version. Experimenting with texture is another avenue; consider cheesy mashed potatoes by adding shredded cheese, or introducing crunchy toppings such as fried onions for contrast.
Serving and Presentation Guide
When serving Ground Beef and Gravy Over Mashed Potatoes, presentation can elevate the dining experience. Start by scooping a generous mound of mashed potatoes onto each plate, creating a well in the center. Gently ladle the rich gravy over the top, allowing it to cascade down the sides for an appealing visual effect.
Garnishing with freshly chopped parsley not only adds a pop of color but also a hint of freshness that complements the dish beautifully. Pair it with traditional accompaniments, such as buttered corn or a light green salad, to balance the heaviness of the meal.
Consider temperature; ensure both the beef and gravy are steaming hot before serving to maximize enjoyment. Portion control remains essential, especially when serving guests; consider providing small bowls with extra gravy for those who desire it.
Wine and Beverage Pairing
For wine pairings, consider a rich Cabernet Sauvignon or a trustworthy Merlot, as both enhance the beef’s flavors perfectly. A buttery Chardonnay can also complement the creaminess of the mashed potatoes well.
If you prefer non-alcoholic options, a homemade lemonade with a hint of mint provides a refreshing contrast to the hearty dish. For a cozy evening, pairing with a dark, robust coffee can also bring out the dish’s savory notes.
When serving, ensure that wines are at the appropriate temperature—red wines should be slightly below room temperature, while any whites should be chilled. Presenting drinks in elegant glassware can elevate the overall dining experience.
Storage and Shelf Life
For optimal storage, allow leftovers to cool completely before transferring them to airtight containers. Ground Beef and Gravy Over Mashed Potatoes can be refrigerated for up to 3-4 days without compromising flavor or safety.
When reheating, ensure the dish is heated thoroughly to 165°F, especially for leftovers. To avoid dryness, consider adding a splash of broth or water before reheating.
For longer-term storage, this dish can be frozen for up to two months. Portioning into smaller containers ensures quick reheating and easy meal portions for busy days. Ensure to label with the date for tracking.
Signs of spoilage include an off odor or any discoloration that suggests it has gone bad—when in doubt, it’s best to discard.
Make Ahead Strategies
Preparing Ground Beef and Gravy Over Mashed Potatoes can be streamlined with thoughtful planning. Consider cooking the ground beef and gravy a day ahead, allowing the flavors to meld overnight, which often enhances the dish. Store in the refrigerator, then reheat before serving.
Mashed potatoes can be prepared up to a day in advance as well. Cook and mash them, then store in a container with a layer of plastic wrap pressed against the surface to prevent browning. Reheat in the microwave or on the stove with a little added cream or milk for smoothness.
For best results, always reheat in smaller batches to ensure even heating. Adding fresh herbs post-reheating can help regain some freshness after storage.
Scaling Instructions
When scaling Ground Beef and Gravy Over Mashed Potatoes, adjustments to ingredient quantities are straightforward. For example, to halve the recipe, simply use 1 pound of ground beef and adjust other ingredients accordingly.
When doubling or tripling the recipe, ensure to use a larger pot to accommodate the extra ingredients, especially for the mashed potatoes; this prevents overcrowding, which can cause uneven cooking. A larger skillet will also help in browning the ground beef effectively.
Keep an eye on the cooking times, as larger batches may take slightly longer to cook through. Adjust storage considerations accordingly to ensure all portions are stored safely and are easily accessible for later meals.
Nutritional Deep Dive
Understanding the nutritional composition of Ground Beef and Gravy Over Mashed Potatoes provides insight into its health benefits. A typical serving combines protein from ground beef with carbohydrates from mashed potatoes, making it a balanced meal option.
From a macro standpoint, this meal roughly delivers 25g of protein per serving, critical for muscle growth and repair. The potatoes contribute to dietary fiber, beneficial for digestive health.
In terms of micronutrient analysis, beef is an excellent source of iron and zinc, essential for energy metabolism and immune function, respectively. Mashed potatoes contribute potassium and vitamin C, vital for maintaining heart health and skin integrity.
Weight management can be considered when serving portions; smaller portions can significantly reduce calorie intake without sacrificing satiety.
Dietary Adaptations
Adapting Ground Beef and Gravy Over Mashed Potatoes for various dietary needs is key to enjoying this delicious meal. Gluten-free individuals can enjoy this dish by ensuring that the gravy uses certified gluten-free flour or cornstarch as a thickening agent.
For those who need a dairy-free version, substitute cream and butter in the mashed potatoes with almond milk or dairy-free margarine. Ground turkey or a lentil mix can replace ground beef for a lower-fat or vegan option.
Low-carb diets can take advantage of cauliflower mash as a substitute for traditional mashed potatoes, maintaining the comforting essence of the dish. Offering variations tailored to specific diets ensures that everyone can savor this classic comfort food.
Troubleshooting Guide
Resolving common issues while making Ground Beef and Gravy Over Mashed Potatoes can enhance the cooking experience. If the gravy is too thin, simmer it longer to allow it to reduce and thicken; you can also create a slurry using cornstarch and water to boost thickness.
Should the mashed potatoes turn out gluey, this may result from over-mashing; to remedy, add a splash of warm milk and gently fold instead of mixing vigorously.
Flavor balance issues can often be addressed by initially tasting during the cooking process. Adding a pinch of salt or seasoning can transform the dish, elevating the overall flavor profile.
In case the beef seems tough, ensure that it is browned properly before simmering in the gravy, allowing it to tenderize during cooking.
Time management can become an issue; overcooking either component can lead to undesirable textures. Be diligent with timers and check doneness frequently.
Recipe Success Stories
Ground Beef and Gravy Over Mashed Potatoes has found a special place in many families’ meal rotations, with numerous success stories. Many readers have shared their adaptations, such as adding a variety of herbs or exploring alternate meats, resulting in discussions about flavor preferences and ingredient choices.
Others highlight their children’s enthusiasm for the dish, often resulting in “seconds” even on school nights. Feedback centers around the wholesome nature of the meal and ability to bring family together, particularly on busy weekdays.
Photographing this vibrant dish also creates a community sharing element, as readers love to showcase their culinary creations across social media, often incorporating the dish into their family meal traditions.
Frequently Asked Questions
What is the best type of beef to use for this recipe?
Ground chuck is ideal due to its fat content, ensuring flavor and moisture. You can also use lean ground beef for a healthier option.
Can I use instant mashed potatoes instead?
Yes, instant mashed potatoes can be a time-saver and may still yield a tasty result, though homemade offers better flavor and texture.
How can I thicken my gravy more?
Use a cornstarch slurry by mixing cornstarch with water and stirring it into the simmering gravy. Allow it to cook for a few minutes until desired thickness is reached.
Can I make this recipe vegetarian?
Absolutely! Substitute ground beef with lentils, mushrooms, or soy-based alternatives, and prepare the gravy with vegetable broth.
What can I serve with this dish?
Traditionally served with green beans or a light salad, you can also pair it with corn on the cob for a festive touch.
How do I store leftovers?
Store leftovers in airtight containers in the fridge for up to 4 days or freeze portions for longer shelf life.
Can I make the gravy in advance?
Yes, the gravy can be made ahead and reheated; just be sure to stir it well to reincorporate before serving.
Is this dish suitable for freezing?
Yes, both the beef mixture and mashed potatoes freeze well; ensure they are properly stored to maintain quality.
Could I add vegetables to the beef mixture?
Absolutely! Chopped carrots, peas, or mushrooms can be incorporated for added nutrition and flavor.
How spicy is this dish?
This recipe is not inherently spicy but can be adjusted by adding spices like cayenne or black pepper to taste.
Additional Resources
For those looking to expand their culinary repertoire, consider exploring related recipes such as shepherd’s pie or beef stroganoff, which use similar ingredients and techniques. Technique guides for mastering perfect mashed potatoes or creating flavorful gravies can boost your cooking skills.
Ingredient information, detailing nuances of various cuts of meat or types of potatoes, can enhance knowledge and elevate cooking outcomes. Looking into kitchen equipment recommendations for food processors or potato ricers provides tools to ease cooking processes and improve results. Seasonal variations of this dish, such as incorporating summertime vegetables or lighter gravies, can refresh the meal throughout the year.
Join the Conversation
We encourage readers to share their culinary journeys with Ground Beef and Gravy Over Mashed Potatoes. Documenting cooking tips, and family variations, or providing feedback fosters a community around this globally cherished dish.
Photography tips and techniques for showcasing meals on social media help to inspire others, encouraging more to enjoy this family favorite. Participating in recipe reviews and discussions about adaptations can amplify the sense of community in food sharing, making connections through our love of hearty, satisfying dishes.
The Recipe
Ground Beef and Gravy Over Mashed Potatoes
Serves: 4 servings
Prep Time: 15 mins
Cook Time: 30 mins
Total Time: 45 mins
Kitchen Equipment Needed
Large skillet
Pot for boiling potatoes
Masher or ricer
Measuring cups and spoons
Wooden spoon
Ingredients
1 pound ground beef
1 medium onion, diced
2 cups beef broth
2 tablespoons Worcestershire sauce
2 tablespoons all-purpose flour
4 large potatoes, peeled and cut into chunks
1/2 cup milk
4 tablespoons butter
Salt and pepper, to taste
Chopped parsley, for garnish (optional)
Directions
In a large skillet, brown the ground beef over medium heat. Drain excess fat.
Add diced onions and cook until soft and translucent.
Stir in flour and Worcestershire sauce until combined, then gradually add beef broth.
Simmer until thickened, stirring occasionally, about 10 minutes. Season with salt and pepper.
While the beef mixture cooks, boil the potatoes in salted water until fork-tender, about 15 minutes.
Drain potatoes and return them to the pot. Add milk and butter; mash until smooth and fluffy.
To serve, place a generous scoop of mashed potatoes on a plate and top with beef gravy. Garnish with parsley if desired.
Recipe Notes
For a creamier texture, feel free to add more milk or cream to mashed potatoes.
Leftovers can be stored in an airtight container in the refrigerator for 3-4 days.
To make this dish ahead, prepare the beef and gravy a day early and reheat before serving.
Delicious Chicken Pecan Cranberry Salad Served on Apple Slices
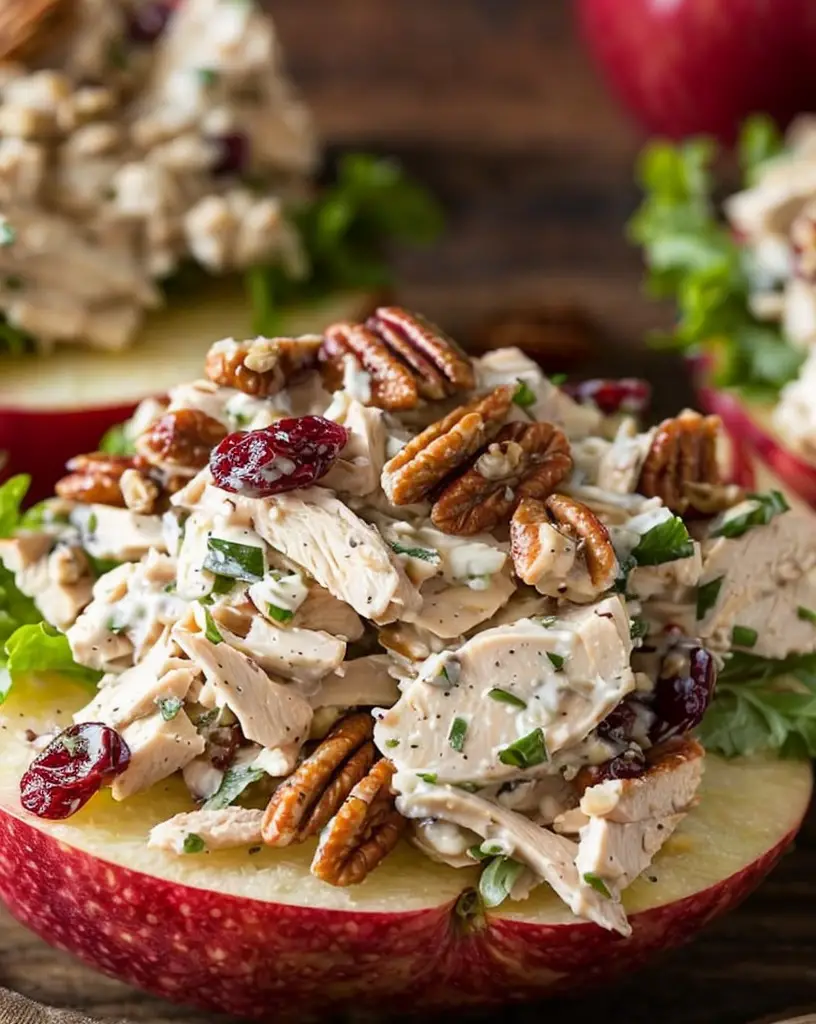
Delicious Chicken Pecan Cranberry Salad on Apple Slices: A Healthy Delight
⚖️
Difficulty
Easy
⏲️
Prep Time
15 mins
🕒
Cook Time
0 mins
⏱️
Total Time
15 mins
🍽️
Servings
4 servings
An enticing and vibrant dish, the Chicken Pecan Cranberry Salad on Apple Slices perfectly combines flavors and textures, making it a standout choice for lunch or a light dinner. The juicy chicken, crunchy pecans, and sweet cranberries harmonize beautifully with the crisp apple slices, elevating a simple salad into a delightful culinary experience. The layers of flavor tell a story, offering sweet, savory, and nutty notes that dance on the palate in every bite.
Not just visually appealing, this healthy salad offers a fantastic mix of textures—from the smoothness of the chicken to the crunch of nuts and the refreshing snap of apples. It is not only a treat for the taste buds but also a feast for the eyes, creating a colorful presentation that is sure to impress. Enjoying this dish on a sunny day can evoke feelings of joy and satisfaction, making it more than just a meal—it’s a celebration.
Quick Recipe Highlights
Flavor Profile: This salad boasts a unique medley of flavors, blending the savory taste of chicken with the sweetness of cranberries and apples, and the earthy crunch of pecans.
Texture: Experience a delightful contrast with the tender chicken pieces softened by creamy dressing, crunchy apples, and the hearty bite from pecans.
Aroma: The fresh, crisp scent of apples combined with the toasted pecans creates a lovely aroma that whets your appetite.
Visual Appeal: The vibrant colors of the red cranberries, green apples, and golden pecans create a stunning presentation that’s as pleasing to the eyes as it is to the palate.
Skill Level Needed: Perfect for beginners and seasoned cooks alike, this salad is straightforward to prepare with minimal cooking required.
Special Equipment: A sharp knife and cutting board are essential, along with prep bowls for easy assembly.
Recipe Overview
Difficulty Level: This recipe is easy to prepare, making it suitable for all skill levels. The straightforward process requires no special culinary techniques.
Category: This dish falls under the salad category, perfect for light lunches or as a refreshing appetizer at gatherings.
Cuisine: This salad draws inspiration from American cuisine, embracing elements of traditional salads while offering fresh and modern twists.
Cost: With relatively affordable ingredients like chicken, apples, and nuts, this salad is economical without compromising on flavor.
Season: Best enjoyed in the fall when apples are in season, but delicious year-round when using fresh ingredients.
Occasion: Ideal for casual gatherings, picnics, or even potluck dinners, this salad is versatile and crowd-pleasing.
Why You’ll Love This Recipe
This Chicken Pecan Cranberry Salad on Apple Slices is not only delicious but also incredibly appealing due to its unique taste and texture. Each bite offers a symphony of flavors—savory chicken combined with sweet cranberries and crunchy pecans brings both excitement and satisfaction. The use of fresh apples adds a refreshing element that complements the richness of the dressing, resulting in a well-balanced dish that’s perfect for any time of the year.
Moreover, this recipe is highly convenient to prepare, requiring minimal cooking time and basic kitchen skills. Simply chop, mix, and serve. This is especially beneficial for busy individuals seeking a nutritious meal without spending hours in the kitchen. With its quick assembly, it’s a solution for lunch at home or on-the-go.
From a nutritional standpoint, this salad is packed with protein from the chicken and healthy fats from the pecans, making it not only tasty but also wholesome. In addition, the cranberries add antioxidants while the apple slices contribute dietary fiber, creating a balanced meal option that supports your health goals.
On top of its dietary benefits, this chicken salad is perfect for social settings. It is an excellent choice for gatherings and potlucks, sure to impress guests and encourage conversation. Its vibrant colors and tantalizing flavors can light up any event.
Finally, this recipe is cost-effective. With simple, readily available ingredients, it offers a delightful eating experience without breaking the bank. Whether you’re looking to serve it on a budget or treat yourself to something special, this Chicken Pecan Cranberry Salad is a great pick.
Historical Background and Cultural Significance
The origins of the Chicken Pecan Cranberry Salad can be traced back to mid-20th century America, where chicken salads became a popular meal choice for home cooks and restaurants alike. Traditionally, chicken salads feature shredded chicken and various vegetables or fruits, but this recipe elevates the classic by incorporating pecans and cranberries, embodying the robust flavors of Southern cuisine.
Culturally, chicken salad holds a special place at family gatherings and celebrations, symbolizing comfort and togetherness. The combination of ingredients in this dish reflects a growing trend toward combining both sweet and savory elements in meals, which has become increasingly popular in contemporary cuisine.
Over the years, variations of the chicken salad have emerged, with each region adding its unique twist. For example, Southern adaptations might include the use of mayonnaise for a creamier base, while other areas may favor lighter vinaigrettes. This evolution shows the adaptability of simple salads as they cross geographic and culinary boundaries, ushering in an era of creativity in home cooking.
Regional variations also play a significant role in how this dish is prepared today. Whether enjoyed as a sandwich filling, a main course, or a refreshing side, the Chicken Pecan Cranberry Salad continues to be a beloved recipe across the United States, appreciated for its versatility and flavor combinations.
Ingredient Deep Dive
Chicken is the star ingredient of this salad, providing a rich source of protein that is essential for muscle repair and energy. It’s important to select high-quality, preferably organic, chicken for the best flavor and health benefits. When buying chicken, look for fresh, moist cuts without any blemishes. Store raw chicken in the fridge for up to two days, and cook it thoroughly before consuming.
Pecans add a delightful crunch and healthy fats to the dish. Known for their buttery texture and sweet flavor, they’re also packed with antioxidants and fiber. It’s best to purchase pecans whole and store them in an airtight container in a cool, dark place to maintain their freshness. If you can’t find pecans, walnuts or almonds can serve as suitable substitutes that will still offer a crunchy texture.
Cranberries not only lend sweetness but also bring a punch of antioxidant benefits that are essential for overall health. Dried cranberries are often used in salads for their convenience and long shelf life. When selecting dried cranberries, look for unsweetened varieties when possible, and those without preservatives. If you want a bolder flavor, fresh cranberries can also be incorporated, though they may require additional sweetening.
Lastly, apples add a refreshing crunch and natural sweetness to the salad, making them an integral part of the dish. Choose crisp varieties like Honeycrisp or Fuji, which will hold their shape well. When storing apples, keep them in a cool, dry place or in the refrigerator to prolong their freshness.
Common Mistakes to Avoid
Using dry chicken: Ensure that the chicken is cooked just until it’s no longer pink to keep it moist.
Overdoing the dressing: Use just enough dressing to coat the salad lightly for a balanced flavor.
Skipping salt: A pinch of salt enhances the overall flavors of the salad, so don’t overlook this seasoning.
Choosing the wrong apple: Make sure to select a variety that is crunchy and sweet for the best flavor.
Not toasting pecans: Toasting pecans brings out their natural oils, enhancing their flavor significantly.
Cutting ingredients too small: To maintain texture, cut chicken and apple into bite-sized pieces but keep them substantial.
Incorrect storage: Store the salad without apples if preparing in advance, as they can brown and become mushy.
Letting salad sit too long: Serve immediately after making to enjoy the fresh textures and flavors.
Forgetting to taste: Always taste the salad before serving; adjust seasonings accordingly.
Skipping the chill: For better flavor, let the salad sit in the fridge for a few minutes before serving.
Essential Techniques
To achieve the perfect balance of flavors in the Chicken Pecan Cranberry Salad, proper ingredient preparation is critical. Begin by properly cooking the chicken to avoid dryness—use a meat thermometer to ensure it reaches the recommended 165°F. This ensures the chicken remains juicy, which enhances the overall texture of the salad.
When incorporating apples, your knife skills come into play. Chop the apples into even pieces for uniformity, which not only enhances presentation but also allows for even distribution in the salad. A sharp knife is essential for clean cuts, ensuring the apples maintain their appealing crunch throughout the dish.
Mixing the ingredients effectively is crucial to prevent the salad from becoming soggy. Rather than stirring with force, gently fold the salad components together with a spatula, allowing the flavors to meld without bruising the delicate apples or overpowering the other ingredients.
Finally, garnishing the salad can elevate its presentation. Consider finely chopping fresh herbs such as parsley or cilantro to sprinkle on top before serving. This not only adds a pop of color but also gives an aromatic lift that tantalizes the senses.
Pro Tips for Perfect Chicken Pecan Cranberry Salad
1. **Opt for rotisserie chicken**: For a quick and easy option, use store-bought rotisserie chicken. It saves time and adds great flavor to the salad.
2. **Experiment with dressings**: Try different dressings like honey mustard or balsamic vinaigrette for a flavor twist.
3. **Add greens**: For added nutrition, serve this salad over a bed of mixed greens or spinach.
4. **Include cheese**: Crumbled feta or goat cheese can introduce a creamy texture that complements the crunchy elements.
5. **Incorporate other nuts**: Feel free to mix in walnuts or hazelnuts to add variety and extra nutrients.
6. **Make it ahead**: Prepare the salad base ahead of time (without the apples) and store in the fridge to save time.
7. **Mix in seasonal fruits**: Swap apples for pears or mandarin oranges for a seasonal variation that still captures the essence of the salad.
8. **Serve cold**: Always chill the salad before serving to enhance refreshment.
Variations and Adaptations
If you want to personalize your Chicken Pecan Cranberry Salad, consider making a few regional variations. In Southern-style adaptations, adding a touch of mayonnaise can deliver creaminess, while a California twist may include avocado slices for an extra layer of flavor.
Seasonal adaptations can significantly change the salad’s profile. In the fall, add roasted butternut squash for warmth, or in the summer, fresh cherries can add a refreshing sweetness. If you have dietary considerations, substituting grilled tofu for chicken can make this salad vegan while still offering plenty of protein.
For those who enjoy spicing things up, consider mixing in slices of jalapeño or a spicy dressing to give the salad a kick that pairs beautifully with the sweet cranberries and rich pecans.
Texture modifications can also bring new life to the recipe; try adding toasted quinoa or farro for a chewy component that enhances the salad’s heartiness. For a modern touch, serving the dish in lettuce cups instead of on apple slices can present this classic recipe in a trendy new format.
Serving and Presentation Guide
When it comes to plating the Chicken Pecan Cranberry Salad, start by choosing an attractive serving dish. Utilizing a large platter showcases the colorful components beautifully. For individual servings, use small bowls or glasses that allow guests to see the vibrant layers.
To add a decorative touch, consider garnishing with sprigs of fresh herbs like dill or parley, which not only looks appealing but also provides an extra aroma. Slices of apples can be arranged artfully around the edge of the plate as a colorful border.
Traditional accompaniments include crusty bread or crackers served alongside the salad. For a modern flair, pair it with a light, sparkling drink to refresh the palate between bites.
Ensure the salad is served at a cool temperature, as this enhances its fresh flavors. Keeping a proper portion size in mind while plating also ensures guests have enough without being overwhelmed, contributing to a pleasant dining experience.
Wine and Beverage Pairing
Pairing the Chicken Pecan Cranberry Salad with the right beverage can elevate your meal. A crisp Sauvignon Blanc complements the freshness of the apples and chicken, offering a palate-cleansing effect that enhances the experience. For a red option, a chilled Pinot Noir can provide a lovely contrast to the sweet elements while maintaining a mellow tone.
If you’re looking for non-alcoholic alternatives, consider serving sparkling water infused with lemon or cucumber. The refreshing qualities of the drink balance beautifully with the salad’s richness, ensuring a delightful combination.
For those who enjoy warming beverages, a cup of chamomile tea after the meal can aid digestion while providing a soothing finish to your dining experience. Always serve these drinks chilled or at room temperature for the best flavor pairing.
Storage and Shelf Life
Proper storage of the Chicken Pecan Cranberry Salad is crucial for maintaining its quality. Store leftovers in an airtight container in the refrigerator to keep ingredients fresh. Generally, this salad is best consumed within 2-3 days to enjoy its crunchy textures and vibrant flavors.
When preparing the salad, consider storing the components separately. For instance, keep the apple slices separate until serving to avoid browning and sogginess. Properly stored, pecans can maintain their crunch for several weeks, while cranberries can last for months, making both ingredients excellent for quick meal prep.
Signs of spoilage include an off-smell, discoloration, or changes in texture, such as excessive mushiness in the apples. If any of these indicators arise, it is advisable to discard the salad for safety.
If you want to extend its lifespan, consider freezing the chicken and pecans separately. While freezing apples isn’t recommended, having the other ingredients prepped will allow for quick assembly when desired.
Make Ahead Strategies
Preparing the Chicken Pecan Cranberry Salad ahead of time requires a thoughtful approach to ensure optimum freshness. Begin by cooking the chicken and allowing it to cool before storing it in an airtight container in the fridge. This can be done up to two days in advance.
Chop the pecans and cranberries ahead of time as well, storing them in separate containers to maintain their integrity. When it comes to the apple slices, it’s recommended to cut them just before serving to prevent them from browning. Alternatively, tossing them in a bit of lemon juice can help keep them vibrant if prepped early.
While making the salad, assemble all ingredients except the dressing. This allows you to mix in the dressing right before serving, preserving the freshness.
Lastly, set aside any garnishes and add them just before serving to elevate the dish’s visual appeal and aroma.
Scaling Instructions
Scaling the Chicken Pecan Cranberry Salad can be straightforward. If you wish to halve the recipe, simply cut each ingredient measurement in half, and you will have a perfect portion for a smaller gathering or meal prep.
To double or even triple the recipe, keep ingredient ratios consistent, but be mindful of mixing in larger bowls to avoid spillage. This is especially important for the dressing, as it may require adjustment in quantity based on the vegetables’ distribution to ensure every piece is well-coated.
Adjustments to your equipment may also be necessary; larger mixing bowls and more extensive storage containers will be required for significant scaling. Always consider the size of your refrigerator when preparing larger batches to ensure proper storage.
Remember, timing may vary particularly when preparing components such as chicken, so plan accordingly to ensure all ingredients are well-prepared and even in fresh quality.
Nutritional Deep Dive
The Chicken Pecan Cranberry Salad offers an impressive macro breakdown. Each serving provides lean protein from chicken, essential for muscle repair and overall health, while healthy fats from pecans contribute to heart health and assist in nutrient absorption.
Micronutrient analysis reveals high levels of vitamins and antioxidants, particularly from cranberries and apples. These ingredients not only boost immunity but also provide the fiber necessary for digestion. The presence of vitamin C from apples aids in maintaining skin health as well.
Additionally, the salad delivers significant health benefits, such as weight management options due to its high fiber and protein content. This can lead to increased satiety, helping individuals maintain healthy eating habits.
Dietary considerations are straightforward with this recipe. The inclusion of lean proteins makes it suitable for various dietary needs, including those focusing on fitness or weight loss. Moreover, it can easily be adapted to cater to nutritional guidelines across different dietary preferences.
Lastly, because the salad is flavorful and satisfying, portion analysis is essential. A proper serving is around one cup, allowing you to control caloric intake without sacrificing flavor or nutrition.
Dietary Adaptations
Adapting the Chicken Pecan Cranberry Salad for specific dietary needs is attainable. For gluten-free eaters, this recipe is naturally gluten-free; just ensure that any dressings used are also certified gluten-free.
If you’re catering to dairy-free individuals, consider replacing any creamy dressing with a vinaigrette or a dairy-free alternative, ensuring everyone can enjoy the dish equally.
Vegans can replace chicken with grilled tofu or chickpeas, providing a rich protein source that maintains texture within the salad.
For those following low-carb or keto diets, substitute the apple slices with slices of cucumber or celery to reduce carb count while keeping that crunchy texture.
Paleo enthusiasts can maintain the integrity of the recipe, simply focusing on whole, unprocessed ingredients, while low-FODMAP followers can exclude cranberries and substitute with lactose-free dressings to enjoy the dish without discomfort.
Troubleshooting Guide
Texture issues may arise if the salad sits too long; it risk becoming soggy. To remedy this, keep prepped ingredients chilled and only mix them together before serving to preserve their crispness.
Flavor balance is key; if the salad tastes bland, try adding more seasoning or a splash of lemon juice to brighten flavors without overdoing it.
Temperature problems can be resolved by ensuring all components are at the right temperature before assembly. If something has been left out too long, cool it or re-chill before combining.
Equipment challenges often occur if the chicken isn’t cooked properly. Always aim to use a meat thermometer for accurate temperature readings to avoid undercooked or dry chicken.
Ingredient substitutions can create variations in taste and texture, so if you’re following a different recipe, taste as you go to adjust the flavors accordingly.
Timing concerns can be critical, especially if you’re in a hurry. Plan your steps ahead, and start with the components that take the longest—chicken and nuts—to ensure everything else falls into place seamlessly.
Recipe Success Stories
Community feedback regarding the Chicken Pecan Cranberry Salad has often highlighted how versatile and approachable the recipe is. Many readers share their personal adaptations, such as incorporating seasonal fruits or adjusting the dressing to suit family tastes. These variations not only provide inspiration but also foster a sense of community and sharing in the kitchen.
Photographs submitted by readers have showcased beautiful presentations, giving advice on plating techniques that make the salad visually appealing, adding to the overall dining experience.
In their success stories, readers often emphasize the salad’s role as a go-to dish for gatherings, praising its flavor and easy preparation. These experiences reflect a positive community dialogue, where individuals find joy in recreating and sharing delicious meals with loved ones.
Additionally, recipe suggestions provided by the audience, such as different side dishes, have led to further experimentation and exploration in their cooking adventures. Recipes shared in family gatherings evoke fond memories and encourage others to turn their innovations into new traditions.
Frequently Asked Questions
1. Can I use leftover chicken for this salad?
Yes, leftover cooked chicken works perfectly in this salad. Simply chop it into bite-sized pieces and mix it with the other ingredients. Using rotisserie chicken also adds great flavor and saves time.
2. What type of apples is best for this recipe?
Crisp varieties like Honeycrisp, Fuji, or Granny Smith are excellent choices. Their firmness helps maintain texture in the salad and their sweet or tart flavors complement the other ingredients well.
3. Can I make this salad ahead of time?
Yes, you can prepare most of the ingredients in advance but keep the apple slices separate to avoid browning. Halve the prep time by chopping everything except the apples and mixing them shortly before serving.
4. How long will leftovers last in the refrigerator?
The salad is best consumed within 2-3 days. Store it in an airtight container in the refrigerator to keep it fresh for as long as possible.
5. What can I use instead of pecans?
If you don’t have pecans, walnuts or slivered almonds work well. They provide a similar crunch and nutty flavor that enhances the salad.
6. Is this salad suitable for meal prep?
Absolutely! The salad is easy to prepare in advance for lunches or snacks. Just remember to keep ingredients like apples separate until it’s time to eat to maintain their freshness.
7. Can I use fresh cranberries instead of dried?
While fresh cranberries can be used, they are quite tart, so you may want to add a sweetener to balance out the flavors. Dried cranberries add a pleasant sweetness that complements the salad nicely.
8. What dressing pairs well with this salad?
A light vinaigrette or dressing made with yogurt pairs well, but you can also use a honey mustard dressing for a sweet touch that complements the salad’s ingredients.
9. How do I prevent my apples from browning?
Toss apple slices with a little lemon juice immediately after cutting to help prevent browning. This not only keeps them looking fresh but also adds a slight tang.
10. Can I add other vegetables to this salad?
Definitely! Consider adding chopped celery, diced bell peppers, or even shredded carrots for added crunch and nutrition. Feel free to get creative with whatever vegetables you enjoy.
Additional Resources
For those looking to expand their culinary repertoire, consider exploring related recipes such as quinoa salads, fruit-based dishes, or other chicken salads that highlight unique flavor combinations. Technique guides on salad preparation can also enhance your skills, particularly in knife techniques and ingredient pairings.
Ingredient information on various nuts, fruits, and salad dressings can be beneficial when considering alternative options or additional elements to include in your meals. Lastly, looking into seasonal variations can inspire creative dishes that showcase what’s fresh at local markets, enhancing your cooking adventures with nature’s bounty.
Join the Conversation
We invite you to share your experiences with the Chicken Pecan Cranberry Salad on social media or in the comments section below! Be sure to tag us in your photos and share how you adapted the recipe to suit your tastes. Your photography tips can help others capture stunning images of their own creations.
We also encourage you to leave reviews or suggestions for variations that worked well for you. Engaging with others ensures the community thrives as we all explore exciting culinary possibilities together!
The Recipe
Chicken Pecan Cranberry Salad on Apple Slices
Serves: 4 servings
Prep Time: 15 mins
Cook Time: 0 mins
Total Time: 15 mins
Kitchen Equipment Needed
Sharp knife
Cutting board
Mixing bowls
Airtight storage container
Ingredients
2 cups cooked chicken, shredded
1/2 cup chopped pecans
1/2 cup dried cranberries
2 medium apples, sliced
1/2 cup plain Greek yogurt
1 tablespoon honey
Salt and pepper to taste
Directions
In a large mixing bowl, combine the shredded chicken, chopped pecans, and dried cranberries.
In a separate bowl, mix the Greek yogurt and honey until well combined. Season with salt and pepper.
Pour the yogurt dressing over the chicken mixture and stir until evenly coated.
Serve the chicken salad on apple slices for a refreshing crunch.
Recipe Notes
For added flavor, toast the pecans in a dry skillet before adding them to the salad.
For a sweeter taste, add more honey to the yogurt dressing.
This recipe can be made gluten-free by ensuring all ingredients are certified gluten-free.
Delicious Beef and Shrimp with Fresh Pesto Sauce Recipe
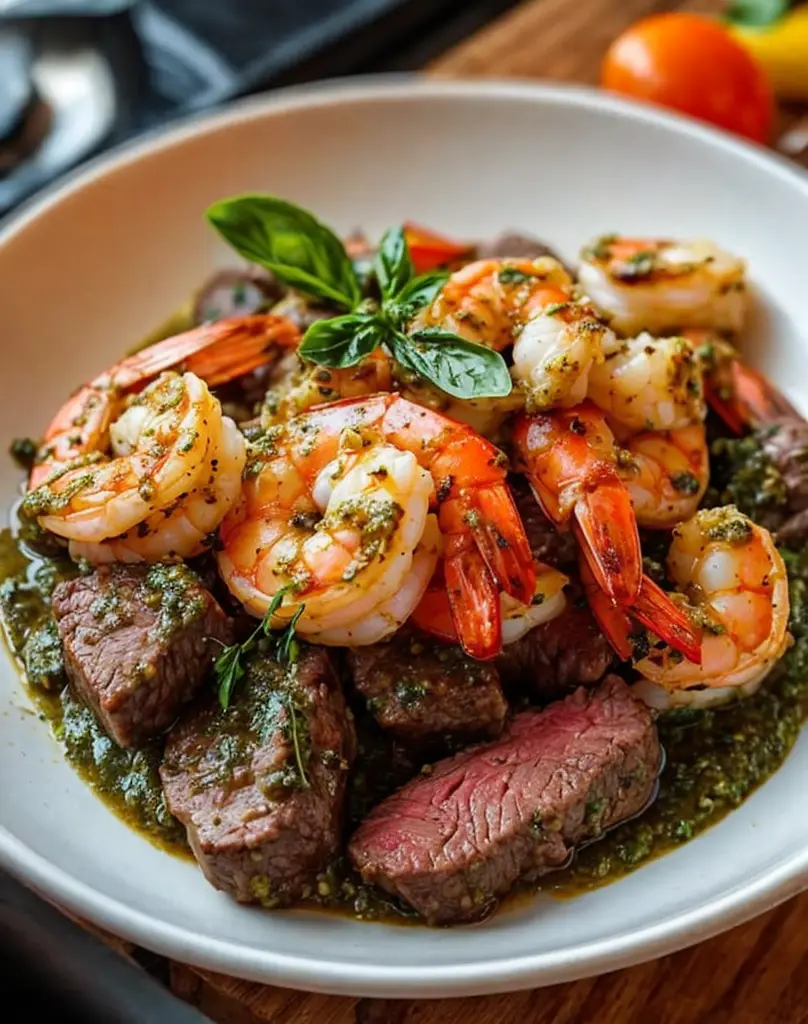
Beef and Shrimp with Pesto Sauce: A Flavorful Delight
⚖️
Difficulty
Intermediate
⏲️
Prep Time
20 mins
🕒
Cook Time
30 mins
⏱️
Total Time
50 mins
🍽️
Servings
4
Beef and Shrimp with Pesto Sauce is a delightful dish that’s bursting with flavor and offers an exciting twist to your usual weeknight meals. This recipe combines the rich, savory taste of beef and the delicate sweetness of shrimp, both coated in a vibrant, herbaceous pesto sauce. The marriage of these two proteins creates a harmonious balance, where the creaminess of the pesto enhances each ingredient’s natural flavors, ensuring every bite is a delicious experience.
The beauty of this dish lies not only in its taste but also in its visual appeal. Picture seared beef strips paired with plump, juicy shrimp, all draped in a bright green pesto that beckons you to dig in. Serve this colorful dish over pasta or alongside a crisp salad for a meal that’s perfect for both casual family dinners and elegant gatherings. The vivid colors and enticing aromas will certainly impress your guests and set the stage for a memorable dining experience.
Quick Recipe Highlights
Flavor Profile: The dish features a robust blend of savory beef, sweet shrimp, and fragrant basil, making each mouthful a burst of flavor.
Texture: Expect a delightful contrast between the tender beef, succulent shrimp, and the creamy consistency of the pesto sauce.
Aroma: You’ll be enchanted by the aromatic scent of fresh basil and garlic as they meld while cooking.
Visual Appeal: A feast for the eyes, this dish showcases the bright green of the pesto against the colorful proteins.
Skill Level Needed: Requires basic cooking skills, making it accessible for home cooks looking to enhance their culinary repertoire.
Special Equipment: A good skillet or sauté pan for cooking is essential, along with a food processor for peak flavor.
Recipe Overview
Difficulty Level: This intermediate-level recipe can be mastered with basic cooking techniques, such as sautéing and combining flavors, making it feasible for home cooks with some experience.
Category: This recipe falls under the dinner category, perfect for a hearty meal that satisfies both family and guests alike.
Cuisine: Combining elements from Mediterranean cuisine, the use of pesto ties this dish to both Italian culinary traditions and contemporary flavor profiles.
Cost: The cost of ingredients is reasonably accessible, with beef and shrimp being the main expenses, while pesto can be homemade or store-bought.
Season: Ideal for any season, this dish brings warmth in colder months and is light enough for summer dining, especially with fresh herbs.
Occasion: Perfect for family dinners or special occasions, it pairs well with a glass of wine and can be dressed up for entertaining.
Why You’ll Love This Recipe
The incredible taste and texture of Beef and Shrimp with Pesto Sauce make it an unforgettable dish. The savory notes from the beef harmonize beautifully with the sweetness of the shrimp, while the smooth and creamy pesto sauce ties everything together, creating a luscious coating that begs to be savored. This dish is built for those who appreciate rich flavors and want to treat themselves or their loved ones to a gourmet experience.
Preparation is simple, making this dish a go-to for busy weeknights or entertaining. A short prep time allows you to bring this protein-packed meal to the table quickly, without sacrificing flavor. With preparing the ingredients taking just 20 minutes and cooking time only adding another half hour, you’ll find yourself enjoying this wholesome dish from stove to table in no time.
Nutritionally, this recipe stands out with its rich protein content from both the beef and shrimp, alongside the healthy fats found in the pesto. Packed with vitamins, minerals, and antioxidants from fresh ingredients, this dish can contribute to a balanced diet while satisfying cravings for flavor and indulgence.
Socially, Beef and Shrimp with Pesto Sauce is a crowd-pleaser that can effortlessly elevate any gathering. If you enjoy hosting dinner parties or family get-togethers, serving this dish not only showcases your cooking skills but also encourages conversation and enjoyment around the dinner table.
From a cost standpoint, this recipe is a fantastic investment for your meal planning. With reasonably priced ingredients and accessible options for substitution, you can whip up a stunning meal without breaking the bank, showcasing that gourmet cooking is achievable at home.
Historical Background and Cultural Significance
The origins of pesto trace back to Italy, particularly from the Liguria region, where fresh basil and pine nuts were blended with cheese and olive oil into a vibrant sauce. This traditional preparation has influenced many recipes worldwide, incorporating local ingredients and customs, which brings us the delightful fusion of flavors found in this Beef and Shrimp with Pesto Sauce.
Culturally, pesto represents the celebration of local produce and seasonal ingredients, highlighting the importance of freshness and simplicity in Mediterranean cooking. Many Italian families have their unique versions of pesto, completing a rich tapestry of flavors and variations across Italy, each telling a story of tradition and culinary creativity.
Over time, this dish has evolved from its traditional roots, adapting to include various proteins such as beef and shrimp, which bring an exciting blend of tastes and textures to the traditional pesto experience. This delicious twist on a classic showcases the versatility of pesto sauce, promoting it as a cornerstone for modern culinary experimentation.
Regional variations abound, with some versions of pesto integrating different nuts or cheeses, or even substituting roasted vegetables for a unique twist. This adaptability keeps the essence of the dish alive, while also making it a modern favorite in households globally, inspiring home cooks to invent their variations and cater to their taste preferences.
Ingredient Deep Dive
Beef: Beef is a staple protein in many cultures, offering numerous nutritional benefits, including protein, iron, and other essential vitamins. Selecting high-quality cuts, such as flank steak or sirloin, ensures a tender and flavorful outcome. Store beef wrapped tightly in the refrigerator for freshness, and consider marinating it to enhance flavor and tenderness. For alternatives, chicken or pork can work, providing different flavor profiles.
Shrimp: Shrimp is renowned for its delicate taste and is a low-calorie source of protein. Rich in omega-3 fatty acids, it supports heart health and provides essential nutrients such as selenium and vitamin B12. When selecting shrimp, opt for fresh or frozen wild-caught varieties for better flavor. Store shrimp in the coldest part of your refrigerator and consume within a couple of days. For substitutions, consider scallops or firm fish, which will still provide a satisfying texture and taste.
Pesto Sauce: Pesto sauce is traditionally made from fresh basil, garlic, pine nuts, and olive oil, infused with a rich history in Italian cuisine. It’s packed with vitamins and antioxidants, providing both flavor and nutrition. To ensure freshness, use basil that is vibrant green and fragrant, and store pesto in an airtight container in the fridge for longer shelf life. Alternatives for pesto can include other herbs like cilantro or spinach blended with nuts like walnuts, offering variations that cater to personal preferences.
Common Mistakes to Avoid
Overcooking the beef or shrimp can lead to tough textures; ensure you cook each protein to the appropriate internal temperature, which for shrimp is just opaque and firm, while beef should be seared and juicy.
Using stale or low-quality pesto can diminish flavor; always opt for fresh or high-quality store-bought versions for the best taste impact.
Not seasoning adequately can result in bland dishes; remember to taste and adjust seasoning throughout the cooking process.
Skipping marinating the beef can lessen depth in flavor; marinate prior to cooking to infuse flavor and tenderize the meat.
Overcrowding the pan during cooking can lead to steaming instead of searing; cook in batches if necessary to achieve that coveted golden-brown crust.
Forgetting to let the beef rest post-cooking can cause juices to seep out; allowing it to rest for a few minutes before slicing can enhance juiciness.
Not using enough heat can lead to prolonged cooking; ensure your skillet or pan is hot enough to properly sear proteins for optimal flavor.
Neglecting to balance accompaniments, such as pasta or sides, can lack harmony in the meal; pay attention to pairing for a well-rounded dining experience.
Using dried herbs instead of fresh in the pesto can give a different flavor profile; fresh herbs will yield a more vibrant sauce.
Not adjusting pesto according to personal taste preferences can lead to a one-note flavor; add additional lemon juice or cheese to customize to your liking.
Essential Techniques
Searing Meat: Searing is crucial as it locks in moisture and develops a flavorful crust. Start with a hot skillet, ensuring the oil is shimmering but not smoking, then place the beef in without crowding. Allow it to cook undisturbed for a few minutes before flipping, at which point you should see a rich brown crust forming. Aim for a well-formed crust without burning!
Making Pesto: Making pesto is an essential skill that requires understanding flavors and balance. Start by blending nuts and garlic, followed by adding fresh basil, and drizzle in olive oil until it reaches a creamy consistency. Variations can include adding different cheeses or using different herbs. Avoid over-blending for a chunky texture that adds interest!
Pro Tips for Perfect Beef and Shrimp with Pesto Sauce
1. Use freshly prepared pesto for a vibrant flavor that will elevate the dish. If you’re short on time, consider buying high-quality pesto but be sure to taste-test for balance.
2. For an extra punch of flavor, add a splash of lemon juice to the pesto before mixing in the proteins; it brightens up the dish remarkably.
3. When preparing the beef, let it come to room temperature before cooking; this ensures even cooking and prevents toughness.
4. Consider adding seasonal veggies for added color and nutrition. Vegetables like bell peppers or zucchini pair well with this recipe!
5. Invest the time in marinating the beef; even a short 15-minute soak in a flavorful marinade can make a significant difference in taste and tenderness.
6. For a creative twist, try using zoodles (zucchini noodles) instead of pasta for a lower-carb alternative that’s equally delicious.
7. Don’t skimp on garnishing; a sprinkle of freshly grated Parmesan or a few pine nuts on top can add a delightful contrast.
8. Always taste as you go; this practice allows you to adjust seasoning and identify areas for improvement while you cook.
Variations and Adaptations
One variation to consider is to move away from traditional beef and shrimp, opting for chicken or firm tofu instead. This adaptation allows those with dietary restrictions to enjoy the dish while maintaining similar textures and flavors. Additionally, swapping out regular pasta for gluten-free options or lentil-based noodles provides further accessibility for those with special dietary needs.
Seasonally inspired variations can bring a fresh twist! In summer, incorporate fresh cherry tomatoes and spinach into the dish for a light, seasonal update. Alternatively, using roasted root vegetables in fall can lend warmth and depth to the overall flavor profile.
Flavors can also be adjusted based on personal tastes; experimenting with different herbs such as arugula or cress can yield exciting results. If you’re feeling adventurous, try infusing the pesto with spicy elements such as red pepper flakes for a kick.
For those looking to enhance texture, consider adding toasted nuts or crispy shallots on top just before serving; these elements can provide a satisfying crunch against the creamy pesto and tender proteins.
Careful presentation can make a dish memorable; plate the beef and shrimp in a shallow bowl, finish with a drizzle of high-quality olive oil, and add colorful edible flowers for a gourmet touch.
Serving and Presentation Guide
The presentation of Beef and Shrimp with Pesto Sauce can elevate the dining experience. Start with a clean, white plate or a shallow bowl, contrasting the vibrant green of the pesto with the colors of the proteins. Twirl pasta elegantly in the center, placed delicately against diced tomatoes or fresh greens.
For garnishing, consider using fresh basil leaves or a sprinkle of pine nuts to add a rustic flair. A light drizzle of extra virgin olive oil over the finished dish can enhance flavors and add gloss. If serving a crowd, consider family-style plating in large bowls, allowing guests to serve themselves in a communal, friendly atmosphere.
Pair hot bread or a light salad on the side to balance the richness, and serve everything at the same temperature to maintain harmony. For an inviting touch, add warm, colorful napkins to set the stage for an intimate dining experience.
Wine and Beverage Pairing
When it comes to wine pairing, opt for a light-bodied white like Pinot Grigio or a crisp Sauvignon Blanc to complement the seafood and herbal notes from the pesto. These wines have the acidity needed to balance out the richness of the beef and shrimp perfectly.
For those who prefer red, a light Chianti can also work, with its bright acidity providing a nice contrast to the dish. If you’re looking for non-alcoholic options, a sparkling water with a twist of lemon offers refreshment and enhances the dish’s herbal characteristics.
Consider serving iced tea or a light herbal tea, especially in warmer weather, for a refreshing complement. Keep temperature in mind; whites should be served chilled, while lighter reds are ideally enjoyed at slightly below room temperature.
Storage and Shelf Life
To store any leftovers, transfer them to an airtight container and refrigerate within two hours of cooking. This dish is best consumed within three days to maintain freshness. For longer storage, consider freezing the beef and shrimp separately from the pesto, which can lose its texture when thawed.
Always label containers with the date to keep track of shelf life. Signs of spoilage include off odors or discoloration, particularly in the shrimp, which can indicate deterioration. When reheating, do so slowly in a pan over low heat to ensure even warming without overcooking.
If you’re freezing leftovers, portion them first so that you can thaw only what you need. This method keeps the dish enjoyable without sacrificing quality! When ready to serve, allow to thaw in the refrigerator overnight for optimal texture.
Make Ahead Strategies
To create an efficient cooking experience, consider preparing pesto a day in advance; it allows flavors to deepen and enhances overall taste. Additionally, you can marinate the beef several hours prior to cooking, which will make dinner a breeze when it’s time to prepare.
Peel and devein shrimp ahead of time, storing them in a covered container with ice for freshness. This step saves time during cooking and ensures maximum convenience, especially on busy weeknights.
Once cooked, allow the dish to cool completely before storing in the refrigerator. If you plan to serve to guests, completing simple sides like salads a few hours ahead can alleviate stress during the main meal preparation.
Lastly, consider prepping pasta separately; cook and chill it a few hours earlier so that it can easily be combined with the proteins at serving time without overcooking.
Scaling Instructions
If you wish to halve the recipe, simply divide all ingredient amounts by two, adjusting cooking times as needed based on quantity – smaller batches may cook faster. Conversely, to double or triple the serving size, ensure you have a large enough skillet to accommodate the increased volume without overcrowding.
When cooking larger quantities, maintain consistent cooking temperatures and closely monitor the doneness of proteins, as they may require different timing.
Also, account for additional storage space if preparing larger batches for later use; ensuring proper refrigeration will help maintain quality. Finally, communicate your adjustments and timing changes to those assisting in the kitchen to ensure a smooth cooking process.
Nutritional Deep Dive
Beef and Shrimp with Pesto Sauce offers an array of nutritional benefits. The protein content from both beef and shrimp makes this dish a satisfying choice for muscle repair and growth. Each serving contains essential amino acids, supporting overall health.
While the dish is rich in protein, it also provides healthy fats from the olive oil in the pesto, which can help in promoting heart health and reducing inflammation. The inclusion of fresh basil in the pesto adds vitamins A, K, and antioxidants that are beneficial to the immune system.
However, portion control is crucial; while packed with nutrition, the calorie content can be significant, especially when served with pasta. Monitoring serving size can aid in weight management strategies, allowing enjoyment of the dish without overindulgence.
Lastly, the use of fresh herbs and vegetables provides essential vitamins and minerals, making this recipe not just satisfying but also a well-rounded component of a balanced diet.
Dietary Adaptations
For a gluten-free version of the Beef and Shrimp with Pesto Sauce, simply serve it over gluten-free pasta or zoodles to cater to dietary needs. Those following a dairy-free lifestyle can replace parmesan with nutritional yeast or omit it entirely, while still enjoying delicious flavors from the other ingredients.
If you’re looking into a vegan adaptation, substitute beef and shrimp with hearty vegetables like mushrooms or jackfruit marinated and sautéed. You can also make a vegan pesto using nuts, nutritional yeast, garlic, and extra virgin olive oil.
Those following a low-carb or keto diet can focus on the proteins and vegetables, serving them over a bed of leafy greens or cauliflower rice instead of traditional pasta. Paleo enthusiasts may also enjoy this dish by ensuring the pesto and seasoning adhere to their dietary guidelines, using whole food ingredients.
Other specific dietary considerations like low-FODMAP diets can replace ingredients like garlic with garlic-infused olive oil to minimize digestive discomfort while still capturing robust flavors.
Troubleshooting Guide
Texture issues can often result from overcooked shrimp or beef. To achieve the right doneness, follow cooking time guidelines carefully, keeping in mind the protein’s thickness and remove from heat while still tender.
Flavor balance may occasionally be skewed due to under-seasoning; always incorporate salt and taste during cooking to achieve a harmonious profile, adjusting seasoning gradually.
Temperature problems can also arise from a skillet too hot or not hot enough; use medium-high heat for steaks and medium for shrimp and monitor closely to avoid burning or steaming.
If ingredient substitutions lead to unexpected results, maintaining consistent cooking protocols can help mitigate challenges; ensure that the substitute proteins or vegetables are suited for the same preparation methods as they can affect cooking times.
Timing concerns in preparing accompanying dishes can impact the overall serving; consider meal prep days for larger gatherings, ensuring that each component is ready simultaneously.
Recipe Success Stories
Community feedback on Recipe Success Stories often highlights variations and unique adaptations made by home cooks. Stories include swirling vibrant pesto through fresh zoodles and watching family members enjoy the healthy twist on pasta. Many readers have shared how the recipe is a hit, often making it a staple in their meal rotation.
Variation successes often emerge from including unique proteins or altering the pesto for a personalized taste. Some readers have reported that substituting traditional nuts for sunflower seeds yielded a delightful, nut-free pesto that children adore.
Adaptation stories frequently come up in discussions where home cooks took note of specific dietary needs, replacing shrimp with chickpeas, demonstrating that creativity triumphs in the kitchen.
Photography tips also create community excitement, as readers share their colorful dishes online to showcase vibrant ingredients and plea for compliments about composition and style, further building a bond among aspiring cooks.
Frequently Asked Questions
Can I use frozen shrimp for this recipe?
Yes, you can use frozen shrimp. Just be sure to thaw them thoroughly before cooking, as this ensures even cooking and prevents the shrimp from becoming chewy. Place them in the refrigerator overnight or run them under cold water to defrost quickly.
What can I substitute for pesto?
If you don’t have pesto on hand, consider using store-bought options or making a quick blend of fresh herbs, nuts, garlic, and olive oil. Alternatively, a creamy avocado sauce can also give you a similar creamy texture with a unique flavor twist.
How can I store leftovers?
Leftovers should be stored in an airtight container in the refrigerator and are best consumed within three days. When reheating, do so gently on the stove to prevent the shrimp from becoming tough.
Is this dish suitable for meal prep?
This dish is great for meal prep! You can prepare everything in advance and store each component separately, ensuring freshness. Combine them when you’re ready to eat for optimal taste and texture.
What are some good side dishes to serve with this?
Pairing this dish with a light arugula salad, garlic bread, or grilled vegetables can elevate your meal experience. For a comforting option, serve with creamy polenta or risotto.
Can I make this dish dairy-free?
Yes, you can make this dish dairy-free by omitting parmesan cheese from the pesto. Alternatively, nutritional yeast offers a cheesy flavor without dairy.
What cuts of beef work best?
Flank steak or sirloin are excellent choices for this recipe, as they cook quickly and become tender when marinated. Choose lean cuts to balance the richness of the shrimp.
How do I know when the shrimp is cooked?
Shrimp is cooked when it turns pink and opaque, with a firm texture. It only takes a few minutes to cook, so keep an eye on it to avoid overcooking.
Can I scale this recipe up for a larger gathering?
Absolutely! You can easily scale the ingredients up or down. Ensure your cooking vessel can accommodate the additional amounts, and adjust the cooking times as needed based on your equipment.
What’s the best way to serve it?
Serving this dish in a shallow bowl with the beef and shrimp over pasta or along with a crisp salad not only creates visual appeal but also invites guests to enjoy a cozy dining experience.
Is there a vegetarian version of this recipe?
You could make a vegetarian version by swapping the beef and shrimp for a hearty combination of grilled vegetables and cannellini beans for protein, while still enjoying the flavorful pesto.
Additional Resources
For those interested in exploring more delightful recipes, consider looking at seasonal dishes that incorporate fresh herbs and vegetables or dive into techniques related to Italian cuisine. Resources on different methods of preparing seafood and meat will also enrich your cooking skills and understanding.
Additionally, checking out equipment recommendations can help fine-tune your kitchen with essential tools like food processors and non-stick pans that make preparation smoother. Embracing seasonal fresh produce will lead to exceptional variations, keeping your meals vibrant and tasty throughout the year.
Join the Conversation
Engage with like-minded individuals by sharing your photos and experiences on social media platforms. Utilize hashtags related to the recipe, gathering a community of home cooks excited about trying and adapting this dish.
Share insights and photography tips about the best plating techniques or variations you’ve tried, fostering enthusiasm. Encouraging others to review their adaptations allows everyone to learn and explore this delicious world of cooking together while creating lasting memories among friends and family.
The Recipe
Beef and Shrimp with Pesto Sauce
Serves: 4
Prep Time: 20 mins
Cook Time: 30 mins
Total Time: 50 mins
Kitchen Equipment Needed
Large skillet or sauté pan
Knife
Cutting board
Food processor or blender
Tongs
Ingredients
1 lb flank steak, sliced into strips
1 lb shrimp, peeled and deveined
1 cup fresh basil leaves
1/2 cup olive oil
1/2 cup grated Parmesan cheese (optional)
1/4 cup pine nuts
3 cloves garlic
Salt and pepper to taste
8 oz pasta of choice (optional)
Directions
In a food processor, combine basil, olive oil, Parmesan cheese, pine nuts, and garlic. Blend until smooth and season with salt and pepper.
In a large skillet, heat a tablespoon of olive oil over medium-high heat. Add the sliced beef and cook until browned, approximately 4-5 minutes. Remove and set aside.
In the same skillet, add the shrimp and cook until pink and opaque, about 3-4 minutes. Return the beef to the skillet.
Pour the pesto sauce over the beef and shrimp mixture, stirring to combine well. Cook until everything is heated through.
If using pasta, cook according to package instructions. Drain and serve topped with beef and shrimp mixture.
Enjoy your flavorful Beef and Shrimp with Pesto Sauce!
Recipe Notes
For a spicy kick, add red pepper flakes to the pesto.
Feel free to add seasonal vegetables for additional nutrition and flavor.
Savor Red Snapper and Shrimp Grits with Cajun Cream Sauce
Red Snapper, Shrimp & Grits with Cajun Cream Sauce: A Flavorful Southern Delight
⚖️
Difficulty
Medium
⏲️
Prep Time
20 mins
🕒
Cook Time
30 mins
⏱️
Total Time
50 mins
🍽️
Servings
4 servings
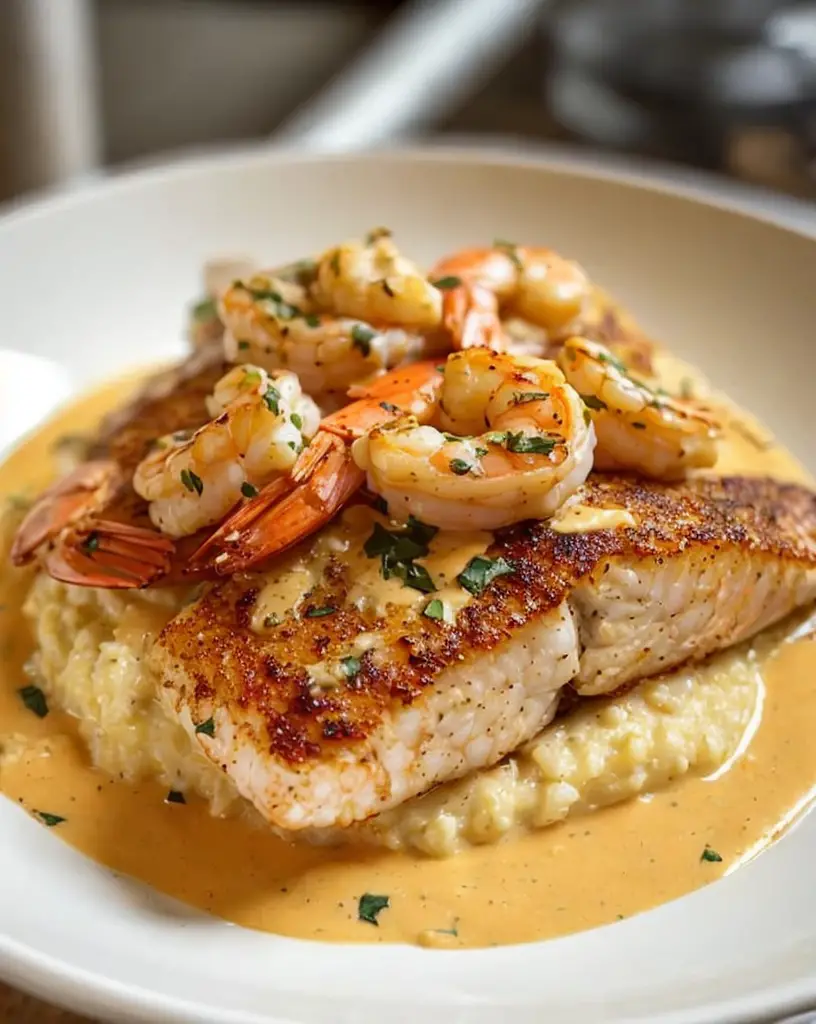
Indulge your senses with this Red Snapper, Shrimp & Grits with Cajun Cream Sauce recipe that brilliantly captures the soul of Southern cuisine. The enchanting blend of fresh seafood combined with creamy grits and a zesty Cajun cream sauce creates a dish that is both comforting and sophisticated. Red snapper, with its delicate, flaky texture, and succulent shrimp, offer a delightful taste of the sea, while the creamy sauce enhances the flavors, making your heart sing.
This dish not only satisfies your palate but also serves as a feast for your eyes. Picture a beautiful plate of vibrant colors—hearty golden grits topped with rich red snapper fillets and plump shrimp, all drizzled with a gorgeous Cajun sauce. It’s an experience that beckons for gatherings or intimate dinners, promising to impress and delight your guests alike. Dive into this culinary adventure and make your mealtimes memorable!
Quick Recipe Highlights
Flavor Profile: Savory, creamy, with a hint of spice from Cajun seasoning.
Texture: Creamy grits contrasting with flaky fish and succulent shrimp.
Aroma: Inviting notes of garlic, herbs, and seafood mingled with cream.
Visual Appeal: A colorful presentation with vibrant seafood atop creamy base.
Skill Level Needed: Intermediate, requiring basic cooking and seasoning skills.
Special Equipment: Skillet, pot for grits, spatula, and measuring cups.
Recipe Overview
Difficulty Level: This recipe is rated as medium difficulty, combining various techniques such as sautéing, simmering, and blending flavors. It requires attention to detail but is manageable for any home cook with some experience.
Category: This dish fits beautifully into a dinner meal, perfect for cozy family evenings or festive gatherings, bringing warmth and comfort to the table.
Cuisine: Rooted in Southern culinary traditions, this dish showcases the flavors of the Gulf Coast, bringing together seafood, cream, and Cajun spices.
Cost: Ingredients are accessible, with seafood variations available to fit different budgets while ensuring high-quality flavors.
Season: Fantastic year-round, but especially appealing in warmer months when seafood is at its peak freshness.
Occasion: Ideal for family dinners, celebrations, or impressing guests at your next gathering.
Why You’ll Love This Recipe
This Red Snapper, Shrimp & Grits with Cajun Cream Sauce dish satisfies a variety of taste buds while providing an exciting eating experience. The balanced blend of flavors from the seafood and the creamy sauce will take your taste buds on a delightful journey. As the spices dance with the richness of the cream, you will find that every bite feels like a moment of indulgence, bringing a taste of the South right to your table.
The convenience of this recipe is another aspect that makes it a winner. With its relatively quick prep and cook times, you can bring together this feast without spending hours in the kitchen. In just 50 minutes, you can have an impressive dish ready to serve, making it perfect for both casual and special occasions alike.
When it comes to nutrition, this dish provides a delightful way to enjoy seafood. Rich in omega-3 fatty acids from the red snapper and shrimp, this recipe not only tantalizes your palate but also nourishes your body. Pairing it with grits rounds out the meal, offering a satisfying source of carbohydrates that fuel energy.
Socially speaking, this dish is great for sharing. Whether it’s a dinner party or a family gathering, the eye-catching presentation and rich flavors are sure to spark conversation. Food has a unique ability to bring people together, and this recipe fits that bill perfectly.
Lastly, cost-effectiveness is key here. With a mix of easily accessible ingredients and affordable options for seafood, you can create a real showstopper without breaking the bank. The versatility of the recipe also allows for substitutions, ensuring you can keep it within your budget while achieving a delicious result.
Historical Background and Cultural Significance
The origins of shrimp and grits can be traced back to the Lowcountry of South Carolina, where these ingredients were staples among coastal communities. This dish has evolved from humble roots to become a symbol of Southern cuisine, loved by locals and visitors alike. Traditionally a breakfast dish for fishermen, it has transformed into a beloved dinner option in restaurants around the globe.
Culturally, shrimp and grits remain an iconic and essential part of Southern heritage. It reflects the area’s rich history and reliance on fresh seafood, bringing together various influences from Native American and African culinary traditions. This recipe embodies the heart of the South, celebrating the bounty of the ocean and the uniqueness of its flavors.
Over the years, as chefs have experimented with this classic pairing, variations have emerged, such as the inclusion of different proteins, spices, and sauces. The addition of Cajun cream sauce to our Red Snapper & Shrimp Grits recipe offers a modern twist that pays homage to traditional flavors while appealing to contemporary tastes.
Regional variations can be found across the Southern United States, each touting unique ingredients or modifications influenced by local culture. Whether you’re in Louisiana enjoying a spicy rendition or in Charleston savoring a more traditional fare, this dish represents a collective memory and cultural significance that is celebrated in festivals and gatherings.
Ingredient Deep Dive
Red Snapper
Red snapper’s vibrant pink skin and mild flavor make it a favorite in seafood dishes. It is rich in omega-3 fatty acids, promoting heart health while also being a great source of protein. When selecting red snapper, look for clear, bright eyes and a firm texture. Store it in the coldest part of your fridge and consume it within two days for optimum freshness.
Shrimp
Shrimp, a staple in many coastal cuisines, not only provides a delightful seafood flavor but is also packed with lean protein and vital nutrients such as iodine, selenium, and vitamin B12. Opt for wild-caught shrimp when possible, as they are generally deemed healthier and more sustainable. Store shrimp in the refrigerator or freezer, ensuring it’s properly sealed to avoid freezer burn.
Grits
Grits are a traditional Southern side made from ground corn. They provide a creamy base that complements the flavors of the seafood beautifully. Choose stone-ground grits for a robust texture and flavor. Store unopened packages in a cool, dry place, while opened grits can be kept in an airtight container for freshness.
Cajun Cream Sauce
The Cajun cream sauce is what brings this dish to life, infusing it with a spicy kick and creamy texture. Made with simple ingredients like cream, butter, and spices, this sauce can elevate any dish. Keep your cream refrigerated and use it fresh for the best results.
Common Mistakes to Avoid
Using overcooked grits: Ensure you follow cooking instructions to achieve the perfect creamy texture.
Not seasoning adequately: Season each component, including the seafood and grits, for a well-rounded flavor.
Skipping the rest time: Allowing the seafood to rest after cooking can help maintain its juiciness.
Overcrowding the pan: When cooking seafood, it’s essential to avoid overcrowding, which can lead to steaming instead of searing.
Neglecting to taste: Always taste as you cook to adjust seasoning and flavors to your liking.
Using old spices: Ensure that your spices are fresh as they greatly affect the flavor of your Cajun sauce.
Improperly storing seafood: Only buy seafood you plan to use within two days of purchase to ensure freshness.
Ignoring presentation: A beautifully plated dish enhances the dining experience, so take a moment to present it well.
Essential Techniques
Cooking Grits
Cooking grits is fundamental as it determines the dish’s texture. To master this, remember to stir frequently and ensure that the water is at a rolling boil before adding the grits. Look for a creamy consistency without lumps; this indicates success.
Searing Seafood
Searing shrimp and red snapper brings out their natural flavors. Use a hot skillet and don’t move the seafood around too much; let it develop a crust. A good visual cue is a golden brown color, showing that it’s nicely seared.
Creating the Cajun Sauce
Creating a rich, flavorful Cajun cream sauce requires attention. Start with a base of shallots and garlic, allowing their aroma to develop, then slowly incorporate cream and seasoning. Avoid boiling the sauce vigorously, as this can cause separation.
Pro Tips for Perfect Red Snapper, Shrimp & Grits
– Use fresh, high-quality seafood to enhance the overall dish, impacting both flavor and texture.
– For creamier grits, consider adding extra butter and cheese during cooking.
– Marinate the seafood in the Cajun spices beforehand for a deeper flavor profile.
– Customize the heat level in the Cajun sauce by adjusting the spice amount to suit your taste.
– Taste and adjust seasonings throughout the cooking process for a well-balanced dish.
– Consider garnishing with chopped green onions or parsley for an added fresh touch.
– Serve immediately for the best texture and flavor, as seafood is best enjoyed fresh.
– Use a thermometer to ensure shrimp is cooked perfectly; it should reach 120°F internally.
Variations and Adaptations
Many adaptations can be made to this dish to cater to local preferences or individual dietary needs. For instance, if you prefer a different protein, feel free to substitute the red snapper with catfish or salmon. If you want to make it vegetarian, consider using sautéed vegetables in place of seafood.
Seasonal adaptations can also play a role here; in fall, integrating squash or pumpkin into the grits can enhance the dish’s flavor profile. You can also play with herbs and spices, adding rosemary or thyme in place of traditional Cajun spices for a new twist.
For those with dietary restrictions, there are plenty of modifications: substitute dairy with plant-based milk for dairy-free options, and opt for gluten-free grits if you’re avoiding gluten.
Serving and Presentation Guide
To present your Red Snapper, Shrimp & Grits beautifully, start by placing a generous mound of creamy grits on the plate. Position the sautéed seafood on top, allowing them to be the focal point. Drizzle the Cajun cream sauce delicately over the seafood and grits, and finish with a sprinkle of fresh chopped herbs for color.
Consider a side of sautéed greens, such as collards or spinach, to add vibrancy and nutritional value to the plate. Serve the dish warm and enjoy immediately for the best experience. Remember to balance portions to ensure everyone gets a fair share of the delicious seafood and creamy grits.
Wine and Beverage Pairing
Pair your meal with a crisp white wine such as Sauvignon Blanc or a light Pinot Grigio. The vibrant acidity of these wines complements the creaminess of the dish while enhancing the seafood flavors wonderfully. If you prefer non-alcoholic beverages, consider serving iced tea with a hint of lemon or a sparkling water with herbs to cleanse the palate.
For an evening twist, offering a coffee with dessert after the meal can provide a delightful balance to the richness of the dish. Be mindful of serving temperatures; ensure white wines are chilled and serve the coffee hot for an enjoyable dining experience.
Storage and Shelf Life
To store any leftovers, allow the dish to cool completely before transferring to an airtight container. Refrigerate and consume within 3 days. For best results, keep the seafood and grits separate if possible to maintain their textures.
For reheating, consider using a stovetop while adding a splash of cream or water to refresh the grits. Avoid the microwave if possible, as it can lead to overcooked seafood. Freezing is an option too, but remember that the texture of the seafood may change; aim to consume frozen leftovers within 1-2 months for the best quality.
Make Ahead Strategies
Prepare grits a day in advance, allowing them to cool. Store them in the refrigerator and reheat with a touch of cream before serving, ensuring they regain their creamy consistency. The Cajun cream sauce can also be prepared ahead of time; just reheat it gently on low heat when ready to serve.
Keep the seafood fresh and cook it close to serving time to ensure optimal flavor and texture. If you’re hosting a dinner party, prepping as much as possible reduces stress, allowing you to enjoy the occasion with your guests.
Scaling Instructions
When scaling this recipe, consider maintaining the same cooking techniques while adjusting ingredient amounts. For halving, simply divide each ingredient by two. To double or triple the recipe, ensure you have appropriate pots and pans to handle larger quantities.
Timing may need adjustments, as cooking multiple servings could take longer. Meanwhile, ensure careful monitoring of the seafood to avoid overcooking. Store any leftovers properly for future meals, as mentioned in previous sections.
Nutritional Deep Dive
This dish is not only delicious but also packs a nutritional punch. A serving generally includes a good source of lean protein from both shrimp and red snapper, while the grits add necessary carbohydrates for energy. High levels of omega-3 fatty acids from the fish contribute to heart health and overall wellness.
For vitamins and minerals, the dish is filled with essential nutrients; shrimp are particularly high in selenium, which supports metabolism and cognitive function. While this dish is not low in calories due to the cream and butter, it can be enjoyed in moderation as part of a balanced diet keeping portion sizes in check.
Dietary Adaptations
For a gluten-free variation, opt for certified gluten-free grits, ensuring that all other ingredients are also free from gluten contaminants. A dairy-free version can be achieved by replacing heavy cream and butter with coconut cream and dairy-free butter alternatives.
For vegan adaptations, replace the seafood with sautéed vegetables or tofu and use plant-based grits made from corn. Consider low-carb options by substituting grits with cauliflower puree. By modifying the spices and choosing the right ingredients, you can create a dish that complies with various dietary needs.
Troubleshooting Guide
If your grits are too lumpy, consider blending them with a hand mixer after cooking to achieve a creamy texture. If the seafood is overcooked, try adding it to the sauce earlier in the cooking process to minimize the cooking time in the skillet.
For seasoning imbalances, always taste during the cooking process and adjust as needed. If the sauce is too thin, let it simmer longer to thicken, or add a cornstarch slurry. Common ingredient substitutions, such as using cream instead of milk, can enhance richness or lightness, depending on your preference.
Recipe Success Stories
Many in our community have written in with feedback praising the euphoria this dish brings. One reader mentioned how they modified the spices to suit their family’s taste while still maintaining the essence of the dish.
Others shared photography tips, emphasizing the importance of lighting and angles when showcasing their culinary creations on social media. Many have adapted this recipe for various occasions, successfully impressing guests at dinner parties and family gatherings.
Frequently Asked Questions
Can I make this dish ahead of time?
Yes, you can prepare the grits and sauce ahead of time. However, it’s best to cook the seafood fresh to maintain its texture.
What kind of grits should I use?
Stone-ground grits are recommended for their robust flavor and creamy texture. Avoid instant grits for the best results.
Can I substitute different seafood?
Absolutely! Feel free to substitute cod or scallops for a different flavor profile while keeping the cooking techniques in mind.
Is this dish spicy?
The Cajun cream sauce provides a mild heat. You can adjust the spice level by adding more or less Cajun seasoning to your liking.
How long does leftover seafood last?
Leftover seafood should be stored in the refrigerator and consumed within two days for optimal freshness.
Can I freeze the leftovers?
Yes, but the texture of the seafood may change upon thawing. Consume within 1-2 months for the best quality.
What’s a good alternative for heavy cream?
You can use coconut cream or a nutrition-based milk alternative like almond milk mixed with cornstarch to thicken.
Will other types of corn work instead of grits?
While grits are traditional, polenta can be a suitable alternative with a different flavor profile.
What is the best way to reheat grits?
Add a splash of water or cream and warm them over low heat on the stovetop, stirring until creamy.
Can I make a vegan version of this dish?
Yes, replace seafood with vegetables or plant-based proteins, and use a vegan-friendly cream substitute.
Additional Resources
To further enhance your culinary journey, consider exploring related recipes that spotlight Southern comfort foods, such as Shrimp Étouffée or Chicken and Dumplings. Additionally, learning more about cooking techniques like sautéing and making different sauces can widen your culinary skills.
Investing in quality kitchen tools, like a reliable skillet or quality measuring cups, can also elevate your cooking experience. Don’t forget to pay attention to seasonal variations in recipes, which can inspire new flavors and variations throughout the year.
Join the Conversation
We invite you to share your experiences with this recipe on social media! Tag us in your cooking attempts and showcase your plating skills. Your feedback and storytelling can enhance our community, inspiring others to try their hand at this beloved dish.
Don’t hesitate to drop your suggestions for variations or improvements; we’re all ears! Engaging with fellow cooking enthusiasts can provide great insights and ideas, making every cooking adventure even more enjoyable.
The Recipe
Red Snapper, Shrimp & Grits with Cajun Cream Sauce
Serves: 4 servings
Prep Time: 20 mins
Cook Time: 30 mins
Total Time: 50 mins
Kitchen Equipment Needed
Skillet
Pot for grits
Spatula
Measuring cups and spoons
Ingredients
1 lb red snapper fillets
1 lb shrimp, peeled and deveined
1 cup grits
2 cups water
1 cup heavy cream
2 tbsp butter
1 tbsp Cajun seasoning
1 clove garlic, minced
Salt and pepper to taste
Fresh parsley, for garnish
Directions
In a pot, bring 2 cups of water to a boil. Stir in grits and a pinch of salt; reduce heat and simmer until thickened, about 20 minutes.
While grits are cooking, heat a skillet over medium heat and add butter. Sauté garlic until fragrant, about 1 minute.
Add shrimp and cook until pink and opaque, about 3-4 minutes. Remove shrimp and set aside.
In the same skillet, season the red snapper with Cajun seasoning and cook for 3-5 minutes on each side until cooked through. Remove and keep warm.
Pour heavy cream into the skillet, stirring to combine flavors, and let simmer until slightly thickened.
Serve grits topped with shrimp and red snapper, drizzled with Cajun cream sauce and garnished with parsley.
Recipe Notes
For a spicier dish, increase the amount of Cajun seasoning.
Feel free to experiment with different types of seafood.
Adjust the consistency of the grits to your preference with additional water or cream.