Decadent Pecan Praline Brownies: A Perfect Blend of Chocolate and Nuts

brownies with praline topping, chocolate pecan praline bars, Southern-style brownies, fudgy praline brownies, pecan dessert recipe

Pecan Praline Brownies: A Southern Dessert Masterpiece

Introduction

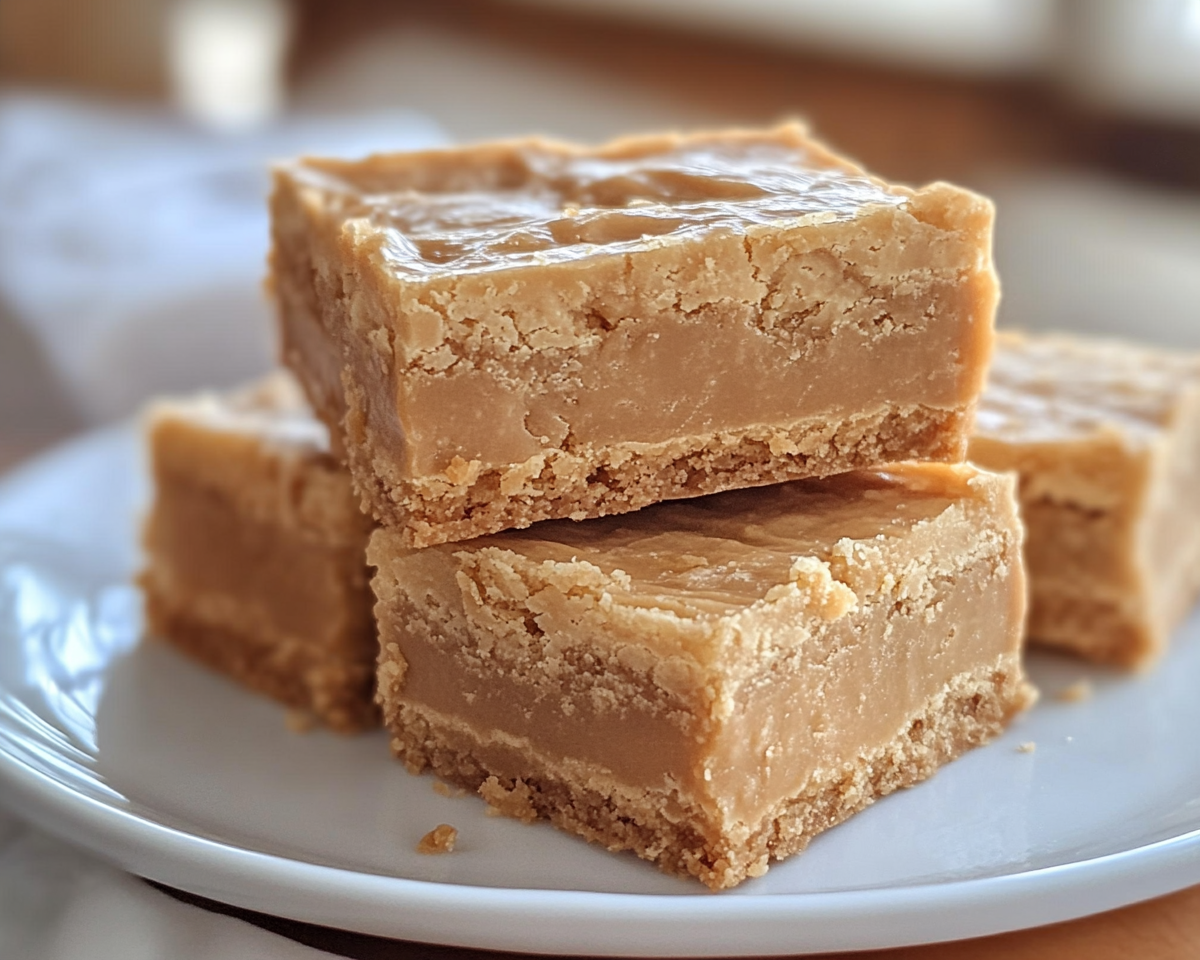
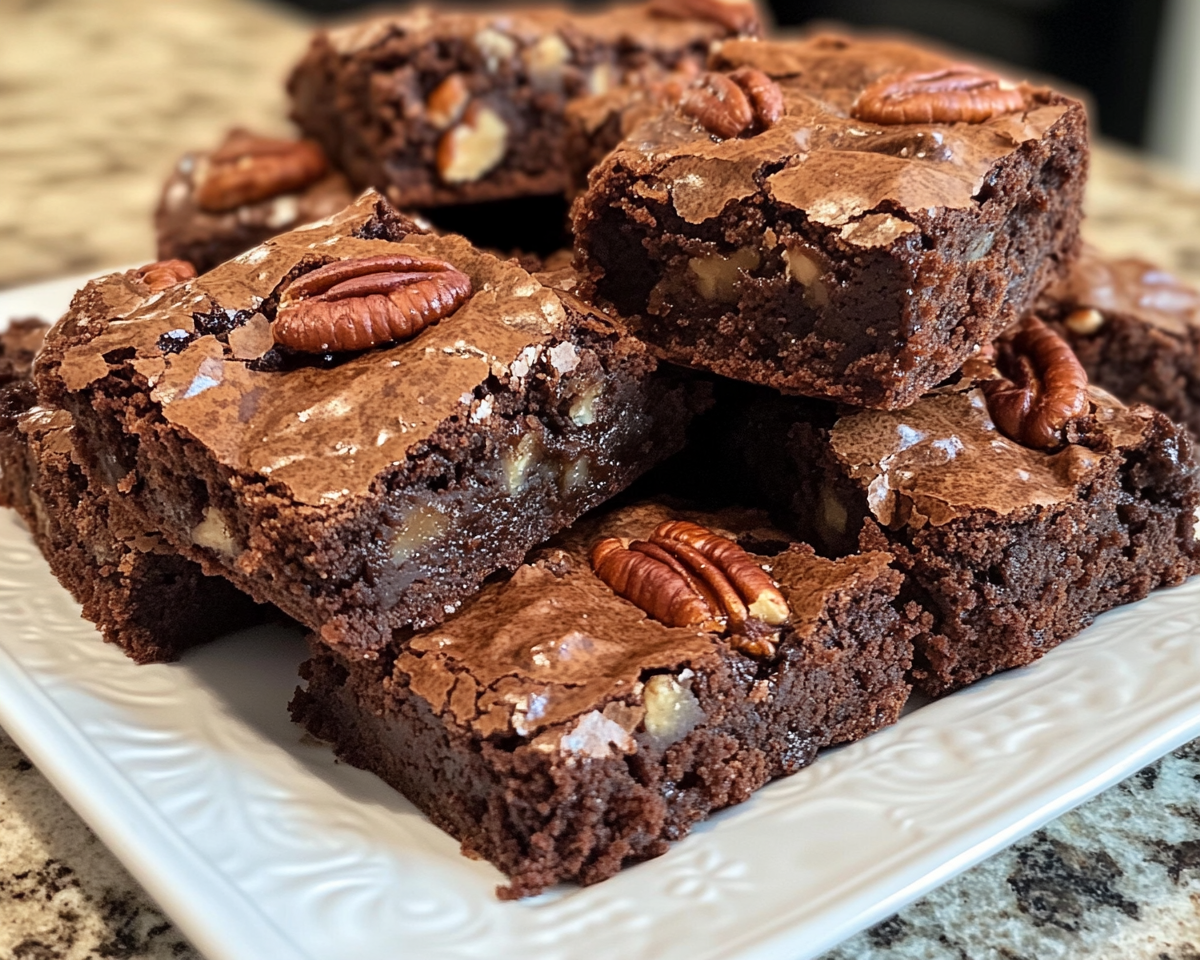
If you’re a fan of brownies and love the rich, nutty flavors of praline, Pecan Praline Brownies are the ultimate treat. This dessert combines a fudgy chocolate base with a buttery pecan topping, creating a luxurious experience in every bite. For those who appreciate creative twists on classic desserts, check out Salted Caramel Apple Cheesecake for another indulgent recipe.


Ingredients and Preparation

Key Ingredients

  • For the Brownie Base:
    • Unsalted butter (1 cup)
    • Granulated sugar (1 ½ cups)
    • Eggs (3 large)
    • Cocoa powder (¾ cup)
    • All-purpose flour (1 cup)
  • For the Pecan Praline Topping:
    • Chopped pecans (1 cup)
    • Brown sugar (1 cup)
    • Heavy cream (½ cup)
    • Butter (4 tablespoons)
    • Vanilla extract (1 teaspoon)

For more inspiration on Southern-style desserts, explore Kentucky Butter Cake.


Step-by-Step Recipe

Step 1: Preparing the Brownie Base

  1. Preheat the oven to 350°F (175°C).
  2. Grease a 9×13-inch baking pan.
  3. Mix melted butter, sugar, and eggs until smooth.
  4. Add cocoa powder, flour, and a pinch of salt. Stir until just combined.
  5. Pour the batter into the prepared pan and bake for 20-25 minutes.

Step 2: Making the Pecan Praline Topping

  1. Toast pecans in a dry skillet over medium heat for 3-5 minutes.
  2. In a saucepan, combine butter, brown sugar, and cream.
  3. Bring the mixture to a gentle boil, then reduce heat and simmer for 5 minutes.
  4. Stir in toasted pecans and vanilla extract.

Step 3: Assembling the Brownies

  1. Spread the praline topping over the baked and slightly cooled brownies.
  2. Allow to set for 10-15 minutes before slicing.

Customization Options

Flavor Enhancements

  • Add bourbon to the praline topping for a sophisticated twist.
  • Sprinkle sea salt for a salted caramel effect.
  • Use dark chocolate chips for an extra-rich base.

Dietary Adjustments

  • Gluten-free: Substitute all-purpose flour with almond or coconut flour.
  • Vegan: Use plant-based butter and a flaxseed egg replacement.

FAQs

Common Questions

  1. Can I use store-bought brownie mix?
    Yes, enhance it with vanilla or espresso powder for depth.
  2. What if my praline topping is too runny?
    Cook the mixture longer to thicken.
  3. How do I store leftovers?
    Store in an airtight container at room temperature for up to 3 days.

Internal Linking Opportunities


External Links for Further Inspiration

  1. Life, Love, and Sugar’s Praline Pecan Brownies
    Anchor Text: “Praline Pecan Brownies Recipe”
  2. Southern-Style Praline Brownies Recipe by Spicy Southern Kitchen
    Anchor Text: “Southern Praline Brownies”
  3. Food & Wine’s Gourmet Praline Brownies
    Anchor Text: “Gourmet Pecan Brownies Recipe”

Conclusion

Pecan Praline Brownies are the perfect blend of Southern charm and rich indulgence. Whether you’re baking for a holiday gathering or simply treating yourself, this recipe is sure to impress. For more dessert ideas, visit Classic Homemade Donuts, a perfect companion to these brownies.

Hobo Casserole: A Hearty and Easy Comfort Food Recipe

ground beef potato casserole, easy hobo casserole recipe, cheesy potato casserole, layered beef casserole, budget-friendly casserole

Hobo Casserole: The Ultimate Comfort Food

Introduction

Hobo Casserole is the epitome of classic comfort food—easy to make, hearty, and packed with flavor. Perfect for busy weeknights or weekend gatherings, this dish combines affordable ingredients like ground beef, potatoes, and cheese into a rich and satisfying meal. It’s also highly versatile, allowing you to customize it with your favorite add-ins. If you’re looking for more cozy casserole recipes, try the Slow Cooker Chicken and Gravy Casserole for another family favorite.


Ingredients and Preparation

Essential Ingredients

  • Base:
    • 1 lb ground beef
    • 4 medium potatoes, thinly sliced
    • 1 can cream of mushroom soup
    • 1 cup shredded cheddar cheese
  • Optional Add-ins:
    • Sautéed onions or mushrooms
    • Mixed vegetables (corn, peas, carrots)
    • Spices: paprika, garlic powder, or dried thyme

For another budget-friendly dinner idea, explore the Ultimate Taco Casserole packed with bold flavors.

Tools You’ll Need

  • 9×13-inch casserole dish
  • Skillet for browning meat
  • Mandoline slicer for evenly sliced potatoes

Step-by-Step Recipe

Step 1: Prepare the Ingredients

  • Preheat your oven to 375°F (190°C).
  • Brown the ground beef in a skillet, seasoning it with salt and pepper. Drain excess fat.
  • Thinly slice potatoes and set them aside.

Step 2: Assemble the Layers

  • Grease the casserole dish.
  • Layer sliced potatoes on the bottom.
  • Spread the cooked ground beef evenly over the potatoes.
  • Pour the cream of mushroom soup over the beef, spreading it out evenly.
  • Top with shredded cheese for a golden, bubbly crust.

Step 3: Bake

  • Cover with foil and bake for 45 minutes.
  • Remove foil and bake for an additional 10–15 minutes until the cheese is melted and golden brown.

Customization Options

Flavor Variations

  • Swap ground beef for ground turkey or chicken.
  • Use sweet potatoes instead of regular potatoes for a twist.
  • Add jalapeños for a spicy kick.

Dietary Adjustments

  • Gluten-Free: Use a gluten-free cream soup alternative.
  • Dairy-Free: Substitute cheese and cream soup with plant-based options.
  • Vegetarian: Replace beef with plant-based crumbles or cooked lentils.

FAQs

Common Questions

  1. Can I make this casserole ahead of time?
    • Yes, assemble it and refrigerate for up to 24 hours before baking.
  2. What’s the best way to ensure the potatoes cook evenly?
    • Slice them thinly and bake covered for most of the cooking time.
  3. Can I freeze leftovers?
    • Absolutely! Store in an airtight container and freeze for up to 2 months.
  4. What other cheeses work well in this recipe?
    • Mozzarella, Monterey Jack, or even pepper jack for added spice.

Internal Linking Opportunities


External Links for Inspiration

  1. Hobo Casserole by Southern Home Express
    Anchor Text: “Easy Hobo Casserole Recipe with Beef”
  2. Hobo Casserole by The Stay At Home Chef
    Anchor Text: “Comforting Ground Beef Hobo Casserole”
  3. OvenSpot’s Hobo Casserole
    Anchor Text: “Simple Ground Beef and Potato Casserole”

Conclusion

Hobo Casserole is a timeless dish that combines hearty ingredients into a single, easy-to-make meal. Whether you’re feeding a family or meal-prepping for the week, this recipe is customizable to fit any taste or dietary need. Pair it with a side salad or bread, and enjoy a meal that feels like a warm hug on a plate.

Zucchini and Tomato Frittata: A Healthy One-Pan Meal

zucchini tomato egg dish, healthy vegetable frittata, baked frittata recipe, tomato and zucchini breakfast, zucchini and egg skillet

Zucchini and Tomato Frittata: A Healthy, Versatile Dish

Introduction

A zucchini and tomato frittata is a vibrant, nutrient-packed meal that’s as versatile as it is delicious. Perfect for breakfast, lunch, or dinner, this dish highlights the best of seasonal produce in a simple one-pan preparation. If you’re a fan of one-dish wonders, check out Slow Cooker Baked Ziti for another hearty, fuss-free option.


Ingredients and Preparation

Essential Ingredients

  • Base Ingredients:
    • 6 large eggs
    • 1 medium zucchini, thinly sliced
    • 1 cup cherry tomatoes, halved
    • ¼ cup milk or cream
    • Olive oil for sautéing
  • Flavor Enhancers:
    • ½ cup Parmesan cheese or crumbled feta
    • Fresh herbs like basil or parsley
    • Seasonings: garlic, salt, and black pepper
  • Optional Add-ins:
    • Protein: diced ham, cooked bacon, or shredded chicken
    • Vegetables: spinach, bell peppers, or mushrooms

For a creative twist, try using zucchini in desserts like Zucchini Chocolate Bread to explore its versatility.

Tools You’ll Need

  • An oven-safe skillet or cast-iron pan
  • Whisk and mixing bowls
  • Cutting board and sharp knife

Step-by-Step Recipe

Step 1: Prep the Ingredients

  1. Wash and slice the zucchini and tomatoes.
  2. Preheat the oven to 375°F (190°C).
  3. Whisk the eggs with milk, seasoning, and half the cheese.

Step 2: Cook the Vegetables

  1. Heat olive oil in the skillet over medium heat.
  2. Sauté zucchini until lightly golden.
  3. Add tomatoes and cook until slightly softened.

Step 3: Assemble the Frittata

  1. Spread the vegetables evenly across the skillet.
  2. Pour the egg mixture over the vegetables.
  3. Sprinkle remaining cheese and fresh herbs on top.

Step 4: Bake the Frittata

  1. Transfer the skillet to the preheated oven.
  2. Bake for 15–20 minutes or until the eggs are set.
  3. Let cool for 5 minutes before slicing.

Customization Options

Flavor Variations

  • Add roasted red peppers for extra sweetness.
  • Incorporate crumbled sausage or tofu for protein.
  • Use goat cheese for a tangy flavor.

Dietary Adjustments

  • Dairy-free: Replace milk with almond or oat milk and skip the cheese.
  • Gluten-free: Naturally gluten-free with no adjustments needed.
  • Vegan: Replace eggs with a chickpea flour batter.

Alternative Cooking Methods

  • Stovetop only: Cover the skillet with a lid and cook on low heat.
  • Mini frittatas: Bake in muffin tins for individual servings.

FAQs

Common Questions

  1. Can I use a different vegetable instead of zucchini?
    Yes, try squash, spinach, or broccoli as substitutes.
  2. What type of cheese works best in this recipe?
    Parmesan, feta, or mozzarella are great options.
  3. How do I prevent my frittata from sticking to the pan?
    Use a well-oiled, non-stick or seasoned cast-iron skillet.
  4. Can I freeze leftover frittata?
    Yes, freeze slices in an airtight container for up to 2 months.

Serving Suggestions

  • Pair with a fresh side salad or crusty bread.
  • Top with a dollop of sour cream or salsa for extra flavor.
  • Serve warm or at room temperature for picnics or potlucks.

For another dish that’s perfect for sharing, try Cheesy Bacon Jalapeño Corn Dip for a bold and creamy appetizer.


Internal Linking Opportunities


External Links for Inspiration

  1. Tomato & Zucchini Frittata by Love & Lemons
    Anchor Text: “Easy Tomato & Zucchini Frittata Recipe”
  2. Skinnytaste’s Tomato and Zucchini Frittata
    Anchor Text: “Healthy Summer Frittata Recipe”
  3. Foodie Crush’s Roasted Tomato & Zucchini Frittata
    Anchor Text: “Delicious Roasted Tomato Frittata”

Conclusion

The zucchini and tomato frittata is a celebration of fresh, simple ingredients in a dish that works for any meal of the day. With its versatility, you can customize it to your taste or dietary needs. Try it warm for a comforting breakfast or chilled as a light lunch. Enjoy experimenting with flavors and make it your own!

Delicious Easy Breakfast Cheese Danish Recipe for Busy Mornings

Easy Breakfast Cheese Danish: A Delightful Morning Treat

⚖️
Difficulty
Easy

⏲️
Prep Time
15 mins

🕒
Cook Time
20 mins

⏱️
Total Time
35 mins

🍽️
Servings
8

The Easy Breakfast Cheese Danish is a delicious way to start your day, combining creamy cheese filling with flaky pastry. This recipe is not just about simplicity; it captures the essence of a classic Danish pastry without the hassle of traditional methods. Imagine biting into a warm, buttery pastry that cradles a sweetened cream cheese filling, each bite melting in your mouth. As the first rays of the morning sun peek through your window, this comforting treat becomes a perfect companion with your morning coffee.

With just a few basic ingredients, you can create a bakery-quality breakfast at home. The balance of sweet and savory flavors with a hint of vanilla and lemon zest satisfies any craving. This Easy Breakfast Cheese Danish is sure to impress family and friends alike, whether you serve it on a relaxing Sunday morning or at a gathering. Prepare to treat yourself and your loved ones to a delightful breakfast experience!

Quick Recipe Highlights

  • Flavor Profile: This Easy Breakfast Cheese Danish features a sweetened cream cheese filling, enhanced with vanilla and a slight citrus kick from lemon zest.
  • Texture: The outer pastry is flaky, buttery, and light, while the filling is creamy and smooth, creating a delightful contrast.
  • Aroma: Baked to perfection, this Danish emits an inviting aroma of warm pastry and sweet cream cheese, making it hard to resist.
  • Visual Appeal: Golden-brown with a glossy finish, the Danish is topped with a dusting of powdered sugar, making it a feast for the eyes.
  • Skill Level Needed: This recipe is easy enough for beginners, making it a perfect choice for those looking to hone their baking skills.
  • Special Equipment: You will need a baking sheet, parchment paper, and basic kitchen tools.

Recipe Overview

  • Difficulty Level: This Easy Breakfast Cheese Danish is incredibly simple, requiring minimal hands-on time to prepare and comes together effortlessly.
  • Category: This recipe falls under breakfast and brunch, making it an ideal choice for leisurely mornings.
  • Cuisine: Traditional Danish pastry with a modern twist, this recipe maintains the beloved elements while simplifying the process for home bakers.
  • Cost: With affordable ingredients such as cream cheese, pastry dough, and sugar, this breakfast treat is economical for most households.
  • Season: Perfect for any season, this Danish is a wonderful addition to holiday breakfast spreads or casual gatherings.
  • Occasion: Ideal for brunches, holidays, or an everyday indulgence, this pastry can elevate any meal.

Why You’ll Love This Recipe

Every bite of the Easy Breakfast Cheese Danish offers a delightful fusion of creamy and flaky textures. The sweetness of the cream cheese filling perfectly balances the light, buttery pastry, creating a satisfying experience that will brighten your mornings. Moreover, the versatility of this recipe allows it to cater to various palates.

Convenience is at the forefront with this recipe, as it requires straightforward steps and minimal preparation. You can whip up the filling while the pastry bakes, making it easy to multitask. The use of store-bought pastry dough further saves time, making breakfast a breeze.

From a nutritional standpoint, the inclusion of cream cheese adds a dose of calcium and protein, ensuring that your breakfast keeps you energized throughout the morning. You can also opt for lower-fat cream cheese for a lighter alternative without sacrificing flavor.

Socially, the Easy Breakfast Cheese Danish serves as a conversation starter at gatherings, inviting friends and family to share their experiences while enjoying a delightful treat. Whether served at a casual brunch or a holiday celebration, it encourages connection and savoring the moment.

Lastly, this recipe stands out for its cost-effectiveness. With simple ingredients readily available at most grocery stores, you can treat yourself and your family to a delightful pastry without breaking the bank. Putting quality food on the table while keeping it budget-friendly is a win for any home cook.

Historical Background and Cultural Significance

The roots of Danish pastry can be traced back to Austria, where it was first developed. Brought to Denmark by bakers in the 19th century, it underwent a transformation to incorporate local Nordic flavors. The pastry evolved over time, blending techniques from various cultures, ultimately leading to the creation of the flaky, delicious Danish we know today.

In Denmark, this pastry isn’t merely a treat; it’s a cultural icon often enjoyed during celebrations and alongside coffee in social settings. The Danish love for pastries has made them a staple in cafes and homes alike, showcasing their culinary heritage.

As the recipe has evolved, so have the variations, leading to countless adaptations featuring fruits, nuts, and even savory fillings. The Easy Breakfast Cheese Danish is a modern iteration, making this beloved classic accessible and easy to prepare.

Regionally, variations of the Danish pastry are celebrated throughout Europe, each with unique fillings and techniques. The ubiquity of the Danish pastry in bakeries worldwide has solidified its status as a beloved breakfast option, infusing homes and gatherings with warmth and tradition.

Ingredient Deep Dive

Cream Cheese:
Cream cheese is known for its smooth, creamy texture and its role in desserts and breakfast dishes. Originating in the United States in the 19th century, it has since become a staple in many recipes. Nutritionally, cream cheese provides a good source of calcium and fat, contributing significantly to flavor and richness in recipes like our Easy Breakfast Cheese Danish. When selecting cream cheese, choose blocks over spreads for better consistency. Store it wrapped tightly in the refrigerator, and it can last for a couple of weeks. For substitutions, consider ricotta or mascarpone for a different flavor profile.

Puff

My Mom’s Fudge: A Rich and Creamy Classic Recipe

homemade fudge recipe, classic fudge recipe, creamy chocolate fudge, mom’s fudge recipe, nostalgic dessert fudge

My Mom’s Fudge: A Timeless Recipe of Sweet Indulgence

Introduction

Few desserts evoke memories as vividly as My Mom’s Fudge. Creamy, rich, and made with love, this classic fudge recipe has stood the test of time. Whether it’s a staple at holiday gatherings or a special treat to share with friends, it’s a dessert that brings everyone together. If you’re looking for more nostalgic desserts, explore Southern Banana Pudding for a sweet slice of Southern comfort.


Ingredients and Preparation

Core Ingredients for Fudge Perfection

  • Base Ingredients:
    • 3 cups granulated sugar
    • ¾ cup unsalted butter
    • ⅔ cup evaporated milk
  • Flavor Boosters:
    • 12 oz semi-sweet chocolate chips
    • 7 oz marshmallow crème
    • 1 teaspoon vanilla extract
  • Optional Add-ins:
    • Chopped nuts (walnuts or pecans)
    • Sea salt for a salted fudge variation

Tools You’ll Need

  • A heavy-bottomed saucepan
  • Wooden spoon for stirring
  • Candy thermometer for precise temperatures
  • An 8×8-inch pan for setting the fudge

Step-by-Step Recipe

Step 1: Prepare the Ingredients

  1. Line your pan with parchment paper for easy removal.
  2. Measure all ingredients and set them aside. Precision ensures smooth execution.

Step 2: Cooking the Fudge Base

  1. Combine sugar, butter, and evaporated milk in the saucepan.
  2. Heat over medium heat, stirring constantly.
  3. Use a candy thermometer to reach 234°F, the soft-ball stage.

Step 3: Adding Flavor and Setting

  1. Remove the pan from heat and stir in chocolate chips until melted.
  2. Quickly fold in marshmallow crème, vanilla, and nuts (if using).
  3. Pour the mixture into the prepared pan, smoothing the surface with a spatula.

Step 4: Cooling and Cutting

  1. Let the fudge cool at room temperature for 4 hours.
  2. Slice into small squares using a warm knife for clean edges.

For more tips on working with chocolate, check out Crafting the Ultimate Thick Homemade Chocolate Chip Cookies.


Customizations and Variations

Flavorful Twists

  • Peanut Butter Fudge: Replace some of the chocolate chips with peanut butter.
  • Rocky Road Fudge: Add mini marshmallows and toasted almonds for texture.
  • Dark Chocolate Mint: Use dark chocolate and a splash of peppermint extract.

Dietary Alternatives

  • Vegan Fudge: Substitute dairy ingredients with plant-based alternatives like coconut milk and vegan chocolate.
  • Sugar-Free Fudge: Use erythritol or another sugar substitute.

FAQs

Common Questions

  1. Why is my fudge grainy?
    • Grainy fudge often results from improper heating or stirring. Ensure a consistent temperature and continuous mixing.
  2. Can I freeze fudge?
    • Yes! Wrap it tightly in plastic and freeze for up to 3 months.
  3. What if my fudge doesn’t set?
    • Refrigerating can help firm up fudge that hasn’t fully set.
  4. Can I use condensed milk instead of evaporated milk?
    • Condensed milk is sweeter and will alter the texture and flavor.
  5. How long does homemade fudge last?
    • Stored in an airtight container, fudge stays fresh for up to 2 weeks.

Serving Suggestions

  • Gift-Worthy Presentation: Wrap pieces of fudge in wax paper and place them in decorative tins.
  • Plating Tips: Arrange on a dessert platter with other sweets like cookies and truffles.

For another crowd-pleasing dessert, try Salted Caramel Apple Cheesecake for its sweet and salty balance.


Internal Linking Opportunities


External Links for Inspiration

  1. Mom’s Easy Fudge Recipe on The View From Great Island
    Anchor Text: “Mom’s Easy Fudge Recipe”
  2. Sweet Pea’s Kitchen Fudge
    Anchor Text: “Creamy and Delicious Fudge”
  3. How to Make Fudge by The Food Charlatan
    Anchor Text: “Step-by-Step Fudge Guide”

Conclusion

My Mom’s Fudge is more than a dessert; it’s a tradition that brings families together. Its creamy texture and rich flavor make it a timeless treat for any occasion. Customize it with your favorite ingredients, and don’t forget to share the joy of homemade fudge with friends and loved ones.