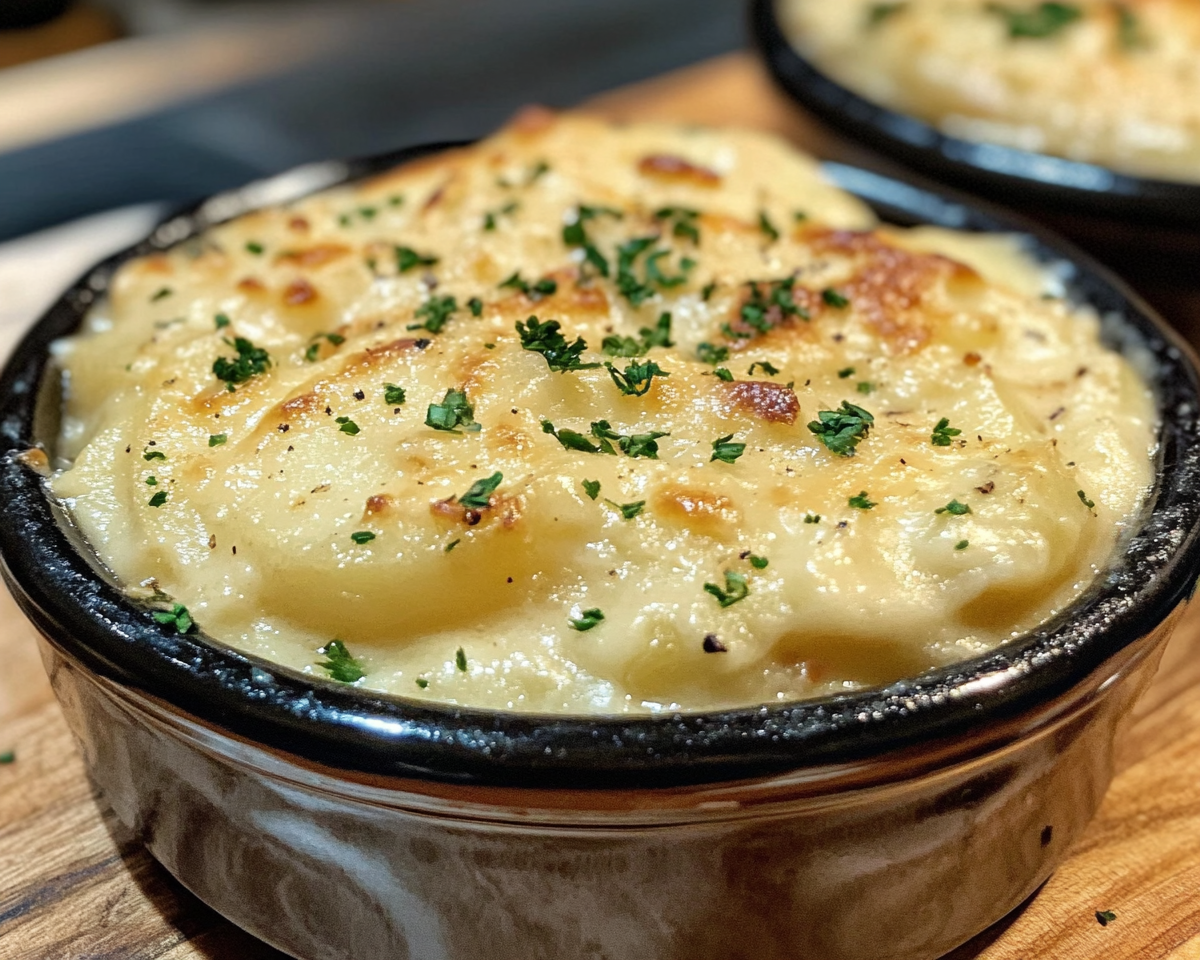
Slow Cooker Scalloped Potatoes: A Creamy and Easy Side Dish
Scalloped potatoes are the epitome of comfort food, with their rich layers of tender potatoes and creamy sauce. Making them in a slow cooker takes the hassle out of preparation, allowing the flavors to meld perfectly while freeing up your oven for other dishes. This guide will walk you through everything you need to know to make the ultimate Slow Cooker Scalloped Potatoes.
What Are Slow Cooker Scalloped Potatoes?
Slow Cooker Scalloped Potatoes are a classic side dish made with thinly sliced potatoes, a rich creamy sauce, and melted cheese, all slow-cooked to perfection. Using a slow cooker ensures even cooking and infuses the dish with deep, satisfying flavors.
For tips on using the best potatoes, check out this guide to russet potatoes. For cheese lovers, explore how to choose the best cheese for cooking for the creamiest results.
Why This Dish Is Perfect for Any Occasion
- Effortless Cooking: Set it and forget it with your slow cooker.
- Versatile Side Dish: Pairs well with a variety of mains like roast chicken, ham, or steak.
- Make-Ahead Friendly: Prep in advance and let the slow cooker handle the rest.
Pro Tip: Use a mandoline slicer for evenly sliced potatoes, ensuring consistent cooking.
Ingredients You’ll Need
Main Ingredients
- Russet Potatoes: Starchy potatoes that hold their shape well.
- Heavy Cream and Milk: For a rich and creamy base.
- Cheddar and Parmesan Cheese: A blend for maximum flavor.
- Garlic and Onion: Aromatics to enhance the dish.
- Chicken or Vegetable Broth: Adds depth to the sauce.
Optional Add-Ins
- Cooked bacon bits for a smoky twist.
- Fresh thyme or parsley for a herbal note.
- Diced ham for a heartier side dish.
Tools
- Slow cooker (5-6 quarts recommended).
- Mandoline slicer or sharp knife.
- Cheese grater for freshly grated cheese.
Step-by-Step Recipe Guide
- Prepare the Potatoes: Peel and slice the potatoes into even, thin slices (about 1/8 inch thick).
- Make the Sauce: In a saucepan, whisk together heavy cream, milk, garlic, onion, and chicken broth over medium heat. Stir in half the cheese until melted.
- Layer the Ingredients: In the slow cooker, start with a layer of potatoes, followed by sauce, then cheese. Repeat until all ingredients are used, ending with cheese on top.
- Cook: Cover and cook on low for 5-6 hours or on high for 3-4 hours.
- Finish and Serve: Let the dish rest for 10 minutes before serving. Garnish with parsley if desired.
Creative Variations
Cheesy Upgrades
- Swap cheddar for Gruyère or Monterey Jack for a different flavor profile.
- Add a layer of mozzarella on top for a gooey finish.
Protein Additions
- Fold in diced ham or shredded chicken for a complete meal.
- Top with crispy bacon for extra indulgence.
Vegetarian Options
- Replace chicken broth with vegetable broth.
- Mix in sautéed mushrooms or spinach for added nutrients.
Serving Suggestions
- Perfect Pairings:
- Roast beef or chicken.
- Grilled salmon or pork chops.
- Steamed broccoli or roasted asparagus.
- Beverages:
- A crisp white wine like Chardonnay.
- Sparkling water with a splash of lemon.
For a similar comforting side, try Crockpot Potato Soup with Hashbrowns.
FAQs About Slow Cooker Scalloped Potatoes
1. Can I use sweet potatoes instead?
Yes, sweet potatoes add a natural sweetness and work well in this recipe.
2. Should I peel the potatoes?
Peeling is recommended for russet potatoes, but red-skinned potatoes can be left unpeeled for added texture.
3. Can I make this dish ahead of time?
Absolutely! Assemble the dish in the slow cooker and refrigerate it overnight. Cook as directed the next day.
4. How do I prevent the sauce from curdling?
Ensure the cream is whisked well and cook on low heat for gradual thickening.
5. How long do leftovers last?
Store in an airtight container in the fridge for up to three days.
Storage and Reheating Tips
- Refrigeration: Allow the dish to cool completely before storing in an airtight container.
- Freezing: Freeze portions without the cheese topping for up to three months.
- Reheating: Reheat in the oven at 350°F or in the microwave with a splash of milk to restore creaminess.
Internal Linking Opportunities
- Link to Crockpot Potato Soup with Hashbrowns for another potato-based slow cooker recipe.
- Suggest Baked Ziti for a cheesy slow cooker pasta option.
- Recommend Chicken and Bacon Ranch Potatoes as a hearty alternative.
Conclusion
Slow Cooker Scalloped Potatoes are the perfect blend of convenience and flavor, making them an essential dish for any gathering or family meal. With endless variations and minimal effort, this creamy side dish is sure to become a favorite in your home.