Table of Contents
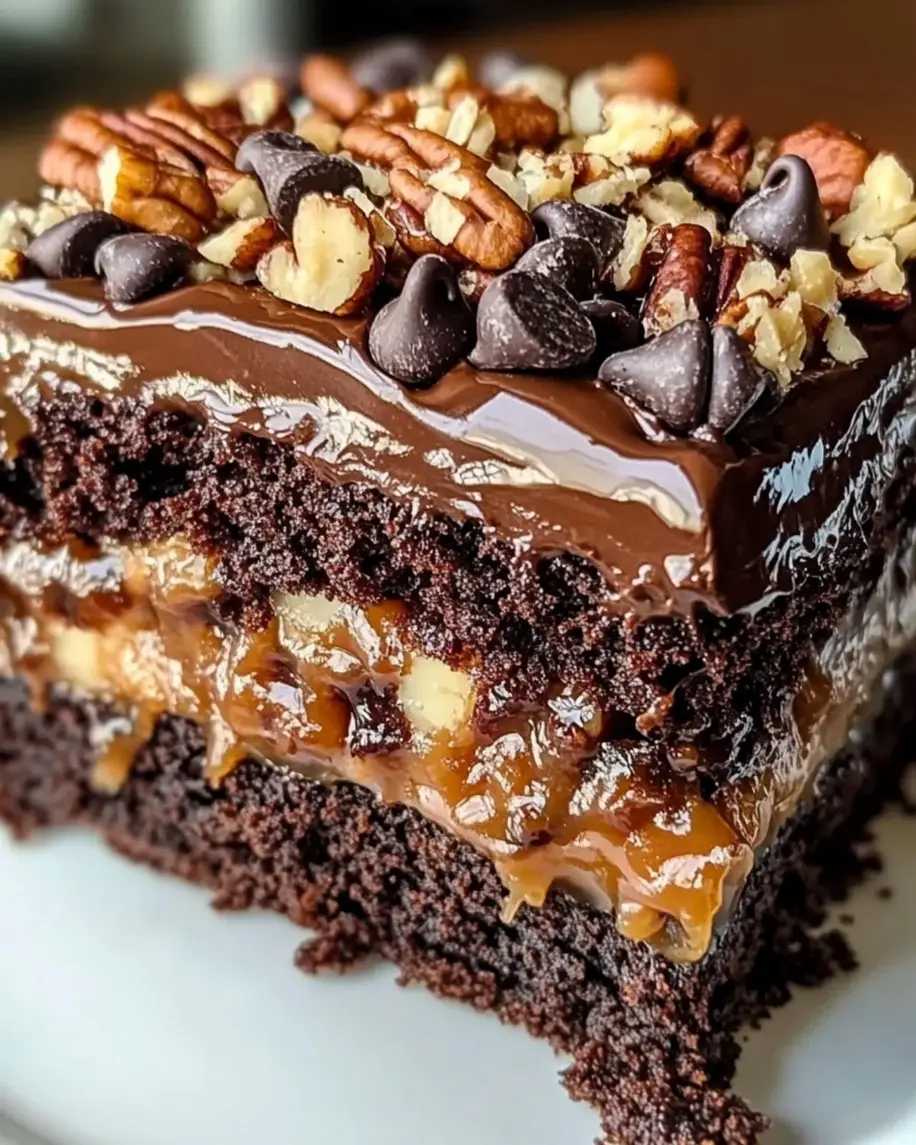
German Chocolate Poke Cake
Craving a Decadent Chocolate Cake? Let German Chocolate Poke Cake Answer the Call!
Are you searching for a dessert that’s both incredibly delicious and surprisingly easy to make? If you’re like many home bakers, you’re probably wondering: “Can I achieve a rich, moist chocolate cake with layers of gooey caramel, coconut, and pecans without spending hours in the kitchen?” The answer is a resounding YES! This German Chocolate Poke Cake is designed to do just that. It takes the classic, beloved flavors of German chocolate cake and transforms them into an effortless poke cake that guarantees a wow factor. Forget complicated frosting techniques; this recipe is all about maximizing flavor and moistness with simple steps. With every bite, you’re treated to tender chocolate cake, a luscious caramel filling that seeps into every crevice, and a crunchy, nutty topping that provides the perfect textural contrast. This isn’t just a cake; it’s an experience, a guaranteed crowd-pleaser that makes any occasion feel truly special.
The Irresistible Ingredients
The magic of this German Chocolate Poke Cake lies in its harmonious blend of familiar yet intensely satisfying ingredients. We’re focusing on simple pantry staples that, when combined, create a symphony of flavor and texture.
For the Chocolate Cake:
- Devil’s Food Cake Mix: The foundation of our rich chocolatey base. Use your favorite brand. You’ll need one 15.25 oz box. (Alternatively, a good quality chocolate cake mix can be used, but Devil’s Food enhances that deep cocoa flavor.)
- Eggs: Typically 3 large eggs. These bind the cake and contribute to its tender crumb.
- Vegetable Oil: 1/2 cup. This ensures a wonderfully moist cake. You can substitute with canola oil or melted, unsalted butter for a slightly different flavor profile.
- Water: 1 cup. Helps create the perfect cake batter consistency.
- Evaporated Milk: 1 can (12 oz). This is key for a moist, tender crumb without the richness of whole milk or cream, making it ideal for soaking.
For the Caramel Coconut Pecan Topping:
- Butter: 1 cup (2 sticks) unsalted butter, softened. This is the creamy base for our topping.
- Brown Sugar: 1 cup, packed. Light or dark brown sugar works, with dark providing a richer molasses flavor.
- Sweetened Condensed Milk: 1 can (14 oz). This is the secret to that wonderfully gooey, caramel-like consistency.
- Large Eggs Yolks: 3 large egg yolks. They add richness and help emulsify the sauce, giving it a luxurious texture.
- Vanilla Extract: 1 teaspoon. Enhances all the sweet flavors.
- Shredded Coconut: 1 1/2 cups, sweetened or unsweetened. Sweetened adds extra sweetness, while unsweetened lets the caramel flavor shine. Toasting it beforehand brings out a nutty depth.
- Chopped Pecans: 1 cup. Toasted for best flavor and crunch. Walnuts are a decent substitute if pecans aren’t your favorite.
Timing is Everything
One of the biggest appeals of this German Chocolate Poke Cake is its efficiency. While average poke cakes might take around 30-40 minutes of active prep and a similar amount of baking, this recipe keeps things streamlined.
Compared to many traditional layer cakes that can command hours of time and effort, this poke cake offers a significant time saving, making it perfect for weeknight desserts or last-minute gatherings.
Step-by-Step Instructions
Follow these simple steps to create your show-stopping German Chocolate Poke Cake. Each step is designed for ease and maximum deliciousness!
Step 1: Preheat and Prepare
Let’s get started! Preheat your oven to 350°F (175°C). Grease and flour a 9×13 inch baking pan. This crucial step ensures your cake releases beautifully without sticking. If you prefer, you can also line the pan with parchment paper for even easier removal.
Step 2: Mix the Cake Batter
In a large mixing bowl, combine the Devil’s Food cake mix, eggs, vegetable oil, and water. Mix on low speed with an electric mixer for about 30 seconds, then increase to medium speed and beat for 2 minutes. The batter should be smooth and well combined. Don’t overmix; just until all ingredients are incorporated.
Step 3: Bake the Cake
Pour the batter evenly into the prepared baking pan. Bake for 30-35 minutes, or until a wooden skewer or toothpick inserted into the center comes out clean. Keep an eye on it towards the end of the baking time, as oven temperatures can vary.
Step 4: Poke Holes
This is where the “poke” magic happens! As soon as the cake comes out of the oven, while it’s still hot, use the handle of a wooden spoon or a skewer to poke holes all over the top of the cake. Make them relatively close together to allow the filling to seep through effectively.
Step 5: Prepare the Gooey Filling
While the cake is still warm (but not piping hot), it’s time to make that irresistible topping. In a medium saucepan, melt the butter over medium heat. Stir in the brown sugar until combined and slightly thickened. Gradually whisk in the evaporated milk, egg yolks, and vanilla extract. Bring the mixture to a gentle simmer, stirring constantly. Cook for about 2-3 minutes, until slightly thickened. It will continue to thicken as it cools.
Step 6: Pour the Filling
Carefully and evenly pour the warm caramel mixture over the poked cake. Make sure to get it into all the holes. Then, sprinkle the shredded coconut and chopped pecans evenly over the top of the still warm filling.
Step 7: Chill and Decorate
Allow the cake to cool completely at room temperature, then cover it with plastic wrap and refrigerate for at least 2 hours, or preferably overnight. This chilling time is essential for the filling to set and for the flavors to meld beautifully. For an extra touch, you can optionally drizzle a bit more caramel sauce or even some melted chocolate over the top before serving, though it’s decadent enough as is.
Nutritional Information
Please note: Nutritional information is an estimate and can vary based on specific ingredients used. This is calculated per serving (assuming 12 servings).
- Calories: Approximately 550-650 kcal
- Fat: 30-40g (Saturated Fat: 15-20g)
- Carbohydrates: 70-85g (Sugars: 50-65g)
- Protein: 6-8g
- Cholesterol: significant
- Sodium: moderate
Healthier Alternatives
While this cake is a treat, you can make some lighter modifications:
- Cake Mix: Opt for a whole wheat or reduced-sugar chocolate cake mix if available.
- Oil: Use unsweetened applesauce for part of the oil for reduced fat, though this may slightly alter texture.
- Topping: Use a sugar-free condensed milk and a reduced amount of sugar. Unsweetened coconut and chopped nuts are already good choices.
- Portion Control: Simply serving smaller slices will significantly reduce overall calorie and sugar intake.
Serving Suggestions
This German Chocolate Poke Cake is fantastic served chilled, allowing the flavors to fully develop. It pairs wonderfully with a glass of cold milk or a cup of coffee. For an extra decadent experience, serve a slice with a dollop of whipped cream or a scoop of vanilla bean ice cream. It’s perfect for birthdays, holidays, potlucks, or just because!
Common Mistakes to Avoid
- Not Poking Enough Holes: This is crucial for the filling to penetrate the cake. Make sure to poke generously!
- Not Letting it Chill: The chilling time allows the filling to set and the flavors to meld. Rushing this step will result in a very soft cake.
- Overbaking the Cake: A dry cake won’t absorb the filling as well. Bake until just done.
- Making the Topping Too Thick: If the topping seems too thick, a tablespoon or two of milk can help thin it out before pouring.
Storing Your Delicious Creation
Store leftover German Chocolate Poke Cake tightly covered in the refrigerator. It will stay fresh and delicious for up to 3-4 days. The flavors often deepen overnight, making it even better on the second day!
Frequently Asked Questions
What makes this cake “German” chocolate cake?
The term “German’s” chocolate cake (named after American baker Samuel German, who developed a type of dark baking chocolate for Baker’s Chocolate Company) refers to a specific style of chocolate cake featuring a traditional coconut-pecan frosting. This poke cake uses those same beloved flavors.
Can I make this cake ahead of time?
Absolutely! In fact, it’s highly recommended. The cake needs at least 2 hours of chilling time for the filling to set. Making it the day before is ideal, as the flavors meld beautifully overnight.
Can I use a different type of chocolate cake mix?
Yes, you can use any chocolate cake mix. However, using a Devil’s Food cake mix will give you a richer, darker chocolate flavor that complements the caramel-coconut topping perfectly.
What if I don’t have evaporated milk?
Whole milk or half-and-half can be used as a substitute for evaporated milk in the topping. However, evaporated milk provides a thicker, richer base that helps achieve the characteristic caramel-like consistency.
How should I store the cake if I’ve made it in advance?
Cover the cake tightly with plastic wrap or foil once it has cooled and chilled. Store it in the refrigerator for up to 3-4 days.
Did you try this decadent German Chocolate Poke Cake? We’d love to hear how it turned out! Share your thoughts, tips, or any variations you tried in the comments below. And don’t forget to tag us on social media when you share your delicious creations!
German Chocolate Poke Cake
Description
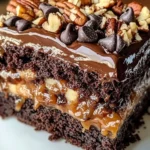
This German Chocolate Poke Cake is a decadent dessert that combines rich chocolate cake with gooey caramel, coconut, and pecans. Perfect for any occasion, it’s easy to make yet tastes indulgent enough to feel special. With every bite, you’ll enjoy layers of moist cake, sweet filling, and crunchy toppings that make this recipe a true crowd-pleaser.
Ingredients
- 1box chocolate cake mix (plus ingredients listed on the box: eggs, oil, and water)
- 1can (14 oz) sweetened condensed milk
- 1 cupcaramel sauce
- 1 cupshredded sweetened coconut
- 1 cupchopped pecans
- 1container whipped topping (or1 cupchocolate ganache for frosting)
- 1/2 cupchocolate chips
Instructions
- Preheat your oven to 350°F (175°C) and prepare a 9×13-inch baking dish by greasing or lining it with parchment paper.
- Prepare the chocolate cake batter according to the instructions on the box, pour it into the dish, and bake as directed.
- Allow the cake to cool slightly. Use the handle of a wooden spoon to poke holes evenly across the surface, being careful not to go all the way through the cake.
- Pour the sweetened condensed milk over the cake, ensuring it seeps into the holes. Drizzle the caramel sauce on top and spread evenly.
- Sprinkle the shredded coconut and chopped pecans over the cake.
- Once the cake has cooled completely, spread the whipped topping or chocolate ganache over the surface.
- Garnish with chocolate chips and additional chopped pecans. Refrigerate for at least 2 hours before serving.
Notes
For extra flavor, toast the coconut and pecans before adding them to the cake.
This cake is best served chilled to fully enjoy the gooey texture and melded flavors.
Leftovers can be stored in the refrigerator for up to 5 days or frozen for up to 3 months.