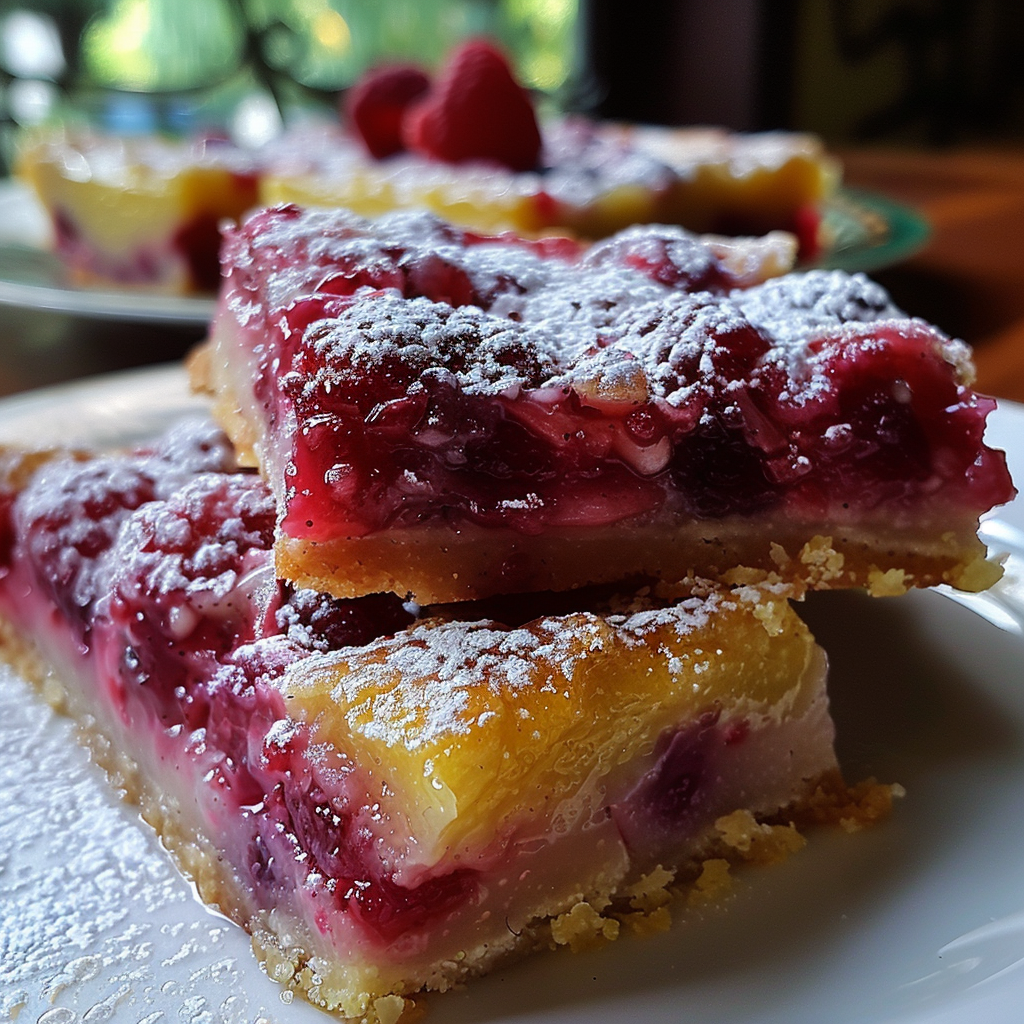
10 Secrets to Perfecting the Most Irresistible Raspberry Lemon Bars You’ll Ever Taste!

Hey there, dessert lovers! Are you ready to embark on a tantalizing journey that’ll make your taste buds dance with joy? Today, we’re diving into the world of heavenly Raspberry Lemon Bars – a dessert so divine, it’ll have you questioning why you haven’t tried it sooner. These zesty, fruity squares are the perfect balance of sweet and tart, creamy and crunchy. Trust me, once you’ve tasted these bad boys, there’s no going back!

So, grab your apron, preheat that oven, and let’s get baking! I’m about to spill all the secrets to creating the most mouthwatering Raspberry Lemon Bars you’ve ever encountered. Whether you’re a seasoned baker or a curious newbie, this recipe is foolproof and guaranteed to impress. Ready to become the dessert hero at your next gathering? Let’s dive in!

  1. The Magic of Raspberry and Lemon: A Match Made in Dessert Heaven

Before we jump into the nitty-gritty of our recipe, let’s take a moment to appreciate the beautiful union of raspberries and lemons. These two flavors are like the power couple of the fruit world – individually amazing, but together? Absolutely explosive!

Raspberries bring a sweet, slightly tart flavor with a soft, juicy texture. They’re packed with antioxidants and vitamin C, making them not just delicious but also nutritious. On the other hand, lemons offer that zingy, citrusy kick that wakes up your taste buds and adds a refreshing twist to any dessert.

When combined, these fruits create a harmony of flavors that’s both bold and balanced. The tartness of the lemon cuts through the sweetness of the raspberries, while the berries add depth and complexity to the citrus notes. It’s no wonder that raspberry lemon desserts have become increasingly popular, with searches for “raspberry lemon recipes” increasing by 22% in the past year alone!

  1. Ingredients: The Building Blocks of Perfection

Now that we’ve established why raspberry and lemon are a match made in dessert heaven, let’s talk about what you’ll need to create these heavenly bars. Remember, quality ingredients are key to achieving that perfect flavor and texture!

For the crust:

  • 1 1/2 cups all-purpose flour
  • 1/3 cup powdered sugar
  • 1/4 teaspoon salt
  • 1/2 cup cold unsalted butter, cubed

For the filling:

  • 4 large eggs
  • 1 1/2 cups granulated sugar
  • 1/4 cup all-purpose flour
  • 2/3 cup freshly squeezed lemon juice (about 4-5 lemons)
  • Zest of 2 lemons
  • 1/4 teaspoon salt

For the raspberry swirl:

  • 1 cup fresh raspberries
  • 2 tablespoons granulated sugar
  • 1 teaspoon cornstarch
  1. Step-by-Step Guide: Crafting Your Raspberry Lemon Masterpiece

Step 1: Preparing the Crust

  1. Preheat your oven to 350°F (175°C) and line a 9×13-inch baking pan with parchment paper.
  2. In a food processor, pulse together flour, powdered sugar, and salt.
  3. Add cold butter cubes and pulse until the mixture resembles coarse crumbs.
  4. Press the mixture evenly into the prepared pan.
  5. Bake for 20 minutes or until lightly golden. Set aside to cool.

Step 2: Creating the Lemon Filling

  1. In a large bowl, whisk together eggs, sugar, flour, lemon juice, lemon zest, and salt until smooth.
  2. Pour the mixture over the cooled crust.

Step 3: Making the Raspberry Swirl

  1. In a small saucepan, combine raspberries, sugar, and cornstarch.
  2. Cook over medium heat, stirring constantly, until the mixture thickens (about 5 minutes).
  3. Strain through a fine-mesh sieve to remove seeds.
  4. Drop spoonfuls of the raspberry mixture over the lemon filling.
  5. Use a knife to gently swirl the raspberry into the lemon filling, creating a marbled effect.

Step 4: Baking to Perfection

  1. Bake for 25-30 minutes, or until the filling is set and the edges are lightly browned.
  2. Allow to cool completely in the pan before cutting into bars.
  3. Tips and Tricks: Elevating Your Raspberry Lemon Bars Game

Now that you’ve got the basic recipe down, let’s explore some pro tips to take your Raspberry Lemon Bars from great to absolutely mind-blowing:

  1. Use fresh lemons: Trust me, the difference in flavor between fresh and bottled lemon juice is night and day. Plus, you’ll need the zest anyway, so why not go all in?
  2. Don’t skip the parchment paper: This simple step will make removing and cutting your bars a breeze.
  3. Chill before cutting: For clean, picture-perfect cuts, refrigerate your bars for at least an hour before slicing.
  4. Experiment with the swirl: Get creative with your raspberry swirl pattern – each bar can be a unique work of art!
  5. Dust with powdered sugar: Just before serving, give your bars a light dusting of powdered sugar for that extra touch of elegance.
  6. Frequently Asked Questions: Your Raspberry Lemon Bar Queries Answered

Q1: Can I use frozen raspberries instead of fresh? A: Absolutely! Just make sure to thaw and drain them well before use to avoid excess moisture.

Q2: How long do these bars keep? A: When stored in an airtight container in the refrigerator, these bars will stay fresh for up to 5 days. But let’s be honest, they probably won’t last that long!

Q3: Can I make these bars gluten-free? A: Yes! Simply substitute the all-purpose flour with a gluten-free flour blend in both the crust and filling.

Q4: Can I freeze Raspberry Lemon Bars? A: You bet! These bars freeze beautifully for up to 3 months. Just thaw in the refrigerator overnight before serving.

Q5: How do I know when the bars are done baking? A: The edges should be lightly browned, and the center should be set but still have a slight jiggle when you gently shake the pan.

  1. The Health Benefits: Guilt-Free(ish) Indulgence

While we can’t claim that these Raspberry Lemon Bars are a health food, they do offer some nutritional benefits that might make you feel a little less guilty about reaching for that second (or third) piece:

  1. Vitamin C powerhouse: Both raspberries and lemons are excellent sources of vitamin C, which supports immune function and skin health.
  2. Antioxidant rich: Raspberries are packed with antioxidants that help fight inflammation and protect against chronic diseases.
  3. Fiber boost: Raspberries provide a good amount of dietary fiber, promoting digestive health.
  4. Low in fat: Compared to many other desserts, these bars are relatively low in fat, especially if you use a light hand with the butter in the crust.
  5. Natural flavors: By using fresh fruits, you’re avoiding artificial flavors and colors often found in store-bought desserts.
  6. Serving Suggestions: Taking Your Raspberry Lemon Bars to the Next Level

While these bars are absolutely delicious on their own, why not get creative with your serving ideas? Here are a few suggestions to really wow your guests:

  1. À la mode: Serve warm with a scoop of vanilla ice cream for a delightful contrast of temperatures and textures.
  2. Lemon curd drizzle: For lemon lovers, add an extra zing with a drizzle of homemade lemon curd.
  3. Fresh berry garnish: Top each bar with a fresh raspberry and a sprig of mint for a pop of color and freshness.
  4. Whipped cream rosette: Pipe a small rosette of fresh whipped cream onto each bar for an elegant touch.
  5. Chocolate pairing: For a decadent twist, serve alongside dark chocolate truffles to balance the fruity flavors.
  6. The Perfect Occasions: When to Serve Your Raspberry Lemon Bars

These versatile bars are perfect for almost any occasion, but here are some ideas to get you started:

  1. Summer picnics: The refreshing flavors are perfect for outdoor dining.
  2. Bridal or baby showers: The pretty colors make them ideal for celebratory events.
  3. Afternoon tea: Pair with a cup of Earl Grey for a sophisticated treat.
  4. Holiday gatherings: A bright alternative to heavy winter desserts.
  5. Just because: Who needs a special occasion to enjoy something delicious?
  6. Variations on a Theme: Twists on the Classic Recipe

Once you’ve mastered the classic Raspberry Lemon Bars, why not get creative with some variations?

  1. Blackberry Lime Bars: Swap raspberries for blackberries and lemon for lime for a different flavor profile.
  2. Orange Cranberry Bars: Perfect for fall, this combination is tart and festive.
  3. Strawberry Lemonade Bars: A summer classic in dessert form!
  4. Blueberry Lemon Lavender Bars: Add a touch of culinary lavender for a floral note.
  5. Tropical Raspberry Lemon Bars: Mix in some coconut to the crust for a tropical twist.
  6. The Science Behind the Perfect Bar: Understanding the Magic

Ever wondered why your Raspberry Lemon Bars turn out so perfectly creamy and set just right? It’s all about the science! The eggs in the filling create a custard-like texture when heated, while the acid in the lemon juice helps to set the filling by denaturing the proteins in the eggs. The cornstarch in the raspberry swirl acts as a thickening agent, ensuring that your swirl holds its shape and doesn’t bleed into the lemon filling.

Understanding these principles can help you troubleshoot if things don’t go quite as planned. For example, if your filling is too runny, you might need to add a bit more flour or cornstarch to help it set. If it’s too firm, you might have overcooked it or used too much thickener.

Conclusion:

There you have it, folks – the ultimate guide to creating the most irresistible Raspberry Lemon Bars you’ll ever taste! From the perfect balance of sweet and tart flavors to the creamy filling and buttery crust, these bars are sure to become a staple in your dessert repertoire.

Remember, baking is both an art and a science. Don’t be afraid to experiment and make this recipe your own. Whether you stick to the classic version or try out one of the variations, the most important ingredient is the love and care you put into your baking.

So, what are you waiting for? Grab those lemons, pick up some fresh raspberries, and get ready to impress your friends, family, and taste buds with these heavenly Raspberry Lemon Bars. Happy baking, and may your kitchen always be filled with the sweet aroma of success!

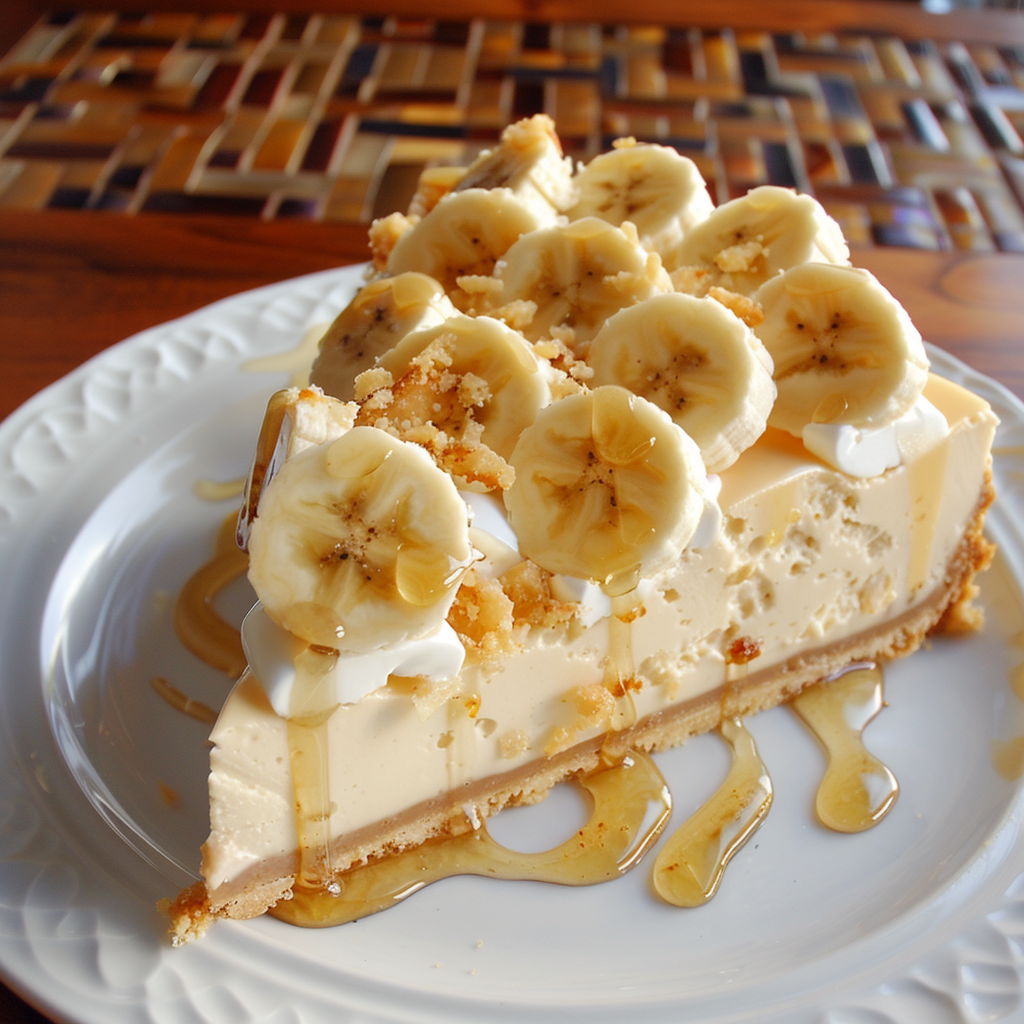
No Bake Banana Pudding Cheesecake: A Deliciously Simple Treat

Are you craving a dessert that’s creamy, delicious, and oh-so-easy to make? Look no further! This No Bake Banana Pudding Cheesecake is the perfect treat for any occasion. With its rich banana flavor, smooth pudding texture, and crunchy graham cracker crust, it’s sure to be a hit with everyone. Plus, it’s no-bake, so you can whip it up without even turning on the oven. Ready to dive in? Let’s get started!

Introduction

Banana pudding and cheesecake are two beloved desserts. Combining them into a no-bake version is like hitting the jackpot in the world of sweets. Whether you’re preparing for a family gathering, a potluck, or just want a sweet treat at home, this No Bake Banana Pudding Cheesecake has got you covered. It’s simple to make, doesn’t require an oven, and is packed with flavors that everyone loves.

In this comprehensive guide, we’ll walk you through the entire process, from selecting the best ingredients to serving the perfect slice. We’ll also answer some frequently asked questions and provide tips and tricks to ensure your cheesecake turns out perfectly every time.

Why No Bake Banana Pudding Cheesecake?

1. Convenience

This recipe is incredibly convenient. No need to worry about preheating the oven or checking if your cheesecake is baked through. Just mix, layer, chill, and you’re done!

2. Perfect for Any Occasion

Whether it’s a summer BBQ, a holiday dinner, or just a weekend treat, this cheesecake fits the bill. Its cool, creamy texture is refreshing and delightful.

3. Crowd-Pleaser

Bananas and cheesecake are both classic flavors that almost everyone enjoys. Combining them guarantees a dessert that will please a crowd.

Ingredients You’ll Need

For the Crust:

  • 2 cups graham cracker crumbs
  • 1/2 cup melted butter
  • 1/4 cup sugar

For the Cheesecake Filling:

  • 2 (8 oz) packages cream cheese, softened
  • 1 cup powdered sugar
  • 1 teaspoon vanilla extract
  • 1 (3.4 oz) package instant banana pudding mix
  • 2 cups cold milk

For the Topping:

  • 2 cups whipped cream
  • 2-3 bananas, sliced
  • Additional graham cracker crumbs for garnish

Step-by-Step Guide to Making No Bake Banana Pudding Cheesecake

1. Prepare the Crust

Start by combining the graham cracker crumbs, melted butter, and sugar in a bowl. Mix until well combined. Press the mixture into the bottom of a 9-inch springform pan to form an even crust. Chill in the refrigerator while you prepare the filling.

2. Make the Cheesecake Filling

In a large mixing bowl, beat the cream cheese until smooth. Gradually add the powdered sugar and vanilla extract, continuing to beat until fully incorporated.

In another bowl, whisk together the banana pudding mix and cold milk for about 2 minutes, or until it starts to thicken. Gently fold the pudding mixture into the cream cheese mixture until well combined.

3. Assemble the Cheesecake

Spread the cheesecake filling evenly over the prepared crust. Smooth the top with a spatula.

4. Add the Topping

Top the cheesecake with whipped cream and sliced bananas. Sprinkle additional graham cracker crumbs on top for garnish.

5. Chill

Refrigerate the cheesecake for at least 4 hours, or until firm. Overnight is even better to allow the flavors to meld together perfectly.

6. Serve and Enjoy!

Carefully remove the cheesecake from the springform pan, slice, and serve. Enjoy the creamy, dreamy goodness!

Tips for the Perfect No Bake Banana Pudding Cheesecake

1. Use Fresh Ingredients

Fresh bananas and high-quality cream cheese will make a significant difference in the taste and texture of your cheesecake.

2. Chill Time

Allowing the cheesecake to chill for the full 4 hours (or overnight) is crucial. This helps the filling set properly and enhances the flavors.

3. Customize Your Toppings

Feel free to get creative with your toppings. Add chocolate shavings, caramel drizzle, or even some chopped nuts for extra texture and flavor.

Frequently Asked Questions

Q: Can I use a different crust?

A: Absolutely! While graham cracker crust is classic, you can also use crushed vanilla wafers or even a chocolate cookie crust for a different flavor profile.

Q: How long will this cheesecake last?

A: Stored in an airtight container in the refrigerator, this cheesecake can last up to 5 days. However, it’s best enjoyed within the first 2-3 days for optimal freshness.

Q: Can I make this cheesecake dairy-free?

A: Yes, you can! Substitute the cream cheese with a dairy-free alternative and use a non-dairy milk for the pudding mix.

Q: What if I don’t have a springform pan?

A: No worries! You can use a regular pie dish or a square baking dish. Just be sure to line it with parchment paper for easy removal.

Q: Can I freeze this cheesecake?

A: You can freeze this cheesecake, but keep in mind that the texture may change slightly. Freeze in individual slices for easier thawing.

Nutritional Information

This No Bake Banana Pudding Cheesecake is not only delicious but also has some nutritional benefits:

  • Calories: Approximately 350 per serving
  • Fat: 20g
  • Carbohydrates: 38g
  • Protein: 5g
  • Fiber: 1g

Conclusion

No Bake Banana Pudding Cheesecake is a fantastic dessert that combines the best of banana pudding and cheesecake into one easy-to-make treat. It’s perfect for those days when you want something sweet but don’t want to turn on the oven. With its creamy texture, rich banana flavor, and crunchy crust, it’s sure to become a favorite in your household. So, what are you waiting for? Give this recipe a try and enjoy a slice (or two) of deliciousness today!

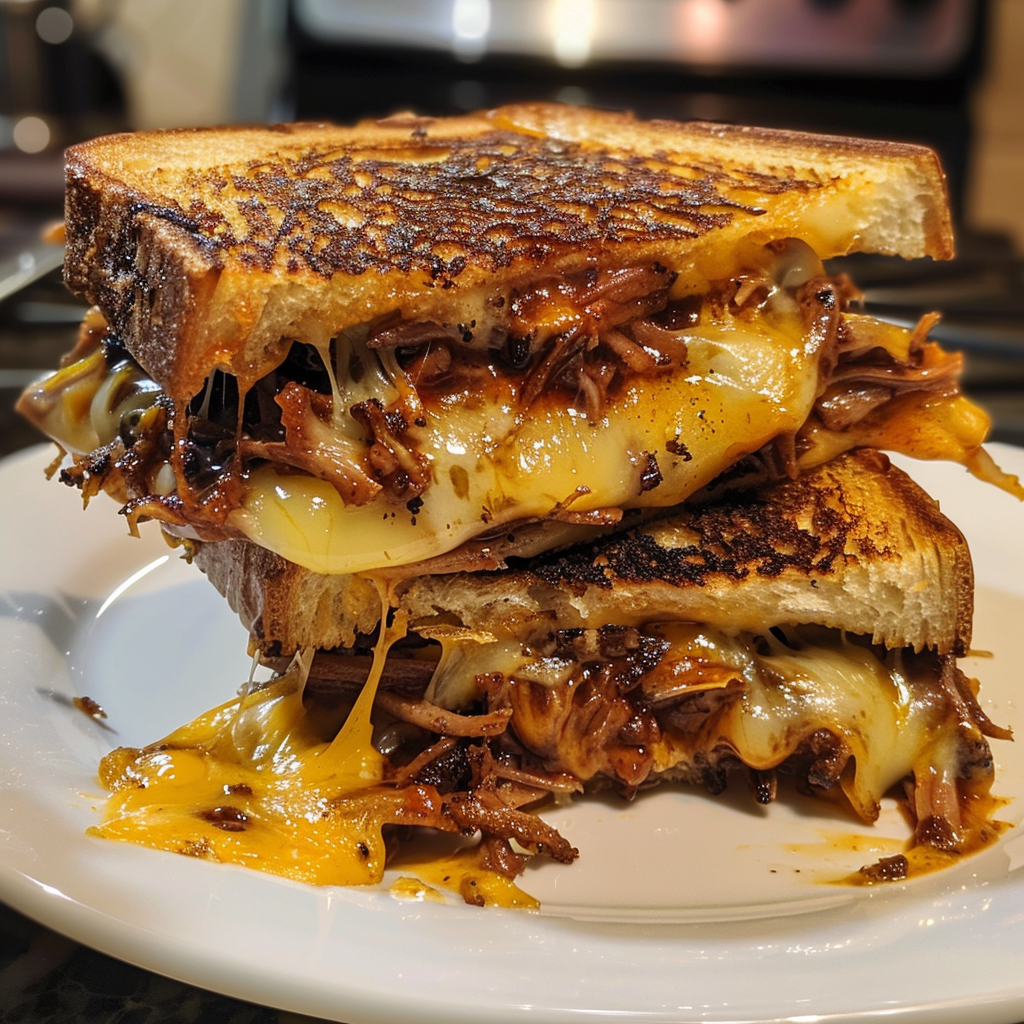
Ultimate BBQ Pulled Pork Grilled Cheese Recipe

If you’re craving a scrumptious dish that embodies both comfort and flavor, look no further than the BBQ pulled pork grilled cheese. This delightful grilled cheese recipe takes the classic pulled pork sandwich to a whole new level by combining smoky, tender pulled pork with ooey-gooey cheese, all nestled between perfectly toasted bread. It’s a mouthwatering fusion that BBQ enthusiasts and home cooks alike will adore. Get ready to impress your friends and family with the best grilled cheese they’ve ever tasted!

Key Takeaways

  • Discover the irresistible combination of BBQ pulled pork and melted cheese.
  • Learn to prepare the pulled pork for the ultimate comfort food recipe.
  • Find out how to choose the best bread for grilling.
  • Explore cooking techniques for perfect pulled pork.
  • Get tips on side dishes and dips to enhance your meal.

Introduction to BBQ Pulled Pork Grilled Cheese

The pulled pork grilled cheese introduction showcases a delicious twist on two beloved American comfort foods. Combining tender, smoked pork with gooey, melted cheese creates an indulgent sandwich that’s hard to resist. BBQ flavors infuse each bite, making it a suitable choice for any meal or gathering.

As this culinary fusion gains popularity, many home cooks and BBQ enthusiasts seek ways to perfect their pulled pork grilled cheese. The rich, smoky notes of expertly prepared smoked pork elevate the simple grilled cheese to an extraordinary level. Whether enjoyed as a hearty lunch or a main course at dinner, this sandwich is sure to impress.

Offering versatility and adaptability, the pulled pork grilled cheese can incorporate various ingredients, highlighting regional BBQ styles or personal preferences. With a blend of flavorful toppings and sides, this creation truly embraces the spirit of comfort food while encouraging creativity in the kitchen.

Ingredients Needed for Ultimate BBQ Pulled Pork Grilled Cheese

Creating the ultimate BBQ pulled pork grilled cheese requires a thoughtful selection of both essential ingredients and optional add-ins. Emphasizing quality will ensure a flavorful and satisfying dish. Below are the key ingredients to gather.

Essential Ingredients

  • BBQ Pulled Pork Ingredients: Tender pulled pork is the star of the show. Use a well-seasoned, slow-cooked pork shoulder or butt for the best results.
  • Grilled Cheese Ingredients: Select your bread, opting for sourdough or brioche for a deliciously buttery taste.
  • Best Cheeses for Grilled Cheese: Cheddar and Gouda pair wonderfully with BBQ flavors, providing that creamy, melty texture.

Optional Add-ins for Extra Flavor

Adding personal touches enhances the experience and allows for endless customization.

  • Grilled Cheese Add-ins: Consider layering in jalapeños for a spicy kick.
  • BBQ Grilled Cheese Extras: Caramelized onions introduce a hint of sweetness that beautifully balances the dish.
  • For added complexity, drizzle some BBQ sauce inside for a tangy burst of flavor.

Experimenting with these ingredients will transform your BBQ pulled pork grilled cheese into a personalized culinary delight! Enjoy the process and make it your own.

How to Prepare Pulled Pork for Grilling

Preparing delicious pulled pork involves selecting the right cut of meat and using a well-thought-out marinating and seasoning strategy. Understanding the best pork for grilling ensures a tender and flavorful end result, which enhances the overall experience of your BBQ pulled pork grilled cheese.

Choosing the Right Pork Cut

For pulled pork preparation, the two most popular pork cuts are pork shoulder and Boston butt. These cuts contain rich marbling, which keeps the meat moist during the cooking process. Choosing the right pork cuts for pulled pork significantly impacts the tenderness and flavor of the finished dish.

Marinade and Seasoning Tips

A proper pulled pork marinade plays an essential role in flavoring and breaking down meat fibers, making the pork tender and juicy. Consider using a blend that includes ingredients such as:

  • Paprika
  • Garlic powder
  • Onion powder
  • Brown sugar
  • Cayenne pepper (for a kick)

Applying a seasoning for BBQ pulled pork dry rub can enhance the flavor even more. Allow the pork to marinate for several hours or overnight for maximum flavor absorption. These flavoring tips ensure your pulled pork will be a highlight at any gathering.

Pork CutDescriptionBest Cooking Method
Pork ShoulderFatty and well-marbled, ideal for slow cooking.Slow cook or Smoke
Boston ButtFlavorful cut with good fat content, very tender.Slow cook or Smoke
Pork LoinLeaner cut, can dry out if cooked too long.Oven Roast or Grill

Cooking Techniques for Perfect Pulled Pork

When it comes to achieving mouthwatering pulled pork, understanding the different cooking methods for pulled pork is essential. Each technique offers unique advantages and flavors, creating versatile results that can suit any palate. Here are two popular methods, along with smoking techniques, that can take your pulled pork to the next level.

Slow Cooking vs. Instant Pot

Slow cooker pulled pork delivers that coveted tenderness and rich flavor through a long cooking process. This method can take anywhere from 8 to 12 hours, but the low and slow approach allows the meat to absorb seasonings deeply, yielding a moist and flavorful dish. It’s a great option for busy individuals who want to set it and forget it.

On the other hand, if time is of the essence, Instant Pot pulled pork can provide similar flavors in a fraction of the time, typically around 60 to 90 minutes. This method is perfect for those needing a quick meal without sacrificing taste. Understanding both methods grants you flexibility based on your schedule and events.

Smoking Methods for Enhanced Flavor

Smoking pulled pork is a revered technique that introduces layers of flavor through wood smoke. BBQ smoking techniques, such as using a dedicated smoker or a gas grill with wood chips, are excellent ways to achieve that delicious, smoky taste. Temperature control is paramount; ideally, aim for a consistent 225°F to 250°F for optimal results.

Smoking time can vary, but generally, a range of 6 to 12 hours is common, depending on the size of the pork cut. Experimenting with different types of wood, such as hickory, mesquite, or applewood, allows for personalized flavor enhancement methods that elevate your pulled pork experience. The combination of time, temperature, and wood choice creates a delightful smoked pork that complements your grilled cheese perfectly.

Cooking MethodTime RequiredFlavor ProfileTenderness
Slow Cooker Pulled Pork8-12 hoursRich, deep flavorFall-apart tender
Instant Pot Pulled Pork60-90 minutesSatisfying, robust flavorTender with slight bite
Smoking Pulled Pork6-12 hoursSmoky, complex flavorMelt-in-mouth texture

Grilled Cheese Basics: Choosing the Best Bread

Selecting the right bread can elevate your grilled cheese experience. Different bread types for grilled cheese offer distinct flavors, textures, and crunch levels that make a significant impact on the overall sandwich. Understanding the best bread for grilled cheese will ensure a delightful fusion of taste and texture in every bite.

Types of Bread That Work Best

When it comes to making grilled cheese, certain breads shine more than others. Here are some popular choices:

  • Sourdough: Known for its tangy flavor and sturdy texture, sourdough provides a fantastic base that holds up well when grilled.
  • Brioche: This rich, buttery bread brings a touch of sweetness, making it an excellent choice for a unique grilled cheese experience.
  • Whole Grain: For a healthier option, whole grain bread adds great flavor while enhancing the nutritional profile of your sandwich.

Tips for Achieving the Perfect Crunch

To ensure that your grilled cheese has that desired crunchy exterior while remaining gooey inside, consider the following grilled cheese crunch tips:

  • Butter Generously: Spread a generous amount of butter on the outer sides of the bread. This creates a golden crust while grilling.
  • Moderate Heat: Use medium heat to allow the bread to toast evenly while the cheese melts. High heat can burn the bread before the cheese is fully melted.
  • Avoid Overcrowding: Cooking one or two sandwiches at a time ensures that they cook properly and develop that perfect crust without steaming.

Experimenting with different bread types for grilled cheese can open up a world of delicious flavor combinations, enhancing your grilled cheese recipes to new heights. With the right bread grilling techniques and tips, you can achieve an irresistible crunch and ooey-gooey center that will have everyone coming back for more.

Bread TypeTextureFlavor Profile
SourdoughCrispy exterior, chewy interiorTangy, slightly sour
BriocheSoft and fluffyRich, buttery sweetness
Whole GrainDense and heartyNutty, slightly sweet

BBQ Pulled Pork Grilled Cheese: Step-by-Step Instructions

Creating the perfect BBQ pulled pork grilled cheese sandwich requires a few simple steps. Follow these cooking instructions for an irresistible grilled cheese that brings together savory pulled pork and melty cheese.

  1. Preheat your skillet. Set your skillet over medium heat to allow for an even cooking temperature.
  2. Prepare the bread. Choose your favorite type of bread. Butter one side of each slice to achieve a golden, crispy exterior during grilling.
  3. Add cheese. Place a generous amount of cheese on the unbuttered side of one slice. Cheddar or Monterey Jack cheese works well.
  4. Layer with pulled pork. Spoon a hearty amount of BBQ pulled pork over the cheese to create a mouthwatering filling.
  5. Top off your sandwich. Place another slice of bread on top, with the buttered side facing outward.
  6. Begin grilling. Carefully place the sandwich in the preheated skillet. Cook it for about 3-4 minutes until golden brown.
  7. Flip and continue cooking. Use a spatula to gently flip the sandwich. Grill the other side for another 3-4 minutes, keeping an eye on the cheese to ensure it melts perfectly.
  8. Check if done. Once both sides are crispy and the cheese has melted, remove the sandwich from the skillet.
  9. Serve and enjoy. Allow the sandwich to cool slightly before slicing it in half. Serve with your favorite sides for the ultimate BBQ pulled pork grilled cheese experience!

By following these grilling sandwich steps, you’ll create a delicious BBQ pulled pork grilled cheese recipe that is sure to impress family and friends.

Essential Cooking Tips for Grilled Cheese

Creating the perfect grilled cheese sandwich involves more than just bread and cheese. Understanding the right cooking heat for grilled cheese is essential for achieving that golden-brown exterior while ensuring the cheese melts beautifully. Follow these tips to elevate your grilled cheese game.

Understanding Heat Levels

One of the most critical heat levels tips is adjusting your stove temperature. Start with medium heat; this helps to toast the bread while giving the cheese time to melt without burning. If the bread browns too quickly, turn down the heat. Settle into a rhythm where you can leisurely flip the sandwich, allowing for consistent cooking.

How to Achieve Melty Cheese

For melty cheese tips, the choice of cheese plays a significant role. A blend of cheeses like cheddar and Monterey Jack offers both flavor and excellent melting properties. Using a lid to cover the pan can create a steam effect, promoting faster melting—an effective cheese melting technique. Remember, patience is key; don’t rush the cooking process to ensure optimal results.

Pairing Ideas: Sides for Your Grilled Cheese

Enhancing your BBQ pulled pork grilled cheese with the right side dishes and dips for grilled cheese can take your meal to a whole new level. Consider these pairing suggestions that balance flavors and textures, ensuring a delightful dining experience.

Delicious Dips to Complement Your Meal

When it comes to dips for grilled cheese, think about how each option can elevate your sandwich:

  • Tangy BBQ Sauce: Adds a smoky sweetness that pairs well with pulled pork.
  • Ranch Dressing: Creamy and herbaceous, it contrasts beautifully with the savory elements of the sandwich.
  • Spicy Ketchup: A zesty twist that brings out the flavors of the grilled cheese.

Best Sides to Serve with BBQ Pulled Pork Grilled Cheese

To create perfect meal pairings, consider these sides for grilled cheese that complement the richness of your sandwich:

  • Coleslaw: The crunch and acidity provide a refreshing counterpoint.
  • Potato Chips: For added texture and a satisfyingly salty crunch.
  • Classic Tomato Soup: A comforting classic that accentuates the flavors of the grilled cheese.
Dip/SauceFlavor ProfileTexture
Tangy BBQ SauceSmoky and SweetThick and Saucy
Ranch DressingCreamy and HerbaceousThick and Smooth
Spicy KetchupZesty and SweetThick and Glossy
ColeslawCrisp and TangyCrunchy
Potato ChipsSalty and SavoryCrunchy
Classic Tomato SoupRich and Slightly AcidicLiquid and Smooth

Experimenting with these pairing suggestions can lead to incredible flavor discoveries, making every bite of your grilled cheese memorable.

Storing and Reheating Leftover Pulled Pork

Properly storing pulled pork is essential for maintaining its deliciousness and safety for future meals. Understanding food preservation techniques can significantly enhance your leftovers experience. Here are some effective methods for storing pulled pork to keep it flavorful and fresh.

Best Practices for Storing Pulled Pork

When it comes to storing pulled pork, following specific guidelines ensures the best quality. Utilize these leftovers tips:

  • Allow the pulled pork to cool to room temperature before transferring it to an airtight container.
  • Seal the container tightly to prevent air exposure, which can lead to spoilage.
  • Refrigerate the container within two hours of cooking to maximize freshness.
  • For longer-term preservation, consider freezing the pork. Portion it out into smaller containers or freezer bags to make reheating easier later.

The ideal duration for storing pulled pork in the refrigerator is 3 to 4 days. In the freezer, it can last for up to 3 months without significant loss of quality.

Reheating Tips to Maintain Flavor

When it’s time to enjoy your leftover pulled pork, reheating properly is crucial for maintaining flavor and moisture. Explore these flavorful reheating methods:

  • Oven: Preheat your oven to 250°F. Place the pulled pork in an oven-safe dish and cover it with foil to keep it from drying out. Heat for about 20 minutes or until warmed through.
  • Stovetop: In a skillet, add a splash of broth or water to the pan. This method helps retain moisture while reheating. Cook over medium-low heat, stirring occasionally until hot.
  • Microwave: Place the pulled pork in a microwave-safe dish, add a bit of liquid, and cover it with a microwave-safe lid. Heat in short intervals, stirring in between, to ensure even warming.

These strategies for reheating pulled pork maximize enjoyment from your leftovers, ensuring each bite tastes fresh and flavorful.

Variations of BBQ Pulled Pork Grilled Cheese

Exploring different variations of BBQ pulled pork grilled cheese can elevate your sandwich experience. By experimenting with various cheese types and vegetarian alternatives, you can create unique flavor combinations that cater to all tastes.

Spicing It Up: Different Cheese Choices

Choosing the right cheese variety for grilled cheese greatly impacts the overall flavor profile. By incorporating bold cheeses, you can enhance your grilled cheese variations:

  • Pepper Jack: Adds a spicy kick, perfect for those craving some heat.
  • Blue Cheese: Provides a rich and tangy flavor that pairs well with BBQ pulled pork.
  • Cheddar: A classic choice, offering a sharp and creamy texture.
  • Monterey Jack: This cheese melts beautifully, creating a gooey sandwich.
  • Smoked Gouda: Adds an enticing smokiness that complements the BBQ flavor.

Vegetarian Version: Substitutes for Pulled Pork

For those seeking meat alternatives, several vegetarian pulled pork substitutes can still deliver a satisfying experience. Consider trying:

  • Jackfruit: Shredded jackfruit mimics the texture of pulled pork and absorbs flavors well.
  • Mushrooms: Their umami richness makes them a great option for BBQ recipes.
  • Tempeh: This fermented soy product offers a hearty texture and can be marinated for flavor.
  • Tofu: When pressed and grilled, it provides a fantastic meat alternative in this recipe.

These vegetarian options can easily fit into BBQ vegetarian recipes, ensuring everyone can enjoy this grilled cheese delight without sacrificing flavor. Feel free to mix and match cheeses and substitutes to create your perfect grilled cheese masterpiece!

Serving Suggestions for BBQ Pulled Pork Grilled Cheese

Creating a visually stunning presentation can elevate your BBQ pulled pork grilled cheese into a remarkable dining experience. Utilizing clever meal presentation tips is essential for impressing guests. Consider the following ideas to enhance the grilling dish aesthetics.

Presentation Tips for a Festive Meal

When serving BBQ pulled pork grilled cheese, presentation can make all the difference. Here are some serving ideas that will catch the eye:

  • Diagonally cut sandwiches for a classic touch.
  • Arrange sandwiches on a colorful platter alongside vibrant sides.
  • Garnish with fresh herbs or a drizzle of BBQ sauce for added flair.
  • Include bite-sized appetizers to complement the main dish.

These meal presentation tips will not only please the palate but also delight the senses, creating an inviting atmosphere for your guests.

How to Create a BBQ Party Platter

Transforming your BBQ pulled pork grilled cheese into a star attraction at a gathering is simple with effective BBQ party ideas. Consider these entertaining suggestions for a shareable platter:

  • Include mini sliders made with leftover pulled pork.
  • Add a variety of dips such as spicy mustard, ranch, or salsa.
  • Incorporate an assortment of sides, like coleslaw or potato salad, for versatility.
  • Feature colorful veggies and fruits to balance the richness of cheese and meats.

Utilizing these serving platter tips will create a vibrant and enjoyable feast. Delight your guests with a visually appealing and delicious BBQ party experience that highlights the best of your grilled cheese creations.

Serving IdeaDescription
Diagonally Cut SandwichesA classic approach that enhances the visual appeal and bite size.
Colorful PlatterUse bold colors to contrast with the grilled cheese for eye-catching aesthetics.
Mini SlidersOffer a variety of flavors while keeping portions small for sharing.
Diverse DipsProvide several options to elevate the dining experience with complementary flavors.
Assorted SidesBalance richness with lighter, refreshing options to satisfy all palates.

Conclusion

In this BBQ pulled pork grilled cheese recap, we’ve explored an exciting and flavorful dish that combines the rich, smoky essence of pulled pork with the delightful crunch of grilled cheese. Throughout the article, you’ve learned how to prepare pulled pork, select the best bread, and even discovered various serving suggestions to elevate your meal experience.

As you prepare to dive into the kitchen, allow your creativity to shine! Feel free to make personal modifications to the recipe, transforming it into a dish that reflects your taste preferences. Whether it’s experimenting with different cheeses or adding unique spices, the possibilities are endless. Our final thoughts emphasize that cooking should be an enjoyable and fulfilling journey.

Now, let this be your invitation for meal inspiration! Gather your ingredients, fire up the skillet, and savor the satisfaction of creating your own BBQ pulled pork grilled cheese at home. Whether it’s a casual weeknight dinner or a festive gathering, this dish promises to impress and delight. Happy cooking!

FAQ

What is BBQ pulled pork grilled cheese?

BBQ pulled pork grilled cheese is a delicious sandwich that combines smoky pulled pork with melted cheese, encased in perfectly toasted bread. It’s a fusion of comfort food and BBQ flavors, making it a must-try for any food lover.

What ingredients do I need to make BBQ pulled pork grilled cheese?

To make BBQ pulled pork grilled cheese, you’ll need pulled pork, cheese (like cheddar or gouda), and your choice of bread (such as sourdough or brioche). Optional add-ins include jalapeños, caramelized onions, and BBQ sauce for enhanced flavor.

How can I ensure my grilled cheese has the perfect crunch?

Achieving a perfect crunch for your grilled cheese involves using the right bread and buttering it thoroughly. Cooking over moderate heat prevents burning while ensuring the inside stays gooey. Don’t overcrowd the pan, as this allows even cooking and optimal texture.

What types of cheese work best for this sandwich?

The best cheeses for BBQ pulled pork grilled cheese include sharp cheddar, gouda, pepper jack, and even blue cheese for those seeking bold flavors. Mixing different cheeses can add depth and enhance the overall taste of your sandwich.

Can I make a vegetarian version of BBQ pulled pork grilled cheese?

Yes! You can use plant-based substitutes like jackfruit, mushrooms, or tempeh to create a delicious vegetarian version of BBQ pulled pork grilled cheese, ensuring it’s packed with flavor without any meat.

What are some good sides to serve with BBQ pulled pork grilled cheese?

Pair your BBQ pulled pork grilled cheese with sides like coloeslaw, potato chips, or a warm bowl of tomato soup. These sides offer great flavor harmony and textural contrast, making for a well-rounded meal.

How should I store leftovers of pulled pork?

To store leftover pulled pork, keep it in an airtight container in the refrigerator. It’s best consumed within 3-4 days. Make sure to reheat using methods that preserve moisture, like the oven or stovetop.

Can I use a slow cooker for my pulled pork?

Absolutely! The slow cooker is an excellent method for making BBQ pulled pork. It ensures tender, flavorful meat by cooking low and slow, which is perfect for achieving that melt-in-your-mouth texture.

What are some creative ways to serve BBQ pulled pork grilled cheese?

For a festive presentation, cut the sandwiches diagonally and serve them with colorful sides. You can also create a BBQ party platter with mini sliders, assorted dips, and various sides to make it an inviting experience for guests.

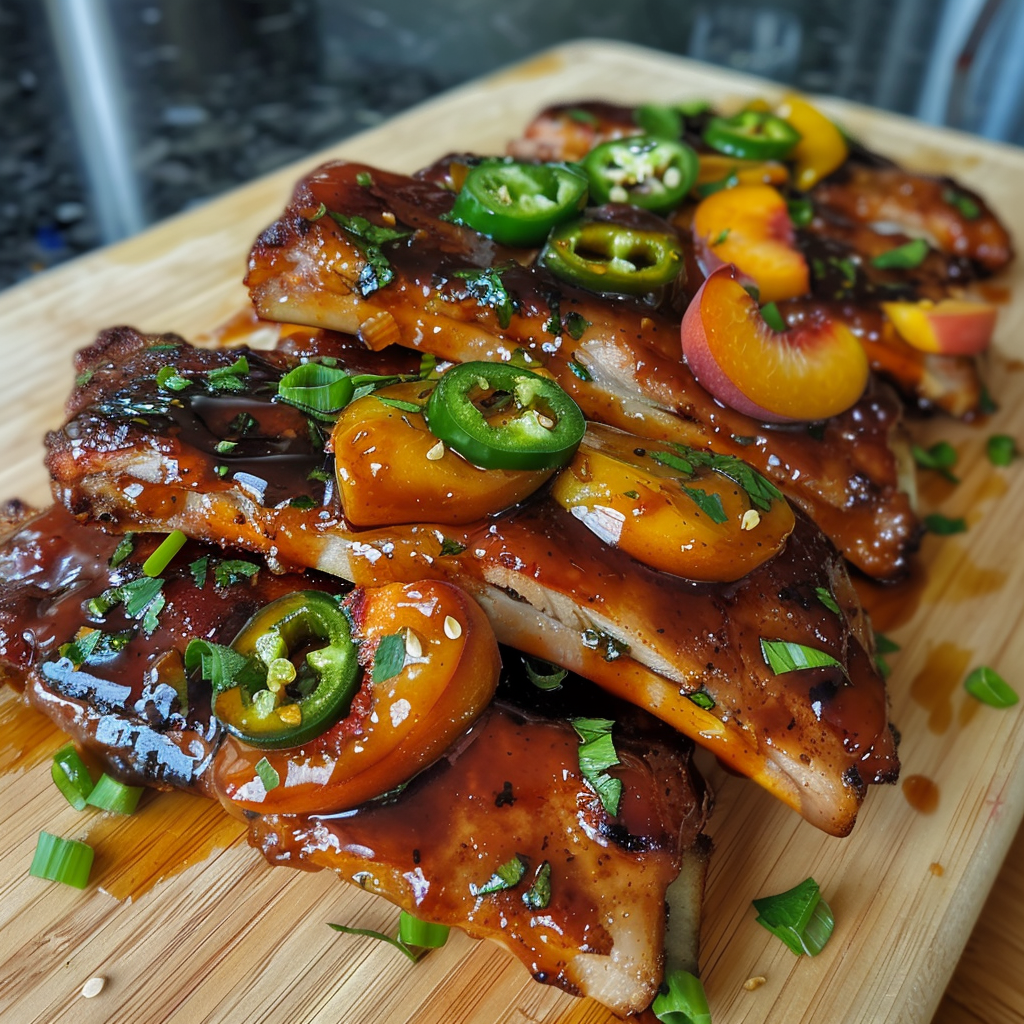
Jalapeno Peach Glazed Ribs Recipe | Sweet & Spicy

Are you ready to elevate your summer BBQ with a culinary delight? The jalapeno peach glazed ribs are an extraordinary combination of flavors, where the sweetness of juicy peaches meets the fiery kick of jalapenos. This BBQ ribs recipe is perfect for summer gatherings or any occasion where flavorful, finger-licking food is a must. Get set to embark on a delicious journey as we explore how to create these sweet and spicy ribs that will surely impress your family and friends while enjoying some memorable grilling ribs moments together!

Key Takeaways

  • Jalapeno peach glazed ribs combine sweet and spicy flavors for a unique taste experience.
  • This BBQ ribs recipe is ideal for summer cookouts and celebrations.
  • Using fresh peaches enhances the flavor of the glaze.
  • Master grilling ribs with proper techniques for the best results.
  • Pair these ribs with complementary side dishes and beverages for a complete meal.
  • Storing and reheating tips can help maintain the deliciousness of leftovers.

Introduction to Jalapeno Peach Glazed Ribs

When it comes to an engaging introduction to ribs, few dishes can compete with jalapeno peach glazed ribs. These delicious creations blend the sweetness of ripe peaches with a zing of jalapenos, resulting in a unique flavor profile that captures the essence of summer barbecues. What are jalapeno peach glazed ribs, you may ask? They’re a delightful twist on traditional barbecue ribs, infusing them with a sweet-spicy glaze that elevates the dining experience.

The history of using fruit-based glazes in barbecue extends back many years, adding depth and complexity to the dish. The combination of sweet and spicy elements in this glaze not only enhances the flavor of the meat but also offers a contrast that keeps diners coming back for more. BBQ flavor combinations like these are what set apart the best backyard grill masters from the rest.

Creating jalapeno peach glazed ribs is an opportunity for culinary creativity, allowing you to explore various flavor notes while impressing your guests. Start this exciting journey into BBQ by mastering the art of these vibrant ribs.

Ingredients for Jalapeno Peach Glazed Ribs

Creating delightful jalapeno peach glazed ribs requires a selection of quality ingredients for glazed ribs. The right components not only enhance flavor but also make the cooking process enjoyable.

Essential Ingredients

  • Pork ribs
  • Fresh peaches
  • Jalapenos
  • Brown sugar
  • Garlic
  • Variety of seasonings (such as salt, pepper, and paprika)

These are the fundamental BBQ rib ingredients that will create a mouthwatering base for this dish. Each ingredient plays a critical role in achieving the ultimate balance of sweet and spicy flavors.

Optional Ingredients for Extra Flavor

  • Honey
  • Balsamic vinegar
  • Fresh herbs (like rosemary or thyme)

For those looking to elevate the flavor profile of the dish, consider adding optional ingredients. A drizzle of honey or a splash of balsamic vinegar can enhance the depth of the jalapeno peach sauce, making each bite a unique experience.

IngredientPurpose
Pork RibsMain protein source
Fresh PeachesSweetness and texture
JalapenosHeat and flavor
Brown SugarCaramelization and sweetness
GarlicAromatic base
SeasoningsFlavor enhancement
HoneyAdditional sweetness
Balsamic VinegarAcidity and depth
Fresh HerbsFresh aroma and flavor

Preparation Steps for the Perfect Ribs

Achieving the perfect rib preparation involves careful attention to the type of ribs and the marinating process. Selecting the right type of ribs lays the foundation for a delicious result. Several types of ribs, including baby back, spare, and St. Louis-style ribs, offer unique flavors and textures. Understanding these options helps in making an informed choice for your meal.

Choosing the Right Type of Ribs

Each type of rib has its own characteristics that affect cooking times, flavors, and tenderness. Here’s a quick guide:

Type of RibsCharacteristicsCooking Time
Baby Back RibsTender and lean, with a sweet flavor2.5 – 3 hours
Spare RibsFattier and more flavorful, with a meatier bite3 – 4 hours
St. Louis-Style RibsSimilar to spare ribs, but trimmed for a uniform shape3 – 4 hours

Marinating the Ribs for Flavor

Marinating ribs not only infuses them with flavor but also tenderizes the meat. Consider these tips for effective marinating:

  • Duration: Marinate the ribs for at least 4 hours, preferably overnight for the best results.
  • Temperature: Always marinate in the refrigerator to prevent bacterial growth.
  • Marinade Ingredients: Use a combination of acidic components (like vinegar or citrus) and seasonings for a balanced flavor profile.

Effective rib preparation involves thoughtful selection and marinating ribs with care, setting the stage for a flavorful feast. Enjoy the process and let your culinary creativity shine!

Making the Jalapeno Peach Glaze

Crafting the perfect jalapeno peach glaze recipe requires attention to detail, especially when selecting the right ingredients. The ideal glaze strikes a balance between sweetness from ripe peaches and the heat brought by fresh jalapenos. This sweet and spicy sauce can elevate any BBQ dish, making it essential for your grilling repertoire.

Choosing the Right Peaches

When making BBQ glaze, the choice of peaches can significantly impact flavor. Look for peaches that are:

  • Firm yet slightly soft to the touch
  • Golden yellow in color with a subtle blush
  • Aromatic, indicating ripeness and flavor

Fresh peaches work best, as they provide the rich sweetness necessary for a well-rounded glaze. If fresh peaches are not available, canned peaches can be an alternative, but opt for those packed in juice rather than syrup to maintain flavor integrity.

Balancing Sweetness and Heat

Creating a sweet and spicy sauce always involves finding the right balance between the two elements. Start with a base of pureed peaches and finely chopped jalapenos. Experiment with the proportions based on your heat tolerance:

  • For a milder sauce, use fewer jalapenos or remove the seeds and membranes
  • Add fresh lime or apple cider vinegar to enhance acidity and brighten flavors
  • Consider incorporating spices like smoked paprika or cumin for added depth

Taste and adjust as needed, ensuring the glaze offers a delightful contrast that complements grilled meats beautifully. Your jalapeno peach glaze recipe is now ready to make any BBQ unforgettable!

How to Cook Jalapeno Peach Glazed Ribs

Cooking ribs perfectly requires careful attention to different rib cooking methods. Here, the primary techniques—grilling, baking, and smoking—offer unique flavors and textures to jalapeno peach glazed ribs.

Grilling is a popular choice, especially when utilizing BBQ cooking techniques. This method allows for great caramelization of the glaze, creating a delightful crust while keeping the meat juicy. Maintain a low heat and cook the ribs for several hours, using indirect heat to ensure even cooking.

Baking offers a more hands-off method. Preheat your oven to a low temperature (around 275°F). Wrap the ribs in foil to lock in moisture. After two to three hours, baste the ribs with the jalapeno peach glaze for the final 30 minutes without the foil, allowing the glaze to set beautifully.

Smoking the ribs infuses them with deep, rich flavors. Use a smoker with wood chips such as hickory or apple for a sweet touch. Maintain a low temperature and smoke the ribs for four to six hours, regularly applying the glaze to enhance the flavor profile.

Cooking MethodAdvantagesIdeal TemperatureCooking Time
GrillingCrispy glaze, quick cookLow heat (225-250°F)3-4 hours
BakingMoisture retention, easyLow heat (275°F)2-3 hours
SmokingRich flavor, tender textureLow heat (225°F)4-6 hours

Choosing the right rib cooking method will elevate your jalapeno peach glazed ribs, ensuring they are tender and flavor-packed. Each technique has its merits, making it essential to select the one that fits your cooking style and desired outcome.

Grilling Techniques for Ideal Ribs

Grilling ribs to perfection involves understanding various techniques that can influence the final outcome. Two primary methods to consider are direct vs indirect grilling. Each method offers unique benefits that can enhance flavor and tenderness when executed properly.

Direct vs. Indirect Heat

Using direct heat is suitable for achieving a nice sear on the ribs, producing those appealing grill marks. This technique works well for smaller cuts or when a quick cook is desired. In contrast, indirect grilling allows for slow, even cooking, making it an excellent choice for larger cuts like spareribs or baby back ribs. By setting up your grill to facilitate indirect heat, you can maintain a lower rib cooking temperature, decreasing the chances of drying out the meat.

Monitoring Cooking Time and Temperature

Proper monitoring of cooking time and the internal temperature of the ribs is essential for achieving tenderness. Aim for a rib cooking temperature around 190 to 203 degrees Fahrenheit; this range allows the collagen to break down, resulting in succulent meat. For best grilling ribs tips, use a reliable meat thermometer. Checking the internal temperature at the thickest part of the rib helps ensure even cooking and prevents overcooking. Keeping an eye on both time and temperature allows for a satisfying grilling experience with deliciously tender ribs.

Serving Suggestions and Pairings

When serving ribs, it’s essential to create a well-rounded BBQ experience that tantalizes the taste buds. Ideal BBQ meal pairings elevate the enjoyment of jalapeno peach glazed ribs, making your meal memorable. Choosing the right side dishes for ribs can significantly enhance the flavors while providing a beautiful presentation on the plate.

Side Dishes to Complement the Ribs

Several side dishes pair beautifully with the sweet and spicy profile of jalapeno peach glazed ribs. Consider these delicious options:

  • Coleslaw: Fresh, crunchy coleslaw balances the richness of the ribs.
  • Grilled Vegetables: Seasonal vegetables add a smoky flavor that pairs well with the glaze.
  • Cornbread: A touch of sweetness from cornbread complements the ribs perfectly.
  • Baked Beans: The hearty flavors of baked beans harmonize with BBQ meals.
  • Potato Salad: Creamy potato salad offers a classic touch that many love.

Beverage Pairings for a Complete Meal

The right beverage can enhance the overall meal experience. Here are several refreshing options:

  • Craft Beer: A hoppy IPA or a rich stout works wonderfully with the flavors of the ribs.
  • Iced Tea: A tall glass of sweetened or unsweetened iced tea provides a refreshing counterpoint.
  • Seasonal Cocktails: Try a peach margarita or a spicy mojito to echo the ribs’ fruity notes.
Side DishFlavor ProfilePairing Suggestions
ColeslawCrunchy and CreamyEnhances side dishes for ribs
Grilled VegetablesSmoky and SavoryBalances BBQ meal pairings
CornbreadSweet and MoistPerfect with sweet glaze
Baked BeansHearty and SweetComplements ribs well
Potato SaladCreamy and TangyClassic BBQ accompaniment

Storing Leftover Jalapeno Peach Glazed Ribs

After enjoying your mouthwatering Jalapeno Peach Glazed Ribs, proper storage becomes essential to maintain their flavor and juiciness. Whether you’re storing ribs in the refrigerator or looking for ways to preserve them for a longer period, following best practices ensures that each bite remains delectable upon reheating.

Best Practices for Refrigeration

For effective leftover rib storage, cool the ribs to room temperature before refrigerating. Wrapping them tightly in plastic wrap or aluminum foil prevents moisture loss and keeps flavors intact. Place the wrapped ribs in an airtight container to minimize any odors from other foods. The following guidelines apply:

  • Store in the refrigerator for up to 3 to 4 days.
  • If you’re unsure about usage, consider freezing for long-term preservation.
  • Label the container with the date for easy tracking.

Reheating Tips for Moist Ribs

When it’s time to savor those leftover ribs, reheating methods play a vital role in retaining their juicy texture. Here are effective ways to reheat ribs while keeping them moist:

  1. Oven Method: Preheat your oven to 250°F (121°C). Wrap the ribs in foil to seal in moisture and place them on a baking sheet. Heat for about 20-30 minutes, or until warmed through.
  2. Grill Method: Preheat the grill to medium heat. Place ribs on the grill away from direct flames, cover, and cook for approximately 15 minutes, turning occasionally to ensure even reheating.
  3. Microwave Method: Use caution with this method, as it can dry out ribs. Place ribs on a microwave-safe plate, cover with a damp paper towel, and heat in intervals of 30 seconds until warmed.

By following these guidelines for storing ribs, along with proper reheating techniques, each serving of your Jalapeno Peach Glazed Ribs can taste just as delicious as the day they were cooked.

Common Mistakes When Making Jalapeno Peach Glazed Ribs

Preparing jalapeno peach glazed ribs can be delightful, but home cooks often encounter certain pitfalls. Recognizing and addressing these mistakes in rib preparation will lead to success on the grill. Avoiding overcooked ribs and achieving a harmonious balance of flavors play crucial roles in delivering mouthwatering results.

Overcooking and Drying Out the Meat

One of the most prevalent common grilling errors is overcooking the ribs. When the cooking time exceeds recommended limits, the meat loses moisture, resulting in dryness and toughness. To combat this, consider investing in a reliable meat thermometer. Aim for an internal temperature of 190°F to 205°F for tender ribs, ideal for breaking down collagen without drying out the meat.

Neglecting the Balance of Flavors

Creating a standout dish requires a careful balance of ingredients. Jalapeno peach glaze benefits from both sweetness and heat. If one flavor overwhelms the other, the overall taste diminishes. Tasting the glaze as you prepare it is essential. Adjust the sweetness or heat gradually to achieve a well-rounded flavor. Achieving this balance prevents the dish from falling prey to mistakes in rib preparation that can lead to a lackluster experience.

MistakeDescriptionSolution
Overcooked RibsMeat becomes dry and tough.Use a meat thermometer to monitor internal temperature.
Lack of Flavor BalanceOne flavor overpowers the others.Taste and adjust ingredients incrementally.

Variations on the Jalapeno Peach Glazed Ribs Recipe

Exploring rib recipe variations allows for delightful culinary creativity that caters to different tastes. By incorporating unique fruit alternatives for ribs, you can customize this dish to suit any palate. Swapping out peaches opens up a world of flavors.

Swap the Fruit for Other Options

While the jalapeno peach glaze shines with its vibrant sweetness, trying different fruits can yield exciting results. Consider these fruit alternatives for ribs:

  • Mango: Its tropical sweetness pairs beautifully with the heat of jalapenos.
  • Pineapple: Adds a tangy flavor that balances perfectly with spicy elements.
  • Apple: A mild sweetness creates a comforting glaze that appeals to everyone.
  • Apricot: Offers a unique flavor profile that compliments the savory aspects of the ribs.

Adjusting Heat Levels for Different Tastes

When adjusting spiciness in recipes, the goal is to find the perfect balance for your guests. Here are some ways to modify the heat:

  • Use milder jalapenos or switch to a sweeter pepper like a bell pepper for less heat.
  • Add more or less jalapeno to the glaze depending on desired spice levels.
  • Incorporate smoky spices like paprika to enhance flavor without increasing heat.
  • Consider adding a touch of honey or brown sugar to temper the spice while boosting sweetness.

Experimenting with these variations results in a personalized rib experience. From sweet-and-savory combinations using fruit alternatives for ribs to tailoring the heat to your liking, these adjustments invite creativity in the kitchen.

Fruit AlternativeFlavor ProfileHeat Level
MangoTropical sweetnessMedium
PineappleTangy and sweetLow
AppleMild and comfortingLow
ApricotUnique sweetnessMedium

Conclusion

In this recap on jalapeno peach glazed ribs, we’ve explored an exciting culinary journey that combines sweet and spicy elements, creating an unforgettable dish perfect for your next gathering. These ribs not only taste amazing but also offer a unique twist that will have your family and friends raving about your grilling skills.

The preparation and cooking techniques we discussed will ensure you create tender, flavorful ribs every time. By mastering the balance of flavors—thanks to the delightful jalapeno peach glaze—you can elevate any BBQ experience. Whether you’re a seasoned griller or a novice, this recipe invites everyone to join in on the joy of grilling, making it an ideal choice for your next outdoor celebration.

As you approach your next BBQ, remember these final thoughts on BBQ: the joy of sharing delicious food with loved ones is what truly makes a gathering special. Dive into this flavorful experience and impress your guests with these jalapeno peach glazed ribs that will undoubtedly leave a lasting impression.

FAQ

What are jalapeno peach glazed ribs?

Jalapeno peach glazed ribs are a tasty BBQ dish that combines the sweetness of peaches with the spicy kick of jalapenos. The glaze is made from fresh ingredients, creating a unique flavor profile perfect for grilling.

What types of ribs can I use for this recipe?

You can use various types of ribs such as baby back, spare, or St. Louis-style ribs. Each type has its unique texture and flavor, allowing for a delicious meal regardless of your choice.

How can I achieve the best flavor balance in the glaze?

To achieve the best flavor balance in the jalapeno peach glaze, adjust the sweetness of the peaches with ingredients like honey or brown sugar, while incorporating jalapenos for heat. Taste as you go and modify according to your personal preference.

Can I prepare the ribs in advance?

Yes, you can prepare the ribs in advance by marinating them and storing them in the refrigerator. This not only saves time but also enhances the flavor. Just remember to allow them to come to room temperature before cooking.

What cooking methods can I use for jalapeno peach glazed ribs?

You can cook jalapeno peach glazed ribs using various methods such as grilling, baking, or smoking. Each method offers a different texture and flavor experience, so choose the one that suits your cooking style best.

What side dishes pair well with jalapeno peach glazed ribs?

Side dishes that complement jalapeno peach glazed ribs include coleslaw, grilled corn, baked beans, and cornbread. These dishes enhance the overall BBQ experience and balance the sweet and spicy flavors of the ribs.

How should I store leftover jalapeno peach glazed ribs?

To store leftover ribs, wrap them tightly in aluminum foil or place them in an airtight container and refrigerate. For longer storage, consider freezing them. When reheating, use low heat to maintain their moisture and flavor.

What are common mistakes to avoid when making these ribs?

Common mistakes include overcooking the ribs, which can lead to dryness, and neglecting the balance of flavors in the glaze. Always monitor cooking times and temperatures, and taste the glaze as you prepare it to achieve the perfect balance.

Can I swap the peaches with another fruit?

Absolutely! You can experiment by swapping peaches with other fruits like mangoes or pineapples for different flavor profiles. This allows you to customize the recipe according to your taste preferences.

How can I adjust the spice level in the glaze?

To adjust the spice level in the jalapeno peach glaze, simply vary the amount of jalapenos you use. For a milder sauce, remove the seeds and membranes of the jalapenos, or use less spicy varieties. Conversely, add more jalapenos or incorporate hot sauce for extra heat.

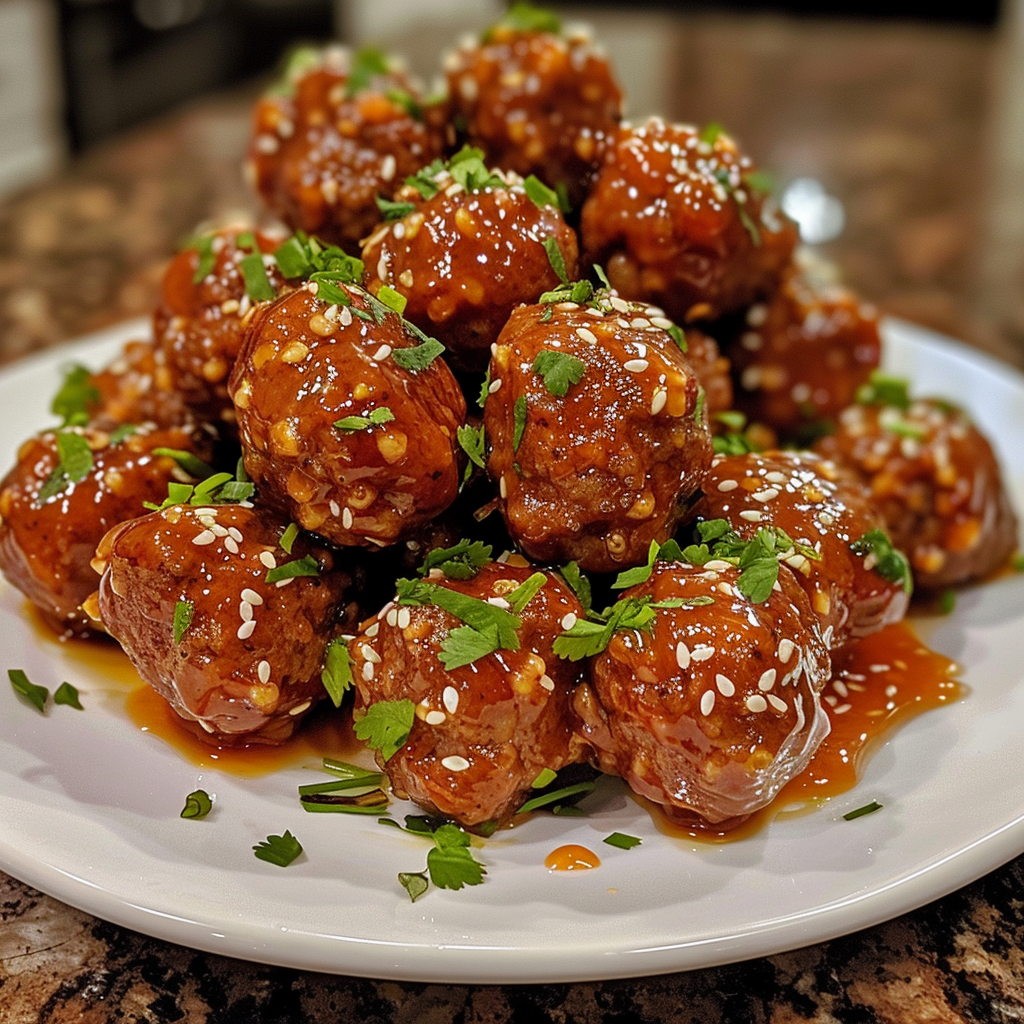
Honey Sriracha Glazed Meatballs Recipe | Quick & Tasty

Welcome to a journey of flavor with our delightful honey sriracha glazed meatballs! This easy recipe showcases the perfect blend of sweet and spicy, making it an ideal choice for busy home cooks seeking quick meals without sacrificing taste. These savory dishes not only tantalize the taste buds but also offer a satisfying meal option that can be prepared in no time. Whether you’re hosting a party or simply craving something delicious, these honey sriracha glazed meatballs are sure to impress everyone at the table.

Key Takeaways

  • Combines the sweet and spicy flavors of honey and sriracha.
  • A perfect quick meal for busy nights.
  • Easy recipe that is great for entertaining.
  • Versatile enough to adapt for different dietary preferences.
  • Provides a unique twist on traditional meatballs.

Introduction to Honey Sriracha Glazed Meatballs

Honey sriracha glazed meatballs offer a delightful fusion of sweetness and heat that has captured the hearts of food lovers everywhere. This introductory recipe encapsulates the growing trend of combining contrasting flavors in modern culinary creations. The rich, sticky glaze derived from honey and sriracha creates an irresistible coating that enhances the meatballs’ taste, making them a versatile choice for any occasion.

These meatballs serve as a perfect appetizer for parties or a main course for a relaxed family dinner. Their growing popularity can be attributed to the easy preparation and the balance of flavors that cater to diverse palates. As guests savor the dish, the sweet-spicy combination creates an engaging culinary experience. Keep in mind these simple cooking tips: experimentation with different types of meat or spice levels can tailor the dish to personal preferences, ensuring every bite is a delight.

Flavor ProfileMeatball TypeServing Occasions
Sweet and SpicyGround Beef, Turkey, or ChickenCasual Dinners, Parties, Potlucks
Rich and SavoryVegetarian Options AvailableHolidays, Gatherings, Celebrations

Why These Meatballs Are a Must-Try

Exploring the world of flavor profiles reveals a delightful combination in honey sriracha glazed meatballs. This dish captures the essence of sweet spicy dishes, harmonizing the natural sweetness of honey with the fiery kick of sriracha. The rich blend creates a complex taste that appeals to diverse palates, making it a standout choice among must-try recipes.

Sweet and Spicy Flavor Combination

The balance of sweetness and spiciness in these meatballs sets them apart. Honey not only adds a delectable sweetness but also enhances the overall flavor by rounding off the heat from the sriracha. This duo creates a flavor profile that is incredibly satisfying, catering to both sweet and savory cravings. Diners often find this attractive combination irresistible, which explains its popularity in many homes.

Quick and Easy Preparation

Time constraints can often deter individuals from trying new recipes, yet this one is refreshingly simple. Even novice cooks can prepare these meatballs within 4 steps, making it accessible for busy weeknight dinners or impromptu gatherings. Quick recipes like this offer a convenient solution for those seeking delicious meals without extensive cooking skills. Enjoying such sweet spicy dishes becomes effortless when preparation is this easy!

Ingredients for Honey Sriracha Glazed Meatballs

Creating delicious honey sriracha glazed meatballs starts with gathering the right ingredients. Knowing which meatball ingredients to use can make a significant difference in taste and texture. Below is a list of essential ingredients needed for this flavorful dish, along with some optional additions that can elevate the dish even further.

Essential Ingredients List

  • 1 pound of ground meat (beef, turkey, or chicken)
  • 1/2 cup breadcrumbs
  • 1/4 cup honey
  • 2 tablespoons sriracha sauce
  • 2 cloves garlic, minced
  • 1 small onion, finely chopped
  • 1 large egg
  • Salt and pepper to taste

These core ingredients combine to create a cohesive mix that enhances the overall flavor of your honey sriracha recipe. For those with dietary restrictions, consider substitutes like gluten-free breadcrumbs or plant-based ground meat alternatives.

Optional Ingredients for Extra Flavor

To customize your meatballs and explore various tastes, consider adding some optional ingredients. This can introduce a delightful twist to your honey sriracha glazed meatballs.

  • Fresh herbs like cilantro or parsley for garnish
  • 1 tablespoon soy sauce for additional umami
  • Spices such as cumin or paprika for a unique flavor profile
  • Chopped bell peppers or mushrooms for added texture

Adding one or more of these ingredients can enhance the flavor depth and give your meatballs that unique twist. Enjoy experimenting with these options to craft the perfect dish that suits your taste! Below is a table summarizing the essential and optional meatball ingredients.

IngredientsTypeMeasurement
Ground meatEssential1 pound
Bread crumbsEssential1/2 cup
HoneyEssential1/4 cup
Sriracha sauceEssential2 tablespoons
GarlicEssential2 cloves, minced
OnionEssential1 small, finely chopped
EggEssential1 large
Salt and pepperEssentialTo taste
CilantroOptionalTo taste
Soy sauceOptional1 tablespoon
SpicesOptionalTo taste

Step-by-Step Instructions to Make Meatballs

Creating mouthwatering honey sriracha glazed meatballs is a simple process. Follow these meatball preparation steps to achieve perfect results every time.

  1. Gather your ingredients: Ensure you have all necessary items on hand. This includes your choice of ground meat, breadcrumbs, honey, sriracha, and seasonings.
  2. Mix the meatball mixture: In a large bowl, combine the ground meat with breadcrumbs, a beaten egg, and seasoning. Thoroughly mix until evenly distributed.
  3. Shape the meatballs: Using your hands, form small, uniform balls, about 1 inch in diameter. This ensures that they cook evenly.
  4. Prepare your cooking surface: Depending on your preferred method, preheat your oven to 400°F for baking, or heat oil in a pan for frying. Grilling is another flavorful option.
  5. Cook the meatballs: For baking, place the meatballs on a lined baking sheet and cook for 20-25 minutes. For frying, cook on medium heat for approximately 10 minutes, turning them regularly. If grilling, cook until evenly browned.
  6. Prepare the glaze: While the meatballs cook, mix honey and sriracha in a small bowl. Adjust according to your desired spice level.
  7. Glaze the meatballs: Once cooked, transfer the meatballs to a large bowl and pour the glaze over them. Toss gently until well-coated.
  8. Serve and enjoy: These flavorful meatballs are perfect for parties or as a main dish. Pair them with your favorite sides for a complete meal.

Following these cooking instructions ensures you achieve tender and flavorful meatballs every time. Happy cooking!

Tips for Perfect Honey Sriracha Glazed Meatballs

Getting the most out of your honey sriracha glazed meatballs involves careful meat selection and mastering the glaze. Understanding the nuances of the meat you choose can elevate your dish while ensuring a delightful finish with the glaze.

Choosing the Right Meat

When considering the best meat for meatballs, factors like flavor, fat content, and texture play a significant role. Ground beef, also known as chuck, offers a nice balance of flavor and juiciness due to its fat content. Other options like ground pork or a combination of both can enhance taste and keep the meatballs moist. For those who prefer a leaner alternative, ground turkey or chicken work well, but they may require added fats such as breadcrumbs or eggs for optimal texture. Keep in mind the following tips for meat selection:

  • Look for a fat content of 15-20% for juicy meatballs.
  • Consider mixing different types of meat for complexity in flavor.
  • Use fresh ground meat for the best results in texture and taste.

Achieving the Perfect Glaze

The key to a luscious meatball glaze lies in how you apply and adjust it. Begin by letting your meatballs cook in a skillet over medium heat. This method helps to develop a nice crust while allowing the glaze to caramelize. Consider these techniques to enhance your meatball glaze:

  1. Apply the honey sriracha mixture during the last few minutes of cooking for a sticky finish.
  2. Adjust the sweetness or spiciness based on your preferences before glazing.
  3. Ensure thorough coating of each meatball by rolling them in the glaze after cooking.

With the right meat selection and attention to detail on the glaze, your honey sriracha glazed meatballs will be a hit at any gathering!

Serving Suggestions for Your Meatballs

Complementing your honey sriracha glazed meatballs with the right meatball side dishes can create a delightful dining experience. Here are some serving suggestions to elevate your meal and enhance the overall flavor profile.

Pairing with Sides

Choosing the right sides can make your meatballs shine. Consider these delicious options:

  • Steamed Rice: A simple bowl of white or jasmine rice absorbs the glaze’s sweetness.
  • Coleslaw: The crunchiness of coleslaw adds a refreshing contrast to the tender meatballs.
  • Roasted Vegetables: Seasonal roasted veggies, like carrots and bell peppers, provide nutrients and flavor.
  • Garlic Bread: A piece of toasted garlic bread can make for a perfect side to mop up any extra sauce.

Ideas for Garnishing

Elevating the presentation of your meatballs can impress guests and enhance the meal. Use these meatball garnishes to add visual flair:

  • Sesame Seeds: A sprinkle on top adds a nutty flavor and an appealing crunch.
  • Chopped Scallions: Fresh scallions introduce a burst of color and a mild onion taste.
  • Drizzle of Sriracha: A light drizzle of extra sriracha can intensify the heat for those who love spice.

These serving suggestions aim to balance flavors and textures, making your meal satisfying and visually stunning. A well-rounded combination contributes to a memorable dining experience, ideal for gatherings or special occasions.

Side DishFlavor ProfileTexture
Steamed RiceSweet and NuttySmooth and Soft
ColeslawCrunchy and RefreshingCrunchy
Roasted VegetablesSweet and SavoryCrispy and Tender
Garlic BreadGarlicky and ButteryCrunchy on the Outside, Soft Inside

Storing and Reheating Leftovers

Proper storage and reheating can greatly enhance your culinary experience with Honey Sriracha Glazed Meatballs. Following these food storage tips ensures they stay delicious for another meal.

To store leftovers, place the cooked meatballs in an airtight container. Ensure they cool down to room temperature before sealing the container. They can be refrigerated for up to three days. For longer storage, think about freezing the meatballs. Use freezer-safe bags or containers to prevent freezer burn. They can last for up to three months in the freezer.

When you’re ready to enjoy your leftovers, refer to these reheating instructions. For best results, reheat the meatballs in the oven. Preheat the oven to 350°F (175°C) and place the meatballs on a baking sheet. Cover them with aluminum foil to retain moisture, warming for about 15 to 20 minutes, or until heated through.

If time is short, using a microwave is a quick option. Place the meatballs in a microwave-safe dish and cover with a damp paper towel. Heat in 30-second intervals, checking to ensure they don’t become dry. Regardless of your method, ensuring the internal temperature reaches at least 165°F (74°C) helps guarantee a safe and tasty meal.

By following these food storage tips and reheating instructions, you can savor those delightful flavors of Honey Sriracha Glazed Meatballs time and again.

Honey Sriracha Glazed Meatballs Variations

Diving into the world of honey sriracha glazed meatballs opens a realm of creativity. Meatball variations not only expand your culinary options but also cater to diverse dietary preferences. Incorporating alternative proteins such as plant-based meats, pork, or shrimp can elevate your dish while keeping it exciting.

Meatball Alternatives

When exploring alternative proteins, consider these options:

  • Plant-Based Meats: These mimic the texture of traditional meatballs and absorb flavors beautifully. Brands like Beyond Meat or Impossible Foods can be fantastic substitutes.
  • Pork: Ground pork yields a richer flavor profile. Adjust cooking times to ensure the meatballs achieve a perfect char while still remaining juicy.
  • Seafood: Options like ground fish or shrimp create a unique twist. Seafood generally requires less cooking time, making these variations quick and nutritious.

Spice Levels and Adjustments

Customization allows you to tailor your dish to specific tastes. To control the heat, consider these methods for adjusting spice levels:

  • Sriracha Sauce: Start by reducing the amount of sriracha. Gradually increase until you achieve the desired kick.
  • Crushed Red Pepper: Add this to the meat mixture for a gradual heat transformation. You can easily moderate the amount based on your preference.
  • Jalapeños: Incorporating finely diced jalapeños brings a fresh, vibrant heat that can elevate your meatball experience.

By experimenting with these variations and adjustments, you can create honey sriracha glazed meatballs that cater to every palate and preference. Enjoy the journey of flavor exploration!

Health Benefits of the Ingredients

Discovering the health benefits of ingredients used in your favorite recipes can enhance the overall enjoyment of meals. Honey and sriracha each contribute unique properties that make them not just flavorful, but beneficial to your health.

Benefits of Honey

Honey boasts numerous health benefits that stem from its rich nutritional value. It is known for its anti-inflammatory, antioxidant, and antiseptic properties. Incorporating honey into your diet can support a balanced lifestyle. The natural sugars in honey provide a quick source of energy without causing a sharp spike in blood sugar levels. Furthermore, honey can soothe sore throats and enhance wound healing.

Sriracha and Its Ingredients

Sriracha sauce, popular for its bold flavor, also offers health benefits. The primary ingredient, chili peppers, contains compounds that may boost metabolism and promote weight loss. Additionally, garlic provides anti-inflammatory properties and may support heart health. The vinegar component aids digestion and adds a tangy flavor, enhancing the nutritional analysis of the dish. Combined, these ingredients contribute to a sauce that not only excites the palate but also supports overall health.

IngredientHealth BenefitsNutritional Value
HoneyAnti-inflammatory, Antioxidant, Antiseptic64 calories per tablespoon, no fat, 17g carbohydrates
Chili PeppersBoosts metabolism, May aid in weight loss18 calories per 100g, 0.4g fat, 4g carbohydrates
GarlicSupports heart health, Anti-inflammatory149 calories per 100g, 0.2g fat, 33g carbohydrates
VinegarAids digestion, May aid weight loss3 calories per tablespoon, 0g fat, 0g carbohydrates

Conclusion

In summary, honey sriracha glazed meatballs offer an incredible blend of sweet and spicy flavors that can elevate any meal. This recipe recap highlights how easy it is to whip up a batch, making them an ideal option for those busy weeknights or casual gatherings. With just a handful of ingredients, you can create a dish that delights the palate without spending hours in the kitchen.

Encouraging culinary adventurers to play with variations, these meatballs can be tailored to suit any spice level or dietary preference. Whether you’re serving them as an appetizer or a main dish, honey sriracha glazed meatballs are sure to impress family and friends alike. Don’t hesitate to share your experiences—there’s a vibrant community ready to celebrate the joy of cooking together!

FAQ

What is a Honey Sriracha Glazed Meatball?

A Honey Sriracha Glazed Meatball is a flavorful dish featuring meatballs coated in a sweet and spicy glaze made from honey and sriracha sauce. This dish combines savory meat with a delightful kick, making it a perfect addition to quick meals or party appetizers.

How do I make my honey sriracha glazed meatballs healthier?

To make honey sriracha glazed meatballs healthier, consider using lean ground meats, such as turkey or chicken, or even plant-based alternatives. You can also reduce the amount of honey in the glaze and incorporate fresh vegetables into the meat mixture for added nutrients.

Can I freeze leftover honey sriracha glazed meatballs?

Yes, you can freeze leftover honey sriracha glazed meatballs! Simply place them in an airtight container or freezer bag after cooling, and store them for up to three months. When you’re ready to enjoy them again, just thaw and reheat carefully to maintain their flavor and texture.

What are some good side dishes to serve with honey sriracha glazed meatballs?

Great side dishes to pair with honey sriracha glazed meatballs include steamed jasmine rice, crispy coleslaw, or roasted vegetables. These complement the sweet and spicy flavors of the meatballs and complete your meal.

How spicy are honey sriracha glazed meatballs?

The spiciness of honey sriracha glazed meatballs can vary depending on how much sriracha you include. You can adjust the heat by adding more or less sriracha to the glaze, or even enhance it further with crushed red pepper or chili flakes if you prefer more heat.

Are there vegan alternatives for this meatball recipe?

Absolutely! You can use plant-based proteins, such as lentils, chickpeas, or meat substitutes made from soy or pea protein, to create a delicious vegan version of honey sriracha glazed meatballs. Simply follow the same cooking method for the best results.

How long does it take to prepare honey sriracha glazed meatballs?

Preparing honey sriracha glazed meatballs typically takes about 30 to 45 minutes, including mixing the ingredients, forming the meatballs, and cooking them. It’s a quick and efficient recipe, perfect for busy weeknight meals!

Can I make honey sriracha glazed meatballs ahead of time?

Yes, you can make honey sriracha glazed meatballs ahead of time! Prepare the meatballs and store them in the refrigerator for up to 24 hours before cooking. You can also cook and glaze them in advance, then reheat before serving.