Air Fryer Grilled Cheese: Quick & Crispy Perfection

Air Fryer Grilled Cheese

Exploring Air Fryer Grilled Cheese is a delightful journey. It turns the classic grilled cheese into a crispy, satisfying sandwich. The air fryer makes it easy and healthy to make a grilled cheese. With just a few ingredients, you can enjoy a golden-brown sandwich in minutes. It’s a modern twist on a classic comfort food.

Key Takeaways

  • The air fryer offers a healthier alternative for making grilled cheese.
  • It provides a quick cooking method without sacrificing taste.
  • Simple ingredients transform into a delicious meal.
  • This method ensures an evenly crispy sandwich every time.
  • Perfect for anyone looking for an easy grilled cheese experience.

Why Choose Air Fryer for Grilled Cheese?

Making grilled cheese in an air fryer is fun and practical. It makes the taste better and is good for your health and time.

Healthier Cooking Option

Air frying is great for your health. Traditional grilled cheese uses a lot of butter or oil, which means more calories. But air fryers use much less oil and still make your food crispy and golden.

This is a smart way to enjoy your favorite food without eating too many calories or fats.

Time Efficiency

Today, we all want to cook fast. Air fryers cook grilled cheese sandwiches quicker than old ways, thanks to their special heating. They make sure every bite is perfectly toasted, saving you time.
health benefits of air frying

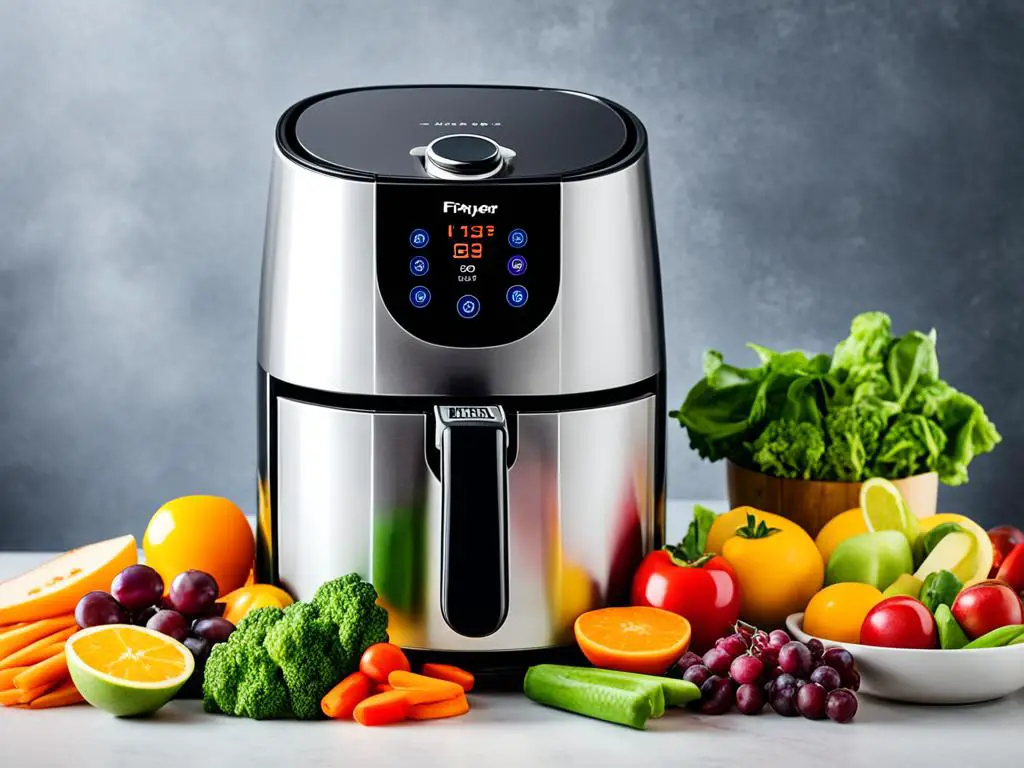
Using an air fryer changes how we make grilled cheese. It gives you health perks and saves time.

Key Ingredients for Perfect Air Fryer Grilled Cheese

Creating the perfect Air Fryer Grilled Cheese is all about picking top-notch ingredients. The right mix of bread, cheese, butter, and seasonings can turn this classic into something amazing. Knowing what goes into it makes the sandwich unforgettable.

Breads to Use

Choosing the right bread is key for a crispy and tasty grilled cheese. Here are some great options:

  • Sourdough: A favorite for its chewy texture and tangy taste.
  • Wheat Bread: Offers a nutty flavor and a hearty texture, great for a healthier choice.
  • White Bread: Classic and soft, it gives a traditional grilled cheese feel.
  • Ciabatta: Its airy structure adds a delightful crunch.

Cheese Variations

Choosing the right cheese can change the flavor and melting of the sandwich. Here are some top picks:

  • Cheddar: A classic for its sharp and rich taste.
  • Gouda: Brings a creamy, buttery texture with a hint of sweetness.
  • Mozzarella: Melts well, adding a stretchy and gooey feel.
  • Swiss: Has a mild taste with unique holes, making the sandwich stand out.

Butter and Seasoning

Butter not only helps get a golden crust but also boosts the flavor. Here are some top picks:

  • Unsalted Butter: Lets you control the saltiness.
  • Garlic Butter: Adds aromatic depth to the sandwich.
  • Herbs: Fresh or dried herbs, like basil or oregano, add more flavor.
  • Seasoning Tips: A bit of garlic powder or chili flakes can take the taste to the next level, making it a delightful experience.

best bread for grilled cheese

Steps to Make Air Fryer Grilled Cheese

Making the perfect air fryer grilled cheese is fun. Just follow these steps for a crispy outside and gooey inside. Start with getting ready and then cook to get a great grilled cheese sandwich.

Preparation Process

First, collect your ingredients for the grilled cheese. Pick your favorite bread, like sourdough or whole wheat, and a cheese that melts well, such as cheddar or mozzarella. Here are the steps to prepare:

  • Spread butter evenly on one side of each slice of bread.
  • Put your cheese slices on the side without butter.
  • Put the second slice of bread on top, with the butter side out.
  • Press down gently to keep the sandwich together.

Cooking Instructions

These air fryer instructions will help you make a great grilled cheese:

  1. Heat the air fryer to 320°F (160°C).
  2. Put the sandwich in the air fryer basket carefully.
  3. Cook for about 5-6 minutes, or until the bread is golden brown.
  4. Flip the sandwich halfway through to cook evenly.
  5. Check if the cheese is melted and the bread is crispy before serving.

Tips for the Best Air Fryer Grilled Cheese

Perfecting air fryer grilled cheese can turn a classic sandwich into something amazing. By adjusting air fryer settings and trying new fillings, you can make your grilled cheese even better.

Adjusting Temperature and Time

Getting the temperature and time right is key for a crispy outside and gooey inside. Begin by setting the air fryer between 350°F and 400°F. Cook for 5 to 8 minutes, flipping the sandwich halfway through. If the bread browns too fast, try lowering the temperature.

Using these tips will make your grilled cheese delicious every time.

Experimenting with Fillings

For a twist on traditional grilled cheese, add fresh tomatoes, creamy avocado, or crispy bacon. These add unique textures and flavors. You can also try pepper jack cheese for a spicy taste or pesto for a herby flavor.

The air fryer lets you customize your sandwich. Every creation can be a new adventure in taste.

Conclusion

The air fryer grilled cheese review shows how great this method is for making a classic dish. It turns simple ingredients into a crispy, golden treat. This way, you get lots of flavor without losing out on health.

Choosing the right bread and cheese is key. Then, mastering air frying makes the dish even better. Each step adds to the fun of eating grilled cheese.

With the right steps, anyone can make a quick, tasty meal. It’s perfect for bringing back childhood memories or trying new things. The air fryer makes cooking fun and easy.

Trying this method for grilled cheese can be a hit with friends and family. It brings people together, encouraging creativity and fun. Sharing this dish can make special moments even more memorable.

FAQ

What is an Air Fryer Grilled Cheese?

An Air Fryer Grilled Cheese is a quick, easy, and healthier version of the classic grilled cheese sandwich. It’s made using an air fryer. This method results in a crispy exterior while minimizing the need for excess oil.

How does air frying make a grilled cheese healthier?

Air frying uses significantly less oil than traditional pan-frying. This reduces the overall fat and calorie content. It makes it a heart-friendly option for enjoying a crispy sandwich.

What types of bread work best for Air Fryer Grilled Cheese?

The best breads for grilling include sourdough, whole wheat, or even gluten-free options. These breads provide the ideal texture and flavor to complement the melty cheese.

What cheese varieties can I use for the best flavor?

Popular cheese varieties for an Air Fryer Grilled Cheese include cheddar, gouda, mozzarella, and provolone. All of these cheeses melt beautifully and enhance the sandwich’s flavor.

Are there any tips for achieving the perfect crispness?

Adjusting the air fryer temperature and cooking time is crucial for perfect crispiness. Typically, around 350°F for 4-6 minutes yields great results. But it’s essential to monitor during cooking.

Can I add additional fillings to my grilled cheese?

Absolutely! Experimenting with fillings like tomatoes, avocado, cooked bacon, or even jalapeños can elevate the flavor. It makes the sandwich uniquely enjoyable.

How do I clean my air fryer after making grilled cheese?

To clean the air fryer, unplug it and let it cool down. Remove the basket and any trays, then wash them with warm soapy water or place them in the dishwasher. Wipe down the interior with a damp cloth to keep it fresh.

Can I make multiple grilled cheese sandwiches at once in the air fryer?

Yes, many air fryers have enough space to make two or more sandwiches at once. Just make sure they don’t overlap. Adjust the cooking time if you’re making additional sandwiches for even cooking.

Are there any specific seasoning tips for grilled cheese?

Adding seasoning like garlic powder, Italian herbs, or even chili flakes to the butter can give your grilled cheese a delicious twist. It enhances its flavor profile significantly.

How do I prevent burning my grilled cheese in the air fryer?

Keep an eye on the cooking time, preheat the air fryer, and use the right amount of butter to prevent burning. Flipping the sandwich halfway through cooking also helps for even browning.

Spicy Pineapple Jalapeño Chutney: Sweet & Fiery

Spicy Pineapple Jalapeño Chutney

Spicy Pineapple Jalapeño Chutney is a mix of flavors that adds a new twist to food. It blends the sweet taste of ripe pineapple with the spicy kick of jalapeños. This creates a burst of flavor that can make any dish better. It’s great on sandwiches, with grilled meats, or to spice up simple recipes.

This chutney is a must-try for those who want to add excitement to their meals. In the next sections, we’ll explore its origins, health benefits, how to make it, and the best pairings. It’s a great way to spice up your cooking.

Key Takeaways

  • Spicy Pineapple Jalapeño Chutney is a flavorful balance of sweetness and heat.
  • It uses fresh pineapple and jalapeños to achieve its vibrant flavor profile.
  • This tropical chutney elevates various dishes and can be used in multiple cooking styles.
  • Health benefits of pineapple and jalapeño enhance its appeal and nutritional value.
  • Readers will learn about the origins, preparation methods, and ideal pairings.

What is Spicy Pineapple Jalapeño Chutney?

Spicy Pineapple Jalapeño Chutney is a mix of sweet and hot flavors. It’s perfect for making different dishes taste better. Its cultural background shows how traditional chutney has changed over time.

It started in Indian cuisine but has spread around the world. Now, it comes in many flavors, including this spicy pineapple mix. This shows how different places have made their own versions of chutney.

Origin and Cultural Significance

Chutney is a key condiment in Indian meals. It balances the flavors of main dishes. Adding tropical fruits like pineapple gives a new twist to old recipes.

This mix shows how food can change and still be loved by many. Each type of chutney tells a story of local ingredients and personal taste. It’s more than just a side dish.

Basic Ingredients Overview

Knowing the jalapeño chutney ingredients helps us understand what makes it special. The main ingredients are:

  • Fresh, ripe pineapples
  • Spicy jalapeños
  • Vinegar for acidity
  • A selection of spices for flavor

These ingredients work together to create a unique taste. Pineapples add sweetness, jalapeños bring heat, and vinegar adds brightness. This makes the chutney great with many dishes.

Health Benefits of Pineapple and Jalapeño

Pineapple and jalapeño peppers are great for your health. They can make you feel better overall. Let’s look at what they offer in terms of nutrition.

Nutritional Value of Pineapple

Pineapple is packed with vitamin C, which is good for your immune system and skin. It also has bromelain, an enzyme that helps with digestion and reduces swelling. Here’s what you get in a serving of pineapple:

NutrientAmount per 100g
Calories50
Vitamin C47.8 mg
Bromelain160 mg
Fiber1.4 g

Pineapple does more than just provide nutrients. It’s good for your digestive health and can help reduce inflammation.

Health Perks of Jalapeño Peppers

Jalapeños add flavor and are good for you. They’re full of vitamin A and antioxidants, which are good for your eyes and overall health. Eating them regularly can help with:

  • Increasing metabolism
  • Reducing the risk of chronic diseases
  • Adding flavor without excessive calories

For those looking into jalapeño nutrition, these peppers are a tasty way to boost your health. They make spicy foods even better.

How to Make Spicy Pineapple Jalapeño Chutney

Making your own chutney is a fun way to try new flavors. This guide will walk you through the ingredients and steps for making pineapple jalapeño chutney. You’ll end up with a tasty condiment that can make any dish better.

Gathering Ingredients

Here’s what you need for Spicy Pineapple Jalapeño Chutney:

  • 2 cups fresh pineapple, diced
  • 1 cup diced jalapeños (adjust according to heat preference)
  • 1 cup sugar
  • 1/2 cup vinegar (apple cider or white distilled)
  • 1 teaspoon mustard seeds
  • 1 teaspoon ground cinnamon
  • 1/2 teaspoon salt

Step-by-Step Preparation Instructions

Here are the steps to make delicious pineapple jalapeño chutney:

  1. In a large pot, mix together the diced pineapple, jalapeños, sugar, and vinegar.
  2. Add the mustard seeds, ground cinnamon, and salt to the mix.
  3. Heat the mixture on medium until it starts boiling, stirring now and then.
  4. Reduce the heat and simmer for 30-40 minutes until it’s thick enough.
  5. Put the chutney into clean jars while it’s still hot.
  6. Seal the jars and let them cool down at room temperature.

Enjoy the bold taste of this homemade condiment. It’s great with meats, cheeses, or snacks!

Perfect Pairings for Spicy Pineapple Jalapeño Chutney

The vibrant flavors of Spicy Pineapple Jalapeño Chutney are perfect for many meals. It’s great with traditional dishes and modern favorites too. This condiment adds a unique twist to your food.

Best Dishes to Complement the Chutney

There are many dishes that go well with pineapple jalapeño chutney. Here are some top choices:

  • Grilled Chicken – The chutney can be used as a marinade or topping, adding smoky flavor.
  • Fish Tacos – It’s a fresh topping that balances the richness of the fish.
  • Vegetarian Stir-Fries – It adds sweetness and heat to the veggies.
  • Cheese Platters – It pairs well with creamy cheeses, offering a savory contrast.

Serving Suggestions

There are many creative ways to serve chutney. Here are some ideas:

  1. Use as a dipping sauce for chips or crackers.
  2. Spread it on sandwiches or wraps for extra flavor.
  3. Use it as a glaze for roasted or grilled meats.
  4. Top a simple salad for a tasty twist.

Chutney pairings with pineapple jalapeño chutney

Spicy Pineapple Jalapeño Chutney is a must-have for enhancing dishes. Try different pairings and serving ideas for a more exciting dining experience.

Variations of Spicy Pineapple Jalapeño Chutney

Exploring chutney variations leads to exciting flavors and unique culinary experiences. By adding different fruits and adjusting the heat, you can transform Spicy Pineapple Jalapeño Chutney. This creativity makes fruit chutney recipes more exciting and caters to various tastes.

Adding Different Fruits

Try adding other fruits to the classic chutney for a twist. Options include:

  • Mango: Adds a tropical sweetness that balances the spiciness.
  • Peach: Introduces a juicy undertone that complements the pineapple.
  • Berries: Offer a tartness that pairs well with the heat of jalapeños.

These variations not only change the flavor but also make traditional recipes more fun.

Adjusting Heat Levels

To adjust the spicy chutney, change the amount of jalapeños used. For a milder chutney, consider:

  • Fresno peppers: These provide a gentle heat.
  • Bell peppers: Add color and sweetness without the spice.
Pepper TypeHeat Level (Scoville)
Jalapeño2,500 – 8,000
Fresno2,500 – 10,000
Bell0

These adjustments let everyone enjoy spicy chutney recipes at their own heat level. Each variation offers a unique twist, encouraging culinary exploration and personalization in the kitchen.

Storing and Preserving Your Chutney

Storing your Spicy Pineapple Jalapeño Chutney right is key to keeping its flavor fresh. By following the best chutney storage tips, you can enjoy your homemade chutney for a long time. The right way to preserve chutney makes it taste even better over time.

Best Storage Practices

Here are some top tips for storing chutney:

  • Use sterilized jars: Make sure jars for storing chutney are clean and sterilized. This stops harmful bacteria from growing.
  • Seal tightly: Sealing jars well keeps air out, which can spoil the chutney.
  • Refrigerate after opening: Keeping chutney in the fridge after opening keeps it fresh.
  • Batch sizes matter: Canning chutney in smaller batches helps preserve it better. It reduces the amount of chutney exposed to air.

How Long Does It Last?

The shelf life of homemade chutney depends on how you store it and what’s in it. An unopened jar of chutney can last months in a cool, dark spot. After opening, try to use it within two to four weeks for the best taste and quality.

chutney storage tips

Spicy Pineapple Jalapeño Chutney in Popular Recipes

Spicy Pineapple Jalapeño Chutney brings a new twist to many dishes. It makes tacos and burritos more exciting and is great for marinades. Its mix of sweet and spicy flavors is perfect for many recipes, making it a must-have in the kitchen.

Use in Tacos and Burritos

Spicy Pineapple Jalapeño Chutney is a top choice for taco toppings. A spoonful adds a burst of flavor, balancing the savory parts of meats and beans. It goes well with grilled chicken, fish, or pulled pork, adding a tangy sweetness. For more fun, try these ideas:

  • Add it directly on top of assembled tacos for a pop of color and flavor.
  • Mix it into guacamole for a unique twist on a classic dip.
  • Use it as a drizzle over burritos, enhancing the overall taste and presentation.

Incorporating in Marinades and Glazes

There are many ways to use Spicy Pineapple Jalapeño Chutney. It makes a great marinade, offering a new level of flavor. The sweetness of pineapple and the heat of jalapeños tenderize meats and add flavor. Here’s how it can elevate your grilling:

  1. Combine the chutney with olive oil and soy sauce to create a delicious marinade for chicken or pork.
  2. Brush it on vegetables before grilling for a caramelized glaze that enhances their natural flavors.
  3. Use it as a finishing glaze on roasted meats for an enticingly sticky and flavorful crust.
DishChutney UseFlavor Profile
TacosToppingSweet and Spicy
BurritosDrizzleSweet and Tangy
Grilled ChickenMarinadeSavory and Spicy
Grilled VegetablesGlazeSmoky and Sweet

Using Spicy Pineapple Jalapeño Chutney in different recipes brings new flavors to the table. It’s great as a taco topping or a marinade, making any dish more exciting.

Conclusion

Spicy Pineapple Jalapeño Chutney is a standout for its amazing flavors and versatility. It combines sweet pineapple with spicy jalapeños for a unique taste. This chutney is not just tasty; it’s also healthy, thanks to the benefits of pineapple and jalapeño.

Making this chutney at home lets you try different fruits and adjust the spice level. It brings out your creativity in the kitchen, leading to many tasty dishes. Adding this chutney to tacos, marinades, or as a condiment makes meals more exciting.

Embracing homemade Spicy Pineapple Jalapeño Chutney starts a flavorful journey full of health benefits and creativity. It brings passion for cooking that spreads warmth and joy at the dinner table.

FAQ

What is Spicy Pineapple Jalapeño Chutney?

Spicy Pineapple Jalapeño Chutney is a mix of sweet pineapple and hot jalapeños. It’s a tasty addition to many dishes. You can use it to spice up appetizers, main courses, and snacks.

How do I use Spicy Pineapple Jalapeño Chutney in my cooking?

Use this chutney as a condiment for grilled meats or a topping for tacos. It also makes a great glaze for vegetables. Its flavors can make any meal better, making it a key ingredient in many recipes.

Can I adjust the heat level in the chutney?

Yes! Adjust the heat by using more or fewer jalapeños. You can also add milder peppers for a gentler heat. This way, you can make it just right for your taste.

How long does homemade Spicy Pineapple Jalapeño Chutney last?

Homemade chutney can last months in the fridge if stored right. But, it’s best eaten within a few weeks for the best taste and freshness.

What are some popular dishes to pair with this chutney?

Great pairings include grilled fish, chicken, and tacos or burritos. It’s also great as a dipping sauce for chips or a unique salad addition.

Are there health benefits associated with the ingredients?

Yes! Pineapples are full of vitamin C and bromelain, which helps with digestion. Jalapeños have antioxidants and can boost metabolism. Together, they make a tasty and healthy choice.

Can I experiment with other fruits in this chutney?

Absolutely! Try adding mango, peach, or berries to the mix. This lets you create your own unique flavors while still enjoying the tropical taste of the chutney.

Apple Cranberry Walnut Salad Recipe: A Tasty Delight

Apple Cranberry Walnut Salad Recipe

Apple Cranberry Walnut Salad is more than just a dish. It’s a mix of flavors and textures that brightens any meal. With tart apples, sweet cranberries, and crunchy walnuts, it’s perfect for those looking for fresh ingredients. It’s great as a holiday side or a summer treat, offering nutrition without losing taste.

This salad is ideal for health lovers wanting tasty, whole foods. It’s a great way to enjoy a delicious, healthy meal.

Key Takeaways

  • A beautiful mix of flavors and textures in every bite.
  • Perfect as a refreshing holiday side dish.
  • Rich in nutrients from fresh salad ingredients.
  • Easy to prepare and customize according to taste.
  • Great addition to festive gatherings or everyday meals.

Introduction to Apple Cranberry Walnut Salad

The apple cranberry salad is a mix of flavors and textures that many love. It’s a healthy choice thanks to its fresh ingredients. The crisp apples, tart cranberries, and crunchy walnuts make it exciting to eat.

Seasonality is key to this salad’s charm. It lets home cooks use fresh produce all year. Families love it for gatherings, holidays, and picnics. It’s a symbol of healthy eating and well-being.

This salad is not just tasty but also good for you. Each ingredient adds important nutrients. It’s perfect for any event with its sweet and tart mix. People often try new versions by adding different fruits or nuts.

Health Benefits of Key Ingredients

The Apple Cranberry Walnut Salad is packed with health benefits. Its main ingredients – tart apples, cranberries, and walnuts – add great taste and nutrition. These foods help keep you healthy.

Tart Apples and Their Nutritional Value

Tart apples are great for your diet because they’re low in calories but high in fiber. They help with digestion and support heart health. Plus, they’re sweet and can help you manage your weight by providing important vitamins and minerals.

Cranberries: A Superfood for Antioxidants

Cranberries are a superfood full of antioxidants. These antioxidant-rich cranberries fight off free radicals in your body. They reduce stress and inflammation. Cranberries also boost urinary tract health and support your immune system, making them key for a healthy diet.

Walnuts: The Heart-Healthy Nut

Walnuts are packed with Omega-3 fatty acids that are good for your heart. Eating them regularly can lower cholesterol and reduce heart disease risk. They’re also full of antioxidants, which are good for your brain and mood.

health benefits of apples

IngredientHealth BenefitsNutritional Highlights
Tart ApplesImproves digestion, supports heart healthLow in calories, high in fiber
CranberriesRich in antioxidants, supports immune healthHigh in vitamin C, low in sugar
WalnutsPromotes heart health, enhances brain functionRich in Omega-3s, high in antioxidants

Apple Cranberry Walnut Salad Recipe

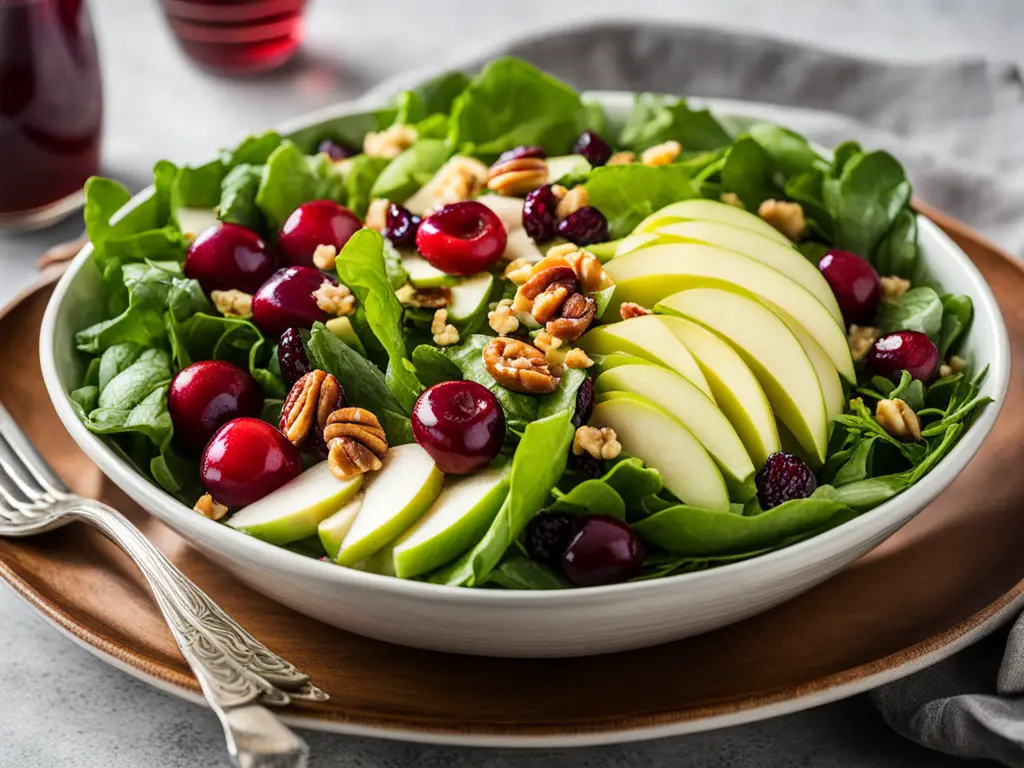
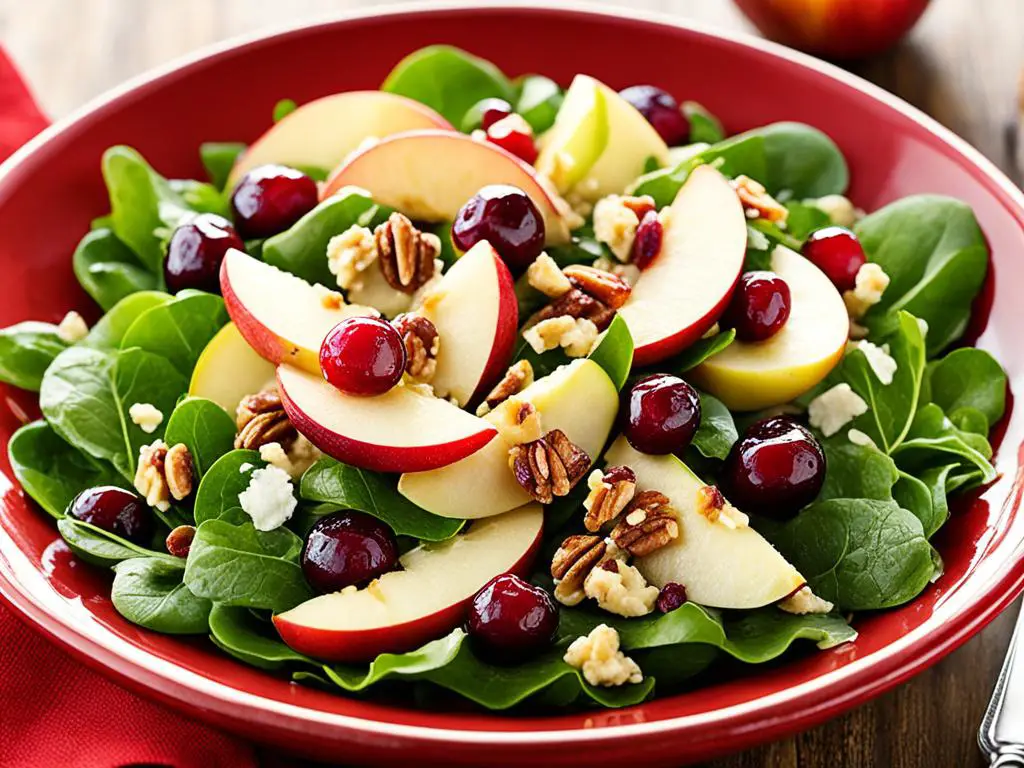
This apple cranberry walnut salad is a fresh and healthy choice for any event. It combines tart apples, juicy cranberries, crunchy walnuts, and mixed greens. This mix not only delights your taste buds but also supports a balanced diet. Learning to make this salad with these ingredients will give you a tasty and fulfilling dish.

Ingredients Needed for the Salad

  • 2 cups mixed greens
  • 1 cup tart apples (like Granny Smith), diced
  • 1/2 cup dried cranberries
  • 1/2 cup walnuts, chopped
  • 1/4 cup feta cheese or goat cheese (optional)
  • 1/4 cup salad dressing (balsamic vinaigrette or your favorite)

Preparation and Cooking Instructions

  1. Start by washing the mixed greens thoroughly under cold water and spinning them dry in a salad spinner.
  2. Dice the tart apples into bite-sized pieces, ensuring to remove the cores and seeds.
  3. In a large mixing bowl, combine the mixed greens, diced apples, dried cranberries, and chopped walnuts.
  4. If using cheese, sprinkle the feta or goat cheese over the salad ingredients.
  5. Drizzle the chosen salad dressing over the mixture.
  6. Toss everything gently until the salad ingredients are well mixed and evenly coated in dressing.
  7. Serve immediately, or chill for a short time before enjoying this delicious apple cranberry walnut salad recipe.

apple cranberry walnut salad recipe

Tips for Perfecting Your Salad

To make the Apple Cranberry Walnut Salad better, use some smart salad tips. Pick the best apples for salad and try different dressings. This way, you can make it just how you like it.

Choosing the Right Apples

Choosing the right apples is key for a great salad. Honeycrisp or Fuji apples add a sweet and crunchy texture. If you like it tangy, go for Granny Smith apples. They bring a unique taste and texture to each bite.

Enhancing Flavor with Dressing Options

Adding the right dressing can really elevate your salad. A honey mustard vinaigrette is a simple yet tasty choice. Or, you can go for olive oil and vinegar for a classic touch. These dressings bring out the best in the apples and cranberries, making the salad even better.

Serving Suggestions and Pairings

Improving the Apple Cranberry Walnut Salad experience means thinking about what goes with it. Pair it with grilled chicken or salmon for the best taste. These options match the salad’s fruity and nutty flavors well, making a complete meal.

Adding a warm roll or a light soup can also make the meal perfect for lunch or dinner. It makes the dining experience more enjoyable.

Great Complements for the Salad

For sides, consider quinoa, roasted vegetables, or a small cheese platter with sharp cheddar. These add different textures and tastes, pleasing everyone. A light vinaigrette or citrus dressing can also tie the flavors together, making each bite more enjoyable.

Beautiful Presentation Ideas

How you present the Apple Cranberry Walnut Salad is important. Use a beautiful stone or wooden board for a rustic look or elegant glassware for a sophisticated feel. Adding edible flowers or serving in mason jars can make it look whimsical and striking.

These touches not only make the dish look better but also make the meal memorable. They elevate the dining experience for everyone.

FAQ

What is an apple cranberry walnut salad?

An apple cranberry walnut salad is a mix of tart apples, sweet cranberries, crunchy walnuts, and mixed greens. It’s a healthy salad perfect for any event, especially during the holidays.

What are the health benefits of this salad?

This salad is packed with cranberries, apples, and walnuts. These ingredients are full of antioxidants and fiber. They help with digestion and heart health.

How do I prepare the apple cranberry walnut salad?

Start by gathering fresh apples, cranberries, walnuts, and mixed greens. Follow the easy recipe steps to make this tasty salad, even if you’re new to cooking.

Can I customize the salad with other ingredients?

Yes, you can! Add cheese like feta or goat cheese, or try different nuts instead of walnuts. You can make the salad your own with fresh ingredients.

What are some dressing options for this salad?

Try a honey mustard vinaigrette or a simple olive oil and vinegar dressing. The right dressing can really bring out the salad’s flavors.

What are some good meal pairings for this salad?

This salad goes well with grilled chicken, fish, or roasted veggies. It’s perfect for a light lunch or a special dinner, making it a great addition to your meals.

How can I make my salad presentation more appealing?

Use colorful ingredients and nice dishes for a beautiful look. Add edible flowers or serve in mason jars for a special touch. A pretty salad can make your meal more enjoyable and impress your guests.

No Bake Peanut Butter Oatmeal Cookies

If you’re looking for a quick, easy, and delicious treat that doesn’t require turning on the oven, you’re in the right place. Our No Bake Peanut Butter Oatmeal Cookies are the perfect solution for those hot summer days or when you’re simply not in the mood to bake. These cookies are packed with the rich, creamy flavor of peanut butter and the wholesome goodness of oats, making them an irresistible option for any occasion.

Why This Recipe is Great

This recipe not only saves time but is also perfect for a variety of occasions:

  • Quick Preparation: Ready in just minutes.
  • No Oven Required: Great for summer and quick snacks.
  • Versatile: Perfect for holidays, parties, or a midday snack.

Table of Contents

  1. Peanut Butter No Bake Cookies
  2. Why We Love This Recipe
  3. Ingredients List
  4. Step-by-Step Instructions
  5. Variations/Substitutions
  6. Tips
  7. FAQ
  8. Similar Recipes
  9. Call to Action

Peanut Butter No Bake Cookies

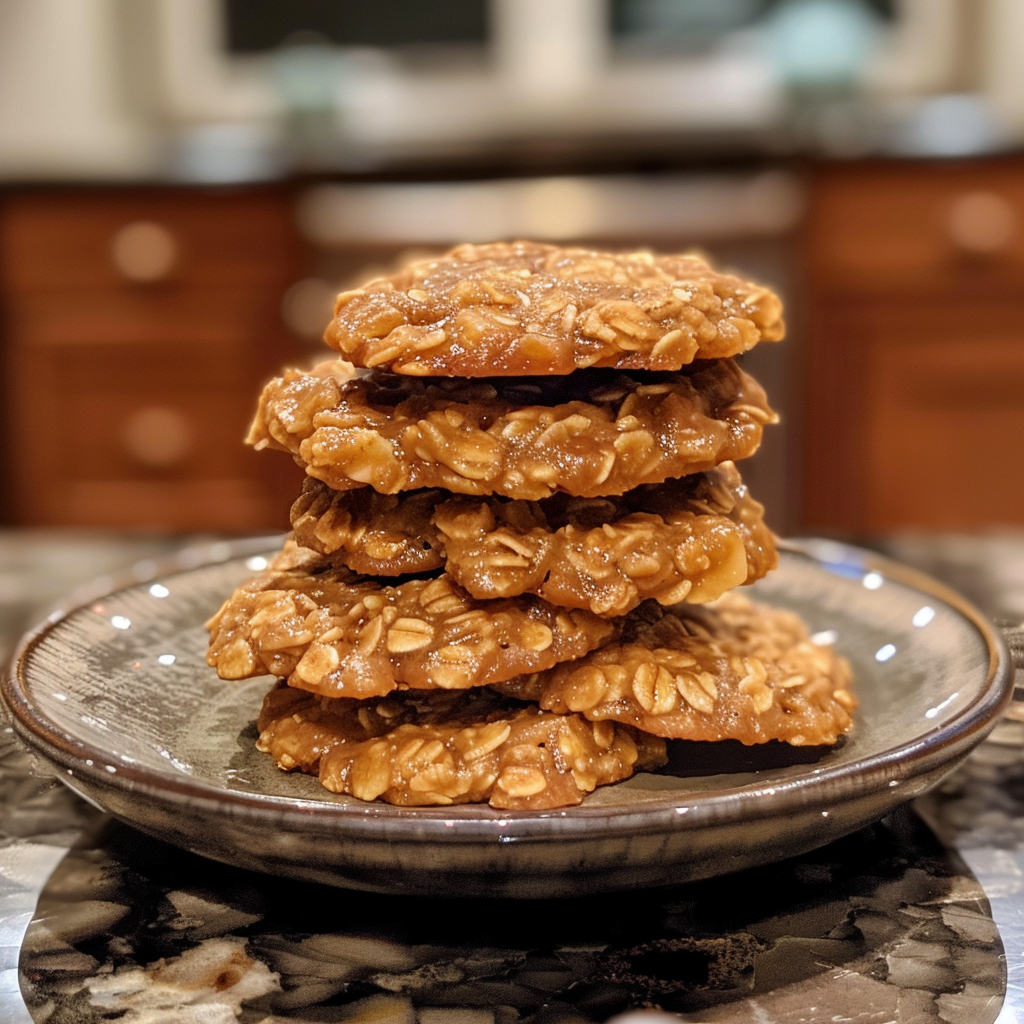
No bake cookies are a fantastic option when you’re short on time but still want to enjoy a homemade treat. These Peanut Butter No Bake Cookies combine the creamy taste of peanut butter with the chewy texture of oatmeal, creating a delightful and satisfying treat that anyone will love.

Why We Love This Recipe

  • Quick and Easy: No baking means less time in the kitchen.
  • Kid-Friendly: Simple steps that children can help with.
  • No Fancy Ingredients: Uses pantry staples.
  • Customizable: Easily adaptable with different flavors.
  • Perfect for Any Occasion: From everyday snacking to special celebrations.

Ingredients List

Here’s what you’ll need to make these delicious no bake cookies:

  • 1 cup peanut butter (creamy or crunchy, depending on preference)
  • 1/2 cup unsalted butter (softened)
  • 1/2 cup milk
  • 2 cups granulated sugar
  • 1 teaspoon vanilla extract
  • 3 cups instant oats
  • Pinch of salt (optional)

Notes:

  • For a sweeter taste, you can use honey or any other sweetener.
  • Gluten-free oats can be used for a gluten-free option.

Step-by-Step Instructions

Step 1: Prepare Your Ingredients

Gather all your ingredients and measure them out before starting.

Step 2: Combine Butter, Milk, and Sugar

In a medium saucepan, combine the unsalted butter, milk, and sugar. Bring to a boil over medium heat, stirring frequently.

Step 3: Blend in Peanut Butter and Vanilla

Once the mixture reaches a rolling boil, remove from heat and stir in the peanut butter and vanilla extract until smooth and well combined.

Step 4: Add Oats

Fold in the instant oats and mix until they are fully coated with the peanut butter mixture.

Step 5: Shape the Cookies

Using a spoon, drop spoonfuls of the mixture onto wax paper or a silicone baking mat. Shape them into round cookies.

Step 6: Let Them Set

Allow the cookies to cool and set for at least 30 minutes. You can speed up this process by placing them in the refrigerator.

Variations/Substitutions

  • Nut Free: Substitute peanut butter with sunflower butter or almond butter.
  • Add Chocolate: Mix in chocolate chips for a chocolatey twist.
  • Sweetener Substitute: Use honey or agave syrup instead of sugar.
  • Add Some Crunch: Sprinkle in chopped nuts or seeds.

Tips

  • Consistency: If the mixture seems too dry, add a little more milk. If too wet, add more oats.
  • Storage: Store these cookies in an airtight container. They can last up to a week at room temperature or longer if refrigerated.
  • Patience: Ensure you wait until the cookies are fully set before removing them from the parchment paper.

FAQ

Q: Can I use old-fashioned oats instead of instant oats? A: Yes, but the texture will be chewier. Instant oats are preferred for a softer cookie.

Q: Can I freeze these cookies? A: Absolutely! They freeze well and can be stored for up to 3 months.

Q: How can I make these cookies vegan? A: Use a plant-based milk and vegan butter substitutes.

Similar Recipes

Did you try our No Bake Peanut Butter Oatmeal Cookies? We’d love to hear from you! Leave a comment below, rate our recipe, and don’t forget to follow us on social media for more delicious and easy recipes!

10 Secrets to Perfecting the Most Irresistible Raspberry Lemon Bars You’ll Ever Taste!

Hey there, dessert lovers! Are you ready to embark on a tantalizing journey that’ll make your taste buds dance with joy? Today, we’re diving into the world of heavenly Raspberry Lemon Bars – a dessert so divine, it’ll have you questioning why you haven’t tried it sooner. These zesty, fruity squares are the perfect balance of sweet and tart, creamy and crunchy. Trust me, once you’ve tasted these bad boys, there’s no going back!

So, grab your apron, preheat that oven, and let’s get baking! I’m about to spill all the secrets to creating the most mouthwatering Raspberry Lemon Bars you’ve ever encountered. Whether you’re a seasoned baker or a curious newbie, this recipe is foolproof and guaranteed to impress. Ready to become the dessert hero at your next gathering? Let’s dive in!

  1. The Magic of Raspberry and Lemon: A Match Made in Dessert Heaven

Before we jump into the nitty-gritty of our recipe, let’s take a moment to appreciate the beautiful union of raspberries and lemons. These two flavors are like the power couple of the fruit world – individually amazing, but together? Absolutely explosive!

Raspberries bring a sweet, slightly tart flavor with a soft, juicy texture. They’re packed with antioxidants and vitamin C, making them not just delicious but also nutritious. On the other hand, lemons offer that zingy, citrusy kick that wakes up your taste buds and adds a refreshing twist to any dessert.

When combined, these fruits create a harmony of flavors that’s both bold and balanced. The tartness of the lemon cuts through the sweetness of the raspberries, while the berries add depth and complexity to the citrus notes. It’s no wonder that raspberry lemon desserts have become increasingly popular, with searches for “raspberry lemon recipes” increasing by 22% in the past year alone!

  1. Ingredients: The Building Blocks of Perfection

Now that we’ve established why raspberry and lemon are a match made in dessert heaven, let’s talk about what you’ll need to create these heavenly bars. Remember, quality ingredients are key to achieving that perfect flavor and texture!

For the crust:

  • 1 1/2 cups all-purpose flour
  • 1/3 cup powdered sugar
  • 1/4 teaspoon salt
  • 1/2 cup cold unsalted butter, cubed

For the filling:

  • 4 large eggs
  • 1 1/2 cups granulated sugar
  • 1/4 cup all-purpose flour
  • 2/3 cup freshly squeezed lemon juice (about 4-5 lemons)
  • Zest of 2 lemons
  • 1/4 teaspoon salt

For the raspberry swirl:

  • 1 cup fresh raspberries
  • 2 tablespoons granulated sugar
  • 1 teaspoon cornstarch
  1. Step-by-Step Guide: Crafting Your Raspberry Lemon Masterpiece

Step 1: Preparing the Crust

  1. Preheat your oven to 350°F (175°C) and line a 9×13-inch baking pan with parchment paper.
  2. In a food processor, pulse together flour, powdered sugar, and salt.
  3. Add cold butter cubes and pulse until the mixture resembles coarse crumbs.
  4. Press the mixture evenly into the prepared pan.
  5. Bake for 20 minutes or until lightly golden. Set aside to cool.

Step 2: Creating the Lemon Filling

  1. In a large bowl, whisk together eggs, sugar, flour, lemon juice, lemon zest, and salt until smooth.
  2. Pour the mixture over the cooled crust.

Step 3: Making the Raspberry Swirl

  1. In a small saucepan, combine raspberries, sugar, and cornstarch.
  2. Cook over medium heat, stirring constantly, until the mixture thickens (about 5 minutes).
  3. Strain through a fine-mesh sieve to remove seeds.
  4. Drop spoonfuls of the raspberry mixture over the lemon filling.
  5. Use a knife to gently swirl the raspberry into the lemon filling, creating a marbled effect.

Step 4: Baking to Perfection

  1. Bake for 25-30 minutes, or until the filling is set and the edges are lightly browned.
  2. Allow to cool completely in the pan before cutting into bars.
  3. Tips and Tricks: Elevating Your Raspberry Lemon Bars Game

Now that you’ve got the basic recipe down, let’s explore some pro tips to take your Raspberry Lemon Bars from great to absolutely mind-blowing:

  1. Use fresh lemons: Trust me, the difference in flavor between fresh and bottled lemon juice is night and day. Plus, you’ll need the zest anyway, so why not go all in?
  2. Don’t skip the parchment paper: This simple step will make removing and cutting your bars a breeze.
  3. Chill before cutting: For clean, picture-perfect cuts, refrigerate your bars for at least an hour before slicing.
  4. Experiment with the swirl: Get creative with your raspberry swirl pattern – each bar can be a unique work of art!
  5. Dust with powdered sugar: Just before serving, give your bars a light dusting of powdered sugar for that extra touch of elegance.
  6. Frequently Asked Questions: Your Raspberry Lemon Bar Queries Answered

Q1: Can I use frozen raspberries instead of fresh? A: Absolutely! Just make sure to thaw and drain them well before use to avoid excess moisture.

Q2: How long do these bars keep? A: When stored in an airtight container in the refrigerator, these bars will stay fresh for up to 5 days. But let’s be honest, they probably won’t last that long!

Q3: Can I make these bars gluten-free? A: Yes! Simply substitute the all-purpose flour with a gluten-free flour blend in both the crust and filling.

Q4: Can I freeze Raspberry Lemon Bars? A: You bet! These bars freeze beautifully for up to 3 months. Just thaw in the refrigerator overnight before serving.

Q5: How do I know when the bars are done baking? A: The edges should be lightly browned, and the center should be set but still have a slight jiggle when you gently shake the pan.

  1. The Health Benefits: Guilt-Free(ish) Indulgence

While we can’t claim that these Raspberry Lemon Bars are a health food, they do offer some nutritional benefits that might make you feel a little less guilty about reaching for that second (or third) piece:

  1. Vitamin C powerhouse: Both raspberries and lemons are excellent sources of vitamin C, which supports immune function and skin health.
  2. Antioxidant rich: Raspberries are packed with antioxidants that help fight inflammation and protect against chronic diseases.
  3. Fiber boost: Raspberries provide a good amount of dietary fiber, promoting digestive health.
  4. Low in fat: Compared to many other desserts, these bars are relatively low in fat, especially if you use a light hand with the butter in the crust.
  5. Natural flavors: By using fresh fruits, you’re avoiding artificial flavors and colors often found in store-bought desserts.
  6. Serving Suggestions: Taking Your Raspberry Lemon Bars to the Next Level

While these bars are absolutely delicious on their own, why not get creative with your serving ideas? Here are a few suggestions to really wow your guests:

  1. À la mode: Serve warm with a scoop of vanilla ice cream for a delightful contrast of temperatures and textures.
  2. Lemon curd drizzle: For lemon lovers, add an extra zing with a drizzle of homemade lemon curd.
  3. Fresh berry garnish: Top each bar with a fresh raspberry and a sprig of mint for a pop of color and freshness.
  4. Whipped cream rosette: Pipe a small rosette of fresh whipped cream onto each bar for an elegant touch.
  5. Chocolate pairing: For a decadent twist, serve alongside dark chocolate truffles to balance the fruity flavors.
  6. The Perfect Occasions: When to Serve Your Raspberry Lemon Bars

These versatile bars are perfect for almost any occasion, but here are some ideas to get you started:

  1. Summer picnics: The refreshing flavors are perfect for outdoor dining.
  2. Bridal or baby showers: The pretty colors make them ideal for celebratory events.
  3. Afternoon tea: Pair with a cup of Earl Grey for a sophisticated treat.
  4. Holiday gatherings: A bright alternative to heavy winter desserts.
  5. Just because: Who needs a special occasion to enjoy something delicious?
  6. Variations on a Theme: Twists on the Classic Recipe

Once you’ve mastered the classic Raspberry Lemon Bars, why not get creative with some variations?

  1. Blackberry Lime Bars: Swap raspberries for blackberries and lemon for lime for a different flavor profile.
  2. Orange Cranberry Bars: Perfect for fall, this combination is tart and festive.
  3. Strawberry Lemonade Bars: A summer classic in dessert form!
  4. Blueberry Lemon Lavender Bars: Add a touch of culinary lavender for a floral note.
  5. Tropical Raspberry Lemon Bars: Mix in some coconut to the crust for a tropical twist.
  6. The Science Behind the Perfect Bar: Understanding the Magic

Ever wondered why your Raspberry Lemon Bars turn out so perfectly creamy and set just right? It’s all about the science! The eggs in the filling create a custard-like texture when heated, while the acid in the lemon juice helps to set the filling by denaturing the proteins in the eggs. The cornstarch in the raspberry swirl acts as a thickening agent, ensuring that your swirl holds its shape and doesn’t bleed into the lemon filling.

Understanding these principles can help you troubleshoot if things don’t go quite as planned. For example, if your filling is too runny, you might need to add a bit more flour or cornstarch to help it set. If it’s too firm, you might have overcooked it or used too much thickener.

Conclusion:

There you have it, folks – the ultimate guide to creating the most irresistible Raspberry Lemon Bars you’ll ever taste! From the perfect balance of sweet and tart flavors to the creamy filling and buttery crust, these bars are sure to become a staple in your dessert repertoire.

Remember, baking is both an art and a science. Don’t be afraid to experiment and make this recipe your own. Whether you stick to the classic version or try out one of the variations, the most important ingredient is the love and care you put into your baking.

So, what are you waiting for? Grab those lemons, pick up some fresh raspberries, and get ready to impress your friends, family, and taste buds with these heavenly Raspberry Lemon Bars. Happy baking, and may your kitchen always be filled with the sweet aroma of success!