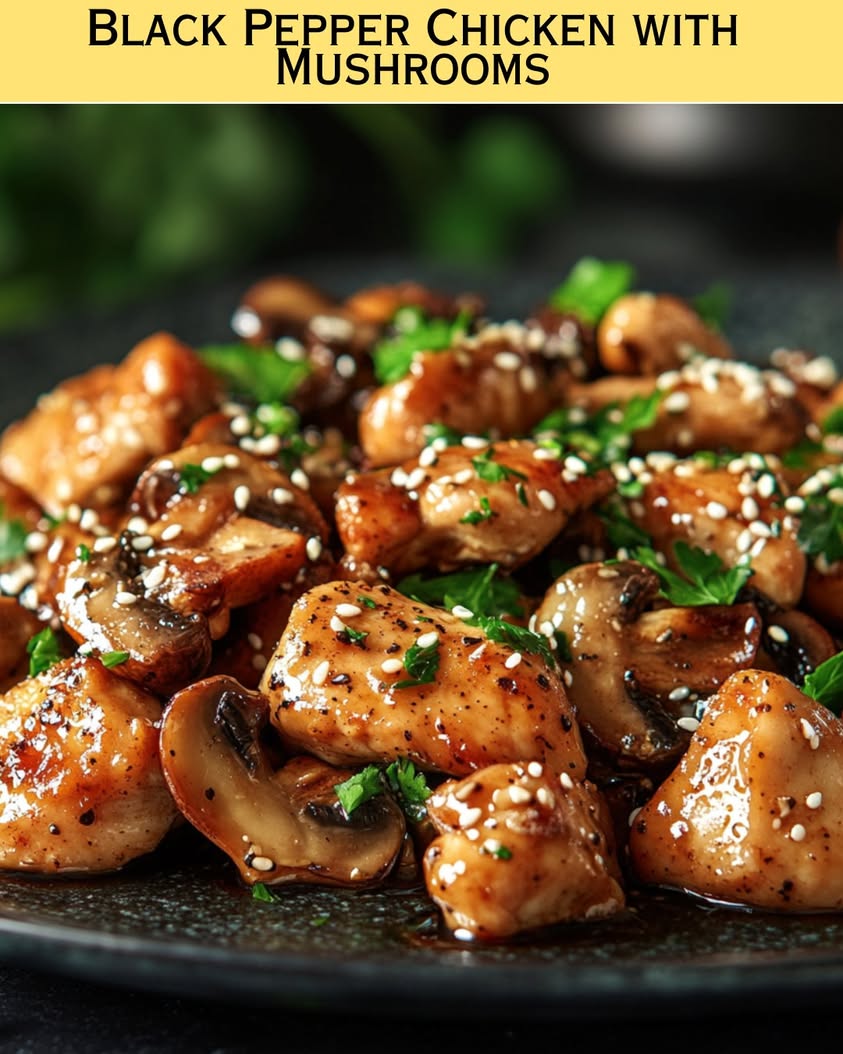
Delicious Black Pepper Chicken with Mushrooms Recipe Unveiled

Black Pepper Chicken with Mushrooms: A Deliciously Savory Delight

⚖️
Difficulty
Medium

⏲️
Prep Time
15 mins

🕒
Cook Time
20 mins

⏱️
Total Time
35 mins

🍽️
Servings
4

Black Pepper Chicken with Mushrooms is a dish that brings together bold flavors and hearty ingredients, making it a favorite among food lovers. With succulent pieces of chicken seared to perfection, every bite is enhanced by the aromatic kick of freshly cracked black pepper and the earthy taste of mushrooms. This recipe not only tantalizes your taste buds but also creates a delightful aroma that fills your kitchen, inviting friends and family to gather around the table.

As you prepare this dish, the vibrant colors of the ingredients catch your eye, from the golden brown chicken to the rich browns of the mushrooms. The combination of flavors and textures—from tender chicken to the slight crunch of bell peppers—creates an unforgettable experience for your palate. Whether served over rice or with noodles, this dish is versatile, satisfying, and truly packed with flavor.

Quick Recipe Highlights

  • Flavor Profile: A perfect balance of savory and spicy notes, enhanced by the umami richness of mushrooms.
  • Texture: Tender chicken with a slightly crispy exterior, contrasted by the juicy tenderness of sautéed mushrooms.
  • Aroma: Invigorating scents of garlic and freshly ground black pepper fill the air, making it hard to resist.
  • Visual Appeal: Vibrant colors and textures, with browns and greens creating an inviting dish that is as attractive as it is delicious.
  • Skill Level Needed: Best for cooks with basic skills, making this an accessible dish for most home chefs.
  • Special Equipment: A large skillet or wok is ideal for even cooking and enhancing the dish’s flavors.

Recipe Overview

  • Difficulty Level: The recipe is categorized as medium difficulty, requiring basic cooking skills such as chopping, sautéing, and seasoning.
  • Category: This dish fits perfectly into the main course category, ideal for weeknight dinners or special occasions.
  • Cuisine: With roots in Asian cuisine, it draws inspiration from stir-fry traditions that highlight fresh ingredients and bold flavors.
  • Cost: The ingredients are relatively inexpensive, making it a budget-friendly option for families and gatherings.
  • Season: Ideal for any season, especially comforting during colder months.
  • Occasion: Great for family dinners, casual gatherings, or even as meal prep during busy weeks.

Why You’ll Love This Recipe

The flavorful interplay between the chicken and mushrooms provides a delightful taste sensation that is hard to beat. The seasoning enhances the overall experience, with black pepper giving a delightful kick that complements the savory chicken. The combination of ingredients ensures a complex yet balanced taste that will leave you wanting more.

Convenience is another appealing factor; this recipe comes together quickly without sacrificing flavor or quality. Perfect for a weeknight meal, you can have an impressive dish ready in under 40 minutes, allowing you to enjoy quality time with family while serving a homemade masterpiece.

Nutritionally, this dish offers a great source of protein from the chicken and an abundance of vitamins and minerals from the mushrooms and bell peppers. By incorporating lean meats and vegetables into your diet, you maintain a healthy lifestyle without compromising on flavor.

Socially, this dish is perfect for entertaining, serving easily as a delightful centerpiece on your dining table. It’s bound to impress guests and family alike with its mouthwatering aroma and presentation. This recipe encourages sharing and connection over a meal, strengthening bonds and creating lasting memories.

From a financial perspective, Black Pepper Chicken with Mushrooms is a cost-effective choice. With affordable ingredients and easy preparation, you can serve a restaurant-quality meal at home without breaking the bank, making it appealing for families and individuals alike.

Historical Background and Cultural Significance

The origins of Black Pepper Chicken can be traced back to the culinary traditions of Asian cuisine, particularly in Chinese and Thai cooking, where black pepper is a staple used to enhance flavors. The use of elements like mushrooms in conjunction with chicken is common in many Eastern dishes, showcasing a balance of ingredients that promote health and flavor.

Culturally, this dish represents the communal aspect of Asian meals where sharing a plate is a sign of togetherness. Meals are often enjoyed in groups, emphasizing the importance of family and relationships, making this dish more than just a meal; it’s a way to connect.

Over time, recipes for Black Pepper Chicken have evolved, adapting to local flavors and preferences. The combination of various ingredients, such as different types of mushrooms or vegetables, reflects the versatility that allows this dish to flourish in different culinary contexts.

Regional variations abound, with some cultures incorporating different spices or vegetables to suit local tastes. Whether it’s the addition of chili for heat, or varying the types of mushrooms based on availability, each adaptation showcases the dish’s flexibility while maintaining its core appeal.

Ingredient Deep Dive

Chicken serves as the hearty protein in this recipe. Rich in essential amino acids, it is a staple across various cuisines due to its versatility and nutritional value. To choose the best chicken, look for fresh, organic options, ideally free-range, which are known for their superior flavor and texture. To store, chicken should be kept in the refrigerator and used within a couple of days, or frozen for longer preservation.

Mushrooms play a significant role in enhancing the depth of flavor in Black Pepper Chicken. They are not only delicious but also provide numerous health benefits as they contain antioxidants and are low in calories. When selecting mushrooms, look for firm ones without any blemishes. Store them in a paper bag in the refrigerator to keep them fresh. They can be substituted with other varieties, like shiitake or cremini, for a flavor twist.

Black pepper is the star spice of this dish. Known for its pungent kick, it has been used in cooking and medicine for centuries. The best way to select pepper is to choose whole peppercorns and grind them fresh to preserve their flavor potency. Whole pepper should be stored in a cool, dry place, and ground pepper should ideally be used within a few weeks for best flavor.

Bell peppers add a fresh crunch and a hint of sweetness to the dish. They are rich in vitamins A and C and contribute significantly to the dish’s visual appeal. When buying bell peppers, look for shiny, firm specimens without any wrinkles. They can last for about a week in a vegetable drawer and can be replaced with other colorful varieties for additional nutrients and aesthetics.

Common Mistakes to Avoid

  • Overcooking the chicken can lead to dry meat. Always ensure that the chicken is cooked just until its juices run clear.
  • Using pre-ground black pepper instead of freshly cracked pepper can dull the dish’s flavor, as pre-ground pepper loses its potency over time.
  • Forgetting to marinate the chicken can result in less flavorful meat. A short marination time significantly enhances the taste.
  • Cooking at too high a temperature might burn the garlic while leaving the chicken undercooked. A moderate flame ensures even cooking.
  • Not using enough oil can make the chicken stick to the pan. Use a suitable amount of oil to assist in browning the meat.
  • Failing to properly wash and dry the mushrooms can cause excess moisture in the pan. Dry mushrooms brown better and enhance flavor.
  • Skipping the resting period after cooking may result in losing juices. Allowing the chicken to rest keeps it juicy.
  • Neglecting to taste and adjust the seasoning throughout the cooking process can lead to a bland result. Regular tasting is key.
  • Rushing through the chopping process can lead to uneven pieces, affecting cooking time and texture. Consistent sizes ensure uniform cooking.
  • Overcrowding the pan when cooking can steam the food instead of searing it, which affects the flavor. Cook in batches if necessary.

Essential Techniques

One of the key techniques in this recipe is sautéing, which is crucial for achieving a flavorful base. Mastering sautéing involves using the right amount of heat and oil, ensuring that ingredients brown without burning. Watch for visual cues like a light golden color to know when to add other ingredients.

Another essential technique is marinating, which helps in enhancing the flavors of the chicken. To master this, ensure the chicken is coated evenly and left to soak in the flavors for long enough—about 15-30 minutes will do the trick. Be cautious of marinating too long with acidic ingredients as it can change the texture unfavorably.

Pro Tips for Perfect Black Pepper Chicken with Mushrooms

Using different types of mushrooms can elevate the dish. Shiitake or oyster mushrooms add their unique textures and flavors, making the dish even more interesting.

A dash of soy sauce during the cooking process can deepen the umami flavors and add a touch of sweetness.

Always ensure to use freshly cracked black pepper right before cooking for enhanced flavor and aroma.

Experiment with seasonings by incorporating additional spices like ginger or chili flakes for heat.

Consider serving the dish over a bed of jasmine rice to soak up the savory sauce.

Top your dish with sliced green onions and sesame seeds for added crunch and visual appeal.

Allowing the cooked chicken to rest for a few minutes before slicing helps retain moisture and keeps it juicy.

Pairing the dish with a simple cucumber salad can provide a refreshing contrast to the savory elements of the chicken.

Variations and Adaptations

Regional variations of Black Pepper Chicken are aplenty. In Sichuan cuisine, for example, numbing peppercorns may be incorporated, creating a unique spiciness.

Seasonal adaptations may include adding fresh vegetables like snap peas in spring, brightening the dish with varied textures and tastes.

For dietary modifications, consider using tofu as a substitution for chicken for a vegetarian version that still retains robust flavor.

Flavor variations can be introduced by substituting black pepper with white pepper for a milder, yet still aromatic experience.

If you prefer a crunchier texture, you may choose to stir-fry the components at a higher heat briefly to achieve a stir-fried finish.

Presentation alternatives include serving the chicken in lettuce wraps or rice paper for a creative twist on how to enjoy this dish.

Serving and Presentation Guide

Plating techniques for Black Pepper Chicken can elevate its visual appeal. Use a large, shallow bowl to allow the dish to be easily scooped and appreciated.

Garnishing with freshly chopped green onions or cilantro adds a pop of color and freshness that balances the rich flavors of the chicken.

Traditional accompaniments include steamed jasmine rice or fried rice to complement the dish’s savory qualities.

For a modern take, serve the chicken in a taco-style fashion in soft tortillas, adding fresh toppings like avocado for creaminess.

Temperature considerations are essential; serve the dish piping hot for the best dining experience.

For portion control, consider serving it family-style in the center of the table, allowing everyone to help themselves while promoting a communal dining experience.

Wine and Beverage Pairing

When it comes to wine pairings, a lightly oaked Chardonnay complements the savory and peppery flavors of the dish wonderfully, providing a rich mouthfeel.

For non-alcoholic alternatives, consider pairing with ginger ale, which adds a refreshing sparkle and slight spice matching the black pepper’s heat.

If you’re a coffee fan, a light roast coffee served warm can also enhance the savory notes in the chicken, creating an aspect of comfort.

Avoid overly heavy wines that might overshadow the dish’s flavors. Look for bright, crisp options instead.

Serving suggestions include allowing wine to breathe for a few minutes to enhance its complex flavors, especially with white wine.

Storage and Shelf Life

To store leftover Black Pepper Chicken, place it in an airtight container and refrigerate, ideally within two hours of cooking. It will typically last about 3-4 days.

For optimal flavor preservation, reheat gently, either in the microwave or on a stovetop, ensuring it reaches an internal temperature of 165°F to safeguard against spoilage.

If freezing, make sure to portion leftovers into single-serving containers for easy thawing. Use them within 2-3 months for the best taste and quality.

Signs of spoilage include a sour smell or an off color, indicating that it’s best to err on the side of caution and discard any questionable food.

Make Ahead Strategies

If you plan to make this dish in advance, marinate the chicken the night before for maximum flavor impact.

Chop and prepare vegetables a day ahead to save time; store them in airtight containers to maintain freshness.

If you’re short on time, cooking the chicken in bulk can streamline meal preparation for the week. This slight preparation ensures a quick meal is always on hand.

Quality may be impacted by reheating, so add additional seasoning and a splash of broth or water to revive moisture when reheating.

Consider adding fresh elements, like chopped herbs, just before serving to keep the flavors vibrant and distinct.

Scaling Instructions

Halving the recipe can be done easily by dividing all ingredient measures by two, ensuring a smaller yield while maintaining flavor integrity.

Doubling or tripling the recipe is also feasible; simply adjust your cooking times and equipment accordingly to accommodate larger quantities.

Use larger pans or more than one skillet to ensure even cooking when scaling up, so each chicken piece receives proper attention.

Timing modifications may be necessary for cooking larger batches. Keep a close eye on cooking process for meat to ensure thorough cooking.

Store extra servings in appropriate containers, and ensure any leftovers are labelled with dates for freshness awareness.

Nutritional Deep Dive

Analyzing the nutritional offers of Black Pepper Chicken reveals it as a protein-rich meal, providing about 25-30 grams of protein per serving, depending on the chicken cut used.

Micronutrient analysis shows significant amounts of vitamin C from the bell peppers and B vitamins from the chicken, promoting overall health.

Health benefits are abundant, with the dish being low in carbohydrates and containing beneficial antioxidants from the mushrooms and peppers.

Dietary considerations favor those looking for high-protein meals while still keeping calories reasonable with fresh vegetables included.

Portion analysis can assist with mindful eating. Consider pairing smaller portions with larger servings of vegetables to create a balanced plate that satisfies.

Dietary Adaptations

For those with gluten sensitivities, ensure the soy sauce is gluten-free or replace it with tamari for a similar flavor profile without gluten.

A dairy-free version is naturally achievable with this recipe, as it contains no dairy ingredients, making it suitable for families wanting to avoid dairy allergies.

For a vegan adaptation, swap chicken for cooked tofu or tempeh to maintain protein content and enhance texture.

Low-carb enthusiasts can omit the rice and replace it with cauliflower rice, blending flavors while lowering carbohydrate intake.

Keto dieters should be pleased with this dish as it is low in carbohydrates and high in protein, aligning perfectly with their dietary restrictions.

Paleo advocates can enjoy this meal as it contains whole food ingredients without processed elements, making it a deliciously compliant option.

Troubleshooting Guide

If the chicken appears tough, adjust cooking times and ensure it isn’t overcooked. Tender meat results from careful heat management and timing.

In case the sauce is too salty, balance flavors by adding a splash of water or more vegetables to dilute the saltiness without affecting the dish adversely.

If the dish is too spicy, dairy products like sour cream or yogurt can tame the heat, creating a smoother texture and flavor within the meal.

Ingredient substitutions can lead to unwanted results, so always choose replacements with similar flavor profiles or textures to maintain harmony within the dish.

Timing concerns, particularly with vegetables, can affect crispness; add them at a later stage to retain their fresh crunch.

Recipe Success Stories

Community feedback on this dish showcases delight over its simplicity and flavor. Many readers celebrate how the dish becomes a standby recipe, repeatedly asked for at family gatherings.

Variation successes include incorporating leftover vegetables, leading to inventive versions that are seasonally inspired yet retain the core appeal.

Adaptation stories highlight the ways readers have integrated personal touches or dietary choices, making it a flexible favorite that fits diverse tastes.

Photography tips from readers capturing their successful versions show how well-plated Black Pepper Chicken can steal the spotlight at dinner parties.

Engagement through sharing tips among community members reflects the popularity and adaptability of this dish in various households, creating a legacy of culinary success.

Frequently Asked Questions

Can I use other types of meat in this recipe?

Absolutely! While chicken is the star of this recipe, you can substitute it with turkey, beef, or even shrimp. Just adjust cooking times accordingly based on the type of protein you choose.

How can I make this dish spicier?

To amp up the heat, consider adding crushed red pepper flakes or sliced fresh chilies while cooking. These ingredients will provide a warming heat that enhances the dish’s overall flavor profile.

What can I do with leftover Black Pepper Chicken?

Leftovers can be used in various ways—serve them over salad, toss with pasta, or stuff into tacos or wraps for a quick and satisfying meal. The flavors often deepen and improve upon reheating!

Can this recipe be made vegetarian?

Yes, replace the chicken with tofu or tempeh, which can absorb the flavors beautifully while providing similar texture. Use ample seasons and marinade for the best results.

Is it possible to prepare this dish ahead of time?

Definitely! You can marinate and chop all ingredients the day before. Prepare the dish up to the cooking step, then quickly stir-fry when you’re ready to serve for optimal freshness.

What is the best way to store leftovers?

Store any leftovers in an airtight container in the refrigerator, where they will last for about three to four days. Reheat gently to maintain texture and flavor.

Can I freeze Black Pepper Chicken?

Yes, you can freeze the dish for up to three months. When ready to eat, thaw overnight in the refrigerator and reheat on the stove for the best texture.

How does the black pepper affect the flavor?

Black pepper adds a distinct warmth and complexity to the dish, enhancing the savory notes of the chicken and mushrooms while adding an aromatic quality that makes this recipe stand out.

What vegetables can I add to the dish?

You can add a variety of vegetables such as broccoli, snap peas, or carrots for added texture and nutritional benefits. Just ensure to adjust cooking times to keep everything perfectly cooked.

Is this dish suitable for meal prep?

Yes, it holds up excellently for meal prep. Make a big batch and divide into containers for ready-to-go lunches or dinners throughout the week.

Additional Resources

For those who love exploring new flavors, check out related recipes such as Sweet and Sour Chicken or Teriyaki Chicken for more Asian-inspired delights.

Technique guides detailing sautéing and marinating tips can help enhance your cooking skills, allowing for consistent, flavorful results.

Ingredient information can offer deeper insights into mushroom varieties or the benefits of black pepper, helping you make informed choices during your grocery shopping.

Understanding essential kitchen equipment improves cooking experiences; consider investing in a quality wok or skillet to achieve optimal results with this recipe.

Additionally, seasonal variations can inspire your cooking throughout the year, ensuring that you enjoy fresh and vibrant ingredients in your meals.

Join the Conversation

We’d love to hear how you enjoy Black Pepper Chicken with Mushrooms! Share your photos and your unique twists on the recipe on social media to inspire others.

For photography tips, focus on natural light to capture the vibrant colors of your dish—good lighting can make all the difference!

Leave a review or share your feedback to foster engagement within our cooking community. Each person’s experience can enhance everyone’s journey through the culinary world.

Share your recipe variations in the comments; we’d love to experiment with your ideas!

Don’t forget to subscribe for more exciting recipes and cooking tips to enrich your culinary adventures—each dish is an opportunity for creativity and connection!

The Recipe

Black Pepper Chicken with Mushrooms

Serves: 4

Prep Time: 15 mins

Cook Time: 20 mins

Total Time: 35 mins

Kitchen Equipment Needed

  • Large skillet or wok
  • Cutting board
  • Chef’s knife
  • Measuring spoons
  • Spatula or wooden spoon

Ingredients

  • 1 pound boneless, skinless chicken thighs, sliced
  • 8 ounces mushrooms, sliced
  • 1 bell pepper, sliced
  • 3 cloves garlic, minced
  • 1 tablespoon freshly ground black pepper (or to taste)
  • 2 tablespoons soy sauce
  • 2 tablespoons vegetable oil
  • Salt, to taste

Directions

  1. Marinate the sliced chicken with soy sauce, half of the black pepper, and a pinch of salt for at least 15 minutes.
  2. Heat vegetable oil in a large skillet or wok over medium-high heat.
  3. Add minced garlic and sauté for 30 seconds until fragrant.
  4. Add the marinated chicken to the skillet and stir-fry until browned and cooked through, about 6-8 minutes.
  5. Add sliced mushrooms and bell pepper to the skillet, cooking until tender, about 4-5 minutes.
  6. Season with remaining black pepper and adjust salt as needed, stirring well to combine all ingredients.
  7. Serve hot over rice or noodles, garnished with additional pepper or herbs if desired.

Recipe Notes

  • Feel free to substitute chicken with tofu or shrimp for a different protein option.
  • For extra heat, add chili flakes or fresh chili slices during cooking.
  • This dish can easily be doubled or halved depending on your needs.
  • Experiment with different mushroom varieties for varied flavors.
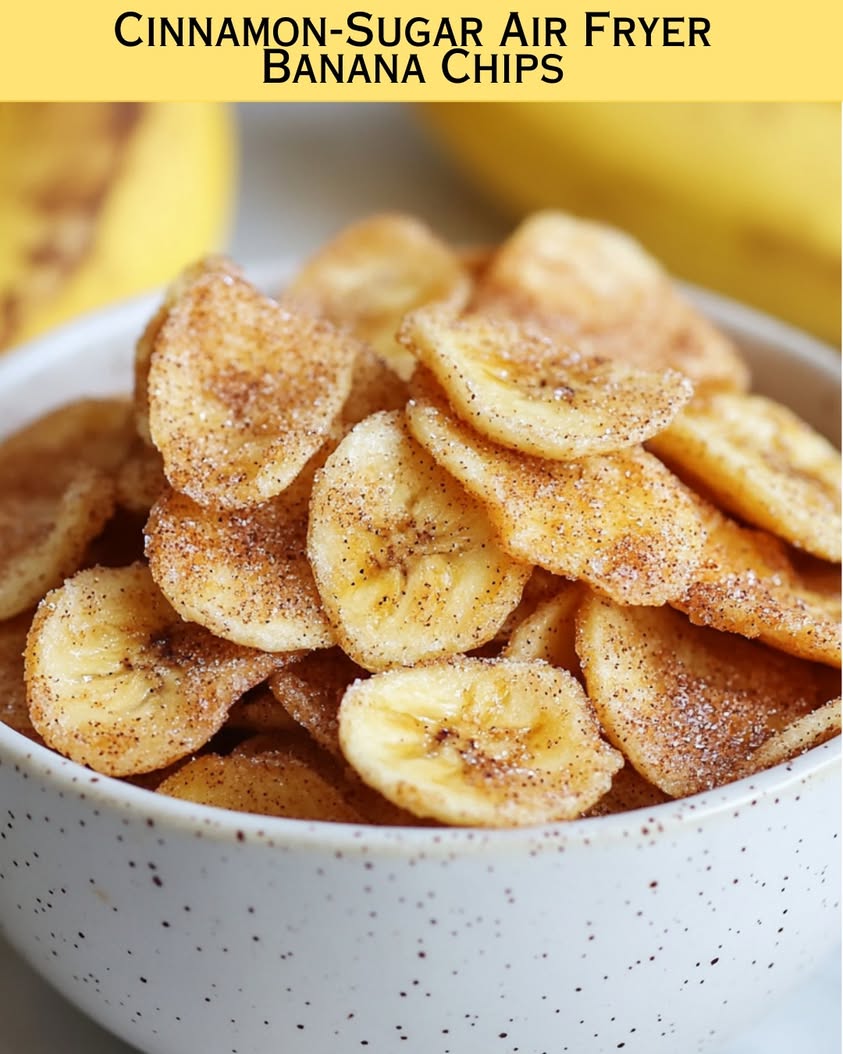
Delicious Cinnamon-Sugar Air Fryer Bananas Recipe for Sweet Treats

Cinnamon-Sugar Air Fryer Bananas: A Quick and Delicious Snack

⚖️
Difficulty
Easy

⏲️
Prep Time
5 mins

🕒
Cook Time
10 mins

⏱️
Total Time
15 mins

🍽️
Servings
4

Indulge in the delightful taste of Cinnamon-Sugar Air Fryer Bananas that will make your taste buds dance with joy. This quick and easy recipe transforms ripe bananas into a warm, sweet treat coated in cinnamon sugar, creating a comforting dessert that brings a hint of nostalgia. The aroma wafting through your kitchen as they crisp up is undeniably irresistible, making them a perfect snack to enjoy any time of the day.

When you bite into these air-fried bananas, you’ll experience a tender fruit that melts in your mouth combined with a crunchy cinnamon-sugar coating, creating a wonderful contrast of texture. Serve them warm, perhaps with a scoop of ice cream, and watch them disappear before your eyes. This recipe is not only simple but also offers a healthier alternative to traditional frying, allowing you to savor all the flavors without the extra guilt.

Quick Recipe Highlights

  • Flavor Profile: Sweet, warm, and comforting with a touch of spice from the cinnamon.
  • Texture: Soft and gooey bananas encased in a crispy caramelized coating.
  • Aroma: Inviting cinnamon and sugary notes that fill your home.
  • Visual Appeal: Golden-brown, glossy bananas that look as good as they taste.
  • Skill Level Needed: No advanced skills required; perfect for beginners.
  • Special Equipment: Requires an air fryer for the best results.

Recipe Overview

  • Difficulty Level: This recipe is rated easy, making it suitable for cooks of all skill levels. It involves minimal preparation and straightforward steps, ensuring a quick and satisfying outcome.
  • Category: Snack or dessert—ideal for a sweet treat at any time of the day.
  • Cuisine: Inspired by classic desserts, this recipe incorporates universal flavors that everyone loves.
  • Cost: Inexpensive to make, the overall cost is under $5 for four servings, making it budget-friendly.
  • Season: Delicious in any season, particularly appealing in the fall and winter months when warm flavors are especially comforting.
  • Occasion: Great for parties, family gatherings, or a simple dessert during the week.

Why You’ll Love This Recipe

Experience the delightful combination of taste and texture with these Cinnamon-Sugar Air Fryer Bananas. The sweetness of the ripe bananas complements the warm cinnamon, creating a flavor explosion that is hard to resist. The crunchiness of the sugary coating provides the perfect contrast, making each bite a pleasurable experience.

This recipe is incredibly convenient, taking only a few minutes to prepare and cook. The air fryer allows the bananas to cook evenly and quickly, making it a fantastic option for those who are short on time. Plus, it’s a delightful way to use up overripe bananas, turning what might be wasted into a delicious treat.

Nutritionally, bananas offer a variety of health benefits. They are rich in potassium, vitamin C, and dietary fiber, making these air-fried bananas a relatively healthy indulgence. With minimal added sugar, this recipe remains a better choice compared to many traditional desserts.

Socially, this recipe is perfect for entertaining. It can be prepared in no time, allowing you to engage with your guests while serving a delightful and impressive dessert. The simple presentation of bananas topped with a scoop of ice cream or yogurt makes it an appealing addition to any gathering.

Cost-effectiveness is another significant advantage. With only a few ingredients needed, and the ability to serve multiple people, this recipe provides satisfaction without breaking the bank. It’s accessible to everyone, making it a wonderful option for families or gatherings.

Historical Background and Cultural Significance

The banana has a rich history that dates back thousands of years, originating from Southeast Asia. As trade routes expanded, bananas spread to various continents, becoming a staple fruit in many cultures. Its versatility in sweet and savory dishes has earned it a place in traditional cuisines around the world.

Culturally, bananas hold significance in many societies. They are often associated with prosperity and are used in various traditional celebrations. Air frying bananas represents a modern twist on classic recipes, merging traditional flavors with contemporary cooking methods.

This recipe evokes nostalgia, as bananas often make appearances in comfort foods. The addition of cinnamon sugar elevates it to a dessert status, reminiscent of grandmother’s desserts. Over time, air fryers have changed the way we enjoy this fruit, making it easier to achieve crispy sweetness without extra oil.

Regional variations of fried bananas can be found worldwide; from the popular Filipino “Turon” to the Caribbean “Tostones,” each culture adds its unique flair. This recipe offers a simplified version that embraces the essence of those traditional snacks, making it easily accessible for all.

Ingredient Deep Dive

Bananas: Bananas are a nutrient-dense fruit, providing essential vitamins and minerals. They are particularly high in potassium, which supports heart health and muscle function. When selecting bananas for this recipe, opt for bananas that are ripe but firm to ensure they hold their shape during cooking. Store them at room temperature and avoid refrigeration to prevent browning. For substitutions, consider using plantains for a different flavor and texture.

Cinnamon: This aromatic spice is derived from the bark of cinnamon trees and has been used for centuries for both flavor and medicinal purposes. It has anti-inflammatory properties and can help regulate blood sugar levels. Choose Ceylon cinnamon for a sweeter taste compared to the more common Cassia cinnamon. Store in a cool, dark place and replace when the flavor diminishes. Consider blending with other spices like nutmeg for added depth if desired.

Brown Sugar: Brown sugar adds a delightful depth and moisture to the dish. It contains molasses, which gives it a richer flavor than white sugar. When storing, keep brown sugar in an airtight container to prevent it from hardening. If you run out, you can create a substitute by mixing white sugar with a bit of molasses. Adjust the amount to taste based on the desired sweetness.

Common Mistakes to Avoid

  • Using overripe bananas can result in mushy texture—choose bananas that are ripe but firm for optimal consistency.
  • Not preheating the air fryer may lead to uneven cooking; always preheat to ensure proper crispness.
  • Using too much cinnamon or sugar can overpower the flavor—stick to the recommended amounts for balance.
  • Not cutting bananas evenly can result in uneven cooking times; ensure uniform slices for the best results.
  • Skipping the parchment paper can lead to sticky situations; using it helps prevent sticking to the fryer basket.
  • Overcrowding the air fryer can affect air circulation; it’s better to cook in batches to achieve even crispness.
  • Not allowing the bananas to cool slightly before serving may result in burns; give them a little time to cool.
  • Forgetting to monitor the cooking time can lead to burnt bananas; always keep an eye on them.
  • Neglecting to check for doneness can result in undercooked bits—look for golden-brown color.
  • Using cold bananas directly from the fridge can hinder their cooking; room temperature bananas work best.

Essential Techniques

Air Frying: Air frying uses hot air circulation to create a crispy texture without the need for excess oil. This technique is pivotal for achieving the desired crunch on the cinnamon-sugar coated bananas. To master it, ensure your fryer is preheated and arrange food in a single layer. Common pitfalls include overcrowding the basket and not checking for doneness. The visual cue for success is a rich golden-brown exterior.

Cinnamon-Sugar Coating: Creating the perfect cinnamon-sugar mix enhances the flavor profile. You will want to blend the two ingredients evenly to ensure each banana slice is adequately coated. Mastering the coating involves mixing the ingredients thoroughly and applying it right before cooking. A common mistake is adding the coating too early, which may lead to soggy bananas. Look for a light dusting over the surface for optimal results.

Pro Tips for Perfect Cinnamon-Sugar Air Fryer Bananas

– Choose ripe but firm bananas to maintain texture during cooking.
– Preheat the air fryer for better results and golden-brown crispness.
– Dust the bananas lightly with the cinnamon-sugar mixture for a balanced flavor—don’t overdo it.
– Consider adding a touch of vanilla extract to the bananas for an added flavor dimension.
– Serve with whipped cream or a scoop of ice cream for a dessert upgrade.
– Garnish with a sprinkle of chopped nuts for added crunch and nutrition.
– Experiment with different spices like nutmeg for a unique twist.
– Always keep an eye on the cooking time to prevent burning.

Variations and Adaptations

Experience regional adaptations like the Caribbean’s fried plantains that can replace bananas for a different delicious spin. Seasonal variations could introduce pumpkin spice or apple-cinnamon flavors in the fall, providing warmth and comfort. For dietary modifications, try using coconut sugar in place of brown sugar for a healthier option while keeping it vegan.

If you’re looking for flavor variations, experiment by adding a drizzle of caramel sauce or chocolate for extra sweetness. You might also consider slicing the bananas diagonally for a more visually appealing presentation. Presentation alternatives could involve using dessert bowls or layering the bananas with yogurt and berries for a healthy parfait.

Serving and Presentation Guide

To beautifully plate your Cinnamon-Sugar Air Fryer Bananas, arrange them neatly on a serving platter. A sprinkle of cinnamon over the top enhances visual appeal. Serve with a dollop of whipped cream, a scoop of vanilla ice cream, or a generous drizzle of honey for an indulgent touch.

Consider garnishing with fresh mint leaves or chopped nuts for an added crunch and freshness. Try serving them warm alongside coffee or tea for a cozy pairing. When serving, be mindful of temperature; these bananas are best enjoyed warm to fully appreciate their flavor and texture. Portion control is important; aim for small servings to allow guests to savor this delicious treat without overindulging.

Wine and Beverage Pairing

Pairing your Cinnamon-Sugar Air Fryer Bananas with a complementary beverage can elevate your tasting experience. For wine lovers, a late harvest Riesling or a sweet Moscato would beautifully complement the sweetness of the dish.

If you prefer non-alcoholic options, consider pairing with a warm spiced apple cider or a creamy chai latte that echoes the warm spices in the dish. Espresso or a strong brewed coffee can provide a nice counterbalance to the sweetness. Ensure beverages are at the right temperature, serving wines chilled and warm drinks steaming hot for the best experience.

Storage and Shelf Life

When it comes to storage, Cinnamon-Sugar Air Fryer Bananas are best enjoyed fresh; however, if you have leftovers, store them in an airtight container in the refrigerator for up to 2 days. They can lose their crispiness, so it’s best to reheat them in the air fryer or oven briefly before serving.

If you decide to freeze them, ensure they are fully cooled before placing them in a freezer bag; they can be frozen for up to a month. To reheat, use the air fryer for a few minutes until hot for best results and to restore some of their initial texture. Always check for signs of spoilage, such as off smells or discoloration before consuming leftovers.

Make Ahead Strategies

For a stress-free experience, you can prepare the bananas ahead of time by slicing and coating them with cinnamon-sugar mixture. Store them covered in the refrigerator for up to an hour before frying, which will keep them fresh while allowing the flavors to meld.

If you opt to pre-make portions, keep the sliced bananas in a single layer and cover them with plastic wrap to prevent browning. When ready to serve, simply pop them into the air fryer and enjoy the ease of freshly made treats. Remember to think about fresh element additions, like adding a dollop of whipped cream just before serving for that perfect final touch.

Scaling Instructions

If you need to adjust the serving size, scaling this recipe is straightforward. To halve the recipe, simply reduce the quantity of bananas and sugar accordingly. Doubling or tripling the recipe can also easily be done; just ensure that your air fryer can accommodate the increased volume without overcrowding.

When scaling, keep an eye on the cooking times—larger batches might take longer, so check for doneness. Storage considerations will also change; ensure you have enough containers to store any leftovers when making larger quantities.

Nutritional Deep Dive

A typical serving of Cinnamon-Sugar Air Fryer Bananas is both satisfying and nutritious. Bananas are rich in carbohydrates, providing a quick source of energy, while also being an excellent source of dietary fiber, especially beneficial for digestive health.

Demonstrating macro breakdown, a serving generally contains around 130 calories, primarily from natural sugars in bananas and added sugars in the coating, making it a sweeter option. Nutritionally, bananas contain vitamin C, vitamin B6, and potassium, crucial for maintaining electrolyte balance and heart health.

For portion analysis, consider enjoying them as part of a balanced meal or alongside protein sources to enhance satiety. If you’re managing your weight, enjoy them occasionally as a treat rather than a daily indulgence for better weight management.

Dietary Adaptations

This delicious recipe can easily be modified to suit various dietary needs. For a gluten-free option, this recipe is naturally gluten-free and safe for those with gluten intolerance. You can also modify it to be dairy-free by serving them plain or with a non-dairy ice cream alternative.

For a vegan adaptation, simply ensure the ice cream or toppings you choose are dairy-free. Those following low-carb or keto diets can consider using a sugar substitute like erythritol instead of brown sugar to keep carbs minimal while still enjoying the sweetness.

If you’re looking for a low-FODMAP option, restrict the portions of bananas since they can be high in FODMAPs in larger amounts. With these simple adjustments, everyone can enjoy Cinnamon-Sugar Air Fryer Bananas without worry.

Troubleshooting Guide

If you find your air fryer bananas are mushy, it may be due to using overly ripe bananas, which can be avoided by choosing firmer fruit. To balance flavor, if your bananas are too sweet, consider reducing the cinnamon-sugar mix for future attempts.

If your bananas are overcooked and too crispy, make adjustments to the cooking time in future batches; every air fryer can have different heating capabilities. If you’re facing texture problems during the cooking process, try slicing the bananas more evenly to help ensure uniformity in cooking.

If the flavor isn’t quite right, consider adding a pinch of salt or vanilla extract to enhance the overall flavors to give it a depth that counteracts the sweetness. Always keep an eye on the cooking time to prevent overcooking or undercooking.

Recipe Success Stories

Feedback from the community has been overwhelmingly positive regarding these Cinnamon-Sugar Air Fryer Bananas. Many readers have shared their creative twists, such as adding nutmeg or coconut flakes to the cinnamon-sugar mix, which has proven to be a hit in enhancing flavor.

Readers have reported successful adaptations, including using different fruits like peaches or apples, which showcased the recipe’s versatility. Photography tips have emerged from social media showcasing the beautiful warm, golden-brown bananas plated with ice cream, inspiring others to recreate the dessert at home.

Additionally, some have suggested serving these air-fried bananas at brunch gatherings; they make a fantastic addition alongside pancakes or waffles, turning the treat into a shared experience. Consistently, the simplicity and deliciousness of this recipe have made it a staple in many kitchens.

Frequently Asked Questions

1. Can I use frozen bananas for this recipe?
While fresh bananas yield the best texture and flavor, you can use frozen bananas if necessary. Just make sure to thaw them completely before air frying, but keep in mind that they may not hold their shape as well.

2. How do I know when the bananas are done?
Look for a golden-brown color and a slight crispiness on the outside. They should feel tender but not overly mushy when properly cooked.

3. Can I make this recipe sugar-free?
Yes! You can substitute the brown sugar with a sugar alternative like erythritol or stevia to make it sugar-free while still enjoying the same delightful flavor.

4. What can I serve with the air fryer bananas?
These bananas are delicious served alone or with ice cream, yogurt, or a drizzle of honey. You can also pair them with pancakes or a breakfast bowl for added yum.

5. Is it possible to make these bananas in the oven?
Yes, if you don’t have an air fryer, you can bake them in the oven at 350°F for about 15-20 minutes until golden brown.

6. Can I add nuts to this recipe?
Absolutely! Chopped nuts can add great texture and flavor. You can toss them in with the cinnamon-sugar mixture or sprinkle on top before serving.

7. How should I store leftovers?
Store any leftovers in an airtight container in the refrigerator for up to two days. Be aware they may lose some crispiness but can be reheated in the air fryer.

8. What types of bananas work best?
Ripe, yet firm bananas work best. Avoid overly ripe bananas as they tend to become mushy when cooked.

9. How can I modify the flavor?
You can experiment with other spices like nutmeg, ginger, or even a touch of cocoa powder mixed into the sugar for a delightful twist.

10. Can I double this recipe?
Yes! Just ensure that your air fryer has enough space to keep the bananas in a single layer for even cooking. You may need to work in batches depending on your air fryer capacity.

Additional Resources

If you enjoyed these Cinnamon-Sugar Air Fryer Bananas, you might want to try similar recipes that focus on quick and enjoyable desserts. Explore other air fryer delights, including air-fried apple slices or donuts.

You can also delve into technique guides that cover effective air frying practices or ingredient information with detailed guides about bananas and their health benefits. For seasonal variations, consider checking recipes that focus on fall flavors, such as apple or pumpkin desserts prepared in the air fryer.

Additionally, investing in quality air fryer equipment can enhance your cooking experience. Look for models with adjustable temperature settings and various cooking capabilities for optimal results.

Join the Conversation

We invite you to share your experiences and variations of this Cinnamon-Sugar Air Fryer Bananas recipe! Tag us on social media with your photos, and connect with fellow cooking enthusiasts who share your love for sweet treats.

If you have been inspired by a particular twist or adjustment, share your suggestions and feedback in the comments. Engaging with our community helps everyone benefit from diverse experiences and encourages creativity in the kitchen.

Sharing your photography tips and tricks also helps others improve their presentation for this delicious dessert, making it even more appealing when shared with friends and family. Your experiences and insights contribute to a vibrant cooking community.

The Recipe

Cinnamon-Sugar Air Fryer Bananas

Serves: 4

Prep Time: 5 mins

Cook Time: 10 mins

Total Time: 15 mins

Kitchen Equipment Needed

  • Air Fryer
  • Mixing Bowl
  • Cutting Board
  • Knife
  • Measuring Spoons

Ingredients

  • 4 ripe bananas
  • 1/4 cup brown sugar
  • 1 teaspoon ground cinnamon
  • 1 tablespoon olive oil spray

Directions

  1. Preheat the air fryer to 350°F (175°C).
  2. In a mixing bowl, mix brown sugar and cinnamon thoroughly.
  3. Peel and slice the bananas diagonally into thick slices.
  4. Toss the banana slices in the cinnamon-sugar mixture until well coated.
  5. Lightly spray the air fryer basket with olive oil to prevent sticking.
  6. Place the banana slices in a single layer in the air fryer basket.
  7. Cook for 10 minutes or until golden brown, checking halfway through.
  8. Remove from the air fryer and serve warm.

Recipe Notes

  • Feel free to add nutmeg to the sugar mixture for an added spice flavor.
  • Try serving with yogurt or ice cream for an extra treat.
  • If you prefer a healthier option, substitute brown sugar with coconut sugar.

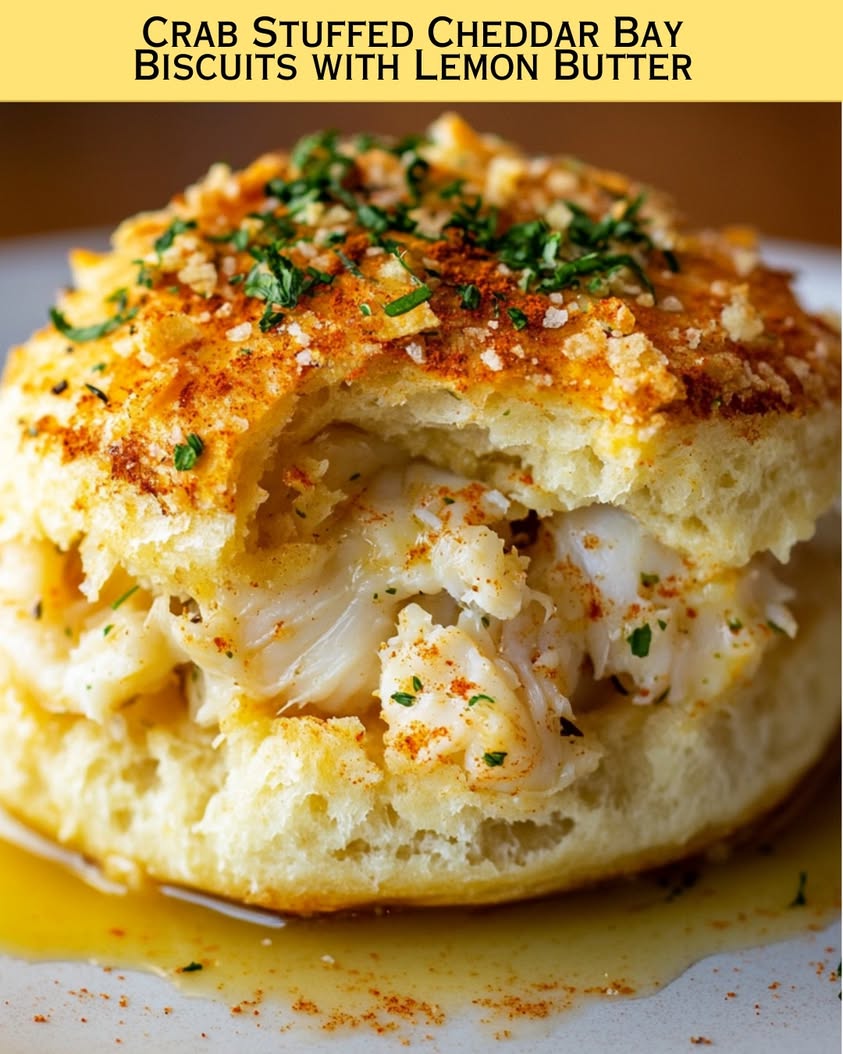
Delicious Crab Stuffed Cheddar Bay Biscuits Recipe to Try Today

Crab Stuffed Cheddar Bay Biscuits: A Delicious Twist on a Classic!

⚖️
Difficulty
Intermediate

⏲️
Prep Time
20 mins

🕒
Cook Time
15 mins

⏱️
Total Time
35 mins

🍽️
Servings
12 biscuits

Crab Stuffed Cheddar Bay Biscuits are the ultimate fusion of rich flavors and comforting textures. Imagine biting into a warm, buttery biscuit infused with the unmistakable taste of crab, garlic, and cheddar. Each bite offers a delightful burst of sweetness from the crab meat that complements the savory notes of rich cheddar and aromatic herbs. Perfect as an appetizer or an indulgent snack, these biscuits promise to impress your guests and tantalize your taste buds.

The marriage of the classic cheddar bay biscuit’s soft, flaky crust with the savory crab filling creates an irresistible texture that will keep you coming back for more. The touch of garlic enhances the flavor profile, bringing a warm, home-cooked feel to every bite. These biscuits not only deliver on taste but also on aroma, filling your kitchen with the inviting scent of freshly baked goodies. Whether served at a dinner party or on a cozy evening at home, they are sure to be a hit.

Quick Recipe Highlights

  • Flavor Profile: A delightful combination of sweet crab, sharp cheddar, and savory garlic butter.
  • Texture: Fluffy and flaky biscuit exterior with a soft, creamy crab filling.
  • Aroma: The mouthwatering scent of baking cheddar biscuits with hints of garlic and herbs.
  • Visual Appeal: Beautifully golden brown on the outside, with a luscious crab filling oozing out.
  • Skill Level Needed: Requires basic baking skills and an understanding of mixing techniques.
  • Special Equipment: Mixing bowl, baking sheet, and a pastry brush for brushing on the garlic butter.

Recipe Overview

  • Difficulty Level: Intermediate, suitable for those with basic baking experience.
  • Category: Ideal as an appetizer or side dish, perfect for gatherings.
  • Cuisine: An exciting nod to seafood and Southern American baking traditions.
  • Cost: Approximately $20 for all ingredients, a reasonable price for such impressive results.
  • Season: Best enjoyed fresh year-round, but particularly delightful during crab season.
  • Occasion: Perfect for parties, holiday gatherings, or cozy family dinners.

Why You’ll Love This Recipe

Crab Stuffed Cheddar Bay Biscuits not only offer an enticing taste but also indulge your senses with an exquisite blend of flavors. The tender biscuits, rich in cheddar, perfectly complement the sweet, tender crab filling, creating a memorable experience that captures the beauty of comfort food. Each bite is a journey through layers of flavor, making them a favorite for both seafood lovers and biscuit fans alike.

One of the most appealing aspects of these biscuits is their convenience. They come together quickly with easy-to-follow steps, making them perfect for weeknight meals or last-minute gatherings. With ingredients that are easily accessible, you can whip up a batch in no time. You can even prepare the filling ahead and assemble the biscuits when you’re ready to bake.

From a nutritional standpoint, crab is a fantastic source of protein and essential nutrients, making these biscuits not just delicious but also a healthier alternative to ordinary appetizers. The cheddar adds calcium while the biscuit dough provides carbohydrates for energy. This balance makes them a guilt-free indulgence that you can enjoy without moderation.

Socially, these biscuits are perfect for entertaining. Their striking appearance and irresistible aroma make them the centerpiece of any gathering. As your guests enjoy each bite, you’ll likely hear compliments and suggestions for trying them out at home, sparking conversations and bringing people together.

Cost-effectiveness is another major benefit of this recipe. With accessible ingredients and straightforward techniques, you can create gourmet-style crab-filled biscuits that rival those found in high-end restaurants without breaking the bank. It’s a dish that allows you to offer your guests a taste of luxury, all while remaining budget-friendly.

Historical Background and Cultural Significance

The origins of Crab Stuffed Cheddar Bay Biscuits can be traced back to the classic Southern-inspired biscuits, which are cherished in American cooking for their softness and versatility. The inclusion of crab speaks to the bounty of coastal regions where fresh seafood is a hallmark of local cuisine. This melding of flavors represents the beautiful culinary diversity of the United States.

The significance of seafood in American cuisine, particularly in coastal areas, cannot be understated. Crab, especially, has deep-rooted ties to many regional cuisines, from Maryland crab cakes to New England clam bakes. This recipe embodies the spirit of sharing fresh, local ingredients while highlighting the simplicity and heartiness of southern cooking traditions.

As the recipe evolved, many variations emerged, with different regions adding their personal touches. The introduction of garlic and herbs reflects the growing appreciation for flavor enhancement in home cooking, catering to adventurous palates looking for a unique twist on classic recipes.

Regional variations are also noteworthy, with some regions opting for different cheeses or even adding spices like paprika or Old Bay seasoning to intensify the flavor profile. This adaptability shows that while the core of the recipe remains, there is always room for creativity and personalization.

Ingredient Deep Dive

Crab Meat:
Crab meat is a delicacy that has historical significance in coastal cuisines. Rich in protein and omega-3 fatty acids, it is not only a flavorful addition but offers numerous health benefits. When selecting crab meat, opt for fresh, sustainable sources. If fresh isn’t available, canned crab will suffice as a good alternative. Fragile yet rich in flavor, crab should be stored in the refrigerator and used within a couple of days for optimal freshness.

Cheddar Cheese:
Cheddar cheese adds depth and complexity to the biscuits. This cheese has a rich history in England, where it originated, and has since become a staple in American kitchens. Cheddar provides calcium and helps achieve a crumbly yet soft texture in the biscuits. When choosing cheddar, consider sharp or aged varieties for a more pronounced flavor. Store it wrapped in wax paper or parchment to maintain freshness, and if necessary, substitute with a similar hard cheese like Gruyère.

Common Mistakes to Avoid

  • Overmixing the dough: Over-mixing can lead to tough biscuits. Mix just until combined for the best texture.
  • Using cold crab meat: Always ensure the crab is at room temperature to blend well with the other ingredients.
  • Skipping the garlic butter topping: This dynamic topping adds flavor and improves the biscuit’s overall appeal.
  • Baking on ungreased sheets: Ensure that your baking sheet is either greased or lined; this prevents sticking.
  • Not checking the temperature: Use a thermometer to ensure your biscuits are cooked through without burning.
  • Seasoning the filling too late: Incorporate seasonings early on to enhance the entire mixture effectively.
  • Using low-quality ingredients: Fresh, quality ingredients make a significant difference in taste and texture.
  • Letting the dough sit too long: Biscuits should be baked immediately to maintain their rise and fluffiness.

Essential Techniques

Each technique utilized in the preparation of Crab Stuffed Cheddar Bay Biscuits plays a crucial role in achieving the desired flavor and texture. For instance, creating the crab filling requires gently folding the ingredients to avoid breaking the delicate crab meat. Master this by using a spoon to combine ingredients without excessive mixing, allowing the flavors to be well distributed without losing the meat’s integrity.

Baking the biscuits to perfection also requires attention. Achieving the perfect height involves not only the right amount of leavening agents but also ensuring your oven is properly preheated. To master this, invest in an oven thermometer to ensure your biscuits bake evenly, with a beautiful golden-brown exterior and a soft center.

Pro Tips for Perfect Crab Stuffed Cheddar Bay Biscuits

1. For enhanced flavor, consider adding a splash of lemon juice to the crab mixture; it brightens the dish beautifully.
2. Use fresh herbs like parsley or chives to elevate the taste and add a pop of color to your biscuits.
3. Experiment with different types of cheeses, such as pepper jack, for a spicy kick.
4. If you have leftovers, reheat them in an oven instead of the microwave to retain their texture.
5. Incorporate a pinch of cayenne pepper for an exciting twist and additional warmth.
6. Allow your biscuits to cool slightly on the baking sheet before transferring to a cooling rack to maintain their structure.
7. When making for a gathering, increase the recipe to have enough for guests; they won’t last long!
8. Try adding diced jalapeños or green onions for a unique flavor variation.

Variations and Adaptations

Crab Stuffed Cheddar Bay Biscuits can be easily customized to suit your palate or dietary needs. For instance, if you’re craving a spicier version, incorporating diced jalapeños or a sprinkle of cayenne pepper in the crab mixture can provide a delightful heat that complements the sweetness of the crab.

For those following a specific diet, alternatives such as gluten-free flour for the biscuits or vegan cheese can transform this dish. By utilizing plant-based crab substitutes or more diverse ingredients like lentils, you can adapt this recipe to fit vegan lifestyles while still delivering fantastic flavor.

Seasonal adaptations are also an exciting way to enjoy these biscuits. In spring, consider filling your biscuits with fresh herbs and cream cheese to lighten them up. Meanwhile, fall offers a chance to infuse them with pumpkin puree for a unique flavor pairing.

Creatively, you may even consider enhancing the presentation by using a muffin tin mold to bake the biscuits, giving them a uniform shape and an appealing look. Adding traditional accompaniments, like a drizzle of spicy aioli, can also elevate the overall dining experience.

Serving and Presentation Guide

When serving Crab Stuffed Cheddar Bay Biscuits, consider the plate’s aesthetics to enhance the dining experience. Arrange the biscuits in a circular pattern on a large platter, and garnish them with freshly chopped herbs for a vibrant pop of color. Utilizing small ramekins filled with dipping sauces can also encourage sharing and interaction.

Pairing these biscuits with a light side salad or refreshing coleslaw can balance the meal perfectly. Temperature plays an important role; serve them warm to accentuate their fluffy texture. For portion control, consider serving the biscuits alongside smaller appetizer plates, allowing guests to enjoy one or two at a time.

To elevate the experience further, use unique serving dishes, like wooden boards or slate platters, which not only showcase your culinary skills but also provide an inviting atmosphere for guests.

Wine and Beverage Pairing

Crab Stuffed Cheddar Bay Biscuits pair beautifully with a variety of beverages. For a classic match, consider a crisp white wine, such as Pinot Grigio or Sauvignon Blanc, which complements the rich flavors of the crab without overpowering them. These options offer a refreshing acidity that balances the buttery texture of the biscuits.

If you prefer non-alcoholic choices, try refreshing herbal teas such as mint or chamomile, which cleanse the palate between bites. Alternatively, a sparkling water with lime brings a zesty brightness that pairs nicely with the rich flavors of the biscuits.

For coffee lovers, a light roast brewed hot or iced will lend an aromatic quality to accompany the meal. Roasted nuts or cheese platters served alongside can round out an elegant wine and cheese evening.

Storage and Shelf Life

To keep your Crab Stuffed Cheddar Bay Biscuits fresh, store any leftovers in an airtight container in the refrigerator. They are best consumed within 2-3 days. For longer storage, consider freezing them, but be cautious when reheating; wrap the biscuits in foil to retain moisture and place them in a preheated oven at 350°F for about 10-15 minutes.

Labeling containers with the freezing date helps ensure you keep track of the storage duration. Always look for signs of spoilage such as an off smell or visible mold before consumption. Reheating in the oven rather than the microwave enhances texture and flavor, creating a nearly fresh-tasting experience.

Make Ahead Strategies

For those planning to serve these biscuits at gatherings, preparing ahead can alleviate the last-minute rush. The crab filling can be made 24 hours in advance and stored in the refrigerator, allowing flavors to meld beautifully overnight. Aim to assemble the biscuits just before baking for optimal freshness.

Dough can also be prepared and shaped, then stored in the refrigerator. Just ensure they are tightly wrapped to prevent drying out. Similarly, freezing the shaped dough is another fantastic make-ahead strategy; simply bake them directly from the freezer when ready, increasing the baking time slightly.

Consider preparing any dipping sauces or accompaniments a day ahead to enhance the experience, allowing guests to enjoy well-thought-out flavors without added stress.

Scaling Instructions

If you wish to scale your Crab Stuffed Cheddar Bay Biscuits, adjusting the quantity is straightforward. When halving the recipe, ensure that ingredients like the crab and cheese are still balanced to avoid an off-flavoring. For doubling or tripling the recipe, consider larger mixing bowls and additional baking sheets to accommodate increased biscuit quantities.

Be mindful of cooking times; larger batches might require slight adjustments to ensure even cooking. Always check for doneness and golden-brown color to gauge readiness. Carefully observe the baking process to make necessary timing modifications.

Keep your additional prepared biscuits aside depending on your serving needs, and store them properly to maintain their quality after cooking.

Nutritional Deep Dive

Analyzing the nutritional values of Crab Stuffed Cheddar Bay Biscuits reveals a delightful balance of macronutrients. A typical serving contains a moderate amount of carbohydrates from the biscuit, high-quality protein from the crab, and healthy fats from the cheese. Understanding the macro balance can empower individuals to make informed dietary choices.

In terms of micronutrients, these biscuits provide essential vitamins such as B12 from crab, which supports nerve function and energy production. Calcium from cheddar contributes to bone health, making these biscuits not only delicious but functional in a balanced diet.

For those managing weight or monitoring their diet, being aware of portion sizes is crucial. Each biscuit should be enjoyed mindfully; savoring the flavors increases satisfaction and may help in managing caloric intake while offering essential nutrients.

Dietary Adaptations

Crab Stuffed Cheddar Bay Biscuits can be modified to suit various dietary preferences. For gluten-free options, substitute all-purpose flour with a 1:1 gluten-free baking blend, ensuring a similar texture while accommodating gluten intolerance.

For those needing dairy-free alternatives, consider using plant-based cheeses and margarines, which can replicate the creamy texture without the lactose. Vegan crab substitutes can also be used, with chickpeas or marinated tofu producing similar flavor profiles.

Individuals on low-carb diets might opt for almond flour instead of regular flour and reduce crabs by substituting with seafood or vegetable options. Other diets like Paleo and Keto can also adapt through thoughtful ingredient tweaks, preserving the dish’s delicious essence.

Troubleshooting Guide

Crab Stuffed Cheddar Bay Biscuits may encounter a few common challenges during preparation. If your biscuits turn out flat, check your leavening agents’ potency, as expired baking powder can lead to insufficient rising. Additionally, using too much liquid can also cause flattening.

Flavor balance can sometimes be tricky; if your biscuits taste bland, consider adjusting salt or adding more flavorful elements, such as lemon zest or fresh garlic in the crab mixture. Ensuring the right seasoning can elevate the overall profile dramatically.

Texture issues can arise if the dough is overworked or contains excess moisture. To achieve the right consistency, keep mixing to a minimum and ensure your crab mixture isn’t watery before folding it in.

If you encounter equipment challenges, such as your biscuits sticking to the baking sheet, using parchment paper or a non-stick spray can help prevent this common issue.

Recipe Success Stories

Community feedback surrounding Crab Stuffed Cheddar Bay Biscuits reflects a resounding success, with many readers raving about their unique flavor and comforting texture. Variations shared include the use of different cheeses, which consistently draw positive comments for personalized flavor notes.

Adaptation stories often feature home cooks experimenting with different types of seafood mixed into their crab filling—like shrimp or scallops—which have also received acclaim for their delightful results. Suggestions for pairing them with particular dipping sauces have heightened the enjoyment level as well.

Readers have reported mastering the recipe on their first attempt, posting pictures on social platforms and crediting the detailed directions provided in this guide. Sharing photography tips has also allowed novices to capture the beauty of their culinary creations, inviting more to join the cooking journey.

Frequently Asked Questions

Q1: Can I use canned crab meat for this recipe?

A1: Yes, canned crab meat is a great alternative. However, be sure to drain it well to avoid excess moisture.

Q2: How can I store leftovers?

A2: Store leftovers in an airtight container in the refrigerator for up to 3 days or freeze them for up to 3 months.

Q3: Can I freeze the biscuits before baking?

A3: Absolutely! You can freeze the assembled biscuits and bake them directly from the freezer; just increase the baking time slightly.

Q4: How do I know when the biscuits are cooked?

A4: They will be golden brown on the outside and should feel firm to the touch. A toothpick inserted should come out clean.

Q5: What is the best way to reheat the biscuits?

A5: Reheat them in the oven at 350°F wrapped in foil to maintain moisture, for about 10-15 minutes.

Q6: Can I substitute the crab meat?

A6: Yes! You can substitute crab with shrimp or even a veggie option for a unique twist.

Q7: Do I have to use cheddar cheese?

A7: While cheddar adds rich flavor, you can experiment with other cheeses like gouda or mozzarella.

Q8: Can I make these biscuits ahead of time?

A8: Yes! You can prepare the filling in advance and assemble the biscuits just before baking.

Q9: How long does it take to bake these biscuits?

A9: They typically take 15-20 minutes to bake, depending on your oven.

Q10: What’s the best way to serve these biscuits?

A10: Serve warm, garnished with fresh herbs, alongside dipping sauces for an added touch.

Additional Resources

For those looking to expand their culinary repertoire, consider exploring related recipes like Lobster Biscuits or Shrimp Scampi. Dive deeper into biscuit-making techniques with guides specifically tailored for perfect biscuit texture and flavor. Information on sourcing the best seafood, including tips on sustainable choices, can also enhance your cooking journey. Don’t forget to check out recommended kitchen equipment that can make the baking process smoother and more enjoyable, along with seasonal variations to keep your recipes fresh and exciting.

Join the Conversation

Join our vibrant community by sharing your photos and experiences of making Crab Stuffed Cheddar Bay Biscuits on social media platforms. Encourage engagement through comments about your personal variations and any creative flavors you’ve incorporated. Your contributions to conversations in the comments section or social media are invaluable for fostering a fun and interactive cooking community. Plus, recipe reviews not only inspire others but provide insight into how we can all improve our culinary journeys together.

The Recipe

Crab Stuffed Cheddar Bay Biscuits

Serves: 12 biscuits

Prep Time: 20 mins

Cook Time: 15 mins

Total Time: 35 mins

Kitchen Equipment Needed

  • Mixing bowl
  • Baking sheet
  • Pastry brush
  • Measuring cups and spoons
  • Spoon for mixing

Ingredients

  • 2 cups all-purpose flour
  • 1 tablespoon baking powder
  • 1 teaspoon salt
  • 1/2 cup cold butter, cubed
  • 1 cup shredded sharp cheddar cheese
  • 3/4 cup milk
  • 1 cup lump crab meat
  • 1/4 cup green onions, chopped
  • 1 tablespoon lemon juice
  • 4 tablespoons melted butter
  • 1 teaspoon garlic powder
  • Salt and pepper to taste

Directions

  1. Preheat your oven to 425°F (220°C) and line a baking sheet with parchment paper.
  2. In a large mixing bowl, combine flour, baking powder, and salt. Add cubed butter, mixing until the mixture resembles coarse crumbs.
  3. Stir in shredded cheddar, followed by milk until just combined.
  4. In a separate bowl, gently mix crab meat with lemon juice, green onions, garlic powder, salt, and pepper.
  5. Fold in the crab mixture into the biscuit dough.
  6. Drop spoonfuls of dough onto the prepared baking sheet, spacing them apart.
  7. Bake for 12-15 minutes, or until the tops are golden brown.
  8. Brush with melted butter and serve warm!

Recipe Notes

  • Feel free to adjust the amount of cheese based on your taste preference.
  • For added flavor, consider mixing in herbs like dill or parsley.
  • These biscuits are best served fresh but can be reheated easily!

Indulge in Nestle Toll House Death by Chocolate Cake Recipe

Nestle Toll House Death by Chocolate Cake: The Ultimate Indulgence for Chocolate Lovers

⚖️
Difficulty
Intermediate

⏲️
Prep Time
30 mins

🕒
Cook Time
40 mins

⏱️
Total Time
1 hr 10 mins

🍽️
Servings
12 servings

Indulge in the luxurious richness of the Nestle Toll House Death by Chocolate Cake. This decadent dessert is for those who crave chocolate in every bite. The combination of rich cocoa powder, semi-sweet chocolate chips, and a creamy chocolate frosting creates a chocolate lover’s paradise. Each slice is a beautiful layer of heaven, offering a mouthwatering experience that no chocolate enthusiast can resist. The cake is perfect for any occasion, be it a birthday celebration or a simple family get-together.

This cake not only satisfies your sweet tooth but also provides a nostalgic feeling. Each forkful transports you back to simpler times, evoking memories of baking with family or celebrating special moments. It’s moist, rich, and layered with flavor, making it the perfect choice for both the young and the young at heart. Get ready to impress friends and family with this stunning dessert that will surely become the highlight of any gathering.

Quick Recipe Highlights

  • Flavor Profile: The Death by Chocolate Cake is intensely rich with a perfect balance of sweetness and cocoa depth.
  • Texture: This cake features a moist crumb, complemented by the chewy chocolate chips scattered throughout, and a silky frosting.
  • Aroma: As it bakes, the cake fills your kitchen with a delightful aroma of warm chocolate and vanilla.
  • Visual Appeal: A beautifully stacked cake layered with dark chocolate frosting makes it both tempting and enticing.
  • Skill Level Needed: While the preparation requires an intermediate skill level, it’s manageable and rewarding for any home baker.
  • Special Equipment: You’ll need basic baking tools, including mixing bowls, a whisk, measuring cups, and cake pans.

Recipe Overview

  • Difficulty Level: This recipe is intermediate due to the layering and baking process but is accessible with some baking experience.
  • Category: Dessert; it’s a rich cake that fits perfectly into any sweet course of a meal.
  • Cuisine: The dessert hails from American culinary traditions, famous for its indulgent chocolate desserts.
  • Cost: The estimated cost for ingredients is moderate, making it an affordable treat.
  • Season: This luscious cake is perfect for any season but shines especially during holidays and special occasions.
  • Occasion: It’s ideal for birthdays, holidays, or simply when you want to treat yourself to something special.

Why You’ll Love This Recipe

This Death by Chocolate Cake is a true delight for your taste buds. The mix of various chocolate elements creates an explosion of flavors that are cherished by every chocolate lover. The cake’s moist texture paired with the soft, rich frosting leaves a lasting impression that keeps you coming back for more.

Convenience in preparation makes this cake a favorite. Despite its impressive appearance, the steps are straightforward and the prep work can be completed in about 30 minutes. With a baking time of around 40 minutes, you’ll soon be enjoying your masterpiece!

While indulgent, this cake offers a range of nutrients from the eggs and cocoa powder, providing a touch of protein and antioxidants. Yet, always remember moderation due to the rich sweetness.

Sharing this cake at gatherings enhances its social appeal. Imagine presenting this stunning dessert to friends and family, sparking conversations and compliments that elevate any event.

Cost-wise, the ingredients are relatively inexpensive and yield a significant number of servings, making it both a special treat and a wise choice for gatherings and celebrations.

Historical Background and Cultural Significance

The Death by Chocolate Cake, while a modern adaptation of classic chocolate cakes, ties into a long history of baking with chocolate. Originating in the United States, it captures the essence of indulgence that American desserts are known for. Over the years, chocolate has evolved from a pricey ingredient exclusive to elite circles to a beloved staple found in kitchens across the globe.

Culturally, chocolate holds a significant spot in celebrations, often associated with sharing love and joy. This cake embodies that spirit perfectly, becoming a popular centerpiece at birthdays and festive occasions. Its layers symbolize richness, both in flavor and experience.

The evolution of this recipe has sparked numerous interpretations, with various bakers adding personal twists by including different types of chocolate or frosting techniques. It serves as a canvas for creativity and adaptation, celebrated in countless households.

Regionally, variations may include local influences in flavor and presentation. In some areas, unique toppings or flavored frostings make the cake an even more delightful treat, showcasing the versatility of chocolate across cultures.

Ingredient Deep Dive

– **All-Purpose Flour:** A staple in baking, all-purpose flour provides the structure needed for cake. It can be substituted with gluten-free options for dietary restrictions.
– **Cocoa Powder:** This key ingredient gives the cake its distinctive chocolate flavor. Look for high-quality unsweetened cocoa for the best results, and store it in a cool, dry place.
– **Sugar:** Sugar not only sweetens but also contributes to the cake’s texture. Experimenting with different types of sugar can yield different depths of flavor.
– **Eggs:** Eggs provide moisture and structure, while also aiding in leavening. They can be substituted with flaxseed meal or applesauce for vegan versions.
– **Baking Powder and Baking Soda:** These leavening agents are essential for achieving a light texture. Ensure they are fresh for optimal rise.
– **Semi-Sweet Chocolate Chips:** These chips enhance the chocolate flavor and provide a delicious melty surprise in every bite. They can be replaced with dark chocolate for a richer taste.

Common Mistakes to Avoid

  • Not measuring ingredients accurately: Baking is a science; precise measurements are crucial for success.
  • Overmixing the batter: Excessive mixing can lead to a dense cake; mix just until combined.
  • Opening the oven door too early: This can cause the cake to collapse; wait until it’s nearly done.
  • Using old baking powder or baking soda: Always check the freshness of leavening agents for a proper rise.
  • Not greasing the pans: A well-greased pan ensures easy removal and an attractive shape.
  • Cooling the cake in the pan for too long: This can cause sogginess; allow it to cool for the right amount of time.
  • Icing a warm cake: Frosting on a warm cake melts the icing; it should be completely cool before applying frosting.
  • Skipping the ingredient room temperature step: Ingredients at room temperature blend and behave better in baked goods.
  • Not tasting the batter: Tasting can help balance sweetness and richness before baking.
  • Ignoring oven temperature calibration: An oven thermometer ensures accurate heating for consistent results.

Essential Techniques

– **Mixing:** Proper mixing combines ingredients effectively to ensure a consistent texture. Use a gentle folding technique to avoid overworking the batter and creating a dense cake.
– **Baking:** Preheating the oven is critical to achieve an even bake. Be sure to follow the time guidelines and check for doneness by inserting a toothpick in the middle.
– **Frosting:** Achieving a smooth and fluffy frosting requires the right consistency. Start with softened butter and gradually add powdered sugar for a perfect spreadable texture.
– **Layering:** For a visually appealing cake, ensure that each layer is level. Use a serrated knife to trim any uneven tops before frosting.
– **Serving:** Allow the cake to set for a bit after frosting for easier slicing. Use a warm knife for cleaner cuts and presentation.
– **Cooling:** Always allow cakes to cool properly before trying to remove them from the pan. A cooling rack promotes airflow and prevents sogginess on the bottom.

Pro Tips for Perfect Death by Chocolate Cake

– Use high-quality chocolate for both the cake and frosting to elevate the overall flavor of your cake.
– If you prefer a deeper chocolate flavor, consider adding espresso powder to enhance the chocolate without adding noticeable coffee flavor.
– To achieve a tall cake, consider using three six-inch cake pans instead of two eight-inch pans.
– For a softer texture, replace some of the all-purpose flour with cake flour.
– If you’re short on time, bake the cake a day ahead and let it sit in an airtight container overnight to develop flavor.
– Experiment with different frostings, such as cream cheese or a ganache, for a unique twist.
– For added flair, consider garnishing the cake with chocolate shavings or fresh berries on top before serving.
– If the cake seems too dry after baking, brush simple syrup over the layers before frosting them to add moisture.

Variations and Adaptations

– **Regional Variations:** Consider incorporating local flavors, such as adding spices like cinnamon or chili for a unique twist.
– **Seasonal Adaptations:** In winter, you could add peppermint extract to the frosting for a festive flair.
– **Dietary Modifications:** For gluten-free needs, use a gluten-free flour blend, ensuring that other ingredients are also free from gluten.
– **Flavor Variations:** Introduce nuts or caramel swirls for added texture and flavor contrasts.
– **Texture Modifications:** For a crunch, add crushed cookies in between the layers or sprinkle them on top of the frosting.
– **Presentation Alternatives:** Serve slices with a dollop of whipped cream and fresh berries for a bright contrast to the rich cake.

Serving and Presentation Guide

To beautifully plate your Death by Chocolate Cake, slice it evenly and serve on a clean, vibrant plate. A drizzle of chocolate sauce around the base adds an artistic touch. For garnishing, a simple dusting of powdered sugar can enhance the cake’s presentation without overwhelming its rich look.

Consider pairing the cake with fresh fruits, such as raspberries or strawberries, to offer a refreshing counterpart to the intense chocolate. This not only enhances the visual appeal but also balances the flavors.

Serve at room temperature for the best flavor experience, ensuring the frosting retains its creamy texture. When sharing, use a warm knife to effortlessly glide through the rich layers, providing clean slices that are as enticing as they are delicious.

Wine and Beverage Pairing

Pairing your chocolate cake with wine can elevate your dessert experience. A rich, full-bodied red wine like Cabernet Sauvignon or a fruity Merlot complements the deep chocolate flavors superbly. Alternatively, a dessert wine such as Port adds sweetness that harmonizes beautifully with the cake.

For non-alcoholic options, a rich dark roast coffee perfectly complements the chocolate, enhancing its flavors while providing a satisfying aftertaste. A creamy chai latte can also present a lovely spice enhancement that uniquely pairs with chocolate.

When serving these beverages, ensure they are at the right temperature to complement the cake effectively. Serve the wines slightly chilled, if recommended, and offer hot drinks freshly brewed to maintain their intended flavors.

Storage and Shelf Life

To store your Death by Chocolate Cake, keep it in an airtight container at room temperature for up to 3 days. After that, refrigerate it to extend shelf life, where it can last for up to a week.

If freezing, it’s best to wrap slices in plastic wrap and place them in a freezer-safe bag. The cake can be frozen for up to three months. Be sure to label it with the date for easy tracking.

To check for spoilage, look for off-smells or mold. When ready to enjoy frozen cake, defrost it in the refrigerator overnight and bring it to room temperature before serving for the best taste and texture.

Make Ahead Strategies

Planning to make this cake ahead of time? You can bake the layers a day or two in advance. Ensure that they are completely cool before wrapping them tightly in plastic wrap. Chilling the cakes in the refrigerator can enhance their flavor.

Assemble the cake no more than a day before serving to keep the layers fresh. If needed, you can prepare the frosting up to a week in advance, storing it in an airtight container in the refrigerator. Just give it a good whisk before using to restore its fluffy consistency.

For those who want an extra touch, consider adding fresh elements like whipped cream or fresh berries on the day of serving for optimal freshness and presentation.

Scaling Instructions

If you plan to double or triple your Death by Chocolate Cake recipe, consider using larger pans. You may need to adjust baking times, as larger layers can take longer to bake evenly.

Halving the recipe is feasible and allows for experimentation with flavors. However, ensure you have the correct pan sizes to maintain the intended texture.

Keep an eye on the oven for any timing modifications by checking for doneness with a toothpick in the center. Adjusting the ingredients allows for scaling while ensuring the same lush flavors emerge in each layer.

Nutritional Deep Dive

While this Death by Chocolate Cake is rich in flavor, understanding its nutritional profile can help manage portions. The cake typically contains carbohydrates, fats, and proteins due to its composition of flour, sugar, and eggs.

Each slice offers a good balance of macronutrients but should be enjoyed in moderation, especially given the higher sugar content from the frosting. Aim for experience over quantity to savor each indulgent bite.

For those conscious of dietary needs, ingredients can be switched out to create a more health-conscious version that still retains its rich flavor. Exploring potential reductions in sugar or substitutions can maintain satisfaction without sacrificing taste.

Dietary Adaptations

For gluten-free adaptations, replace the all-purpose flour with a gluten-free blend, ensuring all other ingredients are certified gluten-free as needed.

Dairy-free versions can substitute traditional butter and cream with coconut oil or dairy-free cream cheese alternatives while using dairy-free chocolate.

For a vegan adaptation, consider using flax eggs in place of the regular eggs, maintaining moisture and binding properties while retaining rich texture and flavor.

Low-carb and keto dieters can opt for almond flour and erythritol or stevia as a sweetener to create a delicious dessert without the high sugar impact.

These adaptations allow more people to enjoy the rich flavors of the cake while aligning with their dietary practices.

Troubleshooting Guide

Texture issues can arise if the batter is overmixed, leading to a dense cake. To fix this, gently fold the ingredients just until combined.

Flavor balance may be off if the cake is too sweet. A touch of salt can enhance the flavors and counteract sweetness.

Temperature problems often occur if the oven is too hot, causing rapid rise and collapse. Using an oven thermometer ensures precise baking conditions.

Equipment challenges can stem from improper tools. Be sure to use the right mixing and baking tools to avoid complications.

Ingredient substitutions can sometimes lead to varying outcomes. Ensure suitable replacements are made when creating similar textures and flavors.

Timing concerns can be adjusted through careful monitoring during baking; always do a toothpick test for doneness.

Recipe Success Stories

Community feedback shows overwhelming love for the Death by Chocolate Cake. Many bakers share variations involving unique flavor additions or creative presentations.

Readers often recount successful adaptations that cater to dietary restrictions without compromising flavor or texture, inspiring others to experiment fearlessly.

The photography of cakes made by enthusiasts highlights the satisfaction and joy that comes from baking this cake. Their stunning presentations demonstrate the cake’s versatility and appeal.

Sharing personal stories about family traditions surrounding this dessert adds to the rich tapestry of experiences connected to the Death by Chocolate Cake.

Frequently Asked Questions

How can I make this cake gluten-free?

You can replace all-purpose flour with a gluten-free flour blend, ensuring that all other ingredients are free from gluten to maintain the integrity and texture of the cake.

Can I freeze the cake, and for how long?

Yes, you can freeze the Death by Chocolate Cake. Wrap it in plastic wrap and store it in an airtight container for up to three months. Just defrost overnight in the refrigerator before serving.

What type of cocoa powder should I use?

For the richest flavor, use high-quality unsweetened cocoa powder. Dutch-processed cocoa can also be used for a smoother taste, but keep the chocolate balance in mind.

Can I use different types of chocolate chips?

Absolutely! Feel free to experiment with dark chocolate, white chocolate, or even peanut butter chips to put your own twist on this classic cake.

Is this cake suitable for a birthday celebration?

This cake is perfect for birthdays! Its rich flavor and beautiful presentation will surely impress guests of all ages.

What can I do if my cake doesn’t rise?

If your cake doesn’t rise, it may be due to expired baking powder or baking soda. Always check these ingredients for freshness before use.

How long should I let the cake cool before frosting?

It’s best to let the cake cool in the pans for about 10 minutes, then transfer them to a cooling rack until completely cooled before frosting.

What is the best way to frost the cake?

For a smooth finish, use offset spatulas or a bench scraper, and chill the cake briefly after applying a crumb coat to make frosting easier.

Can I make it in advance?

Yes! You can bake the cake layers a day or two ahead and even prepare the frosting in advance; just store them in airtight containers until you’re ready to assemble.

How can I enhance the chocolate flavor?

To deepen the chocolate experience, you can add a teaspoon of espresso powder to the batter. It enhances the cocoa flavor without adding coffee taste.

Additional Resources

Explore related recipes in the dessert section of our blog. You’ll find a variety of chocolate cakes, brownies, and layered desserts that will satisfy any sweet tooth.

For those looking to sharpen their baking skills, check out our technique guides that cover fundamental baking techniques and tips for perfecting your desserts every time.

Dive deeper into ingredient specifics to better understand how each component affects your baking. Knowledge of your ingredients can make a significant impact on your preparation.

Scanning through our equipment recommendations can help ensure you have the right tools for successful baking, from mixing bowls to electric mixers.

Seasonal variations are available; try our recipe updates that include fresh fruit additions or themed presentations for special occasions.

Join the Conversation

We’d love to hear how your adventure with the Death by Chocolate Cake turns out! Share your photos and reviews on social media and tag us for a chance to be featured.

Join our community of bakers who love experimenting with variations. Your unique twists or adaptation stories can inspire others to bake with joy and creativity.

Don’t forget to drop your tips and tricks! Sharing helps everyone become a better baker, and your insights could lead to amazing baking stories.

Check our blog regularly for exciting updates, including seasonal inspirations and new techniques. Let’s keep the conversation going and celebrate the art of baking together!

The Recipe

Nestle Toll House Death by Chocolate Cake

Serves: 12 servings

Prep Time: 30 mins

Cook Time: 40 mins

Total Time: 1 hr 10 mins

Kitchen Equipment Needed

  • Mixing bowls
  • Whisk or electric mixer
  • Cake pans (8-inch or 9-inch)
  • Spatula
  • Cooling rack
  • Measuring cups and spoons

Ingredients

  • 2 cups all-purpose flour
  • 1 cup unsweetened cocoa powder
  • 1 ¾ cups granulated sugar
  • 1 tsp baking powder
  • 1 tsp baking soda
  • ½ tsp salt
  • 2 large eggs
  • 1 cup buttermilk
  • ½ cup vegetable oil
  • 2 tsp vanilla extract
  • 1 cup boiling water
  • 2 cups semi-sweet chocolate chips

Directions

  1. Preheat the oven to 350°F (175°C). Grease and flour your baking pans.
  2. In a large bowl, combine the flour, cocoa powder, sugar, baking powder, baking soda, and salt.
  3. Add the eggs, buttermilk, vegetable oil, and vanilla extract; mix until smooth.
  4. Stir in boiling water until the batter is well combined. Fold in chocolate chips.
  5. Pour the batter evenly into the prepared pans. Bake for 30-35 minutes or until a toothpick comes out clean.
  6. Allow the cakes to cool in the pans for 10 minutes, then remove them to a cooling rack to cool completely.
  7. Once cooled, frost with your favorite chocolate frosting and serve.

Recipe Notes

  • If you prefer a richer flavor, swap out some of the granulated sugar with brown sugar.
  • Consider using a ganache for frosting for a more luxurious finish.
  • This recipe can also be adjusted for cupcakes; just reduce baking time to 20-25 minutes.

Delicious Shrimp Tacos Recipe for a Perfect Taco Night

Savory Shrimp Tacos: A Flavorful Delight

⚖️
Difficulty
Easy

⏲️
Prep Time
15 mins

🕒
Cook Time
10 mins

⏱️
Total Time
25 mins

🍽️
Servings
4

Shrimp tacos are a fantastic dish, perfect for anyone who loves vibrant flavors and fresh ingredients. These delightful tacos offer a tantalizing combination of juicy shrimp, zesty lime, and crisp vegetables, all wrapped in a warm tortilla. The appeal lies not only in their incredible taste, but also in their colorful presentation, offering a feast for both the eyes and the palate.

As you prepare these shrimp tacos, the aromas of sautéing shrimp mingled with spices invite anticipation and excitement. Each bite delivers a burst of flavor, with perfectly seasoned shrimp that contrast with the coolness of fresh toppings like avocado and cilantro. Picture a sunny day, friends gathered around, sharing these tasty tacos—it’s a fantastic way to enjoy warm weather and create lasting memories.

Quick Recipe Highlights

  • Flavor Profile: The shrimp are marinated in a mixture of spices and lime, providing a zesty kick that perfectly complements the sweetness of the shrimp.
  • Texture: The combination of tender shrimp and crunchy vegetables creates a delightful contrast, making each taco a mouthwatering experience.
  • Aroma: The tantalizing aroma of sautéed shrimp mixed with spices will awaken your senses, making it impossible to resist.
  • Visual Appeal: Brightly colored toppings like red cabbage and green cilantro add visual flair to your shrimp tacos, making them as beautiful as they are delicious.
  • Skill Level Needed: This recipe is easy enough for beginners, requiring only basic cooking skills and minimal kitchen equipment.
  • Special Equipment: You will need a frying pan and tongs to prepare these tacos, making it accessible for any home cook.

Recipe Overview

  • Difficulty Level: The shrimp taco recipe is categorized as easy, requiring just straightforward steps and simple ingredients that anyone can master.
  • Category: These tacos are great for lunch, dinner, or even as a party appetizer, making them versatile for various meals.
  • Cuisine: Originating from Mexican cuisine, shrimp tacos are now enjoyed internationally, reflecting diverse culinary traditions and flavor profiles.
  • Cost: The recipe is affordable, with shrimp being the primary ingredient, and the rest of the ingredients are commonly found in most kitchens.
  • Season: These shrimp tacos are perfect for warm weather, but can be enjoyed year-round, especially in coastal regions.
  • Occasion: Whether it’s a casual family dinner or a lively gathering with friends, shrimp tacos are always a hit.

Why You’ll Love This Recipe

Shrimp tacos offer an irresistible taste sensation that balances savory and zesty notes, making for a truly enjoyable meal. The combination of succulent shrimp with fresh toppings creates a delightful explosion of flavors in every bite. Each taco is a delightful experience, where warmth and crunch come together perfectly, appealing to those who love different textures in their food.

In terms of convenience, this recipe is a breeze to prepare. With a quick prep time of just 15 minutes and a cook time of 10 minutes, you can whip up these shrimp tacos in under half an hour. This makes them an excellent option for busy weeknight dinners, as well as for spontaneous gatherings with friends.

Nutritionally, shrimp is an excellent source of protein and provides key nutrients like omega-3 fatty acids. By incorporating fresh vegetables, these tacos not only satisfy your cravings but also contribute to a balanced meal.

Socially, shrimp tacos are perfect for entertaining. They are easy to share, allowing friends and family to build their own tacos to their liking. This interactive dining experience encourages conversation and connection, making gatherings even more special.

Finally, the cost-effectiveness of this recipe stands out. Shrimp, while considered a delicacy, can be purchased at reasonable prices, and the other ingredients are typically budget-friendly. This recipe demonstrates that you can create impressive and flavorful dishes without breaking the bank.

Historical Background and Cultural Significance

The origin of shrimp tacos can be traced back to coastal regions of Mexico, where fresh seafood is a staple in local cuisine. This dish reflects the rich traditions associated with the fishing culture and the celebration of the ocean’s bounty. Over time, as shrimp became popular in various culinary scenes, shrimp tacos evolved from street food to a gourmet experience enjoyed in restaurants worldwide.

Culturally, shrimp tacos are significant as they represent the fusion of flavors and techniques from various regions, enriching the culinary landscape. The way they are prepared, seasoned, and served can vary widely, showcasing local ingredients and preferences, while still maintaining their basic identity.

As this recipe evolved, numerous adaptations emerged, allowing for different types of tortillas and toppings. These variations demonstrate creativity and flexibility, making shrimp tacos an exciting option for any meal.

Today, shrimp tacos have a universal appeal, transcending borders and bringing diverse communities together to enjoy this flavorful dish that honors tradition while inviting innovation.

Ingredient Deep Dive

Shrimp
Shrimp hold cultural significance as a popular seafood worldwide, often associated with coastal living and fresh catches. Nutritionally, shrimp are low in calories yet high in protein, making them an excellent choice for healthy diets. When selecting shrimp, look for firm, translucent shells and a fresh, salty smell. Store shrimp in the refrigerator for up to two days or freeze for longer shelf life. If you can’t find shrimp, consider substituting with grilled chicken or tofu for a different flavor profile.

Tortillas
Tortillas are a staple in Mexican cuisine, with a rich history that dates back thousands of years. They are versatile, used in various dishes beyond tacos. Made from simple ingredients, tortillas provide a base that enhances flavors. When purchasing, opt for freshly made or quality pre-packaged options. Store in a cool, dry place for a few days or refrigerate for longer freshness. If needed, corn or lettuce wraps can serve as alternatives for a gluten-free version.

Common Mistakes to Avoid

  • Overcooking the shrimp: Cook only until they turn pink and opaque for optimal texture. Overcooked shrimp can become rubbery.
  • Using pre-cooked shrimp: Fresh, uncooked shrimp yield the best flavor and texture; avoid any frozen pre-cooked options.
  • Skipping the marinade: Letting the shrimp marinate enhances flavor significantly; don’t skip this step!
  • Overloading the tacos: Too many toppings can cause the tacos to fall apart; stick to a moderate amount to maintain structure.
  • Not warming the tortillas: Soft, warm tortillas elevate the taco experience; heat them just before serving.
  • Ineffectively chopping toppings: Ensure uniform cuts for even distribution and texture balance in every bite.
  • Using too many spices: While seasoning is crucial, moderation is key; avoid overwhelming the shrimp’s natural flavor.
  • Failing to taste as you go: Check flavors during preparation to adjust seasoning according to your preference.

Essential Techniques

Marinating Shrimp
Marinating shrimp not only infuses them with flavor but also helps to tenderize them. To master this technique, use a blend of spices, citrus juice, and a bit of oil to impart flavor. Avoid marinating for too long, as this can lead to mushy shrimp; a 15-30 minute soak is ideal. Look for the shrimp to absorb the marinade, changing in color and fragrance as a visual cue.

Cooking Shrimp
For perfect shrimp tacos, mastering the cooking process is crucial. Use a hot pan to quickly sear the shrimp, allowing them to develop a beautiful golden-brown color while retaining moisture. Watch for the color change from gray to pink—this indicates they are done. Timing is essential, so keep a close eye to prevent overcooking.

Pro Tips for Perfect Shrimp Tacos

One tip is to use a mix of different-colored vegetables for added visual appeal and flavor. Bright, fresh toppings like red cabbage, cilantro, and avocado create a beautiful and appetizing presentation.

Another fantastic idea is to let guests customize their tacos with a toppings bar, which includes salsa, lime wedges, and extra spices. This not only enhances the experience but also allows everyone to enjoy their perfect taco.

For extra flavor, consider grilling the shrimp instead of sautéing them for a smoky taste that complements the fresh ingredients.

Make sure to serve the tacos immediately after preparation. Freshly made tacos are always the best; the longer you wait, the more the tortillas will become soggy.

To elevate your shrimp tacos even further, try adding a drizzle of creamy avocado sauce or zesty chipotle mayo for a delicious finishing touch.

Lastly, don’t forget to enjoy with a refreshing beverage, such as a cold beer or a fruity margarita, to complete the taco experience.

Variations and Adaptations

For regional variations of shrimp tacos, consider incorporating local spices and flavors such as Cajun seasoning for a Southern twist or mango salsa for a tropical flair.

Seasonal adaptations could include replacing traditional toppings with seasonal produce like corn in the summer or roasted peppers in the fall, providing a fresh take on this classic dish.

For dietary modifications, you can substitute shrimp with tofu or tempeh for a vegan version or opt for gluten-free tortillas.

Flavor variations such as adding a spicy crema or switching to a different citrus marinade can also transform the dish into something new.

Texture modifications can be introduced with toasted nuts for a crunchier bite or creamy guacamole for a smooth contrast.

Lastly, consider modern serving suggestions like plating the shrimp tacos on a wooden board with small bowls of toppings, enhancing the presentation and making sharing fun.

Serving and Presentation Guide

When plating your shrimp tacos, stack them neatly on a colorful plate or wooden board to create visual interest. Garnishing with fresh cilantro, lime wedges, or even edible flowers elevates the dish’s aesthetic.

Traditional accompaniments like Mexican rice or beans effectively complement the tacos, while modern suggestions might include serving with sweet potato fries for a unique twist.

Temperature plays a significant role; serve shrimp tacos immediately while warm, making sure tortillas stay soft and pliable.

For portion control, consider using small tortillas to create mini tacos, allowing guests to enjoy several flavors without overindulging.

Wine and Beverage Pairing

For a perfect pairing, consider serving these shrimp tacos with a chilled Sauvignon Blanc, which complements the zesty flavors beautifully. The crispness of the wine balances the richness of the shrimp.

If you prefer non-alcoholic options, a refreshing limeade or coconut water can enhance the tropical flavors of the dish while keeping things light.

For those who enjoy a coffee or tea pairing, an iced green tea with mint can cleanse the palate, especially on warmer days.

Serve beverages chilled to match the refreshing nature of the tacos, ensuring guests have a delightful dining experience.

Storage and Shelf Life

To store leftovers effectively, keep the shrimp and toppings separate from the tortillas to maintain texture. Refrigerate shrimp in an airtight container for up to two days.

For tortillas, consider wrapping them in foil and storing in the fridge to prevent them from becoming stale.

Signs of spoilage include an off smell or a slimy texture on the shrimp, so always check before consuming leftovers.

When reheating, do so in a pan over low heat until warmed through, ensuring they remain tender and juicy. Avoid microwaving as it can lead to rubbery shrimp.

If you want to freeze leftovers, do so within 24 hours to maintain freshness. Shrimp can be frozen but are best consumed within a month for optimal flavor.

Make Ahead Strategies

To prepare ahead, consider marinating the shrimp the night before. This enhances flavor and saves time on the day of serving.

Chop and store toppings separately in airtight containers to keep them fresh for a couple of days.

Assess the quality impact when preparing in advance, as fresh toppings may lose crunchiness over time, so plan accordingly.

When assembling, do so just before serving to maintain the taco’s structure and prevent sogginess.

Lastly, if fresh elements like avocado are involved, add them right before serving for the best texture and appearance.

Scaling Instructions

When scaling this recipe, halving the ingredients is simple—just reduce measurement amounts by 50%.

Doubling or tripling the recipe might require adjusting cooking time, as you should ensure even cooking for larger batches.

Keep in mind that the size of your kitchen equipment, like frying pans, may impact how many shrimp you can cook at once efficiently.

When scaling up, consider storage for the leftovers, as they should be kept in a cool place and consumed quickly for the best quality.

Timing modifications may include cooking in batches to avoid overcrowding the pan, which can lead to uneven cooking.

Nutritional Deep Dive

Shrimp tacos provide a nutritious balance of protein and healthy fats. On average, a serving contains approximately 23 grams of protein and very low carbohydrates.

Micronutrient analysis reveals shrimp as an excellent source of selenium, vitamin B12, and iron, contributing to overall health.

Health benefits include supporting heart health due to omega-3 content while being lower in calories compared to other protein sources.

When considering dietary needs, these tacos offer flexibility, allowing for various modifications like adding beans for extra fiber.

Portion analysis encourages mindful eating; enjoy a couple of tacos along with sides such as salad or rice for a satisfying meal without overindulgence.

Dietary Adaptations

For those needing a gluten-free option, simply use corn tortillas instead of flour ones, ensuring a flavorful experience without dietary concerns.

Dairy-free adaptations can replace creamy toppings with homemade guacamole or avocado crema, preserving richness without dairy.

Vegan adaptations could substitute shrimp with spiced jackfruit or marinated tofu for a similar texture and robust flavor.

Low-carb options can utilize lettuce wraps for the shrimp and toppings instead of tortillas, providing a fresh delivery method.

Consider a keto adaptation by grilling shrimp with high-fat toppings like avocado or a creamy dressing made from oil and spices.

Troubleshooting Guide

Common texture issues in shrimp tacos can stem from overcooking. Always monitor shrimp closely and remove from heat once opaque for best results.

Flavor imbalance may occur if too much salt or spices are added; tasting during cooking ensures balance is achieved.

If temperature problems arise, heat tortillas separately in a pan to maintain their softness and prevent tearing.

Equipment challenges, such as non-stick pans, may require additional oil to prevent sticking; try grapeseed or canola oils for higher smoke points.

For ingredient substitutions, ensure to adjust cooking times when replacing shrimp with other proteins, especially if switching to chicken or vegetarian alternatives.

Timing concerns can significantly affect freshness; prepare ingredients in advance to allow for quick assembly at mealtime.

Recipe Success Stories

Community feedback reveals that these shrimp tacos are a crowd favorite at parties, often requested for family gatherings and summer barbecues.

Variations praised include spicy chipotle shrimp tacos, demonstrating adaptability to personal taste preferences.

Adaptation stories highlight how readers have successfully incorporated seasonal ingredients, like fresh corn, creating simpler versions without compromising on flavor.

Suggestions also include pairing tacos with unique salsas, inspiring creativity and exploration in home cooking.

Photography tips shared by readers emphasize capturing vibrant colors and textures to enhance visual appeal when sharing these delicious tacos on social media.

Frequently Asked Questions

1. Can I use frozen shrimp for this recipe?

Yes, you can use frozen shrimp, but ensure they are defrosted completely before cooking to achieve the best results.

2. How do I know when shrimp is cooked?

Shrimp is cooked when it turns opaque and pink. Additionally, it should form a tight “C” shape instead of an “O” when done.

3. Can I prepare the shrimp in advance?

Yes, marinating shrimp a few hours ahead of time enhances flavor, but cook them just before serving for the best texture.

4. What toppings can I use for shrimp tacos?

Popular toppings include avocado, salsa, cilantro, shredded cabbage, and a squeeze of lime for an extra burst of flavor.

5. How spicy can these tacos get?

The spice level can be adjusted by controlling the amount of chili powder or adding spicy salsa as a topping.

6. Is this recipe suitable for meal prep?

Absolutely! You can prepare the components separately and assemble them when ready to eat, ensuring freshness.

7. Can I substitute shrimp for another protein?

Yes, grilled chicken, tofu, or even fish can be great substitutes, allowing for variations of this beloved recipe.

8. How do I store leftover tacos?

Store leftover shrimp and toppings separately from tortillas in airtight containers in the fridge for up to two days.

9. Can I make shrimp tacos gluten-free?

Yes! Simply replace wheat tortillas with corn tortillas or lettuce wraps for a delicious gluten-free option.

10. Is this recipe kid-friendly?

Definitely! The mild flavors of shrimp and customizable ingredients make these tacos enjoyable for kids and adults alike.

Additional Resources

For more delicious recipes, check out our selection of taco variations, including fish, chicken, and vegetarian options.

Explore technique guides for mastering shrimp preparations and learn how to select the freshest seafood.

Ponder using unique ingredients, like heirloom tomatoes or specialty spices, to elevate your culinary creations further.

Recommendations for essential kitchen equipment can also enhance your cooking experience, making you feel like a pro in the kitchen.

Don’t forget to embrace seasonal variations in your cooking, allowing fresh produce to inspire new twists on traditional recipes.

Join the Conversation

We invite you to share your shrimp taco experiences on social media! Use the hashtag #ShrimpTacoDelight to connect with fellow food enthusiasts.

Photography tips for capturing the vibrant colors of shrimp tacos are encouraged; natural light often provides the best results.

Write recipe reviews to let others know how you enjoyed these tacos, and feel free to add your own variations to inspire our community.

Engage with us by suggesting new ingredients or techniques you’d like to explore together in future recipes!

The Recipe

Savory Shrimp Tacos

Serves: 4

Prep Time: 15 mins

Cook Time: 10 mins

Total Time: 25 mins

Kitchen Equipment Needed

  • Frying pan
  • Mixing bowl
  • Tongs
  • Knife
  • Cutting board

Ingredients

  • 1 lb shrimp, peeled and deveined
  • 1 tbsp olive oil
  • 1 tsp chili powder
  • 1 tsp cumin
  • Juice of 1 lime
  • 8 small tortillas
  • 1 cup shredded cabbage
  • 1 avocado, sliced
  • Fresh cilantro, for garnish
  • Salt and pepper, to taste

Directions

  1. In a mixing bowl, combine shrimp, olive oil, chili powder, cumin, lime juice, salt, and pepper. Let marinate for 15 minutes.
  2. Heat a frying pan over medium-high heat and add the marinated shrimp.
  3. Cook shrimp for about 2-3 minutes per side until they turn pink and opaque.
  4. Warm the tortillas in a separate pan for about 30 seconds on each side.
  5. Assemble the tacos by adding shrimp, cabbage, and avocado to each tortilla.
  6. Garnish with fresh cilantro and serve with lime wedges on the side.

Recipe Notes

  • Feel free to substitute shrimp with chicken or tofu for different variations.
  • Add additional toppings like cheese, hot sauce, or salsa for extra flavor.
  • Store leftovers in the refrigerator for up to 2 days; reheat the shrimp before serving.