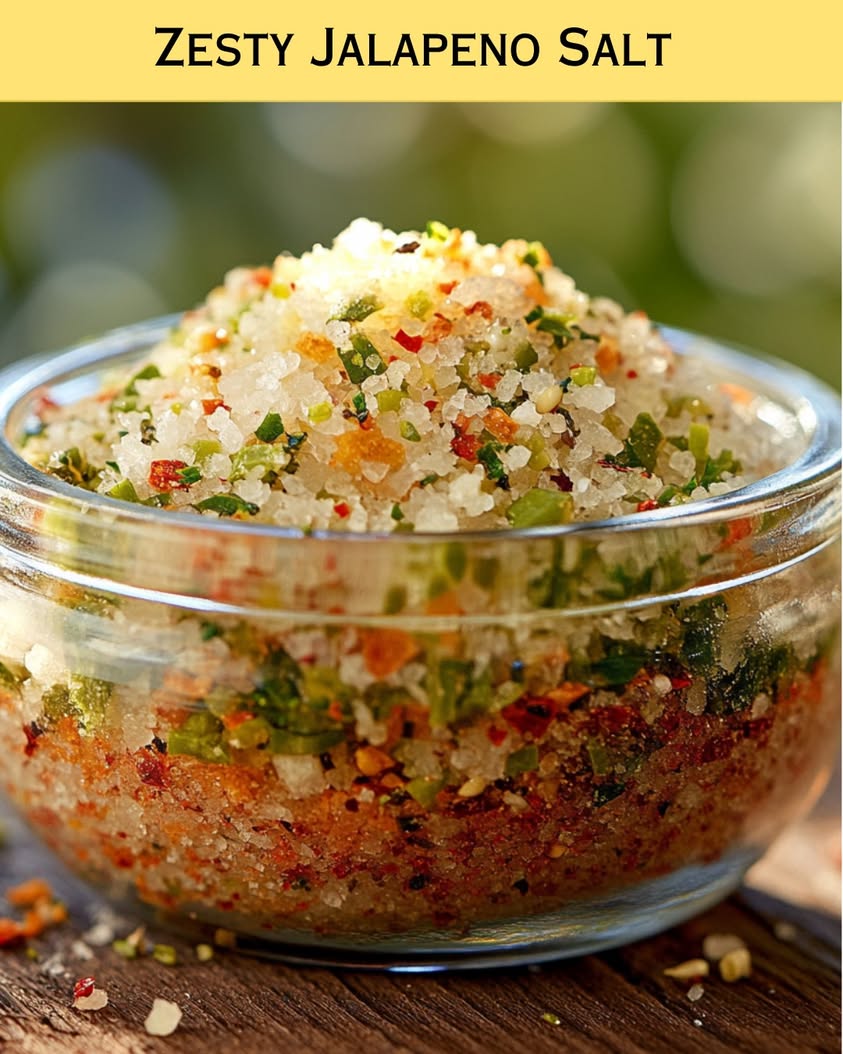
Elevate Your Dishes with Homemade Zesty Jalapeno Salt

Zesty Jalapeno Salt: A Flavorful Twist for Your Culinary Creations

⚖️
Difficulty
Easy

⏲️
Prep Time
10 mins

🕒
Cook Time
0 mins

⏱️
Total Time
10 mins

🍽️
Servings
1 cup

Jalapeno salt is the perfect way to elevate your home cooking, adding a delightful kick to virtually any dish. This vibrant blend of flaky sea salt and zesty jalapenos creates a unique seasoning that not only enhances flavor but also injects a fiery personality into your culinary creations. Imagine sprinkling it over freshly grilled meats, roasted vegetables, or even when preparing your favorite tacos and cocktails. The possibilities are endless!

Making this zesty jalapeno salt is not only quick and easy but requires minimal preparation. With just a few ingredients and a bit of patience for the dried jalapenos to blend harmoniously with the salt, you will have a gourmet seasoning that you can store and use whenever a meal needs a hint of spice.

Quick Recipe Highlights

  • Flavor Profile: A delightful combination of salty and spicy, this jalapeno salt enhances flavors and adds depth to your dishes.
  • Texture: The coarse salt crystals provide a satisfying crunch, making each sprinkle a burst of flavor.
  • Aroma: The earthy scent of jalapenos mingles with the fresh notes of sea salt, creating an enticing aroma.
  • Visual Appeal: The emerald green specks of jalapeno embedded in the salt give it a beautiful visual contrast.
  • Skill Level Needed: Perfect for beginners and seasoned cooks alike, this recipe requires minimal technique.
  • Special Equipment: A food processor or spice grinder is recommended for a fine blend.

Recipe Overview

  • Difficulty Level: This recipe is easy and perfect for anyone looking to add a unique seasoning to their pantry.
  • Category: This fits well as a seasoner for meats, vegetables, and even snacks.
  • Cuisine: Inspired by Mexican flavors, this jalapeno salt pays homage to the culinary traditions of the region.
  • Cost: Very economical, costing less than $5 to prepare a sizable batch.
  • Season: Perfect for year-round use; however, it’s especially great for summer barbecues and casual gatherings.
  • Occasion: Ideal for entertaining guests, enhancing dinner parties or simply jazzing up your everyday meals.

Why You’ll Love This Recipe

The taste and texture of this jalapeno salt is nothing short of extraordinary. The contrast between the coarse salt and the spicy jalapenos creates an exciting flavor experience that can completely transform your dishes. Whether you are seasoning steak, fish, or roasted vegetables, this blend will add a zesty flair that will make your palate sing.

Preparation is a breeze, making it easy to whip up a batch whenever you’re in the mood for a flavorful enhancement. You can make it in advance, and it takes just a few minutes to bring everything together. The best part is that you can customize it according to your spice tolerance, adding more or fewer jalapenos as desired.

Furthermore, jalapenos come with numerous nutritional benefits. They are low in calories, packed with vitamins, and known to boost metabolism. Incorporating this flavorful salt into your meals allows you to add healthful properties without sacrificing taste.

Socially, sharing your homemade zesty jalapeno salt at gatherings creates an exciting opportunity to introduce friends and family to new flavors. It’s a conversation starter that invites others to share in the experience of exploring bold, piquant tastes.

And when it comes to cost-effectiveness, making your own seasoning at home saves money while allowing you to control quality. Instead of purchasing expensive gourmet salts, you can create personalized blends that are just as good, if not better.

Historical Background and Cultural Significance

The origins of jalapeno salt can be traced back to traditional Mexican cuisine, where it has become a staple seasoning that complements the bold flavors of the culture. Jalapenos themselves have a rich history, originating in the region of Veracruz, Mexico, and have been cultivated for over 500 years.

This seasoning reflects the importance of spices in Mexican culture and highlights how flavors have evolved over generations. Salt has always played a crucial role in food preservation, while jalapenos bring a spicy kick that enhances various dishes.

The recipe has likely gone through numerous adaptations, with families making their versions that reflect local tastes and individual preferences. This zesty jalapeno salt also serves as an excellent example of regional variations, showcasing how local ingredients can transform a simple seasoning into a gastronomic treasure.

Today, jalapeno salt has made its way into kitchens worldwide, becoming increasingly popular among food enthusiasts who wish to incorporate a unique twist into their recipes. Its versatility stretches beyond traditional Mexican dishes, lending flavor to everything from grilled meats to gourmet popcorn.

Ingredient Deep Dive

The main ingredient, jalapenos, are more than just a key flavor component; they hold cultural significance deeply rooted in Mexican cuisine. Traditionally used in various dishes, their spicy notes enhance everything they touch. Nutritionally, jalapenos are high in vitamins A and C, and they possess capsaicin, known for its metabolism-boosting properties. When selecting jalapenos, look for firm, bright green peppers without blemishes for optimal flavor, ensuring proper storage in a cool, dry place.

Salt, particularly coarse sea salt, serves as the base for this seasoning. It not only preserves the vibrant flavor of the jalapenos but also brings out their natural zest. Sea salt is rich in minerals and is considered healthier than regular table salt. Choose a high-quality coarse variety for a satisfying crunch when sprinkled on food. Ensure to store your salt in an airtight container to retain its freshness, and it will last indefinitely.

Common Mistakes to Avoid

  • Using old or stale jalapenos can result in a bland flavor, so always opt for fresh ones.
  • Neglecting to dehydrate the jalapenos properly may lead to clumping in your salt mix.
  • Overprocessing may result in a fine powder rather than the desired texture; ensure to pulse until just combined.
  • Failing to balance the salt and jalapeno ratio will lead to overpowering flavors; adjust to suit your preference.
  • Storing jalapeno salt in a humid environment may reduce its shelf life; keep it in a cool, dry place.
  • Omitting key spices, such as garlic or onion powder, can create a less flavorful blend that lacks depth.
  • Improperly measuring the ingredients, especially the jalapenos, can disrupt the intended taste experience.
  • Neglecting to label the jar can lead to confusion about its contents later; always include the date and name.
  • Skipping the taste test prior to storage may cause you to miss the opportunity to adjust for flavor.
  • Using table salt instead of coarse sea salt can result in an overly salty taste instead of balancing flavor.

Essential Techniques

Creating zesty jalapeno salt involves basic yet crucial techniques that elevate the end product. Drying jalapenos ensures that moisture does not compromise the blend during storage. Mastering this technique is simple; use a dehydrator or an oven set to low temperatures. Keep an eye on them to prevent burning, looking for a leathery texture with no signs of moisture.

Ensuring an even blend of flavors is key to the success of your seasoning. Using a food processor or spice grinder helps achieve the correct texture, where you can easily control the coarseness of the salt. The common pitfall is overprocessing, resulting in a fine powder instead of a textured seasoning. Pulse gently to retain some coarse salt crystals for visual and flavor appeal.

Pro Tips for Perfect Zesty Jalapeno Salt

To achieve the best flavor, always use fresh, high-quality ingredients. Experiment with different types of salt, such as Himalayan pink salt or smoked sea salt, to create unique flavor combinations. Consider infusing additional spices like garlic or black pepper for a more complex seasoning.

Adjust the heat level to fit your preference by varying the amount of jalapenos you use or opting for milder varieties. Store your zesty jalapeno salt in an airtight container, preferably glass, to maintain its flavors over time.

Label and date your jars when storing to keep track of freshness. Remember that ground spices lose potency quickly, so use your seasoning within six months for optimal flavor. If clumping occurs, simply break it up before using; moisture can be your enemy here.

Lastly, don’t hesitate to engage friends and family in the process; creating food with loved ones can enhance the experience, making it even more enjoyable.

Variations and Adaptations

This zesty jalapeno salt can be customized in several ways to cater to your taste. For a regional twist, try using local hot peppers from your area instead of jalapenos, introducing new flavor profiles that reflect your locale.

Seasonal adaptations can also be made by incorporating dried herbs such as oregano or thyme during the blending process, balancing the heat with earthy notes that capture the essence of the season. If you’re aiming for dietary modifications, reduce the amount of jalapenos for a milder flavor while still retaining the essence of the salt.

For those preferring diverse textures, consider using a mix of coarse and fine salt to create a unique mouthfeel. Presentation can also be adapted by layering the salt in jars with different colors and flavors for visual appeal while gifting.

Serving and Presentation Guide

When it comes to serving zesty jalapeno salt, consider using small bowls or unique salt shakers to add a decorative touch. Garnish dishes with a sprinkle of this vibrant salt before serving, enhancing both flavor and visual allure.

Pair your jalapeno salt with traditional accompaniments such as grilled meats, chiles rellenos, or even popcorn for a surprising twist. For modern serving suggestions, consider incorporating it into gourmet recipes like artisan cheese plates or as rim salt for margaritas, transforming everyday dining experiences into something memorable.

Serving it at room temperature works best, allowing the robust flavors to shine through. Be mindful of portion control; a little goes a long way, so advise guests to sprinkle a small amount to taste the full impact.

Wine and Beverage Pairing

For those showcasing zesty jalapeno salt, a refreshing white wine, such as Sauvignon Blanc or a crisp Rosé, pairs beautifully, offsetting the heat with acidity. If you prefer beer, opt for a light lager or a citrus-infused IPA to complement the vibrant flavors without overwhelming them.

For a non-alcoholic option, consider crafting a zesty lemonade with a hint of jalapeno salt around the rim, adding an exciting twist to the traditional beverage. If coffee or tea is more your style, a rich dark roast or an herbal tea can serve as a unique counterbalance to the spiciness of the salt, providing a rounded taste experience.

Storage and Shelf Life

Properly sealing your zesty jalapeno salt in an airtight container is essential for maintaining its freshness. Store it in a cool, dry place away from direct sunlight to retain its vibrant flavors for up to six months.

If you notice any changes in aroma or moisture, discard it to avoid any food safety issues. When reheating dishes seasoned with jalapeno salt, a light sprinkling just before serving can help restore the flavors, particularly after freezing.

For those looking to preserve it long-term, freezing the salt blend can extend its shelf life, though the texture may change slightly. If you decide to freeze, separate it into smaller batches for convenience.

Make Ahead Strategies

To optimize your kitchen time, prepare a larger batch of zesty jalapeno salt and store it in an airtight container. Making it in advance allows flavors to meld beautifully and enhances the seasoning over time, making it even more delicious.

When prepping, consider dehydrating the jalapenos a day ahead, allowing them to cool completely before blending with the salt. This will help in achieving a perfectly blended product. Encourage freshness by storing any leftovers properly and using them in various dishes throughout the week.

Assembling your seasoning ahead of time allows spontaneous cooking without the need to reach for multiple jars when flavoring dishes. This strategy promises less hassle during busy meal preparations, keeping you organized.

Scaling Instructions

Scaling the jalapeno salt recipe is quite simple. If you’re looking to halve the recipe, just cut each ingredient in half while maintaining the same preparation method. Doubling or tripling the mix will not disrupt the integrity of the flavors, making it easy to create larger batches for gifting or entertaining.

When changing the quantities, ensure to use appropriately sized containers for mixing and storing. Adjust the timing for preparation when preparing larger quantities; however, drying times for jalapenos remain the same.

Consider testing the salt blend in small batches first if you’re creating a new flavor variation or adapting the heat level. This approach ensures that flavors develop well without committing to a large batch before you’re happy with the outcome.

Nutritional Deep Dive

Zesty jalapeno salt, while primarily a seasoning, offers a unique profile when analyzing its components. The main nutritional ingredient, salt, provides essential minerals like sodium while amplifying flavors in dishes.

Jalapenos themselves are a powerhouse of nutrition, low in calories yet high in vitamins A and C. The capsaicin within these peppers has been linked to various health benefits, including pain relief and improved metabolism.

It’s important to remember that while using this seasoning can enhance meals, moderation is key due to the sodium content in salt. Balancing meals that incorporate jalapeno salt with fresh ingredients contributes to overall dietary health.

Understanding the nutritional elements of each component allows one to maintain awareness of their dietary needs while enjoying flavor-enhancing seasonings.

Dietary Adaptations

Adapting zesty jalapeno salt to fit various dietary needs is incredibly versatile. For those following a gluten-free diet, this recipe is naturally compliant as it requires only salt and jalapenos.

If considering a dairy-free or vegan lifestyle, this recipe is also perfect without any modifications as it contains no animal byproducts. Reducing the jalapenos or substituting them with milder peppers can accommodate individuals following low-FODMAP diets.

Additionally, for low-carb or keto enthusiasts, jalapeno salt fits seamlessly into your regimen, adding flavor without the added carbohydrates. Always remember to verify that the salt used aligns with your dietary needs, as various commercial salts may incorporate additives.

With such flexibility, tailoring this seasoning to fit differing lifestyles ensures that everyone can enjoy the bold flavors it brings.

Troubleshooting Guide

When facing texture issues, remember that the salt may clump due to moisture. Always store zesty jalapeno salt in an airtight container to avoid this and break any clumps before use.

If you find the flavor balance is off, consider adjusting the amount of jalapeno in the mix. Tasting the salt after blending will help refine the flavor before storage.

Temperature problems, particularly during storage, may cause the salt to lose potency or clump; keep it in a cool, dry place away from heat sources. If using alternate equipment for grinding, ensure it produces a consistent texture to avoid overwhelming flavors.

Ingredient substitutions should be approached cautiously; if using table salt, adjust the quantity significantly to maintain the intended flavors. Timing your preparation is also essential; ensure dehydrated jalapenos cool completely before blending, to prevent moisture mishaps.

Recipe Success Stories

Community feedback highlights the success of zesty jalapeno salt in enhancing a variety of dishes. Many readers have shared their creative adaptations, such as using it on popcorn, grilled corn on the cob, and even in homemade marinades.

Photographic tips reveal that vibrant colors in food will be accentuated with flairs of green from the jalapeno salt, making it an eye-catching addition. Variations suggested by readers include experimenting with different heat levels, pairing it with complementary ingredients like lime zest for a refreshing kick.

Illustrating how this recipe found its way into kitchens far and wide, people have been surprised by how easily they can create gourmet flavors in their meals, leading to an outpouring of adaptation stories that inspire creativity in the kitchen.

Frequently Asked Questions

How long does homemade jalapeno salt last?

When stored in an airtight container in a cool, dry place, homemade jalapeno salt can last up to six months. Always check for signs of moisture or off-smells before using.

Can I use fresh jalapenos instead of dried?

This recipe specifically calls for dried jalapenos as they blend better with the salt. Fresh jalapenos have a high moisture content that can lead to spoilage in the salt mixture.

What can I use zesty jalapeno salt on?

This seasoning is perfect for meats, vegetables, tacos, popcorn, and even cocktails. Its versatility makes it a great addition to any dish requiring a flavorful kick.

Can I adjust the spice level?

Absolutely! You can easily control the spice level by varying the amount of jalapenos used. Choose mild varieties for less heat or omit some of the peppers.

Is this recipe gluten-free?

Yes, this recipe is naturally gluten-free, making it an excellent choice for those with gluten sensitivities.

What other spices can I add to this mix?

Feel free to experiment by adding garlic powder, onion powder, or other dried herbs to create a more complex flavor profile.

How should I store my jalapeno salt?

Store your jalapeno salt in an airtight container, in a cool, dry place away from sunlight to maintain its freshness.

Can I freeze jalapeno salt?

Yes, you can freeze the seasoning. Just make sure to store it in an airtight container to minimize moisture exposure and preserve flavor.

Is this a good gift idea?

Absolutely! Zesty jalapeno salt makes a great homemade gift. Consider packaging it in decorative jars for a personalized touch.

What is the best way to use zesty jalapeno salt?

Sprinkle it on dishes just before serving to maximize flavor impact or use it to season meats while cooking for added taste.

Additional Resources

For more culinary inspiration, consider exploring related recipes that utilize unique seasoning blends, such as spice rubs for grilling or flavored oils. Technique guides for proper spice blending might enhance your skills, and ingredient information will assist you in selecting the freshest components for your cooking adventures.

Equipment recommendations, particularly for grinders or dehydrators, can also help streamline your preparation process. Lastly, seasonal variations and how to incorporate fresh ingredients can help personalize your dishes with ease.

Join the Conversation

We invite you to become part of our foodie community by sharing your experiences with this recipe. Engage with us on social media by posting your culinary creations featuring zesty jalapeno salt. Your personal photography tips and recipe reviews contribute to our shared love of cooking!

Share your adaptations and variations, and don’t hesitate to provide feedback. Together, we can celebrate the joy of cooking and inspire others to experiment with bold flavors in their kitchens.

The Recipe

Zesty Jalapeno Salt

Serves: 1 cup

Prep Time: 10 mins

Cook Time: 0 mins

Total Time: 10 mins

Kitchen Equipment Needed

  • Food processor or spice grinder
  • Airtight container for storage
  • Dehydrator or oven (for dehydrating jalapenos)

Ingredients

  • 1 cup coarse sea salt
  • ½ cup dried jalapenos

Directions

  1. Dehydrate jalapenos if they are not pre-dried. Use a dehydrator or an oven set to a low temperature until completely dried.
  2. Allow jalapenos to cool before using them in the next step.
  3. In a food processor, combine the salt and dried jalapenos.
  4. Pulse until you achieve your desired texture, ensuring some coarse salt remains for crunch.
  5. Transfer the jalapeno salt mixture into an airtight container for storage.

Recipe Notes

  • Feel free to customize the heat level by adjusting the amount of jalapenos.
  • This mix can also be infused with additional spices, such as garlic or onion powder.
  • Make sure to store in a cool, dark place to maintain freshness.
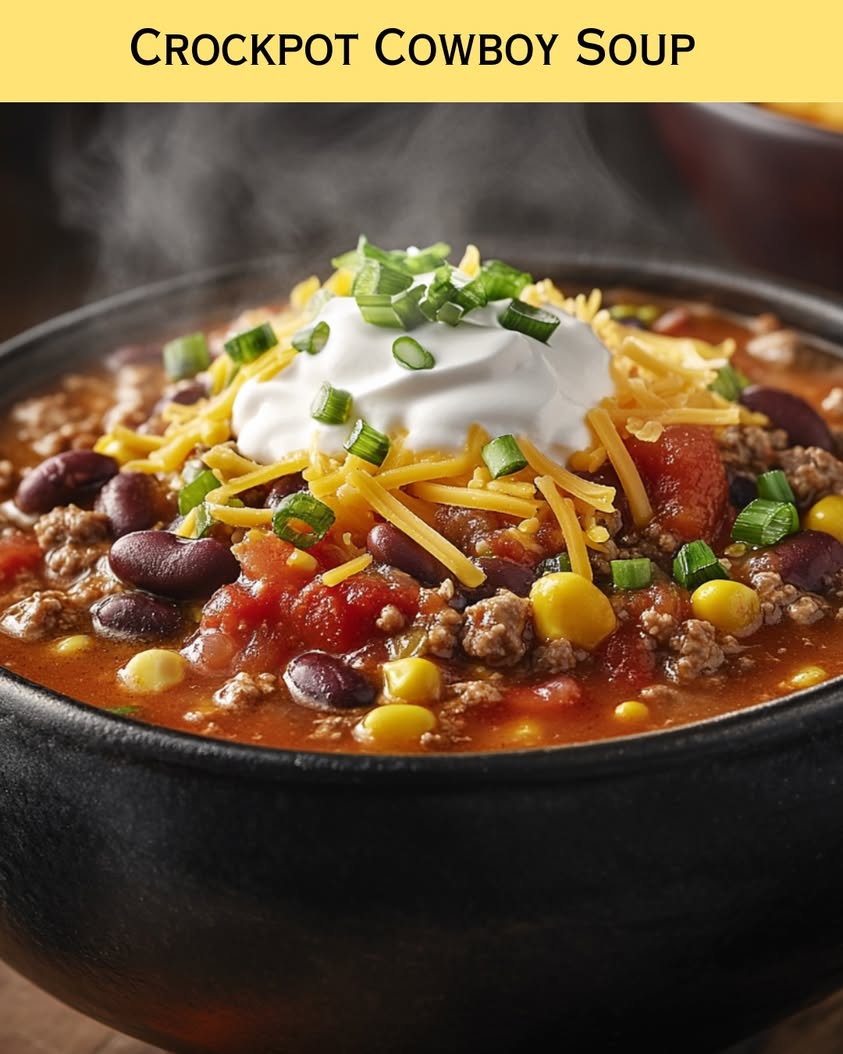
Delicious Crockpot Cowboy Soup Recipe for Ultimate Comfort Food

Crockpot Cowboy Soup: A Hearty Meal for Every Occasion

⚖️
Difficulty
Easy

⏲️
Prep Time
15 mins

🕒
Cook Time
6 hours

⏱️
Total Time
6 hours 15 mins

🍽️
Servings
6 servings

The Crockpot Cowboy Soup is more than just a meal; it’s an experience. Packed with robust flavors, this hearty soup brings together ground beef, beans, corn, and tomatoes, simmered slowly in a savory broth. Imagine the cozy aroma filling your kitchen as it cooks slowly, inviting everyone to gather around the table. It’s the perfect dish for busy families or anyone who wants a filling, nourishing option without spending hours in the kitchen.

This soup is a delightful blend of textures and tastes, offering the creaminess of beans, the crunch of corn, and the savory essence of seasoned beef. Each spoonful warms you from the inside out, making it ideal for chilly evenings. Whether enjoyed alone or accompanied by crusty bread, the flavors meld beautifully, ensuring every bite is satisfying. With this simple yet filling recipe, you’ll understand why it has a special place in many homes.

Quick Recipe Highlights

  • Flavor Profile: This soup combines savory ground beef with the natural sweetness of corn and the richness of tomatoes, creating a deliciously comforting balance.
  • Texture: The contrasting textures of tender beans, hearty beef, and crunchy corn add depth, making each bite interesting and satisfying.
  • Aroma: The enticing aroma of seasoned beef, fresh vegetables, and herbs fills your kitchen, creating an irresistible invitation to mealtime.
  • Visual Appeal: The vibrant colors of the ingredients create a visually appealing dish, with reds, yellows, and greens that catch the eye.
  • Skill Level Needed: This recipe is accessible for beginners, as it requires minimal cooking techniques, mainly chopping and combining ingredients.
  • Special Equipment: A high-quality crockpot or slow cooker is essential for the best flavor infusion and tenderness of the ingredients.

Recipe Overview

  • Difficulty Level: The Crockpot Cowboy Soup is an easy recipe perfect for those new to cooking. It requires simple preparation and minimal hands-on time.
  • Category: This meal falls under the soup category, making it ideal for any time of the day, especially during cooler months.
  • Cuisine: Inspired by cowboy culture, this dish reflects the heartiness and rustic roots of American comfort food, making it a classic favorite.
  • Cost: With affordable ingredients like beans and ground beef, this recipe offers a delicious and filling meal without breaking the bank.
  • Season: Perfect for fall or winter seasons, this comfort food warms you up and provides nourishment during chillier days.
  • Occasion: Great for family dinners, potlucks, or casual gatherings, this soup is versatile enough to suit any occasion.

Why You’ll Love This Recipe

The taste and texture of Crockpot Cowboy Soup create an unforgettable dining experience. Each ingredient contributes to a wholesome flavor, with seasoned beef adding richness, beans providing creaminess, and vibrant vegetables introducing freshness. The slow-cooking process melds the flavors perfectly, allowing every bite to offer a burst of deliciousness, making it a favorite among family members of all ages.

Convenience is perhaps one of the greatest appeals of this soup. With just a bit of prep work, you can throw all the ingredients into the slow cooker, set it on low, and let it do the hard work while you focus on other tasks. This makes it an ideal recipe for busy days when time is of the essence yet you want to provide a warm, home-cooked meal.

Nutritionally, the Crockpot Cowboy Soup offers a balanced mix of protein, fiber, and vegetables. The beans provide protein and fiber, while the variety of vegetables contributes vitamins and minerals essential for a healthy diet. This makes it a fantastic option for anyone looking to eat wholesome, home-cooked food, without compromising on taste.

This recipe is also perfect for social gatherings. Whether it’s a potluck, family gathering, or a casual get-together with friends, serving up a big pot of this hearty soup invites everyone to the table. It creates a warm and inviting atmosphere, encouraging connection and conversation over a delicious meal.

Cost-effectiveness is another key advantage. With the use of bulk beans and affordable ground beef, you can create a generous portion of soup without spending much. The ability to sustain several servings means you can enjoy leftovers or share with friends and family, making this a budget-friendly option that still delights.

Historical Background and Cultural Significance

Crockpot Cowboy Soup has its roots in traditional cowboy cooking where meals had to be hearty, filling, and require minimal fuss. Cowboys needed nourishment during long days on ranches, and this soup’s robust ingredients provided essential sustenance.

The cultural importance of this dish reflects themes of simplicity and comfort that resonate deeply in many American families. It embodies the spirit of gathering around a hearty meal, celebrating community and togetherness. This recipe is often passed down through generations, becoming part of family traditions.

Over time, Crockpot Cowboy Soup has evolved, incorporating various ingredients based on personal preferences and regional influences. Today, it can feature diverse legumes, spices, and vegetables, showcasing the adaptability and creativity of home cooks.

Regional variations exist as well, with some regions adding local ingredients such as green chiles or different kinds of beans. This flexibility allows the soup to take on unique characters while retaining its classic roots.

Ingredient Deep Dive

Ground Beef
Ground beef serves as the protein powerhouse of this soup, providing both richness and heartiness. Historically a staple in many households, it’s selected for its flavor and texture. Look for leaner versions to keep it healthier, and always store it properly in the refrigerator or freezer to maintain freshness. If you need substitutions, ground turkey or plant-based meat can offer a lighter or vegetarian option.

Beans
Beans add nourishment, particularly fiber and protein, making them an essential ingredient in many traditional diets. They have played a significant role in various cultures, providing sustenance and versatility. When selecting beans, opt for dry beans over canned for better texture and flavor, and remember to rinse them well before use. Storage should be in an airtight container, and they can be soaked overnight for easier cooking. Canned beans can also be a quick alternative, just be sure to adjust for added salt in recipes.

Common Mistakes to Avoid

  • Not browning the beef: Failing to brown the ground beef beforehand can result in a greasy texture; searing adds flavor.
  • Overcooking vegetables: Adding veggies too early can lead to mushiness; add them halfway through cooking for better texture.
  • Piling ingredients too high: Overfilling the crockpot might affect cooking time; follow capacity limits to ensure even cooking.
  • Ignoring seasoning: Under-seasoning neglects flavor development; always taste and adjust seasoning as it cooks.
  • Using low-quality ingredients: Fresh ingredients yield better flavor; avoid using expired or subpar produce.
  • Skipping the resting time: Allowing the soup to sit before serving enhances the flavors; a resting period is key.
  • Rushing the cooking process: Cooking on high can make ingredients tough; low and slow is the way to go for tenderness.
  • Not letting it cool before storing: Ensure the soup cools fully before refrigerating; this prevents bacterial growth.

Essential Techniques

Browning the meat is vital for flavor extraction. This technique builds a deep, savory taste that enhances the overall dish. Master it by cooking in batches if necessary to avoid steaming the beef. Watch for the browning color as a cue for when it’s ready.

Layering flavors is another critical aspect. Start with aromatics like onions and garlic before adding the rest of your ingredients. This technique builds a base flavor that brings complexity and depth to your soup.

Pro Tips for Perfect Crockpot Cowboy Soup

One essential tip is to customize the spice level according to your preference. Adding chili powder or cumin can deliver an extra kick.

Using fresh herbs can elevate the dish’s freshness, providing a contrast to the richness of the beef. Consider adding fresh cilantro just before serving for a burst of flavor.

Always check for seasoning adjustments before serving; taste your soup to see if it requires a pinch of salt or a splash of acidity.

Avoid overloading the crockpot, as it can lead to uneven cooking. Make sure all ingredients fit comfortably with enough liquid for smooth cooking.

Experimenting with different bean varieties can change the texture and taste. Swap out kidney beans for black or pinto beans to create your own twist.

Lastly, don’t forget to reserve some soup for reheating; the flavors deepen over time, making day-old soup a real treat.

Variations and Adaptations

Regional variations may include adding corn or sweet potatoes which provide a subtle sweetness and varying texture in the soup.

Seasonal adaptations can be made by introducing summer vegetables like zucchini or bell peppers in warmer months for extra freshness.

Dietary modifications are possible by using plant-based meat alternatives for a vegan option without sacrificing flavor.

Flavor variations can also be explored with different spices such as smoked paprika or oregano for an aromatic twist.

Texture modifications might incorporate additional grains like quinoa or barley, enhancing nutritional content while giving a chewy profile.

For presentation alternatives, serve the soup in unique bowls, garnished with freshly chopped parsley or avocado slices for visual appeal.

Serving and Presentation Guide

Plating techniques can significantly enhance the dining experience. Ladle the soup into individual bowls and top with a sprinkle of fresh herbs for a touch of color and freshness.

Garnishing ideas may include adding shredded cheese, a dollop of sour cream, or diced avocados on top, which can add richness and depth.

Traditional accompaniments often include crusty bread or cornbread, perfect for dipping and soaking up the flavors.

Modern serving suggestions can include creating a soup bar where guests can customize their toppings, making it interactive and fun.

Consider temperature; the best flavor comes from serving it hot. Use warm bowls if possible to keep the dish inviting.

Portion control tips suggest ladling out smaller servings to encourage seconds while preventing waste.

Wine and Beverage Pairing

When selecting a wine pairing, a bold red like a Zinfandel complements the robust flavors of the soup beautifully. The fruitiness balances the savory profile, making each sip enjoyable.

For non-alcoholic alternatives, a sparkling water with a squeeze of lime can refresh the palate and offer a contrast to the rich soup.

Coffee or tea can also beautifully accompany this dish; a rich dark roast coffee enhances the flavors while providing warmth.

Temperature considerations are key; serve beverages chilled or hot depending on the season and setting for optimal enjoyment.

Serving suggestions vary from having wine in elegant glasses to serving tea in casual mugs, tailored to your gathering’s style.

Storage and Shelf Life

Proper storage methods are crucial; store leftover soup in airtight containers to preserve flavor and prevent spoilage.

Maintaining temperature requires refrigerating within two hours of cooking, keeping it cool to ensure food safety.

Container recommendations include glass or BPA-free plastic, which can handle heat and are easy to clean afterward.

Signs of spoilage include off-smells or changes in texture; when in doubt, always err on the side of caution.

Reheating instructions suggest warming on the stovetop for even heating, ensuring the soup reaches the appropriate serving temperature.

Freezing guidelines encourage letting the soup cool completely before portions are frozen in individual servings.

Make Ahead Strategies

Prep timelines for Crockpot Cowboy Soup can include chopping vegetables the night before or browning beef ahead of time. This will save you time on cooking day.

During steps, ingredients can be stored separately to maintain freshness until you’re ready to combine them in the crockpot.

Quality impacts generally improve this recipe; preparing ahead helps flavors develop, making the final dish even tastier.

Assembly tips include layering beans and vegetables for even cooking; this will ensure each bite has a balanced flavor.

Reheating guidelines should focus on gentle reheating to prevent the soup from becoming overly thick or losing its flavor.

Consider adding fresh ingredients like herbs upon serving to keep the soup vibrant and lively.

Scaling Instructions

Halving the recipe is simple; just split the ingredients and adjust cooking time based on your crockpot’s size and strength.

If doubling or tripling, monitor cooking times, as larger quantities may need more time to cook evenly.

Equipment adjustments might be necessary for larger volumes, such as using a larger crockpot to accommodate the increase.

Timing modifications are essential to ensure that flavors meld properly while maintaining the integrity of each ingredient.

Storage considerations flexibly apply if you’re making large batches, allowing you to freeze portions safely for future meals.

Nutritional Deep Dive

Macro breakdown reveals a balance of proteins, fats, and carbohydrates that makes Crockpot Cowboy Soup a well-rounded meal option.

Micronutrient analysis indicates high values of essential vitamins and minerals, particularly from vegetables and beans, promoting overall health.

Health benefits abound, including supporting digestive health through the fiber content of beans and aiding in muscle recovery due to protein levels.

Dietary considerations encompass versatility; this recipe can cater to various dietary preferences while maintaining nutritional value.

Portion analysis should be mindful; understanding serving sizes can help with meal planning and weight management.

Weight management tips could involve controlling add-ons, making this soup as light or hearty as desired.

Dietary Adaptations

For gluten-free diets, ensure all ingredient labels are checked; all components can be made gluten-free without compromising flavor.

Dairy-free modifications can include utilizing coconut cream instead of sour cream or cheese to keep it creamy without dairy.

Vegan adaptations find a home with plant-based proteins such as lentils or textured vegetable protein, making the soup accessible to all.

Low-carb versions could swap beans for zucchini noodles or cauliflower, delivering a satisfying texture without extra carbs.

Keto adaptations maintain richness while reducing carbohydrates through alternative thickening agents like almond flour.

Paleo enthusiasts may embrace the soup using fresh vegetables and avoiding processed ingredients for a wholesome version.

Low-FODMAP adaptations might reduce beans and garlicky ingredients, ensuring the dish remains gentle on the digestive system.

Troubleshooting Guide

Texture issues can arise if ingredients were overcooked; ensure gentle timing management for perfect bite-sized pieces.

Flavor balance is essential; if too salty, add a splash of vinegar or a teaspoon of sugar to counteract it.

Temperature problems may occur if the cooking time is disrupted; always maintain even cooking temperatures by avoiding frequent lid lifting.

Equipment challenges often arise from crockpot variances; familiarize yourself with your specific model for optimal results.

Ingredient substitutions must always be adjusted carefully; too many changes might affect final flavor or texture.

Timing concerns can be avoided; prepare ingredients ahead, and keep an eye on cooking time to ensure everything melds well.

Recipe Success Stories

Community feedback often highlights how this recipe has become a family favorite across homes; many share stories of creating treasured memories around mealtime.

Variation successes can be noted in how people have experimented with unique spices or ingredient inclusions for personalized tastes.

Adaptation stories illustrate the recipe’s flexibility, with individuals tweaking it for dietary needs while still enjoying delicious results.

Reader suggestions often include favorite pairings or side dishes that elevate the dining experience alongside this robust soup.

Photography tips encourage capturing the vibrant colors and textures of the soup, making it visually appealing to share on social media platforms.

Frequently Asked Questions

1. Can I use frozen vegetables in this recipe?
Yes, frozen vegetables can be used; just note they may require less cooking time to avoid mushiness.

2. How long can I store leftovers in the fridge?
Leftovers can be stored in the refrigerator for about 3 to 4 days in an airtight container.

3. Can I cook this soup on high instead of low?
Yes, you can cook it on high for about 3 to 4 hours, but be cautious as it may affect the meat’s tenderness.

4. Can I add more beans or vegetables?
Absolutely! Feel free to customize by adding more beans or vegetables according to your preference.

5. What can I serve with this soup?
This soup pairs beautifully with cornbread, crackers, or a fresh green salad for a complete meal.

6. How do I prevent the soup from being too thick?
If the soup becomes too thick, simply add a bit of broth or water to reach your desired consistency before serving.

7. What is the best way to reheat the soup?
Reheat it gently on the stove over medium heat, stirring occasionally, or use a microwave safe dish.

8. Can I make this a vegetarian dish?
Yes! Substitute meat with plant-based proteins like beans or lentils for a tasty vegetarian adaptation.

9. How spicy can I make this soup?
Adjust the spice level by adding more or less chili powder, or introduce jalapeños for extra heat.

10. Can I freeze this soup?
Yes, this soup freezes well; just allow it to cool completely before transferring it to freezer-safe containers.

Additional Resources

For those interested in related recipes, consider trying other hearty dishes like chili or vegetable stews that offer similar comfort.

Technique guides on chopping vegetables or browning meat can enhance your skills and improve the quality of your dishes.

Ingredient information focusing on beans or corn can deepen your understanding of nutritious options for future meals.

Equipment recommendations can help you choose the right slow cooker or kitchen tools to enhance your cooking experience.

Seasonal variations can inspire you to adapt this recipe with fresh ingredients throughout the year, ensuring every batch is delightful.

Join the Conversation

Sharing your experience on social media can inspire friends and family to try this comforting recipe, encouraging more home cooks to give it a go.

Photography tips for this recipe highlight the vibrant colors and textures, making sharing your culinary achievements a pleasure.

Engage in recipe reviews by commenting on variations or serving suggestions; your insights can help others tailor the soup to their liking.

Community engagement can foster connections as individuals share their adaptation experiences, fostering a shared love for cooking.

Create a dialogue around the recipe by inviting others to share their experiences, reviewing your favorite versions and how they’ve modified the dish.

The Recipe

Crockpot Cowboy Soup

Serves: 6 servings

Prep Time: 15 mins

Cook Time: 6 hours

Total Time: 6 hours 15 mins

Kitchen Equipment Needed

  • Crockpot or Slow Cooker
  • Cutting board
  • Knife
  • Measuring cups and spoons
  • Mixing spoon

Ingredients

  • 1 lb ground beef
  • 1 can (15 oz) black beans, drained and rinsed
  • 1 can (15 oz) kidney beans, drained and rinsed
  • 1 can (15 oz) corn, drained
  • 1 can (14.5 oz) diced tomatoes, undrained
  • 1/2 cup chopped onion
  • 1/2 cup chopped bell pepper
  • 2 cloves garlic, minced
  • 2 cups beef or vegetable broth
  • 2 tsp chili powder
  • 1 tsp cumin
  • Salt and black pepper to taste

Directions

  1. In a skillet, brown the ground beef over medium heat until it’s fully cooked.
  2. Transfer the cooked beef to a crockpot, along with all other ingredients.
  3. Stir well to combine all ingredients.
  4. Set the crockpot to low and cook for 6 hours, or until the soup is heated through and flavors are melded.
  5. Before serving, taste and adjust seasoning as needed.
  6. Optional: Top with shredded cheese, sour cream, or fresh herbs before serving.

Recipe Notes

  • Feel free to customize the beans based on your preferences.
  • This soup can be made ahead and frozen for later use.
  • Adjust the spice level with additional chili powder as desired.

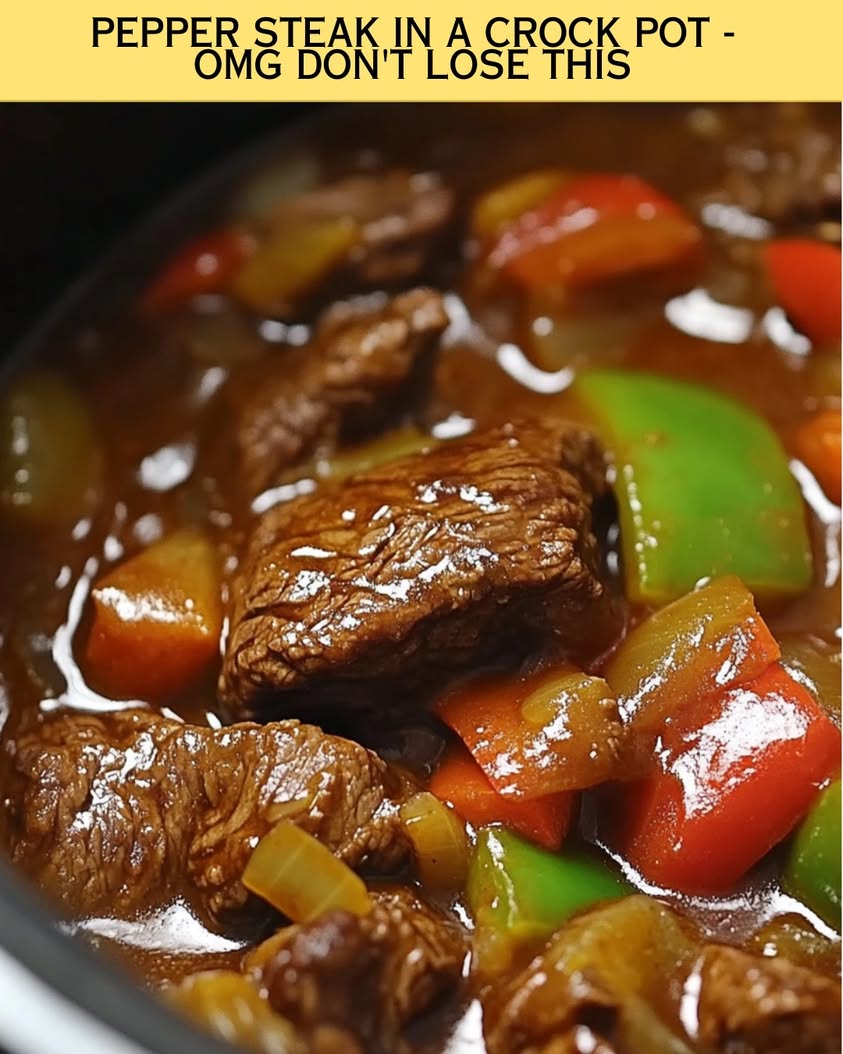
Delicious Crock Pot Pepper Steak for Easy Weeknight Dinners

Crock Pot Pepper Steak: A Flavorful and Easy Dinner Option

⚖️
Difficulty
Easy

⏲️
Prep Time
20 mins

🕒
Cook Time
6 hours

⏱️
Total Time
6 hours 20 mins

🍽️
Servings
4 servings

Crock Pot Pepper Steak is a delightful dish that encapsulates the essence of comfort food with its vibrant flavors and tender texture. Made with juicy slices of beef and colorful bell peppers, this slow-cooked meal delivers an explosion of savory goodness in every bite. The combination of soy sauce, garlic, and ginger adds an aromatic depth that will warm your heart and satisfy your cravings. The ease of preparation makes this recipe perfect for any busy weeknight, allowing you to enjoy a homemade meal without spending hours in the kitchen.

Imagine coming home after a long day to the enticing aroma of Crock Pot Pepper Steak wafting through your home. It’s not just a meal; it’s an experience that invites your family to the dinner table with anticipation. The beautiful interplay of textures from the tender beef and the crisp peppers captivates the palate, while the glossy sauce glistens invitingly. Serve it over a bed of fluffy rice or alongside a fresh salad for a complete culinary experience that pleases both the eye and the taste buds.

Quick Recipe Highlights

  • Flavor Profile: A harmonious blend of savory, sweet, and umami notes that brings the best of Asian-inspired cuisine right to your home.
  • Texture: Tender beef complemented by the crunch of bell peppers creates a satisfying mouthfeel that is both hearty and light.
  • Aroma: The rich scent of garlic and ginger combined with the soy sauce creates an irresistible invitation to dinner.
  • Visual Appeal: The colorful contrast of red, green, and yellow bell peppers against the dark beef creates an eye-catching dish perfect for serving.
  • Skill Level Needed: This recipe requires basic chopping and sautéing skills, making it accessible to beginner cooks.
  • Special Equipment: A reliable crock pot or slow cooker is essential for achieving the perfect tenderness in this dish.

Recipe Overview

  • Difficulty Level: With a straightforward process and minimal hands-on time, this easy recipe is perfect for cooks of any level.
  • Category: Ideal for weeknight dinners, this dish falls under comfort food cuisine, perfect for family meals.
  • Cuisine: Influenced by Chinese cooking, this recipe features essential ingredients like soy sauce and bell peppers, grounding it in Asian culinary traditions.
  • Cost: With affordable ingredients like beef, peppers, and spices, this recipe is budget-friendly for families who love hearty meals.
  • Season: Enjoy this dish in any season, though it’s particularly comforting during colder months when you seek warmth and flavor.
  • Occasion: Great for casual family dinners or meal prepping for the week, this dish is versatile for any casual occasion.

Why You’ll Love This Recipe

The taste and texture appeal of Crock Pot Pepper Steak is undeniable. The tender beef, marinated in a savory mixture, pairs beautifully with the sweetness of fresh bell peppers. Each element melds to create a dish that is both comforting and satisfying, ensuring that each bite delivers a balance of flavors that will keep you coming back for more.

Convenience is a significant benefit of this recipe; it requires minimal prep time and allows for a hassle-free cooking process. Simply toss the ingredients into the crock pot in the morning and let it work its magic while you’re away. When you return home, dinner is ready, allowing you to spend more time with family and less time in the kitchen.

From a nutritional perspective, this dish is packed with protein, vitamins, and minerals, especially from the colorful bell peppers. It’s an excellent way to sneak in some extra vegetables into your diet while enjoying a satisfying meal. The use of lean beef also offers health benefits without compromising flavor.

Socially, Crock Pot Pepper Steak is perfect for gatherings or family dinners, as its generous servings make it a fantastic option for sharing. It’s a dish that encourages conversation and comfort, creating a warm and inviting atmosphere at your dinner table—ideal for friends, family, or even meal prepping for yourself.

Finally, the cost-effectiveness and accessibility of this recipe cannot be overlooked. Most ingredients are readily available at your local grocery store and can be easily substituted if needed. It’s a go-to dish for anyone looking for a delicious and budget-friendly meal.

Historical Background and Cultural Significance

The origin of Pepper Steak can be traced back to Asian cuisines where the emphasis on stir-frying and quick cooking methods allows for vibrant flavors and fresh ingredients. This particular crock pot variation has become a beloved way to enjoy the dish with minimal effort. The method of slow cooking allows the beef to become incredibly tender, making it a popular choice among busy families.

Culturally, dishes like Crock Pot Pepper Steak represent a fusion of cooking styles, merging traditional Asian flavors with Western cooking techniques. This dish embodies the adaptability of recipes as they travel across regions and cultures, adjusting to incorporate local ingredients and preferences.

Over the years, the recipe itself has evolved. Initially, beef was simply sautéed with vegetables; today, the introduction of slow cooking has made it feasible for anyone to recreate this restaurant-style dish right at home. The addition of new ingredients and spices reflects the ongoing evolution of family recipes.

Regional variations of Pepper Steak exist, showcasing local ingredients and personal tastes. From the spices used in different cultures to the variations of vegetables, each adaptation brings something unique to the table, making the dish even more versatile and loved.

Ingredient Deep Dive

Beef: Beef is a staple protein in many cuisines and is rich in iron and protein, essential for maintaining energy levels and muscle strength. When selecting beef for this recipe, look for cuts such as flank or sirloin, which are lean yet flavorful. Store raw beef in the refrigerator and utilize it within a few days or freeze it for longer storage. For substitutions, consider using chicken or tofu for a different protein base.

Bell Peppers: Bell peppers not only enhance the flavor of this dish but also add a colorful pop that makes the presentation appealing. They are rich in vitamins A and C, providing nutritional benefits and antioxidants. When choosing peppers, opt for firm, shiny ones with vibrant colors. Store them in the refrigerator crisper drawer to maintain freshness. If needed, you can substitute with other vegetables like zucchini or broccoli.

Common Mistakes to Avoid

  • Overcooking the beef can lead to a tough texture, so set your crock pot to the recommended time and check doneness periodically.
  • Not browning the beef before adding it to the crock pot can result in a lack of depth of flavor, as the Maillard reaction adds richness.
  • Using low-quality soy sauce can negatively affect the dish’s flavor, so always choose a good quality brand for the best results.
  • Skipping the aromatics like garlic and ginger will diminish the dish’s complexity; they are key to achieving true flavor.
  • Filling the crock pot too high can lead to uneven cooking; ensure there’s enough space for the ingredients to simmer properly.
  • Neglecting to pick the right cut of beef can lead to a less tender result; choose cuts that are known for slow cooking, like chuck or flank.
  • Not allowing enough time for the flavors to meld can leave the dish bland; let it cook as long as needed for optimal flavor.
  • Failing to taste and adjust the seasoning before serving can result in an unbalanced dish; always check before plating!

Essential Techniques

Browning Meat: Browning meat before cooking is important for locking in flavor and creating a rich color. To master this technique, use a hot skillet, ensuring not to overcrowd the pan. Common pitfalls include not letting the meat rest after cooking, which can release moisture. Look for a browned exterior as a visual cue for success.

Layering Flavors: Layering flavors through the addition of ingredients at different stages is crucial. Start with aromatics, followed by the main protein, and then add vegetables later in the cooking process to maintain their structure. Avoiding rushing this step will enhance depth, with signs of success being a fragrant aromatic base.

Pro Tips for Perfect Crock Pot Pepper Steak

1. For an extra kick, add a dash of red pepper flakes or sriracha to the sauce mixture for additional heat.
2. Consider marinating the beef in garlic and soy sauce overnight for even richer flavors.
3. Select the freshest bell peppers, as they contribute both to the flavor and the stunning presentation of your dish.
4. Don’t skip the step of sautéing garlic and ginger before adding the mixture to the crock pot—this boosts the dish’s aromatic profile significantly.
5. If you have time, sauté the onions before placing them in the slow cooker for enhanced flavor.
6. Serve the pepper steak over steamed rice or noodles to absorb the flavorful sauce effortlessly.
7. Reserve some of the cooking liquid to drizzle over the dish when serving for added moisture and flavor.
8. Experiment with different vegetables such as snap peas or carrots for added crunch and nutritional value.

Variations and Adaptations

Crock Pot Pepper Steak can be tailored to fit various regional preferences. Consider adding local spices or ingredients that reflect your culture, such as incorporating cajun spices for a southern twist.

For seasonal adaptations, feel free to switch up the vegetables based on what’s in season, using asparagus in spring or sweet potatoes in the fall.

For dietary modifications, implementing tofu or tempeh instead of beef can easily transform this dish into a vegetarian or vegan option, while still retaining the protein content.

Flavor variations can include experimenting with different sauces such as teriyaki or oyster sauce to change the overall taste profile.

To modify textures, try adding baby corn or snow peas towards the end of cooking to maintain their crunch even after slow cooking.

Lastly, presentation alternatives could involve serving the dish in individual bowls garnished with fresh herbs or sesame seeds for added elegance.

Serving and Presentation Guide

To ensure a stunning presentation of your Crock Pot Pepper Steak, consider your plating techniques. Use a large shallow bowl to create a beautiful base for the dish.

Garnishing with freshly chopped scallions or cilantro can add a burst of color and freshness that complements the dish nicely.

Traditional accompaniments include fluffy white rice, which is perfect for soaking up the delicious sauce, or crispy egg rolls for an appetizer.

Modern serving suggestions could involve presenting the pepper steak in tacos with fresh veggies and a drizzle of creamy sauce for a fun twist.

Be mindful of temperature considerations; serve the dish hot for the best dining experience to enhance the flavors and textures.

Finally, keep portion control tips in mind; aim for about one cup of the dish per serving, balancing it with a side of veggies or salad for a wholesome meal.

Wine and Beverage Pairing

For wine pairings, a medium-bodied red such as Merlot or a light Pinot Noir works beautifully with the richness of the beef and the savory elements of the dish.

If you prefer non-alcoholic alternatives, try pairing with unsweetened iced tea, which can complement the dish without overpowering it.

Coffee or tea can also be delightful if you’re considering a lighter drink. A cup of green tea, enjoyed hot, can provide a refreshing contrast to the hearty meal.

Temperature considerations are essential when serving beverages too; ensure any wines served are at the recommended temperatures for optimal enjoyment.

Serving suggestions can vary—try including a light fruit garnish to freshen the palate between bites of the savory pepper steak.

Storage and Shelf Life

To properly store leftover Crock Pot Pepper Steak, allow it to cool to room temperature before transferring it to an airtight container.

Keep the dish refrigerated and consume within 3-4 days to ensure optimal flavor and quality. Be sure to heat it thoroughly before serving again.

For longer storage, consider freezing the dish in well-sealed freezer bags, extracting as much air as possible to prevent freezer burn. Properly stored, it can last up to 3 months in the freezer.

Signs of spoilage to look for include off odors, discoloration, or an unusual texture. When reheating, ensure it reaches an internal temperature of 165°F for safe consumption.

Freezing guidelines indicate that while the dish can be frozen, fresh vegetables might lose their texture during the thawing process, so consider adding them when reheating.

Make Ahead Strategies

To maximize your time, consider a prep timeline whereby you slice the beef and chop the vegetables the night before. Store them in separate containers in the refrigerator.

Storage between steps can be done by keeping the marinade and vegetables accessible for quick assembly in the morning.

Evaluating the quality impact is essential; while meat can marinate overnight, adding vegetables right before slow cooking helps maintain their freshness.

Assembly tips might include pre-measuring sauces and spices, ensuring a smooth cooking process when you’re ready to prepare.

When reheating, you can add fresh herbs or a splash of soy sauce to rejuvenate flavors and freshness that may have faded during storage.

Before serving, consider adding a fresh element, like cooked jasmine rice, to accompany the dish for a fully assembled meal.

Scaling Instructions

When halving the recipe, remember that cooking times may reduce slightly, so monitor the beef closely for accuracy.

Doubling or tripling the ingredients is straightforward; however, ensure your crock pot has sufficient capacity to accommodate the larger batch.

Equipment adjustments might be necessary, as larger amounts may require longer cooking times, especially with denser cuts of meat.

Timing modifications should reflect larger portions; plan to increase cooking time by about one hour for doubled portions to achieve tenderness.

For storage considerations, consider splitting the dish into smaller containers after cooking, making it easier to thaw and reheat portions later.

Nutritional Deep Dive

A macro breakdown of Crock Pot Pepper Steak includes a healthy balance of protein derived from beef, carbohydrates from rice, and vitamins from vegetables.

Micronutrient analysis reveals that this dish offers significant amounts of vitamins A and C from bell peppers, alongside iron from beef, enhancing overall dietary intake.

Health benefits of this recipe prominently feature the protein and vitamins necessary for maintaining energy levels and supporting bodily functions.

Dietary considerations showing that this dish is rich in iron are particularly beneficial for individuals needing an energy boost or recovering from illness.

Portion analysis can aid in weight management; considering a moderate serving of about one cup ensures a balanced meal while managing caloric intake.

Dietary Adaptations

For a gluten-free version of Crock Pot Pepper Steak, ensure to use gluten-free soy sauce or tamari while substituting traditional soy sauce.

Dairy-free adaptations can easily be made by keeping all components within the original recipe, as it naturally does not contain dairy ingredients.

For a vegan take, replace beef with seitan or king oyster mushrooms for a protein-rich alternative that captures the dish’s essence.

A low-carb option could involve substituting traditional rice with cauliflower rice, allowing for a satisfying yet lower-carb meal.

Keto dieters may enjoy the original flavors while focusing on lean cut selections and ample vegetables without added sugars.

The paleo diet can be accommodated by ensuring all ingredients are whole and minimally processed, whilst avoiding soy sauce in favor of coconut aminos.

Low-FODMAP adjustments are simple; omit high-FODMAP ingredients like onions and garlic, substituting with suitable alternatives for flavor.

Troubleshooting Guide

If you encounter texture issues with the beef, ensure that your crock pot is maintained at a consistent temperature; low heat promotes tenderness.

Flavor balance inquiries may arise; adjust seasonings during cooking and tasting before serving, allowing for more soy sauce or spices if necessary.

Temperature problems typically present in undercooked meat, necessitating additional cooking time while monitoring doneness closely.

Equipment challenges can occur if your slow cooker lacks appropriate settings. Familiarize yourself with its functions to aid in achieving perfect results.

Ingredient substitutions might require you to add additional seasonings; no soy sauce necessitates compensating with alternative flavor enhancers to ensure depth.

Lastly, timing concerns can impact the finished product; always plan ahead to allow for plenty of cooking time to achieve the best textures and flavors.

Recipe Success Stories

Community feedback showcases the widespread admiration for this crock pot recipe, with many praising its ability to deliver restaurant-quality flavor at home.

Variation successes have been shared widely, with families experimenting with diverse vegetables and sauces to customize the dish to their liking.

Adaptation stories frequently highlight how busy parents managed to incorporate this meal into their weekly menus, ensuring flavor and nutrition.

Readers’ suggestions have included creative serving ideas, with some even serving pepper steak in tacos or wraps for a fun twist on leftovers.

Photography tips often revolve around capturing the dish’s vibrant colors and textures, inspiring others to recreate the recipe and share their outcomes.

Frequently Asked Questions

Can I use frozen beef for this recipe?

Yes, you can use frozen beef. However, it’s recommended to thaw it before cooking for even seasoning and tenderness. If using frozen, increase the cooking time to ensure it’s fully cooked.

What type of beef is best for Pepper Steak?

Flank steak or sirloin are excellent choices because they are tender and flavorful. Choose cuts that benefit from slow cooking for the best texture.

Can I make this dish spicy?

Absolutely! Adding crushed red pepper flakes, sriracha, or even diced jalapeños can heighten the heat of the dish according to your preference.

How do I store leftovers?

Store leftovers in an airtight container in the refrigerator for 3-4 days. Ensure to cool it to room temperature before sealing.

Can I add other vegetables?

Yes! Adapt the recipe by adding vegetables like zucchini, baby corn, or snow peas for variety and nutrition. Just add hard vegetables earlier to cook through.

Is this recipe freezer-friendly?

Yes, it stores well in the freezer. Place in freezer-safe bags and consume within 3 months for best quality. Thaw in the fridge before reheating.

Can I double this recipe?

Certainly! Just ensure your crock pot has enough capacity to handle a larger batch. You may need to extend cooking time slightly.

Should I add sugar to balance saltiness?

Adjusting sweetness is a personal preference. If it’s too salty, try adding a pinch of sugar or honey to balance the flavors without overpowering.

Does this recipe have to be made in a crock pot?

While a crock pot is ideal for flavor enhancement, you can also use a Dutch oven on low heat to achieve similar results.

Can I make pepper steak ahead of time?

Making it ahead is possible; prepare it the day before and reheat thoroughly before serving to allow flavors to meld beautifully.

What should I serve with Pepper Steak?

Serve over rice, noodles, or with a fresh salad. It also pairs well with vegetables like asparagus or green beans for a complete meal.

Additional Resources

For more delicious recipes similar to Crock Pot Pepper Steak, explore our collection of slow cooker meals, where we highlight easy preparations that save time and deliver flavor. Dive into technique guides for mastering Chinese cooking essentials like stir-frying or marinading, and discover ingredient information for achieving the best results with seasonal produce. We recommend investing in kitchen equipment that facilitates cooking, such as high-quality knives and sturdy crock pots.

Join the Conversation

We would love to hear your thoughts on Crock Pot Pepper Steak! Share your experiences and any photography tips you have found helpful for capturing your culinary creations. Please engage with the community by leaving a review and sharing your variations of the recipe. Your feedback and participation enrich our cooking community and inspire others to unleash their culinary creativity.

The Recipe

Crock Pot Pepper Steak

Serves: 4 servings

Prep Time: 20 mins

Cook Time: 6 hours

Total Time: 6 hours 20 mins

Kitchen Equipment Needed

  • Crock Pot or Slow Cooker
  • Cutting Board
  • Sharp Knife
  • Measuring Cups and Spoons
  • Large Mixing Bowl

Ingredients

  • 1.5 lbs beef flank steak, sliced thinly
  • 2 bell peppers (red and green), sliced
  • 1 onion, sliced
  • 3 cloves garlic, minced
  • 2 tablespoons ginger, minced
  • 1/4 cup soy sauce
  • 2 tablespoons brown sugar
  • 1 tablespoon cornstarch
  • 1/4 cup water
  • Salt and pepper to taste

Directions

  1. In a large bowl, combine sliced beef, soy sauce, brown sugar, and ginger. Allow to marinate for at least 15 minutes.
  2. Transfer the marinated beef to the crock pot along with the sliced onions and bell peppers.
  3. In a separate bowl, mix cornstarch and water, then pour over the beef and vegetable mixture.
  4. Season with salt and pepper. Stir gently to combine.
  5. Cover and cook on low for 6 hours or high for 3 hours, until the beef is tender.
  6. Serve hot over rice or noodles and enjoy!

Recipe Notes

  • Feel free to add other vegetables like snap peas or carrots for extra texture and flavor.
  • For a gluten-free version, use tamari instead of soy sauce.
  • Adjust cooking times accordingly if using different cuts of beef.

Best Smothered Honey Lime Chicken Burritos – Family Favorite

Smothered Honey Lime Chicken Burritos – Easy & Irresistible!

⚖️
Difficulty
Easy

⏲️
Prep Time
10 mins

🕒
Cook Time
30 mins

⏱️
Total Time
40 mins

🍽️
Servings
6 servings

Welcome to flavor town with our Smothered Honey Lime Chicken Burritos! This recipe is perfect for weeknight dinners or family gatherings, combining sweet and tangy flavors with a satisfying, hearty filling. Imagine tender shredded chicken bathed in a luscious honey-lime marinade, mixed with fluffy rice and hearty black beans, all wrapped snugly in a warm tortilla. Topped with zesty salsa verde and melted cheese, this dish is a hit for both kids and adults alike. Prepare your taste buds for a burst of deliciousness that is easy to make and even easier to slay at the dinner table!

With just a handful of ingredients and simple steps, you’ll have these versatile burritos on your table in no time. The combination of honey and lime creates a mouthwatering, sweet tang that brings an explosion of flavor to every bite. Plus, these burritos are perfect for meal prep, so you can enjoy the delightful taste throughout the week. Let’s dive into this irresistible recipe that promises a memorable culinary experience!

Quick Recipe Highlights

  • Flavor Profile: Enjoy the sweet notes of honey perfectly balanced by the zing of fresh lime, complemented by the warmth of spices.
  • Texture: Each bite offers a delightful combination of creamy, cheesy goodness with tender chicken and soft burrito wraps.
  • Aroma: The fragrant aromas of garlic and lime will waft through your kitchen, leaving everyone eager to dig in.
  • Visual Appeal: The vibrant green salsa verde contrasts beautifully with the golden, melted cheese, creating an eye-catching presentation.
  • Skill Level Needed: This recipe is ideal for both novice cooks and seasoned chefs, as its steps are straightforward and forgiving.
  • Special Equipment: All you need is a skillet and a baking dish to create this delicious meal without any fancy gadgets.

Recipe Overview

  • Difficulty Level: Easy, making it accessible for beginner cooks or those looking for a quick weeknight meal.
  • Category: Main Course, perfect for lunch or dinner, satisfying for anyone at the table.
  • Cuisine: Inspired by Mexican flavors, this recipe uses traditional ingredients like tortillas, beans, and spices.
  • Cost: Budget-friendly, as most ingredients are pantry staples that won’t break the bank.
  • Season: Great year-round, but especially enjoyable during warm weather months when fresh limes are at their peak.
  • Occasion: Excellent for family dinners, picnics, or gathering friends for a fun taco night!

Why You’ll Love This Recipe

The flavors of the Smothered Honey Lime Chicken Burritos are simply irresistible. The chicken marinated in a sweet honey-lime blend lends a delicious contrast to the savory notes of the shredded Monterey Jack cheese, while the addition of black beans enriches the filling with fiber and protein. Each burrito is a delightful experience, combining sweet and savory elements in a harmonious blend.

Convenience is key! This recipe allows for easy prep with minimal fuss. You can marinate the chicken ahead of time, making it perfect for busy days when you want dinner on the table quickly. Additionally, the leftovers (if there are any!) are just as enjoyable the next day, making these burritos ideal for meal prep or lunch-box favorites for the kids.

Nutritionally, these burritos pack a punch with lean protein from the chicken, fiber from black beans, and energy from satisfying carbohydrates in rice and tortillas. They also include essential vitamins from lime juice and herbs, keeping you nourished without sacrificing flavor. Plus, with a garnish of cilantro, you’ll add a fresh touch that’s loaded with nutrients.

They’re perfect for social gatherings, too! These burritos make great finger foods that can kick off a casual dinner party or be served as the main event. Guests can customize their toppings, making each burrito truly their own. Plus, the vibrant colors and enticing scents will make them the star of the meal!

Cost-effectiveness is also a plus. With a few affordable ingredients, you can feed a crowd, stretching your dollar further without sacrificing taste. You’ll find that everyone will be back for seconds, ensuring that your efforts create a satisfying, hearty meal without breaking the bank.

Historical Background and Cultural Significance

Burritos have a storied history rooted in Mexican cuisine, where they originally served as a convenient way for farmers and laborers to transport meals wrapped tightly in tortillas. The term “burrito,” meaning “little donkey” in Spanish, reflects their portable nature. Over the centuries, burritos have evolved, becoming popular in the United States and adapting to local tastes and preferences.

The Mexican culinary tradition heavily influences the flavor profiles of burritos, incorporating various ingredients such as meats, beans, rice, and spices. This has paved the way for numerous regional variations across Mexico, each bringing its characteristics based on locality. Our Smothered Honey Lime Chicken Burritos are a delicious fusion, showcasing the balance of sweet and savory essential to modern Mexican-American cuisine.

As burritos have become a staple in American food culture, they also showcase the adaptability of Mexican cuisine. This recipe incorporates ingredients like honey and lime, blending traditional Mexican roots with contemporary flavors, demonstrating how dishes can evolve while preserving their heritage. The use of readily available ingredients creates accessibility, making this beloved dish a nationwide favorite.

Additionally, the significant role of burritos in social gatherings cannot be understated. They are often associated with celebrations, family meals, and communal dining experiences, making them not just a food item but a way to bring people together over good times and delicious eats.

Ingredient Deep Dive

Chicken Breasts

Chicken breasts are a versatile protein choice and a staple in many households. They are low in fat yet high in protein, making them ideal for health-conscious diets. When selecting chicken for this recipe, look for fresh, organic options when possible for the best flavor and quality. Storage is straightforward; keep them in the refrigerator for up to 1-2 days or freeze for longer preservation. If you need substitutions, turkey breast can serve as an excellent alternative while providing similar taste and texture.

Rich in nutrients, chicken breasts provide essential vitamins such as B6 and B3, which contribute to metabolism and energy levels. They also aid in muscle maintenance and repair, emphasizing the nutritional advantage of incorporating lean meats into your diet. Whether you’re grilling, baking, or shredding, chicken remains a go-to ingredient for many delicious meals.

Honey

Honey has a long historical significance, often used as a natural sweetener and medicinal remedy across cultures. In this recipe, honey not only adds sweetness but also helps to create a sticky coating that enhances the burrito’s flavor. When selecting honey, opt for raw varieties for the most health benefits; they contain essential antioxidants and nutrients. Store honey at room temperature in an airtight container—its long shelf life means it’s a kitchen staple.

From a nutritional perspective, honey is known for its anti-inflammatory and antioxidant properties, making it an advantageous addition to your diet. While flavor is key, it’s important to be mindful of moderation due to its sugar content. You can substitute honey with agave nectar or maple syrup for different flavor profiles while maintaining a similar consistency.

Lime Juice

Lime juice is a key ingredient that infuses brightness into your dishes. Rich in vitamin C, lime juice not only enhances flavor but also acts as a natural preservative to keep ingredients fresh longer. When selecting limes, opt for firm fruit that feels heavy for its size; find ones that are brightly colored and free from blemishes. Fresh lime juice is preferred for its vibrant flavor, although bottled options work in a pinch.

Consuming lime juice has various health benefits, including improved digestion and enhanced skin health due to its vitamin C content. As a natural detoxifier, lime juice can help your body eliminate toxins. Lime also pairs well with other flavors, making it versatile in various cuisines beyond Mexican, including Thai and Indian dishes.

Monterey Jack Cheese

This creamy cheese adds the perfect amount of richness to these burritos. Originating from California, Monterey Jack is mild and melts beautifully, making it a popular choice for quesadillas and burritos. When selecting cheese, opt for blocks over pre-shredded varieties, as this guarantees fresher flavor and avoids added anti-caking agents. Store cheese in the refrigerator and let it breathe by wrapping it in wax paper before placing it in a plastic bag for longer freshness.

Rich in calcium, Monterey Jack supports bone health and provides a hearty serving of protein, beneficial for muscle maintenance. If you wish to experiment, consider substituting it with pepper jack for a spicy twist or a vegan cheese option as a dairy alternative while still achieving a creamy texture.

Flour tortillas

Flour tortillas serve as the foundation for these burritos and come in various sizes, offering versatility for different fillings. When choosing tortillas, go for those made without preservatives to ensure a fresh and authentic taste. Store them in an airtight bag to maintain their softness, and they can be refrigerated for extended freshness.

From a nutritional perspective, flour tortillas provide energy-boosting carbohydrates, essential for a balanced diet. Whole wheat tortillas can be an excellent alternative for those seeking a healthier option, loaded with fiber and nutrients. Tortillas also pair wonderfully with various fillings, showing their versatility in meal preparation.

Common Mistakes to Avoid

  • Over-marinating Chicken: While marinating is crucial for flavor, leaving chicken too long can result in a mushy texture. Aim for 1-12 hours for optimal results.
  • Skipping the Resting Step: After cooking, let the chicken rest before shredding to keep it juicy; cutting it right away can cause moisture loss.
  • Not Using Enough Seasoning: Don’t be shy with spices! Ensure all ingredients are well-seasoned for a robust flavor profile.
  • Filling Tortillas Too Full: Overstuffing leads to messy burritos. Stick to a manageable portion for rolling without bursting.
  • Not Sealing the Burritos: Failing to tuck in the edges can result in filling spilling out during cooking. Roll them tightly for a secure shape.
  • Poorly Preheating the Oven: Always preheat your oven for even cooking and to achieve that desired bubbly cheese topping.
  • Using Cold Tortillas: Warm tortillas before filling to make them pliable and easier to roll without tearing.
  • Inadequate Coverage of Sauce: Make sure to thoroughly coat the burritos with salsa verde to ensure every bite is flavorful.
  • Ignoring Ingredient Quality: Better quality ingredients lead to a more flavorful dish. Invest in good quality chicken, cheese, and fresh produce for best results.
  • Rushing the Cooking Process: Patience is key! Taking your time allows flavors to develop and ensures well-cooked chicken.

Essential Techniques

Marinating Chicken

Marinating is a vital step in infusing your protein with flavor. The acidity from lime juice breaks down proteins, tenderizing the chicken and allowing spices to penetrate deeply. Use a sealable plastic bag for an even coat; mix the marinade well before adding the chicken. Allow it to rest in the refrigerator for at least an hour, but aim for a night for maximum flavor. Look for a change in color and aroma to confirm successful marination.

Shredding Chicken

Shredding the chicken allows for even distribution throughout the burritos. After resting, use two forks to pull apart the meat; shredding works best with warm chicken. Aim for bite-sized pieces to ensure every mouthful is flavorful. Keep an eye on the texture; if it doesn’t shred effectively, it may have been undercooked and need more time to cool before shredding.

Rolling Burritos

Rolling burritos tightly is essential for a neat and delicious presentation. Lay your tortilla flat, add the filling in the center, then fold in the sides while rolling away from you. Pull the filling back slightly as you roll to keep it tightly packed. Look for a snug fit, but don’t overstuff. Practice makes perfect, and soon you’ll be a burrito-rolling pro!

Assembling and Baking

When assembling, layer your ingredients thoughtfully. Start with filling, then salsa, and finish with cheese so it melts perfectly while baking. Place them seam-side down in a greased baking dish to maintain shape during cooking. Look for a bubbly, golden cheese topping as an indicator of doneness once baked. Proper assembly enhances both visual appeal and taste.

Keeping Ingredients at Room Temperature

To achieve harmonious flavor and texture, ensure all fillings are at room temperature before assembly. Cold fillings can negatively affect the warm baked burritos. Allow cheese, beans, and rice to stabilize before use; this creates a delightful contrast when combined with the warm tortillas. Plan your prep so all components are ready to go simultaneously.

Proper Cheese Melting Techniques

To achieve perfectly melted cheese, add it at the end of the baking process. Broiling at the end for a minute can help achieve a bubbly, slightly browned top; watch closely to avoid burning! Providing a layer of cheese on both the filling and the top enhances the burrito’s flavors and texture, creating a cohesive dish. Look for that irresistible gooeyness as your cue for success!

Pro Tips for Perfect Smothered Honey Lime Chicken Burritos

1. Use high-quality chicken for maximum flavor and texture. Organic options usually taste better and yield a superior dish.

2. Experiment with different types of tortillas (flour, whole-grain, corn) for varied flavors and nutritional benefits.

3. Add a squeeze of fresh lime over the top when serving for an extra zing that enhances flavor.

4. Prepare an avocado or guacamole side for creaminess that complements the burrito beautifully.

5. For added heat, consider adding diced jalapeños to the filling or top with sliced pickled jalapeños.

6. Incorporate seasonal vegetables like bell peppers or corn into the filling for added sweetness and nutrition.

7. Make a double batch of the marinades; it works marvelous for other proteins, keeping your meal prep seamless.

8. Top your finished burritos with fresh cilantro or diced green onions for a fresh finish.

Variations and Adaptations

Regional variations of burritos are abundant and offer exciting ways to customize this recipe. Try adding regional staples like chorizo or carne asada to give it a traditional twist. Seasonal adaptations can include roasted fall vegetables like squash or zucchini during the harvest months, creating a lovely contrast of flavors.

Dietary modifications include substituting low-carb tortillas for a keto-friendly version or using brown rice to increase fiber. For a vegan adaptation, replace chicken with jackfruit or chickpeas, keep the marinade, and use plant-based cheese options. The flavor variations can be endless—add the spice of chipotle or the sweetness of mango salsa for a tropical twist.

Presentation alternatives can turn heads; consider preparing mini-burritos as appetizers or using a crispy tortilla bowl as the base to serve these flavors in a fun and modern way. No matter the variations you choose, the essence of flavor remains the same, providing endless adaptations that please any palate.

Serving and Presentation Guide

When it comes to serving Smothered Honey Lime Chicken Burritos, presentation is key. Stack your burritos attractively on a platter, drizzling warm salsa verde atop each one. For garnish, sprinkle freshly chopped cilantro or slices of lime around the plate for a pop of color. For individual servings, consider plating each burrito on a colorful plate, accompanying it with a side of sour cream and fresh salsa for added flavor.

Traditional accompaniments include Mexican rice and a fresh, zesty salad, providing a refreshing balance to the hearty burritos. Modern serving suggestions include garnishes of avocado or guacamole, which enrich features while providing healthy fats. Temperature is crucial; serve burritos hot out of the oven for the best melted cheese experience.

Portion control is another element to consider. Slice each burrito in half diagonally to reveal the colorful filling and offer smaller portions for sharing starters. When planning for parties, complete your table with garnishes and small plates for guests to personalize their meals.

Wine and Beverage Pairing

When it comes to wine pairings, a chilled Sauvignon Blanc is a fantastic option, complimenting the sweetness of the honey and acidity of lime beautifully. Alternatively, a sparkling wine can elevate the experience, creating a refreshing contrast with the richness of the cheese. For something bolder, consider a light-bodied red, like Pinot Noir, which can balance the soft flavors.

If you’re looking for non-alcoholic alternatives, consider pairing with a fresh limeade or a pineapple soda that echoes the recipe’s sweetness and zest. On the side, herbal teas serve a sophisticated touch, with mint or hibiscus offering a refreshing contrast. Always consider serving beverages chilled, allowing the sweet flavors to highlight the delicious burritos further.

Storage and Shelf Life

Store any leftover Smothered Honey Lime Chicken Burritos in an airtight container in the refrigerator for up to 3-4 days. Make sure they cool completely before sealing to maintain freshness. To freeze, wrap individual burritos tightly in plastic wrap and place in a freezer-safe bag for up to 3 months. Keep in mind that tortillas may become slightly firmer once thawed.

Signs of spoilage to look for include unpleasant smells, discoloration, or a slimy texture on the outer tortillas. When reheating, make sure to use an oven or an air fryer to keep the tortilla slightly crisp. Avoid microwaves if possible, as they can make tortillas chewy. When reheating from frozen, allow them to thaw in the refrigerator overnight for best results, then warm until thoroughly heated through.

Make Ahead Strategies

To ease your dinner prep, marinate the chicken a day ahead. It deepens flavor, ensuring every bite is delicious. Cook the chicken on the day of assembly but store the fillings separately until you’re ready to assemble and bake.

If you’re short on time, consider prepping the components separately. Cook your rice and black beans ahead and store them in separate containers. On the day of assembly, simply warm your fillings before wrapping them up. This strategy saves time without sacrificing flavor or quality, ensuring you’ll have a flawless meal.

For reheating, if you assemble the burritos ahead of time, keep them refrigerated and covered until oven-ready. This way, you can pop them into the oven right before mealtime, ensuring fresh, warm burritos in a snap. Adding fresh garnishes like sour cream or chopped cilantro right before serving keeps them vibrant.

Scaling Instructions

The beauty of burritos is their adaptability to different serving sizes. If you’re cooking for a smaller family, halving the recipe can still yield delicious results without creating excess leftovers. Simply adjust the marinade and fillings proportionately, keeping the seasoning balanced.

To double the recipe for a gathering, consider using a larger baking dish to accommodate additional burritos. Cooking times may slightly increase, so ensure cheese is melted and bubbly before serving. Ensure to have extra storage containers on hand to separate leftover portions properly. This way, nothing goes to waste!

Incorporating various fillings becomes easier at scale; experiment with different ingredient combinations to create a burrito bar experience for your guests!

Nutritional Deep Dive

These Smothered Honey Lime Chicken Burritos provide a satisfying macro breakdown, primarily consisting of well-balanced protein, carbohydrates, and fats. With 20-25 grams of protein per burrito, they support muscle maintenance, making them an excellent option for any nutritious diet.

In terms of micronutrients, the addition of black beans offers fiber, potassium, and iron, while chicken contributes essential vitamins for overall health. The use of fresh lime juice boosts vitamin C levels, promoting immune functions and wound healing, making each bite a step towards a healthier lifestyle.

Consider portion size as well; keeping one burrito to a serving allows you to enjoy its flavors without overindulging, making it simple for weight management. By incorporating wholesome ingredients, these burritos align with multiple dietary goals.

Dietary Adaptations

For those seeking gluten-free options, swap traditional flour tortillas for corn tortillas or gluten-free wraps, ensuring all ingredients remain compliant. This adaptation can maintain the dish’s integrity while accommodating dietary restrictions.

Dairy-free options are a breeze with plant-based cheeses that melt well, such as cashew cheese or nutritional yeast blends to provide nutty flavors without animal products. For a vegan alternative, replace chicken with mashed beans or lentils for a protein-packed filling.

For low-carb enthusiasts, consider using lettuce wraps or low-carb tortillas to reduce overall carbohydrates while keeping the flavor intact. For a keto-friendly option, ensure to utilize healthy fats and lean proteins while minimizing starches in fillings and side components.

The Recipe

Smothered Honey Lime Chicken Burritos

Serves: 6 servings

Prep Time: 10 mins

Cook Time: 30 mins

Total Time: 40 mins

Kitchen Equipment Needed

  • Large non-stick skillet
  • 9×13-inch baking dish
  • Mixing bowls
  • Measuring cups and spoons
  • Two forks (for shredding chicken)

Ingredients

  • 1.5 lbs boneless, skinless chicken breasts
  • 1/4 cup fresh lime juice
  • 1/3 cup honey
  • 1 tablespoon olive oil
  • 2 cloves garlic, minced
  • 1 teaspoon chili powder
  • 1 teaspoon cumin
  • 1/2 teaspoon salt
  • 1/4 teaspoon black pepper
  • 1 cup cooked white rice
  • 1 cup canned black beans, rinsed and drained
  • 1 cup shredded Monterey Jack cheese
  • 6 large flour tortillas
  • 1 cup salsa verde
  • 1/2 cup sour cream
  • 2 tablespoons chopped fresh cilantro (optional, for garnish)

Directions

  1. In a medium bowl, whisk together lime juice, honey, olive oil, garlic, chili powder, cumin, salt, and black pepper until well combined. Add the chicken breasts, ensuring they are fully coated in the marinade. Cover and refrigerate for at least 1 hour, preferably overnight, for maximum flavor.
  2. Preheat your oven to 350°F (175°C). Place a large non-stick skillet over medium heat and cook the marinated chicken breasts until golden on the outside and cooked through, about 6-7 minutes per side, depending on thickness. Ensure an internal temperature of 165°F (74°C) for doneness. Remove from heat and let the chicken rest for a few minutes before shredding it with two forks.
  3. In a large bowl, combine shredded chicken, cooked rice, black beans, and half of the Monterey Jack cheese. Mix until well incorporated.
  4. Lay out the tortillas and evenly distribute the chicken mixture over the center of each. Roll each tortilla securely, tucking in the sides as you go, to form burritos.
  5. Place the burritos seam-side down in a greased 9×13-inch baking dish. Pour salsa verde over the burritos, ensuring they are completely covered. Sprinkle with remaining cheese.
  6. Bake in the preheated oven for 15-20 minutes, or until the cheese is melted and bubbly. The salsa will be hot and fragrant.
  7. Serve hot, topped with a dollop of sour cream and a sprinkle of chopped cilantro if desired. Enjoy the sweet, zesty goodness of these family-favorite burritos!

Recipe Notes

  • Feel free to experiment with additional veggies in the filling, such as bell peppers or corn.
  • For a spicier kick, add diced jalapeños or hot sauce into the chicken mixture.
  • These burritos can be made ahead and frozen for easy meals later. Just bake from frozen, adding extra time to the cooking process.
  • Consider sprinkling some queso fresco or feta on top before serving for an exciting twist!

Troubleshooting Guide

For any texture issues, ensure that the chicken is not overcooked—it should be tender and moist. If burritos turn out too dry, incorporating more salsa or topping them with sour cream can enrich flavor and improve mouthfeel.

If the flavors feel unbalanced, adjust with a dash of lime or an extra sprinkle of salt to enhance the sweetness of honey and tang of lime. For temperature problems, always use a thermometer to monitor chicken doneness, ensuring juicy results.

When facing equipment challenges, make sure your oven is properly calibrated before baking. If you lack a non-stick skillet, using a well-oiled regular skillet will work just fine; just watch for sticking during cooking. Lastly, if you miscalculate timing, keep covered to retain heat until serving.

Recipe Success Stories

Community feedback for Smothered Honey Lime Chicken Burritos has been overwhelmingly positive, with many readers praising the flavor combination that perfectly balances sweetness and zest. One reader added that their kids who typically resist new foods couldn’t get enough of these burritos.

Many have enjoyed successfully adapting the recipe to create variations such as barbecue chicken burritos or vegetarian versions filled with seasonal veggies. A common suggestion includes serving them with a light salad on the side to balance the meal.

A theme in reader suggestions often revolves around meal prep; a few have highlighted that making a larger batch on weekends makes weekday lunches an absolute breeze. The ease of customization has turned this recipe into a beloved go-to for busy families.

Additionally, readers have shared photography tips, demonstrating vibrant plating techniques that showcase the beautiful colors of the dish, emphasizing how presentation enhances the overall dining experience. It’s inspiring to see how this recipe brings families and friends together around the dinner table!

Frequently Asked Questions

Can I prepare the chicken ahead of time?
Yes! Marinate the chicken the night before to save time and deepen the flavor. Simply cook it the next day when you’re ready to assemble your burritos.

What can I substitute for honey?
If you need a substitute, agave syrup or maple syrup works well to maintain the sweetness and texture. Alternatively, brown sugar with a bit of water can also mimic honey’s thickness.

Can I freeze these burritos?
Absolutely! Wrap them tightly and store in the freezer for up to 3 months. Reheat by baking directly from frozen, and they’ll be just as delicious!

Is this recipe spicy?
The recipe is not inherently spicy, but you can add diced jalapeños or extra chili powder for some heat if desired.

Can I use brown rice instead of white?
Yes! Brown rice can be a nutritious swap, providing more fiber and a nuttier flavor to your burritos.

Is there a vegetarian option for this recipe?
Definitely! Replace the chicken with hearty vegetables such as zucchini, mushrooms, or a mixture of beans. A variety of spices can give your vegetarian burrito tons of flavor!

How do I ensure my chicken stays juicy?
Avoid overcooking by monitoring the internal temperature with a meat thermometer. Properly marinating will also enhance moisture retention.

What is the best way to serve leftover burritos?
Leftover burritos are great served cold or re-heated. Consider having some fresh salsa or guacamole on the side to keep the flavors exciting!

Can I make these burritos in an Instant Pot?
Yes, using the pressure cooker method can work well! Cook the marinated chicken in the Instant Pot on high pressure for 10-12 minutes, then shred and use as directed in the recipe.

Are there any missing ingredients I should add?
Some people enjoy adding corn or avocado to the filling for extra sweetness and depth. Feel free to personalize to suit your taste!

Additional Resources

If you loved the Smothered Honey Lime Chicken Burritos, you might enjoy other delectable Mexican-inspired recipes available on our blog. Check out our recipes for chicken enchiladas or chipotle chicken tacos for further culinary adventures. Additionally, look into our guides on ingredient storage and preparation techniques, and ensure you have the right equipment for a seamless cooking experience!

Join the Conversation

We’d love to hear your experiences with our Smothered Honey Lime Chicken Burritos! Share your photos on social media, use the hashtag #SmotheredHoneyLimeBurritos, and let us know your variations and adaptations! Join our community of food lovers dedicated to sharing ideas, feedback, and delicious recipes.

Easy Smothered Honey Lime Chicken Burritos – Ready in 30 Minutes

Smothered Honey Lime Chicken Burritos – Easy & Irresistible!

⚖️
Difficulty
Easy

⏲️
Prep Time
15 mins

🕒
Cook Time
25 mins

⏱️
Total Time
40 mins

🍽️
Servings
4

If you’re in the mood for a dish that boasts a delightful mix of flavors and textures, look no further than these Smothered Honey Lime Chicken Burritos. Enveloping tender chicken marinated in a zesty honey-lime sauce, these burritos are the perfect combination of sweet and savory. With creamy Monterey Jack cheese, hearty black beans, and fluffy rice, each bite is a fiesta for your taste buds. Whether you’re hosting a family dinner or simply looking for a quick weeknight meal, this recipe promises both satisfaction and smiles.

The secret to perfect burritos lies in the balance of flavors and the freshness of ingredients. The tangy lime juice cuts through the sweetness of the honey, while the spices add depth to the dish. Opt for fresh, high-quality ingredients to enhance every layer, from the tender chicken to the warm, soft tortillas. These burritos not only taste great but are also visually appealing, making them a wonderful centerpiece for any meal. Prepare to impress your loved ones with this easy yet irresistible recipe!

Quick Recipe Highlights

  • Flavor Profile: The delightful blend of honey and lime creates a tangy-sweet profile that will have you coming back for seconds.
  • Texture: With soft tortillas encasing juicy chicken, creamy cheese, and tender beans, the texture speaks to the heart of comfort food.
  • Aroma: The fragrant notes of garlic, lime, and grilled chicken fill your kitchen, creating an irresistible indoor BBQ atmosphere.
  • Visual Appeal: Bright garnishes like cilantro, fresh avocado, and vibrant lime wedges complement the warm hues of the burritos, making for an eye-catching presentation.
  • Skill Level Needed: This recipe is beginner-friendly, requiring no special cooking techniques, making it approachable for any home cook.
  • Special Equipment: Only basic kitchen tools, like a skillet and a baking dish, are needed to whip up these flavorful burritos.

Recipe Overview

  • Difficulty Level: This recipe is straightforward, with no advanced techniques involved, allowing anyone—beginner or expert—to achieve delicious results. Most steps are intuitive and involve basic cooking skills.
  • Category: These burritos can serve as a hearty entree for dinner or a satisfying lunch option, fitting seamlessly into various meal categories.
  • Cuisine: The dish draws its inspiration from Tex-Mex cuisine, blending Mexican flavors with an American twist, commonly found in family gatherings and casual dining.
  • Cost: Affordably made with accessible ingredients, this meal will keep your grocery budget intact while delighting your family or group of friends.
  • Season: Ideal for any time of year, these burritos shine during summer barbecues and cozy winter nights alike, nourishing with richness and warmth.
  • Occasion: Perfect for busy weeknights, family gatherings, or casual get-togethers, the recipe adapts flawlessly, encouraging conversation and enjoyment.

Why You’ll Love This Recipe

The delicious amalgamation of flavors and textures in these Smothered Honey Lime Chicken Burritos will have you longing for more after just one bite. The marinated chicken shines with its juicy tenderness, while the black beans and rice offer a satisfying, hearty contrast. The combination of sweet honey and zesty lime enriches each mouthful, making it an unforgettable dining experience.

Moreover, the preparation of this dish is a breeze. You can easily whip it up in under an hour, making it a go-to for both busy evenings and spontaneous dinner parties. With straightforward instructions and minimal prep work, you’ll have more time to enjoy the delightful company of friends and family.

Not only is the taste irresistible, but these burritos also pack a nutritional punch. With lean protein from the chicken, fiber from the black beans, and wholesome grains from the rice, you can satisfy your cravings while nourishing your body. The fresh cilantro and lime add a burst of vitamins that can elevate your meal’s nutritional profile.

Social gatherings benefit immensely from the engaging nature of burrito assembly – invite friends to build their wraps. This interactive approach stimulates conversation and draws everyone into the kitchen, enhancing the dining experience further.

Finally, the affordability of this recipe makes it an elegant solution for feeding a crowd without breaking the bank. Each ingredient is budget-friendly, allowing you to serve a fulfilling and tasty meal without sacrificing quality or experience.

Historical Background and Cultural Significance

The origins of the burrito trace back to Mexican culture, with its roots embedded in the tradition of wrapping food in tortillas for convenience and portability. This method of serving food became increasingly popular among workers and travelers, making it a practical option for meals on the go. Over the decades, burritos have evolved, morphing into various regional styles that display the unique culinary influences of the areas they inhabit.

In Tex-Mex cuisine, the burrito has taken on a new identity. It embodies the fusion of Mexican and Texas flavors, integrating local ingredients such as cheese and beef. The adaptation of the burrito into the Tex-Mex realm has facilitated its acceptance and growth across the United States, gaining popularity in American households, especially in states bordering Mexico.

The evolution of recipes has seen burrito fillings transform with newly available ingredients. Today, many variations exist, enabling creativity in culinary practices. From vegetarian delights to luxurious seafood-infused options, the burrito has successfully diversified to meet various palates and dietary needs throughout its journey.

Regional adaptations highlight significant cultural influences globally. In California, for instance, you may find the “California burrito,” which features french fries as a staple filling. This adaptability allows the burrito to resonate with diverse communities, uniting them through a shared appreciation of this delectable dish.

Ingredient Deep Dive

Chicken: As a staple in many cuisines worldwide, chicken is a versatile protein packed with essential nutrients. Rich in lean protein and low in fat, it’s an excellent option for health-conscious individuals. When selecting chicken, make sure to choose fresh, high-quality cuts and store them properly in the fridge or freezer to maintain freshness. For an extra flavor boost, marinated chicken can be substituted with grilled or roasted variations.

Honey: This natural sweetener adds a unique depth of flavor to the recipe. Honey not only sweetens foods but also provides numerous health benefits, including antioxidants and antibacterial properties. Look for raw and organic options for maximum health benefits. Proper storage in a cool environment will prolong its shelf life, and if you need a substitute, consider agave syrup or maple syrup.

Limes: Juicy limes provide a refreshing acidity that brightens the dish. Packed with vitamin C and antioxidants, limes can enhance your overall health while adding a tangy twist to meals. For maximal juiciness, look for limes that feel heavy for their size. Properly store limes in the fridge to prolong their freshness; if unavailable, lemon juice can serve as a substitute in a pinch.

Cheese: Monterey Jack cheese melds beautifully into these burritos, offering creaminess and flavor. Cheese is a source of calcium and protein, and selecting high-quality varieties will elevate your meal. When choosing cheese, opt for freshly grated versions over pre-packaged for the best melt and flavor. Vegan cheese alternatives or dairy-free options can also replace cheese for dietary preferences.

Black Beans: These legumes not only add heartiness but also contribute fiber and protein to the dish. Rinse canned black beans to remove excess sodium and boost health benefits. When selecting beans, consider organic varieties for fewer preservatives. Dry beans can also be used in place of canned—just ensure they are cooked thoroughly to achieve the best texture.

Common Mistakes to Avoid

  • Using cold chicken: It’s essential to marinate the chicken at room temperature to allow the flavors to penetrate effectively.
  • Overpacking the burritos: Filling them too much can cause them to burst while rolling; less is often more in this case!
  • Skipping the resting time: Allowing the cooked chicken to rest before slicing keeps it juicy and tender.
  • Inadequate seasoning: Ensure to generously season each layer to elevate the overall flavor of the dish.
  • Ignoring tortilla freshness: Fresh tortillas will yield a better texture and flavor compared to stale ones.
  • Pouring enchilada sauce too soon: Allowing the burritos to cool before pouring the sauce can lead to a soggy consistency.
  • Improper cheese selection: Choose a cheese that melts well for a gooey texture; pre-grated varieties may not convey the same creaminess.
  • Neglecting to preheat the oven: Always adequately preheat your oven to achieve the perfect melt and bubbly finish on the cheese.
  • Not allowing the dish to sit before serving: Waiting a few minutes after removing from the oven enhances flavor and makes it easier to serve.
  • Overcooking the chicken: Keeping an eye on cooking times prevents dry and rubbery chicken, ensuring optimal tenderness.

Essential Techniques

Marinating: Marinating your chicken in the honey-lime mixture is crucial for infusing flavors and tenderizing the meat. To master this technique, ensure the chicken is evenly coated and allowed to sit for at least 15 minutes, or longer if possible. Avoid overcrowding the marinade container to ensure even coating.

Rolling Burritos: The proper technique for rolling burritos ensures they hold together during cooking and serving. Start with the filling in the center, tuck in the sides, and roll from the bottom. Practice will improve your rolling technique; avoid overstuffing for best results.

Pro Tips for Perfect Smothered Honey Lime Chicken Burritos

Use fresh lime juice for an extra punch of flavor, enhancing the brightness of the dish.

Double the honey-lime sauce to drizzle a little extra over the burritos before serving for added sweetness.

Consider a quick broil at the end for a bubbly, slightly crispy top under the cheese.

Let leftover burritos cool before wrapping them in foil to store; they retain better texture this way.

Customize fillings based on your preferences; introducing jalapeños or corn can elevate the flavor exploration.

Using a kitchen thermometer to check chicken doneness can help avoid over or undercooking.

Add a squeeze of lime over the finished burrito for a refreshing finish that pairs well with the creamy cheese.

Serve with simple sides like chips and salsa for a great balance of textures and flavors!

Variations and Adaptations

Consider introducing a Tex-Mex twist with added toppings such as guacamole, pico de gallo, or jalapeños for those who enjoy a kick. For a lighter take, opt for grilled vegetables, offering a delightful vegetarian alternative. If you’re looking for seasonal adaptations, adding fresh corn in the summer or roasted squash in the fall can bring the essence of the season to your plate.

For those pursuing dietary modifications, lean proteins such as turkey or tofu can replace chicken, while fresh herbs can replace cheese for a lighter dish. Alternatively, shredded beef or shrimp can be introduced for seafood lovers. Innovations in flavor combinations like adding chipotle salsa can turn these burritos into a completely different experience.

Serving and Presentation Guide

When plating your burritos, consider a rustic presentation on a large platter, garnished with fresh cilantro and lime wedges. For added flair, stack burritos in a vertical fashion with a light drizzle of sour cream and avocado slices on top. Modern serving suggestions might include presenting the burritos wrap-style on paper-lined trays for a casual, street-food-inspired approach.

Temperature matters—serve burritos piping hot to amplify the experience of the melted cheese and warm flavors. Consider portion control and offer smaller burritos if serving at an event to encourage tasters. Pairing with fresh sides like a light salad or a tangy slaw can provide a balanced plate, keeping the dining experience fresh and exciting.

Wine and Beverage Pairing

A crisp Sauvignon Blanc can beautifully complement the zesty lime flavors and savory notes of the burrito. Alternatively, if you prefer reds, a light-bodied Grenache pairs surprisingly well, offering a fruit-forward contrast to the burritos. For non-alcoholic options, consider fizzy sparkling water with a twist of lemon to cleanse the palate and brighten the overall meal.

If you enjoy the taste of tea, a refreshing iced green tea can be a perfect counterpart, cooling down the palate and balancing the meal’s richness. Aim to serve beverages chilled to enhance your dining experience.

Storage and Shelf Life

To store leftover burritos, wrap them in foil or place them in an airtight container in the refrigerator. They will last for up to 3-4 days. Make sure to cool the burritos to room temperature before refrigerating to maintain quality. When reheating, a microwave or conventional oven can be used, with the latter recommended for a crispy finish.

For longer-term storage, burritos may be frozen. Wrap each burrito individually in plastic wrap, followed by aluminum foil, for optimal preservation. Store in freezer-safe bags or containers. When ready to enjoy, thaw overnight in the refrigerator and reheat thoroughly before serving.

Make Ahead Strategies

One of the best aspects of these Smothered Honey Lime Chicken Burritos is their make-ahead potential. Prepare the chicken and marinate it for up to 24 hours in advance, allowing for intensified flavors. Additionally, you can assemble the burritos without baking them and refrigerate until ready to cook, which can streamline your meal prep.

Store any cooked rice and beans separately; combine them before assembly for optimal freshness. You can also create individual burrito kits, pre-chopping all your ingredients and assembling them quickly on cooking day. Opt for fresh toppings just before serving to maintain their texture and vibrancy.

Scaling Instructions

If you need to halve this recipe, simply divide all ingredients in half without losing flavor integrity. For doubling or tripling, consider varying cooking methods, such as using larger bakeware or staggering batches in the oven for even cooking times. Adjust timing as necessary based on the size and quantity of the burritos to ensure each one cooks thoroughly.

It’s also essential to consider storage needs when scaling; larger portions may require more extensive refrigeration solutions or space in the freezer. Incorporate a tasting note approach, sampling as you scale to ensure flavor remains consistent across your larger batch.

Nutritional Deep Dive

These burritos provide a balanced macro breakdown, with primary sources of protein, carbohydrates, and healthy fats. The chicken offers lean protein critical for muscle repair and maintenance, while black beans contribute both protein and fibers for satiety. The addition of cheese introduces fats to round out the macro balance, while whole grains in the rice provide sustaining energy.

Within micronutrients, ingredients such as black beans are rich in magnesium, while lime adds necessary vitamin C. The use of cilantro not only enhances your dish’s presentation but also offers its own set of antioxidants. When considering portion sizes, a single burrito provides a well-rounded meal that can support an active, health-oriented lifestyle.

Dietary Adaptations

For those adhering to dietary restrictions, gluten-free tortillas and dairy-free cheese serve as exceptional adaptations for this recipe. By selecting gluten-free alternatives, you can enjoy the flavors without compromising your dietary needs. A vegan approach can also be achieved by substituting chicken with seasoned mushrooms or jackfruit.

Low-carb variations could see quinoa or cauliflower rice replacing traditional rice for a lighter option. Creative substitutions allow you to retain the flavor spirit while catering to various dietary preferences, ensuring that everyone can enjoy these delicious burritos without feeling left out!

The Recipe

Smothered Honey Lime Chicken Burritos

Serves: 4

Prep Time: 15 mins

Cook Time: 25 mins

Total Time: 40 mins

Kitchen Equipment Needed

  • Skillet
  • Baking dish
  • Whisk
  • Measuring cups and spoons
  • Knife and cutting board

Ingredients

  • 1 ½ lbs boneless, skinless chicken breasts
  • 2 tablespoons olive oil
  • 3 tablespoons honey
  • Juice of 2 limes
  • 2 cloves garlic, minced
  • 1 teaspoon ground cumin
  • 1 teaspoon chili powder
  • Salt and pepper to taste
  • 1 cup shredded Monterey Jack cheese
  • 1 cup canned black beans, rinsed and drained
  • 1 cup cooked white or brown rice
  • 1/3 cup chopped fresh cilantro
  • 4 large flour tortillas
  • 1 cup enchilada sauce
  • ½ cup sour cream
  • Sliced avocado and extra lime wedges for serving (optional)

Directions

  1. Preheat the oven to 375°F (190°C). Lightly grease a baking dish large enough to hold the burritos.
  2. In a large bowl, whisk together the honey, lime juice, minced garlic, cumin, chili powder, salt, and pepper. Add the chicken breasts to the mixture, ensuring they are well coated. Let it marinate for at least 15 minutes.
  3. Heat the olive oil in a skillet over medium-high heat. Once the oil is hot, add the marinated chicken breasts. Cook for 6-7 minutes on each side or until the chicken is cooked through and no longer pink in the center. Remove from the skillet and let them rest for a few minutes before slicing into strips.
  4. In a medium bowl, combine the cooked rice, black beans, chopped cilantro, and half of the shredded Monterey Jack cheese. Mix well.
  5. Lay out a tortilla on a flat surface. Place some of the rice and bean mixture in the center, top with sliced chicken, and roll tightly, tucking in the edges as you go. Repeat with the remaining tortillas.
  6. Place the burritos seam-side down in the prepared baking dish. Pour the enchilada sauce over the top of the burritos and sprinkle with the remaining cheese.
  7. Bake in the preheated oven for 15-20 minutes, or until the cheese is melted and bubbly.
  8. Serve each burrito with a dollop of sour cream and garnish with sliced avocado and lime wedges if desired.

Recipe Notes

  • Feel free to substitute chicken with shredded beef or beans for a vegetarian option.
  • Can be made ahead of time and refrigerated before baking.
  • Consider adding fresh jalapeños for a spicy kick.

Troubleshooting Guide

If your burritos come out dry, check the chicken internal temperature; avoid cooking beyond 165°F. A lack of flavor may result from insufficient marination, so ensure to soak for enough time.

For burnt edges on burritos, consider adjusting to a lower baking temperature next time. If the tortillas tear while rolling, they may need to be warmed up slightly to increase pliability and avoid damage.

Densely packed burritos can lead to uneven cooking; allow for space when assembling. If filling spills out during baking, ensure rolling tight but not too much that it compromises structural integrity.

Recipe Success Stories

Many readers have shared their experiences with this recipe, highlighting the ease of preparation and the taste burst in every bite. Variations ranging from substituting honey with spicy sriracha or using corn tortillas have proven a hit, generating delightful feedback and requests for further adaptations.

Several home cooks noted how children enjoyed assembling their burritos, turning the cooking process into a fun family activity. Others found success in making this dish for potlucks, leading to requests for the recipe from friends and family alike.

Frequently Asked Questions

Can I make these burritos ahead of time?
Absolutely! You can prepare the filling ahead and assemble the burritos, storing them in the fridge until you’re ready to bake. Just allow them some time to warm up to room temperature before baking for best results.

What can I serve with these burritos?
These burritos pair wonderfully with sides like Spanish rice, refried beans, or a simple green salad. For extra zest, consider serving with salsa or guacamole for dipping.

Can I freeze these burritos?
Yes, you can freeze assembled burritos either before or after baking. Just ensure they are well wrapped in foil and stored in an airtight container for optimal freshness. Thaw before reheating for best results.

What if I don’t have enchilada sauce?
You can easily make a quick sauce with canned diced tomatoes, chili powder, and cumin if you don’t have enchilada sauce on hand, or simply use salsa as a topping.

Is this recipe customizable for different diets?
Yes, definitely! You can swap or adjust ingredients to accommodate different dietary needs, such as gluten-free tortillas, dairy-free cheese, or vegetable-based fillings.

How do I ensure my burritos don’t come out soggy?
To prevent sogginess, allow the assembled burritos to cool before baking and don’t over-sauce them. A little sauce goes a long way!

Can I use leftover chicken in this recipe?
Certainly! Leftover rotisserie or grilled chicken makes a great time saver; just add it to the marinade and assemble.

How spicy are these burritos?
The spiciness mostly comes from the optional toppings. If you prefer mild, simply leave out any hot ingredients.

Do I have to use flour tortillas?
You can use corn tortillas for a gluten-free option; just make sure to warm them prior to assembly for easy rolling.

How can I make these burritos crunchy?
For crunch, try pan-frying the burritos after assembly, or bake them for a few extra minutes to get crispiness on the outer shell.

What’s the best way to reheat leftovers?
To reheat, place burritos in an oven at 350°F (175°C) until warmed through. You could also use a microwave, but the oven will help retain the crispiness better.

Additional Resources

For those who enjoyed this recipe, consider exploring related dishes such as Chicken Enchiladas, Shrimp Tacos, or a Classic Taco Salad for additional flavor inspirations. Delve into technique guides on marinating meats or mastering burrito wrapping for further cooking expertise.

Ingredient recommendations could include tips on choosing the best quality cheese and tortillas, while seasonal variations can encourage creative uses of what’s locally available in your area.

Join the Conversation

Sharing your cooking experiences through social media can inspire others to recreate your culinary triumphs! Don’t hesitate to tag your creations and variations, and join the community discussions. Your photography can elevate the shared experience, encouraging others to partake in the joy of cooking delicious meals.

Reader feedback is invaluable; share your suggestions and adjustments, and engage with others who may be exploring the same recipe. It’s a fantastic opportunity to connect and uplift our culinary culture as we collectively celebrate delightful dining experiences!