Irresistible Crack Chicken Tenders You’ll Want to Make Today

Delicious Crack Chicken Tenders: A Mouthwatering Delight!

⚖️
Difficulty
Easy

⏲️
Prep Time
15 mins

🕒
Cook Time
20 mins

⏱️
Total Time
35 mins

🍽️
Servings
4 servings

Crack Chicken Tenders are a savory, irresistible treat that will quickly become a family favorite. Coated in a flavorful blend of spices and cooked to golden perfection, these tenders embody the comfort foods we all crave. Whether served with a dipping sauce or enjoyed on their own, these chicken tenders pack a delicious punch that keeps you coming back for more. With their delightful crunch and tender, juicy inside, each bite delivers a harmonious blend of flavors that is sure to satisfy your cravings.

Imagine biting into a perfectly crispy chicken tender, the exterior crackling delightfully as your teeth sink into the tender, well-seasoned meat inside. The contrasting textures create an experience that’s not only about taste but also about pure enjoyment. Easy to make and utterly delicious, these Crack Chicken Tenders are perfect for a quick weeknight dinner or a fun weekend gathering with friends.

Quick Recipe Highlights

  • Flavor Profile: These chicken tenders are seasoned with a perfect blend of spices, providing a smoky, savory taste that dances on your palate.
  • Texture: Expect a crispy outer layer paired with a juicy, tender chicken interior, delivering a delightful mouthfeel with every bite.
  • Aroma: The aroma of these tenders as they cook fills the kitchen with a warm, inviting scent, making them irresistible.
  • Visual Appeal: A golden-brown crust contrasted with the juicy white chicken makes for a visually appealing dish that entices the eyes.
  • Skill Level Needed: This recipe is straightforward and suitable for cooks of any skill level, making it an excellent choice for beginners.
  • Special Equipment: All you need is a baking sheet and an oven to create these delightful chicken tenders.

Recipe Overview

  • Difficulty Level: This easy recipe requires just a few steps and can be completed in under 40 minutes, making it accessible even for novice cooks.
  • Category: These tenders fall under the main dish category, perfect for lunch or dinner, and are great for meal prep.
  • Cuisine: While inspired by classic American comfort foods, these chicken tenders have a universal appeal loved by many culinary traditions.
  • Cost: The ingredients are budget-friendly, making it an economical choice for feeding a crowd without breaking the bank.
  • Season: Deliciously versatile, Crack Chicken Tenders can be enjoyed year-round but are especially great for summer picnics and gatherings.
  • Occasion: Perfect for casual family dinners, game nights, or parties, they suit a variety of occasions and are sure to impress guests.

Why You’ll Love This Recipe

These Crack Chicken Tenders are a culinary delight, boasting an explosion of flavors that make every bite a pleasure. The balance of spices creates a unique taste that is reminiscent of your favorite restaurant dish, but made right in your kitchen. Each tender is perfectly cooked, ensuring that the inside remains juicy and full of flavor, captivating your taste buds with every mouthful.

The convenience of this recipe cannot be overstated. In just 35 minutes, you’ll have a delicious, home-cooked meal ready for the family. With minimal prep work required, it’s an excellent choice for busy weekdays or spontaneous get-togethers. You can serve them with your favorite dipping sauces, salads, or sides, making them incredibly versatile.

Nutritionally, chicken tends to be a great source of protein, making these tenders a healthy option when compared to typical fried foods. They can be a staple in a balanced diet, especially when paired with vegetables or served alongside whole grains. So not only are you indulging in something tasty, but you’re also fueling your body with essential nutrients.

Social gatherings are made even more enjoyable with these Crack Chicken Tenders on the menu. They serve as a fantastic snack for parties or a hearty main dish that everyone will love. These tenders can bring people together, whether it’s sharing stories around the dinner table or watching the game with friends.

Cost-effectiveness is another compelling reason to love this recipe. The ingredients are not only cheap but readily available in most grocery stores, letting anyone whip up this delicious dish without a hefty bill. The low-cost nature, combined with the big flavor, means you’ll be making these tenders quite often!

Historical Background and Cultural Significance

The origin of chicken tenders can be traced back to various cultures, with roots in simple fried chicken recipes that date centuries. However, the modern version as we know it gained popularity in America during the mid-20th century, offering a quick and convenient way to enjoy chicken. The marriage of a crispy coating with juicy chicken pieces led to the iconic dish we cherish today.

Culturally, chicken tenders have become a staple in American cuisine, recognized for their universal appeal across various age groups. They are found on menus in homes, schools, and restaurants alike, showcasing their versatility and how they can adapt to different flavor profiles depending on the seasonings used.

Over time, the recipe has evolved, seeing transformations influenced by trends in cooking and health. While traditionally deep-fried, many adaptations now use baking as a healthier cooking method, allowing the same delicious flavors to shine through without excessive oil.

As with many beloved recipes, regional variations have emerged, adding unique twists. From spicy versions featuring hot sauces to sweet adaptations that incorporate honey or maple syrup, these variations celebrate the creativity of home cooks and regional preferences.

Ingredient Deep Dive

Each ingredient plays a vital role in creating the impeccable flavor and texture of Crack Chicken Tenders. Starting with chicken breast, it is a lean protein with no shortage of culinary history. Chicken has been a cornerstone of diets worldwide, valued for its nutritional properties. When selecting chicken, look for plump, firm pieces devoid of discoloration. Store raw chicken in the coldest part of your fridge and consume it within 2 days or freeze for longer shelf life.

Next, breadcrumbs form the delicious crunchy coating. Commonly used in various cuisines, breadcrumbs enhance texture and provide versatility, easily adapted with different seasonings. When choosing breadcrumbs, opt for whole grain or panko for added crunch. Store in a cool, dry place and use them within 6 months for the best flavor and texture.

Spices, including paprika, garlic powder, and onion powder, make this dish sing. Each adds a distinct flavor, contributing layers to the overall taste. Spices carry cultural heritage and healing properties. To ensure freshness, store them in airtight containers away from direct light, and replace them annually for maximum flavor.

Lastly, oil is essential for achieving that perfect golden crust. Choosing healthy oils, like olive or avocado oil, not only enhances flavor but also provides beneficial nutrients. Look for cold-pressed varieties for the best health benefits. Oils should be stored in a cool area and can last up to two years unopened.

Common Mistakes to Avoid

  • Not seasoning the chicken before coating it, which can lead to bland flavors.
  • Using too much oil, resulting in greasy tenders instead of a crispy texture.
  • Cooking at the wrong temperature can cause uneven cooking, with either burnt outsides or raw insides.
  • Overcrowding the baking sheet, which can trap steam and prevent proper crispiness.
  • Using stale breadcrumbs, which dull the flavor and crunch of the coating.
  • Skipping the pre-heating step, missing out on that perfect initial sizzle.
  • Not letting the tenders rest post-baking, which helps maintain juiciness.
  • Inadequate marination time, which can affect flavor development.
  • Not using a thermometer to check for doneness can lead to undercooked or overcooked chicken.
  • Failure to store leftovers properly can lead to spoilage and waste.

Essential Techniques

Mastering the art of breading is critical for achieving that perfect crunch. This technique involves coating the chicken in flour, dipping in egg, and rolling in breadcrumbs. Each layer plays a distinct role: flour helps the egg adhere, while breadcrumbs provide texture. To master this, ensure equal coverage on each piece and let them rest before baking to help breading stick.

Baking at the right temperature is crucial. Preheat your oven to ensure even cooking from the start. This technique is vital for achieving a crispy exterior while keeping the interior juicy. Visually, you want to see a consistent golden color as an indicator of doneness.

Marination can significantly enhance flavor. Even a short marination time can infuse the chicken with flavor. Allowing it to sit with spices offers the opportunity for deeper absorption. Look for a shiny surface and fragrant aroma as signs of successful marination.

Pro Tips for Perfect Crack Chicken Tenders

– Use high-quality chicken for leaner and healthier tenders that are full of flavor.
– Experiment with different seasonings and spice blends to customize the flavor profile.
– For an extra crunchy finish, add crushed cornflakes to your breadcrumb mixture.
– Ensure your baking sheet is lined with parchment paper for easier clean-up.
– Apply a light spray of oil over the tenders before baking for an added crispiness.
– Allow the tenders to rest for a few minutes after baking, ensuring juiciness.
– Serve with a variety of dipping sauces to please every palate.
– Double the batch for meal prep or entertaining, as they reheat well.

Variations and Adaptations

For regional variations, consider incorporating spices that resonate with your roots. For a Southern twist, add cayenne pepper to the breading. During seasonal changes, introduce fresh herbs like basil or cilantro for a bright touch in the summer.

Dietary modifications allow for creativity; prepare gluten-free tenders by using almond meal instead of breadcrumbs. For a vegan adaptation, consider using tofu or cauliflower coated in a similar preparation process.

In terms of flavor variations, introduce marinades with citrus juices or even a hint of maple syrup for a sweet balance. Experimenting with textures, swap out breadcrumbs for crushed nuts for an extra crunch and nutty flavor profile.

Presentation alternatives can elevate your dish. Serve your tenders in a stylish basket lined with parchment paper or on a wooden board for a rustic touch.

Serving and Presentation Guide

To plate your Crack Chicken Tenders impeccably, stack them neatly in a pile or line them up for a symmetrical look. Garnish with finely chopped parsley or a sprinkle of paprika for visual appeal. Traditional accompaniments like coleslaw or sweet potato fries complement the tenders beautifully.

For modern serving suggestions, consider creating a dipping station with an array of sauces, from classics like honey mustard to spicy sriracha. Temperature matters; serve the tenders hot and crispy for the best experience.

Consider portion control for gatherings by slicing tenders into strips and offering them as finger food. This makes them easy to share and even easier to enjoy.

Wine and Beverage Pairing

For wine pairings, consider a crisp Sauvignon Blanc, which pairs beautifully with the crispy texture of the tenders and enhances their flavors. A light-bodied Pinot Noir also complements without overpowering the dish.

For non-alcoholic alternatives, try serving sparkling water with a splash of lemon or a refreshing iced tea, which can cleanse the palate between bites.

If you’re a coffee lover, a light roast can actually add an interesting contrast to the savory taste of the tenders. Serve each beverage cold to match the delightful, crisp nature of the dish.

Storage and Shelf Life

To maximize the shelf life of your Crack Chicken Tenders, store them in an airtight container in the refrigerator. Ideally, consume within 3-4 days to maintain quality and flavor.

For longer storage, freezing is an excellent option. Ensure that tenders are completely cooled before wrapping them in plastic wrap and placing them in a freezer-safe bag. They can be stored for up to 3 months.

Signs of spoilage include an off smell or a change in texture. When reheating, ensure that the chicken reaches an internal temperature of 165°F to guarantee safety. Reheat in the oven for an exemplary crispy result.

Make Ahead Strategies

To prepare your Crack Chicken Tenders in advance, you can marinate the chicken several hours or overnight before coating. This enhances flavor and reduces prep time on the day of serving.

After breading the tenders, you can keep them in the refrigerator, covered, just until you’re ready to bake them. This can be a real time-saver for busy weeknights or dinner parties.

When assembling the tenders, consider fresh elements like dipping sauces or salads to incorporate later, ensuring freshness and flavor when serving.

Scaling Instructions

Scaling this recipe is straightforward; to halve or double it, simply adjust the number of chicken tenders and the ingredient quantities accordingly, ensuring sufficient baking space.

If doubling or tripling the recipe, remember to check that your baking sheets can accommodate all the pieces without overcrowding, maintaining that feast of crispy goodness.

Timing modifications might include extending cooking time or using multiple ovens to achieve the desired crispiness for larger servings.

Ensure to store any excess properly, as larger batches will require adequate refrigeration or freezing techniques.

Nutritional Deep Dive

A typical serving of Crack Chicken Tenders is packed with protein, offering around 25g per serving. The lean chicken breast provides essential amino acids, while the accompanying carbohydrates from the breadcrumbs contribute to energy levels.

While lower in fats due to baking methods, the tender can still contain healthy fats if using olive oil. The addition of spices provides health benefits; for instance, garlic powder is known for its immune-boosting properties.

Consider portion analysis when serving; this recipe is designed for four servings, so be conscious of portion sizes to maintain a balanced diet. They can fit seamlessly into meal plans focused on high protein and lower carbohydrates.

Dietary Adaptations

For gluten-free adaptations, using gluten-free breadcrumbs or almond flour ensures inclusivity while maintaining that satisfying crunch.

Dairy-free variations can be achieved by ensuring that the breadcrumbs used do not contain dairy products. Consider using coconut-based yogurt for marinades to maintain moisture.

If following a low-carb or keto diet, alternative options such as almond flour or crushed pork rinds deliver a low-carb solution while still achieving crunch.

For paleo followers, adapting with almond or coconut flour and eliminating any processed ingredients allows for a completely clean eating experience.

Troubleshooting Guide

If you encounter texture issues, ensure that not too much oil is used when prepping, as this can lead to sogginess instead of crispiness. If they come out too dry, you might need to adjust baking times and let the internal temperature guide you.

Flavor balance can be managed through proper marination and seasoning; if your tenders turn out bland, consider adding more spices or longer soaking times for future batches.

If you run into temperature problems, always preheat your oven and use a thermometer to ensure chicken doneness without overcooking.

Equipment challenges, like inadequate cooking sheets, can easily be solved by using multiple sheets or batch cooking to guarantee even cooking.

Using substitutions can sometimes alter the original taste; always test a small batch when trying new ingredients for the first time to adjust accordingly.

Recipe Success Stories

Community feedback for Crack Chicken Tenders has been overwhelmingly positive. Many home cooks share their adaptation stories, noting how they incorporated family favorites or local spices, resulting in a dish that feels personalized.

Variation successes often arise during family gatherings, where these tenders become the star of the show, bringing together friends and family around a shared meal. Readers have reported their kids loving these tenders, making them a favored repeated recipe in homes.

Photography tips shared by happy cooks often show off these tenders in a vibrant array of colors, demonstrating their versatility when plated with dips and sides, encouraging others to try their hands at this magical dish.

Frequently Asked Questions

Can I make Crack Chicken Tenders spicy?

Absolutely! You can add cayenne pepper or hot sauce to the breadcrumb mixture to give your tenders a kick. Adjust according to your spice tolerance!

Can these be made ahead of time?

Yes, you can prepare these chicken tenders in advance by marinating the chicken and coating it. Store in the fridge until ready to bake.

How do I reheat leftover chicken tenders?

The best way to reheat them is in the oven at 375°F for about 10-15 minutes until they’re heated through and crisp again.

Can I substitute chicken breast for chicken thighs?

Yes, chicken thighs can also be used! They will render a richer flavor but follow similar cooking instructions to ensure they cook through.

Are these tenders healthy?

Using lean chicken breast and baking instead of frying makes these tenders a healthier alternative to traditional fried chicken.

Can I use a different kind of oil?

Of course! While olive oil is a great option, avocado oil or vegetable oil can work well too without compromising on flavor.

What dipping sauces go well with these tenders?

Honey mustard, barbecue sauce, ranch dressing, or even a spicy sriracha mayo pair beautifully with these Crack Chicken Tenders!

Can I make these tenders gluten-free?

Certainly! Use gluten-free breadcrumbs or make your own from gluten-free bread to keep this recipe safe for those with gluten sensitivities.

Is there an air fryer version of this recipe?

Yes! You can air fry the chicken tenders at 380°F for about 10-12 minutes, flipping halfway for an equally crispy result.

How long will Crack Chicken Tenders last in the fridge?

These tenders can last in an airtight container in the refrigerator for about 3-4 days.

Additional Resources

If you’re looking for related recipes, explore our sections on chicken dinners, quick weeknight meals, and finger foods for entertaining. You may also want to check out technique guides that cover breading methods and oven cooking tips.

For those keen on ingredient information, we provide insights into selecting the freshest produce and meats available. Equipment recommendations can enhance your cooking experience, helping you choose the best tools for successful meal preparation.

Finally, never hesitate to explore seasonal variations of chicken tenders, allowing you to please your palate with delightful, fresh flavors as ingredients change throughout the year.

Join the Conversation

Engage with our community by sharing your experiences with Crack Chicken Tenders on social media. We love seeing your photos and hearing your adaptations! Whether it’s your twist on the recipe or variations that made them special in your household, your input enriches this cooking journey.

Don’t forget to leave a review if you’ve tried the recipe! Your feedback helps others discover the joys of making these delicious chicken tenders. Let’s continue building a community centered around love for food and sharing our culinary journeys together.

The Recipe

Crack Chicken Tenders

Serves: 4 servings

Prep Time: 15 mins

Cook Time: 20 mins

Total Time: 35 mins

Kitchen Equipment Needed

  • Baking sheet
  • Parchment paper
  • Mixing bowls
  • Food thermometer

Ingredients

  • 1 lb chicken breast tenders
  • 1 cup breadcrumbs
  • 1/2 cup all-purpose flour
  • 2 large eggs
  • 1 teaspoon paprika
  • 1 teaspoon garlic powder
  • 1 teaspoon onion powder
  • Salt and pepper to taste
  • Olive oil spray

Directions

  1. Preheat your oven to 400°F (200°C) and line a baking sheet with parchment paper.
  2. In a bowl, mix the flour, garlic powder, onion powder, paprika, salt, and pepper.
  3. In another bowl, beat the eggs and set aside.
  4. Place the breadcrumbs in a third bowl.
  5. Coat each chicken tender in flour, dip in egg, and then roll in the breadcrumbs to coat evenly.
  6. Arrange the chicken tenders on the prepared baking sheet and spray lightly with olive oil.
  7. Bake for 15-20 minutes, flipping them halfway through, until they are golden and cooked through.
  8. Check with a food thermometer to ensure internal temperature reaches 165°F.
  9. Remove from the oven and let them rest for a few minutes before serving.

Recipe Notes

  • Feel free to adjust spices according to your taste preferences.
  • These tenders can be served with various dipping sauces for added flavor.
  • For extra crunch, consider adding crushed cornflakes to the breadcrumbs.

Best Steak with Creamy Garlic Sauce – Perfect for Dinner

Steak with Creamy Garlic Sauce: A Flavorful Delight

⚖️
Difficulty
Intermediate

⏲️
Prep Time
10 mins

🕒
Cook Time
15 mins

⏱️
Total Time
25 mins

🍽️
Servings
4

If you’re looking for a show-stopping dinner that combines rich flavors and succulent textures, then look no further than this Steak with Creamy Garlic Sauce recipe. This dish features perfectly seared steak paired with a luxurious garlic-infused cream sauce that is sure to impress anyone at your table. The savory umami of the steak complements the smooth and garlicky tones of the sauce, creating a delightful harmony of flavors. Perfect for a cozy night in or entertaining guests, this recipe is a versatile addition to your culinary repertoire.

Not only does this dish deliver on taste, but it also offers incredible aroma as the garlic and herbs meld together, enticing everyone in the kitchen. As the sauce simmers, the fragrance fills the air, promising a gourmet meal that isn’t too difficult to prepare. With its modern twist on classic steak dinner, this creamy garlic sauce elevates the ordinary steak into an extraordinary dining experience, making it a staple for steak lovers everywhere.

Quick Recipe Highlights

  • Flavor Profile: The savory steak is enhanced by a creamy garlic sauce, creating a symphony of rich and buttery flavors with hints of herbs.
  • Texture: Each bite of steak is tender and juicy, seamlessly complemented by the silky smoothness of the sauce that envelops the dish.
  • Aroma: The uplifting aroma of sautéed garlic and nourishing herbs wafts through your kitchen, making it irresistible.
  • Visual Appeal: This recipe presents beautifully with the deep caramelized crust of the steak against the ivory cream sauce, garnished with fresh herbs for a touch of color.
  • Skill Level Needed: While this dish requires some culinary skill, the techniques are approachable for home cooks who want to step up their game.
  • Special Equipment: A sturdy skillet or cast-iron pan is ideal for achieving that perfect sear.

Recipe Overview

  • Difficulty Level: This Steak with Creamy Garlic Sauce is rated as intermediate due to the need for pan-searing techniques and sauce preparation.
  • Category: This dish is perfect for dinner, whether it’s a weeknight meal or a weekend feast.
  • Cuisine: This recipe draws inspiration from classic American cuisine, blending traditional steak dishes with a luxurious French-inspired sauce.
  • Cost: The ingredients for this meal can be affordable, especially if you purchase steak on sale, making it budget-friendly for a special occasion.
  • Season: While steak can be enjoyed year-round, the rich and robust flavors of this dish are especially fitting for fall and winter evenings.
  • Occasion: Ideal for gatherings, date nights, or as a decadent weeknight treat, this recipe suits many occasions.

Why You’ll Love This Recipe

There’s something undeniably satisfying about a perfectly cooked steak, but when you add a creamy garlic sauce, it transforms the dish into something spectacular. Each bite is a delightful union of textures, with the tender meat giving way to the comforting richness of garlic cream. This recipe offers convenience, as the preparation and cooking times don’t demand hours in the kitchen, allowing you to whip up an impressive meal even on a busy night.

Beyond its decadent taste, this dish brings nutritional benefits, as steak is an excellent source of protein, vitamins, and minerals. The sauce, made with fresh ingredients, can also provide healthy fats if prepared with care. Make it a centerpiece at your dining table, and it naturally becomes a social affair, inviting conversation and pleasure as guests savor every mouthful.

From a budget perspective, steak can be invested in wisely, and when paired with a homemade sauce, it proves to be a cost-effective way to create an upscale dining experience in the comfort of your home. Each step of crafting this dish not only delivers on flavor but also provides a sense of accomplishment, making it a perfect recipe to share with friends and family.

Historical Background and Cultural Significance

Originating from various culinary traditions, the delicious combination of steak and garlic sauce has been enjoyed around the world. In American cuisine, steak has held iconic status as a symbol of hearty meals, while garlic is revered for its medicinal properties and flavor-enhancing abilities. This combination is particularly popular in French cooking, where rich sauces reign supreme, seamlessly blending with robust protein options like steak.

Over time, the recipe has evolved from simple steak preparations to gourmet variations featuring unique sauces and accompaniments. This trajectory demonstrates culinary creativity and adaptiveness, maintaining the essence of hearty meals while introducing innovative flavors. Regional variations now abound, from the classic garlic butter sauce to more contemporary creamy versions highlighting different herbs and spices.

In many cultures, sharing a meal centered around steak signifies hospitality and celebration. The preparation of a well-cooked steak and its accompanying sauce is often an art form, demonstrating both skill and flair. This dish and its evolving recipes serve as a reminder of the communal aspect of cooking, as friends and family gather to enjoy something delicious together.

Ingredient Deep Dive

Steak

The type of steak used can define the dish, with options like ribeye or sirloin being popular for their tenderness and flavor. Rich in protein, steak is also a source of important nutrients such as iron and zinc, integral to a balanced diet. When selecting steak, look for cuts that are bright in color and well-marbled for the best taste and tenderness.

When it comes to storage, fresh steak should be kept in the refrigerator and consumed within a few days for optimal quality. If you need to store it longer, freezing is a great option. Just be sure to wrap it tightly to prevent freezer burn. For substitution, turkey or chicken cutlets can substitute for a lighter option.

Garlic

Garlic is known for its distinctive aroma and flavor, often symbolizing health and wellness. Rich in antioxidants, it offers numerous health benefits, including boosting the immune system. When selecting garlic, choose heads that feel firm and heavy, avoiding any that are sprouting or soft.

Garlic can be stored in a cool, dry place and can last several weeks. To substitute garlic in recipes, consider using shallots or garlic powder, though the flavor may differ. Freshness matters greatly, so always aim to use fresh garlic for the best impact on flavor.

Common Mistakes to Avoid

  • Choosing the wrong cut of steak: Opting for tougher cuts instead of more tender ones can result in a less enjoyable dining experience.
  • Improper marinating or seasoning: Failure to properly season the steak can lead to bland flavors; always ensure your meat is well-seasoned prior to cooking.
  • Overcooking the steak: Cooking steak beyond medium can result in dry, tough meat; use a meat thermometer to check doneness.
  • Not allowing the steak to rest: Cutting into the steak immediately after cooking will release juices, making it dry; allow it to rest for a few minutes before slicing.
  • Burning the garlic: Garlic can turn bitter if overcooked; add it to the pan last when making the sauce.
  • Neglecting to deglaze: Not deglazing the pan can lead to missing out on flavor-rich bits stuck to the bottom; use broth or wine to lift those flavors.
  • Incorrect sauce consistency: If the sauce is too thin, it won’t adhere to the steak; ensure you achieve a thick, creamy texture by simmering properly.
  • Skipping the garnish: A little fresh herb or sprinkle of seasoning at the end can elevate the visual and flavor profile of the dish greatly.

Essential Techniques

Cooking the perfect steak requires technique in searing. This is crucial as it develops a flavorful crust while keeping the inside tender. To master searing, preheat your pan until hot and avoid overcrowding, which can lower the temperature and result in steaming rather than searing.

Making the creamy garlic sauce involves a foundational method known as emulsification. This is vital for a smooth sauce texture. Heat your cream gently and whisk in the garlic to meld the flavors, ensuring it doesn’t boil to prevent curdling.

Pro Tips for Perfect Steak with Creamy Garlic Sauce

1. Choose quality meat: Invest in high-quality steak for superior flavor and texture.
2. Marinate: Use a marinade or simple seasoning to enhance the depth of flavor.
3. Let it rest: Always allow your steak to rest after cooking for optimal juiciness.
4. Use a meat thermometer: This ensures your steak is cooked precisely to your preferred doneness.
5. Keep ingredients fresh: Fresh garlic and cream make a world of difference in flavor.
6. Finish with acid: A splash of lemon juice or balsamic vinegar can elevate the sauce’s flavor.
7. Plate beautifully: Take the time to plate your steak attractively; it enhances presentation.
8. Experiment with herbs: Fresh parsley or thyme can add a unique twist to the garlic sauce.

Variations and Adaptations

Regional variations of this dish can feature different herbs and spices, like adding smoked paprika for a smoky flavor. Seasonal adaptations can include grilled asparagus or roasted seasonal vegetables as side dishes to complement the main dish. For dietary modifications, consider using mushrooms in place of steak for a vegetarian alternative, and make the garlic sauce using coconut cream for dairy-free options.

Flavor variations might include adding sun-dried tomatoes or freshly cracked black pepper for an extra zing. For texture modifications, serve the sauce over creamy mashed potatoes instead of steak for a comforting twist. When it comes to presentation, consider serving in bowls instead of plates for a rustic, cozy feel.

Serving and Presentation Guide

Plating techniques can transform your dish from homey to haute cuisine. Arrange the steak on a warm plate, artfully spoon the creamy garlic sauce over the top, and add a garnish of finely chopped herbs to add color. Pair with roasted potatoes for a crunchy texture, or serve with a fresh salad for a refreshing contrast.

Garnishing ideas can include a sprinkle of fresh herbs like parsley, chives, or a bit of grated Parmesan cheese on top. Traditional accompaniments such as garlic bread or sautéed green beans elegantly complement the meal. For modern serving suggestions, consider unique serving vessels like wooden boards or slate platters to present the steak and sauce. Keep temperature considerations in mind; serve the steak warm to maximize its flavors.

Wine and Beverage Pairing

When it comes to wine pairings, a full-bodied red wine like Cabernet Sauvignon or Merlot works beautifully with steak, enhancing its rich flavors. For non-alcoholic alternatives, consider serving sparkling water with a slice of lemon or a homemade rosemary lemon soda for a refreshing kick.

If coffee or tea is more your style, bold brews like a dark roast coffee or a robust black tea can harmonize nicely with the dish. Temperature is critical; ensure your wine is served at the correct temperature—red wines at room temperature and white wines slightly chilled—for the best experience.

Storage and Shelf Life

To store leftovers, allow the steak and sauce to cool completely before placing them in airtight containers. The steak can last in the refrigerator for up to 3 days. For longer storage, consider freezing; make sure to vacuum seal to avoid freezer burn. Signs of spoilage include off smells and discoloration.

When reheating, do so gently in a skillet or microwave to prevent the steak from becoming tough. If reheating the sauce, warm it slowly over low heat, adding a splash of cream if it’s too thick. Freezing guidelines recommend consuming within 2-3 months for the best quality.

Make Ahead Strategies

To streamline dinner preparations, consider marinating the steak a day in advance. This not only enhances its flavor but also tenderizes the meat. Prepare the creamy garlic sauce ahead of time; simply store it in the refrigerator and reheat gently when ready to serve.

Quality impact assessments include knowing that while the steak should be cooked fresh for the best results, the sauce can hold well in the refrigerator. Assembly tips suggest preparing side dishes in parallel to save time while cooking the steak. If desired, add fresh elements like herbs or greens just before serving to keep their flavors vibrant.

Scaling Instructions

When it comes to halving the recipe, simply divide all ingredient quantities by two. For doubling or tripling, keep an eye on cooking times, as larger portions may take longer to reach the desired doneness. Equipment adjustments might include using larger pans or more cooking appliances as needed to accommodate greater amounts.

When timing modifications are necessary, allow extra time for the additional cooking involved, especially if you’re cooking in batches. Storage considerations must be made; ensure you have enough containers for leftovers or for the prepared steak and sauce.

Nutritional Deep Dive

The macro breakdown of this dish indicates a high protein content from the steak, complemented by fats from the creamy sauce. Protein is vital for muscle repair and overall bodily function, while healthy fats provide energy. Micronutrient analysis reveals that garlic contributes vitamins B6 and C, along with manganese, adding valuable nutrients to the meal.

Health benefits include boosting your immune system with garlic and enjoying the satisfaction of a filling meal without excess carbohydrates. Portion analysis suggests a healthy serving size of steak per person is approximately 4-6 ounces, making it manageable while remaining hearty. Weight management tips lean heavily on balancing portions with nutrient-dense sides like vegetables or salad.

Dietary Adaptations

This recipe can be adapted for gluten-free diets by ensuring all sauces and seasonings are gluten-free. For dairy-free versions, substitute heavy cream with coconut cream or a non-dairy alternative like almond or cashew cream. Vegan adaptations could replace steak with grilled portobello mushrooms or eggplant slices, making the dish entirely plant-based.

Low-carb and keto-friendly options can be achieved by focusing on the steak while opting for a low-carb accompaniment like zucchini noodles instead of traditional starches. Additionally, paleo dieters can enjoy this dish by avoiding processed ingredients and embracing fresh, whole-food options. Low-FODMAP diets can limit garlic and onion while opting for acceptable flavor enhancers.

Troubleshooting Guide

For texture issues, such as a tough steak, consider checking your cooking times or ensuring proper seasoning. Flavor balance can be fixed by adding acidity, such as lemon juice, or sweetness to counteract excessive saltiness. Temperature problems often arise from an improperly heated pan; make sure it’s at the right temperature before cooking.

Equipment challenges can be mitigated by keeping essential tools within reach and prepping ingredients before starting. Ingredient substitutions need careful consideration; for instance, using different cuts of meat may also require adjustments in cooking time. Timing concerns can be resolved by tasting throughout cooking; this ensures you remain aware of how the flavors develop.

Recipe Success Stories

Community feedback showcases that many home cooks have found this Steak with Creamy Garlic Sauce to be a massive hit at gatherings. They have shared the satisfaction of serving a dish that surpasses expectations. Variation successes, such as using different cuts of steak or introducing seasonal vegetables, have been well-received, with readers encouraging others to experiment in their own kitchens.

Adaptation stories often highlight the versatility of the sauce – home cooks have used it with chicken and pork, proving that this creamy garlic sauce can apply to various proteins. Many readers suggest capturing the moment with photographs, as the dish’s presentation can be stunning, leading to many wonderful memories made around the dinner table.

Frequently Asked Questions

What steak cut is best for this recipe?

Ribeye, sirloin, or filet mignon are excellent choices as they showcase tenderness and rich flavor, perfectly matching the creamy garlic sauce.

Can I use chicken instead of steak?

Absolutely! Chicken thighs or breasts can be substituted, and they pair beautifully with the garlic sauce as well.

Is there a way to make this sauce vegan?

Yes, simply replace the heavy cream with coconut cream or any plant-based cream to maintain a rich texture without dairy.

How do I store leftovers?

Store in an airtight container in the refrigerator for up to three days. For longer storage, freeze it in appropriate containers for up to three months.

What should I serve with this dish?

Consider pairing it with roasted vegetables or a fresh salad for a well-rounded meal that offers various flavors and textures.

Can I make the sauce ahead of time?

Yes! Prepare the sauce in advance and simply reheat it gently on the stove when you’re ready to serve.

What are some good side dishes?

Mashed potatoes, garlic bread, or sautéed greens work wonderfully alongside this rich and creamy steak dish.

Is it necessary to let the steak rest after cooking?

Yes, letting the steak rest allows the juices to redistribute, resulting in a more flavorful and juicy piece of meat.

What can I substitute for garlic?

If you’re looking for alternatives, shallots or chives can provide a milder onion flavor but expect a different taste profile.

How do I know when the steak is done cooking?

Use a meat thermometer for accuracy: aim for around 130°F for medium rare and 145°F for medium doneness.

Additional Resources

Explore these additional resources to enhance your cooking journey. For related recipes, check out our delectable garlic steak skewers and creamy mushroom pasta. Technique guides are available for mastering different cooking methods, specifically searing and sauce preparation, ensuring you can replicate this dish with confidence.

Learn more about ingredient information to understand the nutritional components of each meal you create. We also provide equipment recommendations to help you find the best tools for your cooking needs, ensuring a fantastic experience in the kitchen. Seasonal variations can uplift your cooking with fresh produce and flavors, so be sure to think creatively about your ingredients!

Join the Conversation

We invite you to share your cooking experiences! Join us on social media to post your photos and tips. Photography tips for your finished dish can help inspire others and pique their interest in trying this recipe. We also encourage reviews and community engagement, fostering a friendly space where everyone can share their modifications and successes. Your input can help others navigate their cooking journey with ease, making this a truly communal experience.

The Recipe

Steak with Creamy Garlic Sauce

Serves: 4

Prep Time: 10 mins

Cook Time: 15 mins

Total Time: 25 mins

Kitchen Equipment Needed

  • Cast iron skillet or heavy-bottomed pan
  • Meat thermometer
  • Whisk
  • Chopping board
  • Knife

Ingredients

  • 4 ribeye steaks, about 1-inch thick
  • Salt and pepper to taste
  • 2 tablespoons olive oil
  • 4 cloves garlic, minced
  • 1 cup heavy cream
  • 1 teaspoon dried thyme
  • 1 tablespoon fresh parsley, chopped (for garnish)

Directions

  1. Season both sides of the steaks generously with salt and pepper.
  2. Heat olive oil in a cast-iron skillet over medium-high heat until shimmering.
  3. Add the steaks and cook until browned, about 4-5 minutes per side for medium-rare.
  4. Remove the steaks from the skillet and let them rest on a plate, covered loosely with foil.
  5. In the same skillet, add minced garlic and cook for 1 minute until fragrant.
  6. Pour in the heavy cream and stir in the thyme, scraping up any browned bits from the pan.
  7. Let the sauce simmer for a few minutes until thickened slightly, then season with salt and pepper to taste.
  8. Serve the steaks topped with the creamy garlic sauce and garnish with fresh parsley.

Recipe Notes

  • Feel free to use different cuts of steak according to your preference and budget.
  • The garlic sauce can be prepared in advance; just reheat before serving.
  • For added flavor, consider adding freshly cracked black pepper or a touch of red pepper flakes to the sauce.

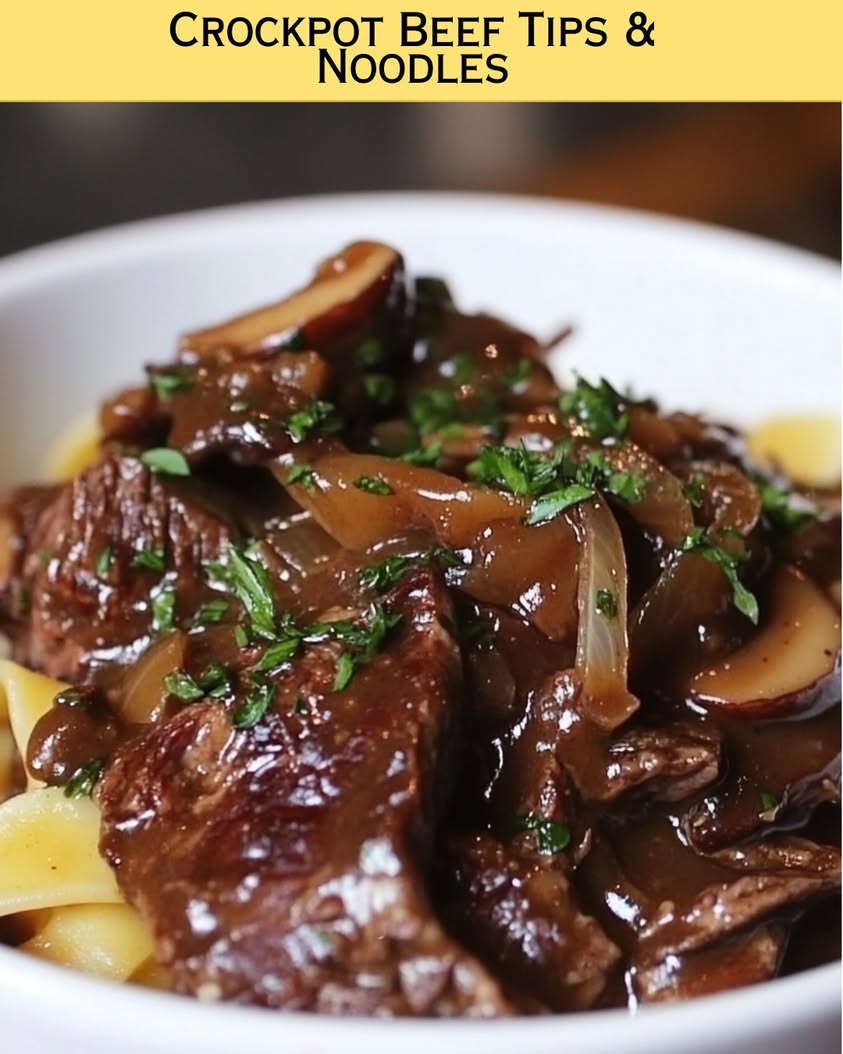
Delicious Crockpot Beef Tips and Noodles for Effortless Dinners

Crockpot Beef Tips & Noodles: A Cozy Comfort Food Delight

⚖️
Difficulty
Easy

⏲️
Prep Time
15 mins

🕒
Cook Time
6 hours

⏱️
Total Time
6 hours 15 mins

🍽️
Servings
4 servings

Crockpot Beef Tips & Noodles is the epitome of comfort food, perfect for those busy weekdays or cozy weekends. This dish features succulent beef tips that simmer to perfection in a rich, savory sauce, served over tender noodles that soak up all the delicious flavors. The use of a slow cooker allows the meat to become melt-in-your-mouth tender while developing deep, complex flavors that will surely satisfy even the heartiest of appetites.

As the aroma wafts through your home, this dish will undoubtedly evoke feelings of warmth and nostalgia, reminding everyone of home-cooked meals shared with family. The hearty combination of beef, noodles, and spices creates a satisfying meal that brings everyone to the table, making it not just a recipe, but a cherished part of family gatherings.

Quick Recipe Highlights

  • Flavor Profile: This dish offers a perfect balance of savory spices and tender beef, creating a deeply satisfying experience for your taste buds.
  • Texture: The tender beef tips paired with soft, chewy noodles provide a delightful contrast in textures that keeps every bite interesting.
  • Aroma: As it cooks, the mingled aromas of garlic, beef, and herbs draw you in like a comforting embrace.
  • Visual Appeal: Served in a rich gravy over golden noodles, this dish is both hearty and visually enticing, making it a feast for the eyes as well.
  • Skill Level Needed: This recipe is straightforward and beginner-friendly, requiring no advanced culinary skills, just a bit of patience as it cooks.
  • Special Equipment: A good-quality crockpot is essential for this recipe, allowing you to set it and forget it while the flavors develop beautifully.

Recipe Overview

  • Difficulty Level: This recipe is easy to follow, making it suitable for home cooks of all skill levels. The straightforward steps and forgiving cooking method mean you can focus on enjoying your daily activities while dinner practically prepares itself.
  • Category: This dish fits perfectly into the category of comfort food, ideal for family meals, potlucks, or any occasion where you want to impress without stress.
  • Cuisine: With roots firmly planted in American home cooking, variations of beef tips can be found across many cultures, offering different twists that reflect regional tastes.
  • Cost: The ingredients for this recipe are relatively inexpensive, making it a budget-friendly option that doesn’t skimp on flavor or heartiness.
  • Season: This dish is particularly great during the colder months when warm meals are preferred, but it can also be enjoyed year-round for its comforting qualities.
  • Occasion: Perfect for family dinners, gatherings, or a cozy night in, this dish is versatile enough for any occasion.

Why You’ll Love This Recipe

The incredible taste and texture of Crockpot Beef Tips & Noodles is hard to resist. The dish is rich in flavor due to the slow cooking process, which allows the beef to absorb all the spices and sauces while tenderizing beautifully. Each bite reveals a depth of savory goodness, perfectly complemented by the noodles.

In terms of preparation, this recipe is a dream come true for busy individuals. With just a quick 15 minutes of prep, you can toss everything into the crockpot and let it work its magic while you get on with your day. The convenience of using a slow cooker means you can set your meal in the morning and return home to a deliciously prepared dinner, making it truly time-efficient.

Nutritionally, this dish offers a hearty meal packed with protein from the beef and carbohydrates from the noodles, providing a balanced plate. Adding vegetables or a side salad can further enhance its nutritional profile, making it a wholesome option for family dinners.

Gathering around a warm meal like this fosters connection and conversation, making it perfect for social occasions. Whether you’re having friends over for dinner or simply catching up with family, Crockpot Beef Tips & Noodles creates a comforting atmosphere where everyone can relax and enjoy good food together.

Lastly, this recipe presents excellent value for your money. Using affordable cuts of beef and pantry staples, you can serve a satisfying meal without breaking the bank, allowing you to enjoy delicious home cooking that’s both economical and accessible.

Historical Background and Cultural Significance

The origins of beef tips as a dish trace back to traditional American home cooking, where resourceful cooks aimed to tenderize less expensive cuts of beef into satisfying meals for families. The slow-cooked method became popular for its ability to enhance flavor and tenderness, particularly during the 20th century when crockpot cooking surged in popularity.

Culturally, dishes like Crockpot Beef Tips & Noodles hold a special place in American homes. They symbolize family gatherings and comfort, reminding many of warm kitchens filled with the love and laughter of shared meals. The notion of slow cooking as nurturing reflects the desire to create lasting memories over food.

Over the years, this recipe has evolved, with countless adaptations and alterations to suit various tastes and dietary preferences. From the addition of different vegetables to alternative cooking methods, each variation adds a unique spin while maintaining the essence of the original dish.

Regionally, beef tips can be prepared in different styles, with variations seen across the Midwest and Southern regions of the United States. Each area boasts its version, often influenced by local ingredients and cooking traditions, adding another layer to the cultural richness of this beloved dish.

Ingredient Deep Dive

Beef Tips: Traditionally cut from the chuck or round, beef tips are prized for their robust flavor and ability to become tender during slow cooking. Selecting a high-quality cut is key; look for marbling, as fat helps to keep the meat moist. Store leftover beef tips in the fridge and consume within three to four days, or freeze for longer storage. If you’re short on time, you can substitute with pre-cut beef stew meat.

Noodles: The type of noodle you use can greatly influence the final dish. Egg noodles are a classic choice, offering a soft yet firm texture that complements the beef tips. When selecting noodles, check for quality—fresh or whole-grain versions often provide better flavor and nutrition. Store uncooked noodles in a cool, dry place and cooked noodles refrigerated. For variations, try substituting with gluten-free noodles to cater to dietary needs.

Common Mistakes to Avoid

  • **Skimping on browning the beef:** Not browning the beef tips before they go into the crockpot can lead to less flavor. Browning helps develop a richer taste and texture.
  • **Overcrowding the crockpot:** Filling the crockpot past its capacity can prevent the beef from cooking evenly. Stick to the recommended serving size for the best results.
  • **Not allowing enough cooking time:** Cooking for less than the recommended time can result in tough beef that hasn’t properly tenderized. Patience is key with slow cooking.
  • **Skipping the liquid:** A common mistake is not adding sufficient liquid, which is essential for proper slow cooking and flavor development. Always ensure there’s enough sauce to cover the beef and noodles.
  • **Forgetting to stir occasionally:** While it’s not crucial, stirring the ingredients occasionally can help redistribute the flavors, especially if the meat is layered on top.
  • **Overcooking the noodles:** Adding noodles too early can lead to mushiness. Instead, add them at the end to ensure they retain their texture.
  • **Ignoring personal taste:** Failing to taste and adjust seasoning can leave your dish flat. Don’t hesitate to add more herbs or spices to suit your palate.
  • **Not using a meat thermometer:** Undercooked beef tips can be unsafe. Using a meat thermometer ensures your beef reaches a safe internal temperature of 145°F.
  • **Neglecting to rest the meat:** Letting the beef rest after cooking allows juices to redistribute, leading to a more tender and juicy final result.
  • **Using low-quality ingredients:** Using inferior beef or cheap noodles can compromise the flavor and enjoyment of the dish. Always choose the best ingredients you can find.

Essential Techniques

**Browning the Beef:** This technique is essential for developing a rich, deep flavor. To master it, make sure to sear the beef in hot oil until a crust forms. Common pitfalls include overcrowding the pan, which can cause steaming instead of browning. Aim for a golden-brown crust for optimal results.

**Utilizing a Slow Cooker:** Understanding how to properly use a slow cooker is vital for this recipe. Ensure you set the correct temperature (low or high) based on your schedule. A common issue is not retaining enough moisture; always check the lid seal and consider adding more liquid if necessary.

Pro Tips for Perfect Crockpot Beef Tips & Noodles

1. For an extra flavor boost, marinate your beef tips overnight with spices and sauces for deeper penetration of flavors.

2. Don’t be afraid to customize your broth! Use beef stock or broth instead of water to elevate the overall taste.

3. For added nutrition, mix in your choice of vegetables – carrots, peas, or bell peppers work wonderfully.

4. Use whole-grain noodles to enhance the fiber content of your dish.

5. If time permits, let the dish cool and refrigerate it overnight to allow flavors to meld even further before reheating.

6. Fresh herbs added at serving time can brighten the dish and add a pop of color.

7. Experiment with different types of sauces like teriyaki or BBQ to give the dish an exciting twist.

8. Be mindful of serving sizes; larger servings may require longer cooking times to reach tenderness.

Variations and Adaptations

Explore different regional adaptations of this classic. In the Southwest, add jalapeños and spices for a kick. Seasonal adaptations could include adding mushrooms in the fall or fresh peas in the spring for vibrant color and flavor. Dietary modifications are easy; consider using lean turkey or chicken to reduce fat content while maintaining protein levels. For flavor variations, try adding red wine for depth or a splash of soy sauce for umami richness. Texture modifications could involve topping with crispy fried onions for a delightful crunch.

Serving and Presentation Guide

When plating this dish, use a large bowl to allow for generous servings that can be layered attractively. Garnishing with freshly chopped parsley or chives adds a burst of color and freshness. For traditional accompaniments, serve with a slice of crusty bread to soak up the delicious gravy. Alternatively, consider modern serving suggestions such as presenting with a side of crispy green beans for added crunch. Remember to serve hot, and manage portion sizes to ensure everyone gets enough without waste—as this dish is always a crowd favorite.

Wine and Beverage Pairing

A full-bodied red wine, such as Cabernet Sauvignon or Merlot, pairs beautifully with the rich flavors of this dish. The tannins in these wines complement the beef nicely. For a non-alcoholic choice, consider a hearty grape juice or an herbal iced tea, both of which can balance the savory aspects of the meal. If you want something warm, a spiced apple cider option can also create a wonderful pairing, especially in cooler months.

Storage and Shelf Life

For optimal storage, place leftovers in an airtight container and refrigerate for up to four days. To extend shelf life, consider freezing portions in labeled freezer bags for up to three months. When reheating, ensure the dish reaches an internal temperature of 165°F to maintain food safety. Signs of spoilage include off smells or discoloration, so always check before consuming if unsure. To reheat, use a crockpot or stovetop to gently warm, adding a splash of broth for moisture if needed.

Make Ahead Strategies

One of the beauties of this recipe is how well it preps ahead. You can chop vegetables and portion meals in advance. Assemble all ingredients in the crockpot the night before, store in the fridge, and then simply set it to cook in the morning. This way, meal preparation is quick and easy, allowing for a delicious home-cooked meal without the fuss. For quality, assess each component before freezing; when ready to assemble, ensure to reheat on low if needed.

Scaling Instructions

If you desire to halve or double this recipe, simply adjust the ingredients accordingly while keeping the cooking times the same for your crockpot. If tripling, consider using a larger slow cooker or preparing in batches. Additionally, you may need to check for doneness earlier or extend cooking time slightly, especially when scaling up the number of beef tips. Storage should also be adjusted based on increased portions, ensuring you have adequate space.

Nutritional Deep Dive

This dish offers a healthy macro breakdown, providing significant protein from the beef and complex carbohydrates from the noodles. Each serving provides a balanced nutritional profile while also offering essential micronutrients, particularly when using added vegetables. It’s a great option for those monitoring their dietary intake, making sure to adjust serving sizes based on individual dietary needs.

Dietary Adaptations

For gluten-free diets, use gluten-free noodles and check any broths for gluten content. Dairy-free versions can easily be achieved by omitting cream-based ingredients or using coconut cream instead. For those following keto, opt for low-carb noodles or zucchini noodles for a delicious twist. Paleo or Whole30 adaptations can be made by using compliant cuts of beef and ensuring no added sugars are included in sauces.

Troubleshooting Guide

If you encounter rubbery texture, ensure you’ve cooked the beef tips long enough and added adequate liquid. Balancing flavor can be tricky; if too salty, add a touch of sweetness with brown sugar, or if too bland, adjust seasoning at the final moments of cooking. Equipment challenges often arise with slow cookers, so ensure yours is functioning properly and holds consistent temperature.

Recipe Success Stories

Readers share how this recipe has become a family favorite, with personal anecdotes of adaptations based on other cuisines. From introducing spicy elements to viewers incorporating their favorite vegetables, many have tailored the dish to fit their preferences. Community snapshots showcase various plating styles, emphasizing the joy of connecting through shared recipes.

Frequently Asked Questions

Can I use frozen beef tips? Yes, frozen beef can be used; just ensure to extend the cooking time to allow for thorough heating and tenderness during cooking.

What can I use as a thickener for the gravy? A simple mix of cornstarch and cold water can be stirred in toward the end of cooking to thicken the gravy if desired.

Can I substitute noodles for rice? Absolutely! Rice can serve as a great substitute; ensure to adjust the cooking liquid based on your rice type.

How do I adjust for high altitude cooking? If you live at a high altitude, consider increasing the cooking time by approximately 30 minutes to ensure everything is thoroughly cooked.

Can leftovers be reheated in the microwave? Yes, leftovers can be reheated in the microwave; just add a splash of broth or water to prevent drying out.

What other spices pair well with this dish? Consider adding bay leaves, paprika, or even a hint of chili powder for a nuanced flavor.

Is it possible to cook this dish in a regular pot instead of a crockpot? Yes, slow simmering in a regular pot is possible, but ensure to monitor the temperature closely and stir periodically.

How do I know when the beef is done? The beef should be fork-tender; it’s an indicator that it has cooked long enough to break down connective tissue.

Can I add more vegetables? Definitely! Feel free to throw in carrots, celery, or mushrooms for added nutrients and flavors.

What’s a good side dish to serve with this meal? A fresh green salad or steamed broccoli pairs nicely with the heartiness of the beef and noodles.

Additional Resources

For further exploration into slow cooking methods, consider checking out additional slow cooker recipes available on our blog. You’ll find a variety of dishes that celebrate the beauty of convenience and flavor, highlighting the versatility of this kitchen appliance. Don’t forget to explore our ingredient guides for more information about selecting quality beef and noodles, as well as tips on essential kitchen equipment.

Join the Conversation

We love hearing from you! Share your experience with Crockpot Beef Tips & Noodles on social media, and don’t forget to tag us. Snap a photo of your finished dish—we’re always excited to see how you interpret the recipe! Engage with our community, share variations you’ve created, and help inspire fellow cooks to get creative in the kitchen!

The Recipe

Crockpot Beef Tips & Noodles

Serves: 4 servings

Prep Time: 15 mins

Cook Time: 6 hours

Total Time: 6 hours 15 mins

Kitchen Equipment Needed

  • Crockpot or slow cooker
  • Skillet (for browning beef)
  • Cutting board
  • Knife
  • Measuring cups and spoons

Ingredients

  • 2 pounds beef tips, cut into 1-inch cubes
  • 1 onion, diced
  • 3 cloves garlic, minced
  • 4 cups beef broth
  • 1 tablespoon Worcestershire sauce
  • 1 tablespoon soy sauce
  • 1 teaspoon dried thyme
  • 2 cups egg noodles
  • Salt and pepper, to taste
  • Fresh parsley, for garnish

Directions

  1. Begin by browning the beef tips in a skillet over medium-high heat until all sides are well-seared.
  2. Transfer the browned beef to the slow cooker and add diced onion, minced garlic, beef broth, Worcestershire sauce, soy sauce, thyme, salt, and pepper.
  3. Cover and cook on low for 6 hours or on high for 3 hours, until beef is tender.
  4. In the last 30 minutes of cooking, add the egg noodles to the crockpot, ensuring they’re submerged in the broth.
  5. Once noodles are cooked and have absorbed flavors, serve hot, garnished with fresh parsley.

Recipe Notes

  • Can substitute beef broth with vegetable broth for a lighter flavor.
  • Add vegetables like carrots or peas for added nutrition.
  • For thicker gravy, mix cornstarch with water and stir in during the last 15 minutes of cooking.

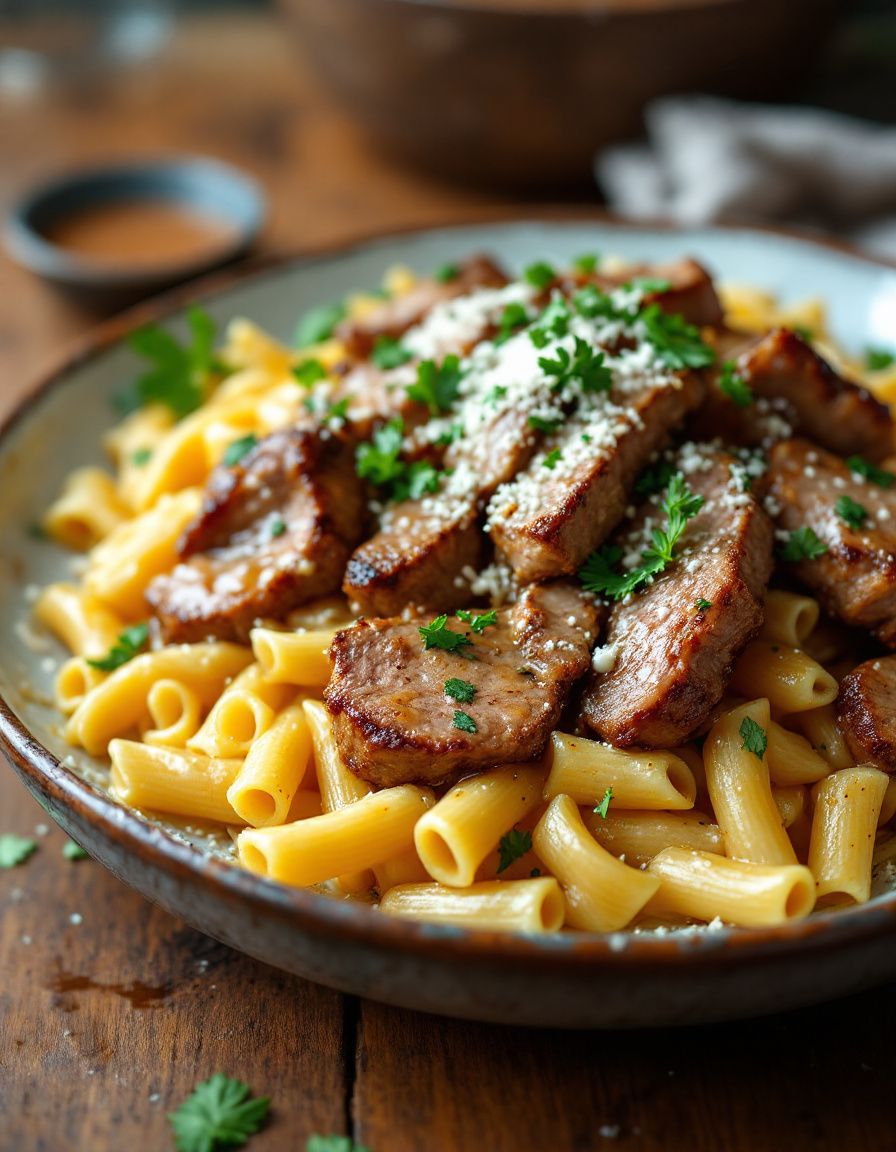
Best Garlic Butter Steak Tips with Cheesy Rigatoni Recipe

Garlic Butter Steak Tips with Cheesy Rigatoni: A Perfect Comfort Meal

⚖️
Difficulty
Medium

⏲️
Prep Time
15 mins

🕒
Cook Time
25 mins

⏱️
Total Time
40 mins

🍽️
Servings
4

Are you ready to tantalize your taste buds with a dish that perfectly blends the savory richness of garlic butter steak tips with the creamy decadence of cheesy rigatoni? This Garlic Butter Steak Tips with Cheesy Rigatoni recipe is a delightful harmony of flavors and textures that will make you feel like a culinary superstar! From the sizzling, mouthwatering steak to the al dente pasta enveloped in a luscious cheese sauce, each bite is a celebration of comfort food at its finest.

Imagine sitting down to a steaming plate of this perfect meal, surrounded by family and friends. The aroma of garlic and fresh herbs wafting through the air, the vibrant colors of the dish catching your eye, and the first bite bursting with flavor—such an experience is not only about eating; it’s about creating memories and sharing moments around the table. Your journey to culinary bliss begins here with this irresistible recipe!

Quick Recipe Highlights

  • Flavor Profile: This dish offers a perfect balance of savory garlic, nutty butter, and hearty steak complemented by a creamy, cheesy pasta.
  • Texture: The steak is tender and juicy, while the rigatoni is perfectly al dente, creating a delightful difference in each mouthful.
  • Aroma: Your kitchen will be infused with the fragrant notes of garlic, herbs, and melted cheese, inviting everyone to the table.
  • Visual Appeal: A gorgeous plating with golden-brown steak tips and a creamy pasta accented by a sprinkle of herbs makes for a dish as pleasing to the eye as it is to the palate.
  • Skill Level Needed: This recipe requires moderate cooking skills, making it suitable for home cooks looking to impress.
  • Special Equipment: All you need is a skillet and a pot—nothing extravagant, just simple tools to whip up this delicious meal!

Recipe Overview

  • Difficulty Level: This garlic butter steak tips recipe is classified as medium, involving basic techniques like sautéing and boiling pasta.
  • Category: Ideal for dinner, this recipe fits perfectly into weeknight meals or special occasions when you want to spoil your loved ones.
  • Cuisine: Merging classic American influences with Italian favorites, this dish showcases how flavorful ingredients can come together beautifully.
  • Cost: The cost for this recipe is reasonable, mainly featuring affordable cuts of meat and pantry staples, making it accessible for everyday cooking.
  • Season: This dish shines in any season, but the heartiness makes it especially comforting during the colder months.
  • Occasion: Perfect for family gatherings, casual get-togethers, or even a cozy night in, this meal suits a variety of dining situations.

Why You’ll Love This Recipe

The delightful combination of taste and texture makes Garlic Butter Steak Tips with Cheesy Rigatoni a crowd-pleaser. The rich umami flavors of steak, enhanced by aromatic garlic and smooth butter, create a feast for the senses. Paired with the creamy rigatoni, each bite is an inviting explosion of flavor, making it a dish that’s hard to resist.

In addition to taste, convenience plays a significant role in this recipe’s appeal. With a modest prep and cook time, you can take a break from cooking while still serving an impressive meal. Perfect for busy weeknights or leisurely weekends, this recipe allows for flexibility without sacrificing flavor.

Nutritionally speaking, this dish incorporates protein-packed steak and hearty pasta for a well-rounded meal. Pairing these ingredients offers a fulfilling option for family dinners while ensuring everyone’s satisfied. The addition of herbs can enhance your nutritional intake, presenting a well-balanced diet.

Garlic Butter Steak Tips with Cheesy Rigatoni also carries social and entertaining value. Its hearty, sharing-friendly nature encourages family and friends to gather around the table, fostering connection and conversation over tasty bites. Meals become memorable experiences, celebrating togetherness over delectable flavors.

Cost-effectiveness is another notable benefit. Using accessible ingredients and affordable cuts, you can nourish your family without breaking the bank. This dish transforms humble pantry items into a luxurious experience that elevates everyday meals into something special.

Historical Background and Cultural Significance

The origin of Garlic Butter Steak Tips with Cheesy Rigatoni can be traced back to the blending of American and Italian culinary traditions. Steak, a staple in American diets, marries beautifully with the subtle influences of Italian pasta. Dishes like these exemplify the creative spirit of home cooks who bring together flavors from different cultures, creating a beloved American classic.

Culturally, this dish reflects the importance of comfort food in bringing families together. As flavors meld and fill the air, the aroma often sparks conversations about family meals and cherished memories. It is a culinary bond that transcends generations, reminding us of the love and joy associated with home-cooked meals.

Over the years, this recipe has evolved, often seen on tables during special occasions or holiday celebrations. The comforting characteristics of garlic butter and steak have made it a go-to for gatherings, blending seamlessly with Italian pasta to create a well-rounded family meal.

Regional variations also offer unique takes on this dish. From the use of different cuts of steak to variations in pasta and cheese, regional preferences can adapt this recipe, making it a unique expression of local culinary art while retaining its core beloved flavors.

Ingredient Deep Dive

Steak Tips:
Steak, especially cuts like sirloin or tenderloin, provides the rich protein foundation of this dish. The choice of steak often reflects regional preferences, with certain areas favoring specific cuts for their flavor and tenderness. Nutritionally, beef is an excellent source of iron, protein, and B vitamins, making it a popular choice in many diets. When selecting steak, look for marbling and freshness to ensure maximum flavor; proper storage involves refrigeration and consumes within a few days for freshness. Substitutions can include chicken or plant-based proteins for those seeking alternatives.

Rigatoni:
Rigatoni is an integral component, providing texture and a medium for the rich flavors of the butter and steak. Traditionally associated with Italian cuisine, the name translates to “ridged” in Italian, as its shape allows it to capture sauce beautifully. Nutritionally, rigatoni offers a good source of carbohydrates for energy. When selecting, opt for whole grain or gluten-free versions if preferred; storing cooked rigatoni includes refrigerating leftovers in an airtight container. Substituting with other pasta types like penne or fusilli can bring added variety.

Common Mistakes to Avoid

  • Overcooking the steak – This can lead to a tough, dry texture. Ensure to monitor cooking time closely and aim for a medium-rare finish for the best flavor.
  • Not letting the steak rest – Allowing cooked steak to rest for a few minutes post-cooking enables juices to redistribute, enhancing flavor and juiciness.
  • Boiling pasta in unsalted water – Properly salting the water elevates the pasta’s taste, making it a flavorful base for the creamy sauce.
  • Using low-quality cheese – Opting for fresh, high-quality cheese makes a significant difference in the creaminess and richness of the rigatoni sauce.
  • Not using enough garlic – Garlic plays a critical role in flavor; feel free to add more according to taste preferences.
  • Skipping the herbs – Fresh herbs add depth; omitting them can result in a one-dimensional flavor profile.
  • Rushing the cooking process – Cooking on too high a heat may lead to uneven cooking and burnt food; slower, moderate heat ensures better flavor.
  • Ignoring sauce consistency – Ensure the cheese sauce is creamy and well-combined; if too thick, add a splash of pasta water to adjust.
  • Misestimating portion sizes – Making too little can result in unhappy diners, plan your servings according to appetites.
  • Not tasting as you cook – This is essential for adjusting flavors; be sure to taste your dish throughout the cooking process.

Essential Techniques

Marinating steak tips is a key technique for infusing flavors. Allow the meat to soak in a marinade for at least 30 minutes before cooking to enhance its taste and tenderness. Monitor the marinating time since overly acidic marinades can break down the meat too much, leading to a mushy texture.

Properly boiling pasta is vital for achieving the desired al dente texture. Start with plenty of water, and once it reaches a rolling boil, add the pasta without overcrowding. Stir occasionally and taste for doneness, typically 1-2 minutes sooner than package instructions for perfect pasta.

Sautéing the garlic and butter requires attention; cook them just until fragrant to prevent burning. Overcooked garlic can turn bitter and dominate the dish. The perfectly sautéed components add richness without overpowering the other flavors.

Making a cheese sauce involves gently melting the cheese into the cream or butter mixtures without curdling. Use low heat, continuously stirring to create a silky consistency. If the sauce appears grainy, add additional liquid or cheese gradually and continue stirring until creamy.

Creating a winning presentation is crucial for serving this dish. Use a large serving platter and layer the rigatoni first, then top with the steak tips. Add a sprinkle of freshly chopped herbs for a burst of color and a garnish of grated cheese on top for finishing.

Pro Tips for Perfect Garlic Butter Steak Tips with Cheesy Rigatoni

1. Ensure the steak is at room temperature before cooking for even cooking and better searing.
2. Use freshly minced garlic for maximum flavor and an aromatic experience.
3. Don’t overcrowd the pan when searing steak tips; this leads to steaming rather than browning.
4. For creamier sauce, slowly add warmed cream to cheese instead of cold milk or cream.
5. Experiment with your choice of cheese for the rigatoni; a blend of cheeses can create a unique flavor.
6. Allow leftovers to sit for a few minutes before reheating to avoid rubbery pasta.
7. Add a touch of lemon juice or zest to the pasta for a refreshing contrast.
8. Invite seasonal produce, like sautéed spinach or roasted vegetables, for added nutrition and flavor.

Variations and Adaptations

Explore regional variations by substituting the steak for local meats. For instance, using grilled chicken or shrimp can create a lighter dish without compromising flavors. Seasonal adaptations also shine; incorporate roasted vegetables in the fall or fresh summer herbs for a bright flavor profile.

For dietary modifications, consider using a low-carb pasta alternative, swapping heavy cream for a plant-based cream for a vegan twist, or opting for gluten-free rigatoni. Flavor variations can readily be introduced through spices, like smoked paprika or chili flakes, depending on your preference. Playing with the texture can be delightful as well; try adding crunch with toasted breadcrumbs as a topping or incorporating creamy ricotta into the cheese sauce for richness.

Serving and Presentation Guide

For an attractive presentation of Garlic Butter Steak Tips with Cheesy Rigatoni, use contrasting colors to enhance visual appeal. Use a large rustic serving dish to showcase the pasta, followed by the steak. As a garnish, sprinkle with freshly chopped parsley or basil, along with a touch of grated parmesan.

Consider serving with crusty bread or a side salad for balance and more hearty fare. Temperature matters too—serve the dish hot for optimal flavor and enjoy while it’s fresh. For portion control, using a serving spoon ensures everyone can enjoy a balanced plate.

Wine and Beverage Pairing

For the ideal wine pairing, a rich, bold red wine, like Cabernet Sauvignon or Malbec, complements the savory flavors of the steak and garlic. If preferring white wine, consider a creamy Chardonnay that matches the cheese sauce’s richness. For non-alcoholic alternatives, a sparkling water with lemon or an herbal iced tea can cleanse the palate beautifully.

Considering temperature, serve red wines slightly below room temperature and whites chilled to enhance their flavor profile. For coffee lovers, a medium roast blend can work as a delicious digestif post-meal, offering warmth and depth.

Storage and Shelf Life

To store leftovers of Garlic Butter Steak Tips with Cheesy Rigatoni, place them in an airtight container and refrigerate. Proper storage will keep the dish fresh for up to 3-4 days. For longer preservation, freezing is an option; allow the dish to cool completely before transferring it to a freezer-safe container.

Reheating can be done in the microwave or on the stove with a touch of added liquid to prevent drying. Always check for signs of spoilage before consuming; if the dish has an off smell or appearance, it’s better to discard it.

Make Ahead Strategies

Preparing for Garlic Butter Steak Tips with Cheesy Rigatoni can begin a day before. Consider marinating steak tips the night before to enhance flavor absorption, and cook the rigatoni al dente slightly earlier, allowing you to finish the dish right before serving.

Store components separately to maintain freshness; reheat the steak quickly on the stovetop while you prepare the cheese sauce. Consider reserving a fresh green topping to elevate flavor and freshness right before serving, providing a delightful finishing touch.

Scaling Instructions

Halving the recipe is simple—just divide all ingredients by two and follow the same cooking methods. Doubling or tripling requires increased pot size for pasta and a larger skillet for steak; cooking times may slightly vary due to volume, so monitor thoroughly.

For each adaptation, consider storage needs for leftovers; scaling up can result in more food, so have containers on hand to store delicious extras!

Nutritional Deep Dive

In this dish, the macro breakdown is primarily supported by hearty protein from beef and carbohydrates from the rigatoni. Including cheese adds healthy fats, while herbs infuse beneficial micronutrients. Beef provides essential iron, which is particularly important for red blood cell production; a serving of rigatoni delivers necessary energy for daily activities as well.

Eager cooks should pay attention to portion sizes, as this recipe is rich; understanding serving sizes can assist in weight management while ensuring satisfaction throughout the meal.

Dietary Adaptations

For a gluten-free adaptation, opt for corn or rice-based rigatoni, ensuring all other components remain gluten-free, including spices and broth used. Dairy-free can be achieved with a creamy coconut milk base in the cheese sauce, while nutritional yeast can add cheesy flavors without dairy.

Vegans can replace steak with marinated mushrooms or vegan seitan, maintaining the essence of the dish while accommodating dietary restrictions. Low-carb diets can benefit from substituting pasta with zucchini noodles or spaghetti squash, providing a fantastic textural element while reducing carbohydrates.

Troubleshooting Guide

If the steak turns out tough, it’s likely due to overcooking or selecting a less tender cut. Choosing a good-quality cut and respecting cooking times can avoid this issue.

Should the cheese sauce be grainy, ensure adding cheese slowly to a warm base and whisking until completely melted to prevent clumping. An overly thick sauce can arise from not adding enough liquid; incorporate warmed pasta water for adjustments.

Recipe Success Stories

Community feedback on Garlic Butter Steak Tips with Cheesy Rigatoni shines with enthusiasm, where many home cooks have experimented successfully with various flavors and adapted them to suit their preferences. Readers have shared photos of their spaghetti variations full of fresh vegetables or delightful versions with less cheese for a lighter option, contributing to an inspiring array of adaptations.

Others have expressed how discovering this dish has cemented its place in their weekly rotation, thanks to its comfort and accessibility, proving it to be a beloved recipe in many households, scoring rave reviews.

Frequently Asked Questions

Can I use other types of pasta? Yes, you can substitute rigatoni with any pasta you prefer, such as penne, fusilli, or even gluten-free options.

How do I store leftovers? Store leftovers in an airtight container in the refrigerator for 3 to 4 days, or freeze them for longer storage.

Can I make this recipe vegetarian? Absolutely! Substitute steak with hearty vegetables like mushrooms or jackfruit for a delicious meat-free version.

What if my steak is overcooked? Lean cuts are preferable, so if overcooked, consider using thinner slices for a more tender mouthfeel.

Can I prep this ahead of time? Yes, marinate your steak the night before and prep the pasta a few hours ahead before combining everything just before serving.

What can I use instead of garlic butter? Olive oil and freshly minced garlic can create a lighter alternative for those who prefer less richness.

Is this meal suitable for meal prep? Definitely! The dish stores well, making it perfect for meal prep. Just reheat before consuming.

How can I elevate the flavor further? Add fresh herbs, like basil or parsley, to brighten the flavors before serving.

Is there a recommended wine pairing? A rich red wine like Cabernet Sauvignon pairs beautifully with the savory flavors of this dish.

Can I add vegetables to this recipe? Yes! Incorporate vegetables like spinach or bell peppers for added nutrition and color.

Additional Resources

Dive into related recipes that complement Garlic Butter Steak Tips with Cheesy Rigatoni. Explore sauce guides to create your base for pasta dishes, ingredient information to enrich your knowledge on steak quality, or equipment recommendations to elevate your cooking game.

Seasonal variations are also intriguing—search for ideas that showcase summer’s bounty or warming winter recipes that favor hearty ingredients like this one.

Join the Conversation

We’d love to hear from you! Share your experiences making Garlic Butter Steak Tips with Cheesy Rigatoni on social media. Share your photography capturing the beauty of your dish and leave your recipe reviews. Engaging with others will only enhance our community, and we look forward to your unique variations and feedback!

The Recipe

Garlic Butter Steak Tips with Cheesy Rigatoni

Serves: 4

Prep Time: 15 mins

Cook Time: 25 mins

Total Time: 40 mins

Kitchen Equipment Needed

  • Skillet or frying pan
  • Large pot for boiling pasta
  • Colander for draining pasta
  • Measuring cups and spoons
  • Cooking utensils (spatula and whisk)

Ingredients

  • 1.5 lbs steak tips (sirloin or tenderloin)
  • 8 oz rigatoni pasta
  • 4 tbsp garlic butter
  • 1 cup heavy cream
  • 1 cup shredded cheese (mozzarella or blend)
  • Salt and pepper to taste
  • Fresh parsley for garnish

Directions

  1. In a bowl, season the steak tips with salt and pepper. Heat garlic butter in a skillet over medium-high heat.
  2. Sear steak tips in the pan for about 3-4 minutes per side until browned and cooked to your preference. Remove from heat and let rest.
  3. Boil the rigatoni in salted water according to package instructions; drain and set aside.
  4. In the same skillet, pour heavy cream and bring to a simmer. Gradually add shredded cheese while whisking to combine.
  5. Once the cheese sauce is smooth, stir in the rigatoni and allow to cook for an additional 2-3 minutes.
  6. Serve rigatoni in bowls topped with succulent steak tips and garnish with parsley.

Recipe Notes

  • Feel free to add vegetables like broccoli or spinach to increase nutritional value.
  • Adjust spices and cheese types to suit your taste preferences.
  • Leftovers can be stored for 3–4 days in the fridge and reheated before serving.

Irresistible Gourmet Cheesy Mushroom and Garlic Toasts Recipe

Gourmet Cheesy Mushroom and Garlic Toasts: Irresistibly Flavorful Appetizer

⚖️
Difficulty
Easy

⏲️
Prep Time
10 mins

🕒
Cook Time
15 mins

⏱️
Total Time
25 mins

🍽️
Servings
4 servings

Mouthwatering and utterly delicious, our Gourmet Cheesy Mushroom and Garlic Toasts are the perfect starter to any meal or a delightful snack on their own. With a combination of sautéed mushrooms, fragrant garlic, and a generous layer of melted cheese piled onto crusty bread, this recipe captures the essence of comfort food while elevating it to a gourmet experience. Each bite is a harmonious blend of earthy flavors and rich textures that will have your guests coming back for seconds.

The rich aroma of garlic wafting through your kitchen, paired with the savory scent of mushrooms sautéing to perfection, creates an inviting atmosphere. The toasts emerge from the oven golden and cheesy, making them visually stunning as well as appetizing. Whether served at a dinner party, holiday gathering, or casual evening with family, these toasts will undoubtedly steal the spotlight.

Quick Recipe Highlights

  • Flavor Profile: Savory, nutty, and cheesy with a hint of garlic.
  • Texture: Crispy bread with creamy melted cheese and tender mushrooms.
  • Aroma: Inviting garlic and earthy mushroom notes.
  • Visual Appeal: Golden brown toasts topped with bubbling cheese.
  • Skill Level Needed: No advanced skills required, perfect for beginners.
  • Special Equipment: Baking sheet and skillet.

Recipe Overview

  • Difficulty Level: This recipe is classified as easy, making it accessible for cookers of all levels.
  • Category: Perfect for appetizers, side dishes, or snacks.
  • Cuisine: Featuring European influences, particularly from Italian and French culinary traditions.
  • Cost: Economically friendly, with a breakdown of ingredients averaging around $10.
  • Season: Best enjoyed in cooler months when comfort food is most desired.
  • Occasion: Ideal for parties, movie nights, or family gatherings.

Why You’ll Love This Recipe

You will fall in love with the irresistible taste of these Gourmet Cheesy Mushroom and Garlic Toasts. The warm, comforting combination of sautéed mushrooms and gooey cheese creates a deliciously satisfying flavor profile that’s hard to beat. Every bite presents a delightful contrast between the crunchy toast and the soft, rich filling. Whether you’re serving them as a party appetizer or enjoying them on a cozy night in, they guarantee smiles all around.

In terms of convenience, these toasts are incredibly quick to make, allowing you to whip them up in no time. This is especially helpful for unexpected guests or last-minute gatherings, as the ingredients are likely already in your pantry. Simply slice the bread, sauté the filling, and toast it all together—a seamless process that doesn’t require advanced cooking techniques.

Additionally, these toasts are packed with nutritional benefits. Mushrooms are low in calories but high in nutrients, contributing to a healthy diet. The recipe can be customized further based on dietary preferences, making it inclusive and versatile for everyone at the table.

Socially, Gourmet Cheesy Mushroom and Garlic Toasts shine as a crowd-pleaser. Their sharable nature encourages mingling and conversation while enjoying good food together. Whether at a gathering where you want to impress friends or during a low-key family dinner, they bring people together effortlessly.

Finally, these toasts are cost-effective. The primary ingredients are affordable, making it an easy dish to prepare without breaking the bank. This accessible recipe highlights that gourmet dining doesn’t have to come with a hefty price tag—great taste is achievable in your own kitchen.

Historical Background and Cultural Significance

The origins of cheesy toasts can be traced back to various Mediterranean nations, where bread and cheese have been staples in the diet for centuries. In Italy, variations such as bruschetta have long celebrated rustic cooking and utilize local ingredients, reflecting a deep appreciation for flavor and tradition.

The cultural significance of mushroom toasts lies in their ability to represent comfort and home-cooked meals across cultures. Garlic, revered for both its flavor and medicinal qualities, has been a culinary icon in many societies, including French, Italian, and Asian kitchens. Combining these elements in a simple toast encapsulates the essence of familial love and joy.

Over time, this recipe has evolved, adopting modern twists while preserving its classic roots. Chefs worldwide are experimenting with mushroom varieties and cheese types, incorporating local flavors to create unique interpretations. This constant adaptation speaks to food’s ability to travel and evolve with the people and cultures it encounters.

Regional variations of cheesy toasts often reflect local available ingredients or dietary restrictions. For example, certain regions may opt for different types of cheese or even gluten-free bread options, which extend the adaptation further, making it a truly global dish that suits various palates.

Ingredient Deep Dive

  • Mushrooms: Rich in flavor and texture, mushrooms are not only delicious but also a source of nutrients. They provide important antioxidants and vitamins, supporting immune health. When selecting mushrooms, look for firm, smooth caps without blemishes. Store them in a paper bag in the fridge for a few days.
  • Garlic: Long hailed for its health benefits, garlic enhances both the flavor and nutritional profile of many dishes. It’s known for its anti-inflammatory properties and can boost heart health. Choose fresh, firm bulbs for the best flavor. Store garlic in a cool, dry place, and it can last weeks.
  • Cheese: This dish can be customized with various cheeses, with mozzarella and cheddar being popular choices. Cheese offers not just flavor but also essential calcium and protein. Taste and meltability are key factors when selecting your cheese; look for blocks versus pre-shredded for better melting characteristics.
  • Bread: A good quality bread is essential for this recipe; rustic or sourdough varieties are great options. Bread provides the base for this delicious topping, offering texture and substance. Always check for freshness and choose a loaf that sounds hollow when tapped, as this indicates quality.

Common Mistakes to Avoid

  • Overcooking the Mushrooms: Sautéing mushrooms too long can lead to a rubbery texture. Aim for a golden brown color, keeping them tender yet flavorful.
  • Using Stale Bread: Fresh bread makes all the difference; stale bread will result in a less satisfying texture. Always use fresh, crusty bread.
  • Piling Too Much Cheese: While it’s tempting to load on the cheese, too much can result in a soggy topping. Stick to a balanced amount that melts nicely without overwhelming the toast.
  • Neglecting Seasoning: Not seasoning the mushrooms properly can lead to bland bites. Season with salt and pepper as you cook to enhance the flavor.
  • Skipping the Garlic: Garlic should be added at the right moment to avoid bitterness. Sauté it briefly after the mushrooms for the best flavor.
  • Not Preheating the Oven: A well-preheated oven ensures the toasts will crisp up nicely. Give your oven time to reach the right temperature before baking.
  • Using Cold Ingredients: Cold cheese doesn’t melt as well; let it come to room temperature before spreading on toast.
  • Inadequate Kitchen Prep: Make sure all ingredients are prepped before starting. This streamlines the cooking process and reduces errors.

Essential Techniques

Sautéing Mushrooms: Sautéing is crucial for developing the rich flavor and tender texture of mushrooms. Use medium-high heat to achieve that perfect amount of browning. Stir frequently yet gently so they cook evenly without breaking apart.

Melting Cheese: Achieving that perfect melt requires even heat distribution. When topping the toasts, ensure your cheese is spread evenly for consistent melting. Pay attention to visual cues, like bubbling and a golden crust, to know when it’s ready.

Pro Tips for Perfect Gourmet Cheesy Mushroom and Garlic Toasts

1. For added flavor, consider incorporating herbs like thyme or rosemary during the sautéing process.
2. Drizzle a bit of balsamic reduction over the top before serving for a sweet contrast.
3. Use a mixture of cheeses for depth—think mozzarella for stretch and parmesan for a crumbly finish.
4. Toast the bread lightly in the oven before topping to ensure it stays crispy even after adding the filling.
5. Experiment with different types of bread, such as ciabatta or baguette, for varying textures.
6. Serve with a side salad for a balanced meal when entertaining guests.
7. Adjust seasoning based on the type of cheese you use—some are saltier than others.
8. Use a broiler for a quick melt right before serving; it adds appealing color and texture.

Variations and Adaptations

For a regional variation, try adding sun-dried tomatoes to your mushroom mix to capture a taste of the Mediterranean. Seasonal adaptations could include using pumpkin puree mixed with the cheese during autumn for a festive twist. For dietary modifications, consider substituting dairy-free cheese for a vegan-friendly option, allowing everyone to enjoy this delicious appetizer.

If you’re in the mood for flavor variations, tossing in a spicy pepper or two can elevate heat levels, offering a gourmet spin on traditional flavors. Texture modifications can also be achieved by incorporating toasted nuts or seeds for added crunch on top. When it comes to presentation, serve atop microgreens or a bed of arugula to not only elevate the dish aesthetically but also increase nutritional value.

Serving and Presentation Guide

For plating, arrange your toasts neatly on a wooden board for a rustic look. Garnishing with parsley or chives adds a pop of color; sprinkle them over the top right before serving. Traditional accompaniments can include a light salad or dipping sauces that complement the flavor profile, while modern presentations can include constructing a small appetizer tower with layers of toast.

Ensure your toasts are served warm, as temperature dramatically affects flavor and enjoyment. Portion control is key; cut toasts into manageable pieces for easier sharing, allowing guests to enjoy without overindulging.

Wine and Beverage Pairing

For a wine pairing, a light-bodied white wine, like a Pinot Grigio, perfectly complements the savory elements of the toasts. Alternatively, a sparkling wine adds a refreshing contrast. For non-alcoholic options, consider pairing with a robust herbal tea or sparkling water infused with lemon, as the crisp flavors enhance the dish beautifully. If coffee is more your style, a light roast can create an intriguing balance with the mushrooms and garlic.

Storage and Shelf Life

To store leftover toasts, cool them completely before sealing in an airtight container. They should be fine in the refrigerator for up to three days. Reheat them in the oven for best results to retain crispness. Signs of spoilage include an off smell or a change in color, indicating it’s time to discard them.

If you wish to freeze them, consider preparing the mushrooms and cheese mixture separately, and then assemble when ready to serve. Leftover toppings can last up to a month in the freezer; make sure to keep them in a suitable freezer-safe bag or container.

Make Ahead Strategies

For those planning ahead, you can prepare the mushroom and cheese mixture a day in advance. Store it in the refrigerator in an airtight container, which allows flavors to meld beautifully. Toast the bread shortly before serving for the best texture.

If you need to prepare for an outdoor event, assemble the toasts and keep them covered until it’s time to heat and serve. Consider reheating on a grill or portable oven at your gathering, ensuring that they retain their deliciousness.

Scaling Instructions

To halve the recipe, simply divide all ingredient measurements by two, which retains the flavor balance. Doubling or tripling the recipe requires a larger baking sheet, so adjust accordingly based on your oven’s capacity.

Timing modifications include a slight increase in cooking time for larger batches, allowing sufficient space for even browning. When scaling, consider how much cheese or mushroom topping is necessary per toast to maintain flavor consistency.

Nutritional Deep Dive

Each toast provides a delightful balance of macronutrients, including protein from cheese and healthy fats from the mushrooms. Additionally, micronutrient analysis shows a rich profile of B vitamins and minerals.

Mushrooms contribute significant antioxidants, while the garlic adds heart health benefits. For dietary considerations, controlling portion sizes helps with weight management, while the flavors ensure satisfaction without excessive calories.

Dietary Adaptations

For gluten-free adaptations, utilize gluten-free bread or crackers as a base, ensuring that all components are gluten-free certified. Dairy-free options can be made using plant-based cheese substitutes, allowing for a vegan-friendly dish.

For low-carb dieters, consider using portobello mushroom caps as a base, transforming a traditional recipe into a low-carb version. Keto and paleo adherents can also enjoy by analyzing ingredients and ensuring they’re compliant with their respective diets, providing alternatives as needed.

Troubleshooting Guide

In case of texture issues, ensure mushrooms are cooked adequately. If they turn out soggy, you may have overcrowded the pan during the sautéing process; be sure to spread them out for optimal moisture evaporation.

Flavor balance can sometimes lean too salty or bland; adjust accordingly by incorporating herbs or spices during cooking. If the toasts seem overcooked, watch the oven carefully during the melting process to avoid burning.

For equipment challenges, if your broiler isn’t working, simply continue baking until golden and bubbling. Ingredient substitutions might require adjustments in cooking times or temperatures—always taste as you adapt.

Timing concerns during busy meal preparations? Prep components ahead and cook them when you’re ready to serve. Keeping an eye on your ingredients can streamline the process and lead to consistent results every time.

Recipe Success Stories

Readers rave about their experiences; one community member shared how their dinner party was enhanced by these toasts. They received applause for their flavor and creativity.

Variations have led to unique takes, such as adding caramelized onions or different herbs, showcasing the versatility of the recipe. Others have suggested their photography tips that perfectly capture the golden crust and melted cheese, resulting in a visually-appealing dish worth sharing.

Frequently Asked Questions

Can I use different types of cheese?
Yes! Feel free to experiment with cheeses like gouda, fontina, or even a spicy pepper jack for varied flavor profiles.

How can I make this dish vegan?
Use vegan cheese and check that your bread is dairy-free for a fully plant-based version.

What other toppings can I use?
You can add ingredients like spinach, artichokes, or sun-dried tomatoes for extra textures and flavors.

Can these be made ahead of time?
They can be prepped in advance by keeping the mushroom mixture ready in the fridge. Assemble before baking for best results.

What type of mushrooms work best?
Common options include cremini and button mushrooms, but feel free to explore shiitake or portobellos for richer flavors.

How long can I store leftovers?
Leftovers can be stored in the fridge for up to three days. Reheat in the oven for the best texture.

Can I freeze the assembled toasts?
While freezing is possible, it’s best to freeze components separately and assemble later for optimal freshness.

How can I improve the crispiness?
Pre-toast your bread for a few minutes or use a broiler to get that extra crunch before serving.

What to serve with these toasts?
Pair with a light salad, dipping sauces, or a selection of wines for an impressive appetizer spread.

Can I make these gluten-free?
Absolutely! Use gluten-free bread or even portobello mushroom caps as bases for a delicious alternative.

Additional Resources

For those seeking further culinary creativity, explore our related recipes for flavorful appetizers like bruschetta or spinach artichoke dip. Technique guides on sautéing and cheese melting can elevate your cooking skills while ingredient information ensures you choose the best produce.

Equipment recommendations can also help you create deliciousness in your kitchen, and discover seasonal variations that inspire new takes on classic favorites.

Join the Conversation

We invite you to share your experiences with this recipe on social media! Snap a photo of your gourmet toasts and inspire friends and family to try their hand at these delicious bites. Engage in community discussions, offer photography tips, and share variations that have worked for you. Reviews help us all grow together as home cooks, so let’s celebrate our culinary successes and learn from each other in the kitchen!

The Recipe

Gourmet Cheesy Mushroom and Garlic Toasts

Serves: 4 servings

Prep Time: 10 mins

Cook Time: 15 mins

Total Time: 25 mins

Kitchen Equipment Needed

  • Skillet
  • Baking sheet
  • Spatula
  • Measuring spoons
  • Knife

Ingredients

  • 8 slices of crusty bread
  • 8 oz mushrooms, sliced
  • 3 cloves garlic, minced
  • 1 cup shredded mozzarella cheese
  • 2 tablespoons olive oil
  • Salt and pepper to taste
  • Fresh parsley, for garnish

Directions

  1. Preheat oven to 400°F (200°C).
  2. Heat olive oil in a skillet over medium heat. Add sliced mushrooms, cooking until they are golden brown.
  3. Stir in minced garlic and cook for an additional 1-2 minutes.
  4. Season with salt and pepper before removing from heat.
  5. In a baking sheet, arrange the bread slices in a single layer.
  6. Top each slice with the mushroom and garlic mixture, followed by a generous layer of shredded mozzarella.
  7. Bake for 10-12 minutes until cheese is melted and bubbly.
  8. Garnish with chopped parsley before serving.

Recipe Notes

  • Feel free to add additional herbs for flavor.
  • Make it vegan by using plant-based cheese and gluten-free bread.
  • For a spicy kick, mix in some red pepper flakes with the mushrooms.