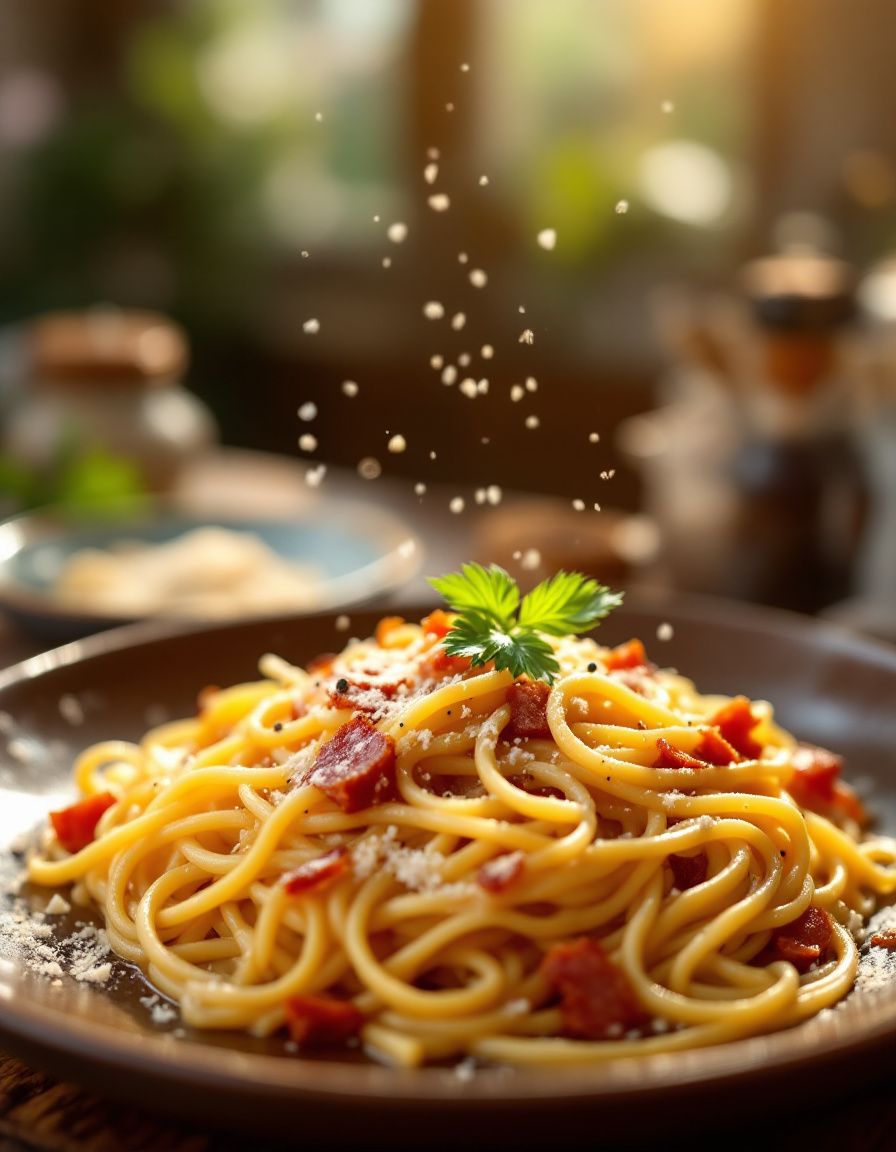
Classic Spaghetti Carbonara – Easy Homemade Italian Recipe

Classic Spaghetti Carbonara: A Timeless Italian Delight

⚖️
Difficulty
Medium

⏲️
Prep Time
10 mins

🕒
Cook Time
15 mins

⏱️
Total Time
25 mins

🍽️
Servings
4

Spaghetti Carbonara is a classic Italian dish that embodies the heart and soul of Roman cuisine, offering a beautiful balance of flavors that are both comforting and indulgent. The luscious combination of al dente spaghetti, enriched with creamy egg yolks, savory pancetta, and a sprinkle of Pecorino Romano, creates a dish that is sure to excite your palate. Each bite transports you to a cozy trattoria in Italy, where the aroma of garlic and freshly ground pepper fills the air, tempting everyone to gather around the table.

This iconic pasta dish not only satisfies the taste buds but also provides an opportunity for culinary creativity in the kitchen. Carbonara showcases the importance of quality ingredients—each component plays a crucial role in achieving the perfect flavor balance. As you prepare this dish, you’ll relish the delightful aromas wafting through your home and experience the joy of crafting a beloved recipe that has been cherished for generations.

Quick Recipe Highlights

  • Flavor Profile: Classic Spaghetti Carbonara features a delightful blend of rich, creamy flavors with a smoky bite from the pancetta and a sharp taste from the Pecorino cheese.
  • Texture: The dish combines the silky smoothness of the sauce with the firm texture of perfectly cooked pasta, creating a gratifying mouthfeel.
  • Aroma: The aromas of garlic, crispy pancetta, and freshly ground black pepper tantalize your senses and draw everyone to the kitchen.
  • Visual Appeal: The glossy sauce coating the pasta, garnished with a dusting of cheese and cracked pepper, results in a visually stunning dish that’s hard to resist.
  • Skill Level Needed: While some techniques are involved, this dish is manageable for anyone willing to follow the steps, making it accessible for amateur cooks and seasoned chefs alike.
  • Special Equipment: A large pot for boiling pasta, a frying pan, and a mixing bowl for combining ingredients are all the essential tools needed for making this dish.

Recipe Overview

  • Difficulty Level: Spaghetti Carbonara has a medium difficulty level, primarily due to the timing of adding the hot pasta to the egg mixture. Mastering this technique without scrambling the eggs requires some practice.
  • Category: This dish falls under the category of main courses, perfect for both family dinners and romantic evenings.
  • Cuisine: Originating from Rome, Spaghetti Carbonara is a traditional Italian dish that reflects the simplicity and richness of Italian culinary culture.
  • Cost: Ingredients are relatively affordable, especially since the recipe requires only a few high-quality items that yield a dish full of flavor.
  • Season: Carbonara is comforting all year round, but its hearty nature makes it especially popular during the cooler months.
  • Occasion: Perfect for casual gatherings, dinner parties, or a cozy night in, Spaghetti Carbonara always impresses guests.

Why You’ll Love This Recipe

The rich taste of Classic Spaghetti Carbonara provides a unique flavor experience that delights the senses. The dish is creamy yet light, with pancetta adding a satisfying salty crunch, creating an irresistible combination. The decadent Pecorino Romano elevates the taste, providing a touch of nuttiness, which makes every bite feel indulgent and special.

Preparing Carbonara is a breeze, especially with its quick cooking time. You can put this dish together in under 30 minutes, making it an ideal option for busy weeknights or last-minute dinner guests. With minimal cleanup, it’s perfect for those who want a delicious meal without the hassle.

From a nutritional perspective, Spaghetti Carbonara can be satisfying without overwhelming your dietary needs, offering a balance of carbohydrates and protein. By serving it with a side salad, you can introduce more vegetables without sacrificing flavor or texture.

This dish brings people together, perfect for gatherings or special occasions. The aroma and presentation create a welcoming atmosphere, encouraging friends and family to indulge in the experience of enjoying home-cooked meals together.

Cost-effectiveness is a major bonus—using everyday ingredients, you can create a gourmet meal without breaking the bank. Whether it’s a cozy dinner or a festive celebration, this classic recipe makes it look and taste like you put in a lot of effort while keeping the budget in check.

Historical Background and Cultural Significance

The origin of Spaghetti Carbonara is somewhat clouded in mystery, but it is widely associated with the Lazio region of Italy, specifically Rome. While some theories suggest that the dish was initially created by coal workers, known as “carbonari,” others believe it emerged as a straightforward way to prepare pasta using readily available ingredients.

Culturally, Carbonara represents the Italian philosophy of cooking with simplicity and quality ingredients. The dish embodies the idea that food should be cherished, savored, and shared, highlighting the importance of communal dining traditions in Italian culture.

Over the years, there have been various adaptations and modifications of the original recipe, leading to unique regional variations that utilize local ingredients. While some lesser-known versions may include cream or vegetables, purists argue that the dish should remain close to its original form.

In many households, Spaghetti Carbonara has become a staple dinner option, passed down through generations as families share their love for pasta. Its enduring popularity showcases its significance in both everyday meals and celebratory feasts.

Ingredient Deep Dive

– **Spaghetti:** A beloved pasta shape, spaghetti pairs perfectly with sauces, particularly creamy ones like Carbonara. It cooks quickly, absorbing flavors while retaining its ‘al dente’ texture.
– **Pancetta:** This Italian cured meat adds a rich, savory flavor to the dish. Selecting high-quality pancetta enhances the overall taste, while storing it properly ensures freshness.
– **Eggs:** Egg yolks create a creamy, velvety sauce without needing cream. Using fresh organic eggs often results in better flavor and nutritional content.
– **Pecorino Romano:** A hard, salty cheese that is key for a genuine Carbonara. It’s essential to use quality cheese, as it heavily influences the dish’s character.
– **Black Pepper:** Freshly cracked pepper adds a kick to the Carbonara, offering a spicy contrast to the creamy sauce.

Common Mistakes to Avoid

  • Using cream: Authentic Spaghetti Carbonara is made without cream. Adding it can lead to a heavy dish that strays from the original flavor profile.
  • Overcooking the pasta: For the best results, the pasta should be cooked al dente, as it will continue to cook when tossed with the warm sauce.
  • Scrambling the eggs: Mixing the eggs with the pasta should be done carefully. Gradually adding pasta to the beaten eggs helps create a smooth sauce without scrambling.
  • Not reserving pasta water: The starchy pasta water is vital for achieving the desired consistency of the sauce. Always reserve some before draining the pasta.
  • Using pre-grated cheese: Freshly grated cheese melts better and has more flavor than pre-grated varieties, which can be coated with anti-caking agents.
  • Not seasoning properly: Don’t forget to season the pasta water with salt. This is where the noodles absorb their first layer of flavor.
  • Skipping the black pepper: Freshly cracked black pepper is essential for authentic Carbonara; it adds necessary heat and complexity.
  • Assembling too quickly: Allowing the cooked pasta to cool slightly before combining with the egg mixture helps to prevent cooking the eggs too fast.
  • Incorrect proportions of ingredients: Following the ingredient ratios closely ensures the balance of flavors and the creaminess of the sauce.
  • Ignoring ingredient quality: Using high-quality ingredients makes a significant difference in the final taste, so choose the best possible options for your Carbonara.

Essential Techniques

– **Emulsifying Sauce:** This technique combines the egg yolks and pasta water to create a creamy sauce. To master this, add warm pasta gradually to the egg mixture, stirring continuously. The key is to ensure that the heat from the pasta cooks the eggs gently without scrambling them. Look for a silky consistency to know you’ve succeeded.

– **Perfectly Cooking Pasta:** Proper pasta cooking involves boiling in salted water until al dente. As the pasta cooks, taste it often toward the end of cooking. The ‘al dente’ texture should be firm yet tender. Watch for visual cues; the pasta should be slightly opaque and retain a fettuccine-like firmness when bitten.

Pro Tips for Perfect Classic Spaghetti Carbonara

– Use the freshest eggs you can find. Fresh eggs contribute to the creamy texture of the sauce and the overall flavor of the dish.
– Opt for Guanciale if available, as it’s the traditional meat used in authentic Carbonara and enhances the dish’s flavor profile.
– Make sure your cheese is freshly grated just before use. This will ensure that it melts beautifully and integrates smoothly into the sauce.
– Experiment with the amount of black pepper; it can drastically change the taste profile. Taste as you go to find your perfect flavor balance.
– Allow your pasta to cool slightly before mixing with the eggs for better control over the cooking process and to avoid scrambling the eggs.
– Always reserve some pasta cooking water; this starchy liquid can adjust the sauce consistency and enhance the creaminess without adding more fat.
– For a richer flavor, try toasting the pancetta or Guanciale in a little olive oil before adding the pasta. This enhances its smoky notes significantly.
– Don’t rush the mixing process. Taking your time ensures the pasta is thoroughly coated in the creamy sauce, leading to a more satisfying dish.

Variations and Adaptations

– **Regional Variations:** In certain areas of Italy, ingredients might differ slightly. For example, some regions might substitute guanciale for pancetta or experiment with different cheeses.
– **Seasonal Adaptations:** In spring, you can add fresh peas for a pop of color and sweetness, or in the fall, consider incorporating roasted pumpkin for added depth and seasonal flavors.
– **Dietary Modifications:** For a gluten-free option, substitute spaghetti with gluten-free pasta varieties, ensuring proper cooking times for the alternative.
– **Flavor Variations:** Experiment with herbs such as parsley or basil for a fresh twist. A touch of lemon zest can also brighten the dish, enhancing its overall flavor.
– **Texture Modifications:** If you prefer a chunkier texture, consider adding sautéed mushrooms or fresh vegetables to the Carbonara for added substance.
– **Presentation Alternatives:** Serve on a bed of fresh arugula for a spicy kick or with a drizzle of high-quality olive oil for an elegant touch.

Serving and Presentation Guide

A beautiful plating can elevate your Classic Spaghetti Carbonara. Start with a twirl of spaghetti in the center of the plate, creating a nest-like appearance. Gently sprinkle freshly grated Pecorino Romano on top, finishing with a generous crack of black pepper for added flavor and visual appeal. Accompany the dish with a vibrant side salad for a pop of color, and consider a slice of rustic bread to complete the ensemble.

When it comes to garnishing, fresh herbs can provide a wonderful contrast and a lively touch. Serve the dish immediately, ensuring temperatures remain high for maximum enjoyment. For portion control, consider serving in individual bowls, allowing guests to feel personally catered to while indulging in their own delightful serving of Carbonara, enhancing the dining experience.

Wine and Beverage Pairing

Pair Classic Spaghetti Carbonara with a crisp white wine, such as a Pinot Grigio or Chardonnay. These whites complement the creaminess of the sauce, balancing the richness of the dish. If you prefer red, a light-bodied Chianti or a medium-bodied Frappato works well, providing a delightful contrast without overwhelming the flavors.

For those seeking non-alcoholic options, sparkling water with a splash of lemon can cleanse the palate effectively. If coffee is more to your liking, an espresso served after the meal is a traditional Italian way to conclude the culinary experience, enhancing the flavors of the Carbonara.

Storage and Shelf Life

To store your Classic Spaghetti Carbonara, place leftovers in an airtight container in the refrigerator promptly after cooling. Ideally, consume within 2-3 days to ensure freshness. When reheating, gently warm in a pan with a splash of reserved pasta water, stirring to revive the creaminess without overcooking.

For long-term storage, you can freeze portions, but keep in mind that the texture may alter upon thawing. Ensure the dish is cooled completely before transferring it to freezer-safe containers. Consume frozen leftovers within a month for best quality. Be cautious when reheating from frozen, using low heat to avoid curdling.

Make Ahead Strategies

To prepare Classic Spaghetti Carbonara in advance, consider pre-cooking the pasta and pancetta. Toss them together and store in the refrigerator, mixing with a bit of oil to prevent sticking. On the day of serving, warm the mixture gently, then add the egg and cheese mixture just before serving.

Prep times can be staggered. Chop and store your herbs or ingredients a day ahead of time to streamline the cooking process. This strategy allows you to enjoy your meal without feeling rushed while enhancing the overall quality of the dish served.

Scaling Instructions

If you need to halve or double your recipe, adjust the ingredients accordingly while keeping the ratios consistent. A larger pot for cooking will facilitate a smooth process when scaling. Timing may also need modifications, especially for cooking and assembly.

For a smaller batch, monitoring the cooking temperatures becomes crucial. Ensure that the pasta’s cooking time remains similar regardless of the portions served.

Nutritional Deep Dive

Classic Spaghetti Carbonara offers a balanced macro breakdown, providing essential carbohydrates from pasta, healthy fats from pancetta, and protein from eggs and cheese. The dish can serve as a satisfying energy source while offering flavor and nutrition.

The inclusion of quality ingredients enhances nutritional content. Free-range eggs provide vital vitamins and minerals, while the cheese contributes calcium and other trace nutrients. Monitoring sodium levels is essential, especially when using cured meats, to manage overall intake in a balanced diet.

When consumed in moderation, this meal can fit into a variety of nutritional plans, promoting enjoyment without feeling deprived. Adjusting portion sizes can assist those focusing on weight management or balanced eating patterns.

Dietary Adaptations

– **Gluten-free:** Substitute with gluten-free pasta options like brown rice or zucchini noodles to accommodate gluten-sensitive diets.
– **Dairy-free:** Consider using dairy-free cheese alternatives combined with nutritional yeast for a similar flavor profile without dairy.
– **Vegan:** Replace eggs with a blend of silken tofu and nutritional yeast, and use plant-based bacon options available in stores for the smoky flavor.
– **Low-carb:** Spiralized vegetables like zucchini can replace pasta to maintain a low-carb approach while still enjoying the flavors of Carbonara.
– **Keto:** Utilize konjac noodles to keep carb counts low while enjoying the creamy sauce and protein-rich ingredients.
– **Paleo:** Omit dairy, replacing it with coconut cream mixed with nutritional yeast for creaminess, and choose a clean-cut meat like turkey bacon.
– **Low-FODMAP:** Reduce garlic content and choose lactose-free cheese while ensuring all ingredients remain compliant.

Troubleshooting Guide

– **Texture issues:** If your sauce becomes too thick, gradually add pasta water until it’s creamy. If it’s too runny, cook it on low heat to reduce excess liquid.
– **Flavor balance:** For excessive saltiness, add a few cooked potatoes to absorb excess seasoning, then remove before serving. Adjusting black pepper levels can also enhance flavor.
– **Temperature problems:** Avoid overheating the egg mixture to prevent scrambling. Use low heat and gradually introduce hot pasta to ensure proper emulsification without excess cooking.
– **Equipment challenges:** If your frying pan isn’t large enough, use a pot for combining pasta and sauce, ensuring nothing is overlooked while tossing ingredients.
– **Ingredient substitutions:** Not having pancetta? Use bacon with similar seasoning or a smoked option for flavor continuation.

Recipe Success Stories

Community feedback for Classic Spaghetti Carbonara reflects its love and admiration among dinner hosts. Readers share their turns on the recipe, whether it be adjusting ingredient quantities or experimenting with variations like adding mushrooms.

Many enthusiasts have sent photos showcasing their Carbonara success, inspiring others to try their hand at this traditional dish. Recipe requests for gatherings and celebrations illustrate its popularity, demonstrating that Carbonara never fails to impress family and guests alike.

Adaptation stories reveal how individuals put their spin on the classic recipe, sharing tips and personal enhancements that have delighted friends and family. These accounts celebrate the versatility of Carbonara while keeping the spirit of community feeding alive.

Frequently Asked Questions

1. Can I make Carbonara without eggs?

While traditional Carbonara relies on eggs for its creamy texture, alternative versions exist using cashews or silken tofu as a base, though the flavor will differ from the classic.

2. How can I prevent my sauce from curdling?

To prevent curdling, avoid direct heat when combining the sauce. Gradually mixing the heated pasta with the egg mixture will help stabilize the sauce.

3. What should I serve with Spaghetti Carbonara?

A light green salad with a tangy vinaigrette complements the richness of Carbonara beautifully. Crusty bread is also a perfect accompaniment for sopping up any remaining sauce.

4. How do I store leftover Carbonara?

Store leftovers in an airtight container in the refrigerator for up to three days. When reheating, use a pan and add a splash of reserved pasta water to revive the sauce’s creamy texture.

5. Is Carbonara gluten-free?

Traditional Carbonara is not gluten-free due to pasta, but you can swap spaghetti with gluten-free alternatives such as rice pasta or vegetables like zucchini noodles.

6. Can I use bacon instead of pancetta or guanciale?

Yes, bacon can be used as a substitute for pancetta or guanciale, although it will introduce a different flavor and texture due to its smoke profile.

7. What can I do if my pasta is overcooked?

If your pasta is overcooked, you may not recover its chewy texture, but serving it with a bit of extra sauce can help mask the softness somewhat.

8. How do I know when the Carbonara is done cooking?

Your Carbonara should be creamy and glossy, code by the sauce clinging to the pasta without excessive liquid pooling on the plate.

9. Can I add vegetables to my Carbonara?

Absolutely! Common additions include peas or spinach, which not only add color but also extra nutrients while pairing well flavor-wise with the creamy sauce.

10. How spicy is Carbonara?

Carbonara’s spice level primarily comes from fresh cracked black pepper. Adjust the amount used to suit your taste for heat, balancing it with other ingredients.

Additional Resources

For those looking to expand their Italian cuisine repertoire, try exploring related recipes like Fettuccine Alfredo, Pesto Pasta, or Lasagna. Each dish highlights the comforting elements and flavors of Italian cooking.

Specific technique guides on making homemade pasta can significantly enhance your cooking skills, allowing you to enjoy fresh pasta that complements the beautiful sauce of your Carbonara perfectly.

Ingredient information such as sourcing quality cheeses or selecting the best pasta will elevate your cooking experiences. Additionally, discovering kitchen equipment that best suits Italian cooking will inspire further culinary creativity.

Seasonal variations can spark new ideas for your next meal, ensuring you enjoy fresh produce paired with classic flavors all year long.

Join the Conversation

We encourage readers to share their Carbonara creations on social media, highlighting unique twists and variations of this beloved dish. Photography tips can aid in capturing the vibrant colors and textures, making the dish even more appealing.

Feedback is always welcome—join our community to share reviews, successes, and suggestions. Whether you have a family recipe to pass down or innovative ideas to incorporate, we want to celebrate the joy of cooking together.

The Recipe

Classic Spaghetti Carbonara

Serves: 4

Prep Time: 10 mins

Cook Time: 15 mins

Total Time: 25 mins

Kitchen Equipment Needed

  • Large pot
  • Frying pan
  • Mixing bowl
  • Whisk
  • Tongs or pasta fork
  • Measuring cups and spoons

Ingredients

  • 400g spaghetti
  • 150g pancetta or guanciale, diced
  • 3 large eggs
  • 100g Pecorino Romano cheese, grated
  • Freshly cracked black pepper
  • Salt for pasta water

Directions

  1. Boil a large pot of salted water. Add spaghetti and cook until al dente.
  2. In a frying pan, cook pancetta until crispy. Remove from heat and set aside.
  3. In a mixing bowl, whisk together eggs and grated cheese until well combined.
  4. Once pasta is cooked, reserve some pasta water, then drain the spaghetti.
  5. Quickly add the hot pasta to the bowl with the egg mixture, mixing gently.
  6. Add pancetta, tossing well to combine. Add reserved pasta water as needed for creaminess.
  7. Season with freshly cracked black pepper and serve immediately, garnished with extra cheese.

Recipe Notes

  • For a richer flavor, you may add garlic during the pancetta cooking process.
  • Always serve Carbonara immediately for the best taste and texture.
  • Feel free to adjust the amount of cheese and pepper to your preference.
  • Leftovers can be stored in an airtight container in the refrigerator for 2-3 days.
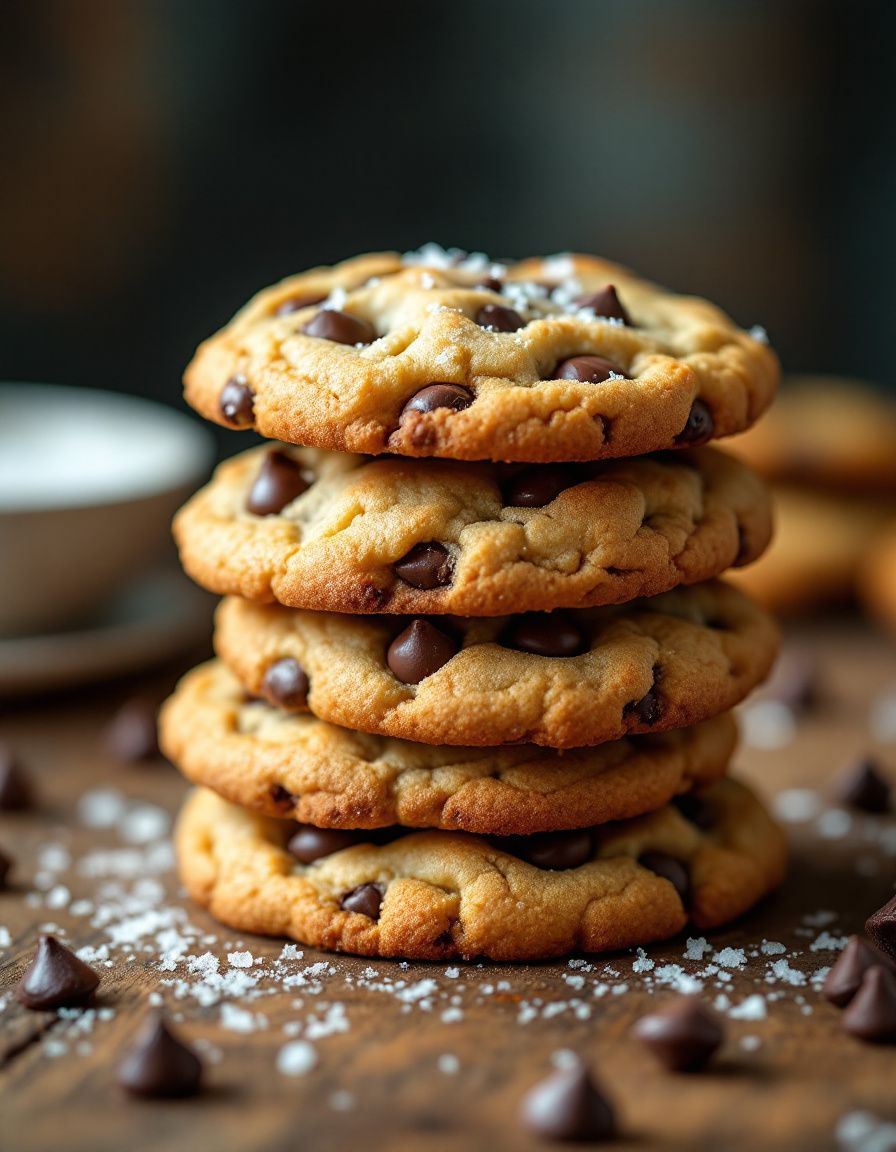
Best Chocolate Chip Cookies Recipe – Perfectly Soft & Chewy

Chocolate Chip Cookies: The Ultimate Comfort Treat

⚖️
Difficulty
Easy

⏲️
Prep Time
15 mins

🕒
Cook Time
10 mins

⏱️
Total Time
25 mins

🍽️
Servings
24 cookies

There’s nothing quite like the smell of freshly baked chocolate chip cookies wafting through your home. This beloved classic combines rich, melty chocolate with a perfectly chewy cookie base, creating a delightful treat that appeals to cookie lovers of all ages. Whether you’re baking for a special occasion, a cozy night in, or simply craving something sweet, these chocolate chip cookies are sure to satisfy your desires and transport you back to childhood memories of baking with family.

With each bite, you’ll delight in the balance of buttery goodness and the sweetness of chocolate. The texture is a perfect blend of soft and slightly crispy edges, melting in your mouth. These cookies not only taste amazing but are also incredibly easy to make! Just mix your ingredients, scoop them out onto a baking sheet, and you’re ready for the magic to happen. Let’s dive into crafting the perfect batch of these irresistible chocolate chip cookies!

Quick Recipe Highlights

  • Flavor Profile: Buttery sweetness merges with semi-sweet chocolate, creating a comforting and nostalgic taste.
  • Texture: Expect a perfect balance of chewy centers with slightly crispy edges for a pleasing mouthfeel.
  • Aroma: The smell of vanilla and warm chocolate fills the air, inviting everyone to gather around.
  • Visual Appeal: Golden brown cookies dotted with dark, melted chocolate chips are as tempting as they are delicious.
  • Skill Level Needed: This recipe is beginner-friendly, requiring only basic baking skills.
  • Special Equipment: You’ll need a mixing bowl, baking sheet, and parchment paper for easy cleanup.

Recipe Overview

  • Difficulty Level: Easy, suitable for novice bakers and fun for kids to help with.
  • Category: Desserts; perfect for snacks, parties, and potlucks.
  • Cuisine: An American classic that has captured hearts and taste buds worldwide.
  • Cost: Affordable ingredients make this a budget-friendly baking project.
  • Season: Great year-round but especially popular during holidays and family gatherings.
  • Occasion: Perfect for baking parties, school lunches, or as a sweet gift for friends.

Why You’ll Love This Recipe

Baking these chocolate chip cookies is not just about satisfying your sweet tooth; it’s about the whole experience that comes with it. The taste is a heavenly blend of sweet and savory, supported by a luxurious mouthfeel that feels comforting with every bite. Made with simple ingredients, the flavor is elevated by the use of quality chocolate, giving it depth you won’t find in store-bought varieties.

The convenience of this recipe makes it a go-to for any occasion. With a total commitment of only 25 minutes, you can whip up a batch and enjoy warm cookies fresh from the oven in no time. Whether you are baking for a special event or simply indulging a craving, the ease of preparation allows for spontaneity, making baking an enjoyable activity.

Additionally, the cookies have nutritional value when made with wholesome ingredients like whole grain flour and dark chocolate. They can provide a hint of iron and fiber, making them a delightful yet indulgent snack when enjoyed mindfully.

Socially, chocolate chip cookies have become a culinary staple that brings people together. A warm batch can pave the way into the hearts of your friends, family, and even new acquaintances. Share them at gatherings, potlucks, or simply enjoy them at home for a cozy night in.

Lastly, baking at home is often more cost-effective than purchasing treats at cafes or bakeries. With relatively inexpensive ingredients, you can create a significant yield, making this recipe an accessible way to enjoy homemade goodness without breaking the bank.

Historical Background and Cultural Significance

The history of chocolate chip cookies can be traced back to the 1930s when Ruth Wakefield, who owned the Toll House Inn, added chopped chocolate to her butter cookie recipe. The result was an instant hit among her guests, leading to the creation of the iconic Toll House chocolate chip cookie. The recipe became widely disseminated through various cookbooks and eventually became the chocolate chip cookie we know today.

Culturally, chocolate chip cookies are deeply tied to American homes, symbolizing comfort and nostalgia. They have made their way into family traditions and are often associated with everything from holiday celebrations to cozy evening treats. Their popularity has ensured they remain a cultural icon in dessert-related conversations.

The evolution of the chocolate chip cookie has led to numerous variations,, including adjustments in sweetness, type of chocolate, and even the addition of nuts to give texture. With every modification, communities have put their spin on this classic, reflecting the diversity of American taste and creativity.

Furthermore, different regions have developed unique takes on the cookie. For example, some opt for a chewy cookie, while others prefer a crunchy exterior, showcasing regional differences in preparation methods that highlight the beauty of this beloved treat.

Ingredient Deep Dive

– **Butter**: Often regarded as the essential fat in baking, butter provides richness and moisture. Historically, butter was a luxury, but today, its easy availability makes it a staple. Nutritionally, it adds vitamins A and D, but moderation is key due to its calorie density. When selecting butter, avoid margarine for a creamier texture and richer flavor. Store in the fridge and clarify if separating milk solids for a more intense flavor. For healthier alternatives, consider using coconut oil or applesauce.

– **Sugar**: The sugary sweetness not only enhances taste but also contributes to the cookie’s texture, causing them to spread and brown. Originating from sugar cane and beet, it has evolved from a luxury item to a household staple. Granulated sugar pairs well with brown sugar, providing moisture and a chewy bite. Always store in an airtight container to prevent clumping. Brown sugar can be substituted if you want a deeper flavor.

– **Flour**: All-purpose flour is used for its versatility, providing structure. Historically, flour was made by grinding grain, and today, it’s essential for desserts. It contains vital nutrients like fiber and B vitamins. Ensure you measure accurately to avoid dense cookies. If possible, sift the flour before incorporating for better aeration. Whole wheat flour can be swapped for added nutrients.

– **Chocolate Chips**: Known for their role in adding rich flavors, semi-sweet chocolate chips are a staple in many recipes. Their history dates back to the invention of chocolate itself. Chips come in varied varieties, catering to all tastes, including dark or milk options. Select high-quality chocolate for superior flavor. Store in a cool, dark place and consider mixing them with toffee or nuts for exciting flavors.

– **Eggs**: Eggs provide moisture and act as a binding agent. Historically, they’ve been a source of nutrition and have been a key ingredient in baking for centuries. They contribute to the fluffiness of cookies as well. Always use fresh eggs and crack them into a separate bowl to check for quality before adding. For vegan alternatives, consider using flaxseed meal mixed with water.

Common Mistakes to Avoid

  • Not measuring ingredients accurately: Baking is a science; even a slight deviation can lead to flat cookies. Use measuring cups and spoons for best results.
  • Overmixing the dough: This can lead to tough cookies. Mix only until just combined to ensure a tender texture.
  • Skipping the chilling time: Allowing the dough to chill helps prevent the cookies from spreading too much.
  • Using expired ingredients: Always check the freshness of your baking soda and baking powder to ensure proper leavening.
  • Not preheating the oven: Ensure the oven is fully preheated for even baking and perfect texture.
  • Overbaking cookies: Keep an eye on the timer; cookies continue to cook a bit after being removed from the oven.
  • Using parchment paper substitutes: Regular foil can cause sticking. Always use parchment for easy removal.
  • Ignoring the cooling time: Let cookies cool on the baking rack; this prevents them from becoming too soft and maintains texture.
  • Not experimenting with flavors: Don’t hesitate to add spices or mix-ins like nuts or dried fruits to enhance the flavor profile.
  • Skipping quality chocolate: Lower quality chocolate can lead to subpar flavor. Always opt for better chocolate for tastier results.

Essential Techniques

– **Mixing Dough**: It’s crucial to whisk sugar and butter until light and fluffy. This aeration is key for the right cookie texture. Mix only until just combined with dry ingredients to avoid toughness. Look for a smooth consistency as a visual cue to stop.

– **Chilling the Dough**: Chilling is essential for controlling spread and enhancing flavor. Cover the bowl with cling film and refrigerate for at least 30 minutes to yield thicker cookies. Check the dough consistency; it should feel slightly firmer after chilling.

– **Proper Baking Temperatures**: Always bake at the recipe-specified temperature for even results. Use an oven thermometer if unsure, as inaccurate prior settings can lead to either burnt edges or raw centers. Look for a golden-brown appearance as an indicator for doneness.

– **Cooling Cookies**: Let cookies cool on a baking rack. This prevents them from steaming and becoming soggy. After 5-10 minutes on the sheet, transfer them to a wire rack for cool-down, allowing air circulation which maintains crispness.

Pro Tips for Perfect Chocolate Chip Cookies

– Use room-temperature ingredients for smoother mixing and better incorporation of flavors.
– Experiment with various chocolate types to find your ideal combination (dark, milk, or white).
– Add a sprinkle of sea salt before baking to enhance the chocolate flavor.
– For chewier cookies, use bread flour instead of all-purpose flour.
– Don’t overbake! Aim for a slightly underdone center for the ultimate chewy texture.
– Try mixing in nuts or oatmeal to add flavor and texture.

Variations and Adaptations

You can explore regional variations by adding spices like cinnamon or nutmeg for a warm touch. Seasonal adaptations might include pumpkin spice during fall or peppermint during the holidays. Dietary modifications, like using gluten-free flour blends, allow everyone to enjoy. Consider flavor variations like using white chocolate or butterscotch chips instead of semi-sweet chocolate. Adjusting the texture using quick oats or crushed graham crackers may yield unique results. For presentation, consider drizzling melted chocolate atop cooled cookies for an appealing finish.

Serving and Presentation Guide

Plating techniques for cookies can be simple yet effective; stack them in groups of three on a decorative plate for an inviting look. Garnish with tiny chocolate chips or mint leaves for added color. Traditional accompaniments include a glass of milk or a scoop of vanilla ice cream, creating delightful pairings. For a modern twist, serve them alongside a homemade fruit jam. Consider serving warm cookies in parchment paper for a rustic vibe. Portion control is key; aim for each cookie size to be consistent, ensuring ideal bite sizes.

Wine and Beverage Pairing

Pairing wine with chocolate chip cookies can enhance the experience! Opt for dessert wines like a late harvest Riesling or a rich port to complement the sweetness. For non-alcoholic alternatives, a glass of cold milk or hot chocolate works beautifully. Well-brewed coffee can awaken the chocolate notes; pair with a bounty of little cookies during gatherings for a fun finish. For tea lovers, try pairing with chai or peppermint tea for flavor enhancement and temperature contrast.

Storage and Shelf Life

Store cookies in an airtight container at room temperature to maintain moisture. They’ll stay fresh for about a week. For longer storage, consider freezing; wrap cookies individually and place them in a zip-top bag. To tell if cookies have gone stale, check for dryness or hard texture, indicating they need consumption. Reheat in the oven for a few minutes to regain softness, or enjoy them cold. If freezing, ensure they’re completely cooled before packing to prolong shelf life.

Make Ahead Strategies

Prepare and pre-chill the dough a day in advance for effortless baking. The timing for chilling allows the flavors to meld beautifully, resulting in tastier cookies. If you want to save time, pre-scoop dough balls onto a baking sheet; layer in the freezer and transfer to a zip-lock bag once solidified. For fresh cookies every day, simply pull out a few and bake them as needed. Adding fresh ingredients like nuts and chocolate chips right before baking ensures maximum flavor.

Scaling Instructions

To halve the recipe, simply adjust all ingredient amounts by 50%. If you wish to double or triple the recipe for a crowd, make sure to have larger mixing equipment to accommodate the volume. Ensure the baking time may require slight adjustments; always check for doneness by visual cues rather than solely relying on timers. Store any leftover dough in the fridge for up to a week, or freeze for excellent future use.

Nutritional Deep Dive

In a standard chocolate chip cookie, the macro breakdown typically consists of carbohydrates, fats, and proteins. A serving can have around 150 calories, with varying amounts depending on ingredient choices. The fat content provides energy, while chocolate and flour contribute to carbohydrates. Micronutrient analysis reveals vitamins and minerals in the eggs and flour. These homemade cookies are a cheerful compromise, allowing for enjoyable sweetness in moderation. Portion analysis recommends sticking to one or two cookies at a time.

Dietary Adaptations

For gluten-free options, substitute regular flour with gluten-free all-purpose blend, ensuring measures align with the recipe. For a dairy-free version, choose coconut oil or vegan butter and use non-dairy chocolate. Vegan adaptations can involve replacing eggs with flaxseed or applesauce for binding. Low-carb versions can be achieved using almond or coconut flour alongside sugar alternatives like erythritol. Each substitution may require testing to achieve similar textures and flavors.

Troubleshooting Guide

If the cookies are too flat, check your butter; it’s possible it was too softened or melted. In the case of overly tough cookies, the flour may have been overmixed or measured inaccurately. If they are too sweet, consider reducing the sugar slightly in your next batch. For flavor balance, adding a pinch of salt can enhance overall taste. If the edges burn, your oven temperature might be too high, requiring adjustments. Ensure proper oven rack positioning to avoid uneven baking.

Recipe Success Stories

Many readers have provided fantastic feedback regarding their variations of the chocolate chip cookie recipe. Some have successfully incorporated nuts while others swap out chocolate for dried fruit, personalizing their experience. Pictures shared on social media capture creative presentations, showcasing their unique spins. Suggestions from the community bring in ideas like using different flavored extracts, opening conversations about taste adaptations. Communities often engage with requests for tips on cookie photography and sharing love across baking platforms.

Frequently Asked Questions

1. Can I freeze chocolate chip cookie dough?

Yes! You can freeze cookie dough for up to three months. Simply scoop out the dough into balls, place them on a baking sheet, freeze until solid, then transfer to an airtight container or zip-top bag.

2. How do I achieve chewier cookies?

For chewier cookies, try using bread flour instead of all-purpose flour and replacing one of the whole eggs with an egg yolk. This will enhance moisture and create a softer texture.

3. What type of chocolate is best?

Using good-quality semi-sweet or dark chocolate chips tends to yield the best flavor. You can also experiment with a blend of chocolate types for a delightful variety.

4. Can I use liquid sweeteners instead of granulated sugar?

While you can substitute liquid sweeteners like honey or maple syrup, you’ll need to adjust other ingredients to maintain the correct cookie consistency and texture.

5. How should I store leftover cookies?

Store leftover cookies in an airtight container at room temperature. They can remain fresh for about a week. For extended freshness, consider freezing them.

6. Why did my cookies spread too much?

Over-softened butter or too much liquid in the dough can cause excessive spreading. Ensure proper butter temperature and measure ingredients accurately to counter this.

7. Can I substitute eggs in the recipe?

Yes! For a vegan version, use 1 tablespoon of flaxseed meal mixed with 2.5 tablespoons of water for each egg, allowing it to gel up before adding it to your mixture.

8. What if I don’t have baking soda?

You can use baking powder as a substitute if needed. However, it’s best to check that you have a proper leavening ratio; typically, use 3 times more baking powder than baking soda.

9. Can I add mix-ins like nuts or fruits?

Absolutely! Adding nuts, cereal, or dried fruits gives everyone a unique twist. Just remember not to overdo it, as too many additions can affect the cookie structure.

10. How do I know when my cookies are done baking?

Look for a golden-brown color around the edges, while the center should appear slightly underbaked. They will continue to cook after being removed from the oven.

Additional Resources

Explore our collection of related recipes for more baking inspiration, including oatmeal raisin cookies and snickerdoodles. Take a look into our technique guides for mastering perfect cookies without hassle. Benefit from ingredient information available that outlines the history and usage of baking essentials. If you’re interested in investing in the best equipment for baking, check out our recommended tools. Don’t forget to look into seasonal variations as fresh ingredients become available!

Join the Conversation

We encourage our readers to share their experiences and photos while trying out this chocolate chip cookie recipe! Post your delicious creations on social media and tag us, enabling us to feature your content as well. Don’t hesitate to leave feedback or suggestions in the comments. Engage with fellow baking enthusiasts to expand your community and exchange tips on making the ultimate cookies. Swap recipe variations, share stories, and inspire one another in your baking ventures!

The Recipe

Chocolate Chip Cookies

Serves: 24 cookies

Prep Time: 15 mins

Cook Time: 10 mins

Total Time: 25 mins

Kitchen Equipment Needed

  • Mixing bowl
  • Baking sheet
  • Electric mixer (optional)
  • Measuring cups and spoons
  • Parchment paper
  • Cooling rack

Ingredients

  • 1 cup unsalted butter, softened
  • 3/4 cup granulated sugar
  • 3/4 cup brown sugar, packed
  • 1 teaspoon vanilla extract
  • 2 large eggs
  • 2 1/4 cups all-purpose flour
  • 1 teaspoon baking soda
  • 1/2 teaspoon salt
  • 2 cups chocolate chips

Directions

  1. Preheat oven to 375°F (190°C).
  2. In a mixing bowl, cream together the softened butter, granulated sugar, brown sugar, and vanilla until smooth.
  3. Add eggs one at a time, mixing well after each addition.
  4. In another bowl, combine flour, baking soda, and salt. Gradually blend into the creamed mixture.
  5. Stir in the chocolate chips.
  6. Drop rounded tablespoons of the dough onto ungreased baking sheets, spacing them about 2 inches apart.
  7. Bake for 9-11 minutes or until golden brown. Remove from the oven and let cool for a few minutes on the baking sheet before transferring to a wire rack.

Recipe Notes

  • For chewy cookies, refrigerate the dough for at least an hour before baking.
  • Experiment with different types of chocolate chips for unique flavors.
  • Store leftover cookies in an airtight container for up to a week.

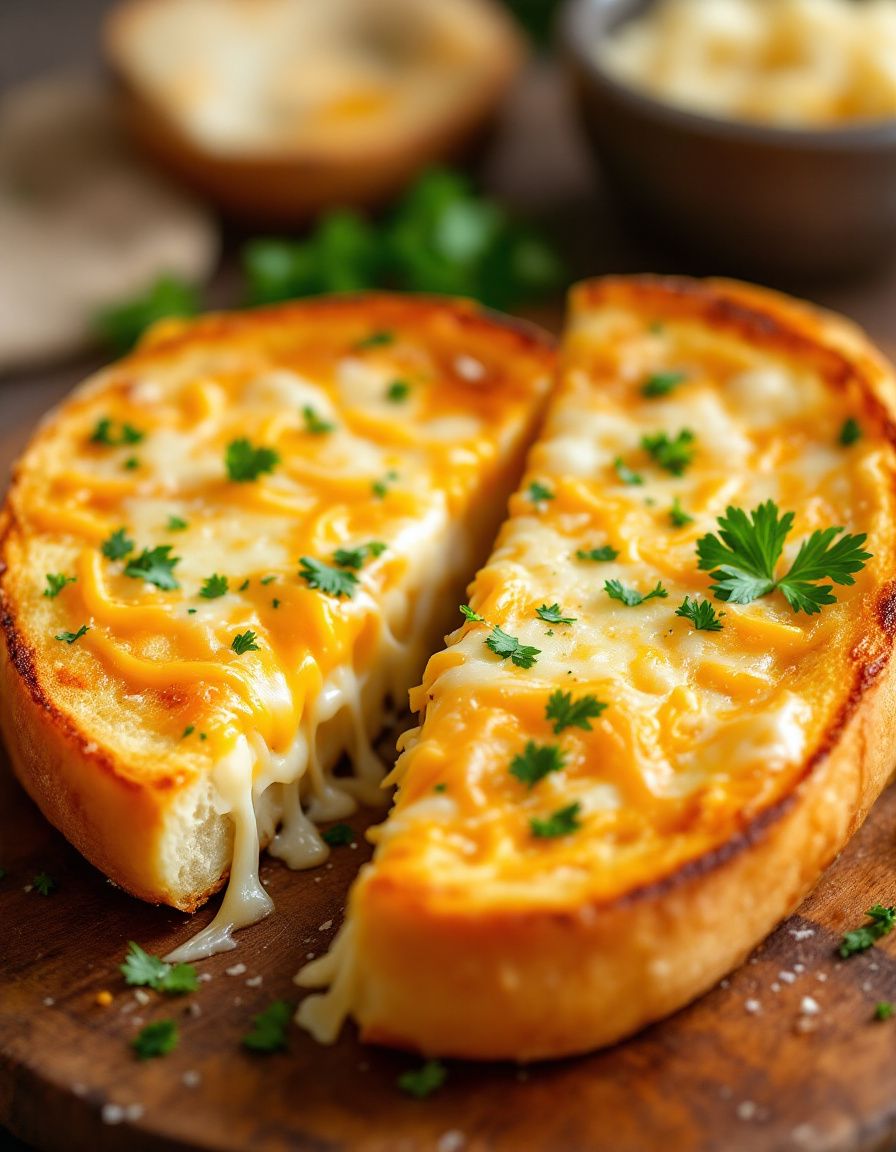
Ultimate Cheesy Garlic Bread with Buttery Crispy Edges

Cheesy Garlic Bread: The Ultimate Comfort Food Experience

⚖️
Difficulty
Easy

⏲️
Prep Time
10 mins

🕒
Cook Time
15 mins

⏱️
Total Time
25 mins

🍽️
Servings
4

Cheesy garlic bread is the epitome of comfort food, making it a beloved side dish that complements a variety of meals. The rich, gooey cheese melds with the aromatic garlic butter, creating a mouthwatering flavor experience that many crave. Serve it alongside pasta, soups, or salads to elevate your dining experience to a whole new level. The golden, crispy texture of the bread, combined with the savory filling, adds an irresistible charm that’s hard to resist.

Whether you’re hosting a casual dinner or a festive gathering, cheesy garlic bread is the perfect addition. It’s quick to prepare and always a crowd-pleaser, ensuring that every guest is satisfied. The fragrant garlic will waft through your kitchen, inviting friends and family to the table, eager to indulge. With every bite, you can enjoy the perfect blend of flavors and textures, leaving you wanting more.

Quick Recipe Highlights

  • Flavor Profile: This cheesy garlic bread features a delightful blend of buttery garlic and gooey cheese, with just the right amount of seasoning.
  • Texture: Expect a perfect contrast of crispy on the outside and soft, melty cheese on the inside.
  • Aroma: The aroma of toasting garlic and melting cheese fills your kitchen with a mouthwatering scent.
  • Visual Appeal: Golden-brown crust topped with melting cheese and a sprinkle of parsley creates an appetizing presentation.
  • Skill Level Needed: This recipe is simple and beginner-friendly, making it accessible for cooks of all levels.
  • Special Equipment: You will need a baking sheet, a butter knife, and a mixing bowl for easy preparation.

Recipe Overview

  • Difficulty Level: This cheesy garlic bread is easy to make, requiring minimal preparation and straightforward cooking steps.
  • Category: It can be served as a side dish, appetizer, or snack, making it versatile for any meal.
  • Cuisine: Rooted in Italian tradition, this recipe has become popular worldwide, often found in pizzerias and family gatherings.
  • Cost: This recipe is budget-friendly, with affordable ingredients available at any grocery store.
  • Season: Enjoy cheesy garlic bread year-round, but it shines especially in the colder months as a cozy comfort food.
  • Occasion: Perfect for casual dinners, game days, and holiday gatherings, it’s a dish that brings people together.

Why You’ll Love This Recipe

The flavors of cheesy garlic bread are a culinary delight. The sharp notes of garlic harmonize with the richness of melted cheese, creating a taste sensation that delights the palate. Every bite provides an explosion of flavor, ensuring that it can stand alone or accompany other dishes without overshadowing them. The texture is equally appealing, with a crunchy crust and a luscious filling that glide smoothly over the taste buds.

Convenience is a hallmark of this recipe. With just a handful of simple ingredients, you can whip up cheesy garlic bread in under thirty minutes. Ideal for busy weeknights, it requires minimal cleanup and storage, making it perfect for those who love homemade meals without a lengthy process. It’s also a great way to utilize leftover bread, turning something ordinary into something extraordinary.

Nutritionally, cheesy garlic bread offers the satisfaction of carbs paired with the benefits of garlic. Although it’s a treat, garlic has numerous health benefits, known for its antioxidant properties and immune-boosting effects. When made with whole grain bread, it can provide additional fiber and nutrients.

Socially, cheesy garlic bread is a fantastic dish for gatherings. Its appeal crosses age boundaries, bringing friends and family together around the dining table. Whether at a birthday party or a casual dinner with friends, sharing this bread adds warmth and camaraderie to any occasion.

Finally, cost-effectiveness is a significant advantage. Most ingredients needed for cheesy garlic bread are pantry staples, making it an easy and economical choice. Perfect for last-minute meal additions, its low investment yields high rewards in flavor and satisfaction.

Historical Background and Cultural Significance

Cheesy garlic bread likely has roots in Italy, where garlic and bread are staples. Over time, it evolved, becoming a household favorite in various regions, especially in America, where it found its niche in Italian restaurants and pizza shops. The addition of cheese transforms a simple garlic bread recipe into a gooey, indulgent experience, reflecting the American penchant for adapting culinary traditions.

Garlic has held cultural significance for centuries, believed to ward off evil spirits and grant strength to those who consume it, particularly among ancient civilizations. The combination of bread and garlic embodies comfort food, offering nourishment both physically and emotionally. In Italian culture, such dishes often highlight community and communal dining, serving as a gateway for connection.

As recipes became more Americanized, variations emerged, incorporating different types of cheese, spices, and even additional toppings. This recipe has become a staple at family gatherings, showcasing how food traditions evolve and adapt over time while remaining rooted in their origins.

Regional variations may include incorporating herbs, spices, or favorite condiments, allowing each family to add their personal touch to the classic cheesy garlic bread.

Ingredient Deep Dive

Garlic is a foundational ingredient in cheesy garlic bread. Known for its pungent flavor and aroma, it not only enhances taste but also carries numerous health benefits. Rich in vitamins C and B6, garlic is praised for its antibacterial properties and ability to boost the immune system. When selecting garlic, look for bulbs that are firm and free of sprouts, and store them in a cool, dry place. An alternative could be garlic powder for convenience, though fresh garlic is recommended for optimal flavor.

Cheese is another star ingredient in this recipe. Whether you choose mozzarella for its melting ability or a blend of cheeses for more complex flavors, cheese provides the essential creamy component. High in calcium and protein, cheese is enjoyed in moderation within a balanced diet. When choosing cheese, opt for high-quality products for the best melt and taste. Ensure it’s stored properly in the refrigerator to maintain freshness and consider substituting with vegan cheeses for a dairy-free option.

Bread is the base of this dish—select a hearty loaf with good texture. Sourdough and French bread work beautifully, creating a crispy exterior with a soft inside, ideal for absorbing garlic and butter. Whole grain varieties can add nutritional value, enhancing fiber content. Look for bread that is fresh but slightly stale for best results in achieving crispy edges. Store bread in a paper bag away from moisture to keep it fresh longer, and you can freeze any extras for future use.

Common Mistakes to Avoid

  • Using stale or overly fresh bread can hinder the texture. Slightly stale bread absorbs flavors better and offers the best crunch when toasted.
  • Not mincing garlic finely enough may result in uneven flavors; ensure it’s chopped finely to infuse its essence throughout the dish.
  • Overloading on cheese can create a greasy outcome, so stick to appropriate amounts for the best melt and maintain a balanced flavor.
  • Not preheating the oven can lead to uneven cooking; ensure the oven reaches the required temperature before placing the bread inside.
  • Skipping the buttering step on the edges can lead to a dry texture, so be generous in spreading to keep it moist and flavorful.
  • Baking time is crucial; overcooking can cause the edges to burn. Keep a close eye for golden-brown perfection.
  • Failing to season adequately can result in blandness; a pinch of salt, pepper, or herbs can enhance the overall flavor significantly.
  • Not letting the garlic butter sit for a few minutes can prevent full flavor extraction; allowing it to rest helps meld the ingredients better.
  • Using low-quality cheese can lead to poor melting, so always select good quality for optimal results.
  • Inadequate storage can lead to spoilage quickly. Always keep leftovers sealed in an airtight container in the fridge.

Essential Techniques

To master garlic bread, start by learning about butter infusion. Infusing butter with minced garlic enhances flavor. To do this, melt the butter over low heat with garlic until fragrant but not browned. This method enriches the flavor without overpowering the dish.

Next, understand the art of toasting bread. To achieve the perfect balance of crispiness, always preheat your oven. Position slices cut side up on a baking sheet, allowing the heat to circulate evenly. Watch closely to prevent burning, and flip halfway through baking for an even golden color.

Finally, mastering melting cheese to the perfect gooey texture can elevate your dish. Use shredded cheese for even melting and spread it uniformly across the surface. Broil in the last minute to achieve a bubbly and slightly golden finish.

Pro Tips for Perfect Cheesy Garlic Bread

– Use unsalted butter to control seasoning better; this allows you to add just the right amount of salt to taste.
– Experiment with different cheese blends for diverse flavor profiles, such as combining mozzarella with parmesan for depth.
– Herbed garlic butter can elevate the flavor; add fresh parsley or oregano to the mixture before spreading on the bread.
– For a kick of spice, include red chili flakes for a zesty variation.
– Serve immediately after baking for the best taste and texture, maximizing the enjoyment of gooey cheese.
– Using a pizza stone can help achieve a perfect crust; preheat it in the oven for crispy bread.
– Assemble any leftovers in an airtight container for maximum freshness and flavor retention for your next meal.
– Pair with marinara or ranch dipping sauce for an exciting twist.

Variations and Adaptations

Cheesy garlic bread can vary widely depending on regional ingredients and personal preferences. For an Italian twist, try adding fresh basil or Italian seasoning to the garlic butter. Seasonal adaptations could involve topping with roasted tomatoes or sautéed mushrooms for a hearty touch during autumn.

Dietary modifications are also possible; use gluten-free flour or bread for those with gluten sensitivities. Consider vegan substitutes, such as cashew cheese or a dairy-free butter alternative, for a plant-based option. Flavor adaptations might include adding pesto or sun-dried tomatoes to the mix for a burst of unique taste.

Texture modifications can enhance the experience as well; consider adding a sprinkle of cornmeal on the bread before toasting for an extra crunch. Presentation alternatives such as cutting the bread into strips or using a muffin pan to create individual servings make for a fun serving style.

Serving and Presentation Guide

When it comes to serving cheesy garlic bread, presentation matters. Arrange the slices in a circular pattern on a wooden board with herbs sprinkled on top for a rustic look. Serve with vibrant dipping sauces in small bowls to enhance the overall dining experience.

Garnishing with fresh parsley or basil adds color and elevates visual appeal, brightening the dish. Traditional accompaniments include marinara sauce, but modern twists might involve serving alongside cheese fondue or a light salad.

Temperature can significantly impact flavor; serve warm to enjoy the rich, gooey cheese at its best. As for portion control, slice the bread into generous portions but keep in mind serving sizes to avoid overeating during gatherings.

Wine and Beverage Pairing

Wine pairings can enhance the garlicky and cheesy experience of this dish. A crisp white wine, such as Pinot Grigio or Sauvignon Blanc, complements the flavors well, cutting through the richness. Alternatively, a light red, like Chianti, works beautifully with the savory notes.

For non-alcoholic alternatives, consider sparkling water with lemon or a citrus-based mocktail; their acidity will balance the flavors. Tea or coffee can also make excellent companions, especially with herbal blends that mirror the garlicky essence of the dish.

Temperature plays a role; serve wine chilled to refresh the palate alongside the warm bread, ensuring a delightful dining experience.

Storage and Shelf Life

To properly store cheesy garlic bread, seal leftovers in an airtight container to maintain freshness. Keep refrigerated for up to three days; however, be mindful that texture will be affected when reheating.

Signs of spoilage include an unusual odor or mold on the bread. When reheating, consider the oven or toaster for the best results; simply wrap in aluminum foil to avoid drying out during the reheating process.

Freezing is a viable option for extended storage. Wrap the bread tightly in plastic wrap and place in a freezer bag, allowing you to enjoy cheesy garlic bread on demand. For best texture, consume within three months and reheat directly from the freezer to retain flavor.

Make Ahead Strategies

To prepare cheesy garlic bread in advance, consider preparing the garlic butter mixture. This can be stored in the refrigerator for up to a week, allowing the flavors to meld beautifully. When ready to serve, simply spread it on the bread and bake.

You may also assemble the bread entirely and wrap it tightly, freezing before the baking step. When needed, simply thaw and bake as directed. This method retains fresh flavor, ensuring your cheesy garlic bread tastes freshly made.

Quality can be impacted based on how it’s made ahead. Fresh elements, such as using fresh garlic and herbs during assembly, will provide maximal flavor compared to dried alternatives.

Scaling Instructions

Scaling recipes for cheesy garlic bread is straightforward. To halve the recipe, adjust the ingredient quantities accordingly but maintain your cooking time. Similarly, to double or triple the recipe, consider your baking sheets; oversized batches might need additional time or may require baking in batches to avoid overcrowding.

Be mindful of equipment adjustments; a larger baking sheet or oven may be necessary when increasing the serving size significantly. Timing modifications depend on the thickness and amount of cheese; keep a close eye on the bread to prevent burning.

Store any leftover portions appropriately based on increased quantities; having more food means more careful packaging to avoid waste.

Nutritional Deep Dive

The nutritional profile of cheesy garlic bread includes macros predominantly comprised of carbohydrates from the bread, fat from the butter and cheese, and protein from the cheese. While it’s a delightful treat, moderation is key, particularly considering caloric density from cheese.

Micronutrient analysis reveals beneficial vitamins and minerals from garlic, which contributes to overall health. Garlic is renowned for its antioxidants and anti-inflammatory properties, potentially aiding health beyond just enjoyment.

Health benefits should be viewed with consideration; with a focus on serving sizes, it’s possible to enjoy this comfort food while balancing dietary needs. Pairing with a light salad or protein dish can help maintain a well-rounded meal.

Portion analysis plays a crucial role in managing indulgence; ensuring reasonable serving sizes helps maintain balanced caloric intake without compromising the experience of enjoying delicious cheesy garlic bread.

Dietary Adaptations

For those with dietary restrictions, cheesy garlic bread can be easily adapted. Gluten-free individuals can substitute with gluten-free bread, ensuring texture and flavor are still delightful. Dairy-free options include using vegan butter and cheese alternatives made from nuts or soy.

Vegans can enjoy cheesy garlic bread by leveraging nutritional yeast flakes mixed into the butter for that distinct cheesy flavor without dairy products.

Low-carb enthusiasts may opt for cloud bread or zucchinis as a base, ensuring they still experience the savory gratification of garlic and cheese without excess carbs.

Paleo followers can substitute traditional bread with sweet potatoes or almond flour-based options. Each dietary adjustment centers around keeping the essence of cheesy garlic bread intact while adapting to individual needs and preferences.

Troubleshooting Guide

If your cheesy garlic bread ends up too soggy, ensure your bread is slightly stale or toast it briefly before applying garlic butter. This allows for better absorption of flavors while maintaining a pleasing crunch.

Flavor balance issues can arise if too much garlic is used; compensate with a touch more olive oil or butter to neutralize the sharpness.

Temperature issues may arise if the oven is not properly preheated. Always ensure the correct temperature to promote even cooking. Keep in mind that baking time may vary based on oven types.

Equipment challenges may occur when using unconventional pans; opt for a stable baking sheet to avoid uneven results. If necessary, rotate pans in the oven for consistent cooking.

When addressing ingredient substitutions, ensure your alternatives maintain similar moisture levels to avoid texture discrepancies in the final dish.

Timing problems, especially undercooked bread, can be resolved with a simple additional few minutes in the oven, keeping a close watch to prevent burning.

Recipe Success Stories

Readers have shared delightful experiences of their cheesy garlic bread, noting its universal appeal among family and friends. One community member shared that it became the highlight of their potluck, inspiring others to request the recipe for their gatherings.

Variations in ingredients sparked excitement, as some readers incorporated jalapeños or a sprinkle of smoked paprika, leading to unique flavor profiles. Others experimented with various cheeses, such as cheddar or pepper jack, to create their customizable take.

Contributors have showcased their photography skills on social media, presenting beautifully plated cheesy garlic bread, allowing others to appreciate the dish aesthetically. These success stories reflect how versatile and beloved cheesy garlic bread can be within diverse settings.

In the comments section, readers often suggest complementary dishes, such as serving it alongside homemade marinara for dipping, elevating the overall culinary experience.

Frequently Asked Questions

Can I make cheesy garlic bread ahead of time?

Yes, you can prepare the garlic butter mixture and store it in the fridge for several days. You can also assemble the bread and freeze it before baking for maximum flavor.

How do I reheat cheesy garlic bread?

The best way is to reheat it in the oven at a low temperature to get back its crispiness. Avoid microwaving, as it can make the bread soggy.

What type of bread works best for cheesy garlic bread?

Hearty options like French bread, sourdough, or Italian loaves are excellent choices. They provide a sturdy base that can hold the toppings well.

Can I use different types of cheese?

Definitely! Feel free to experiment with different cheese types. Mozzarella offers a great melt, while parmesan can enhance flavor complexity.

Is it possible to make this recipe gluten-free?

Yes, you can use gluten-free bread as a substitute to ensure everyone can enjoy this delicious dish.

How long does cheesy garlic bread last?

When stored in an airtight container, it can last for 2-3 days in the refrigerator. For extended storage, you can freeze it for up to 3 months.

What can I serve with cheesy garlic bread?

This dish pairs well with pasta, soups, salads, or as an appetizer with dipping sauces like marinara or ranch.

Can I make it spicy?

Yes! Adding red pepper flakes or jalapeños can spice things up for those who enjoy heat in their cheesy garlic bread.

How can I make this dish vegan?

To make it vegan, use vegan butter and cheese substitutes, like cashew cheese or nutritional yeast, to achieve great flavor without dairy.

What are some common mistakes to avoid?

Be cautious not to overcrowd the baking sheet and use fresh ingredients. Ensure you allow proper baking time to avoid soggy bread.

Can I add herbs for extra flavor?

Absolutely! Fresh or dried herbs like parsley, basil, or oregano can add a delightful twist to the classic cheesy garlic flavor.

Additional Resources

For those looking to expand their culinary repertoire, consider checking out related recipes such as homemade marinara sauce or pasta primavera that pair excellently with cheesy garlic bread. Additionally, delve into technique guides for perfecting bread baking or ingredient information to understand better the components you’re using.

Experimenting with different equipment can also elevate your cooking; investing in a good quality baking sheet ensures even toasting, enhancing your dishes overall. Keep an eye out for seasonal variations to incorporate local ingredients, keeping your meals fresh and exciting.

Join the Conversation

We invite you to share your cheesy garlic bread experiences! Whether it’s a unique twist or a charming story, your contributions enrich our community. Engage in discussions about variations you’d like to try or your favorite way to serve this delicious dish.

Share your beautiful food photography on social media and use our hashtag to connect with fellow food enthusiasts. Recipe reviews and suggestions further enhance our collective cookbook, allowing for limitless culinary creativity.

The Recipe

Cheesy Garlic Bread

Serves: 4

Prep Time: 10 mins

Cook Time: 15 mins

Total Time: 25 mins

Kitchen Equipment Needed

  • Baking sheet
  • Butter knife
  • Mixing bowl

Ingredients

  • 1 loaf French bread
  • 1/2 cup unsalted butter, softened
  • 4 cloves garlic, minced
  • 1 cup shredded mozzarella cheese
  • 1 teaspoon dried parsley (optional)
  • Salt and pepper to taste

Directions

  1. Preheat the oven to 375°F (190°C).
  2. In a mixing bowl, combine the softened butter, minced garlic, parsley, salt, and pepper. Mix well until fully combined.
  3. Slice the French bread in half lengthwise and spread the garlic butter mixture generously over each half.
  4. Sprinkle the shredded mozzarella cheese evenly on top of the butter mixture.
  5. Place the bread halves on a baking sheet and bake for 15 minutes, or until the cheese is melted and bubbly.
  6. If desired, broil for an additional 1-2 minutes for extra crispiness.
  7. Remove from the oven, let cool slightly, slice, and serve warm.

Recipe Notes

  • For a herbaceous twist, try adding fresh basil or oregano.
  • Feel free to experiment with different cheeses for varied flavors.
  • To make it gluten-free, simply use gluten-free bread.

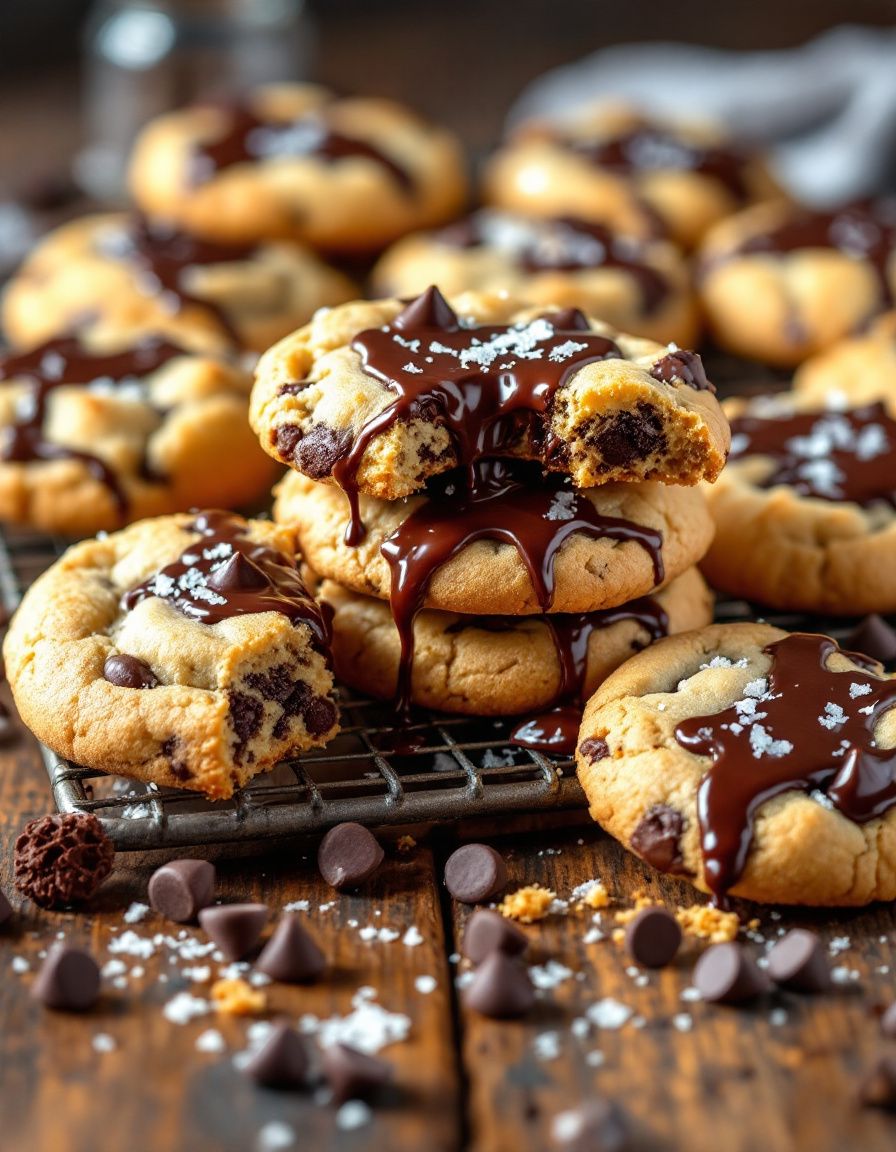
Best Chocolate Chip Cookies Recipe – Soft and Chewy Treat

Chocolate Chip Cookies: The Ultimate Indulgence

⚖️
Difficulty
Easy

⏲️
Prep Time
15 mins

🕒
Cook Time
10 mins

⏱️
Total Time
25 mins

🍽️
Servings
24 cookies

Chocolate chip cookies are a timeless classic, beloved by many for their rich flavor and delightful texture. This recipe will guide you through creating the perfect batch of cookies that are golden brown on the outside, soft and chewy on the inside, and packed with semi-sweet chocolate chunks. The delicious aroma of melted chocolate combined with a hint of vanilla wafts through the kitchen as these cookies bake, making it nearly impossible to resist having just one, or two!

The secret to this recipe lies not just in the quality of the ingredients, but also in the techniques used during preparation. Whether you’re baking for a family gathering, a bake sale, or simply treating yourself, these chocolate chip cookies are guaranteed to impress. With simple ingredients like butter, sugar, and flour, you can create something extraordinary that will have everyone coming back for more.

Quick Recipe Highlights

  • Flavor Profile: Sweet and buttery with rich chocolate notes that melt in your mouth.
  • Texture: A perfect balance of crispy edges and a chewy center, offering a delightful mouthfeel.
  • Aroma: Sweet and nutty, the scent of baking cookies fills your home with warmth.
  • Visual Appeal: Golden brown with generous chunks of chocolate throughout, they are as beautiful as they are tasty.
  • Skill Level Needed: Ideal for beginners, these cookies require minimal skills but deliver maximum satisfaction.
  • Special Equipment: All you need is a mixing bowl, baking sheet, and a spatula—no fancy gadgets required!

Recipe Overview

  • Difficulty Level: This chocolate chip cookie recipe is user-friendly and perfect for bakers of all levels, making it a great starting point for those new to baking.
  • Category: These cookies are a sweet treat perfect for dessert or an afternoon snack, fitting into various meal categories.
  • Cuisine: Originating from the United States, chocolate chip cookies have become a cultural icon worldwide, embodying the spirit of home baking.
  • Cost: Made with affordable pantry staples, these cookies have a low-cost ingredient list, typically totaling under $5.
  • Season: Enjoy these cookies year-round, but they’re especially popular during the holiday season when baking becomes a cherished tradition.
  • Occasion: Ideal for birthday parties, family gatherings, holiday celebrations, or just a cozy night at home.

Why You’ll Love This Recipe

One of the defining features of these chocolate chip cookies is their delightful taste and texture. The combination of sweet, creamy butter and rich chocolate chunks creates a mouthwatering experience that is both comforting and indulgent. Each bite melts in your mouth, satisfying your sweet tooth and leaving you craving more. The contrast of crispy edges with a chewy center offers a unique texture that elevates your cookie experience to new heights.

In addition to their incredible flavor, these cookies are remarkably convenient to prepare. With a quick prep time of just 15 minutes, you can have fresh cookies baking in no time. The simplicity of the ingredients means you can easily whip up a batch on a whim, making them a go-to treat for any occasion. Plus, you can enjoy the satisfaction of baking from scratch without the need for elaborate equipment or complicated techniques.

Nutritionally, while these chocolate chip cookies are a treat, using high-quality ingredients can elevate their benefits. For instance, opt for dark chocolate chips to add antioxidants to your dessert. By incorporating ingredients like whole wheat flour or oats, you can create a slightly healthier version while still maintaining the delicious flavor and texture that you love.

Socially, these chocolate chip cookies hold a special place in gatherings and celebrations. Sharing a batch with friends or family fosters connections and can spark joy. They are the perfect addition to a warm gathering, providing comfort and sweet indulgence that brings people together. Not just for events, they also make a great gift when packed in beautiful tins, showing you care.

Cost-effectively, this recipe stands out as an optimal choice for anyone who loves sweet treats without breaking the bank. With basic components that you probably already have in your kitchen, these cookies are rewarding to make and offer a delightful result that rivals any bakery. This means enjoying your favorite chocolate chip cookies at a fraction of the cost.

Historical Background and Cultural Significance

The chocolate chip cookie was invented in the 1930s by Ruth Wakefield, who owned the Toll House Inn in Massachusetts. Originally created as a new dessert to serve to her guests, the cookies quickly gained popularity. Ruth’s recipe requested a bar of Nestlé semi-sweet chocolate, which is why the chocolate chip cookie remains closely associated with the Nestlé brand. The creation of this cookie represents a unique intersection of culinary creativity and commercial innovation that has made it a staple in many American households.

Culturally, chocolate chip cookies have become synonymous with comfort food and homebaking. They evoke feelings of nostalgia for many, reminding them of their childhoods spent in cozy kitchens with family. The recipe has been passed down through generations, fostering family bonding and creating lasting memories. Their presence at celebrations and holidays underscores their importance in American culture as symbols of love, warmth, and homemade goodness.

Over time, the chocolate chip cookie recipe has evolved and diversified. Variations include additions like nuts, dried fruits, or different types of chocolate, each introducing new flavors while keeping the core of the recipe intact. Today, you’ll find many creative takes on the traditional chocolate chip cookie, showcasing the versatility and adaptability of this beloved dessert.

Regionally, chocolate chip cookies vary in style and preparation methods. In some areas, you may encounter thicker, doughier cookies, while others favor a thinner, crunchier variety. These regional differences add to the charm of the chocolate chip cookie, making them a true reflection of the culture and tastes of their origin.

Ingredient Deep Dive

All-Purpose Flour
Flour is the foundation of any cookie. The history of wheat dates back thousands of years, and it has played a crucial role in the development of baking. In terms of nutrition, all-purpose flour provides carbohydrates for energy but lacks the fiber found in whole grain alternatives. When selecting flour, look for a fine texture and avoid any clumps. Store it in an airtight container in a cool, dry place, and consider using whole wheat flour as a nutritious substitution.

Brown Sugar
Brown sugar adds moisture and a hint of caramel flavor to chocolate chip cookies. Its history goes back centuries, with origins tied to sugar cane cultivation. Nutritionally, brown sugar holds trace minerals that offer slight health benefits compared to white sugar. When selecting brown sugar, pack it tightly to ensure you get a good amount, and always store it in an airtight container to prevent it from hardening.

Chocolate Chips
The choice of chocolate is crucial in defining the overall taste of your cookies. With a history that traces back to ancient Mesoamerican cultures, chocolate has evolved dramatically over centuries. Rich in antioxidants and mood-enhancing properties, chocolate chips provide more than just flavor. Opt for high-quality chocolate chips, and store them in a cool place to maintain their quality. If you’re looking for alternatives, consider using dark chocolate or even flavored chocolate chips for a twist.

Butter
Butter is key to rich, flavorful cookies. Historically associated with dairy farming, it enhances both the flavor and texture of baked goods. Nutritionally, butter is a source of fat, and it’s important to use it at room temperature for proper creaming with sugar. Always look for unsalted butter for the best flavor control in your recipes and store it in a refridgerator or freezer to maintain freshness.

Common Mistakes to Avoid

  • Using cold butter: Avoid hard or cold butter as it won’t cream well with sugar, resulting in flat cookies.
  • Over-mixing the dough: Mixing too much can lead to tough cookies; mix just until the ingredients are combined.
  • Incorrect oven temperature: Always preheat your oven and use an oven thermometer to ensure accurate baking temperatures.
  • Not chilling the dough: Skipping this step can make your cookies spread too much during baking.
  • Using old baking soda: Ensure your baking soda is fresh to achieve the desired rise.
  • Skipping parchment paper: Stick-free baking makes a huge difference; use parchment paper on your baking sheets.
  • Overcrowding the baking sheet: Space out your cookie dough balls to allow for proper spreading.
  • Not checking doneness: Cookies continue to bake on the sheet after removing from the oven, so pull them out slightly underbaked for the best texture.
  • Cooling directly on sheets: Transfer cookies to wire racks after a few minutes for even cooling.
  • Using the wrong measuring technique: Always spoon flour into your measuring cup and level it off for accuracy.

Essential Techniques

Creaming Butter and Sugar
Creaming is a critical technique for achieving light and fluffy cookies. It incorporates air into the butter, which aids in leavening. To master this technique, beat butter until smooth before gradually adding sugar. Look for the mixture to become pale and increase in volume for success.

Chilling Dough
Chilling dough before baking is essential for preventing excessive spreading and ensuring a chewy texture. This technique allows the fats to solidify and the flavors to meld. Chill the dough for at least 30 minutes, and look for a firmer consistency before baking to know it’s ready.

Portioning Cookies
Evenly portioning your cookie dough ensures uniform baking and presentation. Using a cookie scoop or spoon offers consistency, leading to perfectly shaped cookies. Aim for the same size for all dough balls to avoid uneven cooking, and leave spacing on the baking sheet for spreading.

Pro Tips for Perfect Chocolate Chip Cookies

To ensure you achieve the best chocolate chip cookies, use high-quality chocolate for richer flavor. Experiment with different types, like dark chocolate or milk chocolate, to find your favorite combination.

Use a combination of brown and granulated sugar to enhance chewiness and sweetness. Brown sugar adds moisture, while granulated sugar contributes to crispiness.

Make sure to let your cookies cool completely on a wire rack to maintain their structure and prevent sogginess.

If you desire a little extra richness, consider adding a pinch of sea salt on top before baking to enhance the chocolate flavor.

For a unique twist, incorporate a teaspoon of espresso powder to intensify the chocolate taste without adding overt coffee flavor.

Lastly, don’t be afraid to get creative with mix-ins such as nuts, dried fruits, or even a sprinkle of toffee bits for added texture and flavor complexity.

Variations and Adaptations

Chocolate chip cookies can be adapted in numerous ways to cater to different preferences. Regionally, try adding nuts like pecans or walnuts for added crunch and flavor.

Seasonally, consider incorporating festive spices such as cinnamon or nutmeg into the dough during the fall months for a seasonal twist.

For those with dietary restrictions, easy modifications can be made, such as using dairy-free chocolate for a vegan alternative or gluten-free flour blends for those avoiding wheat.

Taste and texture variations can be achieved by using brown butter instead of regular butter. This adds depth and nuttiness to the flavor profile.

Consider alternative presentations by forming the dough into bars rather than traditional rounds for a unique take. Serve them warm with a scoop of vanilla ice cream for an extra decadent dessert.

Serving and Presentation Guide

When it comes to serving chocolate chip cookies, presentation matters! Begin by plating the cookies in an attractive stack or on a decorative platter for gatherings.

Add a dusting of powdered sugar or a drizzle of melted chocolate for a refined touch. To elevate your serving suggestion, pair the cookies with a chilled glass of milk or hot beverage.

For family gatherings, consider grouping the cookies with accessible napkins and plates for a casual approach. Offering an assortment of cookies, such as other flavored variations, can also entice your guests.

Ensure you allow cookies to cool slightly before serving; warm cookies provide a delicious melted chocolate experience, while cooled cookies maintain their structure. Portion control is essential—consider serving two to three cookies per person to encourage enjoyment without overwhelming guests.

Wine and Beverage Pairing

Pairing chocolate chip cookies with beverages can enhance the experience. For wine enthusiasts, a dessert wine such as tawny port beautifully complements the chocolate’s richness.

If you prefer non-alcoholic options, consider serving with cold milk or a rich hot chocolate to evoke nostalgic flavors.

Coffee or espresso pairs exceptionally well with chocolate, with the added bonus of balancing the sweetness of the cookies. Serving it warm brings out vibrant flavors while creating a cozy atmosphere.

When serving cookies at a gathering, offer a flight of beverages to allow guests to explore different pairs, enhancing the tasting adventure.

Storage and Shelf Life

To maintain the freshness of chocolate chip cookies, proper storage is crucial. Store them in an airtight container at room temperature for up to one week to preserve texture and flavor.

Alternatively, if you want to keep them longer, you can freeze the cookies in a single layer on a baking sheet before transferring them to an airtight container or freezer bag. They retain quality for up to three months in the freezer.

When refrigerating, layer parchment paper between cookies to prevent them from sticking together. Always check for signs of spoilage, such as off odors or changes in texture, to ensure food safety.

To reheat, allow cookies to thaw at room temperature, then warm them in a microwave for a few seconds to restore that freshly baked experience.

Make Ahead Strategies

Making chocolate chip cookies ahead of time is a great strategy for busy bakers. You can prepare the dough and refrigerate it for up to three days before baking, allowing flavors to meld.

Alternatively, roll the dough into balls and freeze them, so you can bake fresh cookies as needed. Simply bake the frozen dough balls directly from the freezer, adding a minute or two to the baking time for optimal results.

To optimize quality, bake only what you need and store leftover cookie dough in the refrigerator; however, it’s best used within a week.

When it comes time to bake, ensure your oven is preheated for consistent results, and enjoy the benefits of having delicious homemade cookies on demand.

Scaling Instructions

If you’re looking to scale your chocolate chip cookie recipe, halving or doubling ingredients can be easily done. Keep in mind that baking times may vary slightly depending on the size of your batch.

When doubling, ensure you have a mixing bowl large enough to accommodate increased volumes of the ingredients and avoid overworking the dough.

If halving ingredients, be precise with your measurements, and consider the proportions for flavor balance to maintain the taste while adjusting for size.

In terms of equipment, ensure you have enough baking sheets on hand to avoid overcrowding during baking, which can lead to uneven results.

Storage times can shift as well; larger batches may require longer cooling periods or additional methods for storage to prevent spoilage.

Nutritional Deep Dive

When analyzing the nutritional components of chocolate chip cookies, it’s essential to look at the macros, including carbohydrates, fats, and proteins. Each cookie typically contains a modest balance of these macronutrients that fuel energy levels.

Micronutrient analysis reveals that while cookies are a treat, they can offer beneficial nutrients depending on ingredient choices. Options like dark chocolate and whole grains introduce vitamins and minerals into the mix, promoting health benefits.

For those mindful of dietary considerations, understanding portion control is key. Each cookie offers satisfaction, and moderation is essential for balancing indulgence and health.

Assessing the overall impact on weight management is vital; cookies made with high-quality ingredients can be enjoyed in moderation, aligning with various dietary needs.

Dietary Adaptations

Many adaptations exist for those with dietary restrictions. For gluten-free options, substituting all-purpose flour with a gluten-free blend ensures everyone can enjoy chocolate chip cookies.

Using dairy-free chocolate and coconut oil can cater to vegan diets while maintaining excellent flavor and texture. Simply replace eggs with an appropriate substitute like flaxseed or chia seeds for binding.

Low-carb dieters can utilize almond flour and sugar substitutes to create a keto-friendly version of chocolate chip cookies without compromising taste significantly.

Paleo-friendly options can also be made using nut flours and natural sweeteners while keeping traditional ingredients out of the mix to stay in line with dietary preferences.

Adjusting recipes for low-FODMAP individuals may involve using lactose-free ingredients and limiting certain sweeteners.

Troubleshooting Guide

When faced with texture issues, it’s essential to analyze your mixing methods. Over mixing can lead to tough cookies, while under mixing may prevent proper incorporation of ingredients.

Flavor imbalances can stem from using low-quality chocolate or incorrect proportions; measure carefully and use high-quality ingredients to avoid this.

Temperature problems, like cookies spreading too much or burning quickly, can be adjusted by chilling the dough and ensuring your oven maintains a consistent heat.

For ingredient substitutions, familiarizing yourself with the flavor profiles of alternatives helps in maintaining the intended flavor and texture of your cookies.

Timing concerns are crucial; ensuring correct baking times and checking for doneness helps in achieving that perfect cookie every time.

Recipe Success Stories

Community feedback on chocolate chip cookies is overwhelmingly positive. Many bakers share their success stories of family gatherings transformed by the aroma of freshly baked cookies.

Variations and unique interpretations of the recipe have resonated with readers, leading to adjustments that reflect personal tastes.

Adaptation stories often feature creative replacements, like using peanut butter chips instead of chocolate, offering insights into the versatility of this beloved dessert.

Readers frequently provide suggestions on enhancing the recipe, such as adding a hint of espresso powder or utilizing different types of chocolate for a richer taste experience.

Photography tips shared by the community add value, showcasing techniques to display the cookies beautifully, further enticing others to try the recipe.

Frequently Asked Questions

1. Can I freeze cookie dough? Yes! Chocolate chip cookie dough can be frozen for up to three months. Just scoop the dough onto a baking sheet, freeze until solid, then transfer to an airtight container. Bake straight from the freezer, adding a minute or two to the baking time.

2. How can I make my cookies chewier? To achieve a chewier texture, use more brown sugar and less granulated sugar. Chilling the dough for at least 30 minutes also promotes chewiness.

3. Why are my cookies flat? Flat cookies can result from too much butter, not chilling the dough, or using melted butter instead of softened butter. Ensure proper measurements and technique.

4. What is the difference between baking soda and baking powder? Baking soda is a base that needs an acid to activate, while baking powder contains both an acid and a base. Depending on the recipe, each plays a crucial role in leavening baked goods.

5. Can I use whole wheat flour instead of all-purpose flour? Yes, you can substitute whole wheat flour. However, it may result in denser cookies, so combining it with all-purpose flour can help improve the texture.

6. How do I store my cookies to keep them fresh? Store cookies in an airtight container at room temperature. For longer storage, place them in the refrigerator or freezer.

7. Can I double this recipe? Yes, doubling the recipe is straightforward! Just ensure you have a large enough mixing bowl and baking sheets to accommodate the increased volume of dough.

8. What can I use as a substitute for eggs? Common substitutes include unsweetened applesauce (1/4 cup per egg) or a flaxseed mixture (1 tablespoon of ground flaxseed mixed with 2.5 tablespoons of water).

9. How can I add more chocolate flavor? Incorporate chocolate chips or chunks into the batter and consider using cocoa powder in addition to flour for an intense chocolate flavor.

10. Do I have to use vanilla extract? While vanilla extract adds depth to flavor, if you prefer to omit it, consider using almond extract or none at all; the cookies will still be delicious.

Additional Resources

Enhancing your baking repertoire is always beneficial. Check out other related recipes like oatmeal cookies, snickerdoodles, or peanut butter cookies for more sweet inspiration.

Explore technique guides that can help perfect your cookie-baking skills and broaden your culinary horizons. Ingredient information can shed light on the various types of chocolate and flour available, promoting informed choices in your baking processes.

When considering equipment recommendations, look for quality baking sheets and cooling racks that can make a significant difference in your baking experience. Seasonal variations can inspire festive adaptations of your favorite cookie recipes throughout the year.

Join the Conversation

We encourage you to share your baking experiences, variations, and success stories with the community. Engage with us on social media, showcasing your beautiful chocolate chip cookie creations.

Photography tips to make your dishes look stunning can help inspire others to try the recipe. Your reviews and feedback are invaluable, contributing to the evolving community of bakers and lovers of sweet treats.

If you’ve tried the recipe, consider leaving a comment detailing your experience, favorite modifications, or suggestions for improvement. Share your unique twist, and connect with others who share your passion for baking!

The Recipe

Chocolate Chip Cookies

Serves: 24 cookies

Prep Time: 15 mins

Cook Time: 10 mins

Total Time: 25 mins

Kitchen Equipment Needed

  • Mixing bowl
  • Baking sheets
  • Cooling rack
  • Measuring cups and spoons
  • Spatula

Ingredients

  • 2 1/4 cups all-purpose flour
  • 1/2 teaspoon baking soda
  • 1 cup unsalted butter, softened
  • 1/2 cup granulated sugar
  • 1 cup packed brown sugar
  • 1 teaspoon salt
  • 2 teaspoons vanilla extract
  • 2 large eggs
  • 2 cups chocolate chips

Directions

  1. Preheat your oven to 350°F (175°C).
  2. In a mixing bowl, combine flour and baking soda; set aside.
  3. In another bowl, cream together the butter, granulated sugar, brown sugar, and salt until smooth.
  4. Add the vanilla and eggs to the butter mixture and beat until well combined.
  5. Gradually add the flour mixture to the wet ingredients, stirring until just combined.
  6. Fold in the chocolate chips using a spatula.
  7. Drop rounded tablespoons of dough onto prepared baking sheets, spacing them about 2 inches apart.
  8. Bake for 9 to 11 minutes or until the edges are golden, but the centers are still soft.
  9. Remove from the oven and let the cookies cool on the sheet for 5 minutes before transferring to a wire rack.

Recipe Notes

  • For a nuttier flavor, consider adding chopped nuts such as walnuts or pecans.
  • Store leftover cookies in an airtight container to maintain freshness.
  • Feel free to experiment with different types of chocolate chips.

Perfect Chocolate Chip Cookies – Soft, Chewy, and Easy

Delicious Chocolate Chip Cookies: The Ultimate Comfort Treat

⚖️
Difficulty
Easy

⏲️
Prep Time
15 mins

🕒
Cook Time
10-12 mins

⏱️
Total Time
25-27 mins

🍽️
Servings
24 cookies

Indulging in freshly baked chocolate chip cookies fresh from the oven brings about a wave of nostalgia for many, reminding us of cozy kitchens and sweet moments spent with loved ones. These cookies feature a delicious balance of buttery dough and rich chocolate chips, resulting in an irresistible treat perfect for any occasion or simply as a comforting snack. The gooey centers and slightly crisp edges create an inviting contrast in every bite, making them a beloved classic around the world.

Baking chocolate chip cookies is not just about satisfying a sweet tooth; it’s an experience that fills your home with aromatic scents of baking, bringing friends and family together. Imagine the delightful moment when you pull the cookies out of the oven and the chocolate continues to melt, enticing everyone in the vicinity. These cookies are simple enough to whip up on a rainy day or when surprise guests arrive.

Quick Recipe Highlights

  • Flavor Profile: Rich, buttery, and sweet with hints of vanilla and the irresistible flavor of semi-sweet chocolate chips.
  • Texture: Chewy in the center with a slight crisp on the edges, creating a delightful mouthfeel.
  • Aroma: The aroma of baked butter and sweet chocolate wafts through the air, inviting everyone to gather around.
  • Visual Appeal: Golden brown cookies studded with semi-sweet chocolate chips create an inviting display on any platter.
  • Skill Level Needed: Perfect for beginner bakers, this recipe requires minimal technique to achieve delicious results.
  • Special Equipment: A mixing bowl, baking sheet, and parchment paper are all you need to get started on this delicious treat!

Recipe Overview

  • Difficulty Level: The chocolate chip cookie recipe is rated easy, making it accessible for all skill levels, even kids can lend a hand in measuring and mixing.
  • Category: These cookies fall under the dessert category and make for a perfect after-school snack or a sweet finale to any meal.
  • Cuisine: Originating from North America, chocolate chip cookies highlight the casual and comforting aspect of American baking traditions.
  • Cost: With common ingredients, this recipe can be made on a budget, usually costing under $10 to make a full batch.
  • Season: Perfect for any time of year, chocolate chip cookies are especially popular during the holidays for gift-giving and family gatherings.
  • Occasion: They fit right in at birthday parties, holiday celebrations, or as a delightful addition to a picnic or bake sale.

Why You’ll Love This Recipe

The delightful interplay of flavors in chocolate chip cookies combines sweet, creamy butter with semi-sweet chocolate that melts in your mouth. As you take a bite, the contrasting textures between chewy and crunchy heighten the flavor experience, making each bite a moment to savor. The incorporation of quality ingredients, such as pure vanilla extract and fresh eggs, elevates this recipe from basic to extraordinary. You won’t just be eating; you’ll be enjoying an experience.

Preparation and convenience are additional highlights of this chocolate chip cookie recipe. With a quick prep time and minimal steps, you can have cookies ready to enjoy in less than 30 minutes. This makes it the ultimate choice for those spontaneous cravings or last-minute gatherings. The simplicity of the process invites participation, making baking a delightful experience for children and adults alike; spending quality time creating these sweet treats adds to the enjoyment.

In terms of health, while chocolate chip cookies are a dessert and should definitely be enjoyed in moderation, they can be part of a balanced lifestyle. When made from scratch, you have control over the ingredients, allowing you to opt for higher quality chocolate or healthier substitutes like whole wheat flour. Of course, indulging occasionally can be satisfying for emotional well-being, too, reinforcing memories of comfort, family, and joy.

Chocolate chip cookies also excel in their social and entertaining value. They are not just treats but a catalyst for gatherings—whether it’s hosting a bake sale, having friends over for a movie night, or simply surprising your family. The aroma wafting through your kitchen invites people in, creating a warm and welcoming atmosphere while the nostalgic experience draws in guests of all ages.

Lastly, cost-effectiveness is a significant appeal. The ingredients for this classic cookie are pantry staples, making them easy to whip up at any time without breaking the bank. Given that a batch yields approximately two dozen cookies, it’s quite economical to satisfy the sweet tooth of a large group, making these cookies both a delicious and budget-friendly option for any occasion.

Historical Background and Cultural Significance

The beloved chocolate chip cookie has an interesting origin story, dating back to the 1930s in the United States. Ruth Wakefield, the creator of the chocolate chip cookie, was running a toll house inn when she decided to experiment with adding chopped chocolate bars to her butter cookie recipe. The end result was such a hit that it became a staple dessert for many American families, leading to the Toll House brand being synonymous with chocolate chip cookies.

Over the decades, the cultural significance of chocolate chip cookies has only grown. They are more than just a dessert; they symbolize the comfort and warmth of home baking. Many families have their own variations and traditions surrounding chocolate chip cookies, often passed down through generations. They have become a quintessential part of American baking culture and influence cookie recipes worldwide.

As time went on, the chocolate chip cookie recipe evolved with various interpretations and adaptations. Today’s cookies can be soft, crunchy, or even stuffed with exciting fillings like peanut butter or caramel. This evolution showcases the versatility of the original recipe, allowing adaptations that cater to diverse taste preferences and dietary restrictions.

Regional variations also play a role in the popularity of chocolate chip cookies. Different areas of the U.S. have their own takes on the classic, whether it’s the chewy New York style or the crispy California version. This variety ensures that chocolate chip cookies remain relevant and loved by many, uniting people with their sweet, delightful charm.

Ingredient Deep Dive

Butter: Known for its rich flavor and ability to enhance baked goods, butter brings moisture and tenderness to the cookies. Selecting high-quality unsalted butter ensures the best flavor. When storing, keep it refrigerated to maintain freshness, and if you’re looking for a healthier alternative, coconut oil can be used in its place.

Semi-Sweet Chocolate Chips: These chocolate chips add sweet, creamy goodness to your cookies and are a favorite choice for baking. Look for quality brands with a higher cocoa content for a richer flavor. Store in a cool, dry place, and consider dark chocolate chips for an intense flavor twist.

Granulated Sugar: This sweetener contributes to the overall sweetness and affects the cookie’s thickness and texture. Fine white sugar creates a crisp cookie, while alternatives like coconut sugar can add depth and a hint of caramel flavor to your treats.

Brown Sugar: Adding moisture and a hint of molasses, brown sugar brings a rich flavor to the cookies. It helps achieve a chewy texture as well. When not using it immediately, it’s best to store it in an airtight container to prevent it from hardening.

Eggs: Providing structure and binding, eggs play a vital role in creating the ideal cookie consistency. They can also be substituted for flax eggs or applesauce for vegan variations, which add a unique texture and flavor component.

Vanilla Extract: Vanilla enhances and elevates the overall flavor of the cookies, making them taste more complex. Opt for pure vanilla extract rather than artificial for the best flavor. Store in a cool, dark place, and consider using vanilla bean paste for a more intense flavor profile.

Common Mistakes to Avoid

  • Overmixing the dough: Overmixing can lead to tough cookies. Mix until just combined for the perfect texture.
  • Not chilling the dough: Skipping refrigeration could result in overly flat cookies. A brief chill allows the fats to solidify for a thicker cookie.
  • Using old ingredients: Expired baking powder or old flour can affect the rise and flavor. Always check expiration dates for best results.
  • Baking at the wrong temperature: Ensure the oven is preheated to the correct temperature; too high temperature can lead to burnt edges while leaving the center raw.
  • Adding too many chocolate chips: While tempting, too many chips can throw off the cookie balance, making them unstable. Stick to the recommended amount.
  • Not measuring ingredients properly: Baking is a science; improper measurements can result in varied textures. Use a kitchen scale for accuracy.
  • Baking on an ungreased sheet: This could lead to sticking. Use parchment paper or a silicone mat for easy removal.
  • Ignoring baking time: Every oven varies, so keep a watchful eye as cookies bake. Remove them when the edges are golden but the centers look slightly underdone.
  • Not tasting the dough: While raw cookie dough shouldn’t be consumed in large amounts, a small taste can help adjust flavors before baking.
  • Using chocolate chips that don’t melt well: Always use high-quality chips designed for baking to ensure a melt-in-your-mouth experience.

Essential Techniques

Mixing: Proper mixing is essential. Use the creaming method to incorporate butter and sugar until light and fluffy, which adds air and gives cookies a nice rise. Avoid overmixing after adding dry ingredients to prevent a dense cookie.

Chilling: Chilling the dough for at least 30 minutes allows flavors to meld and ensures the cookies maintain their shape while baking. To master this, portion the dough, cover it, and refrigerate before baking.

Baking: Baking cookies requires precision. Make sure to space the cookies adequately on the sheet to allow for spreading. Keep an eye on the baking time and use an oven thermometer to ensure the correct temperature.

Cooling: Allow cookies to cool on the baking sheet for a few minutes before transferring them to a wire rack. This will ensure they set properly, preventing breakage.

Pro Tips for Perfect Chocolate Chip Cookies

1. Use room temperature ingredients for smoother blending, resulting in a unified dough.
2. Weigh your ingredients for accuracy, especially the flour, to achieve the perfect cookie consistency.
3. Experiment with different types of chocolate chips, like dark or white chocolate, for a unique flavor twist.
4. Use a cookie scoop for uniform sizing, ensuring even baking and presentation.
5. For extra flavor depth, add a sprinkle of sea salt on top before baking.
6. For a chewy texture, slightly underbake the cookies so they continue to firm up out of the oven.
7. Mix in nuts or dried fruit to enhance the flavor and add more texture to your cookies.
8. If cookies are overly flat, try adding more flour or chilling the dough longer next time.

Variations and Adaptations

Chocolate chip cookies can easily transform based on regional preferences, with variations such as oat-based cookies that add hearty texture. Seasonal adaptations include adding crushed peppermint during the holidays or pumpkin spice in autumn to make festive delights. Dietary modifications can cater to various needs; for instance, using almond flour for gluten-free cookies or coconut oil for vegan options.

Flavor variations are endless — try incorporating different types of chocolate like white chocolate or toffee bits. For texture modifications, consider mixing in seeds or nuts for added crunch. Presentation alternatives can include drizzling melted chocolate over the top or serving alongside scoops of ice cream for an indulgent treat.

Serving and Presentation Guide

For serving, consider stacking cookies in clear glass jars to showcase their inviting beauty. Use decorative plates to display the treats during gatherings, and incorporate garnishes such as fresh mint or chocolate shavings for an elegant touch. Pairing cookies with cold milk or warm coffee can enhance the experience, while retaining the right serving temperature is crucial for maximum enjoyment. Maintain appropriate portion sizes by offering cookies alongside a fruit platter as part of a balanced dessert table.

Wine and Beverage Pairing

Indulging in chocolate chip cookies can be elevated with thoughtful beverage pairing. A glass of dessert wine, such as Muscat, enhances the sweet flavors of the cookies. For a non-alcoholic option, pairing cookies with chilled almond milk or a rich hot chocolate can provide a satisfying complement. Moreover, a brewed cup of coffee, especially a dark roast, can cut through the sweetness while enhancing the chocolate notes.

Storage and Shelf Life

To keep your cookies fresh, store them in an airtight container at room temperature for up to a week. For longer storage, consider freezing the cookies; they can last for up to three months when properly sealed. Always check for signs of spoilage, such as a change in texture or smell, before consuming. Reheating in the oven for a few minutes restores the warm, fresh-baked goodness. For freezing, place layers of cookies separated by parchment paper to prevent sticking.

Make Ahead Strategies

A smart prep timeline for chocolate chip cookies involves mixing the dough in advance and chilling it for at least an hour. You can also pre-scoop cookie dough balls and freeze them for quick baking later. This way, you can enjoy freshly baked cookies on demand! Quality is preserved by keeping the dough properly wrapped. When you’re ready to bake, add a couple of extra minutes to the baking time for frozen dough. Incorporating fresh elements like a sprinkle of sea salt prior to baking adds an exciting twist, enhancing flavor significantly.

Scaling Instructions

For halving the recipe, simply divide all ingredients by two. When doubling or tripling, ensure you have enough baking sheets and oven space. The mixing time might also need slight adjustments; closely observe the dough consistency. For larger batches, consider using multiple baking trays simultaneously, but make sure to rotate them mid-bake for an even bake. Storing any excess dough or cookies should be done carefully to maintain freshness and prevent freezer burn.

Nutritional Deep Dive

The chocolate chip cookie is a delightful treat, offering a balanced breakdown of macros. Each cookie contains carbohydrates from the flour and sugars, providing a quick energy boost. Additionally, the butter contributes fats crucial for absorbing vitamins. While cookies are high in sugars, they can be enjoyed in moderation as part of a balanced diet. Some variations increase the fiber content by incorporating whole grain flours, promoting digestive health. Moreover, chocolate contains antioxidants, adding a layer of nutritional value to enjoy guilt-free.

Dietary Adaptations

For gluten-free chocolate chip cookies, simply substitute regular flour for almond flour or gluten-free all-purpose flour. A dairy-free option can be achieved using plant-based butter and non-dairy chocolate chips. For vegan cookies, replace eggs with flax seeds or applesauce to maintain the perfect texture. Low-carb adaptations can involve using almond or coconut flour with sugar substitutes, while a paleo version might focus on nut-based flours and natural sweeteners like honey.

Troubleshooting Guide

For texture issues, if cookies are too dry, consider reducing flour slightly next time. If cookies spread too much, refrigerating the dough can help retain shape. For flavor balance, ensure you aren’t skipping the vanilla, as it elevates the cookie’s overall taste. Equipment challenges, such as uneven baking, can often be resolved by rotating cookie trays midway through baking. Be mindful of ingredient substitutions, as they can impact results significantly; using the specified ingredients produces the most consistent outcomes.

Recipe Success Stories

Readers have shared heartwarming responses to their baking adventures, praising how our chocolate chip cookie recipe has become a family favorite. People have successfully altered the recipe, discovering delightful twists, from gluten-free options to decadent additional toppings. The community engagement around this recipe has fostered sharing experiences and suggestions, encouraging home bakers to confidently explore their own creative versions. Users have also emphasized photographing their cookie batches, capturing the joy of baking and sharing that on social media.

Frequently Asked Questions

Can I freeze chocolate chip cookie dough?
Yes, you can freeze cookie dough! Scoop the dough into balls, freeze until solid, and then transfer to a freezer-safe container for future baking.
How do I keep my cookies from getting hard?
Store cookies in an airtight container with a slice of bread to retain moisture. This helps to maintain their soft texture.
Can I make these cookies without eggs?
Absolutely! You can substitute each egg with 1/4 cup of unsweetened applesauce or a flax egg (1 tbsp ground flaxseed + 3 tbsp water).
Why are my cookies flat?
Flat cookies can result from too much sugar or too little flour. Ensure you measure your ingredients properly and consider chilling your dough.
What type of chocolate is best for these cookies?
Semi-sweet chocolate chips are classic; however, feel free to explore dark chocolate or milk chocolate based on your preference.
Can I add nuts to the recipe?
Yes, adding chopped nuts like walnuts or pecans can enhance the flavor and add a delightful crunch to your cookies.
How do I know when my cookies are done baking?
Look for cookies that are golden around the edges but still appear slightly soft in the center. They will continue to firm up while cooling.
Can I chill the dough overnight?
Yes, chilling your dough overnight enhances the flavor and texture of your cookies; just allow it to sit at room temperature for a few minutes before baking.
What can I do with leftover cookie dough?
Leftover cookie dough can be stored in the fridge for a few days or frozen for longer storage. Alternatively, you can bake mini cookies for a quick snack.
Are these cookies soft or crunchy?
This recipe typically produces cookies that are chewy in the center with slightly crisp edges, but you can adjust the baking time for your desired texture.

Additional Resources

To further enhance your baking journey, consider exploring other related recipes such as oatmeal raisin cookies or peanut butter cookies. Technique guides—such as how to properly measure flour or the importance of ingredient temperature—can significantly affect your baking success. Look into ingredient information for substitutes and seasonal variations, ensuring you can adapt recipes based on what you have available or what’s in season.

Join the Conversation

Engage with our thriving community by sharing your baking photos and experiences on social media! We love to see how our recipes work for you. Your reviews not only inspire us but also fellow bakers eager to try the recipe. Please feel free to suggest your variations; we all have our unique twists that make these classic treats even more enjoyable.

The Recipe

Chocolate Chip Cookies

Serves: 24 cookies

Prep Time: 15 mins

Cook Time: 10-12 mins

Total Time: 25-27 mins

Kitchen Equipment Needed

  • Baking sheet
  • Mixing bowl
  • Measuring cups and spoons
  • Silicone spatula
  • Cooling rack

Ingredients

  • 1 cup unsalted butter, softened
  • 1 cup granulated sugar
  • 1 cup brown sugar, packed
  • 2 large eggs
  • 2 teaspoons vanilla extract
  • 3 cups all-purpose flour
  • 1 teaspoon baking soda
  • 1/2 teaspoon salt
  • 2 cups semi-sweet chocolate chips

Directions

  1. Preheat oven to 350°F (175°C).
  2. In a mixing bowl, cream together the softened butter, granulated sugar, and brown sugar until light and fluffy.
  3. Add the eggs, one at a time, mixing well after each addition, then stir in the vanilla extract.
  4. In a separate bowl, whisk together the flour, baking soda, and salt. Gradually mix the dry ingredients into the wet mixture until combined.
  5. Fold in the chocolate chips until evenly distributed.
  6. Drop rounded tablespoons of dough onto ungreased baking sheets, spaced about 2 inches apart.
  7. Bake in preheated oven for 10-12 minutes or until edges are golden brown and centers are still soft.
  8. Remove from oven and let cool on the baking sheet for 5 minutes before transferring to a wire rack to cool completely.

Recipe Notes

  • For chewier cookies, consider slightly underbaking them.
  • You can substitute half of the all-purpose flour with whole wheat flour for added nutrition.
  • If making ahead, freeze the cookie dough for up to 3 months.