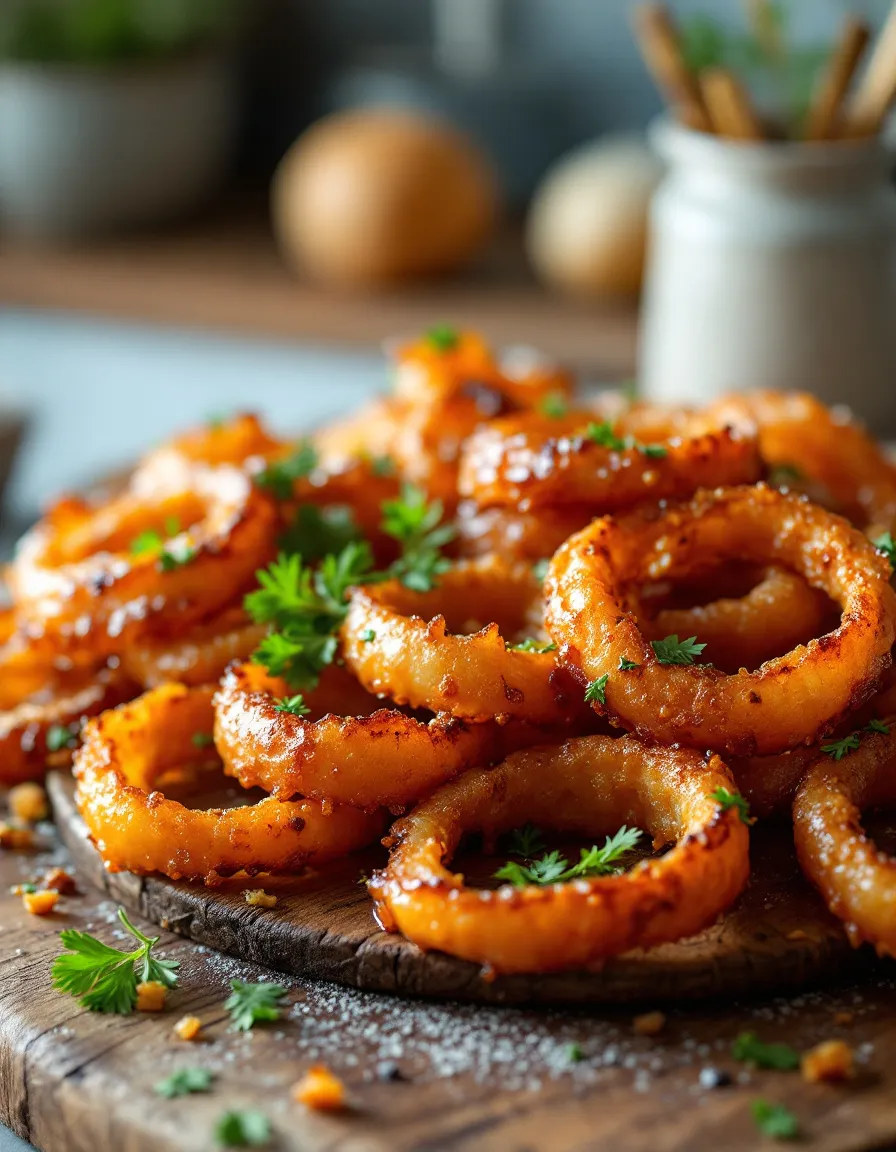
Crispy Onion Rings: The Perfect Crunchy Snack!
Onion rings are a beloved snack, known for their crispy, golden-brown exterior and soft, tender onion inside. These delightful bites are not only easy to make, but they also deliver an unbeatable crunch that brings joy to any gathering. Whether you serve them as a side dish, an appetizer, or a late-night snack, crispy onion rings are a hit with family and friends. With just a few simple ingredients and steps, you can enjoy this classic comfort food right at home.
The combination of warm onions, crispy batter, and savory spices creates a mouthwatering experience. Each bite offers a satisfying crunch followed by the sweet, slightly caramelized flavor of the onion, making them utterly addictive. Perfect for dipping in your favorite sauces, crispy onion rings are versatile and can elevate any meal or party spread. Let’s dive into this simple and delicious recipe that promises to be a crowd-pleaser!
Quick Recipe Highlights
- Flavor Profile: A delightful medley of sweet onion flavor complemented by a savory and crispy coating.
- Texture: The airy and crunchy exterior contrasts beautifully with the tender, juicy onion inside.
- Aroma: A tantalizing aroma of frying batter and caramelized onions fills the kitchen as they cook.
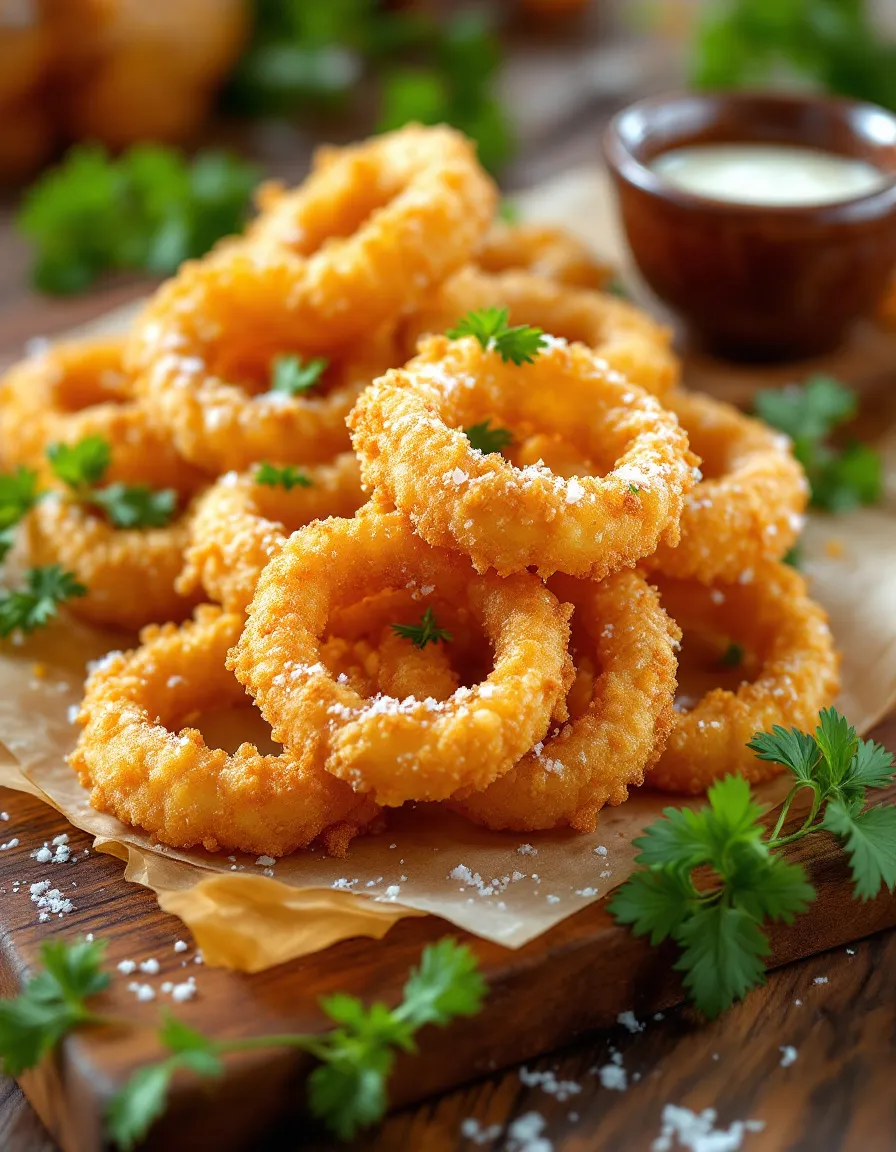
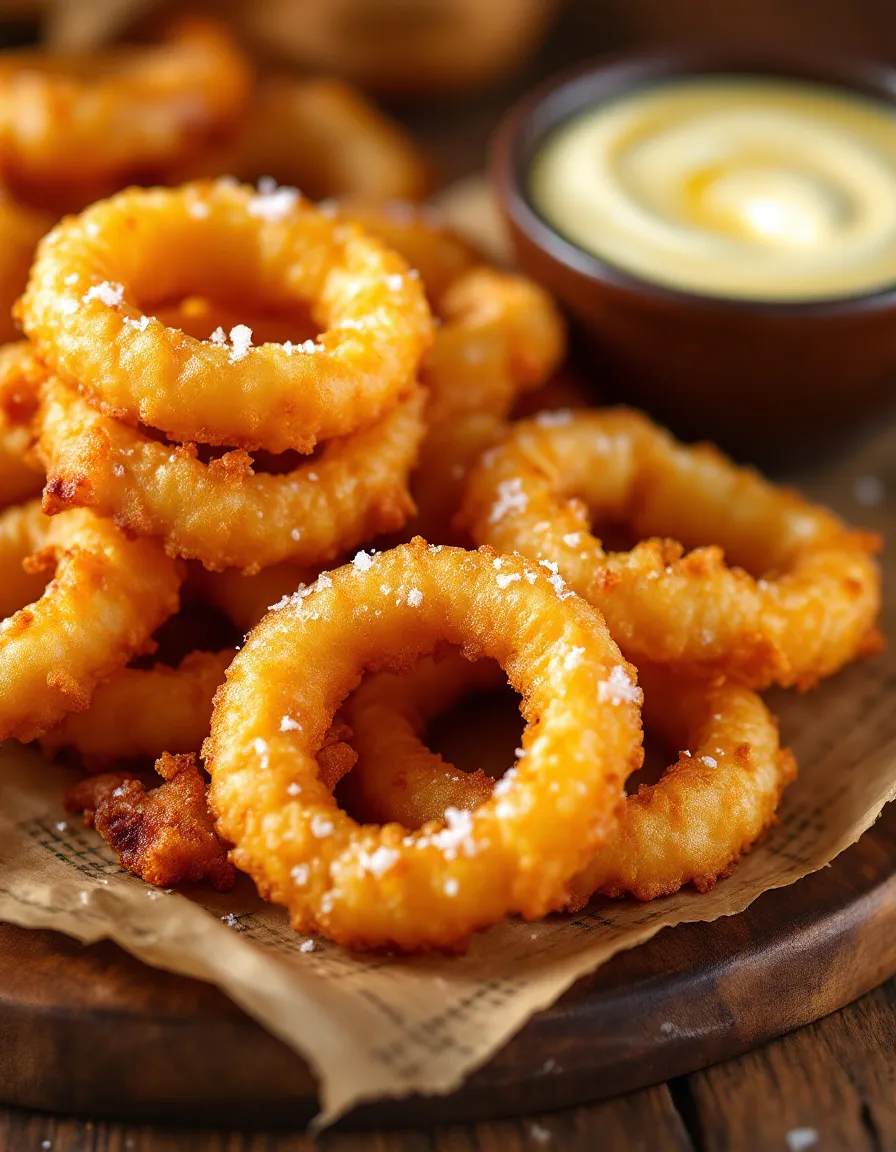
- Visual Appeal: Golden-brown and perfectly shaped, these onion rings are as pleasing to the eye as they are to the palate.
- Skill Level Needed: Requires beginner-level cooking skills, perfect for kitchen newcomers and seasoned cooks alike.
- Special Equipment: A deep fryer or heavy-bottomed pot for frying and a slotted spoon for easy removal.
Recipe Overview
- Difficulty Level: This crispy onion rings recipe is easy for anyone to master, even with minimal cooking experience. Following step-by-step instructions ensures delicious results every time.
- Category: Ideal as a snack or appetizer, crispy onion rings are perfect for game day, movie nights, or casual family dinners.
- Cuisine: Though they are often associated with American cuisine, variations of onion rings can be found across different cultures, showcasing the global love for this snack.
- Cost: The ingredients for making crispy onion rings are budget-friendly, making this a cost-effective recipe suitable for all occasions.
- Season: Great year-round, especially during backyard barbecues and summer gatherings when everyone is looking for tasty snacks.
- Occasion: Perfect for parties, picnics, and casual get-togethers, making them a versatile choice for any social setting.
Why You’ll Love This Recipe
Crispy onion rings present a tantalizing contrast of flavors and textures, making them a favorite for many. The crispy outer coating gives way to the sweet, soft onion, creating an irresistible bite. Their savory flavor pairs well with various dips, such as spicy ketchup or zesty ranch dressing, enhancing their appeal. Recipe variations allow you to explore different spices or batters, tailoring the onion rings to suit your taste preferences.
In terms of convenience, making crispy onion rings is a quick process. With minimal prep and cook time, you can whip up a batch fresh for unexpected guests or as a side for dinner. The ingredients are simple and often found in most kitchens, making it a go-to recipe for satisfying cravings without an elaborate shopping list.
Nutritionally, onions are a great source of vitamins and minerals. They are low in calories and offer health benefits like improved heart health and reduced risk of certain diseases. With some adjustments to the coating, crispy onion rings can be made healthier, such as using whole wheat flour or air frying instead of deep frying.
Socially, crispy onion rings are perfect for sharing. They bring people together, whether at a party, get-together, or family dinner. Their satisfying crunch and dip-friendly nature encourage snacking and sharing, making them a hit with guests.
Cost-effectiveness is another significant benefit. The basic ingredients for crispy onion rings won’t break the bank, and they can easily be made in large batches, providing great value. Enjoying a homemade snack that is both delicious and affordable is the ultimate recipe win.
Historical Background and Cultural Significance
The origin of onion rings can be traced back to the early 1920s in the United States, where they quickly became a popular item in diners and fast-food restaurants. Their crispy exterior and savory filling reflect the American love for fried foods, reinforcing their status as a comfort food staple. As cultural influences melded over time, onion rings grew beyond their simple beginnings into a culinary icon cherished across the country.
Culturally, crispy onion rings have found a place in various cuisines globally, with different nations adding their unique twists. For example, in Japan, the tempura technique has been adapted to create a lighter, crispier version of onion rings, taking advantage of rice flour and cold water for batter preparation.
The evolution of crispy onion rings reflects broader trends in cooking and dining. As people became more adventurous in their culinary choices, onion rings transitioned from being merely a side dish to a gourmet item featured on menus. Chefs have experimented with ingredients, coatings, and flavors that allow ring variations to flourish while retaining their original essence.
Regional variations further enhance the popularity of crispy onion rings. Some regions have embraced unique flavor profiles, such as incorporating spices like Cajun seasoning or introducing a spicy aioli for dipping, thus expanding their cultural significance on the culinary scene.
Ingredient Deep Dive
- Onions: Onions are a staple in many cuisines and hold cultural significance, symbolizing good health and prosperity. They are rich in antioxidants and provide vitamins C, B6, and folate. When selecting onions for frying, opt for larger varieties like sweet or yellow onions for the best flavor. Store them in a cool, dry place. If you wish to substitute, consider using shallots or leeks for a different taste.
- Flour: Flour is the base for most batters and has a crucial role in achieving that iconic crunch. All-purpose flour is commonly used due to its versatility, while whole wheat can offer a nuttier flavor. When selecting flour, consider using a brand with a fine texture for the best coating. For storage, keep flour in an airtight container in a cool, dark place. If needed, cornstarch can serve as a gluten-free alternative.
- Seasonings: The choice of seasonings can dramatically impact the flavor of your crispy onion rings. Popular options include garlic powder, paprika, or Italian herbs. These add depth to the taste profile. When selecting, look for fresh spices for the best flavor. Store them in a cool, dark place to maintain freshness. Feel free to experiment with spices, as adding a bit of cayenne can lend a delightful kick.
Common Mistakes to Avoid
- Choosing the wrong onions: Using pungent varieties like red onions can lead to overpowering flavors; stick to sweet or yellow onions.
- Not soaking the onions: Failing to soak onions in cold water prior to coating can lead to bitterness; a soak helps mellow their sharpness.
- Inconsistent slice thickness: Cutting onions into uneven slices can result in inconsistent cooking times; aim for similar thickness for even frying.
- Overcrowding the frying pan: Adding too many rings at once can drop the oil temperature, leading to soggy rings—fry in batches instead.
- Using cold oil: Cold oil can lead to greasy rings; ensure the oil is hot enough for proper frying.
- Skipping the coating: Not using a coating at all damages the texture and taste; a proper batter creates the signature crunch.
- Not seasoning the flour: Neglecting to season your batter can result in bland onion rings; proper seasoning enhances flavor.
- Improper draining after frying: Failing to drain excess oil leaves the onion rings greasy; use paper towels to absorb extra oil.
- Using weak oil: Using low smoke-point oils like olive oil can lead to burning; opt for oils like vegetable or canola.
- Overcooking: Leaving onion rings in the oil for too long makes them dark and bitter; aim for golden-brown perfection.
Essential Techniques
- Controlling oil temperature: It’s crucial to maintain consistent oil temperature for frying crispy onion rings. This prevents sogginess and ensures they fry evenly. Use a thermometer for the most accurate readings. If frying without a thermometer, flick a small drop of batter into the hot oil—if it sizzles immediately, the temperature is right.
- Achieving the perfect batter: The right consistency of the batter is vital for perfect coverage. It should be thick enough to adhere but not so thick that it weighs the onion rings down. To master this, start with a basic mixture and adjust by adding cold water to achieve the desired thickness; a dip test can help gauge stickiness.
- Layering for crunch: To enhance the crunch factor, consider layering your coating. Dip the rings in flour, then a wet batter, and finally give them another dusting of flour. This creates multiple layers for extra crunchiness, making every bite more enjoyable.
- Drain properly: After frying, ensure you drain onion rings effectively to prevent them from being too oily. Place them on a wire rack over paper towels. This allows air circulation, keeping them crispy and absorbing any excess oil that might render them soggy.
Pro Tips for Perfect Crispy Onion Rings
- Always use cold water for your batter as it creates a crispier texture.
- Consider using panko breadcrumbs instead of regular breadcrumbs for a more intense crunch.
- For extra flavor, marinate onion slices in buttermilk or milk for at least 30 minutes before breading.
- Mix in herbs and spices in your flour for added flavor depth.
- Always do a test fry with one or two rings to check seasoning and cooking time before frying the whole batch.
- Transform your onion rings into a meal by adding cheese or spices to the batter.
- Use a deep fryer for more consistent results if available.
- Experiment with different dips to find your perfect pairing, from spicy sauces to tangy dressings.
Variations and Adaptations
Some popular regional variations include Cajun onion rings, which add a spicy twist with Cajun seasoning, and beer-battered onion rings offering a unique flavor with a crispy texture. Seasonal adaptations could see the inclusion of herbs like rosemary or garlic when fresh during the summer months for a delightful aromatics boost. If you’re looking for dietary modifications, gluten-free flour can be used successfully, and for a healthier twist, try baking or air frying instead of deep frying.
Experimenting with flavors can lead to unexpected delights. Try adding smoked paprika for a hint of smokiness or chili powder for a touch of heat that takes them to another level. For texture modifications, finely crushed potato chips can replace breadcrumbs in the coating, adding crunch while amplifying flavor. Presentation alternatives, such as serving in mini cones or stacked builds layered with various sauces, can elevate the dining experience significantly.
Serving and Presentation Guide
Crispy onion rings can be served in a variety of ways that enhance their appeal. For plating, consider stacking them to create height or using wide, shallow bowls for visual sophistication. Garnishing with fresh herbs like parsley or chives adds a pop of color and freshness. Traditional accompaniments include classic ketchup or aioli, while modern suggestions might feature gourmet dipping options such as sriracha mayo or avocado cream.
When serving, temperatures matter; keep onion rings warm in a low oven until ready to serve to ensure they remain crispy. Portion control can be adjusted based on occasion—from large platters for gatherings to individual servings for personal enjoyment.
Wine and Beverage Pairing
Crispy onion rings pair nicely with light, refreshing wines such as Sauvignon Blanc or a chilled lager, as these beverages complement the savory flavors. For non-alcoholic alternatives, sparkling water with a splash of citrus can cleanse the palate and highlight the food flavors. If desired, an iced tea garnished with lemon can create a refreshing experience. When serving wines, ensure they are chilled to enhance the crunchy texture and sweet onion flavors.
Storage and Shelf Life
The best way to store crispy onion rings is in an airtight container in the refrigerator, where they can last for up to 3 days. For optimal freshness, allow them to cool completely before transferring. Reheating in an oven is ideal; preheat to 350°F (175°C) and bake until warmed through, approximately 10 minutes. Signs of spoilage include off odors or changes in texture. If any ring appears soggy or has absorbed moisture, it’s best to discard them.
For longer-term storage, consider freezing cooked onion rings. Place them in a single layer on a baking sheet to freeze individually before transferring them to a freezer bag. This method preserves texture against freezer burn, allowing for up to 2 months of deliciousness waiting to be reheated.
Make Ahead Strategies
You can prep crispy onion rings ahead of time by slicing onions and soaking them in buttermilk. Store in an airtight container in the fridge up to 12 hours before frying, enhancing flavor and batter adherence. When you’re ready to fry, mix the batter fresh for optimal crispness.
An efficient timeline would involve preparing the onions a few hours before cooking, allowing for maximum flavor absorption. For better quality, avoid assembling until the frying process. However, if preparing the batter ahead, ensure to keep it covered to maintain freshness.
Scaling Instructions
When scaling this crispy onion rings recipe, consider how to properly adjust ingredient measurements while maintaining the same texture and flavor. Halving the recipe works elegantly, keeping the frying time consistent since oil temperature and frying method remain the same.
Doubling or tripling the onion rings means ensuring adequate frying space. If you’re using a home frying method, it’s best to batch fry to prevent overcrowding, which affects crispness. Be aware of the need for further adjustments with timing since larger batches may take longer to cook thoroughly.
When scaling up, investing in larger pots or multiple frying pans aids in timely preparation. There is no need to alter the ingredients substantially; simply increase equipment or choose to work in batches for results that remain consistent.
Nutritional Deep Dive
Fried foods, like crispy onion rings, can have a higher calorie count due to the frying process. A standard serving often contains around 250-300 calories, depending on the batter and frying method. This includes reasonable macros, primarily carbohydrates from the flour with a modest amount of fats from the frying oil.
Onions provide vitamins C, B6, and essential minerals, aiding overall nutrition despite frying processes. For individuals focusing on dietary considerations, consider using healthier oils or oven-frying options that can greatly decrease oil absorption. Portion analysis helps maintain moderation, providing an enjoyable yet mindful experience.
Incorporating more whole grains into the batter or using healthier oils can also improve the overall nutritional profile of your onion rings, making them better for individuals conscious of their dietary intake. Balancing these indulgent bites with nutritious sides ensures a gratifying meal filled with taste and health.
Dietary Adaptations
For gluten-free versions, swap all-purpose flour with almond flour, chickpea flour, or gluten-free blend flours. You can also create a fantastic pancake-style batter using chickpea flour that holds the onion’s sweetness and crispness well.
A dairy-free adaptation might lean towards using plant-based milk for soaking onions prior to breading, ensuring the same benefits as traditional buttermilk. For a vegan take, replace egg in the batter with a mix of ground flaxseed and water, creating an egg substitute that binds well without losing texture.
When following low-carb or keto diets, consider using crushed pork rinds or nut flour for a crispy batter without excess carbs. Air-frying crispy onion rings is another method that lessens calorie intake while maintaining crunch without sacrificing flavor.
For low-FODMAP diets, use a single serving of onion rings instead of large quantities, indicating a way to enjoy flavors while monitoring digestion sensitivity. Adapting recipes to accommodate dietary restrictions ensures everyone can enjoy this beloved snack without guilt.
Troubleshooting Guide
If your crispy onion rings are failing to achieve the desired crunch, ensure the oil is at the correct temperature before introducing the rings. If they are soggy, it could also be due to overcrowding—the rings need space for best results. On the other hand, if burning occurs, reducing the cooking time or lowering the oil’s heat will help maintain proper cooking balance.
Flavor issues may arise if seasoning is missed in either the batter or the breading; double-check both areas for adequate flavoring. If the batter doesn’t stick properly, ensure the onions are dry post-soak and dip, allowing for maximum adherence.
Inconsistent cooking can stem from varying sizes of onion slices; aim for uniform cuts to ensure equal frying. Misjudges on time can also spoil the delicate texture; test-frying one or two can help set expectations for larger batches.
Recipe Success Stories
Home cooks share their successful takes on crispy onion rings, often experimenting with unique spices and dipping sauces that led to rave reviews from family and friends. Some adapted the recipe by introducing cheese into the batter, fundamentally modifying flavors while preserving the beloved crunch.
Many readers also express satisfaction in their results after following straightforward steps, highlighting the ease and adaptability of the recipe. Others have provided feedback on texture especially when using alternative flours, proving that experimentation can produce delightful variations.
Photography and presentation tips from the community showcase visually appealing takes, enhancing reader engagement and interest in recreating the recipe at home. These real-life applications illustrate how a simple recipe can resonate widely, fueling creativity and future culinary ventures.
Frequently Asked Questions
1. Can I bake onion rings instead of frying?
Absolutely! To bake, preheat your oven to 425°F (220°C), and place the onion rings on a baking sheet lined with parchment paper. Bake for about 20-25 minutes, flipping halfway through for even crisping. They may not achieve the same depth of flavor as frying but provide a healthier alternative.
2. How do I keep leftovers crispy?
To maintain crispiness, store leftover onion rings in a single layer in an airtight container in the fridge. Reheat in the oven at 350°F (175°C) for about 10 minutes to revitalize their crunch before serving.
3. Can I freeze uncooked onion rings?
Yes! Arrange uncooked onion rings on a parchment-lined baking sheet and freeze them until solid. Once frozen, transfer them to a freezer bag, allowing for easy frying whenever you crave them.
4. What are some alternative dips I can use?
Crispy onion rings are versatile enough to pair with various dips, such as ranch, chipotle mayo, or even garlic aioli. These options provide exciting flavor contrasts and presentations during gatherings.
5. Can I use different types of onions?
While yellow and sweet onions are preferred, feel free to experiment with red or purple onions for a bolder flavor and vibrant color. Each type offers unique taste profiles that can enhance your crispy onion rings in different ways.
6. How do I make onion rings spicier?
For heat, include cayenne pepper or hot sauce in your batter, or incorporate spices like chipotle in the flour coating. Adjust according to taste preferences for an exciting kick!
7. What’s the best type of oil to use?
Using oils with high smoke points, like vegetable oil or peanut oil, is ideal for frying crispy onion rings. These oils can withstand the high temperatures required for frying without burning, ensuring perfectly cooked rings.
8. Can crispy onion rings be made without gluten?
Yes! Substitute all-purpose flour with gluten-free flour blends or almond flour for a delicious gluten-free version of crispy onion rings that mимics the same texture and flavor.
9. Can crispy onion rings be made ahead of time?
Prepared onion rings can be refrigerated before frying and stored for up to 12 hours. Alternatively, consider frying and then freezing for future use, allowing for quick reheating.
10. What if my onion rings are too oily?
If onion rings turn out oily, ensure the oil is at the right temperature before frying. Blot excess oil with paper towels post-frying to absorb any leftover grease, keeping them crispy.
11. How do I achieve a better batter coating?
Ensure the batter consistency is thick enough to coat the onions adequately. Consider double-coating by dipping first in flour, then in batter, and then back into flour for extra crispiness.
12. Can I use an air fryer for onion rings?
Using an air fryer can provide a much healthier cooking method while still producing crispy results. Lightly spray the onion rings with oil before cooking to enhance crispiness.
Additional Resources
Explore similar recipes such as sweet potato fries or zucchini fritters for variations on crispy snacks. Technique guides on frying safely and ensuring the perfect oil temperature can significantly improve your frying skills. Make sure to check out ingredient information on the best types of onions or flours to enhance your cooking depth and versatility.
Lastly, consider equipment recommendations and reviews, ensuring you have the right tools for delicious creations that will impress family and friends. Seasonal variations in recipes can also inspire delightful new dishes tailored to the freshest ingredients available.
Join the Conversation
Share your crispy onion rings creations on social media to inspire others! Engaging with the community through comments on tips or variations encourages creativity and adaptation of this beloved recipe. Request feedback to see how others have successfully modified their versions while showcasing unique plating and photography techniques.
Participate in discussions about favorite dipping sauces or what shortcuts help streamline the cooking process. This interaction fosters excitement and makes cooking a shared passionate experience, as everyone loves discovering new ideas and inspirations in the realm of crispy treats.
The Recipe
Crispy Onion Rings
Serves: 4
Prep Time: 15 mins
Cook Time: 10 mins
Total Time: 25 mins
Kitchen Equipment Needed
- Deep fryer or heavy-bottomed pot
- Slotted spoon
- Thermometer (optional)
- Mixing bowls
- Cutting board
- Knife
Ingredients
- 2 large sweet onions, sliced into ¼ inch rings
- 1 cup all-purpose flour
- 1 cup buttermilk
- 1 cup breadcrumbs (or panko)
- 1 teaspoon garlic powder
- 1 teaspoon paprika
- Salt and pepper to taste
- Vegetable oil for frying
Directions
- Slice onions into rings, and soak in buttermilk for at least 30 minutes.
- In a separate bowl, mix flour, garlic powder, paprika, salt, and pepper.
- Remove onion rings from buttermilk and dredge in the flour mixture, then dip back into the buttermilk, followed by breadcrumbs.
- Heat oil in a deep fryer or pot to 375°F (190°C).
- Fry onion rings in batches until golden brown, about 2-3 minutes each side.
- Drain on paper towels and serve warm with dipping sauce.
Recipe Notes
- For extra crunch, double coat the onion rings.
- These onion rings can also be made in an air fryer—reduce cooking temperature slightly and check doneness frequently.
- Feel free to adjust seasoning in the flour mixture to suit your taste.