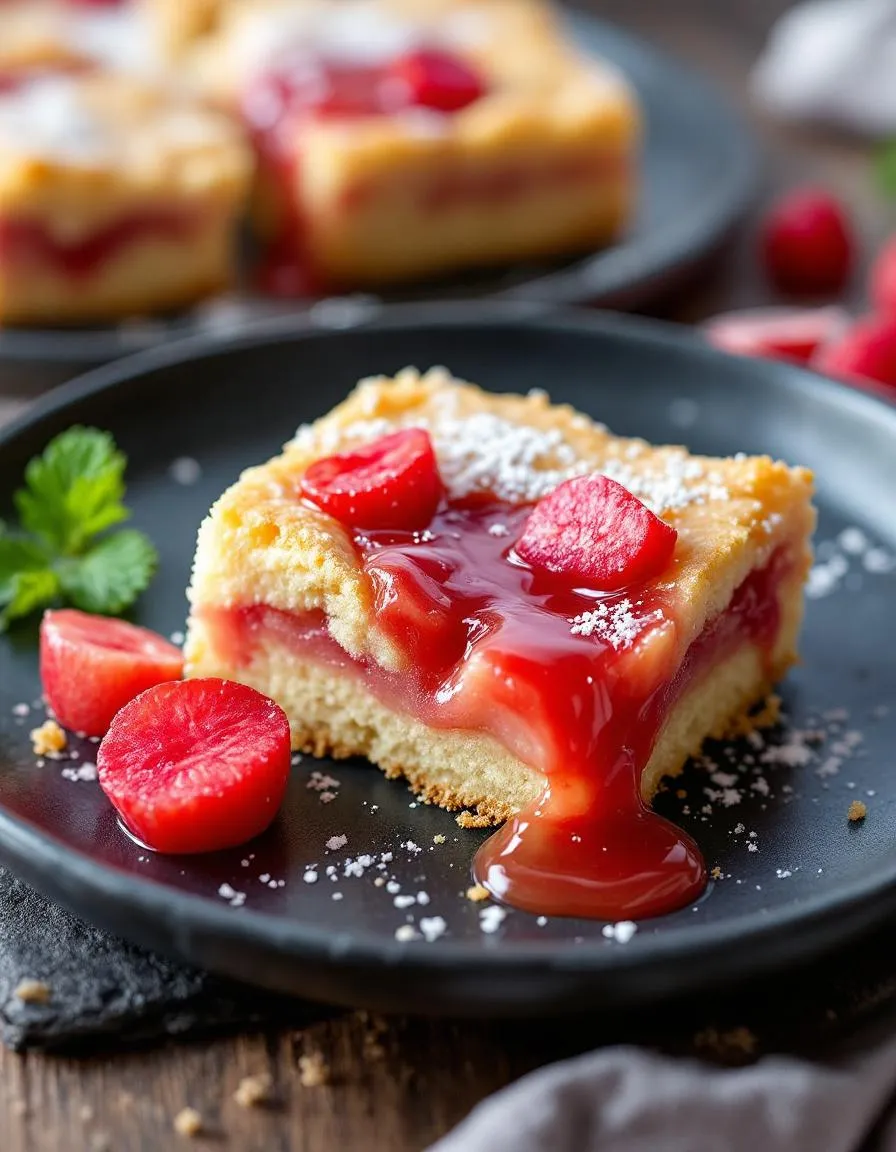
There’s something undeniably comforting about the combination of tart rhubarb and buttery shortbread. Whether you’re craving a nostalgic treat or a dessert that balances sweet and tangy flavors perfectly, these Rhubarb Shortbread Bars deliver every time. In fact, they remind me of lazy summer afternoons spent baking with my grandma, and I can’t wait to share that same joy with you. Plus, they’re surprisingly simple to make, even if you’re new to baking.
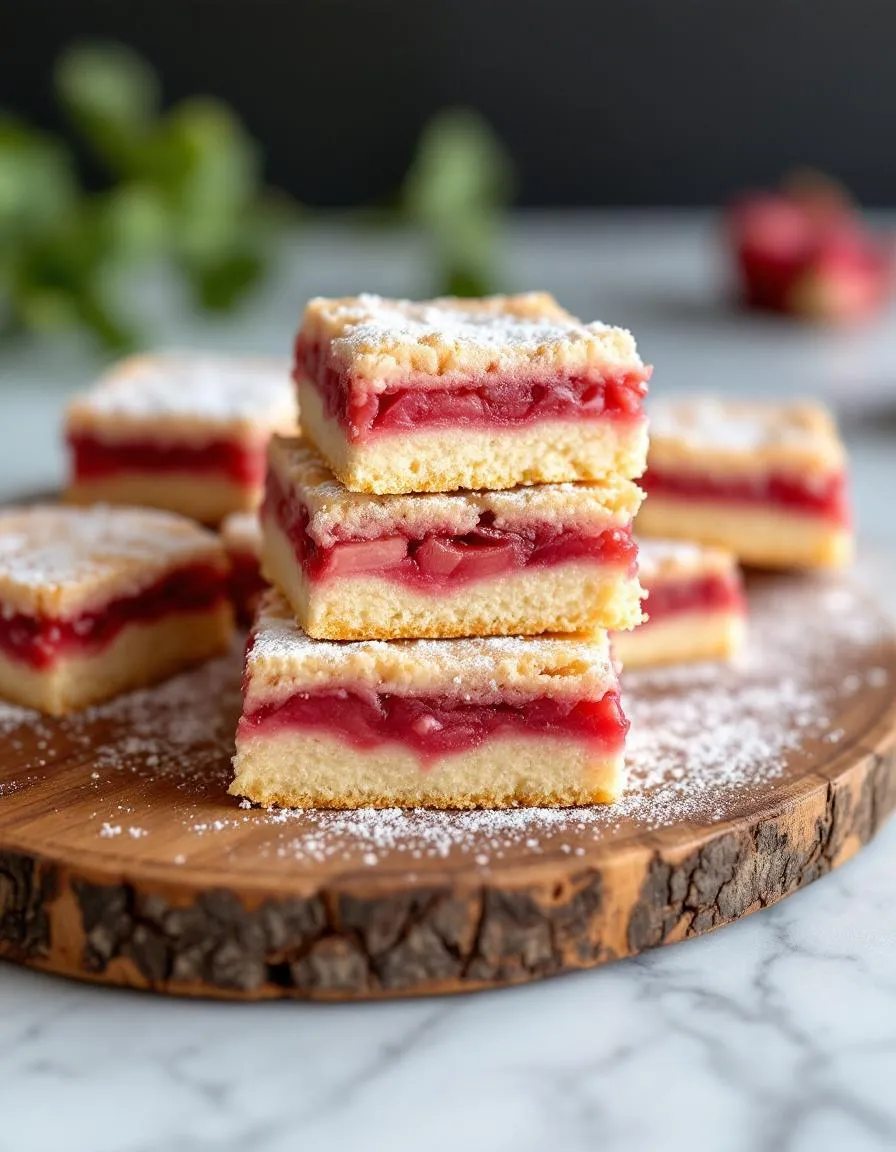
Rhubarb Shortbread Bars are a delightful twist on classic shortbread, featuring a crisp, buttery base topped with a vibrant rhubarb filling and a crumbly streusel finish. Unlike overly complicated desserts, this recipe lets the natural tartness of rhubarb shine while keeping the texture irresistibly tender. For anyone who loves seasonal baking, rhubarb’s short spring and early summer window makes these bars feel extra special. If you’re a fan of fruit-forward treats like my Strawberry Rhubarb Pie, you’ll adore this easier, handheld version. And if you’re looking for more ways to use rhubarb, check out my rhubarb recipe roundup for inspiration. The beauty of this dessert lies in its versatility—serve it warm with ice cream for a cozy indulgence or pack it for picnics as a crowd-pleasing sweet.
Why I Love This Recipe
Rhubarb Shortbread Bars hold a special place in my heart because they capture the essence of my childhood summers. My grandma grew rhubarb in her garden, and we’d bake together as soon as the stalks were ready. The way the tartness cuts through the rich shortbread takes me right back to her kitchen, where flour dusted the counter and laughter filled the air. Now, every time I make these bars, I feel that same connection—to her, to home, and to the simple joy of sharing something delicious.
Health and Nutrition
Why it’s good for your body
Rhubarb Shortbread Bars pack a surprising nutritional punch while satisfying your sweet tooth. First, rhubarb delivers a hefty dose of vitamin K, which supports bone health and blood clotting. Additionally, it contains fiber to aid digestion and antioxidants to combat inflammation. Meanwhile, the shortbread base provides energy-boosting carbohydrates, making these bars a balanced treat.
Moreover, rhubarb’s natural tartness means you can reduce added sugars without sacrificing flavor. This makes Rhubarb Shortbread Bars a smarter choice compared to overly sugary desserts. The combination of whole ingredients like butter and flour also ensures you avoid processed additives. As a result, you indulge in a dessert that feels wholesome.
Finally, the bars offer versatility for dietary tweaks. For instance, you can swap in almond flour for a gluten-free version or add oats for extra fiber. Whether you enjoy them as an afternoon pick-me-up or a post-dinner delight, Rhubarb Shortbread Bars prove that treats can be both delicious and nourishing.
How it fits in a healthy lifestyle
Rhubarb Shortbread Bars fit seamlessly into a balanced diet when enjoyed mindfully. Pair them with a protein-rich snack like Greek yogurt to stabilize blood sugar, or savor a small portion as part of a varied meal plan. Their moderate sweetness and fiber content help curb cravings, preventing overindulgence in less nutritious options.
For those with dietary preferences, the recipe adapts easily. Use gluten-free flour to align with celiac needs, or opt for coconut oil instead of butter for a dairy-free twist. If you love heart-healthy desserts, check out our gluten-free baking guide for more ideas. You can also explore balanced dessert options to keep your sweet treats in harmony with your goals. With simple swaps and smart pairing, Rhubarb Shortbread Bars become a guilt-free pleasure.
Buttery shortbread topped with a tangy rhubarb filling for a delightful dessert.
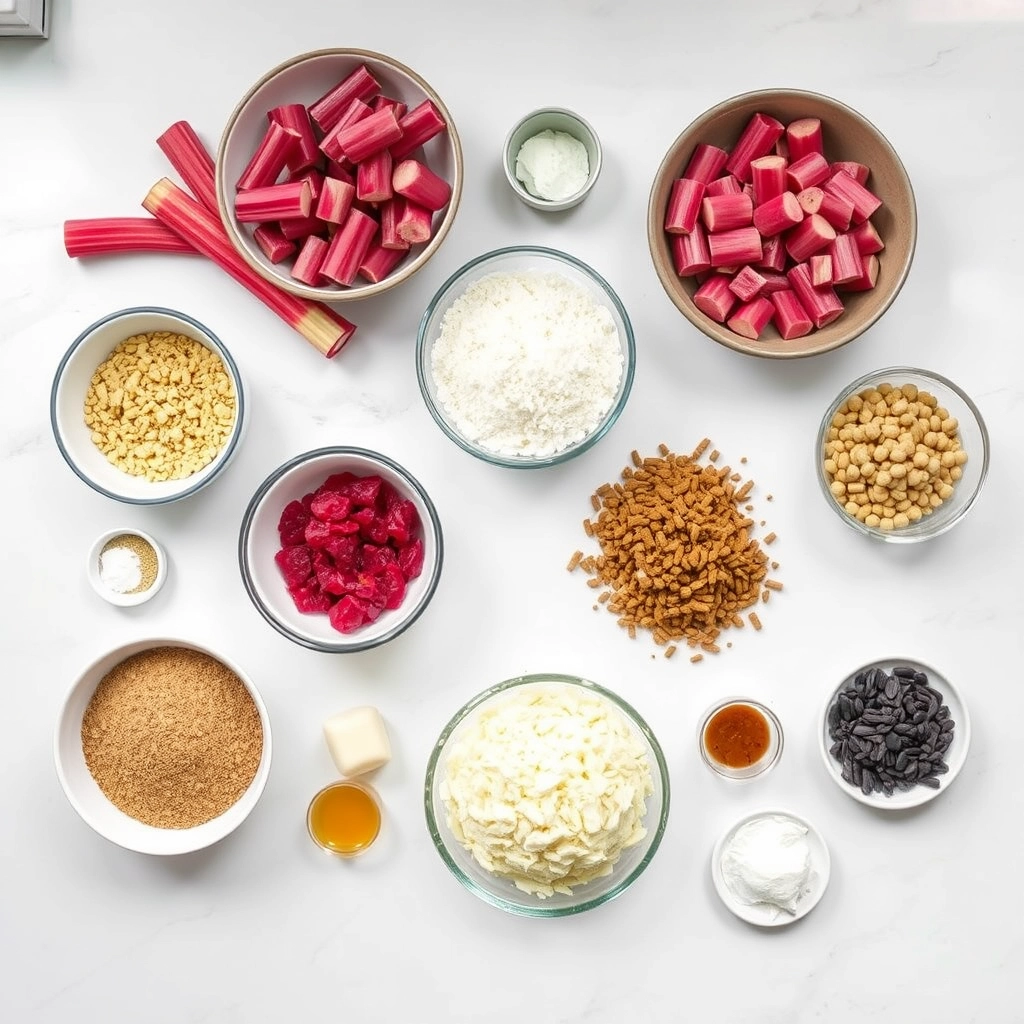
Ingredients
Scale
For the Crust:
1 cup unsalted butter, softened
1/2 cup granulated sugar
2 cups all-purpose flour
1/4 teaspoon salt
3 cups chopped rhubarb
1/2 cup granulated sugar
2 tablespoons cornstarch
1/4 cup water
1 teaspoon vanilla extract
Instructions
1. Prepare the Crust:
Preheat oven to 350°F (175°C). Grease a 9×9-inch baking pan.
In a large bowl, cream together butter and 1/2 cup sugar until light and fluffy. Mix in flour and salt until crumbly. Press mixture into the prepared pan.
Bake for 15 minutes or until lightly golden. Remove from oven and let cool slightly.
In a saucepan, combine rhubarb, 1/2 cup sugar, cornstarch, and water. Cook over medium heat until thickened, about 5-7 minutes. Stir in vanilla extract.
Spread rhubarb mixture over the baked shortbread crust. Return to oven and bake for an additional 15 minutes.
Let cool completely before cutting into bars.
Notes
You can customize the seasonings to taste.
How to Prepare This Dish
Steps and time-saving tips
Start by preheating your oven to 350°F and lining an 8×8-inch baking pan with parchment paper for easy removal later. Next, whisk together the flour, sugar, and salt for the shortbread crust in a large bowl. Cut cold butter into small cubes, then use your fingers or a pastry cutter to work it into the dry ingredients until the mixture resembles coarse crumbs. Press this evenly into the prepared pan and bake for 15 minutes until lightly golden. Meanwhile, toss chopped rhubarb with sugar, cornstarch, and a splash of lemon juice to balance the tartness. Once the crust is ready, spread the rhubarb mixture over it and return to the oven for another 25 minutes. For a time-saving trick, chop the rhubarb while the crust bakes or use frozen rhubarb if fresh isn’t available. Let the bars cool completely before slicing—this ensures clean cuts and lets the filling set. If you’re in a hurry, pop them in the fridge for 30 minutes. Serve with a dusting of powdered sugar or a dollop of whipped cream for extra flair.
and-learned-from">Mistakes I’ve made and learned from
I once rushed the cooling process and ended up with Rhubarb Shortbread Bars that fell apart—patience is key here! Another time, I overmixed the shortbread dough, which made it tough instead of tender. Now, I stop as soon as the butter is incorporated. If your rhubarb filling turns out too watery, try tossing it with an extra teaspoon of cornstarch, like I learned from my fruit dessert troubleshooting guide. And if you’re new to baking with rhubarb, don’t skip the lemon juice—it brightens the flavor perfectly, as I discovered after a bland batch. For more tips on working with seasonal ingredients, check out my spring baking essentials post. Trust me, these small adjustments make all the difference!
Cultural Connection and Variations
Where this recipe comes from
Rhubarb Shortbread Bars carry a nostalgic charm, blending tart rhubarb with buttery shortbread in a way that feels both rustic and refined. Originally, this dessert likely traces its roots to British and Scottish baking traditions, where rhubarb thrived in cooler climates and shortbread reigned as a staple. However, over time, home cooks across North America embraced Rhubarb Shortbread Bars, adapting them to local tastes and seasonal ingredients.
In the Midwest, for exa
mple, you might find bakers pairing rhubarb with strawberries for a sweeter twist, while in the UK, they often keep the filling purely rhubarb for a sharper tang. Some families even add a hint of ginger or cardamom to the shortbread for extra warmth. Meanwhile, in Scandinavia, a similar treat might layer almond paste beneath the rhubarb, creating a richer texture. No matter the variation, Rhubarb Shortbread Bars always deliver that perfect balance of crisp, crumbly crust and juicy fruit.
How it fits in today’s cooking
Today, Rhubarb Shortbread Bars remain a beloved treat, especially during spring and early summer when rhubarb peaks. They bridge the gap between old-fashioned comfort and modern convenience, fitting just as well at a picnic as they do on a holiday dessert table. Many bakers now experiment with gluten-free or vegan shortbread bases, proving how adaptable this classic really is.
For those who love seasonal baking, Rhubarb Shortbread Bars pair beautifully with other spring desserts like lemon lavender cake or a simple berry chia pudding. Whether you stick to tradition or put your own spin on it, this recipe keeps finding new ways to shine in today’s kitchens.
>Taste and Texture
What makes it delicious
Rhubarb Shortbread Bars deliver a perfect balance of sweet and tangy flavors, with a buttery, crumbly base that melts in your mouth. The tart rhubarb filling bursts with bright, fruity notes, while the shortbread adds a rich, toasty sweetness. Each bite offers a delightful contrast—crisp edges give way to a tender, slightly chewy center. Fragrant vanilla and a hint of cinnamon deepen the warmth, making these bars irresistible. Whether served warm or at room temperature, Rhubarb Shortbread Bars always feel indulgent yet comforting.
Boosting the flavor
For an extra layer of flavor, try swirling a spoonful of raspberry jam into the rhubarb filling before baking—it adds a berry-kissed sweetness. Alternatively, sprinkle coarse sugar over the shortbread crust for a sparkling crunch. If you love warm spices, a pinch of cardamom or ginger pairs beautifully with the rhubarb. For a decadent twist, drizzle cooled bars with a simple vanilla glaze or serve them with a scoop of homemade vanilla ice cream. These small tweaks elevate Rhubarb Shortbread Bars from delicious to unforgettable.
Tips for Success
Best practices for results
Always chill the dough before baking to prevent spreading and ensure your Rhubarb Shortbread Bars hold their shape. Use parchment paper for easy removal and a perfectly crisp texture. For even layers, press the shortbread base firmly into the pan before adding the rhubarb filling. Additionally, let the bars cool completely before slicing to keep them neat and intact. Finally, store leftovers in an airtight container to maintain freshness for days.
Mistakes to avoid
Avoid overmixing the shortbread dough, as this can make it tough instead of tender. For the best texture, mix just until the ingredients come together. Also, don’t skip preheating the oven—uneven heat can cause the Rhubarb Shortbread Bars to bake improperly. If your rhubarb filling seems too watery, try thickening it with a bit of cornstarch, similar to our rhubarb pie filling guide. Lastly, resist cutting the bars while warm; patience ensures clean slices, just like our perfect bar cookies tutorial recommends.
Serving and Pairing Suggestions
How to serve this dish
Rhubarb Shortbread Bars shine when you serve them with a touch of elegance. For a beautiful presentation, dust them lightly with powdered sugar or add a dollop of whipped cream on top. Meanwhile, if you want to impress guests, arrange them on a tiered dessert stand alongside fresh rhubarb stalks for a pop of color. These bars work perfectly for afternoon tea, spring brunches, or even as a sweet ending to a holiday meal. Since they hold their shape well, you can also pack them for picnics or bake sales without worry.
h-it">What goes well with it
A warm cup of Earl Grey tea enhances the tangy rhubarb flavor in these shortbread bars, creating a balanced and comforting pairing. Alternatively, try serving them with a scoop of vanilla bean ice cream for a creamy contrast that mellows the tartness. If you love fruity desserts, pair them with our Strawberry Lemonade Cupcakes for a vibrant dessert spread. For a refreshing drink option, our Homemade Iced Latte adds a smooth, caffeinated twist that complements the buttery shortbread crust.
What is the best way to prepare rhubarb for shortbread bars?
For Rhubarb Shortbread Bars, chop fresh rhubarb into small, even pieces (about 1/2-inch thick) to ensure even cooking. Toss the rhubarb with a bit of sugar to balance its tartness before layering it over the shortbread crust. This step helps create the perfect sweet-tart filling for your bars.
rank-math-faq-item">
Can I use frozen rhubarb instead of fresh in shortbread bars?
Yes, frozen rhubarb works well in Rhubarb Shortbread Bars—just thaw and drain it thoroughly to remove excess moisture. Pat it dry with a paper towel to prevent a soggy crust. Adjust the sugar slightly since frozen rhubarb can be more tart than fresh.
How do I store Rhubarb Shortbread Bars to keep them fresh?
Store Rhubarb Shortbread Bars in an airtight container at room temperature for up to 2 days or refrigerate for up to 5 days. For longer storage, freeze the bars in a single layer before transferring to a freezer-safe bag for up to 3 months.
Can I add strawberries to Rhubarb Shortbread Bars?
Absolutely! Strawberries pair wonderfully with rhubarb in shortbread bars, adding natural sweetness. Replace half the rhubarb with sliced strawberries for a classic flavor combo. Just ensure the fruit layer isn’t too watery to maintain the bars’ texture.
>
Best Crispy Almond Cookies – Easy Homemade Recipe
Introduction
There’s something undeniably comforting about the aroma of freshly baked cookies wafting through the house, isn’t there? Whether you’re craving a nostalgic treat or need a simple yet impressive dessert for gatherings, these Crispy Almond Cookies deliver every time. Light, buttery, and packed with nutty flavor, they strike the perfect balance between delicate crunch and melt-in-your-mouth goodness. Plus, they’re incredibly versatile—pair them with afternoon tea, pack them for picnics, or gift them to someone special. Trust me, once you try them, you’ll understand why they’ve become a staple in my kitchen.
Crispy Almond Cookies are more than just a sweet bite—they’re a celebration of simplicity and tradition. Unlike overly complicated desserts, these cookies rely on quality ingredients like almond flour and butter to shine. Their delicate texture makes them ideal for those who prefer lighter treats, while their rich flavor satisfies even the most discerning palates. What truly sets them apart, though, is their adaptability. Whether you follow my classic recipe or add a twist like citrus zest or dark chocolate drizzle, they always feel uniquely yours. If you love exploring timeless bakes with a personal touch, you’ll adore these cookies as much as I do. For more inspiration, check out my guide to perfect baking techniques or discover other crowd-pleasers in my easy dessert collection.
Why I Love This Recipe
These Crispy Almond Cookies hold a special place in my heart because they remind me of baking with my grandmother. She taught me that the best recipes don’t need fancy ingredients—just patience and care. Every time I make them, I remember her hands shaping the dough and the way she’d sneak me an extra cookie when no one was looking. Now, I share that same joy with my own family, creating new memories while honoring old ones. That’s the beauty of food—it connects us across generations, one crispy, golden bite at a time.
Health and Nutrition
Why it’s good for your body
Crispy Almond Cookies pack a nutritious punch while satisfying your sweet tooth. First, almonds deliver a hearty dose of healthy fats and protein, which keep you full longer and stabilize blood sugar. Additionally, these cookies often contain less refined sugar than traditional desserts, making them a smarter choice for energy levels. Moreover, almonds provide vitamin E, a powerful antioxidant that supports skin health and immunity.
Beyond their nutrient density, Crispy Almond Cookies offer dietary fiber, thanks to almond flour or whole almonds. Fiber aids digestion and promotes gut health, so you can enjoy a treat without discomfort. Furthermore, the natural crunch of almonds adds texture without unhealthy additives. If you opt for homemade versions, you control the ingredients, avoiding preservatives and excess sodium.
Finally, Crispy Almond Cookies fit seamlessly into mindful eating habits. Their rich flavor means a small portion goes a long way, helping curb overindulgence. Whether as an afternoon pick-me-up or a post-dinner delight, these cookies prove that wholesome ingredients can elevate everyday snacks.
How it fits in a healthy lifestyle
Crispy Almond Cookies align perfectly with balanced eating. For gluten-free diets, swapping regular flour for almond flour creates a delicious alternative without sacrificing texture. They also suit heart-healthy goals, as almonds support cholesterol management. Pair them with a cup of herbal tea or fresh fruit for a satisfying yet light snack.
If you focus on protein intake, Crispy Almond Cookies contribute to your daily needs, especially when made with extra almond butter. For more gluten-free inspiration, explore our gluten-free baking guide. Meanwhile, if you love nutrient-dense sweets, our healthy dessert swaps offer even more ideas to keep treats guilt-free. Enjoy these cookies in moderation, and they’ll effortlessly complement your wellness routine.
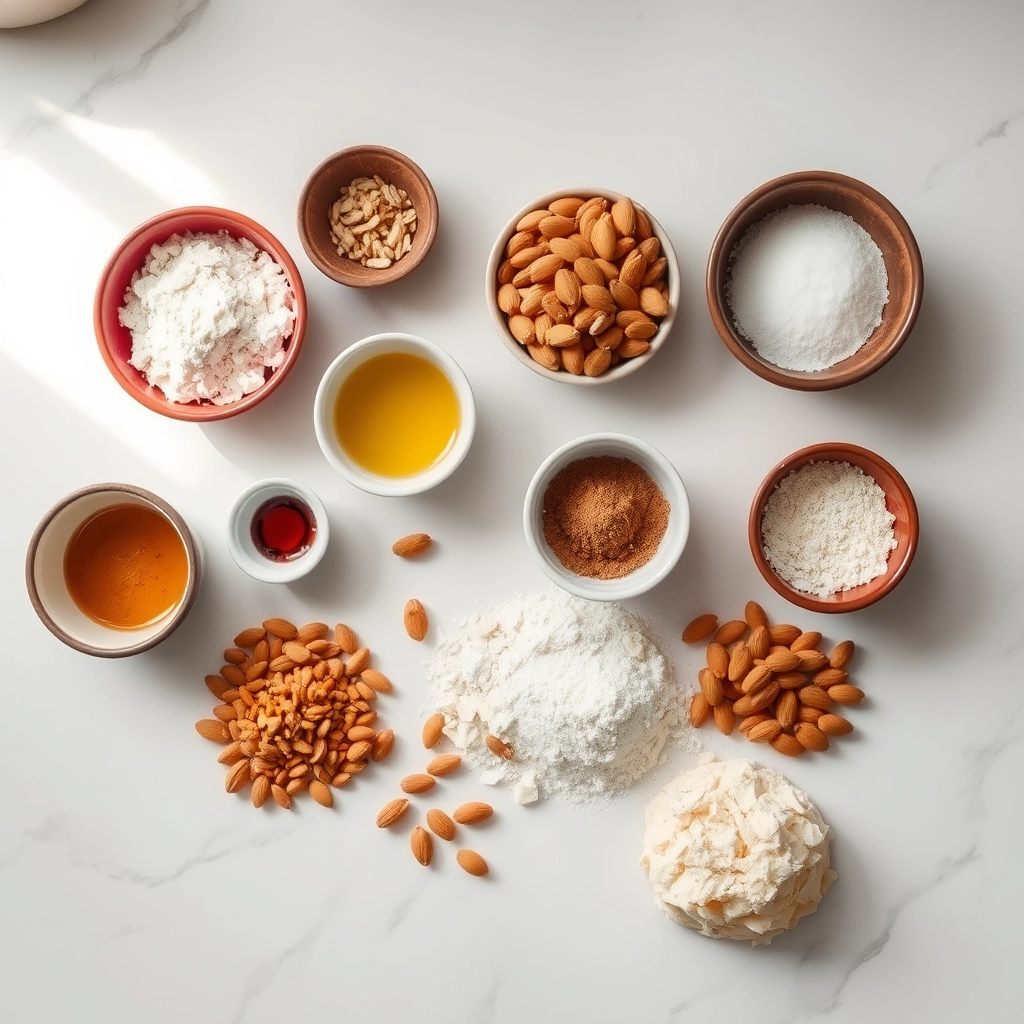
Deliciously crispy almond cookies with a rich nutty flavor, perfect for tea time or as a snack.
Ingredients
Scale
For the Crust:
1 cup all-purpose flour
1/2 cup almond flour
1/2 cup unsalted butter, softened
1/2 cup granulated sugar
1/4 teaspoon salt
1/2 teaspoon vanilla extract
1/4 cup sliced almonds for topping
Instructions
1. Prepare the Crust:
Preheat oven to 350°F (175°C) and line a baking sheet with parchment paper.
In a bowl, cream together the butter and sugar until light and fluffy.
Add the vanilla extract and mix well.
Gradually add the all-purpose flour, almond flour, and salt, mixing until a dough forms.
Roll the dough into small balls, flatten slightly, and place on the prepared baking sheet.
Press sliced almonds onto the top of each cookie.
Bake for 12-15 minutes or until the edges are golden brown.
Allow to cool on the baking sheet for 5 minutes before transferring to a wire rack.
Notes
You can customize the seasonings to taste.
“`html
s-dish">How to Prepare This Dish
Steps and time-saving tips
Start by preheating your oven to 350°F to ensure it’s ready when your Crispy Almond Cookies dough is prepared. Next, whisk together the almond flour, sugar, and a pinch of salt in a large bowl until well combined. In a separate bowl, beat the softened butter until creamy, then gradually fold in the dry ingredients. For extra crunch, gently mix in chopped almonds or almond slices. If the dough feels too sticky, chill it for 15 minutes—this makes rolling easier. Shape the dough into small balls, flatten them slightly, and place them on a parchment-lined baking sheet. Bake for 12-15 minutes until golden around the edges. Let the cookies cool completely before serving; they’ll crisp up as they sit. To save time, double the batch and freeze half the dough for later. Just thaw it in the fridge overnight when you’re ready to bake.
Mistakes I’ve made and learned from
I once rushed the baking process and pulled my Crispy Almond Cookies out too soon, leaving them soft instead of crisp. Now I always wait for that golden edge before removing them from the oven. Another mishap? Overmixing the dough, which made the cookies tough. A light hand works best, as I learned from my guide to common baking mistakes. If your cookies spread too much, try chilling the dough longer or checking your butter temperature—it shouldn’t be too soft. For more troubleshooting tips, my cookie texture fixes post covers how to adjust for perfect results every time.
Crispy Almond Cookies trace their roots to Mediterranean and Middle Eastern traditions, where almonds have been a staple for centuries. Bakers in countries like Italy and Greece often prepare these cookies during festive seasons, especially Christmas and Easter. Meanwhile, in Morocco, they add a touch of orange blossom water for a fragrant twist. Every culture, however, shares one thing in common: the love for that perfect crunch.
In my family, Crispy Almond Cookies became a holiday staple after my grandmother brought her version from Sicily. She insisted on hand-grinding the almonds for extra texture, a method I still cherish today. Across the globe, variations pop up—some dip the cookies in chocolate, while others sprinkle them with powdered sugar. No matter the twist, the essence remains: a buttery, nutty bite that feels like home.
ays-cooking">How it fits in today’s cooking
Today, Crispy Almond Cookies bridge tradition and modern convenience. Busy bakers swap hand-ground almonds for store-bought flour, yet the cookies still shine at holiday gatherings. They also pair beautifully with afternoon tea or coffee, making them a versatile treat. For those exploring gluten-free options, almond flour keeps the recipe naturally inclusive—just like these gluten-free desserts that cater to diverse diets.
Social media fuels new creativity, with food bloggers adding matcha or lavender for a trendy spin. Whether you stick to the classic or experiment, Crispy Almond Cookies fit seamlessly into today’s kitchens. For more inspiration, check out these holiday baking tips to elevate your cookie game. After all, some traditions only get better with time.
Taste and Texture
What makes it delicious
Crispy Almond Cookies deliver a perfect balance of nutty richness and delicate crunch. The toasted almonds infuse every bite with a warm, buttery aroma, while the golden edges offer a satisfying snap. Inside, the texture stays tender yet crumbly, melting just slightly on your tongue. A hint of vanilla and a touch of brown sugar deepen the flavor, making these cookies irresistibly fragrant. Whether you enjoy them with tea or on their own, Crispy Almond Cookies bring a comforting, homemade charm to every bite.
r">Boosting the flavor
Elevate your Crispy Almond Cookies by swapping regular sugar for honey or maple syrup to add a subtle caramel note. For extra crunch, sprinkle flaky sea salt on top before baking. If you love bold flavors, try folding in a pinch of cinnamon or cardamom—both pair beautifully with almonds. For a decadent twist, drizzle melted dark chocolate over the cooled cookies or serve them with a side of vanilla ice cream. Looking for more almond-inspired treats? These cookies also pair wonderfully with a glass of almond milk latte for a cozy afternoon treat.
Tips for Success
Best practices for results
For perfect Crispy Almond Cookies every time, always chill the dough for at least 30 minutes before baking. This step prevents spreading and ensures a crisp texture. Additionally, use parchment paper to keep the bottoms golden without over-browning. Measure your almond flour precisely for the right balance of chewiness and crunch. Finally, rotate the baking sheet halfway through to guarantee even browning.
>Mistakes to avoid
Avoid overmixing the dough, as this can make your Crispy Almond Cookies tough instead of light. Instead, gently fold ingredients until just combined. Many bakers also skip the cooling step, but letting the cookies rest on the pan for 5 minutes ensures they set properly. For more troubleshooting, check our guide on common baking mistakes. If your cookies spread too much, review our tips for fixing cookie texture to adjust your technique next time.
Serving and Pairing Suggestions
How to serve this dish
For a delightful presentation, arrange your Crispy Almond Cookies on a rustic wooden board or a vintage ceramic plate. Meanwhile, sprinkle a few crushed almonds or edible flowers around them for a touch of elegance. These cookies shine at holiday gatherings, but they also make a perfect afternoon treat with tea. If you’re hosting a brunch, stack them neatly beside a fruit platter for a balanced spread. No matter the occasion, their golden hue and crisp texture always impress.
What goes well with it
Pair Crispy Almond Cookies with a warm cup of spiced chai for a cozy experience. The aromatic spices in the chai enhance the nutty flavor of the cookies beautifully. Alternatively, serve them alongside a scoop of vanilla bean ice cream for a simple yet indulgent dessert. If you love contrasting textures, try our Creamy Coconut Pudding—its smooth richness balances the cookies’ crunch. For a refreshing twist, enjoy them with our Iced Mango Lassi, which adds a tropical sweetness to every bite.
What ingredients are needed for crispy almond cookies?
To make crispy almond cookies, you’ll need almond flour, butter, sugar, egg whites, and a pinch of salt. Some recipes also include almond extract for extra flavor. These simple ingredients create a delicate, crunchy texture that makes crispy almond cookies so irresistible.
How do you keep almond cookies crispy?
Store crispy almond cookies in an airtight container at room temperature to maintain their crunch. Avoid refrigeration, as moisture can soften them. For extra protection, place a piece of bread in the container—it absorbs excess humidity while keeping the cookies perfectly crisp.
rank-math-faq-item">
Can I substitute almond flour in crispy almond cookies?
While almond flour is key for authentic crispy almond cookies, you can use finely ground blanched almonds in a pinch. Avoid regular flour substitutes, as they’ll change both the texture and flavor. For nut-free options, try sunflower seed flour, but expect a slightly different taste.
Why are my almond cookies not crispy?
If your almond cookies aren’t crispy, they may need more baking time at a lower temperature to dry out properly. Overmixing the dough or using too much butter can also prevent crispiness. For perfect crispy almond cookies, follow measurements closely and let them cool completely on a wire rack.
Best Southern-Style Honey Butter Cornbread Poppers
Introduction
There’s something undeniably comforting about bite-sized treats that pack a punch of flavor, and that’s exactly what you’ll find with these Southern-Style Honey Butter Cornbread Poppers. Whether you’re hosting a cozy gathering or simply craving a nostalgic taste of the South, these golden little bites deliver sweetness, warmth, and a hint of buttery richness in every mouthful. Trust me, once you try them, you’ll understand why they’ve become a staple in my kitchen—and maybe yours too.
Southern-Style Honey Butter Cornbread Poppers are a delightful twist on classic cornbread, transforming it into irresistible, poppable morsels. Perfect for parties, potlucks, or even a quiet night in, these poppers combine the rustic charm of cornmeal with the luxurious sweetness of honey butter. What makes them special isn’t just their flavor but also their versatility. Serve them as an appetizer, a side dish, or even a sweet snack—they always steal the show. Here at brekcakes.com, we celebrate recipes that bring people together, and this one does exactly that. If you love crowd-pleasing dishes, you’ll also adore our Southern Comfort Food Classics or our Easy Party Appetizers for more inspiration.
Why I Love This Recipe
Southern-Style Honey Butter Cornbread Poppers hold a special place in my heart because they remind me of lazy Sunday afternoons at my grandma’s house. She’d pull a pan of cornbread from the oven, and the whole kitchen would smell like home. This recipe captures that same warmth but in a fun, modern way. Every time I make them, I feel like I’m sharing a piece of my story—and that’s what cooking is all about.
Health and Nutrition
Why it’s good for your body
Southern-Style Honey Butter Cornbread Poppers pack a surprising nutritional punch while delivering irresistible flavor. First, cornmeal serves as the base, offering a good source of fiber to support digestion and keep you feeling full longer. Additionally, honey provides natural sweetness without refined sugar, giving you a quick energy boost without the crash. Meanwhile, the butter adds healthy fats that help your body absorb fat-soluble vitamins like A and D.
Moreover, Southern-Style Honey Butter Cornbread Poppers contain essential nutrients like iron and magnesium from the cornmeal. These minerals play key roles in energy production and muscle function. Since these poppers bake instead of fry, they retain moisture without excess oil, making them a lighter alternative to traditional fried snacks. Finally, the combination of protein from eggs and complex carbs from cornmeal ensures a balanced macronutrient profile.
Beyond macros, Southern-Style Honey Butter Cornbread Poppers bring comfort and satisfaction to your plate. The honey’s antioxidants may even help reduce inflammation over time. Whether you enjoy them as a side or a snack, these poppers prove that wholesome ingredients can taste indulgent.
How it fits in a healthy lifestyle
Southern-Style Honey Butter Cornbread Poppers fit seamlessly into a balanced diet when enjoyed mindfully. For gluten-free eaters, they’re a delicious option since cornmeal naturally lacks gluten. Pair them with a protein-rich dish like our Slow Cooker BBQ Chicken to create a satisfying, well-rounded meal.
If you’re watching your sugar intake, the honey offers a smarter sweetener choice than processed alternatives. You can also tweak the recipe by reducing the honey slightly or using a heart-healthy oil instead of butter. For more ideas on balancing treats with nutrition, explore our guide to Healthy Meal Prep Tips. Southern-Style Honey Butter Cornbread Poppers remind you that flavor and wellness can go hand in hand.
Bite-sized cornbread muffins infused with honey butter for a sweet and savory Southern treat.
Ingredients
Scale
For the Crust:
1 cup cornmeal
1 cup all-purpose flour
1/4 cup granulated sugar
1 tbsp baking powder
1/2 tsp salt
1 cup buttermilk
1/3 cup unsalted butter, melted
1 large egg
1/4 cup honey
2 tbsp unsalted butter, softened
Instructions
1. Prepare the Crust:
Preheat oven to 375°F (190°C). Grease a mini muffin tin.
In a large bowl, whisk together cornmeal, flour, sugar, baking powder, and salt.
In another bowl, mix buttermilk, melted butter, and egg until combined.
Pour wet ingredients into dry ingredients and stir until just combined.
Spoon batter into prepared mini muffin tin, filling each cup about 3/4 full.
Bake for 12-15 minutes until golden brown and a toothpick comes out clean.
While baking, mix honey and softened butter in a small bowl to make honey butter.
Brush warm cornbread poppers with honey butter before serving.
Notes
You can customize the seasonings to taste.
“`html
s-dish">How to Prepare This Dish
Steps and time-saving tips
Start by preheating your oven to 375°F and greasing a mini muffin tin to ensure your Southern-Style Honey Butter Cornbread Poppers release easily after baking. In a large bowl, whisk together the dry ingredients—cornmeal, flour, sugar, baking powder, and salt—until fully combined. Next, mix the wet ingredients in a separate bowl, including buttermilk, melted butter, honey, and a lightly beaten egg. Pour the wet mixture into the dry ingredients and gently fold everything together until just combined; overmixing can make the batter dense. Spoon the batter into the muffin tin, filling each cup about two-thirds full to allow room for rising. Bake for 12-15 minutes until golden brown and a toothpick comes out clean. While the poppers cool slightly, melt extra butter and honey together for a glossy drizzle. Brush this mixture over the warm poppers for that irresistible Southern-Style Honey Butter Cornbread Poppers finish. For a time-saving hack, prepare the batter the night before and refrigerate it overnight—just give it a quick stir before baking.
Mistakes I’ve made and learned from
I once rushed the baking process and pulled my Southern-Style Honey Butter Cornbread Poppers out too early, leaving them gummy in the middle. Now, I always use a toothpick test and wait for that perfect golden hue. Another blunder? Skipping the buttermilk and using regular milk instead—it made the texture less tender. If you’re out of buttermilk, try my easy homemade buttermilk substitute for similar results. I also learned the hard way that overmixing the batter leads to tough poppers. A light hand is key, just like when making fluffy cornbread muffins. Trust me, these small adjustments make all the difference between good and unforgettable Southern-Style Honey Butter Cornbread Poppers.
Southern-Style Honey Butter Cornbread Poppers carry the soul of Southern comfort food, where cornbread reigns as a staple. Rooted in Native American traditions, cornbread evolved with European settlers who added buttermilk and baking powder. Today, these poppers capture that legacy in bite-sized form, perfect for gatherings. Meanwhile, in Mexico, a similar concept exists with savory corn muffins called “pan de elote,” often sweetened with condensed milk. Even in Brazil, “bolo de fubá” offers a crumbly, slightly sweet cornbread cousin.
In my family, Southern-Style Honey Butter Cornbread Poppers became a game-day favorite, replacing dinner rolls with something richer. My grandma insisted on using stone-ground cornmeal for extra texture, while my aunt swears by adding a pinch of cayenne for heat. Across the South, you’ll find versions with bacon bits, jalapeños, or even cheddar cheese. No matter the twist, the honey butter glaze remains the star—sticky, sweet, and impossible to resist.
ays-cooking">How it fits in today’s cooking
Southern-Style Honey Butter Cornbread Poppers still shine because they bridge nostalgia and modern convenience. Busy home cooks love them for meal prep, pairing perfectly with hearty slow-cooker dishes or as a standalone snack. During holidays, they’re a festive alternative to dinner rolls, especially when served alongside herb-roasted mains.
Health-conscious bakers tweak the recipe too, swapping in almond flour or coconut sugar. Some even bake them in mini muffin tins for portion control. Yet, no matter how you adapt them, these poppers keep their comforting charm. Whether you’re hosting a backyard BBQ or craving a cozy night in, they deliver that unmistakable Southern hug in every bite.
Taste and Texture
What makes it delicious
Southern-Style Honey Butter Cornbread Poppers deliver a mouthwatering balance of sweet and savory with every bite. The golden-brown crust crackles lightly under your teeth, giving way to a tender, moist crumb that melts on your tongue. Rich honey butter seeps into the warm cornbread, creating a luscious, velvety finish. Meanwhile, the natural sweetness of cornmeal mingles with a hint of smoky depth, thanks to a touch of browned butter. Fragrant and inviting, these poppers fill the air with the cozy aroma of toasted grains and caramelized honey. Whether you enjoy them fresh from the oven or at room temperature, Southern-Style Honey Butter Cornbread Poppers offer a comforting, irresistible treat.
r">Boosting the flavor
For an extra flavor kick, try drizzling warm cinnamon honey butter over your poppers—it adds a spicy warmth that complements the cornbread’s sweetness. Alternatively, sprinkle crumbled crispy bacon or sharp cheddar into the batter for a savory twist. If you love contrasting textures, serve them with a side of whipped cream cheese frosting for dipping. A pinch of chili powder or smoked paprika can also elevate the flavor profile, adding a subtle heat that balances the honey’s richness. With these simple tweaks, you can customize Southern-Style Honey Butter Cornbread Poppers to suit any craving.
Tips for Success
Best practices for results
Always preheat your oven before baking Southern-Style Honey Butter Cornbread Poppers to ensure even cooking. For the best texture, use fresh cornmeal and avoid overmixing the batter—just stir until combined. Additionally, brush the poppers with melted honey butter right after baking for extra moisture and flavor. If you prefer crispier edges, bake them in a well-greased cast-iron skillet instead of a standard pan.
>Mistakes to avoid
One common error is using cold ingredients, which can lead to dense Southern-Style Honey Butter Cornbread Poppers. Instead, bring eggs and buttermilk to room temperature first for a lighter crumb. Another mistake is skipping the resting time for the batter; letting it sit for 10 minutes helps the cornmeal hydrate properly. For more baking tips, check out our guide on perfect cornbread every time. Also, avoid overbaking—test doneness with a toothpick as explained in our baking troubleshooting post.
Serving and Pairing Suggestions
How to serve this dish
Southern-Style Honey Butter Cornbread Poppers shine when served warm straight from the oven. For a rustic touch, arrange them in a woven basket lined with a checkered cloth. Alternatively, stack them on a wooden board with drizzled honey and a sprinkle of flaky sea salt for extra visual appeal. These poppers make a fantastic addition to brunch spreads, holiday gatherings, or game-day snack tables. To elevate the presentation, garnish with fresh thyme or a light dusting of powdered sugar. No matter the occasion, their golden-brown crust and sweet aroma will draw everyone to the table.
What goes well with it
Pair Southern-Style Honey Butter Cornbread Poppers with a tangy buttermilk ranch dip for a delightful contrast of flavors. The cool, creamy dip balances the poppers’ sweetness perfectly. For a heartier meal, serve them alongside a bowl of smoky Southern baked beans, which complement the cornbread’s richness. To complete the experience, offer a refreshing glass of sweet iced tea or a crisp classic lemonade. The citrusy notes in the lemonade cut through the buttery richness, making every bite even more satisfying.
What are Southern-Style Honey Butter Cornbread Poppers?
Southern-Style Honey Butter Cornbread Poppers are bite-sized, savory-sweet cornbread muffins infused with honey butter. They’re a popular Southern appetizer or side dish, often served at gatherings or as a comforting snack. The honey butter glaze gives them a rich, moist texture and irresistible flavor.
How do you make Southern-Style Honey Butter Cornbread Poppers from scratch?
To make Southern-Style Honey Butter Cornbread Poppers, mix cornmeal, flour, baking powder, and salt, then combine with wet ingredients like buttermilk and eggs. Bake in mini muffin tins and brush with a warm honey-butter mixture right after baking. The key is using real butter and quality honey for that authentic Southern taste.
rank-math-faq-item">
Can I make Southern-Style Honey Butter Cornbread Poppers ahead of time?
Yes, you can prepare Southern-Style Honey Butter Cornbread Poppers a day in advance—just store them airtight at room temperature. For best results, warm them slightly before serving and refresh with an extra drizzle of honey butter. They also freeze well for up to 3 months when properly wrapped.
What dishes pair well with Southern-Style Honey Butter Cornbread Poppers?
Southern-Style Honey Butter Cornbread Poppers complement barbecue ribs, fried chicken, or chili perfectly. They also work great as part of a brunch spread with collard greens or as an appetizer with pimento cheese. The sweet-savory balance makes them versatile for many Southern meals.
Easy French Onion Ground Beef and Rice Casserole
Introduction
There’s something deeply comforting about a dish that brings together familiar flavors in a way that feels both nostalgic and new. That’s exactly what you’ll find with this French Onion Ground Beef and Rice Casserole. Whether you’re craving a cozy weeknight dinner or need a crowd-pleasing dish for gatherings, this recipe delivers rich, savory goodness with minimal effort. Plus, it’s the kind of meal that makes everyone at the table ask for seconds.
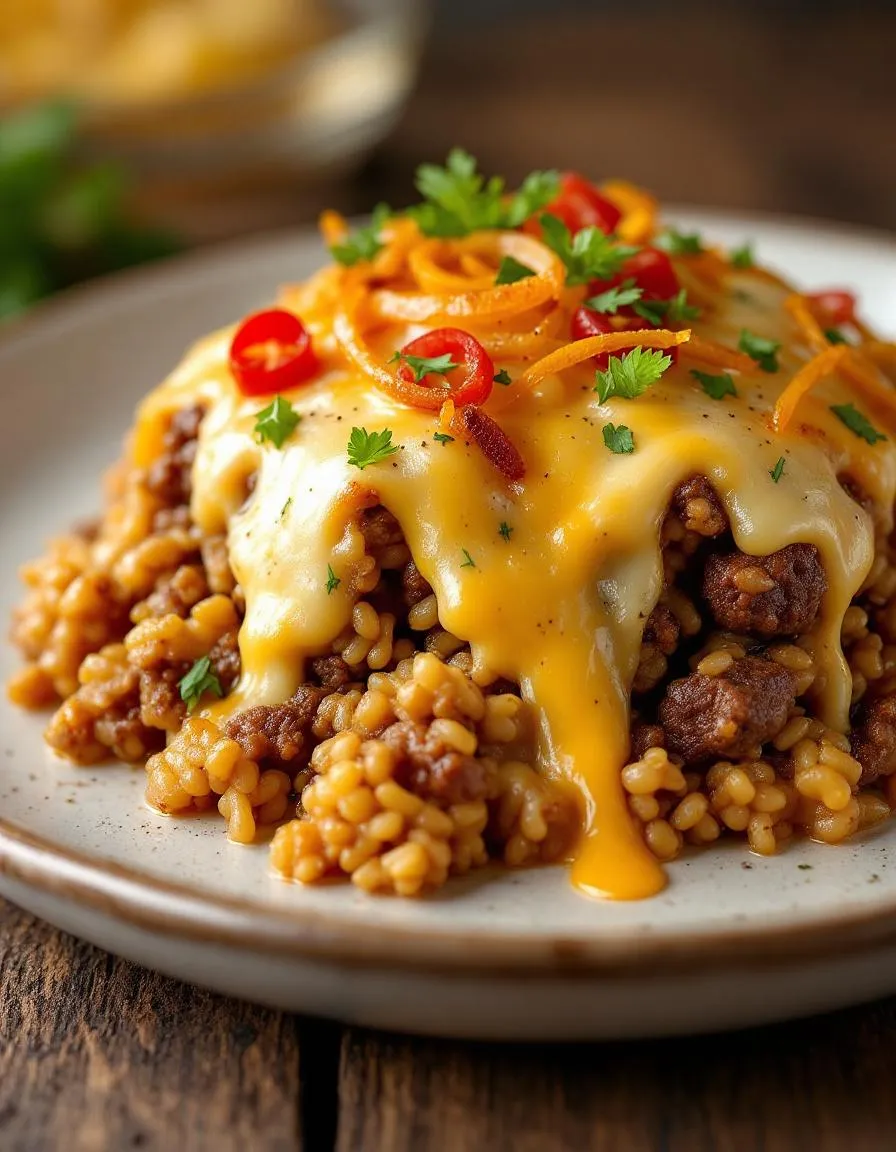
French Onion Ground Beef and Rice Casserole combines tender ground beef, caramelized onions, fluffy rice, and a creamy French onion sauce baked to golden perfection. It’s a hearty, budget-friendly dish that takes inspiration from classic French onion soup but transforms it into a satisfying one-pan wonder. What makes it special is how effortlessly it comes together, yet it tastes like you spent hours in the kitchen. If you love easy comfort food with bold flavors, this casserole will quickly become a staple in your rotation. For more family-friendly meals, check out my Creamy Chicken and Rice Casserole, or if you’re craving another onion-infused dish, try my French Onion Pasta.
Why I Love This Recipe
This French Onion Ground Beef and Rice Casserole holds a special place in my heart because it reminds me of Sunday dinners growing up. My mom would often whip up casseroles to feed our big family, and the aroma of onions and beef simmering together would fill the house. Now, whenever I make this dish, it brings back those warm memories while creating new ones with my own family. It’s proof that the simplest recipes often carry the most love.
Health and Nutrition
Why it’s good for your body
French Onion Ground Beef and Rice Casserole packs a nutritious punch while delivering rich, savory flavors. First, the lean ground beef provides high-quality protein, which helps build muscle and keeps you full longer. Additionally, the caramelized onions add antioxidants and anti-inflammatory benefits, supporting your immune system. Meanwhile, the rice offers complex carbohydrates for steady energy throughout the day.
Moreover, French Onion Ground Beef and Rice Casserole balances macronutrients, making it a satisfying meal. The dish includes fiber from onions and rice, aiding digestion and promoting gut health. Furthermore, the combination of protein and carbs helps stabilize blood sugar levels, preventing energy crashes. With its hearty ingredients, this casserole also delivers essential vitamins like B12 and iron, which boost energy and cognitive function.
Finally, French Onion Ground Beef and Rice Casserole is versatile enough to accommodate healthier tweaks. For instance, you can use brown rice for extra fiber or swap in low-sodium broth to reduce salt intake. Whether you enjoy it as-is or customize it, this dish fuels your body without sacrificing taste.
How it fits in a healthy lifestyle
French Onion Ground Beef and Rice Casserole fits seamlessly into a balanced diet. If you focus on high-protein meals, the ground beef and rice combo helps meet your daily needs. For gluten-free eaters, this dish naturally avoids wheat-based ingredients, making it a safe and flavorful option. Plus, you can easily pair it with a fresh side salad for added nutrients.
This casserole also supports heart-healthy eating when you opt for lean beef and minimal added fats. If meal prepping is your goal, it stores well and reheats beautifully for busy weeknights. For more high-protein meal ideas, check out our guide on high-protein dinners. And if you love gluten-free comfort food, explore our gluten-free casseroles for more inspiration. With simple adjustments, French Onion Ground Beef and Rice Casserole becomes a staple for any health-conscious kitchen.
Start by preheating your oven to 375°F so it’s ready when you finish assembling the French Onion Ground Beef and Rice Casserole. While the oven heats, grab a large skillet and brown the ground beef over medium-high heat, breaking it into small crumbles with a wooden spoon. Once the beef is fully cooked, drain any excess grease but leave just enough to sauté the onions for extra flavor. Toss in thinly sliced onions and cook them until they turn soft and golden, which usually takes about 5 minutes. Stir in minced garlic for the last 30 seconds to avoid burning it. Next, mix in uncooked rice, French onion soup mix, and beef broth, then let everything simmer for a couple of minutes so the flavors meld. Transfer the mixture to a greased casserole dish and spread it evenly. Top with shredded cheese, covering the entire surface for a gooey, golden finish. Bake uncovered for 25-30 minutes until the rice is tender and the cheese bubbles. For a time-saving hack, use pre-shredded cheese or cook the rice ahead of time to cut prep in half. Let the casserole rest for 5 minutes before serving so the layers set perfectly.
Mistakes I’ve made and learned from
I’ve learned the hard way that skipping the step of draining excess grease from the ground beef makes the French Onion Ground Beef and Rice Casserole overly greasy. Now, I always tilt the skillet and use a spoon to remove the extra fat before adding onions. Another blunder? Undercooking the rice because I rushed the baking time. To avoid crunchy rice, I check for doneness by fluffing the center with a fork—if it’s still firm, I add a splash of broth and bake longer. For more foolproof tips, check out my guide on perfecting rice textures or how to balance flavors in casseroles. Trust me, these small tweaks make all the difference between a good dish and a great one.
French Onion Ground Beef and Rice Casserole feels like a warm hug from the past. While it doesn’t trace back to a single country, it borrows flavors from French onion soup and American comfort food traditions. Imagine caramelized onions, rich beef, and gooey cheese melting into tender rice—a dish built for cozy nights. In some households, cooks add a splash of Worcestershire sauce for depth, while others toss in mushrooms for an earthy twist. My grandma always swore by a pinch of thyme, claiming it tied everything together like a secret ingredient.
Across regions, this casserole adapts effortlessly. In the Midwest, you might find it baked with cream of mushroom soup for extra richness. Down South, a dash of Cajun seasoning kicks up the heat. Even abroad, similar dishes pop up. For instance, in parts of Europe, they layer beef and onions with hearty grains like barley instead of rice. No matter the version, French Onion Ground Beef and Rice Casserole stays a crowd-pleaser, blending simplicity with bold flavors.
ays-cooking">How it fits in today’s cooking
Today, this casserole shines as a weeknight hero. Busy families love it because it’s a one-pan wonder, and meal preppers swear by its freezer-friendly magic. Modern twists? Try swapping ground turkey for beef or using cauliflower rice for a low-carb spin. It’s also a star at potlucks, especially during fall and winter when comfort food rules. Pair it with a crisp green salad to balance the richness, or serve it alongside roasted veggies for a hearty feast.
What keeps it relevant? Versatility. Whether you’re craving nostalgia or need a quick dinner fix, French Onion Ground Beef and Rice Casserole delivers. For dessert, why not follow it with a slice of classic apple pie? Some traditions never go out of style.
Taste and Texture
What makes it delicious
French Onion Ground Beef and Rice Casserole wraps you in layers of rich, savory comfort. The caramelized onions melt into the dish, offering a sweet depth that balances the hearty umami of ground beef. Each bite delivers a satisfying chew from tender rice, while melted cheese stretches luxuriously over the top, adding a creamy contrast. Fragrant thyme and garlic weave through the casserole, making every forkful aromatic and irresistible. Whether you scoop into the crispy-edged crust or dive into the soft, steaming center, French Onion Ground Beef and Rice Casserole keeps you coming back for more.
r">Boosting the flavor
For an extra flavor kick, try swapping regular onions for sweet Vidalias or topping the casserole with crispy fried shallots. A splash of Worcestershire sauce deepens the savory notes, while a sprinkle of smoked paprika adds a subtle warmth. If you love cheesy goodness, layer in Gruyère alongside mozzarella for a nutty twist. Pair it with a bright side like our Garlic Parmesan Roasted Carrots to cut through the richness. Craving more French onion inspiration? Our French Onion Soup Dumplings riff on similar flavors in bite-sized form.
Tips for Success
Best practices for results
Always brown the ground beef thoroughly before mixing it into your French Onion Ground Beef and Rice Casserole, as this step locks in flavor and prevents greasiness. Meanwhile, caramelize the onions slowly over medium-low heat to develop their natural sweetness without burning. For the best texture, use long-grain white rice instead of instant varieties, since it holds up better during baking. Additionally, cover the casserole tightly with foil for the first half of baking to ensure the rice cooks evenly. Finally, let the dish rest for 5-10 minutes after baking so the flavors meld perfectly.
>Mistakes to avoid
Avoid overcrowding the pan when browning the beef, as this steams the meat instead of searing it. Instead, work in batches if needed for a crisp, flavorful result. Another common mistake is skipping the deglazing step after cooking the onions—scraping the browned bits into the casserole adds depth. Also, resist the urge to overmix the ingredients, which can make the rice mushy. For more on balancing flavors, check out our guide to seasoning savory dishes. If your casserole turns out dry, try adjusting the liquid ratios using our rice cooking tips for foolproof results every time.
Serving and Pairing Suggestions
How to serve this dish
French Onion Ground Beef and Rice Casserole shines when you serve it fresh from the oven with a golden, bubbly cheese topping. For a cozy family dinner, scoop generous portions into rustic bowls and garnish with fresh thyme or parsley for a pop of color. Alternatively, layer it in a stylish baking dish for potlucks or holiday gatherings, letting the cheesy crust become the centerpiece. If you want to elevate weeknight meals, pair individual servings with a crisp side salad for contrast. Either way, this hearty casserole brings comfort to any table.
What goes well with it
A crisp green salad with tangy vinaigrette balances the richness of French Onion Ground Beef and Rice Casserole perfectly. For something heartier, try roasted garlic butter asparagus, which adds a savory crunch. If you love bread, warm slices of crusty sourdough or our easy homemade focaccia soak up every flavorful bite. For drinks, a light red wine or sparkling water with lemon complements the dish without overpowering it. Craving more cozy recipes? Our creamy mashed potatoes or roasted Brussels sprouts make excellent sides too.
Can I use frozen onions in French Onion Ground Beef and Rice Casserole?
Yes, frozen onions work well in French Onion Ground Beef and Rice Casserole, though fresh onions provide a stronger flavor. Thaw and drain them first to avoid excess moisture. The dish will still taste delicious with either option.
What type of rice is best for French Onion Ground Beef and Rice Casserole?
Long-grain white rice or jasmine rice works best for French Onion Ground Beef and Rice Casserole because they hold their texture well. Avoid instant rice, as it can become mushy during baking. The rice absorbs the rich French onion flavors perfectly.
rank-math-faq-item">
How do I store leftover French Onion Ground Beef and Rice Casserole?
Store leftovers in an airtight container in the refrigerator for up to 3–4 days. Reheat French Onion Ground Beef and Rice Casserole in the oven or microwave with a splash of broth to keep it moist. Freezing is also an option for longer storage.
Can I make French Onion Ground Beef and Rice Casserole in a slow cooker?
Absolutely! Brown the ground beef first, then combine all ingredients in the slow cooker. Cook on low for 4–5 hours. The French Onion Ground Beef and Rice Casserole will turn out tender and full of flavor.
Easy Ground Beef and Chopped Cabbage Recipe
Introduction
If you’re craving a hearty, comforting meal that’s both easy to make and packed with flavor, you’ve come to the right place. Ground Beef and Chopped Cabbage is one of those dishes that feels like a warm hug after a long day. Whether you’re cooking for a busy weeknight or meal prepping for the week, this recipe delivers satisfaction without the fuss. Plus, it’s a fantastic way to sneak extra veggies into your family’s diet—something I always prioritize in my healthy dinner ideas.
Ground Beef and Chopped Cabbage is a simple yet versatile dish that combines tender, savory ground beef with crisp, slightly sweet cabbage. The beauty of this recipe lies in its adaptability. You can tweak the seasonings, add a splash of soy sauce for depth, or toss in other veggies like carrots or bell peppers. Beyond its delicious taste, this dish matters because it’s budget-friendly, nutritious, and quick to prepare—perfect for home cooks who want a wholesome meal without spending hours in the kitchen. It fits the tone of brekcakes.com perfectly, where I celebrate approachable, flavorful recipes that bring joy to everyday cooking. If you love easy, one-pan meals, you’ll also appreciate my one-pan wonders collection for more stress-free dinner inspiration.
Why I Love This Recipe
Ground Beef and Chopped Cabbage holds a special place in my heart because it reminds me of my grandma’s kitchen. She used to whip it up on chilly evenings, and the aroma alone would make everyone gather around the table. What I love most is how effortlessly it comes together, yet it always feels like a comforting, home-cooked meal. Even now, whenever I make it, I’m transported back to those cozy nights filled with laughter and good food. It’s a reminder that the simplest dishes often create the fondest memories.
Health and Nutrition
Why it’s good for your body
Ground beef and chopped cabbage make a powerhouse duo for your health. First, ground beef delivers high-quality protein, which helps build and repair muscles. Additionally, it provides essential nutrients like iron, zinc, and B vitamins to keep your energy levels steady. Meanwhile, chopped cabbage brings a crisp, fiber-rich crunch that supports digestion and gut health.
Together, ground beef and chopped cabbage create a balanced meal. The cabbage adds antioxidants like vitamin C, which boosts immunity and fights inflammation. On the other hand, the ground beef offers healthy fats that help your body absorb these fat-soluble nutrients. Plus, cabbage is low in calories, making it a great way to bulk up your meal without extra carbs.
Another benefit of ground beef and chopped cabbage is their versatility. You can easily adjust the fat content of the beef to fit your dietary needs. At the same time, cabbage provides a satisfying texture while keeping the dish light. Whether you’re aiming for more protein or extra fiber, this combination delivers both in one delicious bite.
How it fits in a healthy lifestyle
Ground beef and chopped cabbage fit seamlessly into a balanced diet. If you’re following a high-protein plan, the beef gives you a solid foundation, while the cabbage keeps things fresh and fiber-packed. For gluten-free eaters, this combo is naturally safe and full of flavor.
Heart-healthy eaters will appreciate lean ground beef paired with cabbage’s cholesterol-lowering benefits. You can also meal prep this duo ahead of time for quick, nutritious dinners. Check out our meal prep guide for more time-saving ideas.
Looking for ways to spice up your routine? Try adding ground beef and chopped cabbage to stir-fries or stuffed peppers. They’re also perfect for quick healthy dinners when you need something satisfying without the hassle. No matter your goal, this pair keeps meals simple, nutritious, and delicious.
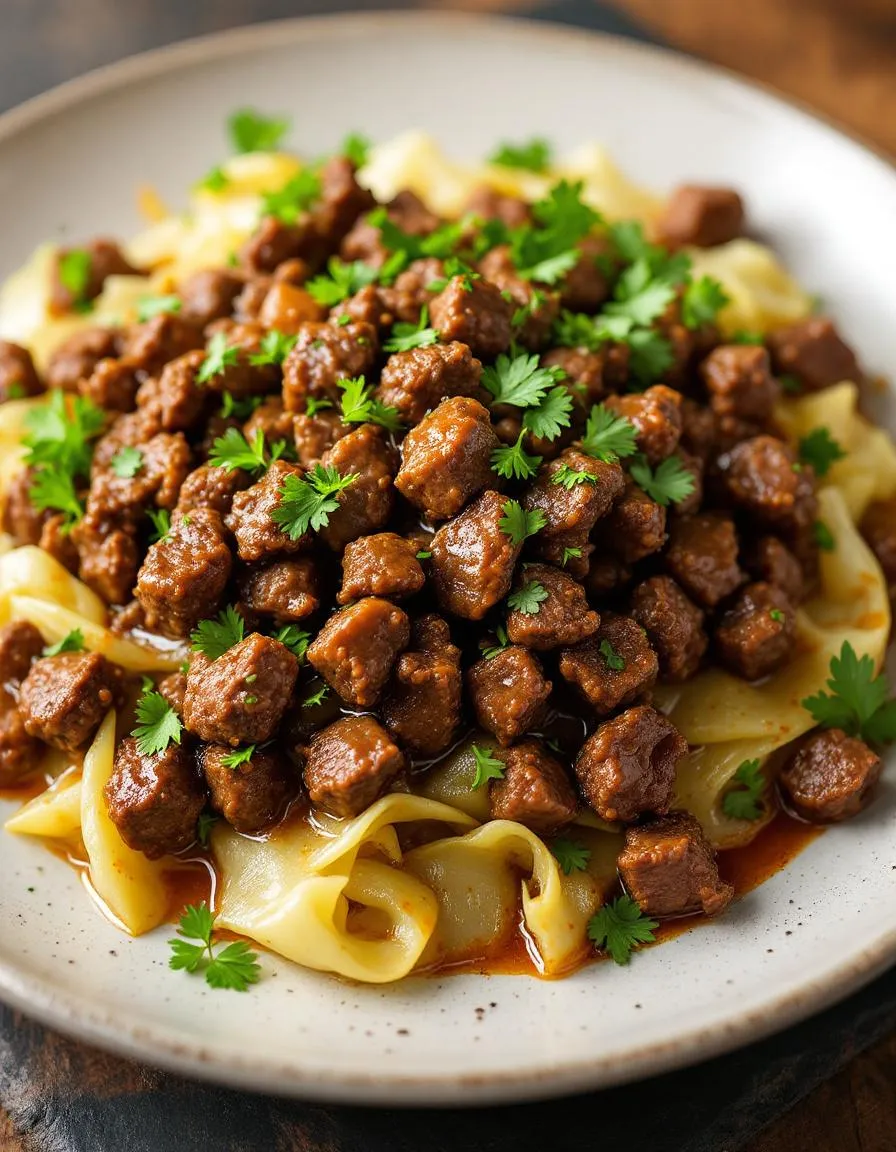
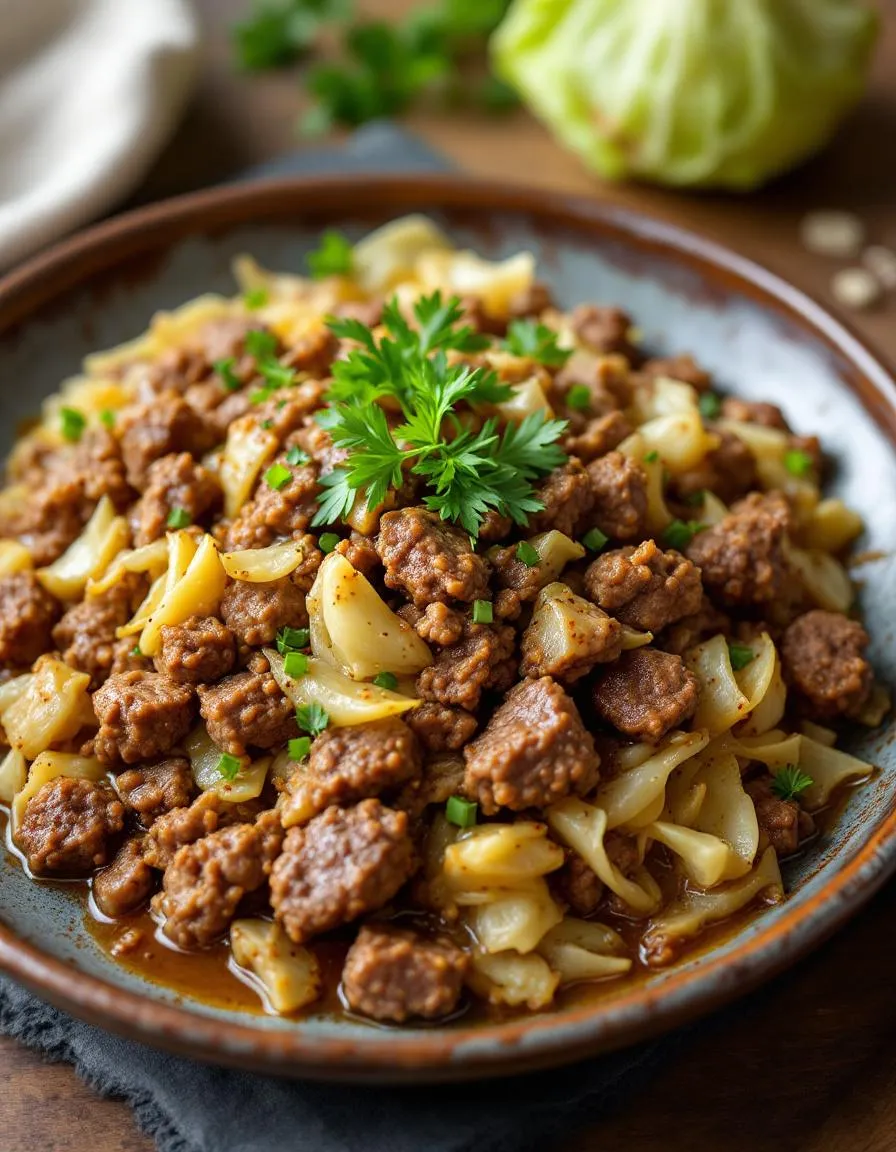
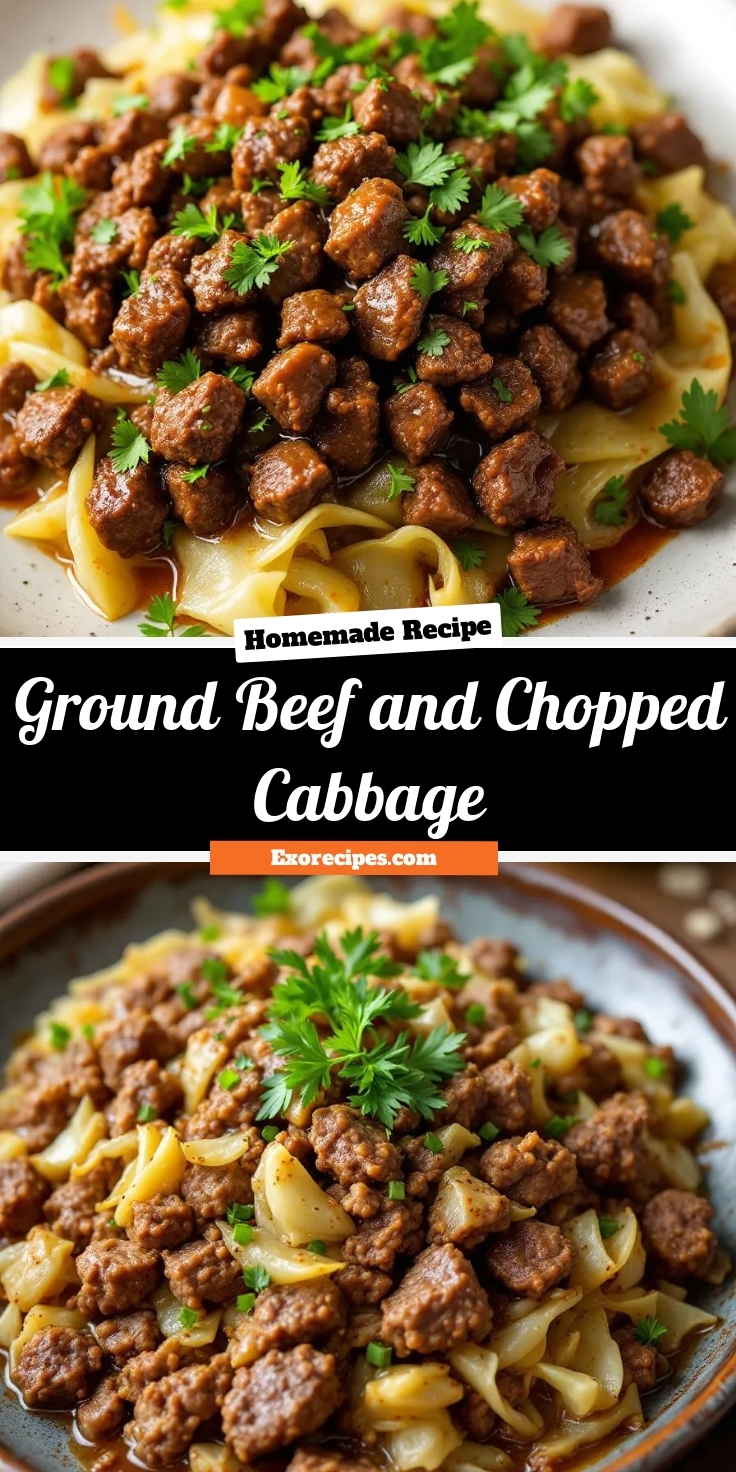
A hearty and nutritious dish combining ground beef and cabbage for a simple yet flavorful meal.
Ingredients
Scale
For the Crust:
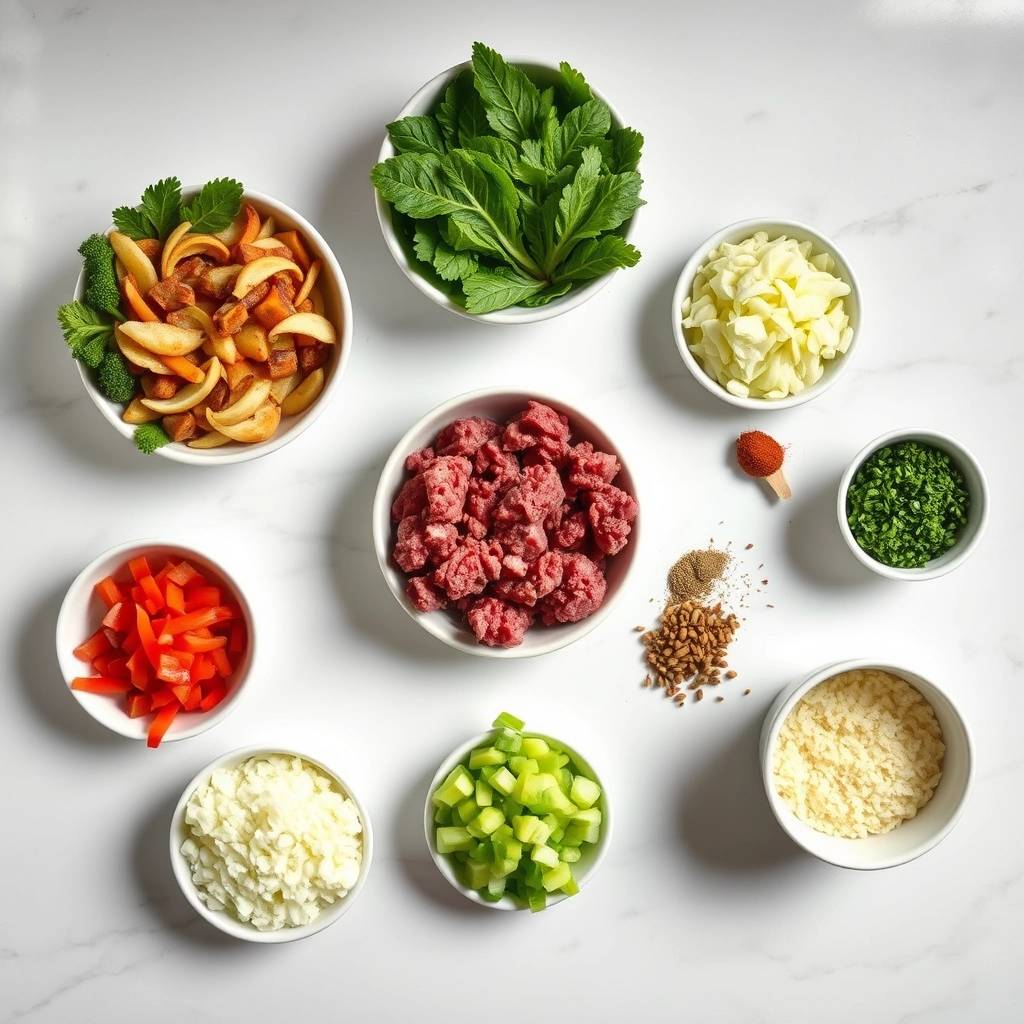
1 lb ground beef
1 medium head cabbage, chopped
1 onion, diced
2 cloves garlic, minced
1 tbsp olive oil
1 tsp salt
1/2 tsp black pepper
1 tsp paprika
1/2 tsp cumin
Instructions
1. Prepare the Crust:
Heat olive oil in a large skillet over medium heat.
Add diced onion and minced garlic, sauté until fragrant and translucent.
Add ground beef to the skillet, breaking it up with a spoon, and cook until browned.
Stir in chopped cabbage, salt, black pepper, paprika, and cumin.
Cover and cook for 15-20 minutes, stirring occasionally, until cabbage is tender.
Adjust seasoning to taste and serve hot.
Notes
You can customize the seasonings to taste.
s-dish">How to Prepare This Dish
Steps and time-saving tips
Start by heating a large skillet over medium-high heat and browning the ground beef until it’s fully cooked, breaking it into small crumbles with a wooden spoon. Meanwhile, chop the cabbage into thin, even strips so it cooks evenly. Drain any excess fat from the beef, then toss in the cabbage and stir everything together. For extra flavor, add minced garlic, a pinch of salt, and a dash of black pepper. Let the mixture simmer for about 10 minutes until the cabbage softens but still has a slight crunch. If you’re short on time, use pre-shredded coleslaw mix instead of chopping fresh cabbage. Stir in a splash of soy sauce or Worcestershire sauce for depth, then serve hot over rice or enjoy it as a hearty standalone dish. To save cleanup, use the same skillet for browning and sautéing—just wipe it out quickly between steps.
Mistakes I’ve made and learned from
Early on, I overcooked the cabbage until it turned mushy, losing that perfect texture. Now I keep an eye on the clock and pull it off the heat while it’s still slightly crisp. Another misstep? Underseasoning the ground beef and chopped cabbage, leaving it bland. I’ve since learned to taste as I go, adjusting spices like garlic powder or red pepper flakes for a bolder kick. If you’re new to balancing flavors, check out my guide on seasoning basics for foolproof tricks. Also, skipping the fat-draining step once left the dish greasy—lesson learned! For more skillet hacks, my skillet secrets post covers how to master one-pan meals without the mess.
n-and-variations">Cultural Connection and Variations
Where this recipe comes from
Ground Beef and Chopped Cabbage might seem simple, but it carries deep roots in many cultures. In Ireland, cooks often pair cabbage with hearty meats, creating dishes like colcannon or stir-fried skillet meals. Meanwhile, in parts of Asia, you’ll find variations with soy sauce, ginger, and a quick sear in a wok. My grandmother, for instance, swore by her version—seasoned with caraway seeds and a splash of apple cider vinegar—to stretch groceries during lean winters.
Interestingly, Ground Beef and Chopped Cabbage also pops up in Mexican picadillos, where it mingles with tomatoes and spices. Some families even stuff it into tacos or layer it over rice. No matter where you go, this combo adapts beautifully. Whether it’s a German krautpfanne or a Southern U.S. skillet dinner, the dish proves that humble ingredients can tell rich stories.
How it fits in today’s cooking
Today, Ground Beef and Chopped Cabbage still wins hearts as a budget-friendly, nutrient-packed meal. Busy parents love it for quick weeknight dinners, while meal preppers chop extra cabbage to toss into healthy meal prep bowls. During colder months, it becomes a cozy staple, especially when simmered with broth for a hearty soup.
Modern twists keep it f
resh, too. Some cooks swap beef for turkey or add a kick with chili flakes. Others layer it into vegetarian casseroles by using plant-based crumbles. Whether you’re craving comfort or need a fridge clean-out hero, this dish stays as versatile as ever.
Taste and Texture
What makes it delicious
Ground Beef and Chopped Cabbage deliver a satisfying contrast of flavors and textures. The beef cooks up juicy and savory, with a rich umami depth, while the cabbage stays crisp-tender, adding a refreshing bite. Aromatic garlic and onions mingle with the meat, creating a fragrant base, and a splash of soy sauce or Worcestershire lends a tangy-sweet kick. Every forkful balances hearty, meaty goodness with the light crunch of cabbage, making it a comforting yet vibrant dish. Plus, the slight caramelization on the beef and edges of the cabbage adds a subtle smokiness that ties everything together.
Boosting the flavor
For an extra flavor boost, try browning the Ground Beef and Chopped Cabbage in sesame oil instead of neutral oil—it adds a nutty depth. A sprinkle of red pepper flakes or a dash of fish sauce can elevate the savory notes, while a squeeze of lime brightens the dish. If you love bold toppings, try adding pickled jalapeños or a drizzle of spicy mayo sauce for creamy heat. Pair it with a side of garlic fried rice to soak up every last bit of flavor. Small tweaks make this dish endlessly adaptable!
First, brown the ground beef thoroughly before adding the chopped cabbage to ensure rich flavor. Meanwhile, slice the cabbage uniformly so it cooks evenly. For the best texture, stir the mixture occasionally but avoid overcooking the cabbage. Additionally, season in layers—adding salt and spices to the ground beef first, then adjusting after combining with the cabbage. Finally, let the dish rest for a few minutes off the heat to let the flavors meld.
Mistakes to avoid
One common mistake is overcrowding the pan, which steams the ground beef instead of browning it. Instead, cook in batches if needed to get that perfect sear. Another error is skipping the draining step after browning the beef, which can make the dish greasy. For more tips on handling ground beef, check out our guide on cooking ground beef perfectly every time. Also, resist the urge to overcook the cabbage, as it turns mushy quickly. For ideal vegetable textures, explore our chopping vegetables guide to master the prep work.
g-suggestions">Serving and Pairing Suggestions
How to serve this dish
Ground Beef and Chopped Cabbage shines as a versatile dish that suits both casual weeknights and festive gatherings. For a cozy family dinner, serve it straight from the skillet with a sprinkle of fresh parsley or green onions for a pop of color. Alternatively, layer it over steamed rice or quinoa to create a hearty bowl that feels extra satisfying. If you’re hosting a potluck, transfer it to a colorful serving dish and pair it with warm tortillas for a build-your-own taco bar. The crisp texture of the cabbage adds a refreshing contrast to the savory ground beef, making every bite delightful.
What goes well with it
Elevate your Ground Beef and Chopped Cabbage with a tangy side like our Creamy Cucumber Salad, which balances the richness with its cool, crisp flavors. For a heartier meal, pair it with fluffy Garlic Herb Dinner Rolls to soak up every last bit of flavor. If you prefer a beverage pairing, try a light citrusy white wine or a chilled ginger beer to cut through the dish’s savory notes. Each option enhances the meal while keeping the focus on the delicious combination of ground beef and chopped cabbage.
math-faq-block">
What is the best way to cook ground beef and chopped cabbage together?
The best way to cook ground beef and chopped cabbage is to brown the beef first in a skillet, then add the cabbage and sauté until tender. Season with salt, pepper, and your favorite spices for a simple, flavorful dish. This combo works great for stir-fries, soups, or as a filling for tacos.
Is ground beef and chopped cabbage healthy?
Yes, ground beef and chopped cabbage make a nutritious meal. Lean ground beef provides protein and iron, while cabbage adds fiber, vitamins C and K. For a healthier version, use 90% lean beef and limit added oils.
How long does it take to cook ground beef and cabbage?
Ground beef typically cooks in 5-7 minutes, while chopped cabbage needs 8-10 minutes to soften. When cooked together, the dish is usually ready in 15 minutes total. Stir occasionally to ensure even cooking.
rank-math-faq-item">
What spices go well with ground beef and cabbage?
Garlic, onion powder, paprika, and cumin complement ground beef and chopped cabbage perfectly. For Asian-inspired dishes, try ginger and soy sauce. Italian seasoning works well for a simple skillet meal.