If you’ve ever craved a snack that’s both bright and comforting, Lemon Hummus might just become your new obsession. Whether you’re dipping veggies, spreading it on toast, or sneaking spoonfuls straight from the bowl, this zesty twist on classic hummus brings a burst of sunshine to every bite. Plus, it’s incredibly easy to whip up, even on busy weeknights when you need a quick, wholesome pick-me-up.
Lemon Hummus is a creamy, tangy blend of chickpeas, tahini, garlic, and fresh lemon juice that delivers a refreshing flavor upgrade. Unlike traditional hummus, the citrusy kick makes it perfect for spring and summer gatherings, though honestly, I make it year-round because it’s just that good. What sets it apart is its versatility—it pairs beautifully with everything from crunchy pita chips to roasted vegetables. If you’re a fan of my Garlic Herb Flatbread, you’ll love how this hummus complements it. And for those who adore meal prep, it stores wonderfully, so you can enjoy it all week long. Speaking of prep, if you’re looking for more effortless recipes, check out my 5-Ingredient Dinners for inspiration.
Why I Love This Recipe
Lemon Hummus holds a special place in my kitchen because it reminds me of lazy Sunday afternoons spent with friends, sharing stories over a platter of snacks. The first time I made it, I worried the lemon might overpower the dish, but instead, it created the perfect balance—bright yet mellow, just like those golden-hour conversations. Now, it’s my go-to when I want something that feels both indulgent and nourishing. Every time I take a bite, it’s like a little reminder that the simplest things often bring the most joy.
Health and Nutrition
Why it’s good for your body
Lemon Hummus packs a powerful nutritional punch while delighting your taste buds. First, chickpeas, the base of this creamy dip, deliver plant-based protein and fiber to keep you full and energized. Additionally, the lemon juice adds a burst of vitamin C, which supports immunity and helps your body absorb iron more efficiently.
Moreover, Lemon Hummus contains heart-healthy fats from olive oil, which may reduce inflammation and improve cholesterol levels. The garlic and tahini in the recipe also contribute antioxidants and minerals like calcium and magnesium. Together, these ingredients make Lemon Hummus a smart choice for anyone looking to nourish their body without sacrificing flavor.
Finally, the zesty lemon brightens the dish while aiding digestion. Because it’s naturally low in sugar and free from processed ingredients, Lemon Hummus fits seamlessly into a balanced diet. Whether you enjoy it as a snack or a meal accompaniment, you’ll reap its many benefits with every bite.
How it fits in a healthy lifestyle
Lemon Hummus effortlessly supports a variety of dietary goals. If you follow a gluten-free or plant-based diet, it’s a versatile staple that pairs well with veggies, crackers, or whole-grain pita. For those focused on heart health, the olive oil and fiber content make it a smart addition to your rotation.
You can also use Lemon Hummus as a protein-rich spread in wraps or as a dip for healthy snacking. Its balanced macronutrients help stabilize blood sugar, making it ideal for sustained energy. Plus, the recipe adapts easily to different preferences—swap ingredients to align with your needs, like using roasted garlic for extra depth.
Looking for more ways to incorporate nutritious dips? Check out our guide to meal prep tips for effortless healthy eating. With Lemon Hummus, you get flavor, convenience, and nourishment in one delicious scoop.
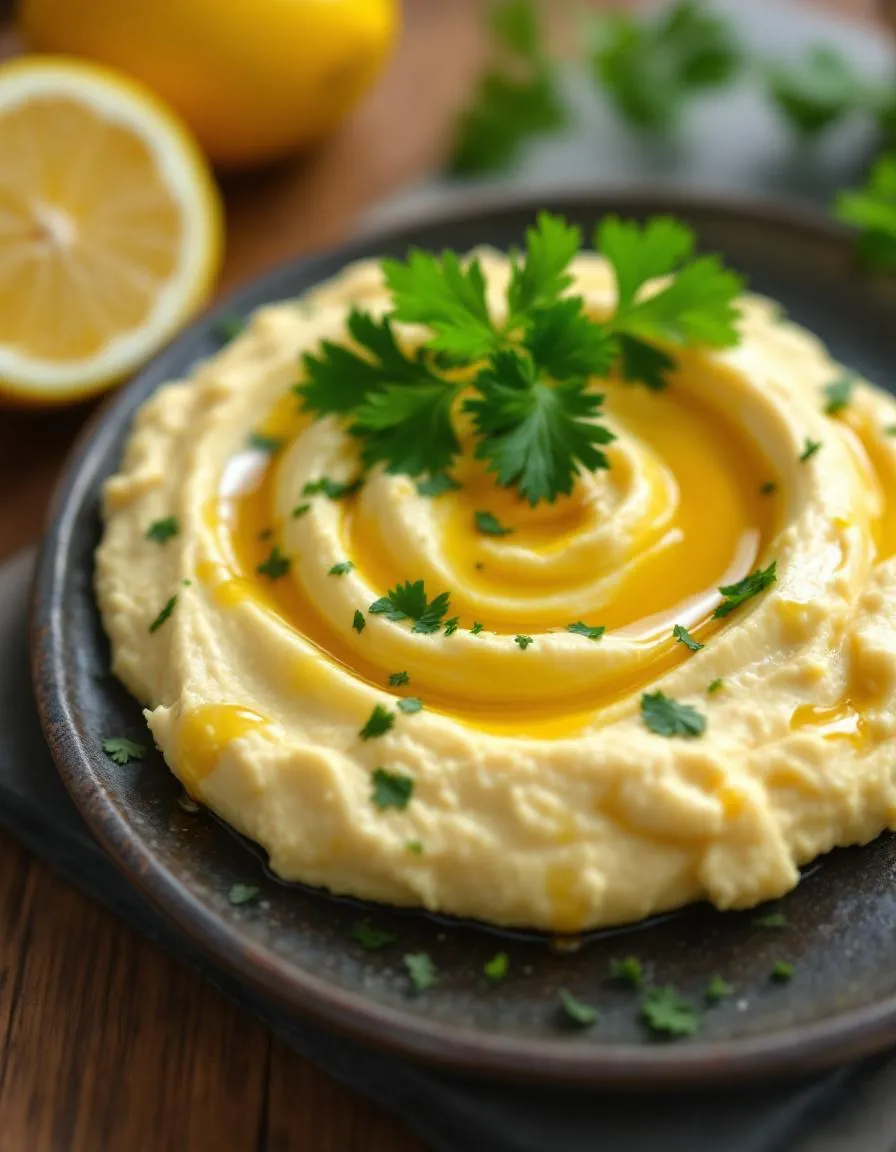
A zesty and creamy hummus with a bright lemon flavor, perfect for dipping or spreading.
Ingredients
Scale
For the Crust:
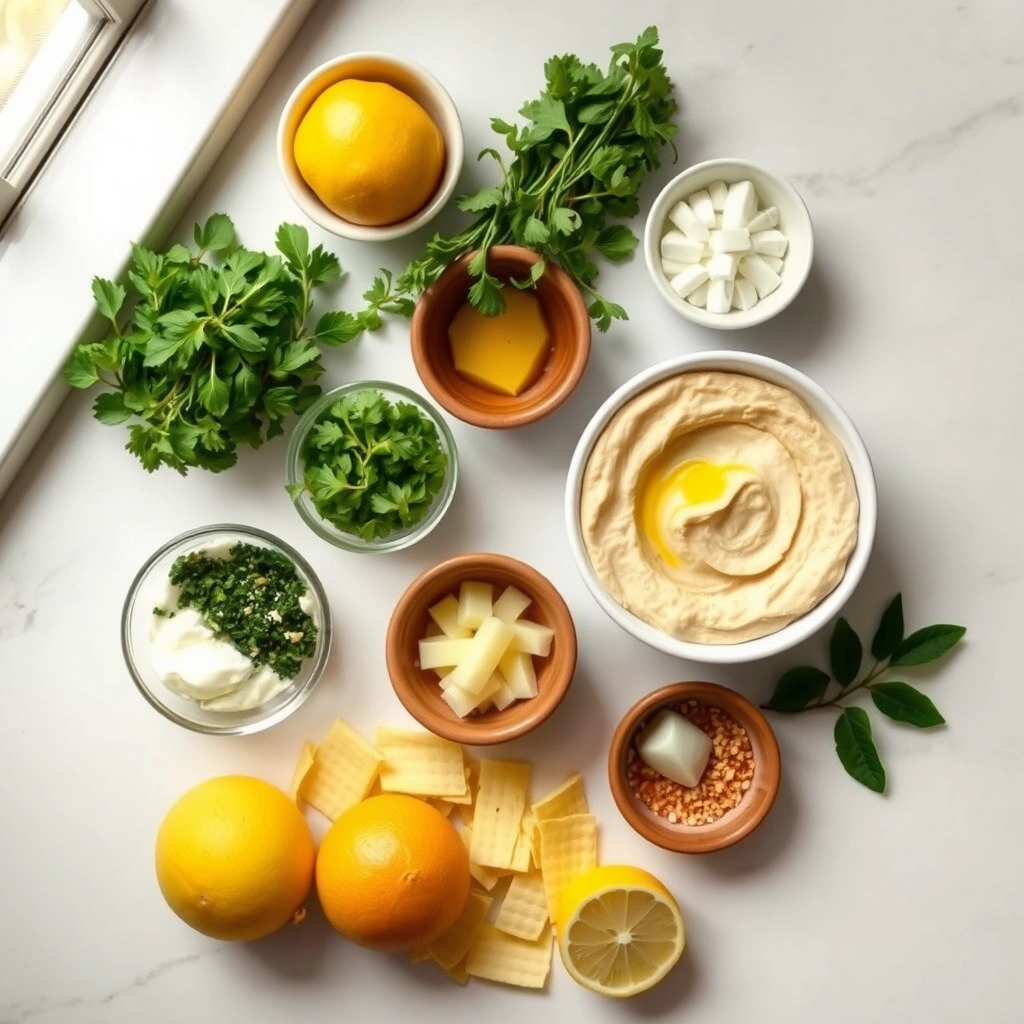
1 can (15 oz) chickpeas, drained and rinsed
1/4 cup tahini
1/4 cup fresh lemon juice
2 cloves garlic, minced
2 tablespoons olive oil
1/2 teaspoon ground cumin
1/2 teaspoon salt
2–3 tablespoons water (as needed for consistency)
1 tablespoon fresh parsley, chopped (for garnish)
Instructions
1. Prepare the Crust:
In a food processor, combine chickpeas, tahini, lemon juice, garlic, olive oil, cumin, and salt.
Process until smooth, scraping down the sides as needed.
Add water, one tablespoon at a time, until the desired consistency is reached.
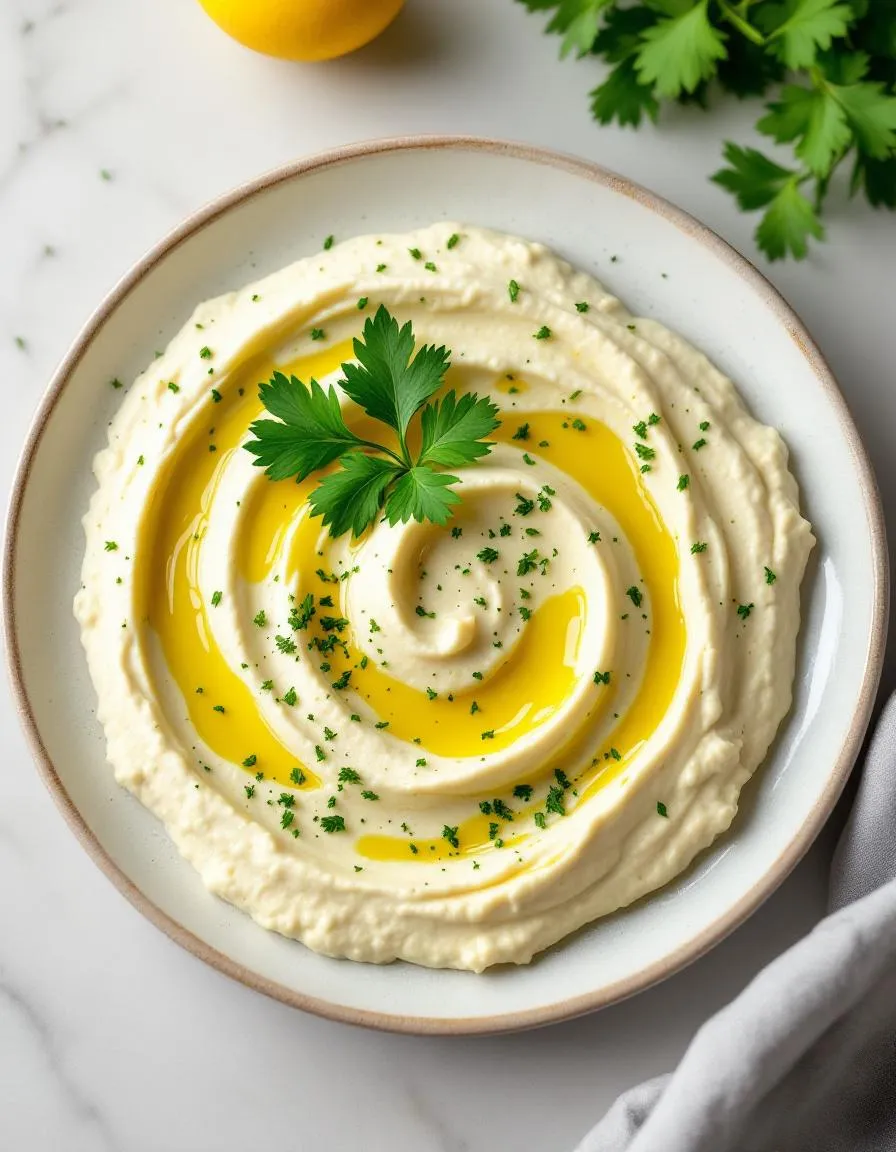
Transfer to a serving bowl and garnish with chopped parsley and a drizzle of olive oil.
Serve with pita bread, vegetables, or crackers.
Notes
You can customize the seasonings to taste.
How to Prepare This Dish
Steps and time-saving tips
Start by draining and rinsing a can of chickpeas, then pat them dry with a paper towel to remove excess moisture. This step ensures your Lemon Hummus turns out creamy instead of watery. Next, toss the chickpeas into a food processor along with tahini, fresh lemon juice, minced garlic, and a pinch of salt. Blend everything for about 30 seconds until the mixture starts to smooth out. Pause to scrape down the sides with a spatula, then drizzle in olive oil while the processor runs. For extra flavor, add a sprinkle of cumin or smoked paprika. If the hummus feels too thick, splash in a tablespoon of cold water and blend again until silky.
Meanwhile, toast some p
ita bread or chop fresh veggies for dipping. To save time, use pre-peeled garlic or bottled lemon juice—though fresh ingredients always deliver the brightest taste. Once blended, transfer the Lemon Hummus to a serving bowl and swirl the top with the back of a spoon. Finish with a drizzle of olive oil, a dusting of za’atar, or a handful of chopped parsley. Chill it for 15 minutes if you prefer a firmer texture, but it’s ready to enjoy right away.
Mistakes I’ve made and learned from
I once rushed the blending process and ended up with lumpy Lemon Hummus because I didn’t scrape the sides of the food processor. Now I pause halfway to ensure everything combines evenly. Another time, I skipped drying the chickpeas, and the hummus turned out disappointingly thin. Lesson learned: a quick pat-down makes all the difference. If you’re new to homemade dips, check out my guide on fixing runny hummus for troubleshooting tips. And if you love bold flavors, try adding roasted garlic like I did in this garlic tahini sauce—it adds incredible depth without overpowering the lemon.
n-and-variations">Cultural Connection and Variations
Where this recipe comes from
Lemon Hummus dances between tradition and innovation, with roots stretching back to the Levant. While classic hummus leans on tahini and garlic, the bright twist of lemon zest and juice gives this version a refreshing kick. In Lebanon, cooks often add extra citrus for a tangy bite, especially during summer gatherings. Meanwhile, in Greece, you might find Lemon Hummus paired with olives and feta, turning it into a mezze platter star.
My family’s version, however, skips the tahini entirely and doubles down on lemon, creating a lighter, almost whipped texture. It’s a nod to my aunt’s coastal Italian cooking, where citrus reigns supreme. Across the Mediterranean, cooks tweak Lemon Hummus to match local tastes—some add herbs like dill or parsley, while others fold in roasted peppers for sweetness. No matter the variation, the dish always feels like sunshine on a plate.
How it fits in today’s cooking
Today, Lemon Hummus fits perfectly into fast, flavorful meals. Busy home cooks love it as a protein-packed snack or a vibrant spread for meal prep lunches. Its zesty profile also makes it a hit at picnics and potlucks, especially when paired with crisp veggies or warm pita. Plus, it’s a forgiving recipe—swap in lime for lemon, or add a dash of cumin for warmth, and it still shines.
Modern twists keep it f
resh, too. Some blend in avocado for creaminess, while others top it with quick dinner recipes like grilled shrimp or spiced chickpeas. Whether you’re honoring tradition or experimenting, Lemon Hummus bridges the gap between comfort food and today’s crave for bold, healthy flavors. It’s proof that some dishes only get better with time.
Taste and Texture
What makes it delicious
Lemon Hummus bursts with bright, zesty flavors that dance on your tongue. The creamy, velvety texture melts effortlessly, while fresh lemon juice and zest add a tangy punch that wakes up your taste buds. Earthy tahini and garlic deepen the flavor, creating a rich yet refreshing balance. Meanwhile, a hint of cumin warms each bite, and a drizzle of olive oil adds a silky finish. Whether you dip or spread it, Lemon Hummus delivers a vibrant, satisfying experience that’s both light and indulgent.
Boosting the flavor
Elevate your Lemon Hummus by stirring in extra lemon zest or a pinch of smoked paprika for a smoky twist. For crunch, top it with toasted pine nuts or a sprinkle of za’atar. Pair it with warm pita bread or crisp veggies for contrast. If you love bold flavors, try adding a dash of harissa or a swirl of garlic herb sauce. For a creamy companion, serve it alongside roasted red pepper dip to create a dynamic duo of flavors. Small tweaks make this dish endlessly customizable.
Always use fresh lemon juice for the brightest flavor in your Lemon Hummus. Additionally, blend the tahini and lemon juice first to create a smooth, creamy base before adding chickpeas. For the best texture, process the hummus for at least two minutes, scraping down the sides as needed. Finally, taste and adjust the seasoning just before serving to balance the tangy lemon flavor.
Mistakes to avoid
One common mistake is skipping the ice water trick, which helps achieve ultra-smooth Lemon Hummus. Instead, add a tablespoon of ice water while blending to loosen the mixture without diluting flavor. Another error is using canned chickpeas without rinsing them thoroughly, which can leave a metallic taste. For more tips on perfecting dips, check out our guide on perfect party dips. Also, avoid overloading the food processor, as crowding the blades prevents even blending. Learn how to optimize appliance use in our kitchen hacks post.
g-suggestions">Serving and Pairing Suggestions
How to serve this dish
Brighten up any gathering with Lemon Hummus by serving it in a shallow bowl drizzled with extra olive oil and a sprinkle of za’atar. For a stunning presentation, arrange colorful vegetable crudités like bell peppers, cucumbers, and cherry tomatoes around the bowl. Alternatively, spread it on a rustic wooden board alongside warm pita wedges for a cozy appetizer. This versatile dip shines at brunch spreads, holiday parties, or even as a quick snack. To elevate the look, top it with lemon zest and fresh parsley for a pop of color.
What goes well with it
Pair Lemon Hummus with crisp white wine or a refreshing iced herbal tea to balance its zesty tang. For a heartier option, serve it alongside fluffy garlic naan or crunchy pita chips. The creamy texture also complements grilled vegetables, especially when paired with a side of roasted eggplant dip for a Mediterranean-inspired spread. Whether you choose light bites or bold flavors, each pairing enhances the bright, citrusy notes of the hummus.
math-faq-block">
What is lemon hummus made of?
Lemon hummus is a zesty twist on traditional hummus, made with chickpeas, tahini, olive oil, garlic, and fresh lemon juice. The bright citrus flavor pairs perfectly with the creamy texture, making it a refreshing dip or spread. You can also add lemon zest for an extra burst of flavor in your lemon hummus.
How do you make lemon hummus less bitter?
To balance bitterness in lemon hummus, adjust the tahini-to-lemon ratio or use sweeter tahini brands. Adding a pinch of sugar or honey can also counteract bitterness, while blending the hummus longer creates a smoother texture. Properly cooked chickpeas and fresh lemon juice will ensure your lemon hummus tastes bright, not bitter.
Can you freeze lemon hummus?
Yes, you can freeze lemon hummus for up to 4 months in an airtight container. Thaw it overnight in the fridge and stir well before serving, as separation may occur. For best results, omit fresh herbs before freezing and add them after thawing to keep your lemon hummus tasting fresh.
rank-math-faq-item">
What goes well with lemon hummus?
Lemon hummus pairs wonderfully with pita chips, fresh veggies like cucumber and bell peppers, or as a spread on sandwiches and wraps. Its citrusy flavor also complements grilled chicken, falafel, or roasted vegetables. For a vibrant appetizer, serve lemon hummus with olives and warm flatbread.
Best Air Fryer Chicken Breast – Juicy & Easy Recipe
Introduction
If you’ve ever struggled with dry, bland chicken breast, I totally get it. That’s why I’m so excited to share this game-changing recipe for Air Fryer Chicken Breast. Not only does it deliver juicy, flavorful results every time, but it also fits perfectly into busy weeknights. Whether you’re meal prepping or serving a quick family dinner, this method saves time without sacrificing taste. Plus, it’s a healthier alternative to frying, making it a win-win for anyone craving delicious simplicity.
Air Fryer Chicken Breast is exactly what it sounds like—tender, seasoned chicken cooked to perfection in an air fryer. The high-speed circulating air crisps the outside while locking in moisture, creating a texture that’s hard to resist. What makes it special? It’s versatile, foolproof, and ready in under 20 minutes. For anyone juggling work, kids, or just life in general, this recipe is a lifesaver. It aligns with my philosophy that great food should be accessible, not complicated. If you’re new to air frying, don’t worry—this recipe walks you through every step. And if you love easy, protein-packed meals, you’ll adore my Healthy Meal Prep Ideas for more inspiration. Trust me, once you try this method, you’ll never go back to dry chicken again.
Why I Love This Recipe
Air Fryer Chicken Breast holds a special place in my kitchen because it’s the recipe that won over my skeptical husband. He used to avoid chicken breast, calling it boring, but this version changed his mind. Now, it’s our go-to for quick dinners, salads, and even meal prep sandwiches. The simplicity reminds me of cooking with my grandma—no fancy techniques, just honest, satisfying food. Every time I make it, I’m reminded that the best meals don’t need to be complicated to be memorable.
Health and Nutrition
Why it’s good for your body
Air Fryer Chicken Breast packs a powerful nutritional punch while keeping calories in check. First, it delivers lean protein, which helps build and repair muscles, supports metabolism, and keeps you full longer. Because air frying requires little to no oil, you also cut down on unnecessary fats without sacrificing crispiness or flavor.
Additionally, Air Fryer Chicken Breast retains more nutrients compared to deep-frying. The quick cooking time preserves vitamins like B6 and niacin, which boost energy and brain function. Meanwhile, the high heat locks in moisture, ensuring each bite stays juicy and satisfying.
Beyond protein, Air Fryer Chicken Breast provides essential minerals like phosphorus and selenium. These nutrients strengthen bones and support immune health. Plus, you can easily pair it with fiber-rich veggies or whole grains for a well-rounded meal. Whether you’re meal-prepping or cooking dinner on a busy night, this dish keeps nutrition simple and delicious.
How it fits in a healthy lifestyle
Air Fryer Chicken Breast fits seamlessly into almost any diet plan. If you’re focused on high-protein eating, it’s a perfect staple—just pair it with quinoa or a fresh salad. For gluten-free or low-carb lifestyles, skip the breading and season with herbs and spices instead.
Heart-healthy eaters will appreciate how air frying reduces saturated fats compared to traditional frying methods. You can also explore our guide to balanced meal prep ideas to incorporate this protein into weekly routines. And if you’re managing portion control, Air Fryer Chicken Breast cooks evenly, making it easy to divide into single servings.
Busy families and fitness enthusiasts alike will find this recipe adaptable. For more inspiration on healthy cooking techniques, check out our tips for easy weeknight dinners. With minimal prep and maximum nutrition, Air Fryer Chicken Breast simplifies eating well every day.
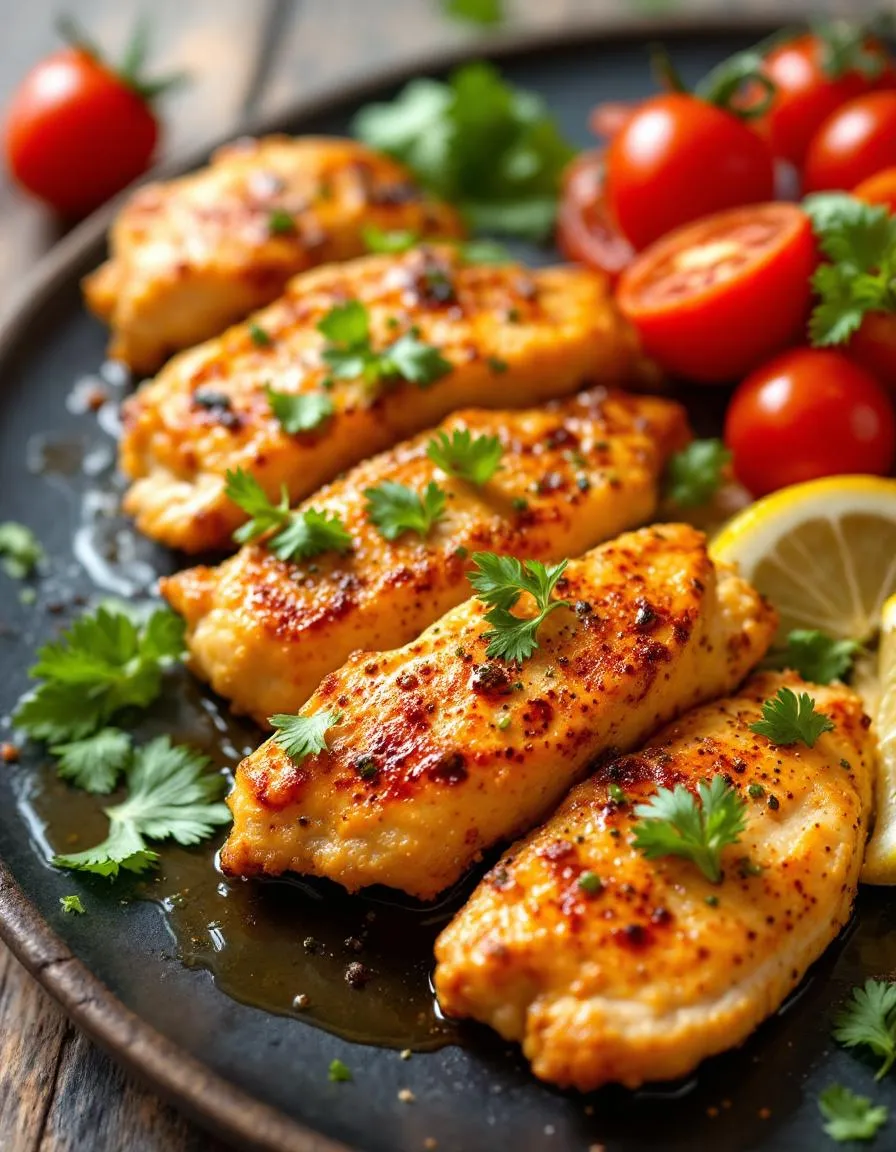
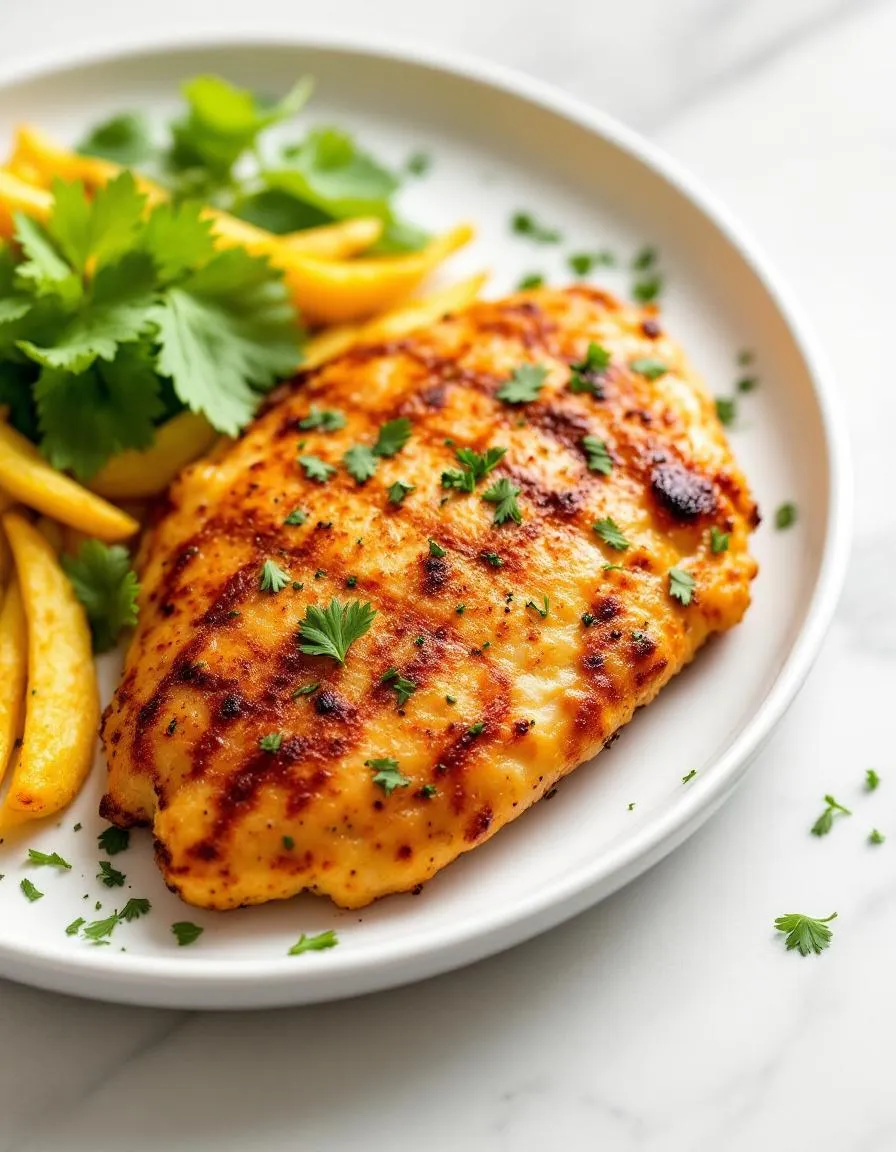
Juicy and flavorful chicken breast cooked to perfection in the air fryer.
Ingredients
Scale
For the Crust:
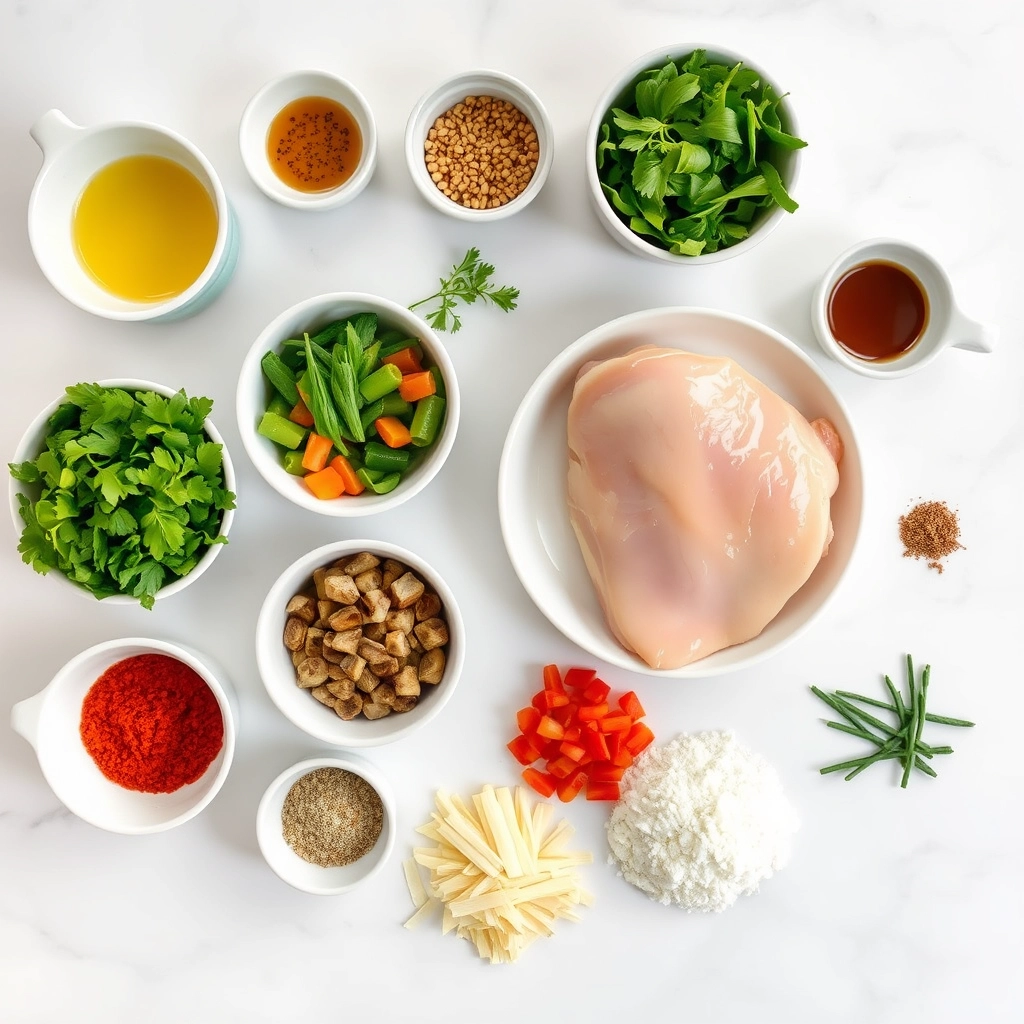
2 boneless, skinless chicken breasts
1 tablespoon olive oil
1 teaspoon garlic powder
1 teaspoon paprika
1/2 teaspoon salt
1/2 teaspoon black pepper
Instructions
1. Prepare the Crust:
Preheat the air fryer to 375°F (190°C) for 5 minutes.
Pat the chicken breasts dry with paper towels and brush with olive oil.
In a small bowl, mix garlic powder, paprika, salt, and black pepper. Rub the seasoning evenly over the chicken breasts.
Place the chicken breasts in the air fryer basket in a single layer, ensuring they are not touching.
Cook for 12-15 minutes, flipping halfway through, until the internal temperature reaches 165°F (74°C).
Let the chicken rest for 5 minutes before slicing and serving.
Notes
You can customize the seasonings to taste.
s-dish">How to Prepare This Dish
Steps and time-saving tips
Start by patting your Air Fryer Chicken Breast dry with paper towels to ensure a crispy exterior. Next, drizzle olive oil over the chicken and rub it evenly on both sides. Season generously with salt, pepper, and your favorite spices—I love garlic powder and smoked paprika for extra flavor. Meanwhile, preheat your air fryer to 375°F for about 3 minutes so it’s ready to go. Place the chicken in the basket in a single layer, leaving space between each piece for proper air circulation. Cook for 12-15 minutes, flipping halfway through, until the internal temperature reaches 165°F. For juicier results, let the chicken rest for 5 minutes before slicing. To save time, marinate the chicken the night before or batch-cook several breasts for easy meal prep. If you’re short on spices, a simple lemon-herb mix works wonders too.
Mistakes I’ve made and learned from
I’ve definitely overcooked Air Fryer Chicken Breast by skipping the preheat step—the uneven heat left some parts dry and others underdone. Now I always let the air fryer warm up first, just like I do with my roasted vegetables. Another lesson? Crowding the basket. I used to pile in the chicken, thinking I’d save time, but the steam made everything soggy. Spacing them out, as I learned from my air fryer fries, is the key to crispiness. If your chicken still dries out, try lowering the temperature by 25°F and checking it a few minutes early. Trust me, a meat thermometer is worth the investment!
n-and-variations">Cultural Connection and Variations
Where this recipe comes from
Air Fryer Chicken Breast might seem like a modern convenience, but its roots stretch back to classic cooking traditions. Around the world, people have been roasting, grilling, and frying chicken for centuries, often infusing it with local flavors. In the American South, for example, cooks might brine chicken breast before frying it, while in the Mediterranean, they’d drizzle it with olive oil and herbs. The air fryer simply gives us a quicker, healthier way to achieve that same crispy perfection.
In my family, Air Fryer Chicken Breast became a weeknight hero during busy seasons. My grandmother used to pan-fry hers with a dusting of paprika, but now we get similar results with less oil and mess. Across Asia, you’ll find versions marinated in soy sauce or five-spice powder, proving how adaptable this dish really is. Whether you’re craving something simple or globally inspired, the air fryer lets you explore without fuss.
How it fits in today’s cooking
Today, Air Fryer Chicken Breast fits perfectly into fast, healthy routines. Meal preppers love it because it reheats well, and fitness enthusiasts rely on its lean protein. Plus, it’s a blank canvas for flavors—toss it in buffalo sauce for game day or pair it with a fresh summer salad for a light dinner.
Modern cooks also tweak
the recipe for special occasions. Some add a honey glaze for holiday gatherings, while others keep it simple for quick weeknight dinners. No matter how you serve it, this dish proves that convenience doesn’t have to sacrifice taste or tradition.
Taste and Texture
What makes it delicious
Air Fryer Chicken Breast delivers a juicy, tender bite with a golden, slightly crisp exterior that crackles with every forkful. The high heat locks in moisture, creating a succulent interior that melts in your mouth, while the seasoning blends into a savory, aromatic crust. Garlic powder and smoked paprika add depth, infusing each piece with a warm, smoky fragrance. Meanwhile, a hint of lemon zest brightens the richness, balancing the dish with a subtle tang. Whether served hot or cold, Air Fryer Chicken Breast stays irresistibly flavorful, making it a versatile star for any meal.
Boosting the flavor
Elevate your Air Fryer Chicken Breast by brushing it with a honey-mustard glaze before cooking for a sweet-and-savory kick. Alternatively, try a sprinkle of herbed breadcrumbs for extra crunch. Pair it with a creamy avocado salsa or a drizzle of garlic herb sauce to amplify the richness. For a bolder twist, marinate the chicken in spicy chipotle marinade overnight—the smoky heat will permeate every bite. Simple swaps like these transform the dish without complicating the process, keeping it exciting yet effortless.
Always pat your Air Fryer Chicken Breast dry with paper towels before seasoning to ensure a crispier exterior. Meanwhile, preheat your air fryer for 3-5 minutes so the chicken cooks evenly from the start. For extra juiciness, lightly coat the chicken with olive oil or a thin layer of mayonnaise. Additionally, avoid overcrowding the basket to let hot air circulate properly around each piece. Finally, let the chicken rest for 5 minutes after cooking to lock in the juices before slicing.
Mistakes to avoid
One common mistake is skipping the preheat step, which can lead to unevenly cooked Air Fryer Chicken Breast. Instead, always preheat your air fryer just like you would a traditional oven. Another error is using thick cuts without adjusting the cook time, resulting in dry edges and undercooked centers. For perfectly cooked chicken, check out our guide on air fryer timings to match thickness with cooking duration. Also, avoid flipping the chicken too often—just once halfway through ensures a golden crust without losing moisture. If you’re unsure about seasoning blends, our chicken seasoning ideas offer simple, flavorful solutions.
g-suggestions">Serving and Pairing Suggestions
How to serve this dish
Air Fryer Chicken Breast shines when you plate it with style. For a casual weeknight dinner, slice it and fan the pieces over a bed of fluffy quinoa or rice. Alternatively, layer it atop a vibrant salad for a protein-packed lunch. If you’re hosting guests, garnish with fresh herbs like parsley or thyme and a squeeze of lemon for a pop of color. This dish also works beautifully for meal prep—simply pack it with roasted veggies for a balanced grab-and-go option. Whether it’s a cozy family meal or a festive gathering, Air Fryer Chicken Breast adapts effortlessly.
What goes well with it
Pair Air Fryer Chicken Breast with creamy garlic mashed potatoes for a comforting classic. The rich, buttery flavors balance the lean, juicy chicken perfectly. For a lighter option, try a crisp arugula salad with lemon vinaigrette—its tangy brightness cuts through the dish’s savoriness. Don’t forget a side of roasted Brussels sprouts, which add a delightful crunch. If you love dipping sauces, our homemade honey mustard or tangy BBQ sauce elevates every bite. For drink pairings, a chilled glass of white wine or sparkling water with lemon complements the meal wonderfully.
math-faq-block">
How long should I cook chicken breast in an air fryer?
Air Fryer Chicken Breast typically cooks in 12–16 minutes at 375°F, depending on thickness. Flip halfway through for even crispiness. Always check the internal temperature reaches 165°F for safety.
Do you need to flip chicken breast in the air fryer?
Yes, flipping Air Fryer Chicken Breast halfway ensures even cooking and crispiness on both sides. This prevents one side from drying out while the other stays undercooked.
Should I put oil on chicken breast in the air fryer?
A light spray or brush of oil enhances crispiness, but Air Fryer Chicken Breast can cook without it. Use ½ teaspoon of high-smoke-point oil like avocado or olive oil for best results.
rank-math-faq-item">
Why is my air fryer chicken breast dry?
Overcooking or using thin cuts often dries out Air Fryer Chicken Breast. Brine the meat first or cook at 360°F for juicier results. Always use a meat thermometer to avoid overdoneness.
Best Grilled Artichoke Recipe – Easy and Flavorful
Introduction
If you’ve ever craved a dish that feels both indulgent and wholesome, this Grilled Artichoke Recipe is for you. Picture tender, smoky artichoke hearts with a hint of lemon and garlic—simple yet unforgettable. Whether you’re hosting a summer barbecue or just treating yourself, this recipe turns an underrated veggie into a showstopper. Plus, it pairs perfectly with my garlic aioli dipping sauce for an extra layer of flavor.
Grilled artichokes might seem intimidating at first, but trust me, they’re easier than you think. Unlike boiling or steaming, grilling unlocks a depth of flavor that makes every bite worth savoring. The charred edges add a satisfying crunch, while the marinade keeps the inside juicy. This dish fits right into my philosophy of elevating everyday ingredients without fuss. It’s also a great way to impress guests or add a veggie-forward twist to your grilling essentials lineup. Best of all, it’s versatile—serve it as an appetizer, side, or even a light main course.
Why I Love This Recipe
This Grilled Artichoke Recipe holds a special place in my heart because it reminds me of lazy summer evenings with friends. The first time I made it, I worried the artichokes would be too tricky, but the moment I tasted that smoky, lemony goodness, I knew it was a keeper. Now, it’s my go-to when I want something that feels gourmet without the stress. There’s something magical about how grilling transforms humble veggies into something extraordinary—and that’s exactly what cooking should be about.
Health and Nutrition
Why it’s good for your body
Grilled Artichoke Recipe packs a powerful nutritional punch while delighting your taste buds. First, artichokes are rich in fiber, which supports digestion and keeps you feeling full longer. Additionally, they contain antioxidants like quercetin and rutin, which help combat inflammation. When you grill them, you enhance their natural flavors without adding unnecessary fats or oils.
Moreover, this dish delivers a healthy dose of vitamins C and K. Vitamin C boosts your immune system, while vitamin K promotes bone health. Since Grilled Artichoke Recipe uses minimal ingredients, you avoid processed additives that can derail your wellness goals. The olive oil often used in the recipe also provides heart-healthy monounsaturated fats.
Finally, artichokes naturally support liver function by aiding detoxification. When you enjoy Grilled Artichoke Recipe, you’re treating your body to a meal that’s as nutritious as it is delicious. The simple preparation ensures you retain most of these benefits, making it a smart choice for health-conscious eaters.
How it fits in a healthy lifestyle
Grilled Artichoke Recipe fits seamlessly into a balanced diet, whether you’re focusing on heart health or simply eating cleaner. Its low-calorie, high-fiber profile makes it ideal for weight management, and since it’s naturally gluten-free, it’s perfect for those with dietary restrictions. Pair it with a lean protein like grilled chicken or fish for a complete, nutrient-dense meal.
If you’re following a Mediterranean diet, this dish aligns perfectly with its emphasis on vegetables and healthy fats. For more inspiration on wholesome meals, check out our guide to Mediterranean diet recipes. Even busy weeknights can benefit from Grilled Artichoke Recipe—it’s quick to prepare and pairs well with other easy dishes like our quick healthy sides. Whether you’re meal prepping or hosting a dinner party, this recipe supports your health goals without sacrificing flavor.
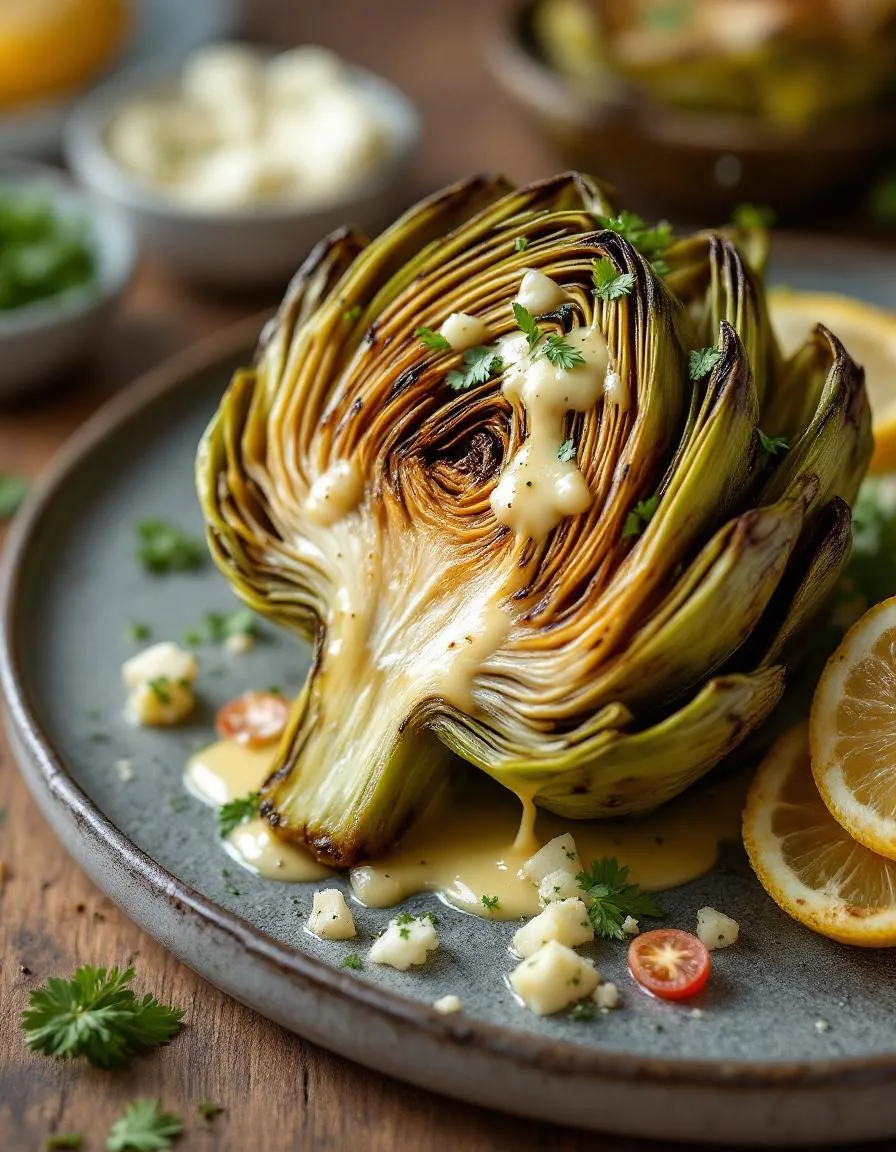
A simple and delicious grilled artichoke recipe with garlic and lemon flavors.
Ingredients
Scale
For the Crust:
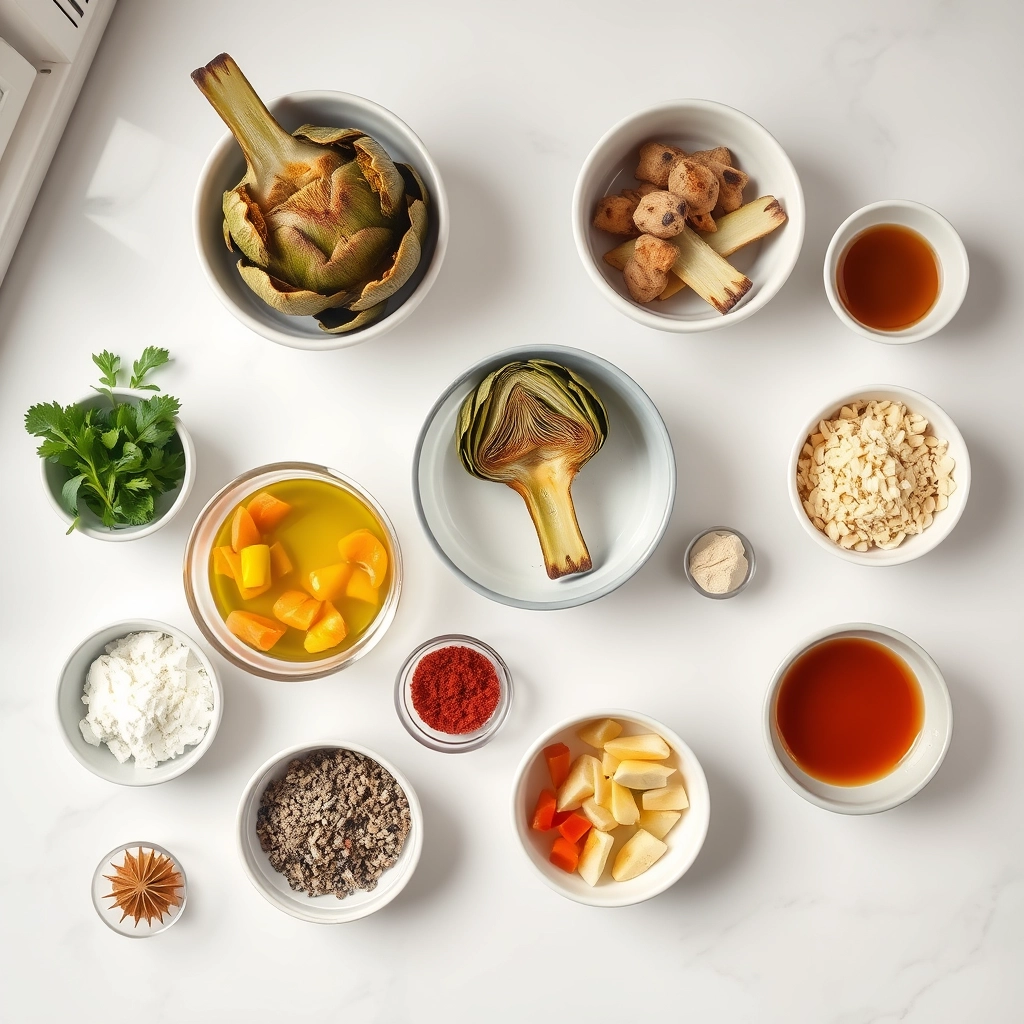
2 large artichokes
2 cloves garlic (minced)
1/4 cup olive oil
1 lemon (juiced)
1/2 tsp salt
1/4 tsp black pepper
1/4 tsp red pepper flakes (optional)
Instructions
1. Prepare the Crust:
Trim the artichokes by cutting off the top third and removing the tough outer leaves.
Steam the artichokes for 15-20 minutes until tender.
In a bowl, mix olive oil, minced garlic, lemon juice, salt, black pepper, and red pepper flakes.
Cut the steamed artichokes in half and brush with the garlic-lemon mixture.
Grill the artichokes for 5-7 minutes per side until lightly charred.
Serve warm with extra dipping sauce if desired.
Notes
You can customize the seasonings to taste.
“`html
="how-to-prepare-this-dish">How to Prepare This Dish
Steps and time-saving tips
Start by trimming the artichokes for your Grilled Artichoke Recipe. Slice off the top third and trim the stems, then use kitchen shears to snip the thorny tips from the leaves. Next, halve each artichoke lengthwise and scoop out the fuzzy choke with a spoon. Meanwhile, bring a large pot of salted water to a boil and add a squeeze of lemon to prevent browning. Parboil the artichokes for about 10 minutes until slightly tender, then drain and pat them dry. This step saves grilling time and ensures even cooking.
While the artichokes cool, whisk together olive oil, minced garlic, salt, and pepper in a small bowl. Drizzle this mixture generously over the cut sides of the artichokes, making sure to get some between the leaves. Heat your grill to medium-high and place the artichokes cut-side down for 5-7 minutes until char marks appear. Flip them carefully and grill for another 5 minutes. For extra flavor, sprinkle grated Parmesan or a squeeze of fresh lemon juice before serving.
To save time, prep the
artichokes a day ahead and store them in lemon water. You can also mix the oil marinade in bulk for future use. If you’re short on grill space, roast them in the oven at 400°F for similar results. Just keep an eye on them to avoid overcooking.
Mistakes I’ve made and learned from
I once rushed the parboiling step for my Grilled Artichoke Recipe, leaving the centers too firm. After a few disappointing batches, I learned to test a leaf for doneness—it should pull away easily. Another time, I skipped the lemon water soak, and the artichokes turned brown before grilling. Now I always keep a bowl of acidulated water nearby, just like I do for my avocado prep. Also, overcrowding the grill led to uneven charring, so I grill in batches if needed. For more on avoiding kitchen mishaps, check out my common cooking mistakes guide—it’s saved me more than once!
Grilled Artichoke Recipe traces its roots to the sunny Mediterranean, where artichokes thrive in coastal climates. Farmers in Italy and Greece often char them over open flames, enhancing their earthy sweetness with smoky depth. Meanwhile, in Spain, cooks might stuff the leaves with breadcrumbs and garlic before grilling. Every region adds its own twist, proving how versatile this dish truly is.
In my family, Grilled Artichoke Recipe became a summer staple. We’d drizzle them with lemon-infused olive oil and serve them alongside grilled meats. Friends from California swear by dipping the leaves in aioli, while others add Parmesan for a richer finish. No matter the variation, the ritual of peeling each leaf and scraping off the tender flesh feels timeless—a shared experience across cultures.
ays-cooking">How it fits in today’s cooking
Today, Grilled Artichoke Recipe fits perfectly into modern cooking trends. Health-conscious eaters love its fiber-rich profile, while plant-based diets celebrate it as a hearty centerpiece. For quick weeknight meals, many pair it with easy weeknight dinners, like grilled chicken or quinoa bowls. It’s also a star at gatherings, whether as an appetizer or part of a summer entertaining menu.
Social media has given the dish new life, too. Home cooks experiment with spicy marinades or air-fryer adaptations. Yet, the essence remains the same: a simple, satisfying way to enjoy fresh produce. Whether you’re hosting a barbecue or craving a light snack, Grilled Artichoke Recipe bridges tradition and modern tastes effortlessly.
Taste and Texture
What makes it delicious
This Grilled Artichoke Recipe delivers a smoky, charred flavor with a tender yet slightly crisp bite. The outer leaves caramelize on the grill, offering a subtle crunch that gives way to a creamy, buttery heart. Garlic and lemon infuse every bite with bright, zesty notes, while a drizzle of olive oil adds richness. Meanwhile, the earthy aroma of grilled artichokes mingles with fresh herbs, making each mouthful irresistible. Whether you serve it as a side or a standalone dish, this Grilled Artichoke Recipe transforms a simple vegetable into a showstopper.
r">Boosting the flavor
For an extra punch, try rubbing the artichokes with a spicy chimichurri sauce before grilling. Alternatively, sprinkle them with smoked paprika or grated Parmesan for a savory twist. If you love bold contrasts, pair them with a tangy lemon aioli for dipping. A squeeze of fresh lime or a pinch of red pepper flakes can also elevate the flavors without overpowering the dish. Experiment with different herbs or citrus blends to make this recipe your own.
Tips for Success
Best practices for results
First, always trim the artichoke stems to about an inch so they sit flat on the grill. Next, steam them until just tender before grilling to ensure even cooking. For the best flavor, generously brush the Grilled Artichoke Recipe with olive oil and lemon juice before placing them on the grill. Additionally, keep the heat medium-high to get those perfect char marks without burning. Finally, serve them immediately with a dipping sauce for maximum freshness.
>Mistakes to avoid
One common mistake is skipping the steaming step, which can leave the artichokes too tough. Instead, steam them first for a tender texture. Another error is overcooking, so watch them closely after the 5-minute mark. For more grilling tips, check out our guide on grilling vegetables perfectly. Also, avoid using too much salt before grilling, as it can draw out moisture. For balanced seasoning ideas, explore our healthy dipping sauces to complement the Grilled Artichoke Recipe.
Serving and Pairing Suggestions
How to serve this dish
Elevate your Grilled Artichoke Recipe by arranging the charred halves on a rustic wooden platter for a casual yet elegant look. Alternatively, drizzle them with extra virgin olive oil and sprinkle flaky sea salt right before serving to enhance their smoky flavor. For special occasions, pair them with a vibrant aioli or lemon-herb dip in small ramekins to encourage dipping. Meanwhile, this dish shines as a standout appetizer at summer barbecues or a refreshing addition to a Mediterranean-inspired mezze platter. Finally, garnish with fresh parsley or microgreens for a pop of color that makes the Grilled Artichoke Recipe even more inviting.
What goes well with it
First, try pairing your Grilled Artichoke Recipe with a crisp white wine like Sauvignon Blanc, which cuts through the richness of the charred edges. If you prefer non-alcoholic options, a sparkling lemonade with a hint of mint offers a refreshing contrast. For sides, consider serving it alongside a light quinoa salad or our creamy garlic mashed potatoes for a heartier meal. Additionally, a tangy yogurt dip or our zesty roasted red pepper sauce adds a delightful creaminess that balances the artichokes’ smoky depth. Whatever you choose, these pairings will make your Grilled Artichoke Recipe the star of the table.
To prepare artichokes for grilling, trim the top 1 inch and stem, then cut them in half lengthwise. Scoop out the fuzzy choke with a spoon and brush the cut sides with olive oil, lemon juice, and seasonings. This ensures your Grilled Artichoke Recipe turns out tender and flavorful.
How long does it take to grill artichokes?
Grilled artichokes typically take 15–20 minutes over medium heat, turning occasionally until charred and tender. For best results, parboil them for 10 minutes before grilling to soften the leaves. This method ensures your Grilled Artichoke Recipe cooks evenly.
rank-math-faq-item">
What dipping sauce goes well with grilled artichokes?
A classic garlic aioli or lemon-herb mayo pairs perfectly with grilled artichokes. For a lighter option, try a balsamic glaze or yogurt-based dill sauce. These dips enhance the smoky flavor of your Grilled Artichoke Recipe.
Can you grill artichokes without boiling them first?
Yes, but they’ll take longer (30–40 minutes) and may dry out. Boiling first helps soften the tough leaves, making the Grilled Artichoke Recipe more enjoyable. If grilling raw, wrap in foil with oil and seasonings to steam them slightly.
Best Coconut Custard Pie – Classic Recipe
Introduction
There’s something undeniably comforting about a slice of Coconut Custard Pie. Whether you’re reminiscing about family gatherings or simply craving a dessert that feels like a warm hug, this classic treat never fails to deliver. With its creamy filling, flaky crust, and just the right amount of tropical sweetness, it’s the kind of recipe that turns an ordinary day into something special. Plus, if you’re a fan of custard desserts like my Vanilla Bean Panna Cotta, you’ll adore this pie’s velvety texture and rich flavor.
Coconut Custard Pie is a timeless dessert that combines simplicity with indulgence. Unlike overly complicated pastries, it relies on humble ingredients—eggs, milk, sugar, and shredded coconut—to create a symphony of taste and texture. The custard bakes into a silky-smooth filling, while the coconut adds a subtle crunch and nutty aroma. What makes it truly stand out is its versatility. Serve it chilled for a refreshing summer treat or warm with a dollop of whipped cream for cozy winter vibes. It’s also a fantastic way to use up leftover coconut, much like my Coconut Macaroons. Perfect for potlucks, holidays, or just because, this pie embodies the kind of effortless elegance that defines brekcakes.com—where every recipe feels like home.
Why I Love This Recipe
This Coconut Custard Pie holds a special place in my heart because it reminds me of my grandmother’s kitchen. She used to make it for birthdays, and the scent of toasted coconut would fill the entire house. Even now, every bite takes me back to those moments of laughter and shared stories around the table. It’s more than just a dessert—it’s a delicious slice of nostalgia that I’m thrilled to pass on to you.
Health and Nutrition
Why it’s good for your body
Coconut Custard Pie offers more than just irresistible flavor. First, coconut milk provides healthy fats that support brain function and energy levels. These medium-chain triglycerides (MCTs) may even boost metabolism. Meanwhile, eggs in the custard deliver high-quality protein to keep you full longer.
Additionally, Coconut Custard Pie contains essential nutrients like iron and potassium. The coconut adds fiber, which aids digestion and helps regulate blood sugar. Unlike many desserts, this pie avoids artificial additives when made with wholesome ingredients.
Furthermore, the natural sweetness of coconut means you can often reduce added sugars. For a lighter version, try swapping refined sugar with honey or maple syrup. Whether you enjoy it as an occasional treat or a special dessert, Coconut Custard Pie brings both indulgence and nourishment.
How it fits in a healthy lifestyle
Coconut Custard Pie fits surprisingly well into balanced eating habits when enjoyed mindfully. For gluten-free diets, simply use almond flour or a gluten-free crust alternative. The healthy fats from coconut make it a satisfying choice that curbs sugar cravings.
Pair a small slice with protein-rich foods like Greek yogurt for a balanced snack. If you’re exploring heart-healthy desserts, check out our guide to smarter sweet treats. For those tracking macros, Coconut Custard Pie offers a better ratio of fats and proteins than typical pastries.
Remember, moderation is key. Enjoy it as part of varied meals alongside nutrient-dense dishes like those in our meal prep collection. This way, you savor the flavors without compromising your wellness goals.
Start by preheating your oven to 350°F so it’s ready when you finish mixing the Coconut Custard Pie filling. While it heats, whisk together the eggs, sugar, and vanilla in a large bowl until smooth. Then, slowly pour in the warm milk while stirring constantly to avoid curdling. Fold in the shredded coconut last, making sure it’s evenly distributed. For a time-saving hack, use a store-bought pie crust—just blind bake it for 10 minutes first to prevent sogginess. Pour the custard mixture into the crust and sprinkle extra coconut on top for a golden finish. Bake for 45-50 minutes until the center jiggles slightly but isn’t liquid. Let the pie cool completely before slicing, or chill it for a firmer texture. If you’re short on time, speed up cooling by placing it in the fridge for an hour. Serve with a dollop of whipped cream or a drizzle of caramel for extra flair.
Mistakes I’ve made and learned from
I’ve learned the hard way that rushing the cooling process for Coconut Custard Pie leads to a messy slice. Once, I served it too warm, and the custard oozed everywhere—now I always chill it for at least two hours. Another mistake? Overbaking. The first time I made this pie, I left it in too long, and the texture turned rubbery. Now I set a timer and check early. If you’re new to custard pies, my guide on perfect pie crusts helps avoid underbaking the shell. And if your filling cracks, don’t panic—my tips on fixing cracked custards will save the day. Trust me, even imperfect pies taste delicious!
Coconut Custard Pie carries a rich history, blending tropical flavors with classic comfort food. Many trace its roots to the American South, where bakers often added coconut to traditional custard pies for extra texture and sweetness. Meanwhile, in the Caribbean, cooks might infuse it with spices like nutmeg or rum, turning it into a festive treat. Even in the Philippines, a similar dessert called “buko pie” highlights young coconut meat, proving how versatile this dish can be.
In my family, Coconut Custard Pie was a holiday staple, always appearing at Thanksgiving alongside pumpkin pie. My grandmother swore by toasting the coconut first, which gave it a deeper, nuttier flavor. Some bakers skip the crust entirely, opting for a lighter, crustless version. Others fold in citrus zest or swap dairy for coconut milk, making it creamier. No matter the twist, Coconut Custard Pie always feels like a warm hug from the past.
ays-cooking">How it fits in today’s cooking
Today, Coconut Custard Pie still shines as a nostalgic favorite, especially during summer picnics or winter gatherings. Modern cooks love adapting it—some use gluten-free crusts, while others layer it into parfaits for a fun twist. Its simplicity also makes it perfect for busy weeknights; you can whip it up with pantry staples and still impress guests.
Many bakers now pair it with trendy flavors, like matcha or salted caramel, proving its versatility. For those watching sugar intake, sugar-free versions work just as well. Whether you serve it warm or chilled, Coconut Custard Pie remains a timeless dish that bridges generations and tastes.
Taste and Texture
What makes it delicious
Every bite of Coconut Custard Pie delivers a dreamy contrast of textures and flavors. The custard melts in your mouth, rich and velvety, while toasted coconut flakes add a delicate crunch. Sweet, tropical coconut infuses every layer, balanced by the warm vanilla and buttery crust. As it bakes, the aroma fills your kitchen with notes of caramelized sugar and toasted coconut. Whether served chilled or slightly warm, Coconut Custard Pie feels indulgent yet comforting—like a sweet escape in every forkful.
r">Boosting the flavor
Elevate your Coconut Custard Pie with a drizzle of homemade caramel sauce for extra depth, or sprinkle dark chocolate shavings for a bittersweet twist. Toasting the coconut flakes longer deepens their nutty flavor, while a pinch of cardamom or nutmeg enhances the custard’s warmth. For a showstopping finish, pair it with vanilla bean whipped cream—the airy texture complements the pie’s creaminess perfectly. With these tweaks, your Coconut Custard Pie becomes even more unforgettable.
Tips for Success
Best practices for results
Always pre-bake your pie crust for a crisp base, especially since Coconut Custard Pie has a creamy filling that needs extra support. Use full-fat coconut milk for the richest texture, and toast your shredded coconut lightly before mixing it in for deeper flavor. Meanwhile, temper your eggs carefully by slowly adding warm custard to prevent curdling. For the best set, bake the pie just until the center jiggles slightly when shaken. Finally, let it cool completely before slicing to ensure clean cuts.
>Mistakes to avoid
Overmixing the custard can introduce air bubbles, leading to a cracked surface. Instead, stir gently until just combined. Also, avoid overbaking—Coconut Custard Pie continues to firm up as it cools. If your crust browns too quickly, tent the edges with foil as detailed in our perfect pie crust guide. For more troubleshooting, check our custard texture fixes to address issues like graininess or weeping.
Serving and Pairing Suggestions
How to serve this dish
For a stunning presentation, slice your Coconut Custard Pie into generous wedges and plate them on chilled dessert plates. Meanwhile, sprinkle toasted coconut flakes or a dusting of powdered sugar on top for an elegant touch. Alternatively, serve it family-style on a decorative pie stand for holiday gatherings or summer barbecues. Since Coconut Custard Pie has a rich yet light texture, it works beautifully as a finale to brunch or a festive dinner. To make it extra special, add a dollop of whipped cream and fresh berries on the side.
What goes well with it
Pair this creamy pie with a cup of hot coffee or chai tea to balance its sweetness with a hint of bitterness. If you prefer something cooler, try a scoop of vanilla bean ice cream for a delightful contrast in temperatures. For a tropical twist, serve it alongside a refreshing Piña Colada Smoothie, which echoes the coconut flavor. If you want to turn dessert into a full spread, offer a slice with our Classic Banana Bread for a comforting duo.
What is the difference between coconut custard pie and coconut cream pie?
Coconut custard pie has a thicker, egg-based custard filling that sets firmly, while coconut cream pie uses a lighter, pudding-like filling. Both feature coconut, but custard pie often has a denser texture and richer flavor. Coconut custard pie also typically bakes with the filling, whereas cream pie fillings are cooked separately.
How do you keep coconut custard pie from getting soggy?
Pre-bake (blind bake) your pie crust for 10-15 minutes before adding the coconut custard filling to create a moisture barrier. Another tip is to brush the crust with egg wash or melted chocolate before baking. Properly setting the custard by baking until the center jiggles slightly also prevents sogginess in coconut custard pie.
rank-math-faq-item">
Can you freeze coconut custard pie?
Yes, coconut custard pie freezes well for up to 2-3 months. Wrap it tightly in plastic wrap and aluminum foil to prevent freezer burn. Thaw overnight in the refrigerator before serving. Note that the texture may soften slightly, but the rich coconut custard flavor remains delicious.
Why did my coconut custard pie crack on top?
Cracking usually occurs when coconut custard pie is overbaked or cools too quickly. To prevent this, bake until the edges are set but the center still wobbles slightly, then cool gradually at room temperature. Covering with plastic wrap while cooling can also help maintain moisture and prevent cracks in your coconut custard pie.
Easy Instant Pot Chicken and Noodles Recipe
Introduction
There’s something deeply comforting about a bowl of Instant Pot Chicken and Noodles—especially on those days when you crave a hug in food form. Whether you’re juggling a busy schedule or simply want a cozy meal that tastes like home, this recipe delivers. Plus, thanks to the Instant Pot, you can enjoy tender chicken, rich broth, and perfectly cooked noodles in a fraction of the time. Trust me, once you try it, you’ll wonder how you ever lived without it.
Instant Pot Chicken and Noodles is the ultimate comfort food, blending simplicity with soul-warming flavors. Unlike traditional stovetop versions, the Instant Pot locks in moisture, ensuring every bite is packed with tender chicken and silky noodles. This dish matters because it solves the age-old dilemma of wanting a homemade meal without spending hours in the kitchen. It’s also incredibly versatile—swap in your favorite veggies or adjust the seasoning to make it your own. If you love easy, hearty recipes, you’ll adore this one as much as my Instant Pot Beef Stew or my Creamy Tuscan Chicken. Perfect for weeknights or lazy Sundays, it’s a dish that brings people together with minimal effort.
Why I Love This Recipe
Instant Pot Chicken and Noodles holds a special place in my heart because it reminds me of my grandmother’s kitchen. She used to make a similar dish on rainy afternoons, and the aroma alone could lift anyone’s spirits. Now, whenever I make it, I feel that same warmth—and I love how it fills my home with nostalgia. Best of all, it’s a recipe that never fails to impress, whether I’m cooking for my family or sharing it with friends. Simple, satisfying, and full of love—just like the best meals should be.
Health and Nutrition
Why it’s good for your body
Instant Pot Chicken and Noodles delivers a powerhouse of nutrients in every comforting bite. First, the lean chicken breast provides high-quality protein to support muscle repair and keep you full longer. Additionally, the carrots and celery add fiber, vitamins A and K, and antioxidants to boost immunity and digestion. Meanwhile, the egg noodles offer energizing carbohydrates, especially when you opt for whole wheat varieties.
Because the Instant Pot locks in moisture and flavor, you retain more nutrients compared to traditional boiling methods. Moreover, the broth in Instant Pot Chicken and Noodles hydrates your body while delivering collagen from simmered bones, which may support joint health. The dish also balances sodium levels naturally, especially if you use low-sodium broth or fresh herbs for seasoning.
Finally, this meal is incredibly versatile. You can easily swap ingredients to fit dietary needs, like gluten-free noodles or extra veggies. Whether you need a post-workout recovery meal or a cozy immune-boosting dinner, Instant Pot Chicken and Noodles checks all the boxes for taste and nutrition.
How it fits in a healthy lifestyle
Instant Pot Chicken and Noodles fits seamlessly into balanced eating habits. For protein-focused diets, the chicken offers a lean source to help meet daily goals without excess fat. If you prefer gluten-free options, simply substitute regular noodles with rice noodles or zucchini ribbons, as suggested in our gluten-free pasta guide.
This dish also supports heart-healthy eating when you use low-sodium broth and load up on vegetables. The fiber from carrots and celery aids digestion, while the broth keeps you hydrated. For meal preppers, Instant Pot Chicken and Noodles stores well and reheats beautifully, making it a practical choice for busy weeks. Pair it with a fresh salad from our quick healthy salads roundup for a complete, nutrient-packed meal.
Start by setting your Instant Pot to sauté mode and heating a tablespoon of olive oil. Add diced onions and minced garlic, stirring until they soften and release their aroma. Next, toss in bite-sized chicken pieces, seasoning them with salt, pepper, and a pinch of thyme for extra flavor. Once the chicken turns golden, pour in low-sodium chicken broth and scrape the bottom to loosen any browned bits—this adds depth to your Instant Pot Chicken and Noodles. Secure the lid, switch to high pressure, and set the timer for 10 minutes. Meanwhile, whisk together a simple slurry of cornstarch and water to thicken the sauce later. When the timer beeps, carefully quick-release the pressure and stir in wide egg noodles. Lock the lid again and cook on high pressure for just 4 more minutes. Finally, release the pressure, stir in the slurry, and let the residual heat thicken the broth into a creamy, velvety sauce. For a time-saving twist, use pre-cut chicken or frozen noodles, but adjust cooking times slightly to avoid mushiness.
Mistakes I’ve made and learned from
Early on, I learned the hard way that overcooking noodles turns them into glue—especially if I left them in the Instant Pot too long after cooking. Now, I set a separate timer for the noodle step and immediately release the pressure to stop the cooking process. Another blunder? Skipping the slurry step, which left my broth watery. A reader tip from my Instant Pot basics guide saved me: always mix the slurry cold to prevent clumping. I also once overloaded the pot, triggering the dreaded “burn” warning. Now, I stick to the max fill line and layer ingredients as outlined in my common Instant Pot mistakes post. These tweaks made all the difference between a forgettable meal and the cozy, restaurant-worthy dish my family craves.
Instant Pot Chicken and Noodles carries the cozy charm of home cooking across generations. Originally, this dish roots itself in American comfort food, often appearing in Midwest kitchens where hearty, simple meals rule. Families would simmer chicken with thick egg noodles, creating a creamy, satisfying bowl perfect for chilly evenings. However, variations pop up worldwide. In Germany, a similar dish might use spaetzle instead of noodles, while in Asia, you’ll find lighter versions with rice noodles and ginger.
My grandma made her Instant Pot Chicken and Noodles with a splash of heavy cream and fresh thyme from her garden. Meanwhile, Southern cooks might swap in dumplings or add a kick of cayenne. No matter the twist, the soul of the dish stays the same: warmth, comfort, and a touch of nostalgia. Whether you grew up with it or discovered it later, Instant Pot Chicken and Noodles feels like a hug in a bowl.
ays-cooking">How it fits in today’s cooking
Today, Instant Pot Chicken and Noodles fits seamlessly into busy lives. Modern cooks love how the Instant Pot cuts cooking time without sacrificing flavor. It’s a go-to for weeknight dinners, yet special enough for holiday gatherings. Some families even pair it with holiday side dishes for a festive twist.
Others adapt it for meal prep or lighter eating, like using gluten-free noodles or adding extra veggies. The dish also shines in seasonal rotations, especially during fall and winter. For those craving more comfort food ideas, check out these cozy winter recipes. No matter how you serve it, Instant Pot Chicken and Noodles remains a timeless favorite.
Taste and Texture
What makes it delicious
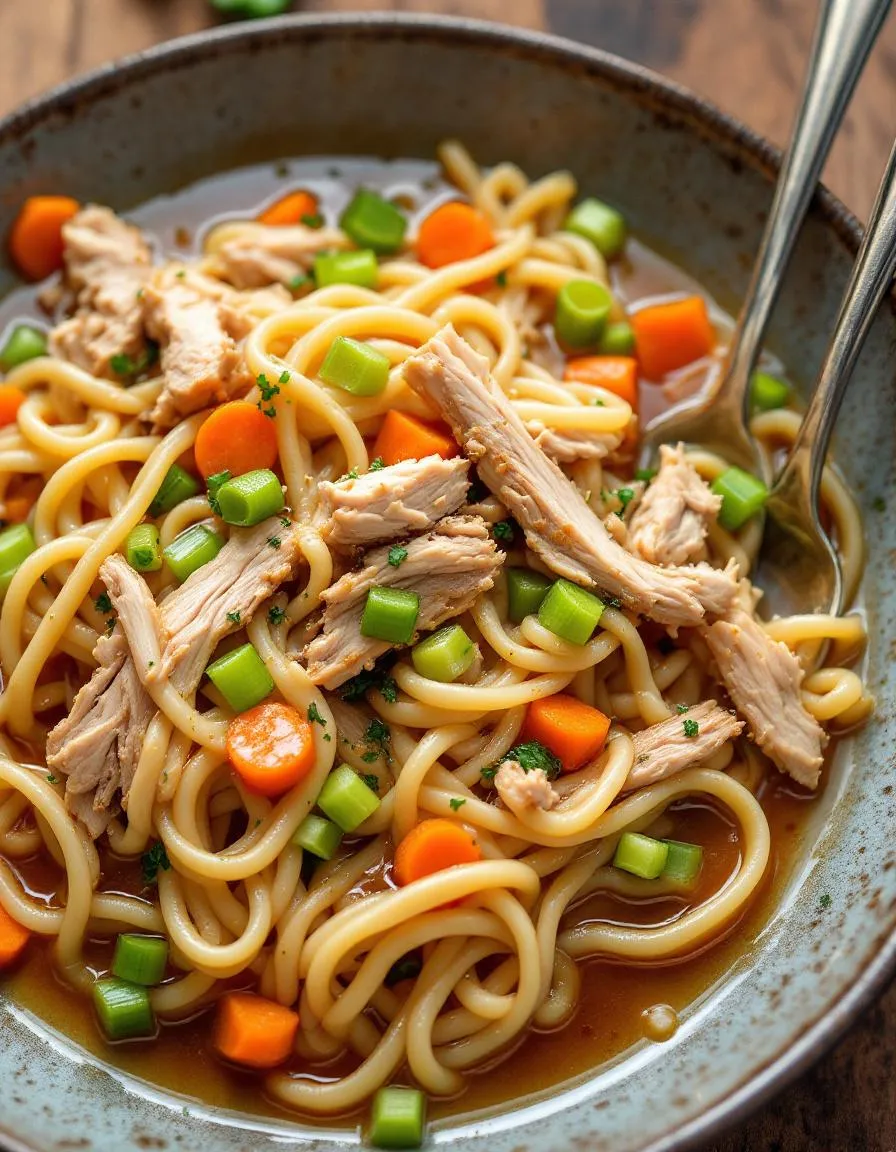
Instant Pot Chicken and Noodles delivers a comforting, soul-warming experience with every bite. The tender chunks of chicken melt in your mouth, while the noodles soak up the rich, savory broth, creating a satisfyingly chewy texture. Fragrant herbs like thyme and parsley add a fresh, earthy aroma, while a touch of butter lends a creamy richness. Each spoonful balances hearty umami flavors with a subtle sweetness from carrots and onions. Whether you crave warmth on a chilly day or a quick family meal, Instant Pot Chicken and Noodles hits all the right notes.
r">Boosting the flavor
Elevate your Instant Pot Chicken and Noodles with a few easy tweaks. Stir in a splash of heavy cream for extra silkiness, or top with crispy fried shallots for a crunchy contrast. For a brighter kick, finish with a squeeze of lemon or a sprinkle of red pepper flakes. Pair it with a side of garlic herb dinner rolls to soak up every drop of broth. If you love bold flavors, try adding a dash of smoked paprika or a spoonful of homemade pesto sauce for an herby twist. Small changes make a big difference!
Tips for Success
Best practices for results
Always use fresh, high-quality chicken for the best flavor in your Instant Pot Chicken and Noodles. Additionally, layer the ingredients properly by placing the chicken at the bottom to ensure even cooking. For tender noodles, add them last and avoid overcooking by setting the Instant Pot to manual high pressure for just 5 minutes. Finally, let the pressure release naturally for 10 minutes before opening the lid to prevent a mushy texture.
>Mistakes to avoid
One common mistake is overcrowding the Instant Pot, which can lead to uneven cooking. Instead, leave enough space for the steam to circulate properly. Another error is skipping the natural release, which can cause the noodles to turn gummy. For more tips on perfecting pressure cooking, check out our guide on Instant Pot basics. Also, if your broth tastes bland, try seasoning in stages as explained in our seasoning soups article for deeper flavor.
Serving and Pairing Suggestions
How to serve this dish
For a cozy family dinner, ladle Instant Pot Chicken and Noodles into deep bowls to keep the broth warm. Top with fresh parsley or a sprinkle of grated Parmesan for a pop of color and flavor. Alternatively, serve it in a rustic bread bowl for a fun twist that soaks up every delicious drop. If you’re hosting a potluck, transfer the dish to a stylish slow cooker to keep it warm while guests help themselves. This comforting meal also shines during chilly holiday gatherings, especially when paired with warm rolls or a crisp side salad.
What goes well with it
Balance the richness of Instant Pot Chicken and Noodles with a bright, tangy side like our Easy Cucumber Salad, which adds a refreshing crunch. For heartier appetites, pair it with fluffy buttermilk biscuits or crusty garlic bread to mop up the savory broth. A chilled glass of iced tea or crisp white wine, such as Pinot Grigio, complements the dish perfectly. If you crave extra warmth, try our Momma’s Potato Soup as a starter for a comforting, soup-centric meal.
How long does it take to cook Instant Pot Chicken and Noodles?
Instant Pot Chicken and Noodles typically takes about 15 minutes of pressure cooking time, plus 5-10 minutes for natural release. The total prep and cook time is around 30 minutes, making it a quick and easy comfort food meal.
Can I use frozen chicken for Instant Pot Chicken and Noodles?
Yes, you can use frozen chicken breasts or thighs in Instant Pot Chicken and Noodles. Just add 5-7 extra minutes to the pressure cooking time to ensure the chicken cooks through completely before adding the noodles.
rank-math-faq-item">
What kind of noodles work best for Instant Pot Chicken and Noodles?
Egg noodles are the classic choice for Instant Pot Chicken and Noodles because they hold up well under pressure. You can also use wide pasta like fettuccine or even homemade noodles, but adjust cooking times slightly to prevent mushiness.
How do I thicken Instant Pot Chicken and Noodles?
For thicker Instant Pot Chicken and Noodles, mix 1-2 tablespoons of cornstarch with cold water and stir it in after cooking. Alternatively, let the pot sit on “Keep Warm” for 10 minutes – the noodles will absorb more liquid naturally.