Table of Contents
Creamy Orzo with Roasted Butternut Squash and Spinach
Introduction
Did you know that a staggering 78% of home cooks seek out recipes that deliver restaurant-quality comfort in under 30 minutes? If you’re part of that majority, you’ve found your perfect match. This creamy orzo with roasted butternut squash and spinach is the ultimate answer to your weeknight dinner dilemmas. It’s a symphony of textures and flavors where sweet, caramelized squash meets tender, rice-shaped pasta, all enveloped in a luxuriously creamy sauce punctuated by fresh, vibrant spinach. It’s the kind of dish that feels indulgent yet is deceptively simple to prepare, proving that you don’t need hours to create something truly special on your plate. Let’s dive into how this 30-minute wonder can become your new go-to comfort food.
Ingredients List
Gather these simple ingredients to create a dish bursting with autumnal warmth and creamy satisfaction. I’ve included sensory notes and substitutions to make this recipe your own.
- 1 medium butternut squash (about 2 lbs), peeled and diced into ½-inch cubes – You’ll love the sweet, nutty aroma as it roasts. Substitution: Sweet potato or acorn squash work beautifully.
- 2 tablespoons olive oil, divided – For roasting and sautéing.
- 1 teaspoon smoked paprika – Adds a deep, smoky warmth. Substitution: Sweet paprika or a pinch of cayenne for heat.
- Salt and freshly ground black pepper – To taste.
- 1 cup (8 oz) uncooked orzo pasta – The star that gives the dish its delightful, rice-like texture.
- 3 cloves garlic, minced – For that essential aromatic base.
- 2 cups vegetable broth – Use low-sodium to control saltiness. Substitution: Chicken broth for a non-vegetarian version.
- ½ cup heavy cream – The key to the lush, velvety sauce. Substitution: Full-fat coconut milk for a dairy-free, rich alternative.
- 4 cups fresh baby spinach – Adds a pop of color and a fresh, slightly earthy flavor.
- ½ cup freshly grated Parmesan cheese, plus more for serving – For salty, umami depth. Substitution: Nutritional yeast or Pecorino Romano.
- 1 tablespoon fresh thyme leaves (or 1 tsp dried) – Herbal, slightly lemony notes that complement the squash perfectly.
Timing
This recipe delivers a complete, satisfying meal in a crisp 30 minutes. Compared to the average pasta bake or risotto, which can take 45-60 minutes, this creamy orzo is a speed champion. The secret is multitasking: while the squash roasts to caramelized perfection in the oven, you simultaneously build the creamy orzo base on the stovetop. This efficient workflow is what makes it a perfect candidate for busy evenings without sacrificing an ounce of flavor or comfort.

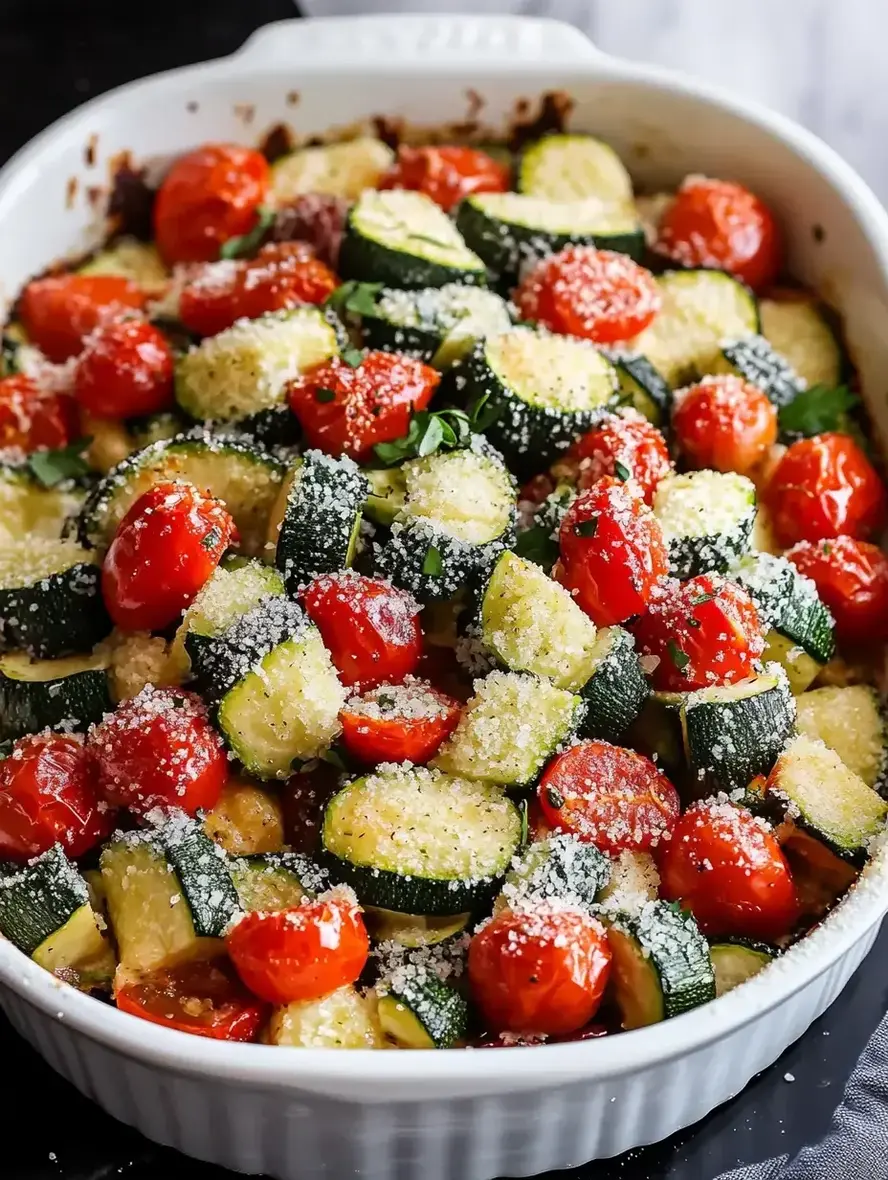
A vibrant bowl of creamy orzo, showcasing the golden roasted squash and bright green spinach.
Step-by-Step Instructions
Step 1: Roast the Squash
Preheat your oven to 425°F (220°C). On a large baking sheet, toss the diced butternut squash with 1 tablespoon of olive oil, smoked paprika, and a generous pinch of salt and pepper. Spread it out in a single layer—this is crucial for getting those beautifully caramelized edges instead of steamed squash. Roast for 15-20 minutes, or until the squash is fork-tender and has golden-brown spots. You’ll know it’s ready when your kitchen smells incredibly sweet and nutty.
Step 2: Cook the Orzo
While the squash roasts, heat the remaining tablespoon of olive oil in a large, deep skillet or Dutch oven over medium heat. Add the uncooked orzo and toast it for 2-3 minutes, stirring frequently, until it turns a light golden color. This step unlocks a deeper, nuttier flavor in the pasta. Next, add the minced garlic and cook for just 30 seconds until fragrant—be careful not to let it burn.
Step 3: Build the Creamy Sauce
Pour in the vegetable broth, scraping up any tasty bits from the bottom of the pan. Bring the mixture to a simmer, then reduce the heat to medium-low. Let it cook, stirring occasionally, for about 8-10 minutes, or until the orzo is al dente and has absorbed most of the broth. The mixture will look starchy and thick. Now, stir in the heavy cream and fresh thyme. Let it simmer gently for another 2-3 minutes to allow the sauce to reduce and coat the orzo luxuriously.
Step 4: Combine and Serve
Remove the skillet from the heat. This is important to prevent the spinach from wilting too much and the cheese from clumping. Stir in the fresh spinach and grated Parmesan cheese. The residual heat will perfectly wilt the spinach and melt the cheese into a smooth sauce. Finally, gently fold in the roasted butternut squash. Taste and adjust seasoning with more salt and pepper if needed. Serve immediately, topped with an extra sprinkle of Parmesan and a crack of black pepper.
Nutritional Information
(Approximate values per serving, based on 4 servings)
- Calories: 420 kcal
- Carbohydrates: 58g
- Protein: 12g
- Fat: 18g
- Saturated Fat: 8g
- Fiber: 6g
- Sugar: 6g
- Vitamin A: 350% DV (Thank you, squash and spinach!)
- Vitamin C: 45% DV
- Calcium: 20% DV
Healthier Alternatives
Want to lighten up this creamy orzo without losing the comfort factor? Here are some brilliant, flavor-packed swaps:
- Cream Swap: Replace heavy cream with half-fat cream cheese thinned with a splash of broth, or use pureed white beans or cauliflower for a dairy-free, protein-boosted creaminess.
- Pasta Swap: Use whole-wheat orzo or a legume-based orzo (like chickpea or lentil) to significantly increase fiber and protein content.
- Cheese Conscious: Reduce the Parmesan to ¼ cup and add 2 tablespoons of nutritional yeast for a cheesy, umami flavor with less fat. Or, use a sharp, flavorful cheese like feta so you can use less but still get a big taste impact.
- Boost the Veggies: Add a cup of sliced mushrooms when sautéing the garlic, or stir in a cup of peas along with the spinach for extra color, fiber, and nutrients.
Serving Suggestions
This dish is a complete meal in a bowl, but it also plays wonderfully with others. For a heartier dinner, pair it with a simple garlic-herb grilled chicken breast or pan-seared salmon. If you’re keeping it vegetarian, a side of lemony white beans or a crisp arugula salad with a lemon vinaigrette provides a lovely textural contrast. To elevate the presentation, garnish with toasted pine nuts or walnuts for crunch, a drizzle of high-quality olive oil, or a sprinkle of fresh herbs like chopped parsley or chives.
Common Mistakes
- Overcrowding the Baking Sheet: If the squash pieces are touching, they’ll steam instead of roast. Use two sheets if necessary to ensure a single layer for perfect caramelization.
- Skipping the Orzo Toast: Don’t rush past toasting the dry orzo. This simple step adds a foundational nutty flavor that makes the final dish taste more complex.
- Adding Cheese on High Heat: Adding Parmesan while the skillet is still on the burner can cause it to seize and become grainy. Always remove from heat first, then stir in the cheese for a silky sauce.
- Overcooking the Spinach: Stirring in the spinach at the end with the residual heat is enough. If you cook it further, it will become soggy and lose its vibrant green color and fresh taste.
Storing Tips
Store leftovers in an airtight container in the refrigerator for up to 3 days. The orzo will continue to absorb moisture, so it will thicken upon standing. To reheat, add a splash of broth, milk, or water to a skillet over low heat and stir gently until warmed through and creamy again. I do not recommend freezing this dish, as the creamy sauce and the texture of the orzo and spinach can become grainy and watery upon thawing.
Conclusion
This creamy orzo with roasted butternut squash and spinach is more than just a recipe; it’s a reliable strategy for a delicious, nourishing, and impressively quick dinner. It masterfully balances sweet, savory, and creamy elements into a cohesive and comforting bowl. Whether you’re cooking for your family on a Wednesday night or need an elegant yet easy option for guests, this dish delivers every time. I hope it earns a permanent spot in your recipe rotation.
Did you make this recipe? I’d love to see your creation! Tag @exorecipes on Instagram or leave a comment and rating below. Your feedback helps other home cooks and inspires our future recipes. What’s your favorite add-in for creamy orzo?
FAQs
Can I use frozen butternut squash? Absolutely. There’s no need to thaw it first. Toss the frozen cubes directly with oil and spices, but add 5-10 minutes to the roasting time. Be sure to spread them well to allow excess moisture to evaporate.
Is orzo the same as risotto? No, but they create a similar comforting effect. Orzo is a short-cut pasta made from semolina wheat, while risotto is a dish made from a specific type of short-grain rice (like Arborio) cooked slowly with broth. This recipe is a fantastic, faster alternative to traditional risotto.