If you’ve ever craved a meal that’s both comforting and exciting, you’re in the right place. Today, I’m sharing my Halloumi Pasta recipe—a dish that perfectly balances creamy, salty, and savory flavors. Whether you’re cooking for a weeknight dinner or impressing guests, this recipe delivers joy in every bite. Plus, it’s a fantastic way to explore new flavors while sticking to familiar comforts.
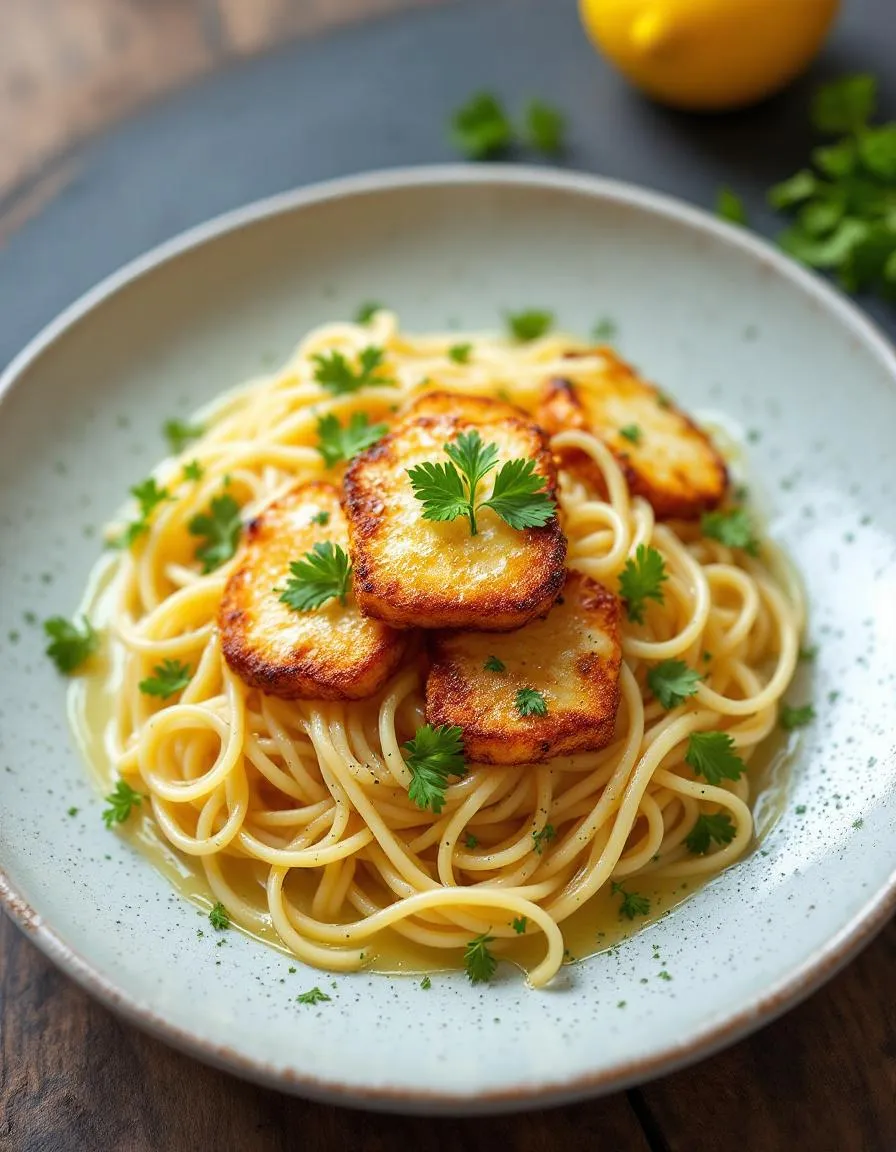
Halloumi Pasta combines tender pasta with crispy, golden halloumi cheese, creating a texture-rich experience you’ll adore. Unlike traditional pasta dishes, this recipe stands out because halloumi adds a satisfying chewiness and a hint of saltiness that pairs beautifully with creamy sauces or fresh veggies. It’s a versatile dish that fits seamlessly into busy schedules or leisurely weekend cooking. At brekcakes.com, we celebrate recipes that feel both special and approachable, and this one checks all the boxes. If you love experimenting with cheese, you’ll also enjoy our Gooey Mac and Cheese, another crowd-pleaser. And for more quick meal ideas, check out our 30-Minute Dinners collection.
Why I Love This Recipe
Halloumi Pasta holds a special place in my heart because it reminds me of my first trip to Cyprus, where I fell in love with halloumi’s unique texture. Back home, I spent weeks perfecting this recipe, tweaking it until it captured that same magic. Now, it’s my go-to when I need a meal that feels indulgent yet effortless. Every time I make it, I’m transported back to sunny Mediterranean evenings—and I hope it brings a little of that warmth to your table too.
Health and Nutrition
Why it’s good for your body
Halloumi Pasta packs a nutritious punch while delivering bold flavors. First, halloumi cheese offers a solid dose of protein, which helps keep you full and supports muscle repair. Additionally, the pasta provides complex carbs for steady energy, making this dish a balanced choice. Because halloumi contains calcium, your bones benefit too.
Moreover, Halloumi Pasta includes fresh vegetables like cherry tomatoes or spinach, adding fiber and vitamins. Fiber aids digestion, while antioxidants from veggies combat inflammation. Since halloumi has a high melting point, it retains its texture, giving you a satisfying chew without excess grease.
Furthermore, this meal adapts easily to healthier tweaks. For example, whole wheat pasta boosts fiber, and olive oil adds heart-healthy fats. Whether you enjoy Halloumi Pasta as a quick dinner or a meal prep staple, its nutrient profile makes it a smart pick. Finally, the dish’s versatility means you can load it with seasonal produce for extra nutrition.
How it fits in a healthy lifestyle
Halloumi Pasta fits seamlessly into balanced eating habits. If you follow a high-protein diet, the cheese and pasta combo delivers a satisfying macros split. For gluten-free needs, simply swap regular pasta for a gluten-free alternative without losing flavor.
This dish also works well for meal prepping, saving time without sacrificing nutrition. Pair it with a light salad or roasted veggies to round out your plate. If you’re watching sodium, rinse the halloumi briefly to reduce salt content. For more ideas on balancing indulgent ingredients, check out our guide to healthy meal swaps. Whether you’re fueling up post-workout or need a family-friendly dinner, Halloumi Pasta keeps things wholesome and delicious.
Start by heating a large skillet over medium heat and drizzling in a tablespoon of olive oil. While the pan warms, slice your halloumi into thin strips—this helps it crisp evenly. Toss the halloumi into the skillet and let it sizzle for 2-3 minutes per side until golden. Meanwhile, bring a pot of salted water to a boil for the pasta. Opt for a short shape like penne or fusilli, which holds sauce well. Once the pasta cooks al dente, reserve a cup of starchy water before draining. In the same skillet, sauté minced garlic and cherry tomatoes until they soften, then fold in the cooked pasta. Crumble the crispy halloumi over the top and toss everything together, adding a splash of pasta water to create a light, glossy sauce. Finish with a handful of fresh basil and a squeeze of lemon for brightness. To save time, prep your ingredients before turning on the stove—it keeps the process smooth and stress-free.
Mistakes I’ve made and learned from
I’ve definitely overcooked halloumi before, leaving it rubbery instead of crispy. The trick? Pat the cheese dry first and avoid overcrowding the pan. Another blunder? Skipping the pasta water. Without it, my halloumi pasta turned dry and clumpy. Now I always save that liquid gold—it’s a game-changer for saucy texture. If you’re new to working with halloumi, check out my guide on avoiding common cheese mistakes. And if you love pairing pasta with bold flavors, my pasta pairing guide has more tricks to elevate your dish. Trust me, a little patience and these fixes make all the difference.
Halloumi Pasta blends Mediterranean flavors with the universal love of comfort food. Originating from Cyprus, halloumi cheese brings a salty, squeaky texture that pairs perfectly with pasta. In coastal villages, locals often grill the cheese before tossing it with fresh herbs and tomatoes. Meanwhile, in Greece, cooks might add olives and capers for a briny twist. Even in my own kitchen, I love swapping in sun-dried tomatoes or roasted peppers for extra depth.
Families across the Middle East and Europe have their own takes on Halloumi Pasta. Some toast the cheese until crispy, while others let it melt slightly into the sauce. During summer, you’ll find it at picnics with lemon zest and mint. In colder months, it becomes heartier with roasted squash or spinach. No matter the version, Halloumi Pasta always feels like a celebration of simple, bold flavors.
ays-cooking">How it fits in today’s cooking
Today, Halloumi Pasta fits seamlessly into modern meals. Busy cooks adore it for quick weeknight dinners, while food bloggers spotlight it as a vegetarian showstopper. Its versatility shines year-round—think spring peas in April or roasted pumpkin come fall. Plus, it’s a star at potlucks, where guests rave about the crispy cheese topping.
Many home chefs tweak the recipe to suit their tastes. Some add chili flakes for heat, while others mix in creamy avocado for richness. For those craving extra protein, grilled chicken or shrimp work beautifully. And if you’re exploring global flavors, check out our Mediterranean-inspired tips to elevate your dish. Whether you stick to tradition or experiment, Halloumi Pasta remains a timeless favorite.
Taste and Texture
What makes it delicious
Halloumi Pasta delivers a mouthwatering contrast of textures and flavors that make every bite exciting. The salty, squeaky halloumi cheese crisps up beautifully, adding a golden crunch that pairs perfectly with tender pasta. Meanwhile, the creamy sauce coats each strand, creating a rich, velvety mouthfeel. Fresh herbs like basil or mint brighten the dish, while a hint of garlic and lemon zest adds a fragrant, zesty kick. Whether you savor the savory cheese or the silky sauce, Halloumi Pasta balances bold and comforting tastes in every forkful.
r">Boosting the flavor
Elevate your Halloumi Pasta with a few easy tweaks. For extra depth, toss in sun-dried tomatoes or roasted red peppers—their sweet, tangy notes complement the salty halloumi. A drizzle of homemade pesto adds herbal freshness, while a sprinkle of chili flakes brings subtle heat. If you love creamy textures, stir in a dollop of garlic herb yogurt sauce for a tangy twist. Experiment with toasted pine nuts or crispy breadcrumbs for an irresistible crunch. With these simple upgrades, your Halloumi Pasta will taste even more unforgettable.
Tips for Success
Best practices for results
Always pat dry the Halloumi before frying it for your Halloumi Pasta—this ensures a golden, crispy crust. Meanwhile, cook the pasta al dente since it will soften slightly when mixed with the sauce. For the best flavor, use fresh cherry tomatoes and tear the basil by hand instead of chopping it. Finally, toss the Halloumi Pasta gently to keep the cheese intact while evenly coating every bite.
>Mistakes to avoid
Overcrowding the pan when frying Halloumi is a common mistake—it lowers the temperature and makes the cheese steam instead of crisp. Instead, cook it in batches if needed. Another error is skipping the pasta water reserve, which helps bind the sauce beautifully. For more sauce tips, check out our guide to perfect pasta sauces. Also, avoid over-salting the dish early since Halloumi is naturally salty. Learn how to balance flavors with our seasoning tips.
Serving and Pairing Suggestions
How to serve this dish
Bring your Halloumi Pasta to life with a few simple touches. For a vibrant presentation, top it with fresh basil leaves or a sprinkle of chili flakes. Alternatively, serve it in a shallow bowl to showcase the creamy sauce and golden halloumi cubes. This dish shines at casual gatherings, whether you’re hosting a summer brunch or a cozy weeknight dinner. To make it extra special, pair it with crusty bread for dipping into the sauce. Finally, let the colors pop by adding a side of roasted cherry tomatoes or a simple arugula salad.
What goes well with it
Elevate your Halloumi Pasta experience with a crisp white wine like Sauvignon Blanc, which cuts through the richness of the cheese. For a non-alcoholic option, try a sparkling lemonade with a hint of mint. If you’re serving sides, consider a light Mediterranean salad or roasted vegetables for balance. Craving something heartier? Pair it with our Garlic Herb Focaccia to soak up every last bite. For dessert, keep it simple with our Honey Yogurt Parfait to round out the meal.
Halloumi Pasta is a delicious dish combining grilled or pan-fried halloumi cheese with pasta, often tossed in a light sauce or fresh vegetables. The salty, firm texture of halloumi pairs perfectly with pasta, creating a satisfying meal. This dish is popular for its simplicity and bold flavors.
How do you cook halloumi for pasta?
To cook halloumi for pasta, slice it into cubes or strips and pan-fry in a little oil until golden brown on all sides. Avoid overcooking, as halloumi can become rubbery. Add the crispy halloumi to your cooked pasta just before serving to maintain its texture.
rank-math-faq-item">
What sauce goes well with Halloumi Pasta?
A light lemon-garlic sauce, pesto, or a simple tomato-based sauce pairs beautifully with Halloumi Pasta. The saltiness of halloumi balances well with tangy or herby sauces. For a creamier option, try a yogurt or tahini dressing.
Can you make Halloumi Pasta ahead of time?
You can prep ingredients ahead, but it’s best to assemble Halloumi Pasta just before serving to keep the halloumi crispy. Store cooked pasta and halloumi separately, then combine when ready. Reheating may soften the cheese, so fresh is ideal.
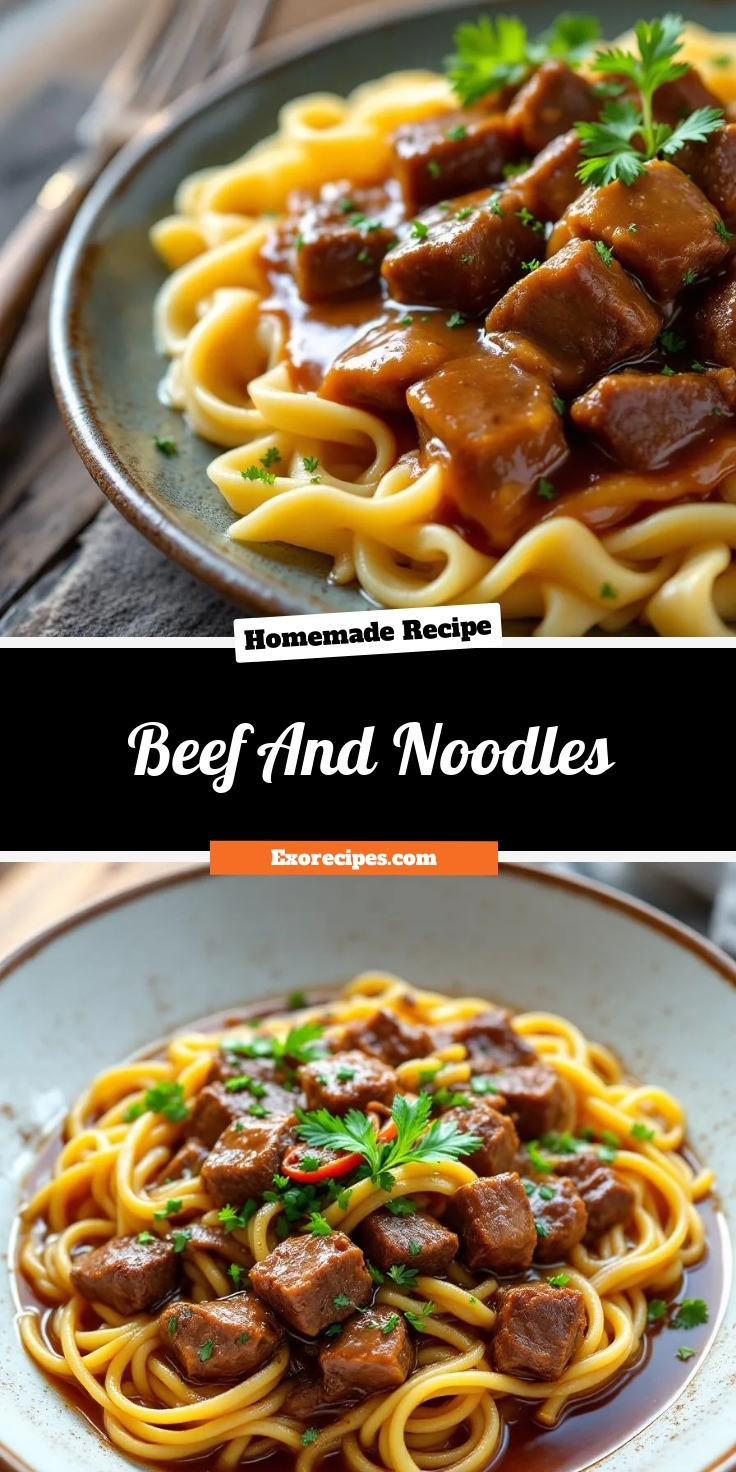
Best Beef and Noodles – Comforting Homemade Recipe
Introduction
There’s something undeniably comforting about a steaming bowl of Beef And Noodles. Whether you’re craving a hearty weeknight dinner or a nostalgic dish that reminds you of home, this recipe delivers. In fact, it’s the kind of meal that brings people together—simple, satisfying, and packed with flavor. Plus, with just a few pantry staples, you can whip up a dish that feels like a warm hug on even the busiest days.
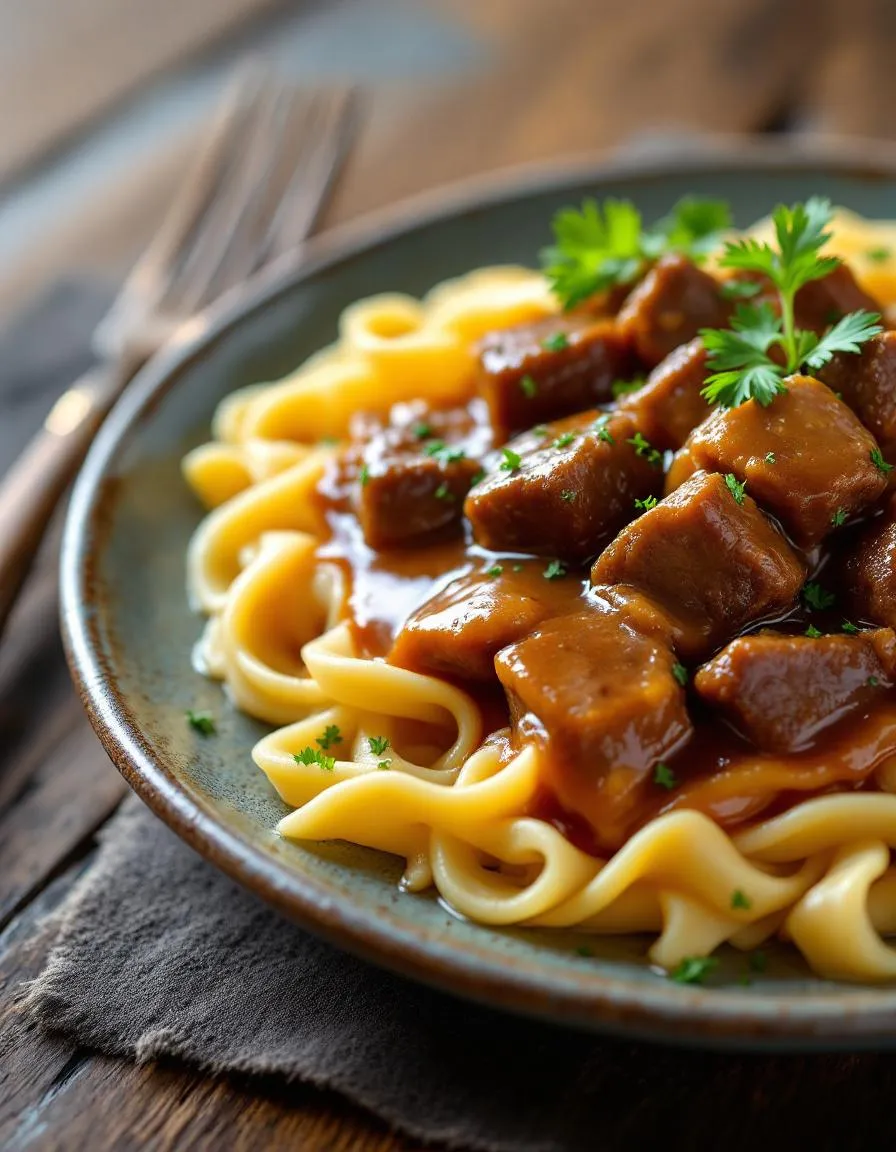
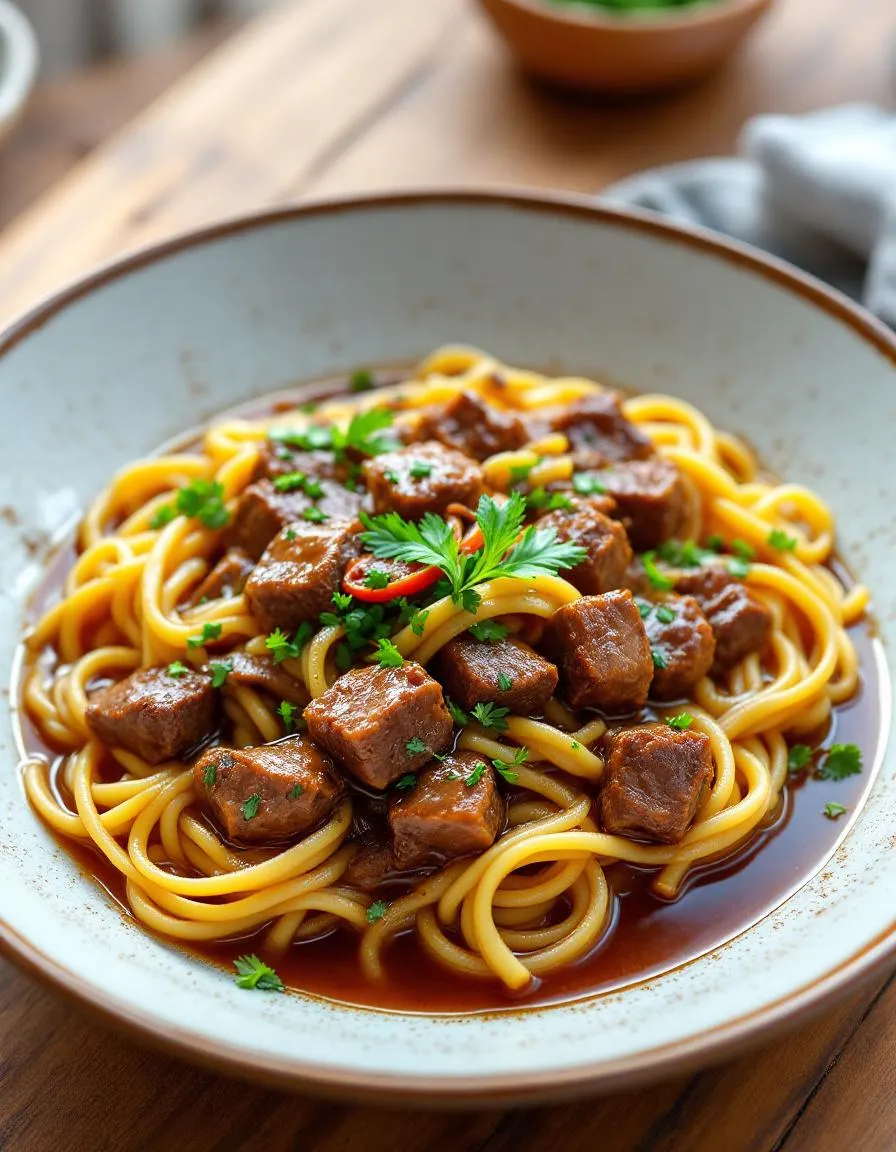
Beef And Noodles is a classic comfort food that combines tender beef, rich broth, and soft egg noodles for a dish that’s both filling and flavorful. Unlike fussy recipes that require hours of prep, this one keeps things straightforward without sacrificing taste. It’s perfect for busy families, meal preppers, or anyone who appreciates a no-fuss dinner. What makes it special is its versatility. You can customize it with your favorite veggies, adjust the seasoning to your liking, or even swap the beef for another protein if you prefer. At brekcakes.com, we celebrate recipes that balance simplicity and soul, and Beef And Noodles fits right in. If you love easy, crowd-pleasing meals, you’ll also enjoy our One-Pot Chicken and Rice or Creamy Tuscan Pasta.
Why I Love This Recipe
Beef And Noodles holds a special place in my heart because it reminds me of Sunday dinners at my grandma’s house. She’d simmer the beef low and slow until it practically melted, and the aroma would fill the entire kitchen. Now, whenever I make it, I feel that same sense of warmth and connection. It’s more than just a meal—it’s a reminder of the people and moments that make life delicious.
Health and Nutrition
Why it’s good for your body
Beef And Noodles delivers a powerhouse of nutrients in every comforting bite. First, the lean beef provides high-quality protein, which helps build and repair muscles while keeping you full longer. Additionally, it packs iron, a mineral that supports healthy blood flow and energy levels. Meanwhile, the noodles offer energizing carbohydrates to fuel your day without spiking blood sugar too quickly.
Beyond protein and carbs, Beef And Noodles includes vegetables like carrots and celery, which add fiber, vitamins, and antioxidants. These ingredients work together to support digestion and immunity. Furthermore, the dish’s balanced macros make it a satisfying meal that stabilizes hunger and cravings. Whether you need post-workout recovery or a hearty family dinner, Beef And Noodles covers both taste and nutrition.
Lastly, homemade versions let you control sodium and fat levels, making it a smarter choice than processed alternatives. By using whole-grain noodles or grass-fed beef, you can boost the dish’s health benefits even further. With its versatility and nutrient density, Beef And Noodles proves that comfort food can also be good for you.
How it fits in a healthy lifestyle
Beef And Noodles fits seamlessly into balanced eating habits. For protein-focused diets, the lean beef helps meet daily goals while keeping meals satisfying. If you prefer gluten-free options, simply swap traditional noodles for chickpea or rice-based alternatives. The dish also pairs well with leafy greens or a side salad for extra fiber and vitamins.
For heart-healthy adjustments, trim excess fat from the beef and use low-sodium broth. This tweak reduces saturated fat without sacrificing flavor. Meal preppers love Beef And Noodles because it reheats beautifully, saving time on busy weeknights. If you’re exploring more high-protein recipes, check out our protein-packed dinners for inspiration. Or, for gluten-free noodle ideas, our gluten-free pasta guide offers plenty of tasty swaps. With simple modifications, this classic dish supports nearly any dietary preference.
A comforting and hearty dish featuring tender beef and egg noodles in a rich gravy.
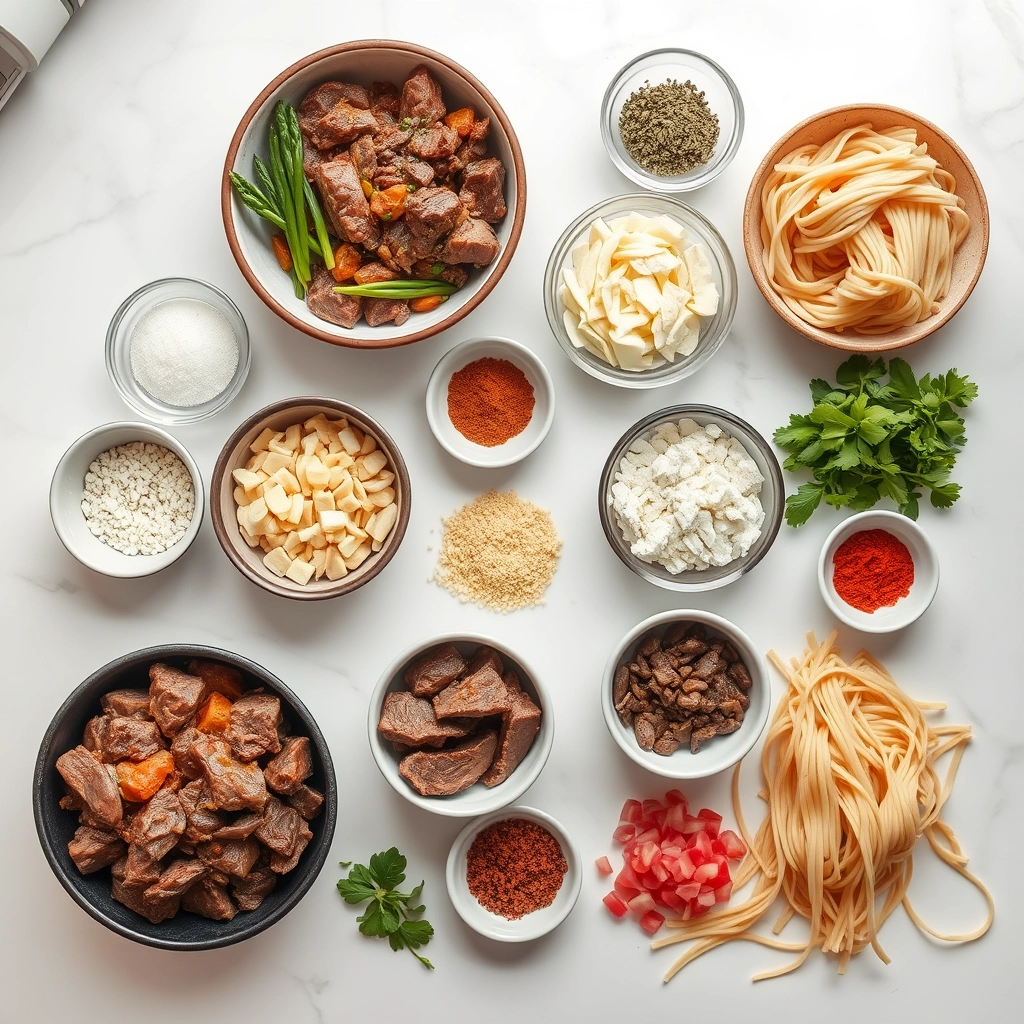
Ingredients
Scale
For the Crust:
1 lb beef stew meat, cubed
2 tbsp vegetable oil
1 onion, diced
2 cloves garlic, minced
4 cups beef broth
1 tsp Worcestershire sauce
1 tsp dried thyme
1 tsp salt
1/2 tsp black pepper
12 oz egg noodles
2 tbsp all-purpose flour
1/4 cup water
Instructions
1. Prepare the Crust:
Heat vegetable oil in a large pot over medium-high heat. Add beef cubes and brown on all sides, about 5 minutes.
Add diced onion and minced garlic to the pot. Cook until softened, about 3 minutes.
Pour in beef broth, Worcestershire sauce, thyme, salt, and pepper. Bring to a boil, then reduce heat to low and simmer for 1 hour or until beef is tender.
Cook egg noodles according to package instructions. Drain and set aside.
In a small bowl, mix flour and water to create a slurry. Stir into the beef mixture and simmer for 5 minutes until gravy thickens.
Add cooked noodles to the pot and stir to combine. Serve hot.
Notes
You can customize the seasonings to taste.
How to Prepare This Dish
Steps and time-saving tips
Start by heating a large pot over medium heat and browning your beef in batches to avoid overcrowding. Meanwhile, chop your onions and garlic to save time. Once the beef sears nicely, remove it and sauté the onions until they turn translucent. Then, stir in the garlic for just 30 seconds to release its aroma. Next, deglaze the pot with a splash of broth, scraping up those flavorful browned bits. Return the beef to the pot, pour in the remaining broth, and bring everything to a gentle simmer. Cover and let it cook low and slow until the beef becomes tender.
While the beef simmers,
boil your noodles separately to prevent them from soaking up too much broth. Drain them just shy of al dente since they’ll finish cooking in the sauce later. Once the beef shreds easily with a fork, stir in the noodles and let them soak up the rich flavors for a few minutes. For a creamy twist, fold in a dollop of sour cream right at the end. Finally, garnish with fresh parsley and serve hot. To save time, use pre-cut stew meat or even leftover roast beef from your Sunday dinner.
Mistakes I’ve made and learned from
I once rushed the browning step, which left my Beef And Noodles lacking depth. Now, I take my time to caramelize the meat properly—it’s worth the extra minutes. Another blunder? Overcooking the noodles early on. They turned mushy after simmering in the broth. Now, I undercook them slightly and let them firm up in the sauce. If you’re new to balancing flavors, check out my guide on seasoning tips to avoid bland results. Trust me, a pinch of thyme or a bay leaf makes all the difference. And don’t skip tasting as you go—adjusting salt early saves the dish later.
n-and-variations">Cultural Connection and Variations
Where this recipe comes from
Beef And Noodles carries a rich history, blending comfort and tradition in every bite. Many trace its roots to Central Europe, where hearty meat-and-dough dishes like German Rouladen or Hungarian Tarhonya inspired similar meals. Over time, immigrants brought these flavors to America, adapting them to local ingredients. In the Midwest, for example, Beef And Noodles became a Sunday supper staple, often simmered with tender chuck roast and wide egg noodles.
Families everywhere put their own spin on it. Some cooks add a splash of red wine for depth, while others keep it simple with just broth and onions. In Asia, you might find a version with soy sauce and udon noodles, proving how versatile Beef And Noodles can be. My grandma always made hers with a pinch of thyme and extra carrots, turning it into a cozy one-pot wonder. Whether served over mashed potatoes or straight from the bowl, this dish bridges cultures and generations.
How it fits in today’s cooking
Today, Beef And Noodles still shines as a go-to comfort food, especially during chilly months. Busy home cooks love its flexibility—swap in slow-cooker shortcuts or leaner cuts like sirloin for a modern twist. It’s also a star at potlucks and holiday gatherings, where its warmth brings people together. For weeknight dinners, many pair it with a crisp side salad to balance the richness.
Health-conscious eaters
tweak the recipe too, using whole-grain noodles or adding extra veggies. Meanwhile, food bloggers reinvent it as a freezer-friendly meal prep option. No matter how you serve it, Beef And Noodles fits seamlessly into today’s kitchens. Craving more cozy recipes? Try our comfort food classics collection for dishes that feel like a hug on a plate.
Taste and Texture
What makes it delicious
Beef And Noodles delivers a rich, comforting experience with every bite. Tender chunks of beef melt in your mouth, while the noodles soak up the savory, umami-packed broth. Aromatic garlic and onions deepen the flavor, while a hint of thyme adds earthy warmth. The dish smells heavenly as it simmers, filling the kitchen with notes of caramelized meat and herbs. Meanwhile, the noodles offer a satisfying chew, balancing the velvety sauce. Whether you crave hearty comfort or bold taste, Beef And Noodles hits all the right notes.
Boosting the flavor
Elevate your Beef And Noodles with a few easy tweaks. Try swapping regular egg noodles for homemade pasta to add a fresh, springy texture. For extra depth, stir in a splash of balsamic vinegar or a spoonful of tomato paste. Crispy fried shallots or a sprinkle of Parmesan make irresistible toppings. If you love heat, a dash of smoked paprika or red pepper flakes wakes up the flavors. Small changes create big results, so experiment and enjoy!
Always sear the beef in small batches to avoid overcrowding the pan, as this ensures a rich, caramelized flavor for your Beef And Noodles. Additionally, use fresh egg noodles for the best texture, since they hold up better in the broth. For extra depth, deglaze the pan with a splash of red wine before adding your broth. Finally, let the dish simmer gently so the flavors meld perfectly without overcooking the noodles.
Mistakes to avoid
Avoid boiling the noodles separately unless the recipe specifies, as they absorb more flavor when cooked directly in the broth. Many cooks also make the mistake of using low-quality beef cuts, which can turn tough. Instead, opt for well-marbled chuck roast for tender results. For more on selecting the right ingredients, check out our guide on choosing the best beef cuts. Also, resist the urge to stir too frequently once the noodles are added, or they may break apart. If you need help with timing, our perfect simmering techniques post has great tips.
g-suggestions">Serving and Pairing Suggestions
How to serve this dish
For a cozy family dinner, serve Beef And Noodles in deep bowls to keep the dish warm and inviting. Top it with fresh parsley or chives for a pop of color and freshness. Alternatively, layer it over creamy mashed potatoes for a hearty twist. If you’re hosting a casual gathering, set up a buffet-style station with toppings like shredded cheese, sour cream, or crispy fried onions so guests can customize their bowls. During the holidays, elevate Beef And Noodles by pairing it with elegant dinner rolls or a side of roasted vegetables for a festive touch.
What goes well with it
A crisp green salad with tangy vinaigrette balances the richness of Beef And Noodles perfectly. For a heartier meal, try pairing it with our garlic butter dinner rolls, which soak up the savory sauce beautifully. If you prefer a refreshing drink, a glass of iced tea or a light red wine like Pinot Noir complements the flavors without overpowering them. For dessert, our classic apple crisp adds a sweet, comforting finish to the meal.
math-faq-block">
What cut of beef is best for Beef And Noodles?
Chuck roast or stew meat works best for Beef And Noodles because they become tender when slow-cooked. These cuts have enough marbling to keep the dish flavorful, and they shred easily to pair perfectly with the noodles.
Can I use egg noodles for Beef And Noodles?
Yes, egg noodles are a classic choice for Beef And Noodles because they hold up well in the broth and absorb flavors beautifully. For a heartier texture, opt for wide or extra-wide egg noodles.
How do you thicken Beef And Noodles?
Mix a slurry of cornstarch or flour with cold water and stir it into the simmering Beef And Noodles. Let it cook for a few minutes until the sauce thickens to your preferred consistency.
rank-math-faq-item">
What sides go well with Beef And Noodles?
Buttered green beans, roasted carrots, or a simple side salad complement Beef And Noodles nicely. For a heartier meal, serve it with crusty bread to soak up the rich broth.
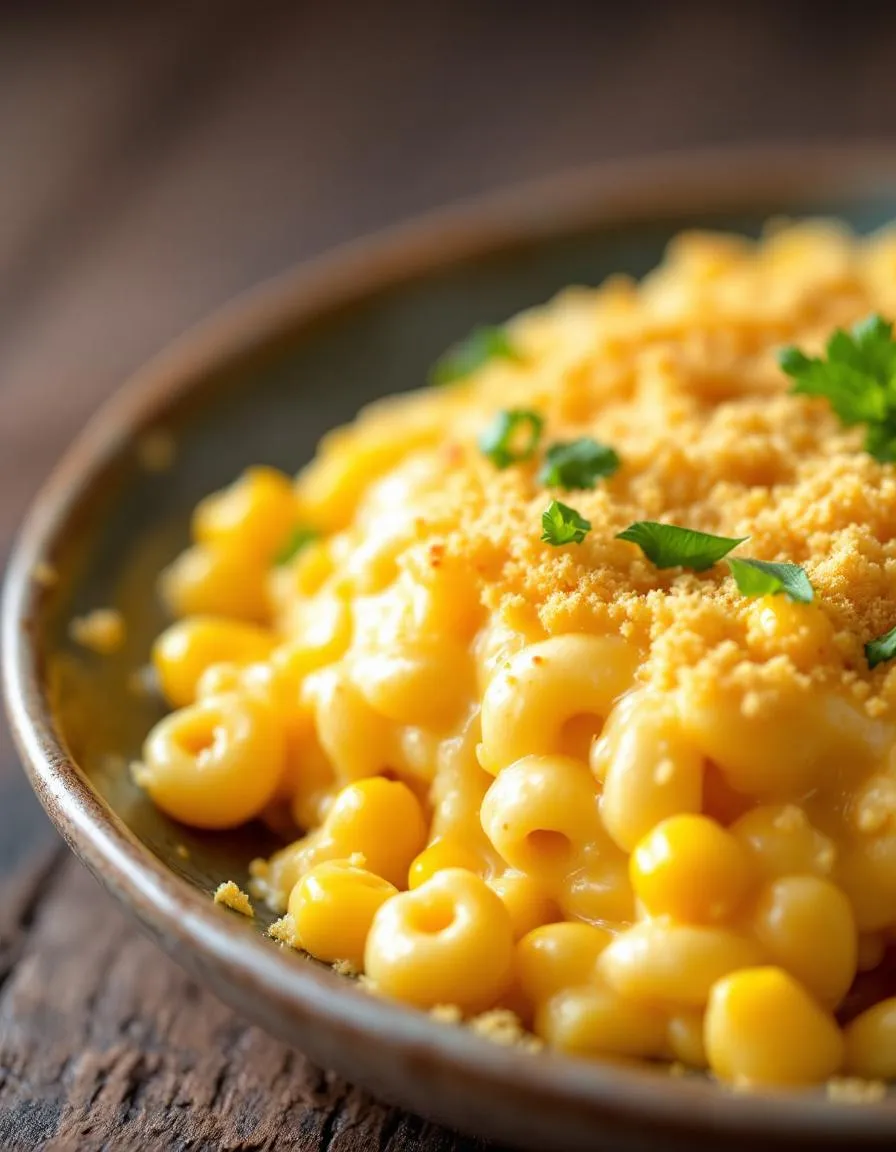
Best Corn Mac Cheese Bake – Easy Comfort Food
Introduction
There’s something undeniably comforting about a dish that brings together creamy, cheesy goodness with a touch of sweetness. That’s exactly why I adore this Corn Mac Cheese Bake—it’s the ultimate hug in a casserole dish. Whether you’re craving a cozy weeknight dinner or need a crowd-pleasing side for your next gathering, this recipe delivers nostalgia and flavor in every bite. Plus, it’s incredibly easy to customize, making it a staple in my kitchen and hopefully yours too.
Corn Mac Cheese Bake is a delightful twist on classic mac and cheese, blending tender elbow pasta with sweet corn and a rich, velvety cheese sauce. The dish strikes the perfect balance between hearty and comforting, making it ideal for family dinners or potluck favorites. What sets it apart is its versatility—you can add crispy bacon for smokiness, jalapeños for heat, or even breadcrumbs for extra crunch. At brekcakes.com, we celebrate recipes that feel both familiar and fresh, and this one fits right in. If you love easy, satisfying meals, you’ll also enjoy our Creamy Garlic Parmesan Pasta or our Loaded Potato Casserole for similar comfort-food vibes.
Why I Love This Recipe
This Corn Mac Cheese Bake holds a special place in my heart because it reminds me of Sunday dinners at my grandma’s house. She always knew how to make simple ingredients feel like a celebration, and this dish captures that spirit perfectly. Every time I pull it out of the oven, the golden, bubbly top and the aroma of melted cheese take me right back to those cherished moments. It’s more than just a recipe—it’s a little piece of home I’m thrilled to share with you.
Health and Nutrition
Why it’s good for your body
Corn Mac Cheese Bake packs a nutritious punch while satisfying your comfort food cravings. First, the corn adds a sweet, fiber-rich boost that supports digestion and keeps you full longer. Meanwhile, the whole-grain pasta provides complex carbs for steady energy, so you avoid the crashes that come with refined grains. Additionally, the cheese delivers a hearty dose of calcium and protein, which strengthen bones and muscles.
Because Corn Mac Cheese Bake balances carbs, protein, and healthy fats, it fuels your body without spiking blood sugar. The dish also includes antioxidants from corn, which help fight inflammation. Plus, you can easily tweak the recipe with veggies like spinach or bell peppers for extra vitamins. Whether you serve it as a main or side, Corn Mac Cheese Bake offers both flavor and nourishment.
Finally, the creamy texture comes from real cheese, not processed sauces, so you skip unnecessary additives. With each bite, you get a comforting meal that supports your health goals. Corn Mac Cheese Bake proves that delicious food can also be good for you.
How it fits in a healthy lifestyle
Corn Mac Cheese Bake fits perfectly into a balanced diet when enjoyed mindfully. For gluten-free eaters, simply swap regular pasta for a gluten-free alternative, and the dish stays just as satisfying. If you’re watching your heart health, opt for low-fat cheese and add a sprinkle of flaxseed for omega-3s. The recipe also pairs well with a crisp salad or roasted veggies, making it easy to round out your meal.
Busy weeknights call for meals that are both quick and nutritious, and Corn Mac Cheese Bake delivers. Prep it ahead and reheat for a stress-free dinner. For more high-protein ideas, check out our protein-packed dinners. And if you love customizable recipes, explore our meal prep tips to keep your fridge stocked with healthy options. With simple swaps and smart pairings, Corn Mac Cheese Bake helps you stay on track without sacrificing flavor.
A creamy and cheesy macaroni bake with sweet corn for a delightful twist.
Ingredients
Scale
For the Crust:
2 cups elbow macaroni
1 cup sweet corn kernels
2 cups shredded cheddar cheese
1 cup milk
2 tablespoons butter
2 tablespoons all-purpose flour
1/2 teaspoon garlic powder
1/2 teaspoon salt
1/4 teaspoon black pepper
1/4 cup breadcrumbs
Instructions
1. Prepare the Crust:
Preheat oven to 375°F (190°C). Cook macaroni according to package instructions, drain, and set aside.
In a saucepan, melt butter over medium heat. Stir in flour and cook for 1 minute.
Gradually whisk in milk until smooth. Cook until the sauce thickens, about 3-4 minutes.
Remove from heat and stir in 1 1/2 cups of cheddar cheese, garlic powder, salt, and pepper until melted.
Combine cooked macaroni, corn, and cheese sauce in a large bowl. Transfer to a greased baking dish.
Sprinkle remaining cheese and breadcrumbs on top. Bake for 20-25 minutes until golden and bubbly.
Notes
You can customize the seasonings to taste.
s-dish">How to Prepare This Dish
Steps and time-saving tips
Start by preheating your oven to 375°F so it’s ready when you finish assembling the Corn Mac Cheese Bake. While the oven heats, cook the macaroni al dente to avoid mushiness later. Drain the pasta, then toss it with a drizzle of olive oil to prevent sticking. Meanwhile, whisk together the cheese sauce in a saucepan over medium heat—melt the butter, stir in the flour, then gradually add milk while whisking to avoid lumps. Once smooth, fold in shredded cheddar and a pinch of paprika for depth. Combine the cooked macaroni, cheese sauce, and sweet corn kernels in a large bowl, mixing gently to coat every bite. Transfer the mixture to a greased baking dish, then top with a crispy breadcrumb layer for texture. Bake uncovered for 20-25 minutes until bubbly and golden. Let it rest for 5 minutes before serving to allow the sauce to thicken. For a time-saving hack, use pre-shredded cheese or prepare the sauce ahead and reheat it before mixing.
Mistakes I’ve made and learned from
Early on, I rushed the cheese sauce and ended up with a grainy texture—turns out, high heat breaks the emulsion. Now I melt the butter slowly and remove the pan from the heat before adding cheese, which gives a silky finish. Another blunder? Overbaking the dish until the top dried out. A timer is your best friend here, and checking at the 20-minute mark ensures perfection. If you’re new to cheese sauces, my cheese sauce guide breaks down the science. Also, skipping the resting time once led to a soupy mess, so now I follow my own baking rest tips religiously. Trust me, patience pays off with this dish.
n-and-variations">Cultural Connection and Variations
Where this recipe comes from
Corn Mac Cheese Bake feels like a warm hug from the Midwest, where hearty casseroles rule the dinner table. Farmers and families have long relied on dishes like this one to stretch ingredients and feed a crowd. Originally, it likely started as a clever way to use leftover corn and pasta, but over time, it became a beloved staple. In the South, you might find a spicier version with jalapeños or a smoky twist from bacon. Meanwhile, some coastal regions add crab or shrimp for a seafood spin.
My grandma made her Corn Mac Cheese Bake with sharp cheddar and a buttery breadcrumb topping, a recipe she swore came from her Pennsylvania Dutch neighbors. In Mexico, a similar dish might include poblano peppers and cotija cheese, while in Italy, cooks could swap the corn for sun-dried tomatoes and fontina. No matter where it’s made, though, the creamy, carb-loaded comfort stays the same.
How it fits in today’s cooking
Today, Corn Mac Cheese Bake still shines as a versatile crowd-pleaser. Busy parents love it for weeknight dinners, while meal preppers pack it for lunches all week. Modern twists, like using gluten-free pasta or plant-based cheese, keep it relevant for today’s diets. It’s also a star at potlucks and holiday gatherings, especially when paired with easy holiday side dishes.
With the rise of comfor
t food trends, this bake has found new life on social media and food blogs. Some cooks even turn it into a one-pan meal by adding protein like chicken or sausage. Whether you stick to the classic or experiment with new flavors, Corn Mac Cheese Bake proves that some traditions only get better with time.
Taste and Texture
What makes it delicious
Corn Mac Cheese Bake delivers a comforting, crave-worthy experience with every bite. The creamy, velvety cheese sauce coats tender macaroni, while sweet corn kernels add a burst of freshness and subtle crunch. A golden, buttery breadcrumb topping contrasts beautifully with the soft interior, creating layers of texture. Fragrant garlic and sharp cheddar deepen the savory notes, making each forkful rich and satisfying. Whether served straight from the oven or reheated, Corn Mac Cheese Bake stays irresistibly gooey and flavorful.
Boosting the flavor
Elevate your Corn Mac Cheese Bake with a few easy tweaks. For extra smokiness, stir in crispy bacon or swap the cheddar for smoked gouda. A dash of cayenne or paprika adds warmth without overpowering the dish. Top it with fresh herbs like chives or parsley for a bright finish. Pair it with a tangy garlic ranch sauce or a zesty spicy tomato relish to balance the richness. Experiment with different cheeses or roasted veggies to make it your own.
Always preheat your oven before baking Corn Mac Cheese Bake to ensure even cooking. Additionally, use freshly grated cheese instead of pre-shredded varieties for a smoother, creamier texture. Stir the pasta and cheese sauce gently to avoid breaking the noodles, and cover the dish with foil during the first half of baking to prevent drying. For extra flavor, top the bake with a buttery breadcrumb mixture before the final bake.
Mistakes to avoid
Avoid overcooking the pasta before baking, as it will turn mushy in the Corn Mac Cheese Bake. Instead, cook it just until al dente since it will soften further in the oven. Also, don’t skip the step of buttering the baking dish, or the edges may stick. If you’re short on time, check out our quick kitchen hacks for efficient prep. Finally, resist the urge to overmix the cheese sauce, which can make it grainy—follow our perfect cheese sauce guide for foolproof results.
g-suggestions">Serving and Pairing Suggestions
How to serve this dish
Bring your Corn Mac Cheese Bake to the table straight from the oven while it’s still bubbling and golden for maximum appeal. For a cozy family dinner, serve it in individual ramekins with a sprinkle of fresh chives or parsley on top. Alternatively, transfer it to a rustic cast-iron skillet for a charming, shareable centerpiece at potlucks or holiday gatherings. If you’re hosting brunch, pair it with a crisp green salad to balance the richness. Either way, let the cheesy aroma and vibrant colors tempt everyone before they take the first bite.
What goes well with it
Corn Mac Cheese Bake shines alongside tangy or fresh accompaniments. For a refreshing contrast, try a simple cucumber tomato salad, which cuts through the creaminess with its bright flavors. If you crave something heartier, crispy garlic bread or roasted Brussels sprouts add satisfying texture. To elevate the meal, pair it with a chilled glass of citrusy white wine or a fizzy homemade sparkling lemonade, balancing the dish’s richness with a touch of acidity.
math-faq-block">
What ingredients do I need for Corn Mac Cheese Bake?
You’ll need elbow macaroni, corn kernels (fresh, frozen, or canned), shredded cheddar cheese, milk, butter, flour, and seasonings like salt, pepper, and paprika. Corn Mac Cheese Bake combines the creaminess of mac and cheese with the sweetness of corn for a comforting dish.
Can I make Corn Mac Cheese Bake ahead of time?
Yes! Assemble the Corn Mac Cheese Bake up to a day in advance, cover it tightly, and refrigerate. Bake it just before serving, adding a few extra minutes to the cooking time if it’s cold from the fridge.
How do I prevent my Corn Mac Cheese Bake from drying out?
Use enough sauce and avoid overbaking—the dish should be bubbly and golden but still moist. Covering it with foil for part of the baking time helps retain moisture in your Corn Mac Cheese Bake.
rank-math-faq-item">
What can I serve with Corn Mac Cheese Bake?
Pair Corn Mac Cheese Bake with a crisp green salad, roasted vegetables, or grilled chicken for a balanced meal. It also works well as a standalone comfort food or a hearty side dish at potlucks.
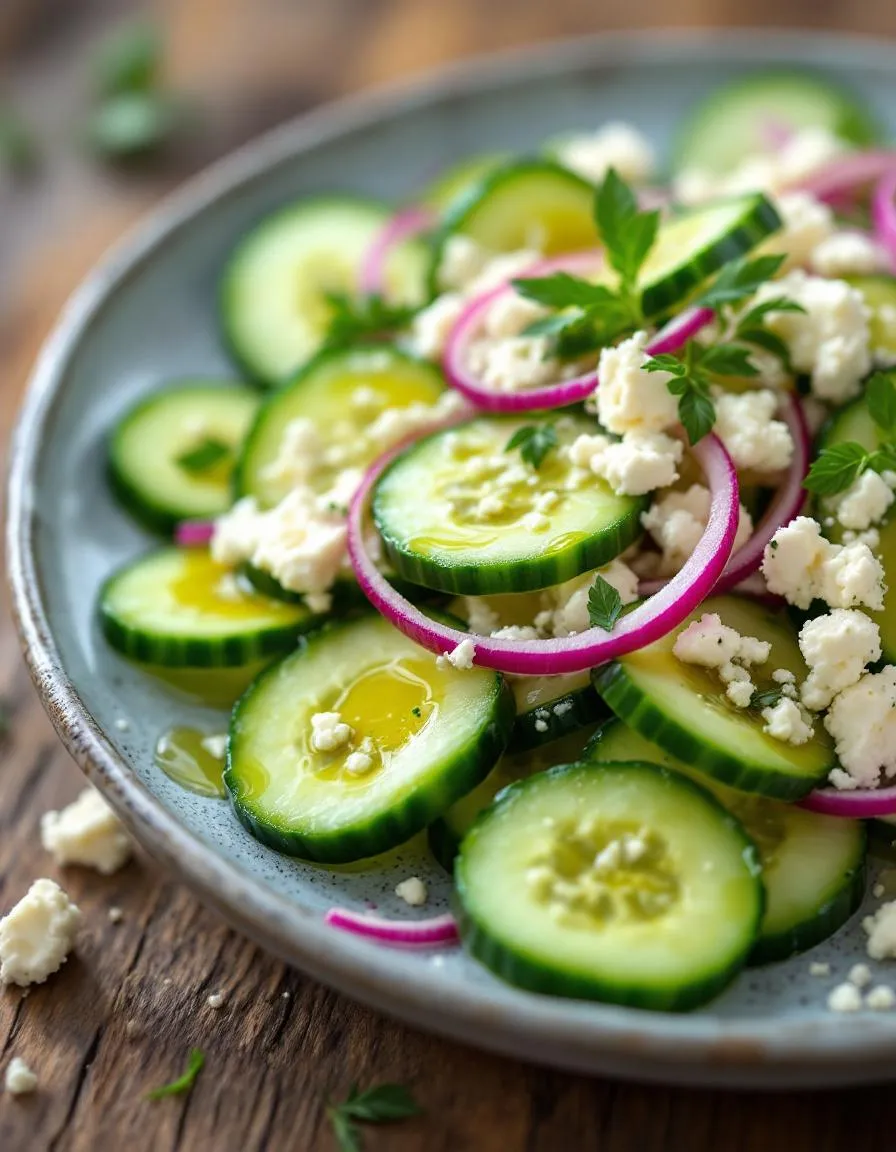
Best Cucumber Feta Salad – Refreshing & Easy Recipe
Introduction
There’s something undeniably refreshing about a dish that balances crispness, creaminess, and tang in every bite. That’s exactly why I adore this Cucumber Feta Salad—it’s a vibrant, no-fuss recipe that brings joy to any table. Whether you’re prepping for a summer picnic or just craving a light yet satisfying side, this salad delivers. Plus, it’s a fantastic way to celebrate fresh produce, something I always emphasize in my seasonal cooking guides.
Cucumber Feta Salad is a Mediterranean-inspired dish that combines crunchy cucumbers, creamy feta cheese, and a zesty dressing for a burst of flavor in every forkful. Unlike heavy, complicated recipes, this salad shines in its simplicity, making it perfect for busy weeknights or last-minute gatherings. It’s also incredibly versatile—you can toss in olives, red onions, or even a handful of fresh herbs from your garden. For those who love meal prep, it keeps well in the fridge, so you can enjoy it throughout the week. If you’re looking for more easy, crowd-pleasing dishes, check out my quick dinner ideas for inspiration. Above all, this salad embodies the breezy, approachable vibe of brekcakes.com, where good food doesn’t have to be fussy to feel special.
Why I Love This Recipe
This Cucumber Feta Salad holds a special place in my heart because it reminds me of lazy Sunday lunches with my family. My mom used to whip it up with garden-fresh cucumbers, and I’d sneak extra feta when she wasn’t looking. Now, whenever I make it, the crisp crunch and salty-sweet flavors transport me right back to those sunny afternoons. It’s more than just a recipe—it’s a little edible memory, and I hope it becomes one for you too.
Health and Nutrition
Why it’s good for your body
Cucumber Feta Salad packs a refreshing punch while delivering impressive health benefits. First, cucumbers hydrate your body thanks to their high water content, which keeps you feeling full and energized. Additionally, they provide vitamins like K and C, supporting bone health and immunity. Meanwhile, feta cheese adds a protein boost and healthy fats, helping you stay satisfied longer.
Moreover, this salad includes heart-healthy olive oil, rich in monounsaturated fats that may lower bad cholesterol. The combination of crisp cucumbers and creamy feta also offers a balanced texture and flavor, making it easy to enjoy nutrient-dense ingredients. Since cucumbers are low in calories but high in fiber, Cucumber Feta Salad promotes digestion without weighing you down.
Finally, the dish contains antioxidants from fresh herbs like dill or mint, which fight inflammation. Whether you need a light lunch or a side dish, Cucumber Feta Salad nourishes your body without compromising taste. Its simplicity ensures you get wholesome nutrients in every bite.
How it fits in a healthy lifestyle
Cucumber Feta Salad fits seamlessly into a balanced diet, whether you’re aiming for weight management or heart health. Because it’s naturally gluten-free and low-carb, it pairs well with gluten-free meal plans. The protein from feta and healthy fats from olive oil also make it a smart choice for those focusing on satiety and muscle maintenance.
For busy weeknights, this salad comes together quickly, encouraging healthier eating habits without extra effort. You can even meal-prep it ahead of time, just like our easy meal-prep strategies suggest. Whether served as a side or a main with grilled chicken, Cucumber Feta Salad keeps your meals fresh, flavorful, and full of nutrients.
Start by washing and drying two large cucumbers thoroughly, then slice them into thin rounds or half-moons for a crisp bite. Toss the cucumber pieces into a large mixing bowl and sprinkle with a pinch of salt to draw out excess moisture—this keeps your Cucumber Feta Salad from getting watery. While the cucumbers rest, crumble a block of high-quality feta cheese into small chunks and set aside. In a separate bowl, whisk together olive oil, lemon juice, minced garlic, and a dash of dried oregano until smooth. Drain any liquid from the cucumbers, then gently fold in the feta, halved cherry tomatoes, and thinly sliced red onion. Drizzle the dressing over the salad and toss lightly to coat everything evenly. For the best flavor, let the salad chill in the fridge for at least 15 minutes before serving. If you’re short on time, skip the salting step but pat the cucumbers dry with a paper towel to prevent sogginess. For extra crunch, add toasted pine nuts or sunflower seeds right before serving.
Mistakes I’ve made and learned from
Early on, I made the mistake of overdressing my Cucumber Feta Salad, which turned it into a soggy mess. Now, I always add the dressing in stages, tasting as I go, to avoid drowning the fresh ingredients. Another lesson? Not all feta is created equal. I once used pre-crumbled feta, and the salad lacked the creamy texture I wanted. Now, I buy a solid block and crumble it myself—it makes all the difference. If you’re new to working with feta, check out my guide on choosing the right cheese for tips. Also, don’t skip the salting step unless you enjoy a watery salad. Trust me, I learned that the hard way! For more tricks on keeping salads crisp, read my salad hacks post—it’s a game-changer.
Cucumber Feta Salad traces its roots to the sunny Mediterranean, where crisp cucumbers and tangy feta cheese thrive under the warm coastal breeze. Greeks often serve it as a refreshing side dish, drizzled with olive oil and sprinkled with oregano. Meanwhile, in Turkey, they might add a splash of pomegranate molasses for a sweet-tart twist. Even within my family, we’ve put our own spin on it—tossing in juicy cherry tomatoes or swapping fresh mint for dill depending on the season.
Travel further east, and you’ll find Middle Eastern versions studded with sumac or za’atar for an earthy kick. Some regions even fold in creamy yogurt to make it heartier. No matter where you go, Cucumber Feta Salad adapts beautifully, reflecting local flavors while keeping its crisp, cooling essence. Whether it’s a picnic staple or a meze platter star, this dish carries stories of shared tables and sunny afternoons.
ays-cooking">How it fits in today’s cooking
Today, Cucumber Feta Salad shines as a go-to for busy cooks and health-conscious eaters alike. It’s a breeze to whip up for weeknight dinners, yet elegant enough for summer barbecues or holiday spreads. Modern twists include adding quinoa for extra protein or tossing in avocado for creaminess. Many even pair it with grilled meats from our easy grilling recipes collection for a balanced meal.
Seasonal eating also keeps this salad relevant. When cucumbers peak in summer, it’s a crisp, hydrating treat. In cooler months, some roast the cucumbers lightly for a warmer variation. And for those meal-prepping? It’s a perfect make-ahead dish, just like the meal prep ideas we love for busy weeks. No matter how you serve it, Cucumber Feta Salad remains a timeless, versatile favorite.
Taste and Texture
What makes it delicious
Cucumber Feta Salad bursts with refreshing, vibrant flavors that dance on your tongue. Crisp cucumbers deliver a juicy crunch, while creamy feta cheese adds a tangy, salty richness. Fresh herbs like mint or dill bring a fragrant brightness, and a drizzle of olive oil ties everything together with a smooth, velvety finish. Every bite of Cucumber Feta Salad feels light yet satisfying, making it perfect for warm days or as a zesty side dish. The contrast between the cool cucumbers and the bold feta creates a harmony that keeps you reaching for more.
r">Boosting the flavor
Elevate your Cucumber Feta Salad with a handful of toasted walnuts or pine nuts for a nutty crunch. Alternatively, toss in some Kalamata olives for a briny depth that pairs beautifully with the feta. A squeeze of lemon juice or a sprinkle of sumac can brighten the flavors even further. For a creamy twist, try adding a dollop of Greek yogurt dressing to balance the tanginess. If you love heat, a pinch of red pepper flakes or a dash of homemade harissa will add a spicy kick. Experimenting with these small tweaks keeps the salad exciting and tailored to your taste.
Tips for Success
Best practices for results
Always slice cucumbers evenly so they marinate uniformly in your Cucumber Feta Salad. For the best flavor, chill the salad for at least 30 minutes before serving. Meanwhile, use fresh, high-quality feta cheese—it makes a noticeable difference in texture and taste. If you prefer a creamier dressing, gently fold in Greek yogurt for extra richness. Finally, toss the salad just before serving to keep the cucumbers crisp and refreshing.
>Mistakes to avoid
Avoid oversalting the salad early on, since feta cheese already adds plenty of saltiness. Instead, season in stages and taste as you go. Also, don’t let the salad sit too long before serving, or the cucumbers may lose their crunch. For more tips on balancing flavors, check out our guide on salad dressing ratios. Another common mistake is using watery cucumbers—pat them dry first to prevent a soggy salad. Learn how to prep vegetables properly in our vegetable prep guide.
Serving and Pairing Suggestions
How to serve this dish
For a refreshing presentation, serve Cucumber Feta Salad in a shallow bowl or on a large platter to showcase its vibrant colors. Meanwhile, garnish with extra crumbled feta and a sprinkle of fresh dill for a pop of contrast. This dish shines at summer picnics, but it also makes a light yet impressive side for holiday gatherings. If you want to elevate the look, arrange cucumber slices in a circular pattern and drizzle the dressing just before serving.
What goes well with it
Pair Cucumber Feta Salad with grilled proteins like lemon herb chicken or garlic shrimp for a balanced meal. Additionally, it complements tangy dips like tzatziki or hummus, adding extra creaminess to each bite. For drinks, try a crisp white wine or sparkling water with lime to enhance the salad’s freshness. If you’re planning a full spread, serve it alongside our Mediterranean Quinoa Bowl or Grilled Halloumi Skewers for a Mediterranean-inspired feast.
What ingredients are in a classic Cucumber Feta Salad?
A classic Cucumber Feta Salad typically includes fresh cucumbers, crumbled feta cheese, red onion, olives, and fresh herbs like dill or mint. The dressing is usually a simple mix of olive oil, lemon juice, salt, and pepper. This refreshing salad highlights the crispness of cucumbers and the tangy creaminess of feta.
How long does Cucumber Feta Salad last in the fridge?
Cucumber Feta Salad stays fresh for about 2–3 days when stored in an airtight container in the fridge. The cucumbers may release some water over time, so draining excess liquid before serving helps maintain texture. For best results, add fresh herbs right before eating.
rank-math-faq-item">
Can I add avocado to Cucumber Feta Salad?
Yes, avocado pairs wonderfully with Cucumber Feta Salad, adding creaminess and healthy fats. Dice or slice the avocado and gently toss it in just before serving to prevent browning. The combination of cool cucumbers, salty feta, and rich avocado creates a delicious balance.
Is Cucumber Feta Salad healthy?
Absolutely! Cucumber Feta Salad is packed with nutrients—cucumbers provide hydration and fiber, while feta offers protein and calcium. Using olive oil and fresh herbs boosts heart-healthy fats and antioxidants. It’s a light, nutritious dish perfect for summer meals or as a side.
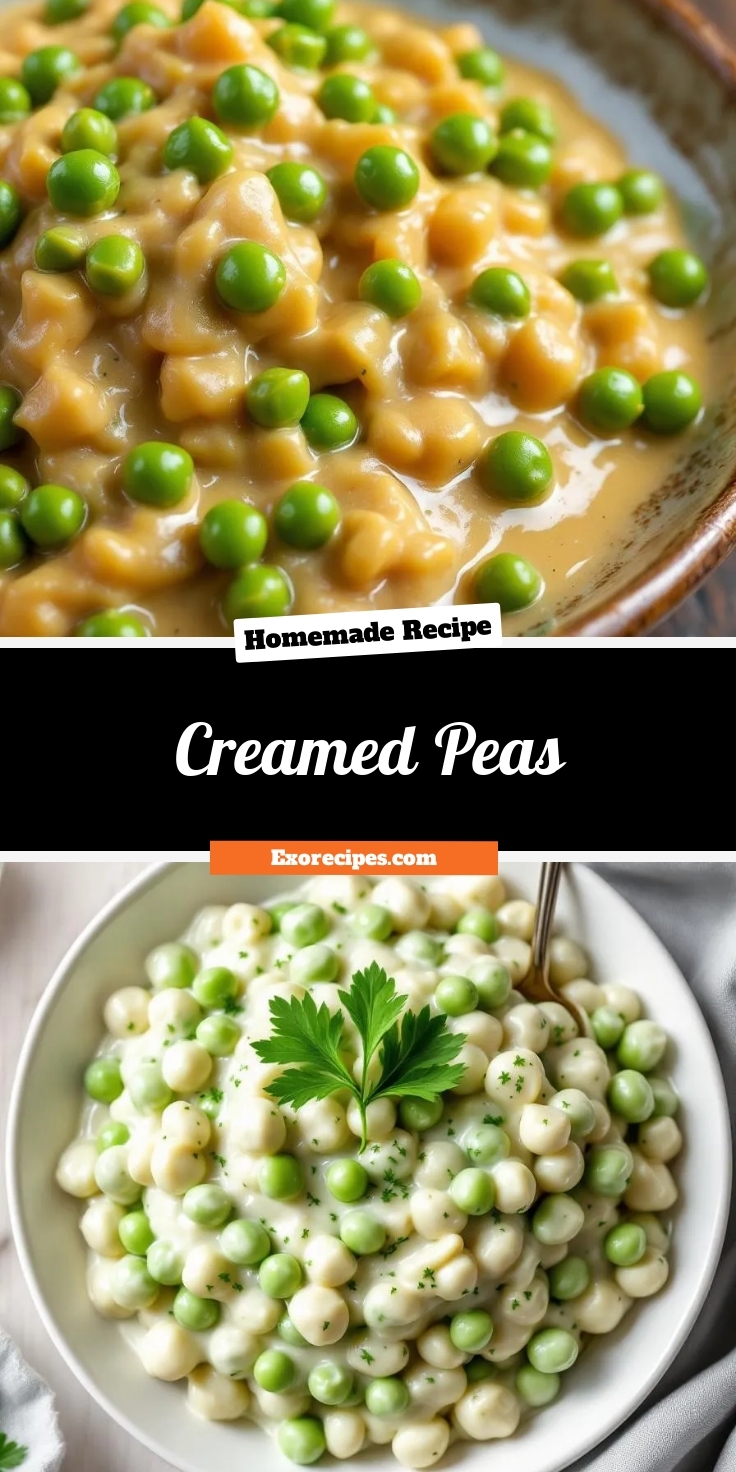
Best Creamed Peas – Classic Comfort Food Recipe
Introduction
There’s something undeniably comforting about a bowl of Creamed Peas—soft, buttery, and bursting with fresh flavor. Whether you grew up with this classic side dish or are discovering it for the first time, it has a way of wrapping you in nostalgia. Moreover, it pairs perfectly with everything from roasted chicken to flaky biscuits, making it a versatile addition to any meal. If you’re craving a taste of home or simply want to elevate your weeknight dinners, this recipe delivers warmth and satisfaction in every bite.
Creamed Peas is a timeless dish that transforms humble ingredients into something truly special. At its core, it combines tender peas with a rich, velvety sauce made from butter, flour, and milk or cream. While it might sound simple, the magic lies in the balance of textures and flavors—sweet peas contrast beautifully with the savory cream base. Historically, this dish has roots in American home cooking, often appearing on holiday tables or as a comforting weeknight staple. On brekcakes.com, we celebrate recipes like this because they bridge tradition and modern simplicity. For instance, if you love classic comfort food, you’ll appreciate our fluffy buttermilk biscuits, which pair wonderfully with Creamed Peas. Similarly, if you’re exploring more vegetable-forward sides, our garlic green beans offer another delicious option. Ultimately, this dish embodies what we stand for—approachable, flavorful, and deeply satisfying cooking.
Why I Love This Recipe
Creamed Peas holds a special place in my heart because it reminds me of Sunday dinners at my grandmother’s house. She always made it with garden-fresh peas and a touch of nutmeg, which added warmth to every spoonful. Even now, whenever I prepare this dish, it brings back memories of laughter around the table and the joy of sharing food with loved ones. Beyond nostalgia, I adore how effortlessly it comes together, proving that the simplest recipes often leave the biggest impression.
Health and Nutrition
Why it’s good for your body
Creamed Peas deliver a powerhouse of nutrients in every creamy, satisfying bite. First, they pack a punch of plant-based protein and fiber, which keeps you full longer and supports digestion. Additionally, peas provide essential vitamins like vitamin K for bone health and vitamin C to boost immunity. Since Creamed Peas often include milk or a dairy alternative, they also offer calcium for strong teeth and bones.
Moreover, this dish contains antioxidants that fight inflammation and promote heart health. The natural sweetness of peas means you can enjoy Creamed Peas without added sugars, making it a smarter choice for balanced eating. Furthermore, the combination of healthy fats from cream or butter substitutes and the low glycemic index of peas helps stabilize blood sugar levels. Whether you serve it as a side or a main, Creamed Peas contribute to a nutrient-dense meal without sacrificing flavor.
Finally, Creamed Peas adapt easily to dietary preferences. For instance, you can swap traditional dairy for almond milk or coconut cream to reduce lactose. Either way, you still get the same wholesome benefits. With so many advantages, it’s no wonder Creamed Peas remain a timeless favorite for health-conscious eaters.
How it fits in a healthy lifestyle
Creamed Peas fit seamlessly into a balanced diet, whether you’re aiming for heart-healthy meals or plant-based protein sources. Their versatility makes them ideal for weeknight dinners or meal prep, especially when paired with lean proteins like grilled chicken or fish. If you’re exploring gluten-free options, Creamed Peas naturally avoid gluten while still feeling indulgent.
For those focusing on weight management, the fiber in Creamed Peas helps control cravings, so you stay satisfied without overeating. You can also lighten the dish by using low-fat milk or a splash of olive oil instead of heavy cream. Looking for more ways to incorporate veggies? Try pairing Creamed Peas with our Roasted Vegetable Medley for a colorful, nutrient-packed plate. Or, if you need quick family-friendly ideas, our 30-Minute Weeknight Dinners guide offers plenty of inspiration. However you enjoy it, Creamed Peas make healthy eating simple and delicious.
A simple and creamy side dish featuring tender peas in a rich, velvety sauce.
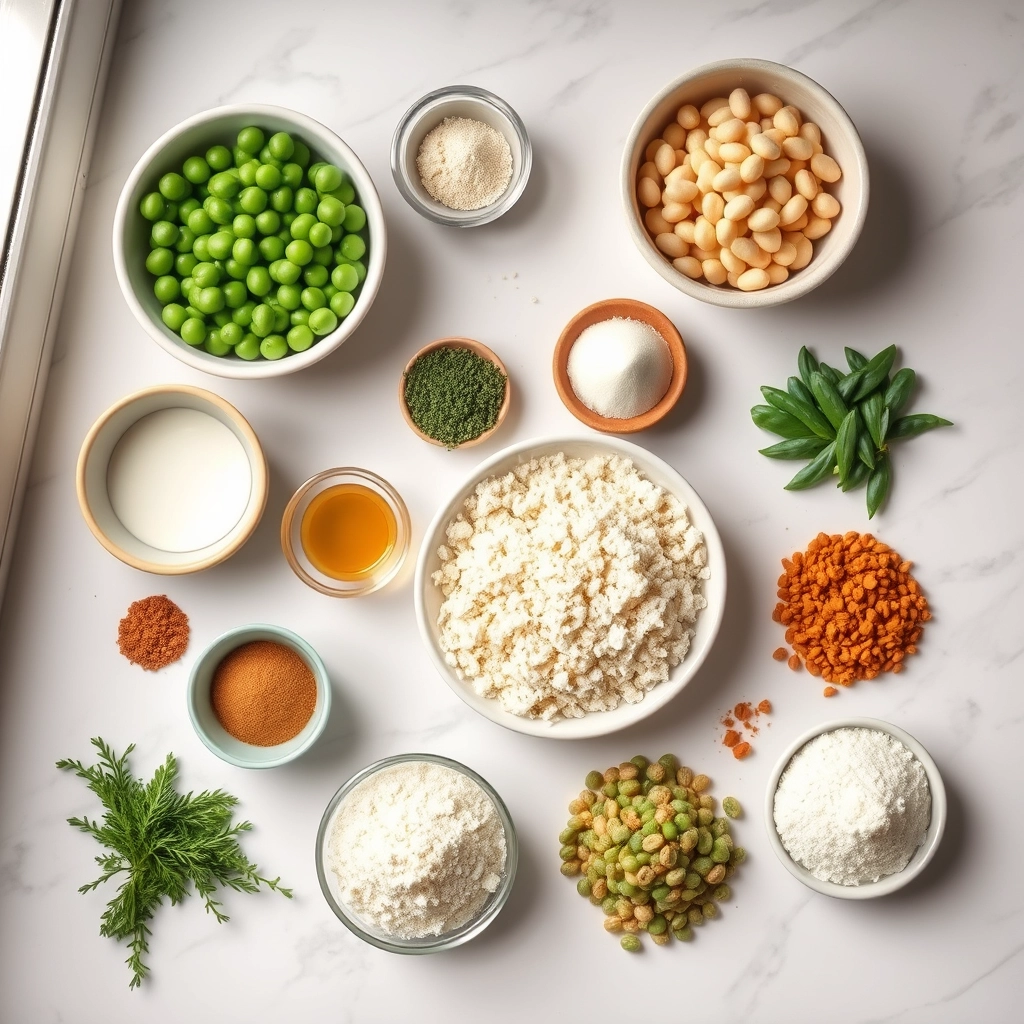
Ingredients
Scale
For the Crust:
2 cups frozen peas
2 tablespoons butter
2 tablespoons all-purpose flour
1 cup whole milk
1/2 teaspoon salt
1/4 teaspoon black pepper
1/4 teaspoon garlic powder
Instructions
1. Prepare the Crust:
In a medium saucepan, melt the butter over medium heat.
Whisk in the flour and cook for 1-2 minutes until lightly golden.
Gradually whisk in the milk, ensuring no lumps form.
Cook the sauce, stirring constantly, until it thickens (about 3-4 minutes).
Stir in the peas, salt, pepper, and garlic powder.
Simmer for 5-7 minutes until the peas are heated through and the sauce is creamy.
Notes
You can customize the seasonings to taste.
“`html
="how-to-prepare-this-dish">How to Prepare This Dish
Steps and time-saving tips
Start by melting butter in a saucepan over medium heat, then whisk in flour to create a smooth roux. Cook it for just a minute to remove the raw flour taste, but don’t let it brown. Gradually pour in milk while stirring constantly to avoid lumps—this ensures your creamed peas stay velvety. Once the sauce thickens, reduce the heat and fold in fresh or frozen peas, letting them simmer until tender. Season with salt, pepper, and a pinch of sugar to balance the flavors. For a time-saving hack, use pre-cooked peas or steam them in the microwave while preparing the sauce. If the mixture feels too thick, splash in a little extra milk or broth. Finish with a sprinkle of fresh herbs like parsley or chives for brightness. Serve immediately while warm, or keep it covered on low heat to prevent a skin from forming on top.
Mistakes I’ve made and learned from
I once rushed the roux and ended up with a grainy sauce—patience is key here! Letting the flour and butter cook just long enough makes all the difference. Another time, I overcooked the peas, turning them mushy. Now I add them at the last minute if they’re already tender, as I learned from my guide to perfect vegetable textures. If your sauce separates, don’t panic. A quick whisk or a splash of warm milk usually brings it back together. For more troubleshooting tips, check out my sauce consistency fixes. Trust me, creamed peas forgive small mistakes, so keep it simple and enjoy the process.
Creamed Peas carry a cozy, nostalgic charm that stretches back generations. Originally, this dish found its roots in rural American kitchens, where families relied on simple, hearty ingredients to stretch meals. Farmers often paired fresh or preserved peas with creamy sauces to create a comforting side dish, especially during colder months. Meanwhile, in England, a similar version called “mushy peas” became a staple alongside fish and chips, proving how versatile this humble dish can be.
In my own family, Cream
ed Peas always made an appearance at holiday gatherings. My grandmother would simmer them with a touch of nutmeg, a trick she learned from her German neighbors. Across the South, cooks might add a dash of hot sauce or crumbled bacon for extra flair. Even today, you’ll find regional twists—some prefer a lighter sauce, while others go all-in with butter and cream. No matter the variation, Creamed Peas remain a timeless way to turn simple ingredients into something special.
How it fits in today’s cooking
Modern cooks still love Creamed Peas for their versatility and comfort-food appeal. They’re a natural fit for holiday tables, especially when paired with classic mains like roasted turkey or ham. But you don’t need a special occasion to enjoy them. Many home chefs whip up a batch for weeknight dinners, swapping heavy cream for coconut milk or almond milk to keep things light. Others fold them into pasta dishes for an easy upgrade.
What keeps Creamed Peas relevant today? Their adaptability. Whether you’re cooking for a crowd or meal-prepping solo, this dish fits right in. Some even repurpose leftovers into creamy soups or savory pie fillings. With so many ways to customize it, Creamed Peas prove that classic flavors never go out of style.
>Taste and Texture
What makes it delicious
Creamed Peas deliver a comforting blend of sweetness and richness that makes every bite irresistible. The tender peas burst with a fresh, slightly grassy flavor, while the velvety cream sauce wraps them in a luxurious, buttery embrace. A hint of onion or garlic adds depth, and a sprinkle of black pepper brings just the right amount of warmth. The texture is pure harmony—soft yet slightly firm peas swimming in a smooth, decadent sauce. Whether served as a side or spooned over toast, Creamed Peas offer a nostalgic, satisfying dish that feels both hearty and light.
Boosting the flavor
For an extra layer of flavor, try stirring in crispy bacon bits or a handful of grated Parmesan cheese just before serving. Fresh herbs like dill or chives brighten the dish, while a dash of nutmeg or smoked paprika adds subtle complexity. If you love creamy sides, pair Creamed Peas with our Garlic Mashed Potatoes for a dreamy comfort-food duo. Craving crunch? Top them with toasted breadcrumbs or slivered almonds for contrast. For more inspiration, check out our guide to Easy Herb Sauces to elevate your next batch.
Tips for Success
Best practices for results
Always use fresh or frozen peas for the best texture in your Creamed Peas. If you opt for frozen, thaw them first to prevent excess water from diluting the sauce. Stir the cream sauce frequently over medium heat to avoid lumps, and season generously with salt and pepper for balanced flavor. For extra richness, finish with a pat of butter just before serving. Finally, serve Creamed Peas immediately to keep them warm and creamy.
Mistakes to avoid
Avoid overcooking the peas, as they can turn mushy and lose their vibrant color. Instead, add them to the sauce just before serving to maintain their texture. Many cooks also forget to taste the sauce before finishing, so adjust the seasoning early to avoid bland Creamed Peas. For more tips on perfecting creamy sauces, check out our guide on cream sauce secrets. Additionally, if your sauce separates, learn how to fix it with our troubleshooting tips for sauces gone wrong.
Serving and Pairing Suggestions
How to serve this dish
Serve Creamed Peas warm in a shallow bowl or elegant side dish plate to showcase their creamy texture. For a pop of color, sprinkle fresh chopped parsley or chives on top. Meanwhile, a drizzle of olive oil or a pinch of smoked paprika adds visual appeal. Creamed Peas shine at holiday dinners, but they also make a comforting weeknight side. If you’re hosting brunch, pair them with fluffy biscuits for a cozy touch.
h-it">What goes well with it
For a hearty meal, pair Creamed Peas with roasted chicken or our savory Herb-Crusted Pork Tenderloin. The tender meat balances the dish’s creaminess perfectly. Alternatively, serve them alongside crispy roasted potatoes for contrasting textures. If you prefer lighter fare, try our refreshing Citrus Avocado Salad to brighten the meal. Finally, a chilled glass of Sauvignon Blanc or sparkling water with lemon complements the peas’ rich flavor.
What are creamed peas made of?
Creamed peas are a simple dish made with tender peas cooked in a creamy sauce, typically consisting of butter, flour, milk, and seasonings. Some variations include onions, garlic, or herbs to enhance the flavor. This classic comfort food pairs well with mashed potatoes or roasted meats.
rank-math-faq-item">
How do you thicken creamed peas?
To thicken creamed peas, make a roux by melting butter and whisking in flour before adding milk. Simmer the mixture until it reaches your desired consistency. For a lighter option, you can also use cornstarch or heavy cream to adjust the thickness of the sauce.
Can you freeze creamed peas?
Yes, you can freeze creamed peas, but the texture may change slightly upon thawing. Store them in an airtight container for up to 3 months. Reheat gently on the stovetop, stirring occasionally to restore the creamy consistency.
What to serve with creamed peas?
Creamed peas pair wonderfully with dishes like fried chicken, meatloaf, or baked ham. They also complement starches such as biscuits, rice, or buttery noodles. For a vegetarian option, try serving creamed peas over toast or alongside roasted vegetables.