“`html
Table of Contents
- What is Steak Pizzaiola?
- Ingredients for Classic Steak Pizzaiola
- Timing is Everything
- Step-by-Step Instructions
- Nutritional Information
- Healthier Alternatives
- Serving Suggestions
- Common Mistakes to Avoid
- Storing and Reheating Tips
- Conclusion: Your Steak Pizzaiola Adventure Awaits!
- Frequently Asked Questions (FAQs)
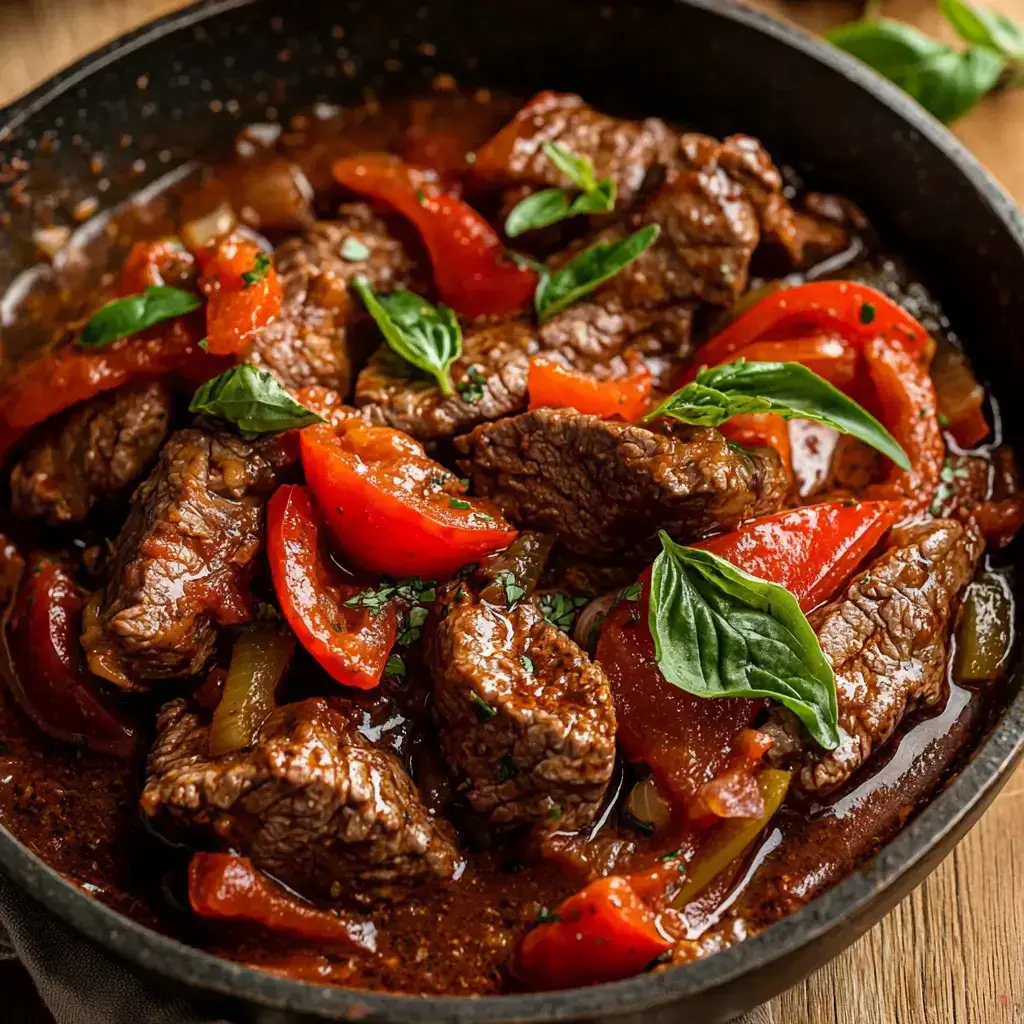
Classic Steak Pizzaiola Recipe
Craving a Flavorful Italian Classic That’s Both Comforting and Impressive?
Are you on the hunt for a recipe that brings the vibrant flavors of the Mediterranean right to your dinner table without demanding hours in the kitchen? If so, you’ve landed in the perfect spot! Classic Steak Pizzaiola is a dish that has captivated palates for generations, marrying the robust heartiness of steak with the rustic charm of a rich, herb-infused tomato sauce. This isn’t just any steak; it’s a tender, juicy cut transformed into a culinary masterpiece, often a weeknight savior for busy home cooks and a star for special occasions. With an average preparation time of just 15-20 minutes, this Italian-inspired delicacy is significantly quicker to make than many other steak dishes, proving that exceptional flavor doesn’t always require extensive effort. Let’s dive into this beloved classic and discover why it’s a staple in so many kitchens!
Ingredients for Classic Steak Pizzaiola
The beauty of Steak Pizzaiola lies in its simplicity and the quality of its components. We’re focusing on fresh, vibrant ingredients that work in harmony to create a truly memorable dish.
For the Steak
-
2 (6-8 oz) Ribeye or New York Strip Steaks (about 1-1.5 inches thick): Opt for well-marbled cuts for ultimate tenderness and flavor. The marbling will melt during cooking, basting the steak in its own delicious juices.
- Substitution: Sirloin or flank steak can work, but may require a slightly longer simmering time to tenderize. Aim for a thickness of at least 1 inch.
- 1 tablespoon Olive Oil: For searing. Use a good quality extra virgin olive oil for its flavor and higher smoke point.
- Salt and freshly ground Black Pepper: To taste. Generously season your steaks before searing to create a beautiful crust.
For the Pizzaiola Sauce
- 1 tablespoon Olive Oil: To sauté the aromatics.
- 1 medium Yellow Onion, thinly sliced: Provides a sweet, aromatic base. The natural sugars caramelize beautifully.
-
4-5 cloves Garlic, thinly sliced: Essential for that classic Italian zest. Don’t be shy with the garlic!
- Substitution: 1 teaspoon minced garlic from a jar if fresh cloves are unavailable, though the flavor will be less pungent.
- 1 (28 ounce) can Crushed Tomatoes: The heart of our sauce. Opt for San Marzano tomatoes if possible for their superior sweetness and lower acidity.
- 1/2 teaspoon Dried Oregano: A quintessential Italian herb that adds a warm, earthy note.
- 1/2 teaspoon Dried Basil: Complements the oregano with its slightly sweet, peppery flavor.
- Pinch of Red Pepper Flakes (optional): For a subtle background warmth that enhances the other flavors.
-
1/4 cup Dry Red Wine (optional): Adds depth and complexity to the sauce. A Merlot or Chianti works well.
- Substitution: Beef broth or water can be used if you prefer not to use wine.
- Salt and freshly ground Black Pepper: To taste. Adjust seasoning after the sauce has simmered.
- Fresh Parsley, chopped (for garnish): Adds a burst of freshness and color, cutting through the richness of the dish.
- Shaved Parmesan Cheese (for garnish, optional): For a salty, umami finish.
Timing is Everything
15 minutes
30-40 minutes
45-55 minutes
Compared to many other steak preparations which can take over an hour, especially considering marinating or extended resting times, Steak Pizzaiola is incredibly efficient. The active prep is minimal (slicing veggies and seasoning steak), and the cooking time is moderate, allowing flavors to meld beautifully without a lengthy commitment. This makes it an excellent choice for a busy weeknight when you desire a gourmet experience with less fuss.

Step-by-Step Instructions
Follow these simple steps to create a restaurant-worthy Steak Pizzaiola at home. We’ll break it down to ensure perfect results every time!
Step 1: Prepare the Steak
Pat your steaks thoroughly dry with paper towels. This is crucial for achieving a good sear. Season both sides generously with salt and freshly ground black pepper. Let the steaks sit at room temperature for about 15-20 minutes while you prepare the sauce ingredients; this helps them cook more evenly.
Step 2: Sear the Steak
Heat 1 tablespoon of olive oil in a large, heavy-bottomed skillet (cast iron is ideal) over medium-high heat until shimmering hot. Carefully place the seasoned steaks into the hot skillet. Sear for 2-4 minutes per side, depending on thickness, until a beautiful golden-brown crust forms. You’re not cooking them all the way through at this stage; just aiming for that gorgeous exterior. Remove the steaks from the skillet and set them aside on a plate.
Step 3: Sauté the Aromatics
Reduce the heat to medium. Add another tablespoon of olive oil to the same skillet (no need to wipe it out – those steak bits are pure flavor!). Add the thinly sliced onion and cook, stirring occasionally, until softened and translucent, about 5-7 minutes. Stir in the sliced garlic and red pepper flakes (if using) and cook for another minute until fragrant, being careful not to burn the garlic.
Step 4: Simmer the Sauce
If using red wine, pour it into the skillet and scrape up any browned bits from the bottom of the pan. Let it simmer for a minute to reduce slightly. Add the crushed tomatoes, dried oregano, and dried basil. Stir everything together. Bring the sauce to a gentle simmer, then reduce the heat to low, cover, and let it cook for about 10-15 minutes, allowing the flavors to meld and the sauce to thicken slightly.
Step 5: Return Steak to Sauce for Simmering
Nestle the seared steaks back into the simmering tomato sauce. Spoon some of the sauce over the top of each steak. Cover the skillet again and let it simmer gently for another 10-20 minutes, or until the steaks are cooked to your desired doneness (use a meat thermometer if unsure: 130-135°F for medium-rare, 140-145°F for medium). The residual heat and the sauce will continue to tenderize the steak.
Step 6: Rest and Serve
Once the steaks are cooked, remove the skillet from the heat. Let the steaks rest in the sauce for 5-10 minutes. This allows the juices to redistribute throughout the meat, ensuring a more tender and flavorful bite. Taste the sauce and adjust seasoning with salt and pepper if needed. To serve, place a steak on a plate and generously spoon the rich pizzaiola sauce over it. Garnish with fresh chopped parsley and a sprinkle of shaved Parmesan cheese, if desired.
Nutritional Information
(Note: Nutritional values are approximate and can vary based on steak cut, size, and specific ingredients used.)
- Calories: ~450-600 per serving (steak + sauce)
- Protein: ~40-55g
- Fat: ~25-40g (varies with steak marbling)
- Carbohydrates: ~15-25g
- Fiber: ~4-6g
Healthier Alternatives
Looking to lighten up this classic dish without sacrificing flavor? Try these simple swaps:
- Leaner Steak Cut: Opt for sirloin or a leaner cut of beef. While it might be less tender, the simmering in sauce will help.
- Reduce Oil: Use a non-stick skillet and a tablespoon or less of olive oil for searing and sautéing. You can also spray with cooking oil.
- Add More Veggies: Bulk up the sauce with diced bell peppers (red, yellow, or green), mushrooms, or zucchini. This adds volume and nutrients while allowing you to get by with slightly less steak per person.
- Whole Wheat Pasta: Serve with whole wheat spaghetti or a side of quinoa instead of white pasta or rice for added fiber.
- Reduced Sodium Tomatoes: Use low-sodium crushed tomatoes for the sauce.
Serving Suggestions
Steak Pizzaiola is a versatile dish that pairs wonderfully with a variety of sides. Here are some classic and modern suggestions:
- Pasta: Serve it over a bed of your favorite pasta – spaghetti, linguine, or penne are excellent choices.
- Crusty Bread: Essential for soaking up every last drop of that delicious sauce!
- Polenta: Creamy polenta is a fantastic starchy complement to the rich sauce and steak.
- Roasted Vegetables: Broccoli, asparagus, or green beans lightly roasted or steamed offer a fresh, healthy counterpoint.
- Simple Salad: A light arugula or mixed green salad with a vinaigrette dressing cuts through the richness.
Common Mistakes to Avoid
Ensure your Steak Pizzaiola is a triumph by sidestepping these common pitfalls:
- Not Patting Steak Dry: Skipping this step prevents a good sear, leading to a steak that steams rather than browns.
- Overcrowding the Pan: Searing steaks in batches is crucial for achieving a beautiful crust. Overcrowding lowers the pan temperature and steams the meat.
- Burning the Garlic: Garlic cooks quickly. Add it towards the end of sautéing aromatics and cook until just fragrant, not browned or burnt, as this will make it bitter.
- Not Resting the Steak: Resting is essential for juicy, tender steak. Cutting into it too soon will result in juices running out onto the plate.
- Unders-seasoning: Steak and sauce need adequate salt and pepper to bring out their full flavors. Season at multiple stages.
Storing and Reheating Tips
Leftover Steak Pizzaiola is a treat! Store completely cooled leftovers in an airtight container in the refrigerator for up to 3 days. Reheat gently on the stovetop over low heat, adding a splash of water or broth if the sauce seems too thick, or in the microwave until heated through. The flavors often meld and deepen overnight, making it even more delicious the next day!
Conclusion: Your Steak Pizzaiola Adventure Awaits!
There you have it – a classic Steak Pizzaiola recipe that delivers big on flavor with manageable effort. This dish is a testament to the magic that happens when simple, quality ingredients are brought together with a little bit of love and Italian flair. Whether you’re a seasoned cook or just starting your culinary journey, this recipe is sure to become a favorite. So, gather your ingredients, put on your apron, and get ready to enjoy a truly satisfying and delicious meal. Don’t forget to let us know how yours turned out in the comments below!
Frequently Asked Questions (FAQs)
***What kind of steak is best for Steak Pizzaiola?***
Well-marbled cuts like Ribeye or New York Strip are ideal for their tenderness and flavor. Sirloin is also a good option for a slightly leaner choice.
***Can I make the sauce ahead of time?***
Yes, you can make the pizzaiola sauce a day or two in advance. Store it in an airtight container in the refrigerator and reheat it before simmering the steak.
***What if I don’t have fresh garlic or onions?***
You can use minced garlic from a jar (about 1 teaspoon for every clove) and dried onion flakes or onion powder (about 1 teaspoon) as substitutes, though the flavor might be less vibrant.
***How do I know when the steak is cooked to my liking?***
The most accurate way is to use an instant-read meat thermometer. For medium-rare, aim for 130-135°F (54-57°C). For medium, 140-145°F (60-63°C). Remember to factor in a few degrees for carryover cooking as the steak rests.
***Can I add other vegetables to the sauce?***
Absolutely! Sliced mushrooms, bell peppers, or even chopped zucchini can be added along with the onions to give the sauce more texture and nutritional value.

How to Make the Best Steak Pizzaiola Recipe
Description
For extra flavor, marinate the steaks in olive oil, garlic, and herbs for 30 minutes before cooking.Add a dash of red pepper flakes for some heat.
Ingredients
- 4 boneless ribeye or flank steaks
- 2 tbsp olive oil
- 1 medium onion, thinly sliced
- 4 cloves garlic, minced
- 1 cup cherry tomatoes, halved
- 1 can (14 oz) crushed tomatoes
- 1 tsp dried oregano
- 1 tsp dried basil
- Salt and pepper to taste
- Fresh basil leaves for garnish
- Grated Parmesan cheese (optional)
Instructions
Notes
For extra flavor, marinate the steaks in olive oil, garlic, and herbs for 30 minutes before cooking.Add a dash of red pepper flakes for some heat.
“`