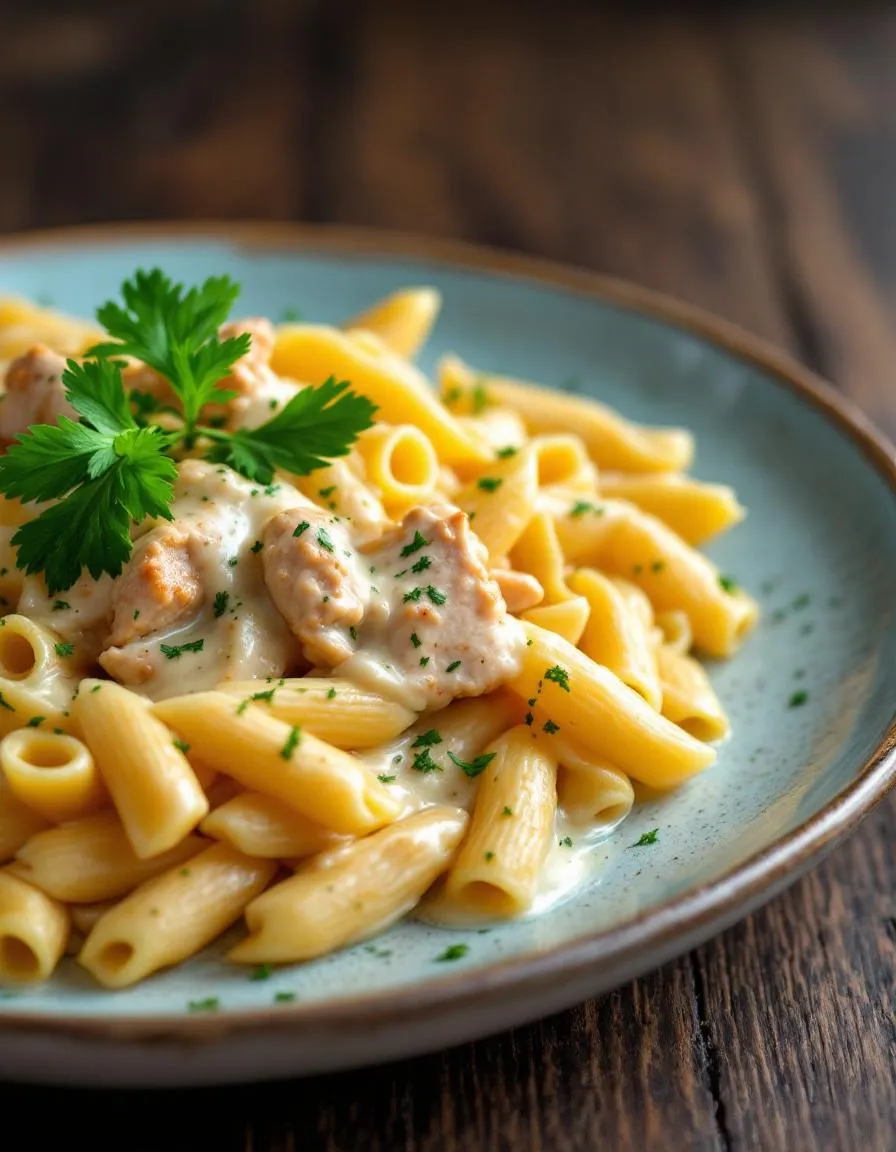
There’s something magical about a dish that brings bold flavors and comforting creaminess together in one bite. If you’ve ever craved a meal that feels indulgent yet comes together effortlessly, this Creamy Cajun Chicken Penne Pasta Recipe is your answer. Whether you’re cooking for a busy weeknight or a cozy weekend dinner, this dish delivers restaurant-quality taste without the fuss. Let’s dive into why this recipe deserves a permanent spot in your rotation.
Creamy Cajun Chicken Penne Pasta Recipe combines tender chicken, al dente penne, and a rich, spicy sauce that’s bursting with Cajun-inspired flavors. The dish balances heat from the seasoning with the smoothness of a creamy sauce, creating a harmony that keeps you coming back for more. What makes it special? First, it’s versatile—you can adjust the spice level to suit your taste. Second, it’s a crowd-pleaser, perfect for family dinners or entertaining friends. Plus, it pairs beautifully with a crisp salad or garlic bread for a complete meal.
This recipe fits perfectly with our blog’s mission to deliver approachable yet impressive dishes. Like our Garlic Butter Shrimp Pasta, it’s quick enough for weeknights but elegant enough for special occasions. And if you love bold flavors, you’ll adore our Spicy Honey Glazed Salmon too. The Creamy Cajun Chicken Penne Pasta Recipe checks all the boxes: simple ingredients, big flavor, and minimal cleanup. Let’s get cooking!
Why I Love This Recipe
This dish holds a special place in my heart because it reminds me of lazy Sunday dinners with my family. The aroma of Cajun spices filling the kitchen always brings everyone to the table before I even call them. I love how the creamy sauce clings to every noodle, and how the chicken stays juicy despite the bold seasoning. It’s the kind of meal that feels like a hug—comforting, satisfying, and full of love. Every time I make it, I’m reminded why cooking isn’t just about feeding people; it’s about creating memories.
Health and Nutrition
Why it’s good for your body
Creamy Cajun Chicken Penne Pasta Recipe packs a nutritious punch while delivering bold flavors. First, the lean chicken breast provides high-quality protein to support muscle repair and keep you full longer. Additionally, the Cajun seasoning adds more than just heat—it contains spices like paprika and garlic, which offer antioxidants to combat inflammation. Meanwhile, the creamy sauce, when made with Greek yogurt or light cream, balances richness with fewer calories than traditional heavy cream versions.
Moreover, the whole-grain penne pasta in this dish supplies complex carbs for steady energy. Unlike refined pasta, whole grains digest slowly, preventing blood sugar spikes. The vegetables, like bell peppers and onions, also sneak in fiber and vitamins, boosting immunity and digestion. Together, these ingredients make Creamy Cajun Chicken Penne Pasta Recipe a satisfying yet nutrient-dense meal.
Finally, the dish’s versatility lets you tweak it for extra health perks. For instance, you can add spinach for iron or swap in gluten-free pasta if needed. Whether you prioritize protein, gut health, or balanced macros, Creamy Cajun Chicken Penne Pasta Recipe adapts to your goals without sacrificing taste.
How it fits in a healthy lifestyle
Creamy Cajun Chicken Penne Pasta Recipe fits seamlessly into a balanced diet. If you’re watching portions, pair it with a light salad for a well-rounded plate. The protein-rich chicken and fiber from veggies help control cravings, making it a smart choice for weight management. For fitness enthusiasts, the meal’s macros support recovery after workouts, especially when you opt for whole-grain pasta.
Those following heart-healthy eating will appreciate the lean protein and anti-inflammatory spices. If you need gluten-free options, simply substitute the penne with a chickpea or brown rice pasta—just like our gluten-free dinner ideas suggest. And if you’re meal prepping, this dish stores well, so you can enjoy it throughout the week without resorting to less nutritious takeout.
For more inspiration on balancing indulgence with nutrition, explore our healthy comfort food guide. Whether you’re cooking for family or solo dinners, Creamy Cajun Chicken Penne Pasta Recipe proves that wholesome eating never has to be boring.
A flavorful and creamy pasta dish with tender Cajun-spiced chicken and penne in a rich sauce.
Ingredients
Scale
For the Crust:
8 oz penne pasta
2 boneless, skinless chicken breasts, sliced
1 tbsp Cajun seasoning
1 tbsp olive oil
1/2 cup heavy cream
1/2 cup chicken broth
1/4 cup grated Parmesan cheese
1/2 tsp garlic powder
1/2 tsp onion powder
1/4 tsp paprika
Salt and pepper to taste
Fresh parsley for garnish
Instructions
1. Prepare the Crust:
Cook penne pasta according to package instructions. Drain and set aside.
Season chicken slices with Cajun seasoning, salt, and pepper.
Heat olive oil in a large skillet over medium heat. Add chicken and cook until browned and fully cooked, about 5-6 minutes per side. Remove and set aside.
In the same skillet, add heavy cream, chicken broth, Parmesan cheese, garlic powder, onion powder, and paprika. Stir well and simmer for 3-4 minutes until slightly thickened.
Return cooked chicken to the skillet and add the cooked penne. Toss to coat evenly in the sauce.
Garnish with fresh parsley and serve hot.
Notes
You can customize the seasonings to taste.
How to Prepare This Dish
Steps and time-saving tips
Start by seasoning your chicken breasts generously with Cajun spice, then sear them in a hot skillet until golden brown. While the chicken cooks, boil your penne pasta until al dente, saving a cup of pasta water for later. Next, remove the chicken and let it rest before slicing it into thin strips. In the same skillet, sauté minced garlic and diced onions until fragrant, then stir in heavy cream and a touch of chicken broth for depth. Gradually whisk in grated Parmesan until the sauce thickens, adding reserved pasta water if needed. Toss the cooked penne and sliced chicken back into the skillet, coating everything evenly. For a time-saving twist, use pre-cooked grilled chicken or store-bought Cajun seasoning blends. Finally, garnish with fresh parsley and a sprinkle of red pepper flakes for extra heat. Serve immediately while the sauce is still velvety and rich.
and-learned-from">Mistakes I’ve made and learned from
I once rushed the sauce and added cold cream straight from the fridge, which caused it to curdle. Now, I let dairy ingredients sit at room temperature first, just like I do when making my perfect béchamel sauce. Another blunder? Overcooking the pasta—mushy penne ruins the texture. I’ve learned to set a timer and taste-test a minute early, similar to my trick for al dente pasta. If your Cajun seasoning is too salty, balance it with a squeeze of lemon or a pinch of brown sugar. Trust me, these small tweaks make all the difference.
Cultural Connection and Variations
Where this recipe comes from
The Creamy Cajun Chicken Penne Pasta Recipe bursts with the bold flavors of Louisiana, where Cajun cuisine roots itself in rich cultural history. Originally, Cajun cooking blended French techniques with local ingredients, creating dishes that pack a spicy, hearty punch. This pasta dish takes those traditions and wraps them in a creamy, comforting embrace, perfect for family dinners or festive gatherings.
Across the South, cooks
tweak the Creamy Cajun Chicken Penne Pasta Recipe to match their pantry or palate. Some add andouille sausage for extra smokiness, while others toss in bell peppers or mushrooms for a veggie boost. In Italy, chefs might swap the Cajun spices for herbs like oregano and basil, turning it into a Mediterranean-inspired meal. Even at home, my grandma used to dial down the heat for us kids, proving how adaptable this dish truly is.
How it fits in today’s cooking
Today, the Creamy Cajun Chicken Penne Pasta Recipe stays a weeknight hero because it’s fast, flavorful, and endlessly customizable. Busy cooks love it for meal prep, while foodies dress it up with gourmet touches like fresh herbs or a splash of white wine. It’s also a star at potlucks, where it pairs perfectly with garlic bread or a crisp salad.
Modern twists keep it fresh, like using gluten-free penne or coconut milk for a dairy-free version. For a cozy twist, try serving it alongside a slice of moist lemon blueberry bread for a sweet-spicy contrast. And if you’re craving more comfort food, our creamy tomato basil soup makes an ideal starter. Whether you stick to tradition or experiment, this dish proves Cajun flavors never go out of style.
>Taste and Texture
What makes it delicious
The Creamy Cajun Chicken Penne Pasta Recipe delivers a bold, satisfying experience with every bite. Tender penne pasta soaks up a rich, velvety sauce infused with smoky Cajun spices, while juicy chicken adds a hearty, protein-packed punch. Garlic and onions create a fragrant base, while a touch of cream balances the heat with a luscious, smooth texture. Meanwhile, bell peppers and tomatoes lend a slight crunch and bright acidity, cutting through the richness. Every forkful of this Creamy Cajun Chicken Penne Pasta Recipe bursts with layers of flavor—spicy, savory, and irresistibly creamy.
Boosting the flavor
For an extra kick, stir in a spoonful of homemade chipotle mayo to amplify the smokiness. Alternatively, top with freshly grated Parmesan or a squeeze of lemon to brighten the dish. If you love heat, double the Cajun seasoning or add a dash of cayenne. For a refreshing contrast, serve it alongside a crisp avocado cucumber salad. Small tweaks can transform this already flavorful recipe into a showstopper.
Tips for Success
Best practices for results
Always cook the penne al dente so it holds up in the creamy sauce without becoming mushy. Meanwhile, use fresh chicken breast for the best texture in your Creamy Cajun Chicken Penne Pasta Recipe. Additionally, toast the Cajun spices briefly in the pan before adding liquids to deepen their flavor. For a perfectly balanced dish, gradually stir in the cream while keeping the heat medium-low to prevent curdling. Finally, taste and adjust seasoning just before serving since Cajun blends vary in saltiness.
Mistakes to avoid
Avoid overcrowding the pan when searing the chicken, as this steams instead of browns the meat. Instead, cook in batches if needed for even caramelization. Another common misstep is adding raw garlic too early, which burns and turns bitter. Instead, sauté it for just 30 seconds before deglazing. For more on perfecting protein prep, check out our guide to cooking chicken tenders. Also, resist the urge to over-sauce the pasta—toss gently to coat without drowning it, as shown in our creamy pasta sauces tutorial.
Serving and Pairing Suggestions
How to serve this dish
For a restaurant-worthy presentation, plate your Creamy Cajun Chicken Penne Pasta Recipe in wide, shallow bowls to showcase the vibrant sauce. Meanwhile, sprinkle fresh chopped parsley or thinly sliced green onions on top for a pop of color. If you love a little crunch, add a handful of toasted breadcrumbs or crushed red pepper flakes for texture. This dish shines at casual weeknight dinners but also works beautifully for potlucks or date nights. To make it extra special, serve it alongside warm garlic bread for dipping into that luscious Cajun cream sauce.
h-it">What goes well with it
A crisp, chilled glass of Sauvignon Blanc cuts through the richness of Creamy Cajun Chicken Penne Pasta Recipe, while its citrus notes highlight the Cajun spices. Alternatively, try a light beer like a pilsner for a refreshing contrast. For sides, a simple garlic parmesan roasted broccoli adds earthy balance, or go for a bright classic Caesar salad to complement the pasta’s bold flavors. Either way, these pairings turn your meal into a well-rounded feast.
What’s the best way to season chicken for Creamy Cajun Chicken Penne Pasta?
For authentic flavor, coat chicken breasts with a blend of paprika, garlic powder, onion powder, cayenne, oregano, and black pepper. This Cajun seasoning mix adds the perfect kick to your Creamy Cajun Chicken Penne Pasta Recipe while keeping the dish balanced.
ank-math-faq-item">
Can I make Creamy Cajun Chicken Penne Pasta ahead of time?
Yes! Prepare the sauce and cooked chicken separately, then combine with freshly cooked pasta when ready to serve. The Creamy Cajun Chicken Penne Pasta Recipe tastes best within 1-2 days, as the sauce may thicken when refrigerated.
What can I substitute for heavy cream in this recipe?
For a lighter version, use half-and-half or whole milk with a tablespoon of flour to thicken. Coconut milk also works well in the Creamy Cajun Chicken Penne Pasta Recipe if you prefer dairy-free options.
How spicy is traditional Creamy Cajun Chicken Penne Pasta?
The heat level depends on your Cajun seasoning blend—most versions have mild to medium spice. Adjust the cayenne pepper in your Creamy Cajun Chicken Penne Pasta Recipe to suit your taste, or serve with extra Parmesan to mellow the heat.
div>
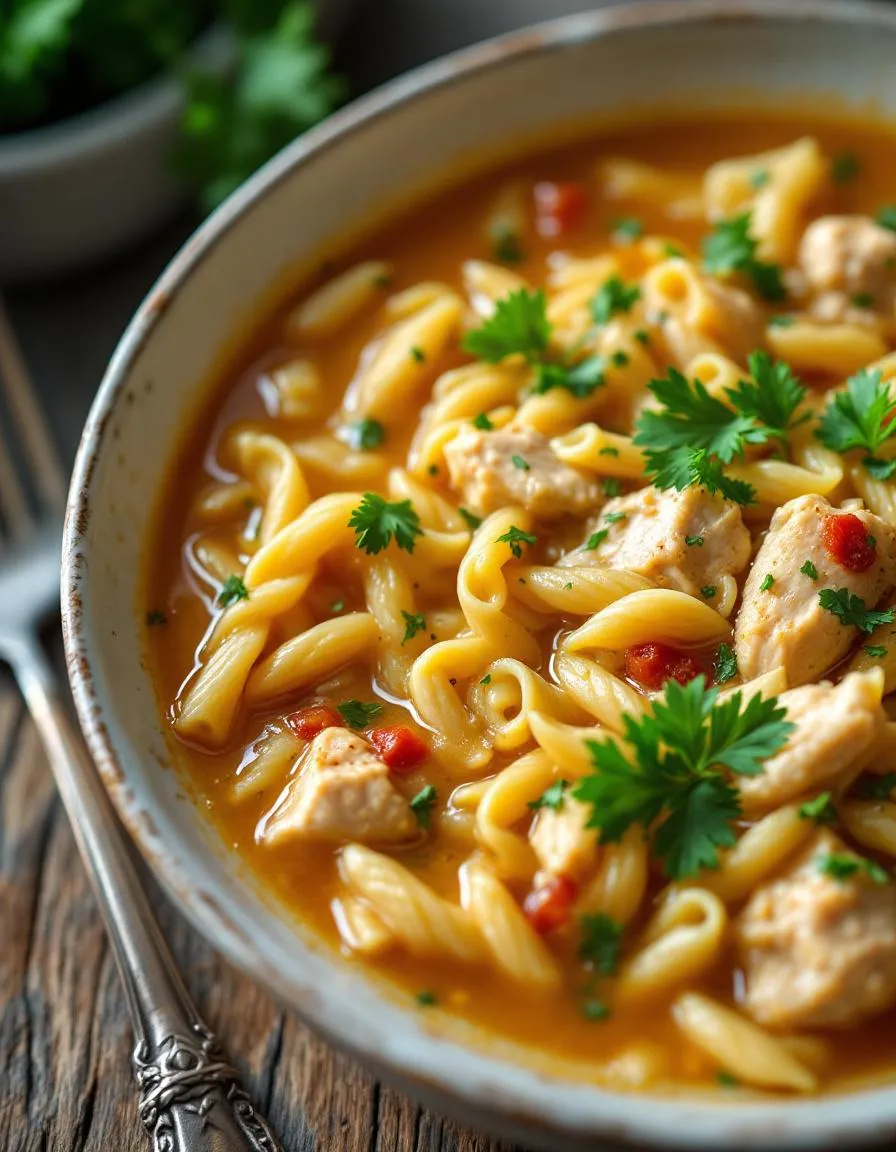
Best Chicken Orzo Soup – Easy Homemade Recipe
Introduction
There’s something deeply comforting about a bowl of Chicken Orzo Soup Recipe, especially when you need warmth and nourishment. Whether you’re fighting off a chilly evening or craving a simple yet satisfying meal, this recipe delivers every time. With tender chicken, wholesome veggies, and delicate orzo pasta swimming in a flavorful broth, it’s the kind of dish that feels like a hug in a bowl. Best of all, you can whip it up with minimal effort, making it perfect for busy weeknights or lazy Sundays.
Chicken Orzo Soup Recipe combines the heartiness of classic chicken soup with the delightful texture of orzo, a rice-shaped pasta that adds a unique twist. Unlike traditional noodle soups, the orzo cooks directly in the broth, thickening it slightly while absorbing all the rich flavors. This dish matters because it strikes the perfect balance between comfort and convenience. Moreover, it’s versatile enough to accommodate pantry staples or fresh ingredients, so you can customize it based on what you have on hand. If you love easy, one-pot meals, you’ll appreciate how this recipe fits seamlessly into your routine.
At Exorecipes, we celebrate recipes that blend simplicity with big flavors, and this Chicken Orzo Soup Recipe does exactly that. It aligns with our mission to deliver approachable, family-friendly meals that don’t compromise on taste. For more cozy soup ideas, check out our Creamy Tomato Soup or explore our Quick Weeknight Dinners collection for other time-saving dishes. Whether you’re a seasoned cook or a beginner, this soup will quickly become a staple in your kitchen.
Why I Love This Recipe
This Chicken Orzo Soup Recipe holds a special place in my heart because it reminds me of my grandmother’s kitchen. She used to make a similar version whenever I visited, and the aroma alone would make my stomach growl. Now, whenever I prepare it, I feel that same sense of comfort and nostalgia. Plus, it’s incredibly forgiving—I’ve swapped veggies, added spices, or even tossed in leftover rotisserie chicken, and it always turns out delicious. It’s the kind of recipe that never fails to bring people together, and that’s why I keep coming back to it.
Health and Nutrition
Why it’s good for your body
Chicken Orzo Soup Recipe packs a nutritious punch while keeping flavors light and satisfying. First, the lean chicken breast delivers high-quality protein to support muscle repair and energy levels. Additionally, the orzo pasta provides slow-digesting carbs, which help maintain steady blood sugar. Moreover, the vegetables like carrots, celery, and onions add fiber, vitamins, and antioxidants to boost immunity.
Since this soup simmers in a savory broth, it hydrates your body while delivering essential minerals. Furthermore, the garlic and herbs not only enhance taste but also offer anti-inflammatory benefits. Chicken Orzo Soup Recipe is also gentle on digestion, making it ideal for recovery or light meals. Finally, the balanced macros make it a wholesome choice for anyone seeking a nourishing yet comforting dish.
How it fits in a healthy lifestyle
Chicken Orzo Soup Recipe fits seamlessly into a balanced diet. If you focus on high-protein meals, the chicken and orzo combo keeps you full without heavy calories. For gluten-free eaters, simply swap regular orzo for a rice-based version. The soup also aligns with heart-healthy goals, as it’s low in saturated fat and rich in veggies.
Busy weeknights call for easy, nutritious options, and this recipe delivers. Pair it with a crisp salad for extra greens or enjoy it solo for a light lunch. If you love meal prep, double the batch and freeze portions for quick reheating. For more gluten-free inspiration, check out our gluten-free dinner ideas. Or, if you’re exploring high-protein dishes, our protein-packed meals roundup offers plenty of variety.
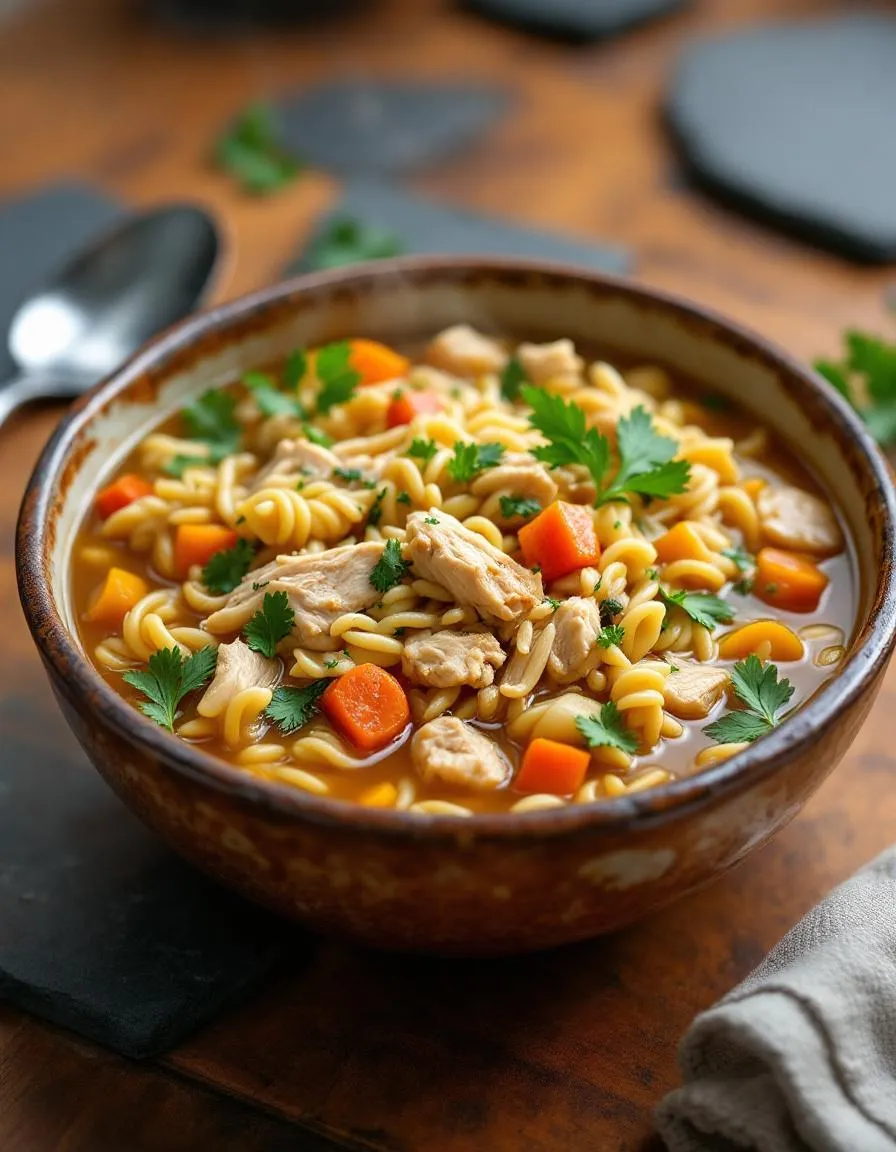
A comforting and hearty soup with tender chicken, orzo pasta, and vegetables in a flavorful broth.
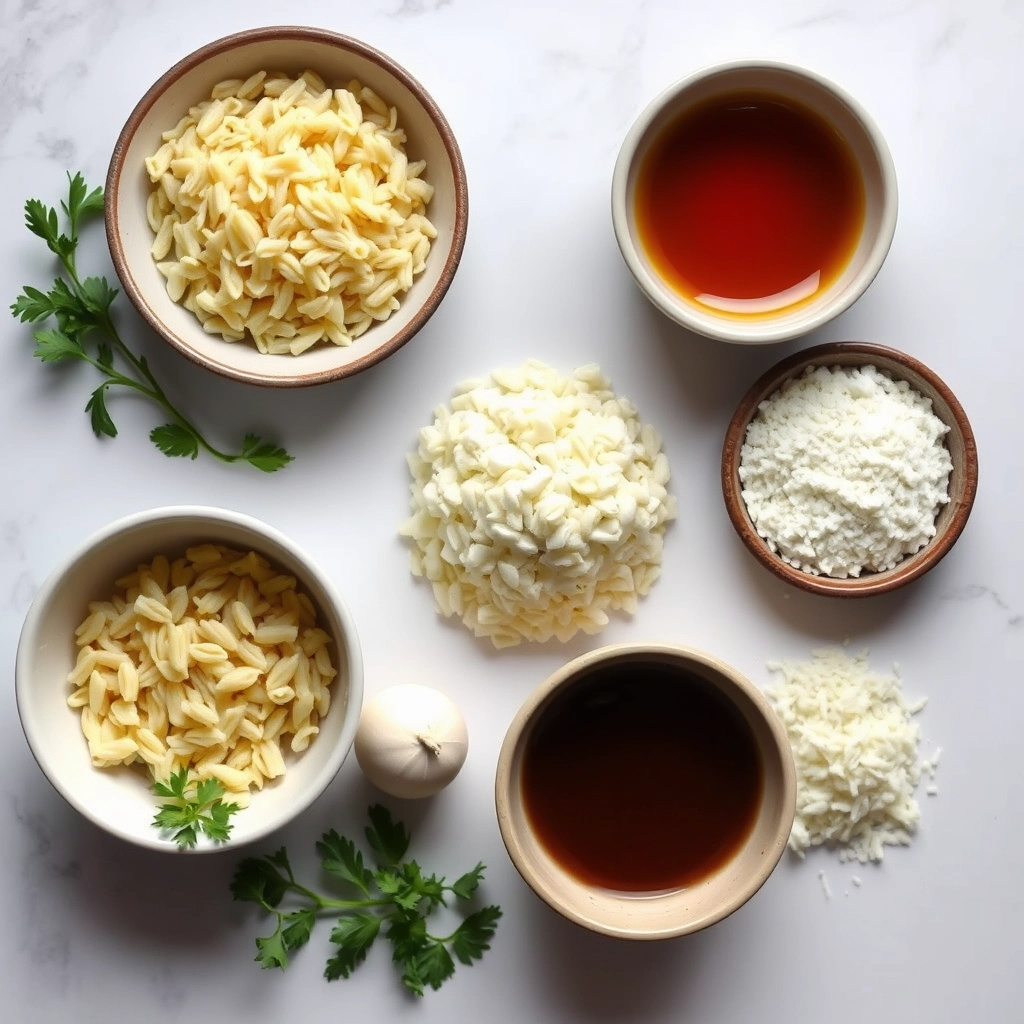
Ingredients
Scale
For the Crust:
1 lb boneless, skinless chicken breasts
1 cup orzo pasta
1 onion, diced
2 carrots, sliced
2 celery stalks, sliced
4 cloves garlic, minced
6 cups chicken broth
1 tsp dried thyme
1 tsp dried oregano
Salt and pepper to taste
2 tbsp olive oil
Fresh parsley for garnish
Instructions
1. Prepare the Crust:
Heat olive oil in a large pot over medium heat. Add onion, carrots, and celery. Cook until softened, about 5 minutes.
Add garlic, thyme, and oregano. Stir for 1 minute until fragrant.
Pour in chicken broth and bring to a boil. Add chicken breasts and simmer for 15-20 minutes until cooked through.
Remove chicken, shred it, and return to the pot. Stir in orzo and cook for 8-10 minutes until pasta is tender.
Season with salt and pepper. Garnish with fresh parsley before serving.
Notes
You can customize the seasonings to taste.
How to Prepare This Dish
Steps and time-saving tips
Start by heating a large pot over medium heat and drizzle in a bit of olive oil. Toss in diced onions, carrots, and celery, then stir them until they soften—about 5 minutes. Next, add minced garlic and cook for another 30 seconds until fragrant. Now, pour in chicken broth and bring it to a gentle boil. Meanwhile, shred cooked chicken into bite-sized pieces and drop them into the pot. Stir in orzo pasta and let it simmer for about 8-10 minutes, stirring occasionally to prevent sticking. If you’re short on time, use pre-cooked rotisserie chicken to skip a step. For extra flavor, toss in a bay leaf or a sprinkle of dried thyme. Once the orzo is tender, season the Chicken Orzo Soup Recipe with salt and pepper to taste. Finally, finish with a handful of fresh parsley and a squeeze of lemon juice for brightness. Serve hot with crusty bread on the side.
and-learned-from">Mistakes I’ve made and learned from
Early on, I made the mistake of adding uncooked orzo directly to the soup without stirring enough, which caused it to clump together. Now, I give it a good stir every few minutes to keep it separated. Another blunder was overcooking the orzo, turning it mushy—I’ve learned to check for doneness a minute early since it keeps cooking in the hot broth. If you’re new to soups, my guide on soup basics covers these pitfalls in detail. Also, I once skipped the lemon juice, and the soup tasted flat. Trust me, that acidic kick makes all the difference! For more tips on balancing flavors, check out my post on seasoning secrets. These small tweaks transformed my Chicken Orzo Soup Recipe from mediocre to unforgettable.
Cultural Connection and Variations
Where this recipe comes from
Chicken Orzo Soup Recipe weaves together Mediterranean comfort and American practicality. While orzo pasta traces its roots to Greece and Italy, this dish borrows from both traditions, blending tender chicken, bright herbs, and tiny pasta into a soul-warming bowl. In Greece, they might swap the chicken for lamb and add a squeeze of lemon for tang. Meanwhile, Italian versions often lean into richer broths with Parmesan rinds simmered right in.
In my family, Chicken O
rzo Soup Recipe became a winter staple after my grandmother brought back the idea from a trip to Crete. She tweaked it by adding extra garlic and a pinch of red pepper flakes, turning it into a cold-weather favorite. Across the U.S., regional twists pop up too. Some Southern cooks stir in collard greens for heartiness, while others in the Midwest might toss in sweet corn for a summery twist. No matter where it’s made, this soup carries the same cozy magic.
How it fits in today’s cooking
Today, Chicken Orzo Soup Recipe holds its own as a quick, nourishing meal for busy weeknights or lazy Sundays. Modern cooks love it because it’s adaptable—swap the orzo for quinoa if you’re gluten-free, or load it up with kale for extra greens. It’s also a star during flu season, offering warmth and comfort when you need it most. Plus, it pairs perfectly with a slice of homemade banana bread for a satisfying meal.
Beyond everyday cooking, this soup fits right into holiday spreads, especially as a lighter starter before richer dishes. Some families even make it a tradition after Thanksgiving, using leftover turkey instead of chicken. And if you’re looking for another cozy recipe to round out your menu, try serving it with classic pot roast for a hearty dinner combo. Whether you stick to the classics or put your own spin on it, Chicken Orzo Soup Recipe stays a timeless favorite.
>Taste and Texture
What makes it delicious
Chicken Orzo Soup Recipe delivers a comforting, savory experience with every spoonful. The tender shredded chicken melts in your mouth, while the orzo pasta adds a satisfyingly chewy texture. Fragrant garlic and fresh herbs like thyme and parsley infuse the broth with earthy, aromatic notes. Meanwhile, carrots and celery lend a subtle sweetness and gentle crunch. Each bite of this Chicken Orzo Soup Recipe feels rich yet light, thanks to the silky broth that coats your palate. The bright acidity of lemon juice balances the deep umami flavors, making it irresistibly delicious.
Boosting the flavor
For an extra flavor kick, try stirring in a spoonful of pesto or a sprinkle of grated parmesan right before serving. If you love heat, a pinch of red pepper flakes or a dash of hot sauce will add a spicy twist. Fresh herbs like dill or basil also brighten the soup beautifully. For more inspiration, check out our guide on herb pairings for soups or explore ways to elevate homemade broth. These small tweaks make Chicken Orzo Soup Recipe even more memorable.
Tips for Success
Best practices for results
For the best Chicken Orzo Soup Recipe, always use fresh vegetables like carrots and celery to build a flavorful base. Additionally, simmer the chicken until it easily shreds with a fork, ensuring tender bites in every bowl. Meanwhile, stir the orzo occasionally to prevent sticking, and add a splash of broth if the soup thickens too much. Finally, taste and adjust the seasoning just before serving to highlight all the rich flavors.
Mistakes to avoid
Avoid overcooking the orzo, as it can turn mushy and ruin the texture of your Chicken Orzo Soup Recipe. Instead, cook it al dente and remember it will soften further in the hot broth. Also, don’t skip sautéing the aromatics like onions and garlic—this step builds depth of flavor. For more on balancing flavors, check out our guide on seasoning soups perfectly. Lastly, resist the urge to boil the soup vigorously after adding the orzo; a gentle simmer keeps everything intact. Learn more about controlling heat in our soup temperature tips.
Serving and Pairing Suggestions
How to serve this dish
Serve Chicken Orzo Soup Recipe in deep, rustic bowls to highlight its comforting texture. For a pop of color, sprinkle fresh parsley or dill on top just before serving. Meanwhile, a squeeze of lemon brightens the flavors and adds a refreshing touch. This dish shines at cozy family dinners, but it also makes a thoughtful meal for someone under the weather. If you’re hosting a casual gathering, pair it with crusty bread for dipping and let guests help themselves from a stylish tureen.
h-it">What goes well with it
A crisp green salad balances the heartiness of Chicken Orzo Soup Recipe perfectly. Try a simple arugula salad with lemon vinaigrette for a tangy contrast. Alternatively, warm garlic knots or a slice of sourdough bread elevate the meal with their buttery richness. For drinks, a chilled glass of Sauvignon Blanc complements the soup’s savory notes, while herbal tea keeps things cozy. If you love pairing soups with sides, our Easy Homemade Focaccia or Roasted Vegetable Medley add delightful texture and flavor.
What is the best way to thicken Chicken Orzo Soup?
To thicken Chicken Orzo Soup, let it simmer uncovered for 10-15 minutes to reduce the liquid. You can also mash some of the orzo or add a slurry of cornstarch and water. This Chicken Orzo Soup Recipe stays hearty without becoming too thick.
ank-math-faq-item">
Can I use rice instead of orzo in Chicken Orzo Soup?
Yes, you can substitute rice for orzo, but adjust the cooking time since rice takes longer. For this Chicken Orzo Soup Recipe, keep the broth ratio the same and cook until the rice is tender. The texture will differ slightly but still taste delicious.
How long does Chicken Orzo Soup last in the fridge?
Chicken Orzo Soup Recipe stays fresh for 3-4 days when stored in an airtight container. The orzo may absorb more broth over time, so add a splash of water or broth when reheating. Always check for spoilage before eating leftovers.
What vegetables go well in Chicken Orzo Soup?
Classic additions to Chicken Orzo Soup Recipe include carrots, celery, onions, and spinach. For extra flavor, try zucchini, kale, or diced tomatoes. These veggies complement the chicken and orzo while keeping the soup light and nutritious.
div>
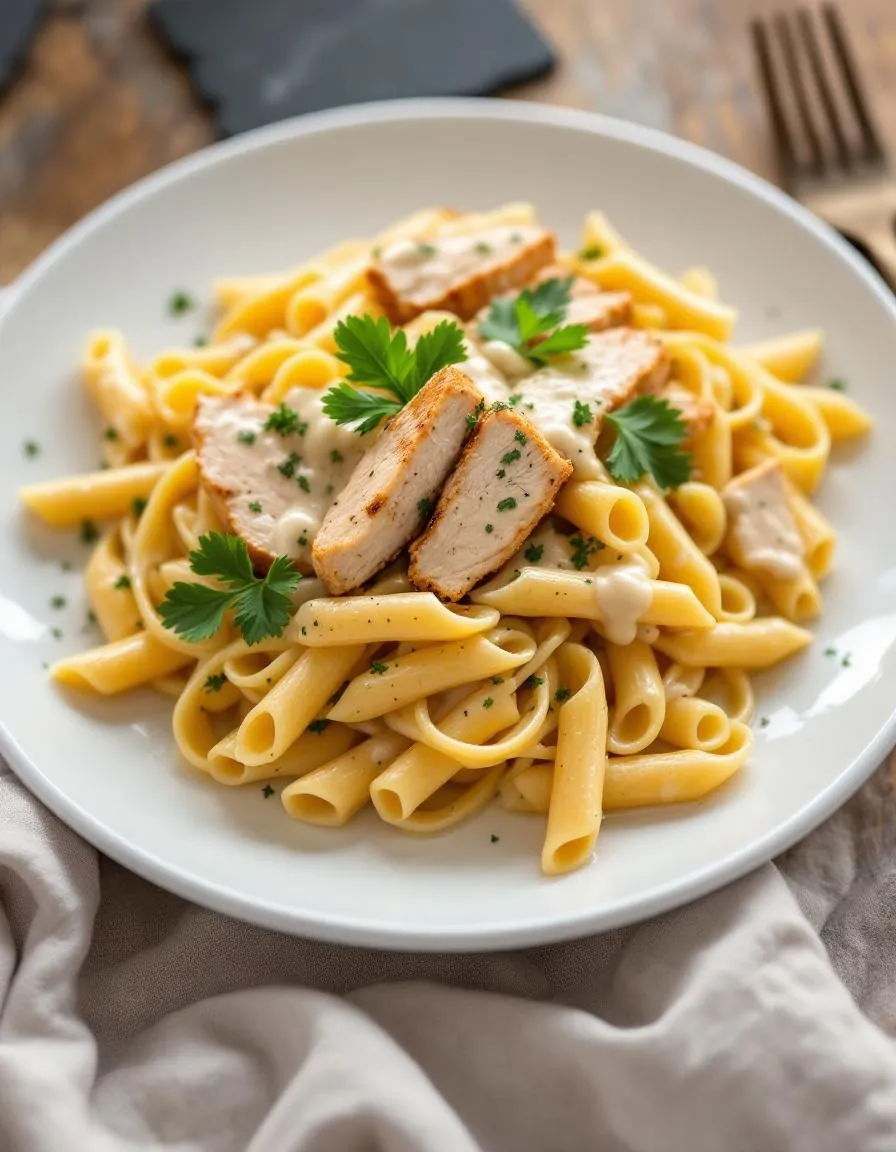
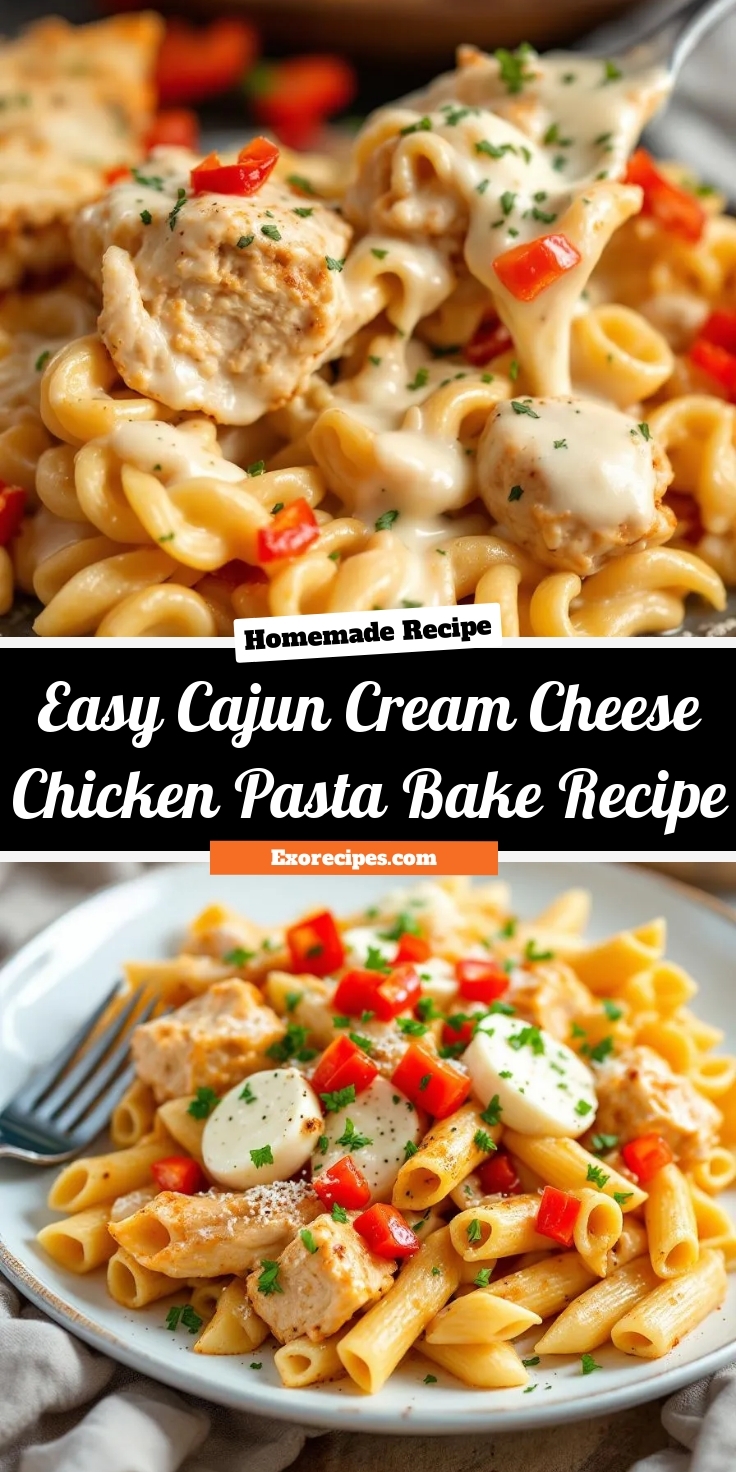
Easy Cajun Cream Cheese Chicken Pasta Bake Recipe
Introduction
Craving a dish that’s creamy, spicy, and downright comforting? This Cajun Cream Cheese Chicken Pasta Bake Recipe delivers all that and more. Whether you’re feeding a hungry family or meal prepping for the week, this recipe wraps bold Cajun flavors in a velvety cream cheese sauce, creating a dish that’s as satisfying as it is easy to make. Plus, it’s perfect for those nights when you want something hearty without spending hours in the kitchen.
The Cajun Cream Cheese Chicken Pasta Bake Recipe combines tender chicken, al dente pasta, and a rich, spiced sauce for a meal that’s bursting with flavor. Cajun seasoning brings the heat, while cream cheese balances it with a luscious, melt-in-your-mouth texture. This dish matters because it solves the eternal dinner dilemma: how to make something quick, delicious, and crowd-pleasing. It fits right into our blog’s tone of approachable, flavor-packed recipes that don’t require fancy techniques. If you love creamy pasta bakes, you’ll adore our Creamy Tuscan Chicken Pasta too. And for more Cajun-inspired meals, check out our Cajun Shrimp and Grits.
Why I Love This Recipe
This Cajun Cream Cheese Chicken Pasta Bake Recipe holds a special place in my heart because it’s the dish I turn to when I need comfort with a kick. The first time I made it, the aroma of Cajun spices filled my kitchen, and one bite transported me to a cozy Louisiana kitchen. It’s become my go-to for potlucks because friends always ask for the recipe. There’s something magical about how the cream cheese mellows the heat just enough, making every forkful irresistible.
Health and Nutrition
Why it’s good for your body
The Cajun Cream Cheese Chicken Pasta Bake Recipe packs a flavorful punch while delivering key nutrients your body craves. First, the lean chicken breast provides high-quality protein to support muscle repair and keep you full longer. Meanwhile, the Cajun seasoning adds more than just heat—it contains spices like paprika and garlic, which offer antioxidants to combat inflammation.
Additionally, the cream cheese in this dish contributes a creamy texture while supplying healthy fats for sustained energy. When paired with whole-grain pasta, the Cajun Cream Cheese Chicken Pasta Bake Recipe becomes a balanced meal with complex carbs for steady fuel. The dish also includes vegetables like bell peppers or onions, which add fiber and vitamins to support digestion and immunity.
Finally, this recipe balances indulgence with nourishment. The bold Cajun flavors satisfy cravings, so you won’t feel deprived. Plus, because you control the ingredients, you can adjust the spice level or swap in low-fat dairy if preferred. Whether you need a post-workout meal or a comforting dinner, the Cajun Cream Cheese Chicken Pasta Bake Recipe delivers taste and nutrition in every bite.
How it fits in a healthy lifestyle
The Cajun Cream Cheese Chicken Pasta Bake Recipe fits seamlessly into a balanced diet. For those focusing on protein intake, the chicken and dairy provide a hearty dose to support active lifestyles. If you prefer gluten-free options, simply swap regular pasta for a chickpea or brown rice alternative—the dish stays just as delicious.
This recipe also works well for meal prep, making healthy eating convenient during busy weeks. Pair it with a simple side salad or roasted veggies for extra nutrients. If you’re exploring heart-healthy choices, check out our guide on nutritious dinner ideas for more inspiration. And for those tracking macros, the Cajun Cream Cheese Chicken Pasta Bake Recipe offers flexibility—adjust portion sizes or ingredients to meet your goals. Want more tips? Our article on efficient meal prep can help you stay on track without sacrificing flavor.
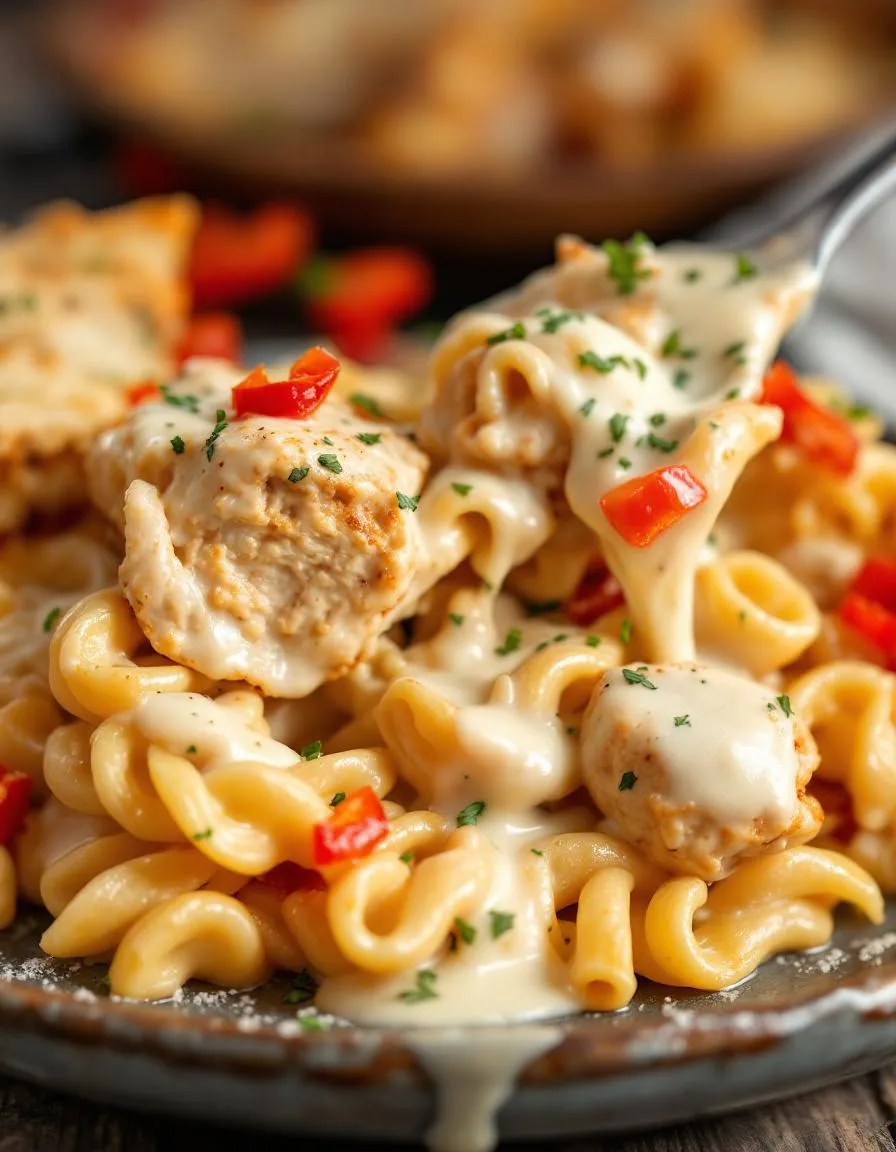
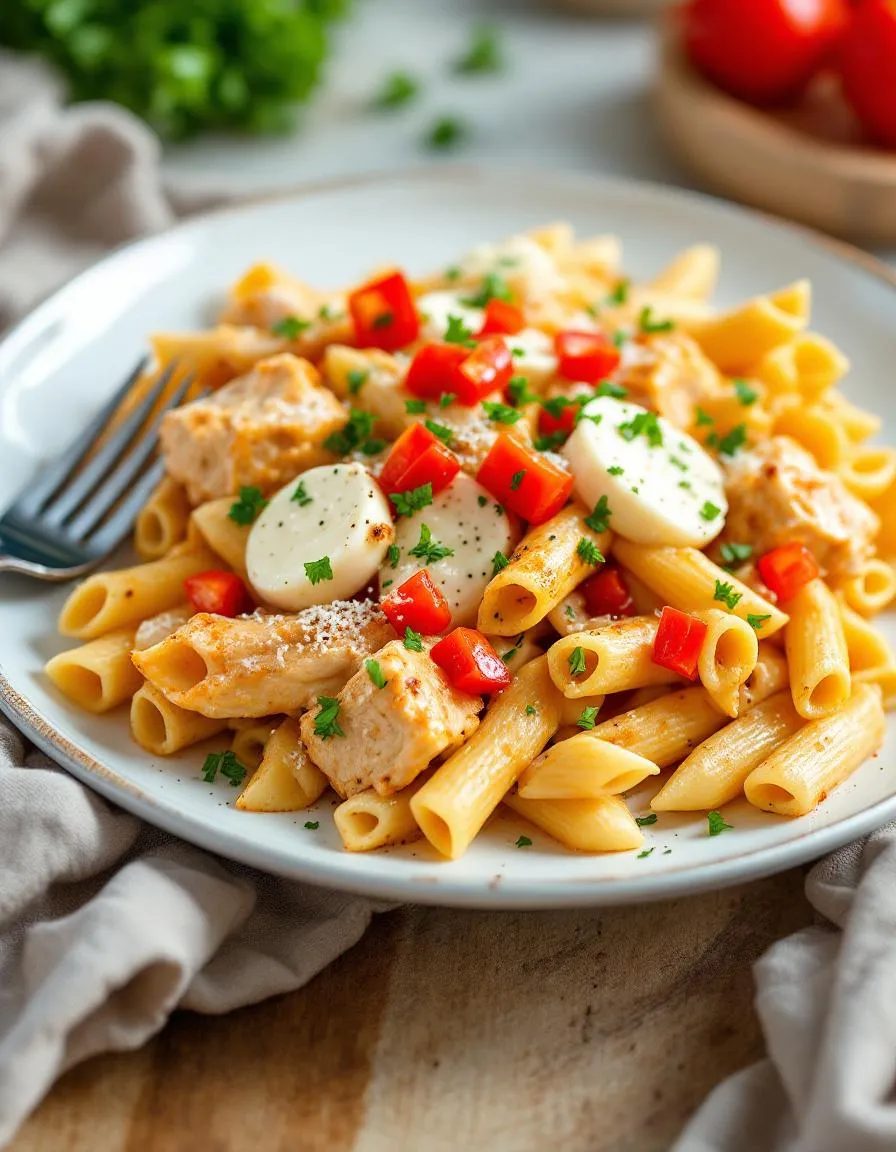
A creamy, spicy, and comforting pasta bake loaded with tender chicken and Cajun flavors.
Ingredients
Scale
For the Crust:
12 oz penne pasta
2 boneless, skinless chicken breasts (cubed)
1 tbsp Cajun seasoning
2 tbsp olive oil
1 small onion (diced)
3 cloves garlic (minced)
1 red bell pepper (diced)
8 oz cream cheese (softened)
1 cup heavy cream
1/2 cup chicken broth
1 cup shredded mozzarella cheese
1/2 cup grated Parmesan cheese
Salt and pepper to taste
Instructions
1. Prepare the Crust:
Preheat oven to 375°F (190°C). Cook pasta according to package instructions until al dente. Drain and set aside.
Season chicken cubes with Cajun seasoning. Heat olive oil in a large skillet over medium-high heat. Cook chicken until browned and cooked through, about 5-6 minutes. Remove and set aside.
In the same skillet, sauté onion, garlic, and bell pepper until softened, about 3-4 minutes.
Reduce heat to low. Add cream cheese, heavy cream, and chicken broth, stirring until smooth and combined. Season with salt and pepper.
Return chicken to the skillet, then add cooked pasta. Toss until evenly coated.
Transfer mixture to a greased baking dish. Top with mozzarella and Parmesan cheese.
Bake for 15-20 minutes until cheese is melted and bubbly. Broil for 2-3 minutes for a golden top if desired.
Notes
You can customize the seasonings to taste.
How to Prepare This Dish
Steps and time-saving tips
Start by preheating your oven to 375°F so it’s ready when you finish prepping. While it heats, cook the pasta al dente—it’ll finish baking later, so undercooking slightly prevents mushiness. Meanwhile, season diced chicken generously with Cajun spice, then sauté it in a skillet until golden. Remove the chicken and use the same pan to melt cream cheese with a splash of milk, whisking until smooth. Stir in minced garlic, diced tomatoes, and a pinch of salt for extra flavor. Combine the cooked pasta, creamy sauce, and chicken in a large bowl, then transfer everything to a greased baking dish. Top with shredded mozzarella and a sprinkle of parsley for color. Bake uncovered for 20 minutes until bubbly and lightly browned. Let it rest 5 minutes before serving—this helps the sauce thicken. For a time-saving hack, use pre-cooked rotisserie chicken or double the batch and freeze half for later. If you love creamy pasta bakes, try pairing this with a crisp salad to balance the richness.
and-learned-from">Mistakes I’ve made and learned from
Early attempts at this Cajun Cream Cheese Chicken Pasta Bake Recipe taught me two big lessons. First, I once overcooked the pasta before baking, leaving it disappointingly soft. Now I always drain it a minute early—it absorbs sauce perfectly later. Second, skipping the rest time led to a runny sauce, so I’ve learned patience pays off. If you’re new to Cajun flavors, start with less spice and adjust gradually. For more tips on balancing heat, check out my guide to spice blends. Also, if your sauce ever feels too thick, a splash of reserved pasta water saves the day. For other creamy pasta tricks, my sauce secrets post dives deeper. Trust me, even the flops taste good—just fold in extra cheese and call it a win.
Cultural Connection and Variations
Where this recipe comes from
The Cajun Cream Cheese Chicken Pasta Bake Recipe bursts with the bold, soulful flavors of Louisiana. Cajun cuisine blends French, African, and Southern influences, and this dish captures that spirit perfectly. Families in the Bayou often tweak the recipe with whatever they have on hand, swapping shrimp for chicken or adding extra cayenne for heat. Meanwhile, home cooks in other regions might tone down the spices but keep the creamy, comforting base.
In my kitchen, the Caju
n Cream Cheese Chicken Pasta Bake Recipe became a weeknight hero after a trip to New Orleans. A local chef shared his trick: letting the cream cheese melt slowly into the roux for extra richness. Some versions skip the bake step entirely, tossing everything in a skillet for a quicker meal. No matter how you make it, the dish always feels like a celebration—whether served at Mardi Gras or a cozy family dinner.
How it fits in today’s cooking
Today, the Cajun Cream Cheese Chicken Pasta Bake Recipe fits right into modern cooking trends. Busy cooks love its one-pan simplicity, while meal preppers stash leftovers for easy lunches. It’s also a hit for potlucks, blending comfort food vibes with just enough spice to stand out. For a lighter twist, some swap heavy cream for Greek yogurt or toss in extra veggies like bell peppers or spinach.
This dish also pairs beautifully with seasonal flavors. In fall, try adding roasted sweet potatoes or smoked sausage for heartier appeal. And if you’re craving more Southern-inspired meals, explore our Southern comfort food classics or our guide to quick weeknight dinners. Whether you stick to tradition or make it your own, the Cajun Cream Cheese Chicken Pasta Bake Recipe keeps bringing people together—one creamy, spicy bite at a time.
>Taste and Texture
What makes it delicious
The Cajun Cream Cheese Chicken Pasta Bake Recipe delivers a bold, satisfying experience with every bite. Imagine tender chunks of juicy chicken coated in a rich, velvety sauce that blends tangy cream cheese with smoky Cajun spices. The pasta soaks up the creamy goodness, while a golden, bubbly cheese topping adds a irresistible crispness. Fragrant garlic and earthy paprika deepen the flavor, creating a warm, comforting aroma that fills the kitchen. Each forkful balances creamy, spicy, and savory notes, making the Cajun Cream Cheese Chicken Pasta Bake Recipe a crave-worthy dish. Plus, the slight chew of al dente pasta contrasts perfectly with the melt-in-your-mouth chicken.
Boosting the flavor
For an extra flavor kick, try stirring in a handful of sharp cheddar or pepper jack cheese to amplify the creaminess. If you love heat, a dash of cayenne or a sprinkle of smoked paprika will elevate the Cajun spice blend. Crispy bacon bits or toasted breadcrumbs on top add a delightful crunch. Pair it with a light, citrusy salad or garlic bread to balance the richness—check out these garlic bread twists for inspiration. A squeeze of fresh lemon juice just before serving brightens the dish, making every flavor pop even more.
Tips for Success
Best practices for results
First, always cook your pasta al dente since it will soften further while baking in the Cajun Cream Cheese Chicken Pasta Bake Recipe. Meanwhile, generously season your chicken with Cajun spice before searing to lock in bold flavor. For a creamy, lump-free sauce, soften the cream cheese at room temperature and whisk it slowly into the warm mixture. Additionally, reserve some pasta water to adjust the sauce consistency if needed. Finally, broil the dish for the last two minutes to create a golden, bubbly top.
Mistakes to avoid
Avoid overcrowding the pan when browning the chicken, as this steams instead of sears the meat. Instead, cook in batches for even caramelization. Another common error is skipping the taste test before baking—adjust the Cajun seasoning at this stage since flavors intensify in the oven. For more seasoning guidance, check out our spice blends guide. Also, don’t overbake the casserole, or the pasta may dry out. If you’re unsure about timing, refer to our pasta doneness tips for perfect results every time.
Serving and Pairing Suggestions
How to serve this dish
For a stunning presentation, scoop the Cajun Cream Cheese Chicken Pasta Bake Recipe into individual ramekins or a large ceramic dish. Top it with fresh parsley or chopped green onions to add a pop of color. Alternatively, serve it family-style in a cast-iron skillet for a rustic touch. This dish shines at cozy gatherings, whether it’s a weeknight dinner or a potluck with friends. If you’re hosting a holiday meal, pair it with a crisp salad to balance the rich flavors.
h-it">What goes well with it
A chilled glass of Sauvignon Blanc or a light beer like a pilsner cuts through the creamy richness of the Cajun Cream Cheese Chicken Pasta Bake Recipe. For sides, try a tangy cucumber salad or roasted garlic bread to soak up the sauce. If you love bold flavors, our Spicy Honey Glazed Carrots add a sweet-heat contrast. For dessert, a slice of our Classic New York Cheesecake keeps the creamy theme going while offering a refreshing finish.
What’s the best pasta to use for Cajun Cream Cheese Chicken Pasta Bake?
Penne or rigatoni work best for Cajun Cream Cheese Chicken Pasta Bake because their ridges hold the creamy sauce well. Avoid delicate pastas like angel hair, as they may become mushy during baking.
ank-math-faq-item">
Can I make Cajun Cream Cheese Chicken Pasta Bake ahead of time?
Yes! Assemble the Cajun Cream Cheese Chicken Pasta Bake up to 24 hours in advance and refrigerate it. Just add 5–10 extra minutes to the baking time if cooking straight from the fridge.
How spicy is Cajun Cream Cheese Chicken Pasta Bake?
The spice level depends on your Cajun seasoning blend. For a milder Cajun Cream Cheese Chicken Pasta Bake, use half the seasoning or a low-sodium blend. Adjust to taste before baking.
What sides go well with Cajun Cream Cheese Chicken Pasta Bake?
Pair Cajun Cream Cheese Chicken Pasta Bake with garlic bread, a crisp green salad, or roasted vegetables. The creamy richness balances well with lighter, fresh accompaniments.
div>
Best Cheesy French Onion Chicken Recipe
Introduction
There’s something undeniably comforting about the rich, savory flavors of French onion soup, especially when they transform into a hearty, cheesy chicken dish. If you’re craving a meal that feels like a warm hug, this Cheesy French Onion Chicken Recipe delivers. Imagine tender chicken smothered in caramelized onions, gooey melted cheese, and a golden, toasted breadcrumb topping—each bite is pure comfort. Whether you’re cooking for a weeknight dinner or impressing guests, this recipe turns simple ingredients into something extraordinary. Plus, it’s easier to make than you might think.
The Cheesy French Onion Chicken Recipe takes inspiration from the classic French onion soup but reinvents it as a protein-packed main course. Caramelized onions bring deep, sweet umami notes, while Gruyère or Swiss cheese melts into a luscious blanket over juicy chicken breasts. Toasted breadcrumbs add the perfect crunch, mimicking the iconic soup’s cheesy crouton topping. This dish matters because it bridges the gap between rustic home cooking and elegant dining. It’s the kind of meal that feels special without requiring hours in the kitchen. If you love our one-pot meals, you’ll appreciate how this recipe maximizes flavor with minimal cleanup. Similarly, fans of our comfort food classics will recognize the same soul-satisfying appeal. The blog’s tone celebrates approachable yet impressive cooking, and this recipe fits perfectly—simple enough for beginners but delicious enough to wow anyone at the table.
Why I Love This Recipe
This Cheesy French Onion Chicken Recipe holds a special place in my heart because it reminds me of chilly evenings gathered around the table with family. The first time I made it, my kids—who usually pick at their food—cleaned their plates and asked for seconds. There’s magic in how the caramelized onions mellow into sweetness, balancing the sharp cheese and savory chicken. It’s also incredibly versatile. I’ve served it over mashed potatoes for a decadent twist or paired it with a crisp salad for lighter nights. Every time I make it, the aroma fills the kitchen, and everyone knows something delicious is coming. That’s the power of a truly great recipe.
Health and Nutrition
Why it’s good for your body
Cheesy French Onion Chicken Recipe packs a flavorful punch while delivering serious nutrition. First, the chicken provides lean protein, which helps build muscle and keeps you full longer. Additionally, the caramelized onions add a dose of antioxidants, supporting your immune system and reducing inflammation. Meanwhile, the melted cheese offers calcium for strong bones, making this dish a well-rounded choice.
Moreover, Cheesy French Onion Chicken Recipe balances indulgence with wholesome ingredients. For example, using olive oil instead of butter keeps the dish heart-healthy without sacrificing richness. The onions also contain prebiotics, which promote gut health and better digestion. Plus, when you pair this meal with a fresh side salad or steamed veggies, you boost its vitamin content even further.
Finally, this recipe fits seamlessly into a nutrient-dense diet. The combination of protein, healthy fats, and fiber ensures steady energy levels. Whether you’re fueling up after a workout or need a satisfying family dinner, Cheesy French Onion Chicken Recipe delivers both taste and nourishment in every bite.
How it fits in a healthy lifestyle
Cheesy French Onion Chicken Recipe adapts easily to various dietary goals. If you’re focusing on high-protein meals, the chicken serves as an excellent base. For gluten-free eaters, this dish naturally avoids grains, especially when paired with roasted potatoes or a crisp green salad. Even those watching their sodium intake can tweak the recipe by using low-sodium broth and cheese.
This recipe also fits into meal prep routines. You can make a batch ahead and reheat it for quick lunches or dinners. Pair it with our Easy Roasted Vegetables for extra fiber or our Quinoa Salad for a complete, balanced plate. With simple swaps and smart sides, Cheesy French Onion Chicken Recipe becomes a versatile staple in any health-conscious kitchen.
A delicious twist on classic French onion soup, featuring tender chicken smothered in caramelized onions and melted cheese.
Ingredients
Scale
For the Crust:
4 boneless, skinless chicken breasts
2 large yellow onions, thinly sliced
2 tbsp butter
1 tbsp olive oil
1 tsp sugar
1/2 tsp salt
1/4 tsp black pepper
1 cup beef broth
1 tsp Worcestershire sauce
1 cup shredded Gruyere cheese
1/2 cup shredded mozzarella cheese
1 tsp fresh thyme leaves
Instructions
1. Prepare the Crust:
In a large skillet, melt butter with olive oil over medium heat. Add onions, sugar, salt, and pepper. Cook, stirring occasionally, until onions are caramelized (about 20 minutes).
Push onions to the sides of the skillet and add chicken breasts. Cook for 5-6 minutes per side until golden brown.
Pour beef broth and Worcestershire sauce over the chicken. Simmer for 5 minutes.
Sprinkle both cheeses and thyme over the chicken and onions. Cover and cook for 2-3 minutes until cheese is melted.
Serve hot, spooning the cheesy onion mixture over each chicken breast.
Notes
You can customize the seasonings to taste.
“`html
s-dish">How to Prepare This Dish
Steps and time-saving tips
Start by preheating your oven to 375°F to ensure it’s ready when you finish prepping the Cheesy French Onion Chicken Recipe. While the oven heats, slice two large onions thinly and sauté them in a skillet with butter over medium heat. Stir them frequently until they caramelize to a golden brown, which takes about 15 minutes. Meanwhile, season four chicken breasts with salt, pepper, and a pinch of garlic powder for extra flavor. Once the onions are ready, layer them over the chicken in a baking dish. Drizzle a tablespoon of Worcestershire sauce over the top for that signature French onion tang. Next, sprinkle a generous amount of shredded Gruyère cheese over the onions and chicken. Bake for 25 minutes or until the cheese melts into a bubbly golden crust. For a time-saving tip, use pre-shredded cheese or caramelize the onions ahead of time and store them in the fridge. Let the dish rest for five minutes before serving to allow the flavors to settle. Pair it with a simple green salad or crusty bread for a complete meal.
Mistakes I’ve made and learned from
One of my biggest mistakes with this Cheesy French Onion Chicken Recipe was rushing the caramelization process. I cranked the heat too high, hoping to speed things up, but ended up with burnt onions and a bitter taste. Now, I keep the heat at medium-low and stir often for even browning. Another lesson came from using low-quality cheese—it didn’t melt properly and left the dish greasy. Investing in good Gruyère or even a blend of Swiss and mozzarella makes all the difference. If you’re new to caramelizing onions, my guide on caramelizing onions perfectly breaks it down step by step. Also, don’t skip resting the dish after baking—it helps the cheese set so it doesn’t slide right off. For more cheese tips, check out my post on the best melting cheeses to elevate any recipe.
The Cheesy French Onion Chicken Recipe is a delicious mashup of two beloved classics—French onion soup and tender, juicy chicken. French onion soup, with its caramelized onions and gooey cheese topping, has deep roots in 18th-century France, where it started as a humble peasant dish. Meanwhile, chicken has always been a versatile staple in kitchens worldwide. Combine the two, and you get a dish that feels both nostalgic and fresh.
Different regions put their own spin on the Cheesy French Onion Chicken Recipe. In the American South, cooks might add a splash of bourbon to the onions for extra depth. In Italy, they could swap Gruyère for mozzarella or Parmesan. Some families even layer the chicken with crispy bacon or fresh herbs like thyme for a personal touch. No matter the variation, the dish always delivers rich, comforting flavors.
In my own kitchen, this
recipe became a weeknight favorite after a trip to Paris, where I fell in love with the bold flavors of French onion soup. Now, it’s a go-to for cozy dinners or impressing guests. Whether you stick to tradition or experiment, the Cheesy French Onion Chicken Recipe adapts beautifully to any table.
How it fits in today’s cooking
Today, the Cheesy French Onion Chicken Recipe fits perfectly into modern cooking because it balances indulgence with simplicity. Busy home cooks love how it transforms basic ingredients into something special, while meal preppers appreciate that it reheats well for leftovers. Plus, it’s a crowd-pleaser for holidays or casual gatherings—imagine serving it alongside garlic herb roasted potatoes for a complete feast.
Health-conscious eaters also adapt the recipe by using low-fat cheese or baking instead of frying. Others make it gluten-free by swapping breadcrumbs for almond flour. And let’s not forget how social media has given this dish new life—food bloggers often feature it as a cozy, photogenic meal. For more inspiration, check out our one-pan dinner ideas to see how versatile this recipe can be. No matter how you tweak it, the Cheesy French Onion Chicken Recipe remains a timeless comfort food.
>Taste and Texture
What makes it delicious
The Cheesy French Onion Chicken Recipe delivers a rich, savory experience with layers of deep, caramelized onion sweetness and gooey melted cheese. Each bite combines tender, juicy chicken with a golden, slightly crisp topping of Gruyère or Swiss cheese. Meanwhile, the caramelized onions add a buttery, fragrant depth, while a hint of thyme ties everything together with earthy warmth. The dish smells irresistible as it bakes, filling the kitchen with the comforting aroma of toasted cheese and sweet onions. Whether you serve it straight from the oven or let it rest for a minute, the Cheesy French Onion Chicken Recipe promises a satisfying balance of creamy, crunchy, and umami flavors.
Boosting the flavor
For an extra flavor kick, try swapping Gruyère for smoked Gouda to add a subtle smokiness that pairs perfectly with the caramelized onions. Alternatively, sprinkle crispy fried shallots on top for a crunchy contrast. If you love bold herbs, stir a teaspoon of rosemary into the onion mixture for a piney twist. A drizzle of homemade balsamic glaze adds a tangy-sweet finish, while a side of garlic parmesan roasted potatoes turns this dish into a full, hearty meal. Small tweaks like these keep the Cheesy French Onion Chicken Recipe exciting every time you make it.
Tips for Success
Best practices for results
Always caramelize the onions slowly for the Cheesy French Onion Chicken Recipe to develop deep, sweet flavors. Meanwhile, use freshly grated cheese instead of pre-shredded for better melt and texture. Additionally, sear the chicken on high heat first to lock in juices before baking. Finally, let the dish rest for 5 minutes after baking so the cheese sets perfectly.
Mistakes to avoid
Avoid overcrowding the pan when browning the chicken, as this steams instead of sears the meat. Instead, cook in batches if needed. Also, don’t skip deglazing the pan after caramelizing onions—those browned bits add incredible flavor. For more on perfecting caramelized onions, check out our caramelized onions guide. Lastly, resist overbaking the Cheesy French Onion Chicken Recipe, or the chicken may dry out. For ideal doneness, use a meat thermometer as explained in our chicken temperature guide.
Serving and Pairing Suggestions
How to serve this dish
For a stunning presentation, plate your Cheesy French Onion Chicken Recipe over a bed of buttery mashed potatoes or creamy polenta. Meanwhile, drizzle the rich onion gravy over the top and let it cascade down the sides. Sprinkle fresh thyme or chopped parsley on top for a pop of color and freshness. This dish shines at cozy family dinners, yet it also makes an impressive centerpiece for holiday gatherings. If you want to elevate the experience, serve it in individual cast-iron skillets for a rustic touch that keeps the cheese bubbly and warm.
h-it">What goes well with it
Pair your Cheesy French Onion Chicken Recipe with a crisp green salad dressed in a tangy vinaigrette to balance the richness. Alternatively, roasted garlic asparagus or honey-glazed carrots add a sweet, savory contrast. For a heartier meal, try serving it alongside our Garlic Herb Dinner Rolls to soak up every last bit of gravy. If you’re hosting a dinner party, a glass of dry white wine or a light-bodied red, like Pinot Noir, complements the caramelized onions and melted cheese perfectly. Don’t forget to check out our Creamy Mashed Potatoes for the ultimate comfort food pairing.
What ingredients do I need for Cheesy French Onion Chicken?
To make Cheesy French Onion Chicken, you’ll need chicken breasts, French onion soup mix, shredded Gruyère or Swiss cheese, sour cream, and breadcrumbs. This recipe also calls for butter, garlic, and fresh thyme for extra flavor. The combination of these ingredients creates the rich, savory taste that defines this dish.
ank-math-faq-item">
Can I make Cheesy French Onion Chicken in a slow cooker?
Yes! Cheesy French Onion Chicken adapts well to slow cooking. Layer chicken breasts with French onion soup mix and cook on low for 4-5 hours, then top with cheese during the last 30 minutes. The slow cooker method yields tender chicken with deep onion flavor, though you may need to broil the cheese topping briefly for perfect melt.
What sides go well with Cheesy French Onion Chicken?
Classic pairings for Cheesy French Onion Chicken include roasted potatoes, garlic green beans, or a crisp garden salad. For a heartier meal, serve it with buttered egg noodles or crusty bread to soak up the delicious sauce. These sides complement the rich flavors of the dish without overpowering it.
How do I prevent the cheese from burning on Cheesy French Onion Chicken?
To avoid burnt cheese on your Cheesy French Onion Chicken, add the cheese topping during the last 5-7 minutes of baking. Use an oven thermometer to ensure your oven isn’t running too hot, and consider covering loosely with foil if browning too quickly. The cheese should be golden and bubbly, not blackened.
div>
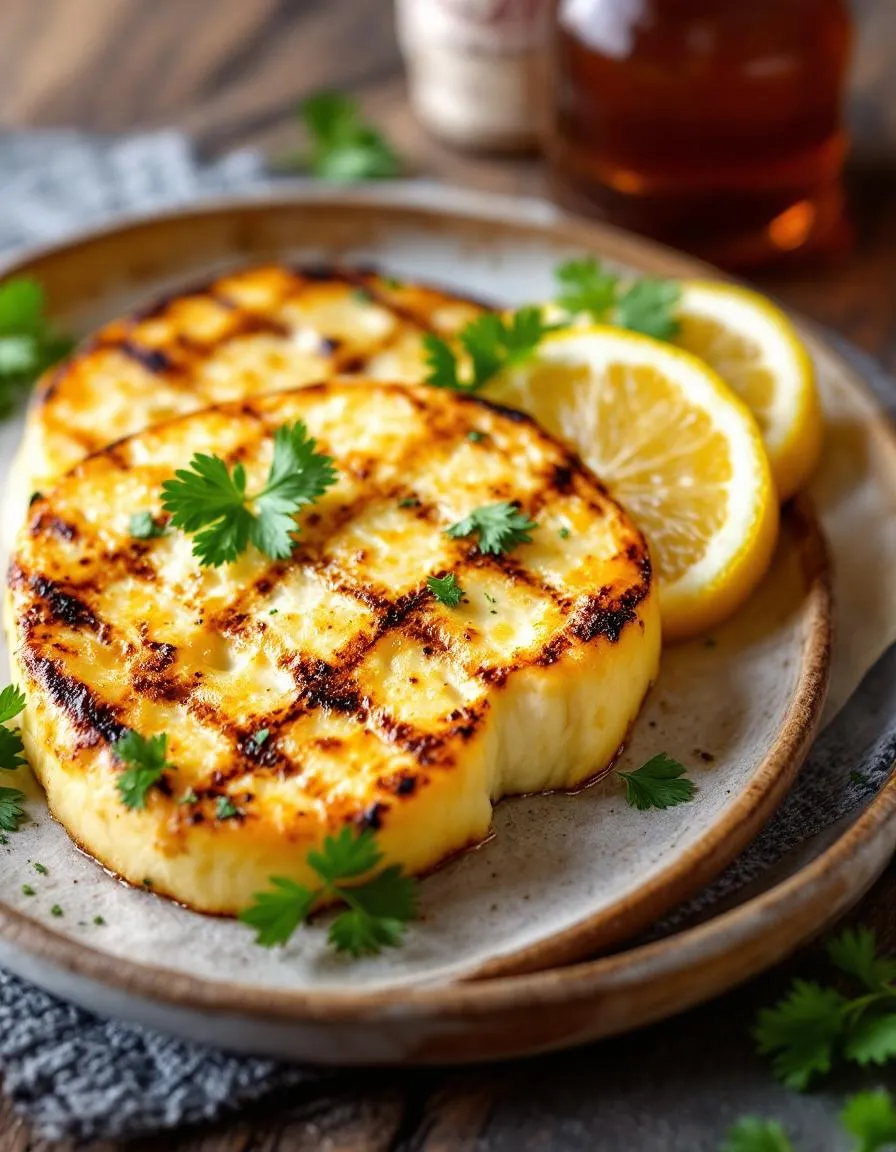
Best Grilled Halloumi Cheese Recipe – Easy & Delicious
Introduction
There’s something magical about the sizzle of halloumi hitting a hot grill—the crispy edges, the salty bite, and that irresistible squeak. Whether you’re a vegetarian seeking a hearty centerpiece or a cheese lover chasing bold flavors, this Grilled Halloumi Cheese Recipe delivers. It’s quick, versatile, and packed with Mediterranean charm. Plus, it turns any meal into a celebration with minimal effort. Let’s dive into why this dish deserves a spot in your weekly rotation.
Grilled halloumi cheese is a Cypriot treasure that has won hearts worldwide. Unlike most cheeses, halloumi holds its shape under heat, making it perfect for grilling or pan-searing. Its salty, tangy profile pairs beautifully with fresh veggies, dips like tzatziki, or even fruity accompaniments like watermelon. This Grilled Halloumi Cheese Recipe isn’t just about technique—it’s about embracing simplicity while creating something extraordinary. Whether you’re hosting a barbecue or whipping up a quick lunch, halloumi adapts effortlessly. It’s also a star in Mediterranean-inspired bowls, adding protein-rich heft without meat. On this blog, we celebrate approachable yet impressive dishes, and grilled halloumi fits perfectly. It’s beginner-friendly but feels gourmet, bridging the gap between weeknight ease and weekend indulgence.
Why I Love This Recipe
My love for grilled halloumi started on a tiny seaside taverna in Greece, where it arrived charred and drizzled with honey. The contrast of salty cheese and sweet syrup hooked me instantly. Now, I make this Grilled Halloumi Cheese Recipe year-round—it’s my go-to for last-minute guests or lazy summer dinners. It reminds me that great food doesn’t need complexity, just quality ingredients and a little heat. Every bite takes me back to that sunlit table, and I hope it brings you joy, too.
Health and Nutrition
Why it’s good for your body
The Grilled Halloumi Cheese Recipe packs a nutritious punch while delighting your taste buds. First, halloumi cheese offers a solid dose of protein, which helps build muscle and keeps you full longer. Additionally, this recipe skips heavy oils, so you enjoy a lighter yet satisfying dish. Because halloumi retains its structure when grilled, you also get a satisfying texture without excess grease.
Moreover, the Grilled Halloumi Cheese Recipe includes healthy fats that support brain function and energy levels. Unlike many cheeses, halloumi contains less lactose, making it easier to digest for some people. When you pair it with fresh veggies or whole grains, the dish becomes a balanced meal. Furthermore, grilling enhances the natural saltiness of halloumi, so you won’t need extra seasoning.
Finally, this recipe provides calcium and phosphorus, which strengthen bones and teeth. Since halloumi doesn’t melt easily, you can grill it to perfection without losing nutrients. Whether you serve it as a main or side, the Grilled Halloumi Cheese Recipe delivers both flavor and health benefits in every bite.
How it fits in a healthy lifestyle
The Grilled Halloumi Cheese Recipe fits seamlessly into a balanced diet. If you follow a gluten-free lifestyle, this dish naturally meets your needs. It also works well for high-protein diets, thanks to halloumi’s rich protein content. For a heart-healthy twist, pair it with antioxidant-rich veggies like roasted peppers or a crisp salad.
Planning meals ahead? This recipe stores well and reheats quickly, making it perfect for busy weeknights. If you love Mediterranean flavors, try pairing it with our Mediterranean Quinoa Bowl for a complete, nutrient-packed meal. For more protein-rich ideas, check out our High-Protein Vegetarian Meals guide. With simple ingredients and quick prep, the Grilled Halloumi Cheese Recipe helps you eat well without sacrificing time or taste.
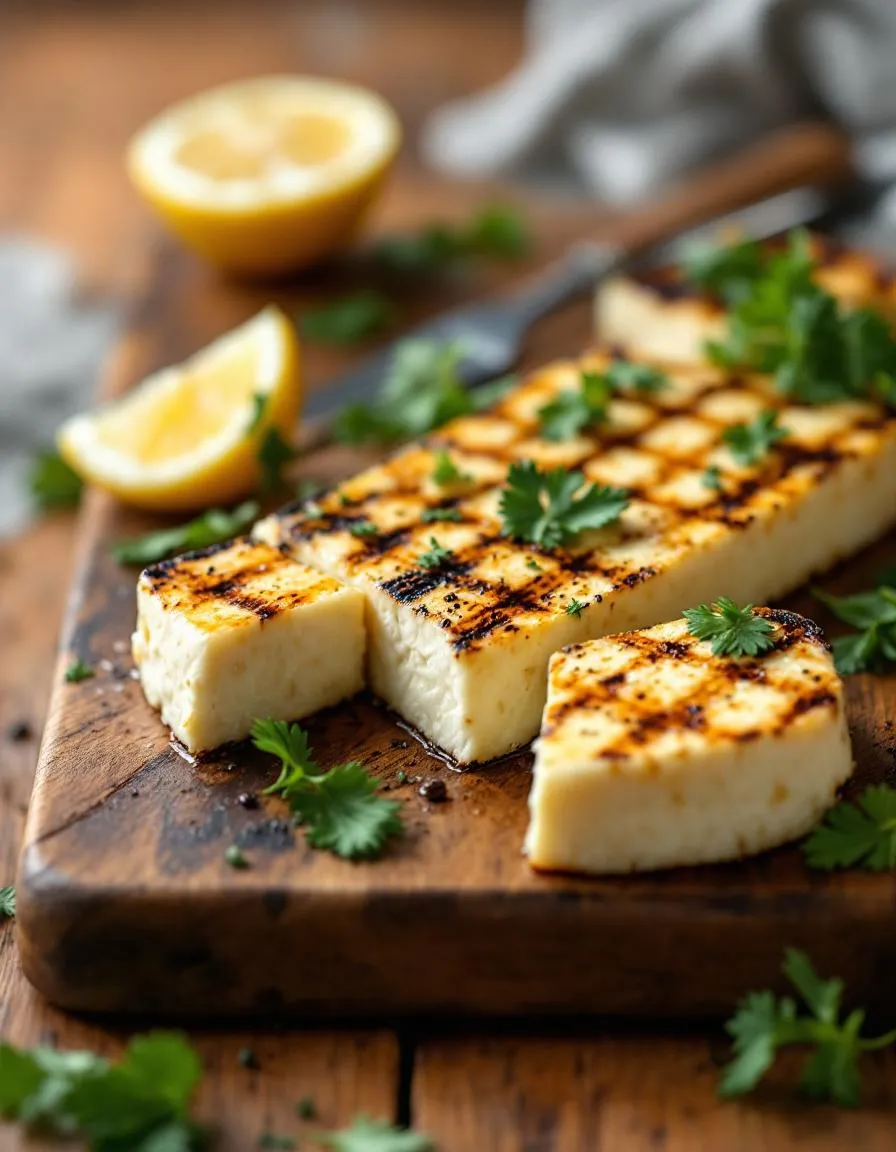
A simple and delicious grilled halloumi cheese dish with a crispy exterior and soft interior.
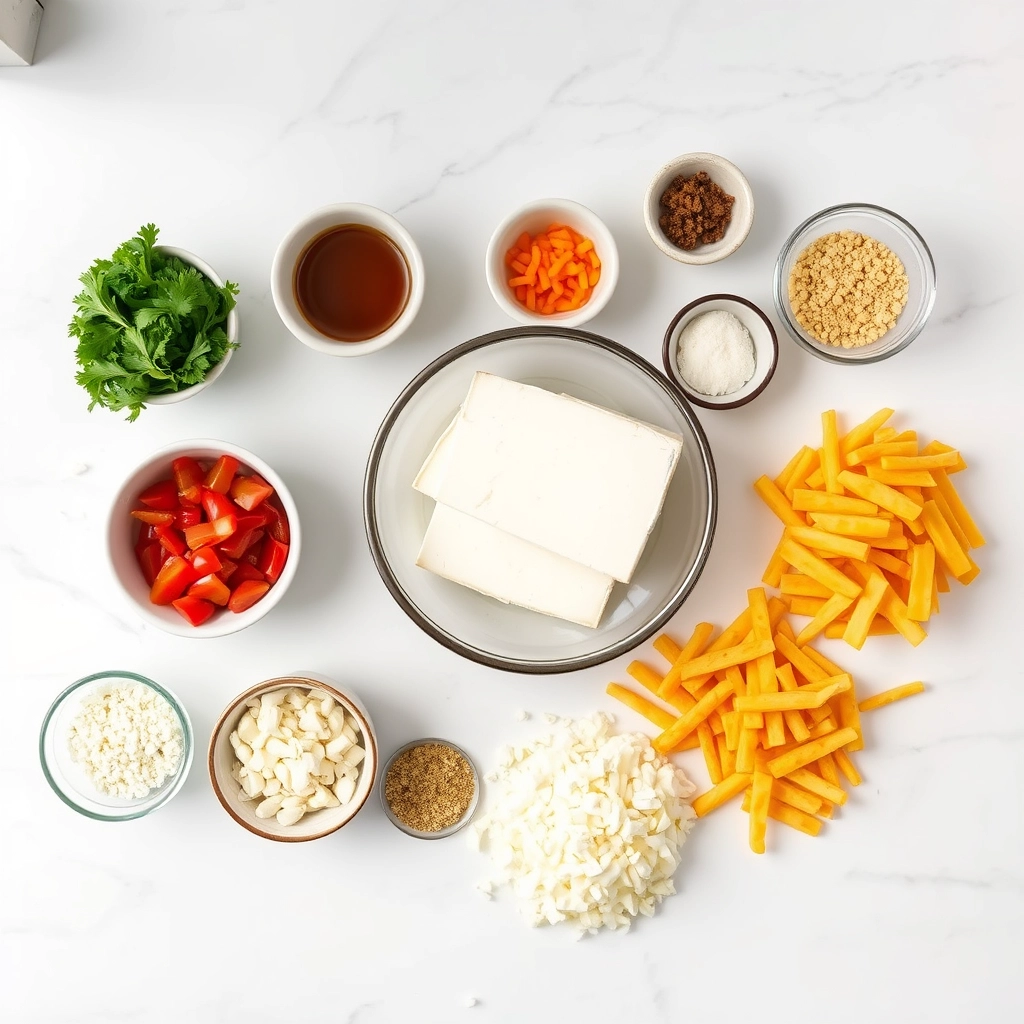
Ingredients
Scale
For the Crust:
8 oz halloumi cheese, sliced into 1/2-inch thick pieces
1 tbsp olive oil
1 tsp dried oregano
1/2 tsp black pepper
1 lemon, cut into wedges
Fresh parsley, chopped (for garnish)
Instructions
1. Prepare the Crust:
Preheat a grill or grill pan over medium-high heat.
Brush the halloumi slices lightly with olive oil on both sides.
Sprinkle oregano and black pepper evenly over the cheese slices.
Grill the halloumi for 2-3 minutes per side, until golden brown grill marks appear.
Remove from heat and serve immediately with lemon wedges and a sprinkle of fresh parsley.
Notes
You can customize the seasonings to taste.
How to Prepare This Dish
Steps and time-saving tips
Start by slicing the halloumi cheese into even half-inch thick pieces. This ensures they cook evenly without burning. Next, pat the slices dry with a paper towel to remove excess moisture. Meanwhile, preheat your grill or grill pan over medium-high heat for about five minutes. Lightly brush the halloumi with olive oil on both sides to prevent sticking and enhance flavor. Once the grill is hot, place the cheese slices directly on the grates or pan. Let them cook for two to three minutes per side until golden grill marks appear. Resist the urge to move them too soon—letting them sear properly gives that perfect crispy texture.
While the halloumi gril
ls, whisk together a quick dressing of lemon juice, olive oil, and a pinch of dried oregano. Drizzle this over the cheese as soon as it comes off the grill for a bright, zesty finish. For a time-saving twist, prep the dressing ahead and store it in the fridge. Serve the grilled halloumi cheese recipe immediately while it’s warm and slightly gooey. Pair it with fresh veggies or pita bread for a complete meal. If you’re doubling the batch, keep cooked slices warm in a low oven while you finish grilling the rest.
Mistakes I’ve made and learned from
I’ve definitely rushed the grilling process before, flipping the halloumi too early and ending up with pale, limp slices. Now I wait patiently for those crisp edges—it makes all the difference. Another lesson? Overcrowding the pan. When I tried to grill too many slices at once, they steamed instead of searing. Spacing them out fixes this instantly. If you’re new to working with halloumi, check out my guide on choosing the right cheese to avoid rubbery results. And if your grill marks aren’t as defined as you’d like, a cast-iron grill pan like the one I mention in my essential kitchen tools post can help achieve restaurant-quality sear every time.
n-and-variations">Cultural Connection and Variations
Where this recipe comes from
The Grilled Halloumi Cheese Recipe traces its roots to Cyprus, where this salty, squeaky cheese has been a staple for centuries. Locals often grill it over open flames during summer gatherings, pairing it with fresh watermelon or drizzling it with honey for a perfect balance of sweet and savory. Meanwhile, in Greece, they might toss it with oregano and lemon, while Middle Eastern variations sometimes include za’atar or pomegranate molasses. Every region adds its own twist, making the Grilled Halloumi Cheese Recipe a versatile dish with deep cultural ties.
In my family, we love to marinate halloumi in olive oil and garlic before grilling, a trick my aunt picked up during her travels. Friends from Turkey once served it skewered with vegetables, proving how adaptable this recipe truly is. Whether you enjoy it as a meze, salad topper, or standalone snack, the Grilled Halloumi Cheese Recipe bridges traditions and tastes across borders. Its simplicity lets the cheese shine, while its rich history makes every bite feel like a celebration.
How it fits in today’s cooking
Today, the Grilled Halloumi Cheese Recipe thrives as a favorite for plant-based eaters and cheese lovers alike. Its high melting point makes it ideal for grilling, frying, or even air-frying, fitting seamlessly into modern cooking trends. Many home cooks now layer it into grain bowls or stuff it into wraps, like those featured in our vegan lunch ideas, proving its versatility beyond traditional plates.
Seasonally, halloumi st
ars at summer barbecues and winter charcuterie boards alike. It’s also a hit during holidays, especially for vegetarians seeking hearty options. For a quick weeknight meal, try pairing it with our Mediterranean salads—the salty cheese contrasts beautifully with crisp greens. Whether you’re hosting or keeping it simple, the Grilled Halloumi Cheese Recipe adapts to today’s kitchens without losing its timeless appeal.
Taste and Texture
What makes it delicious
The Grilled Halloumi Cheese Recipe delivers a mouthwatering contrast of textures and flavors. When you take a bite, the exterior crisps up with a golden char, while the inside stays delightfully chewy and slightly springy. The cheese itself boasts a salty, tangy richness that mellows into a creamy finish as it melts on your tongue. Meanwhile, the smoky aroma from the grill mingles with the herbaceous notes of fresh thyme or oregano, if you’ve added them. Every bite of this Grilled Halloumi Cheese Recipe feels indulgent yet light, making it irresistible whether served warm or at room temperature.
Boosting the flavor
Elevate your Grilled Halloumi Cheese Recipe with a few easy tweaks. For a touch of sweetness, drizzle it with honey or a balsamic glaze right off the grill. Alternatively, toss in a sprinkle of chili flakes or smoked paprika to add warmth and depth. Pair it with a bright, herby sauce like herb yogurt sauce for a refreshing contrast. If you’re serving it as part of a larger spread, try layering it over a bed of peppery arugula or alongside roasted vegetables for a satisfying mix of flavors and textures. A squeeze of lemon right before serving also brightens the dish beautifully.
Always pat the halloumi dry before grilling to prevent excess moisture and ensure a perfect sear. Meanwhile, preheat your grill or pan over medium heat for even cooking without burning. Slice the halloumi into even, half-inch thick pieces so they cook uniformly. Additionally, brush the cheese lightly with olive oil to enhance crispiness and prevent sticking. For the best Grilled Halloumi Cheese Recipe results, serve immediately while hot and slightly golden.
Mistakes to avoid
Avoid overcrowding the pan or grill, as this steams the halloumi instead of crisping it. Instead, leave space between slices for proper heat circulation. Furthermore, don’t skip resting the cheese at room temperature for 10 minutes before cooking—this prevents toughness. If you struggle with sticking, check out our guide on non-stick cooking tips for foolproof techniques. Finally, never overcook halloumi, or it becomes rubbery. For more on perfect textures, explore our grilling cheese guide.
g-suggestions">Serving and Pairing Suggestions
How to serve this dish
For a stunning presentation, arrange your Grilled Halloumi Cheese Recipe on a wooden board or slate platter. Drizzle it with honey or balsamic glaze and scatter fresh herbs like mint or thyme for a pop of color. Alternatively, skewer the grilled halloumi with cherry tomatoes and cucumber slices for a fun appetizer. This dish shines at summer barbecues, brunch spreads, or even as a festive holiday starter. To make it extra inviting, serve it warm right off the grill with a sprinkle of chili flakes or za’atar.
What goes well with it
Pair your Grilled Halloumi Cheese Recipe with a crisp Greek salad for a refreshing contrast to its salty richness. The juicy tomatoes and cucumbers balance the cheese perfectly. For a heartier meal, try it alongside our Mediterranean Quinoa Bowl, which adds wholesome grains and vibrant flavors. Meanwhile, a chilled glass of rosé or a citrusy wheat beer cuts through the halloumi’s creaminess. If you love dips, our Roasted Red Pepper Hummus adds a smoky, tangy twist that elevates every bite.
math-faq-block">
How do you keep halloumi from sticking to the grill?
To prevent halloumi from sticking, lightly oil the grill grates and the cheese slices before cooking. For the best Grilled Halloumi Cheese Recipe results, use medium heat and avoid moving the cheese too soon—let it develop a golden crust first.
What do you serve with grilled halloumi?
Grilled Halloumi Cheese Recipe pairs well with fresh salads, grilled vegetables, or warm pita bread. For a complete meal, try adding it to grain bowls or serving it with a drizzle of honey and chopped herbs.
Can you eat halloumi cheese without grilling it?
Yes, halloumi can be eaten raw, but grilling enhances its texture and flavor. The Grilled Halloumi Cheese Recipe brings out a deliciously crispy exterior while keeping the inside soft and slightly salty.
ank-math-faq-item">
Why does halloumi not melt when grilled?
Halloumi’s high melting point comes from its unique brining and aging process. This makes it perfect for the Grilled Halloumi Cheese Recipe, as it holds its shape and develops a satisfying texture without turning gooey.