Best Almond Flour Apple Cake – Easy Gluten-Free Recipe
Introduction
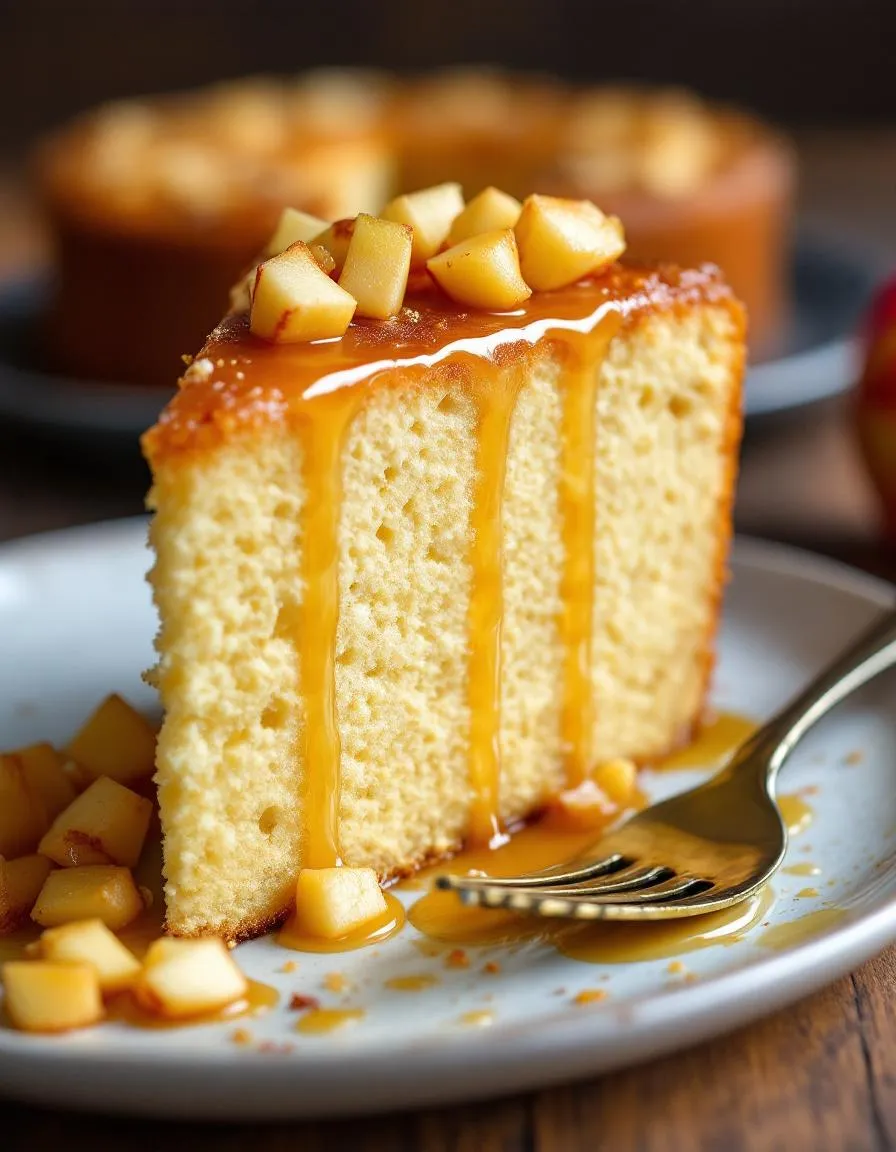
There’s something magical about the aroma of warm apples and cinnamon wafting through the kitchen, especially when it leads to a slice of Irresistible Almond Flour Apple Cake. Whether you’re craving a cozy dessert or a gluten-free treat that doesn’t compromise on flavor, this recipe delivers. Imagine tender chunks of apple nestled in a moist, nutty cake—each bite feels like a hug. Plus, it’s so easy to make, you’ll wonder why you haven’t baked it sooner. Let’s dive into why this cake deserves a spot in your recipe rotation.
Irresistible Almond Flour Apple Cake is a gluten-free twist on a classic dessert, blending the natural sweetness of apples with the rich, nutty flavor of almond flour. Unlike traditional cakes, this version skips refined sugars and wheat, making it a healthier option without sacrificing taste. The texture is soft yet satisfying, thanks to the almond flour’s moisture-retaining properties. Meanwhile, the apples add a delightful freshness, balancing the cake’s richness. If you love baking with alternative flours, you’ll appreciate how this recipe aligns with other favorites like our Almond Flour Banana Bread or Cinnamon Apple Muffins. Perfect for fall gatherings or a simple weeknight indulgence, this cake fits seamlessly into any occasion. It’s also versatile—serve it warm with a scoop of ice cream or enjoy it plain with your morning coffee. No matter how you slice it, this dessert is a crowd-pleaser.
Why I Love This Recipe
This Irresistible Almond Flour Apple Cake holds a special place in my heart because it reminds me of family Sundays. My grandmother used to bake a similar version, and the scent alone transports me back to her kitchen. What I love most is how effortlessly it comes together, yet it always feels like a celebration. The almond flour gives it a rustic charm, while the apples keep it light and fresh. Every time I make it, friends ask for the recipe—and that’s the best compliment a baker can get. Trust me, once you try it, you’ll understand why it’s a staple in my home.
Health and Nutrition
Why it’s good for your body
Irresistible Almond Flour Apple Cake packs a nutritious punch while satisfying your sweet tooth. First, almond flour delivers healthy fats and protein, keeping you full longer. Additionally, it’s naturally gluten-free, making it easier to digest for those with sensitivities. The apples add fiber and vitamin C, which support gut health and immunity.
Moreover, this cake contains no refined sugars, relying instead on the natural sweetness of apples and a touch of honey or maple syrup. As a result, it helps stabilize blood sugar levels compared to traditional desserts. Furthermore, almond flour provides magnesium and vitamin E, which promote heart health and reduce inflammation.
Irresistible Almond Flour Apple Cake also stands out for its balanced macros. Unlike typical cakes, it offers a better ratio of protein, fats, and complex carbs. Finally, the cinnamon in the recipe adds antioxidants, boosting metabolism and fighting oxidative stress. Whether you enjoy it as a snack or dessert, this cake nourishes your body without compromise.
How it fits in a healthy lifestyle
Irresistible Almond Flour Apple Cake fits seamlessly into a balanced diet. For gluten-free eaters, it’s a delicious alternative to wheat-based treats. If you follow a heart-healthy approach, the almond flour’s unsaturated fats support cardiovascular wellness. Even keto dieters can adapt the recipe by tweaking sweeteners.
Pair a slice with Greek yogurt for a protein-rich breakfast or enjoy it as an afternoon pick-me-up with herbal tea. Since it’s nutrient-dense, a small portion satisfies cravings without derailing your goals. For more gluten-free baking ideas, explore our gluten-free desserts guide. If you love wholesome ingredients, check out our healthy baking tips to elevate your kitchen game.
A moist and flavorful gluten-free cake made with almond flour and fresh apples.
Ingredients
Scale
For the Crust:
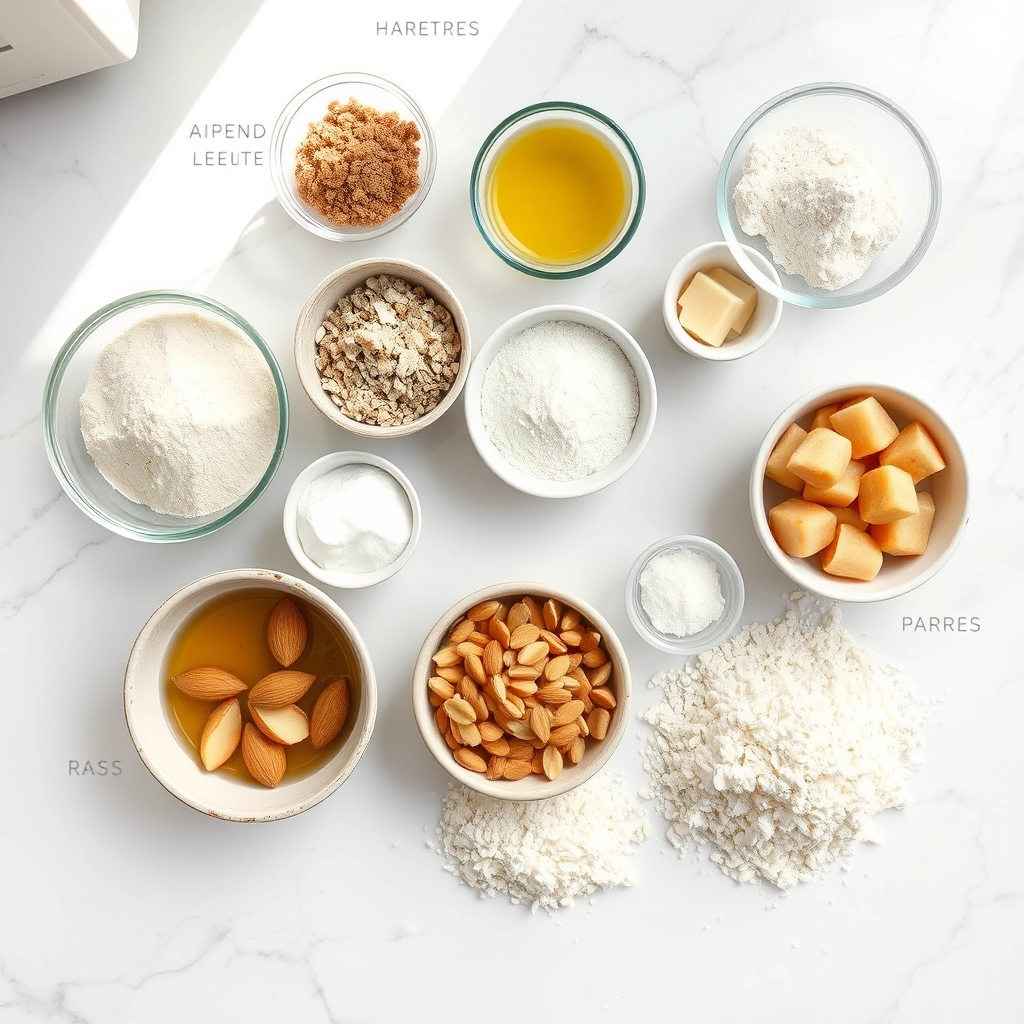
2 cups almond flour
1/2 cup coconut sugar
1 tsp baking powder
1/2 tsp cinnamon
1/4 tsp nutmeg
3 eggs
1/4 cup melted coconut oil
1 tsp vanilla extract
2 medium apples, peeled and diced
1 tbsp honey (optional for drizzle)
Instructions
1. Prepare the Crust:
Preheat oven to 350°F (175°C) and grease a 9-inch round cake pan.
In a large bowl, whisk together almond flour, coconut sugar, baking powder, cinnamon, and nutmeg.
In another bowl, beat eggs, then stir in melted coconut oil and vanilla extract.
Combine wet and dry ingredients, then fold in diced apples.
Pour batter into prepared pan and bake for 30 minutes or until a toothpick comes out clean.
Cool for 10 minutes before drizzling with honey (optional).
Notes
You can customize the seasonings to taste.
How to Prepare This Dish
Steps and time-saving tips
Start by preheating your oven to 350°F and greasing a 9-inch cake pan. While the oven warms up, whisk together the almond flour, baking powder, and cinnamon in a large bowl. In a separate bowl, beat the eggs until frothy, then mix in the honey and melted butter. Gradually fold the wet ingredients into the dry mixture until just combined—don’t overmix! Next, peel and thinly slice the apples, then gently fold half into the batter. Pour the batter into the pan and arrange the remaining apple slices on top in a decorative pattern. Bake for 35-40 minutes, or until a toothpick comes out clean. Let the Irresistible Almond Flour Apple Cake cool for 15 minutes before slicing. For a time-saving hack, prep the dry ingredients the night before or use a mandoline to slice the apples evenly in seconds. If you’re short on time, swap honey for maple syrup—it blends faster.
Mistakes I’ve made and learned from
I once rushed the mixing process and ended up with a dense Irresistible Almond Flour Apple Cake—turns out, overworking the batter activates too much starch. Now, I stop stirring as soon as the ingredients combine. Another blunder? Skipping the cooling step. Slicing too soon made the cake crumble, so I always let it rest now. If you’re new to gluten-free baking, check out my guide on almond flour tips to avoid common pitfalls. Also, if your apples sink to the bottom, dust them with a bit of almond flour first—a trick I picked up from my fruit cake secrets post. Trust me, these small tweaks make all the difference.
The Irresistible Almond Flour Apple Cake carries a cozy, nostalgic charm that spans generations. Originally inspired by European baking traditions, this dessert blends the rustic simplicity of apple cakes with the nutty richness of almond flour. In France, bakers often add a splash of Calvados for warmth, while German versions might layer spiced apples for extra depth. Meanwhile, my grandmother’s twist included a hint of cinnamon and a dollop of whipped cream—because everything tastes better with whipped cream.
Across the Mediterranean, you’ll find similar cakes sweetened with honey or studded with figs. Some bakers even swap apples for pears or top the Irresistible Almond Flour Apple Cake with toasted almonds for crunch. In my kitchen, I love using seasonal apples like Honeycrisp or Granny Smith, depending on whether I crave tartness or sweetness. No matter the variation, this cake always feels like a hug in dessert form.
ays-cooking">How it fits in today’s cooking
Today, the Irresistible Almond Flour Apple Cake fits perfectly into modern cooking trends. Gluten-free bakers adore it for its almond flour base, and health-conscious folks appreciate its natural sweetness from fruit. Plus, it’s a star at fall gatherings—pair it with a scoop of homemade vanilla ice cream for the ultimate comfort combo.
Busy home cooks also love how adaptable it is. Some bake it as a weekend treat, while others turn it into muffins for easy breakfasts. For more almond-flour inspiration, check out our almond flour pancakes. Whether you serve it warm with tea or as a showstopper at holiday dinners, this cake bridges tradition and today’s cravings effortlessly.
Taste and Texture
What makes it delicious
Irresistible Almond Flour Apple Cake delights the senses with its warm, cozy aroma and rich, moist crumb. The almond flour adds a subtly nutty depth, while tender apple chunks melt into sweet, juicy pockets. Each bite offers a perfect balance—lightly spiced with cinnamon, fragrant with vanilla, and just sweet enough to satisfy. The texture is irresistibly tender yet sturdy, thanks to the almond flour’s fine grain. Whether served warm or at room temperature, Irresistible Almond Flour Apple Cake feels comforting and indulgent, like a hug in dessert form.
r">Boosting the flavor
Elevate your Irresistible Almond Flour Apple Cake with a drizzle of homemade caramel sauce for a buttery, decadent twist. Alternatively, fold in toasted walnuts or pecans for extra crunch and earthy warmth. A dusting of powdered sugar or a scoop of vanilla bean ice cream turns it into a showstopping dessert. For a bolder spice profile, try adding a pinch of cardamom or nutmeg alongside the cinnamon. These small tweaks keep the cake exciting while letting its natural flavors shine.
Tips for Success
Best practices for results
Always measure your almond flour carefully for the best texture in your Irresistible Almond Flour Apple Cake. Since almond flour packs differently than wheat flour, spoon it into the measuring cup and level it off. Additionally, use room-temperature eggs to help the batter blend smoothly. For even baking, rotate the pan halfway through and check doneness with a toothpick. Finally, let the cake cool completely before slicing to ensure clean cuts and perfect layers.
>Mistakes to avoid
Avoid overmixing the batter, as this can make your Irresistible Almond Flour Apple Cake dense instead of light. Gently fold the wet and dry ingredients just until combined. Also, don’t skip lining the pan with parchment paper—it prevents sticking and makes removal effortless. If your apples release too much moisture, pat them dry before adding them to the batter. For more troubleshooting tips, check out our guides on almond flour baking and apple cake techniques.
Serving and Pairing Suggestions
How to serve this dish
Slice your Irresistible Almond Flour Apple Cake while it’s still slightly warm for an extra cozy treat. For a stunning presentation, dust the top with powdered sugar or drizzle it with caramel sauce. Meanwhile, fresh apple slices or a sprinkle of cinnamon make perfect garnishes. Serve this cake at brunch with friends or as a holiday dessert centerpiece. Alternatively, pack individual slices for picnics or lunchboxes—they stay moist and flavorful for hours.
What goes well with it
Pair your Irresistible Almond Flour Apple Cake with a steaming cup of spiced chai tea for a comforting autumn combo. The warm spices in the tea highlight the cake’s cinnamon notes. For a creamy contrast, try a scoop of vanilla bean ice cream or a dollop of whipped coconut cream. If you love fruity desserts, serve it alongside our Berry Chia Pudding for a balanced breakfast spread. Finally, a glass of cold almond milk or our Honey Lavender Latte adds a soothing touch to every bite.
Can I substitute almond flour for regular flour in apple cake?
Yes, almond flour works beautifully in Irresistible Almond Flour Apple Cake, providing a moist, nutty texture. Unlike regular flour, almond flour is gluten-free and adds protein, making it a healthier choice. Just note that the cake may be denser than traditional versions.
How do I keep my almond flour apple cake from being too dry?
To prevent dryness in Irresistible Almond Flour Apple Cake, ensure you use enough moisture-rich ingredients like grated apples or yogurt. Almond flour absorbs liquid differently than wheat flour, so slightly increasing wet ingredients or baking at a lower temperature helps retain moisture.
ank-math-faq-item">
What type of apples are best for almond flour apple cake?
Firmer, sweeter apples like Honeycrisp or Fuji work best in Irresistible Almond Flour Apple Cake, as they hold their shape during baking. Tart varieties like Granny Smith add a nice contrast, but avoid overly juicy apples to prevent a soggy texture.
Can I make Irresistible Almond Flour Apple Cake dairy-free?
Absolutely! Substitute butter with coconut oil or vegan butter, and use almond milk instead of regular milk. The Irresistible Almond Flour Apple Cake still turns out rich and flavorful, making it perfect for dairy-free diets.
Best White Cake Recipe – Light and Heavenly
Introduction
There’s something magical about a cake that feels light as a cloud yet tastes rich enough to melt in your mouth. If you’ve ever craved a dessert that balances elegance with pure indulgence, this Heavenly White Cake Recipe is your answer. Whether you’re celebrating a special occasion or simply treating yourself, this cake delivers perfection in every bite. Let’s dive into why this recipe stands out and how it can become your go-to for unforgettable moments.
The Heavenly White Cake Recipe is a classic dessert that elevates simplicity into something extraordinary. Unlike dense or overly sweet cakes, this version focuses on a tender crumb, delicate vanilla flavor, and a frosting that’s just sweet enough. Perfect for birthdays, weddings, or afternoon tea, it adapts to any event while always stealing the spotlight. Moreover, it pairs beautifully with fresh berries or a dollop of whipped cream, making it versatile for any season. If you love timeless bakes, you’ll appreciate how this recipe honors tradition while keeping the process approachable. For more inspiration, check out our guide to vanilla cake variations or explore our baking tips for beginners to build confidence in the kitchen.
Why I Love This Recipe
This Heavenly White Cake Recipe holds a special place in my heart because it reminds me of my grandmother’s kitchen. She baked it for every family gathering, and the first bite always transported me back to those warm, laughter-filled moments. Over the years, I’ve tweaked the recipe to achieve that same nostalgic flavor while ensuring it’s foolproof for home bakers. Every time I make it, I’m reminded that the best desserts aren’t just about taste—they’re about the memories we create around them.
Health and Nutrition
Why it’s good for your body
Heavenly White Cake Recipe delivers more than just irresistible flavor. First, it uses simple, wholesome ingredients like egg whites and vanilla extract, which provide a lighter alternative to dense desserts. Additionally, the cake’s airy texture comes from properly whipped egg whites, offering a protein boost without heavy fats. Moreover, when you enjoy Heavenly White Cake Recipe in moderation, it satisfies sweet cravings without overwhelming your diet.
Furthermore, this dessert contains fewer calories than butter-based cakes, making it a smarter choice for those mindful of their intake. The recipe also skips artificial additives, relying instead on natural flavors for its delicate taste. Because of its balanced sweetness, Heavenly White Cake Recipe pairs perfectly with fresh berries, adding antioxidants and fiber to your treat. Finally, its light crumb means you can savor every bite without feeling weighed down.
How it fits in a healthy lifestyle
Heavenly White Cake Recipe fits seamlessly into a balanced diet when enjoyed thoughtfully. For instance, you can serve smaller portions alongside protein-rich snacks like Greek yogurt or nuts to create a satisfying yet nutritious dessert. If you’re exploring gluten-free options, consider swapping regular flour with a gluten-free blend for a celiac-friendly version.
This cake also works well for special occasions where you want a lighter indulgence. Pair it with herbal tea or a scoop of fruit sorbet to keep the meal refreshing. By focusing on mindful eating, you can enjoy Heavenly White Cake Recipe as part of a varied, health-conscious lifestyle without guilt.
A light and fluffy vanilla cake that melts in your mouth.
Ingredients
Scale
For the Crust:
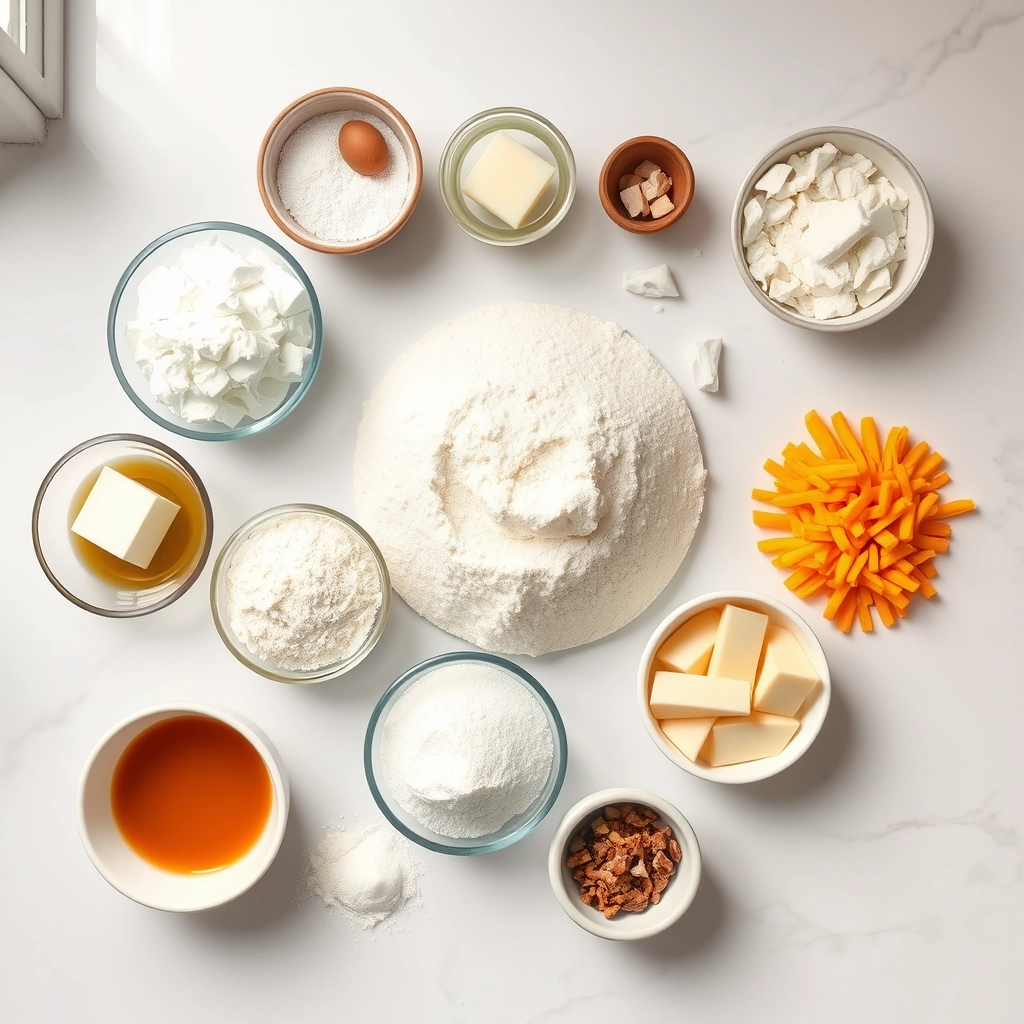
2 1/2 cups cake flour
1 tablespoon baking powder
1/2 teaspoon salt
1 3/4 cups granulated sugar
1/2 cup unsalted butter, softened
1 cup milk
1 teaspoon vanilla extract
4 large egg whites
1/4 teaspoon cream of tartar
Instructions
1. Prepare the Crust:
Preheat oven to 350°F (175°C). Grease and flour two 9-inch round cake pans.
Sift together cake flour, baking powder, and salt in a medium bowl.
In a large bowl, cream butter and sugar until light and fluffy. Gradually mix in milk and vanilla.
Beat egg whites with cream of tartar until stiff peaks form.
Fold dry ingredients into butter mixture alternately with beaten egg whites.
Divide batter evenly between prepared pans. Bake for 25-30 minutes or until a toothpick comes out clean.
Cool cakes in pans for 10 minutes, then transfer to wire racks to cool completely.
Notes
You can customize the seasonings to taste.
s-dish">How to Prepare This Dish
Steps and time-saving tips
Start by preheating your oven to 350°F and greasing two 9-inch cake pans. Meanwhile, sift together the flour, baking powder, and salt in a large bowl to ensure a light, airy texture for your Heavenly White Cake Recipe. In a separate bowl, cream the butter and sugar until fluffy, then gradually add egg whites one at a time, whisking well after each addition. Alternate mixing in the dry ingredients and milk, beginning and ending with the flour mixture, to avoid overworking the batter. For extra tenderness, fold in a splash of vanilla extract right before pouring the batter evenly into the pans. Bake for 25-30 minutes or until a toothpick comes out clean. Let the layers cool completely before frosting—this prevents melting and keeps your cake looking pristine. If you’re short on time, pop the cakes in the fridge for 15 minutes to speed up cooling. Finally, spread a generous layer of buttercream between the cakes, stack them, and cover the entire dessert with a smooth finish. A quick offset spatula swirl adds a professional touch without fuss.
Mistakes I’ve made and learned from
Early on, I rushed the egg-white incorporation for my Heavenly White Cake Recipe, leaving streaks of unmixed batter that created dense spots. Now, I whisk each egg white fully before adding the next—patience pays off with a uniform crumb. Another blunder? Skipping the cake pan lining, which led to stubborn sticking. A quick parchment paper round saves the day, as I learned from my cake-baking hacks post. Temperature matters too; once, I frosted a warm cake, and the buttercream slid right off. Letting layers cool fully, as detailed in my frosting perfection guide, ensures a flawless finish every time. Trust me, these small tweaks make all the difference between good and heavenly.
n-and-variations">Cultural Connection and Variations
Where this recipe comes from
The Heavenly White Cake Recipe traces its roots back to early 20th-century America, where bakers prized its delicate crumb and pure vanilla flavor. Many families served it at weddings and christenings, symbolizing celebration and purity. Meanwhile, in the South, cooks often added a splash of almond extract for extra depth, while Midwestern bakers might top it with fresh strawberries in summer. Today, the Heavenly White Cake Recipe still holds a special place in home kitchens, especially during holidays like Easter and Christmas.
Around the world, similar cakes take on local twists. In France, they might layer it with raspberry jam for a gateau blanc, while in Mexico, bakers sometimes soak the layers in tres leches for a richer texture. My grandmother, however, swore by her version with coconut flakes folded into the batter. Whether you stick to the classic or experiment, the Heavenly White Cake Recipe adapts beautifully to personal tastes and traditions.
How it fits in today’s cooking
Modern cooks love the Heavenly White Cake Recipe for its versatility. Some bake it as a showstopping dessert for birthdays, while others turn it into cupcakes for easy sharing. For a healthier twist, many substitute almond flour or reduce the sugar without losing that signature lightness. If you’re looking for more inspiration, check out our guide to baking tips for beginners or explore how to pair it with the best frosting recipes.
Despite changing trends
, this cake remains a timeless favorite. Busy bakers appreciate its straightforward steps, while food bloggers reinvent it with matcha or lavender infusions. Whether you’re honoring family traditions or creating new ones, the Heavenly White Cake Recipe fits seamlessly into today’s kitchens—proof that some classics never go out of style.
Taste and Texture
What makes it delicious
The Heavenly White Cake Recipe delivers a dreamy, cloud-like experience with every bite. Its tender crumb melts in your mouth, while the subtle vanilla aroma wraps you in warmth. Fresh egg whites and buttermilk create a light, airy texture, and a touch of almond extract adds a delicate nutty sweetness. Meanwhile, the frosting—fluffy and just sweet enough—balances the cake’s simplicity. Whether served plain or dressed up, the Heavenly White Cake Recipe feels like a celebration in every slice.
Boosting the flavor
Elevate your Heavenly White Cake Recipe with a few easy tweaks. For a citrusy twist, fold lemon zest into the batter or drizzle a bright berry glaze over the top. If you love layers, try sandwiching the cake with vanilla whipped cream and fresh strawberries. A sprinkle of toasted coconut or crushed pistachios adds crunch, while a dash of cardamom in the batter brings warmth. Experiment freely—each addition lets the cake’s delicate flavor shine even brighter.
For the best Heavenly White Cake Recipe, always use room-temperature egg whites since they whip to a fluffier consistency. Meanwhile, sift your dry ingredients twice to prevent lumps and ensure an even rise. Additionally, gently fold the batter to maintain airiness rather than stirring aggressively. Finally, check for doneness early since overbaking can dry out this delicate cake.
Mistakes to avoid
Avoid overmixing the batter after adding flour, as this develops gluten and creates a dense Heavenly White Cake Recipe. Instead, stop as soon as streaks disappear. Also, never skip greasing the pans properly—try our recommended cake release spray for effortless removal. Lastly, if your layers sink, you might have underbaked them; use a toothpick test like we explain in our troubleshooting guide for perfect timing.
g-suggestions">Serving and Pairing Suggestions
How to serve this dish
For a stunning presentation, slice your Heavenly White Cake Recipe into elegant layers and stack them with fresh berries or edible flowers between each tier. Meanwhile, dust the top with powdered sugar or drizzle a light vanilla glaze for a touch of sophistication. Serve it at room temperature to let the flavors shine, whether you’re hosting a bridal shower, birthday party, or holiday gathering. To make it extra special, pair each slice with a dollop of whipped cream or a scoop of vanilla ice cream.
What goes well with it
Brighten up your Heavenly White Cake Recipe with a glass of sparkling rosé, as the crisp bubbles balance the cake’s delicate sweetness. Alternatively, try a cup of Earl Grey tea for a comforting contrast. If you’re serving it as part of a dessert spread, consider adding our Berry Chia Pudding for a refreshing side or our Lemon Curd Tartlets for a zesty complement. Each pairing enhances the cake’s light, airy texture without overpowering it.
math-faq-block">
What makes a Heavenly White Cake Recipe different from regular vanilla cake?
A Heavenly White Cake Recipe focuses on using only egg whites (no yolks) for a pure white color and light, airy texture. It also typically calls for cake flour instead of all-purpose flour, giving it a delicate crumb that sets it apart from denser vanilla cakes.
Can I make a Heavenly White Cake Recipe without cake flour?
Yes, you can substitute all-purpose flour in a pinch, but your Heavenly White Cake Recipe won’t be as tender. For best results, replace 2 tablespoons of all-purpose flour per cup with cornstarch to mimic cake flour’s lower protein content.
What’s the best frosting for a Heavenly White Cake Recipe?
Classic choices include fluffy white buttercream or cream cheese frosting to complement the Heavenly White Cake Recipe’s delicate flavor. For a pure white finish, avoid frostings with egg yolks or butter that hasn’t been bleached white.
ank-math-faq-item">
How do I prevent my Heavenly White Cake Recipe from drying out?
Proper ingredient measurements and avoiding overbaking are key. The Heavenly White Cake Recipe benefits from using room temperature ingredients and brushing baked layers with simple syrup before frosting to lock in moisture.
Best Crunchy Honeycrisp Apple Broccoli Salad Recipe
Introduction
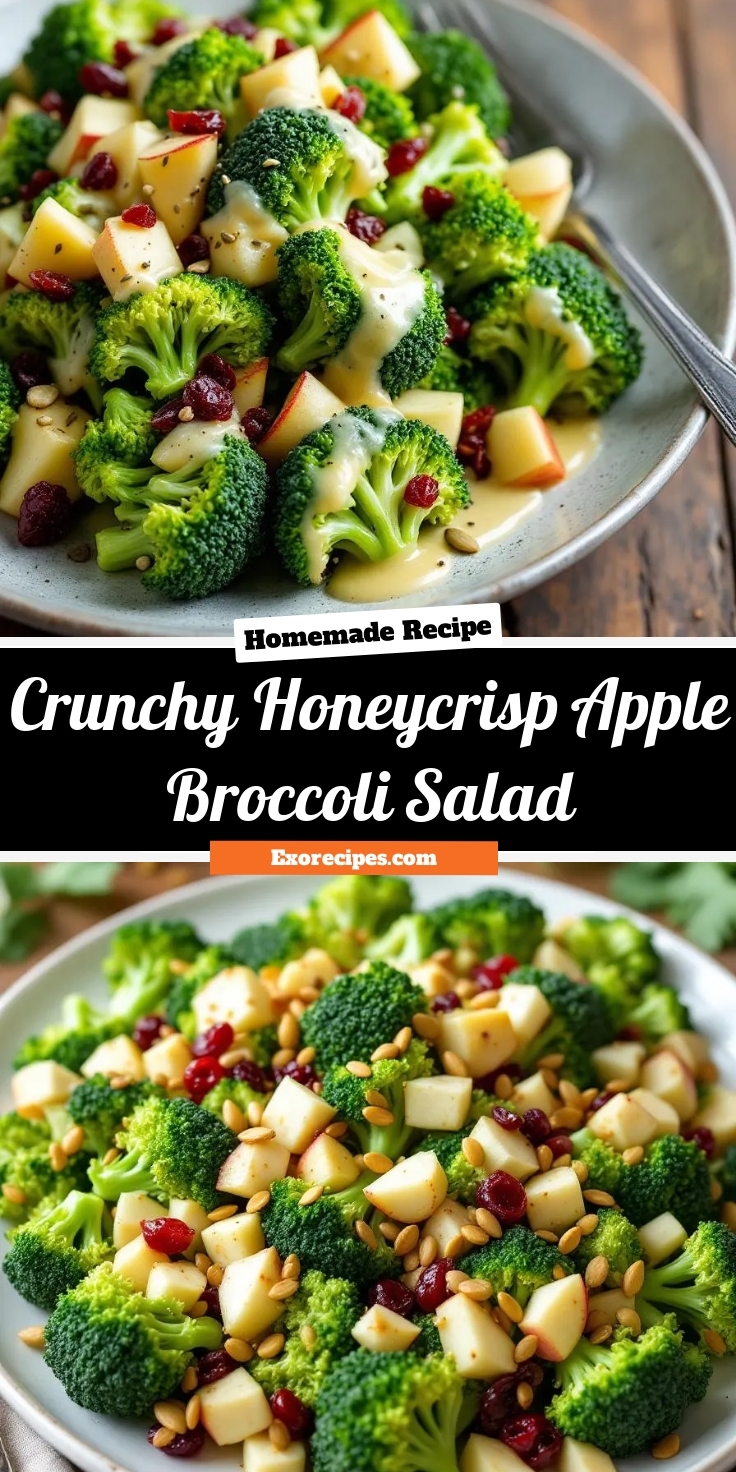
There’s something magical about a salad that balances crunch, sweetness, and freshness in every bite. If you’re craving a dish that’s both wholesome and bursting with flavor, this Crunchy Honeycrisp Apple Broccoli Salad delivers. Whether you need a quick lunch, a vibrant side dish, or a meal prep hero, this recipe brings joy to the table. Plus, it’s packed with nutrients that keep you energized. Let’s dive into why this salad deserves a spot in your rotation.
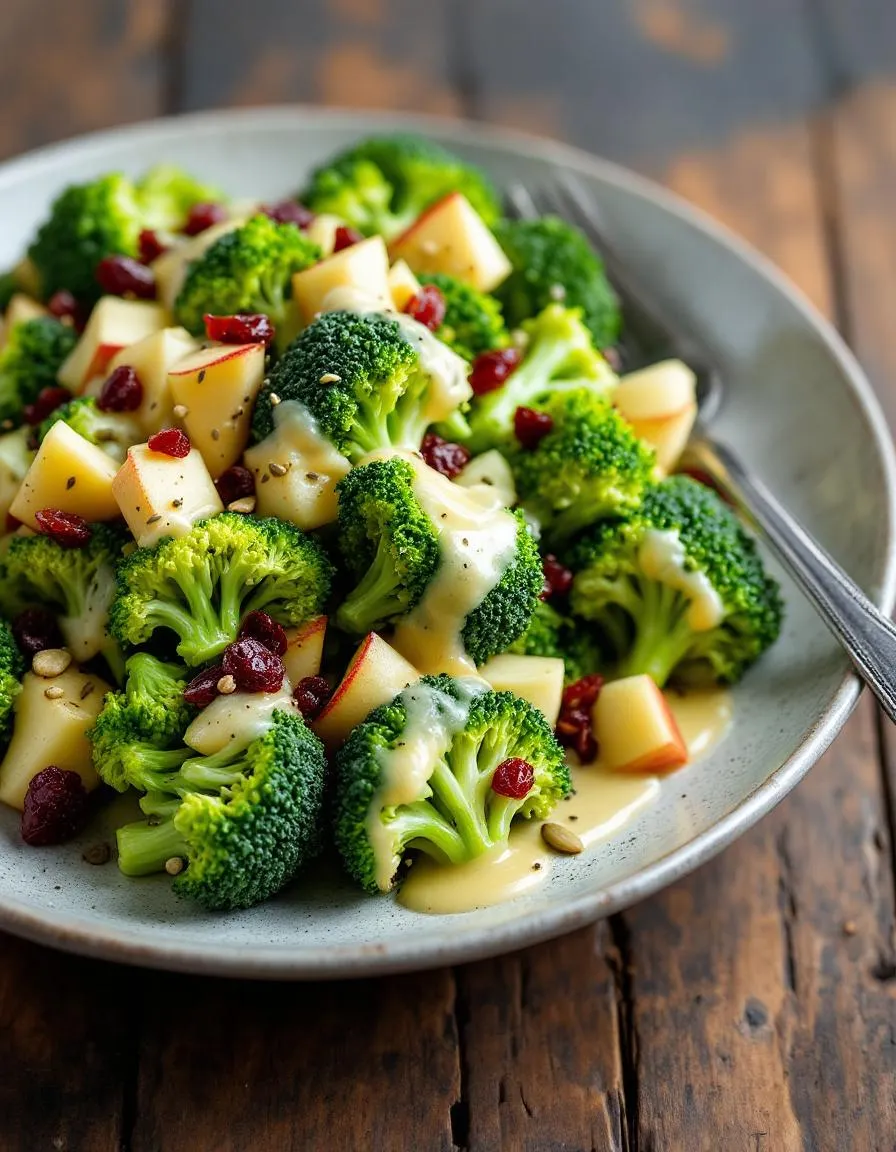
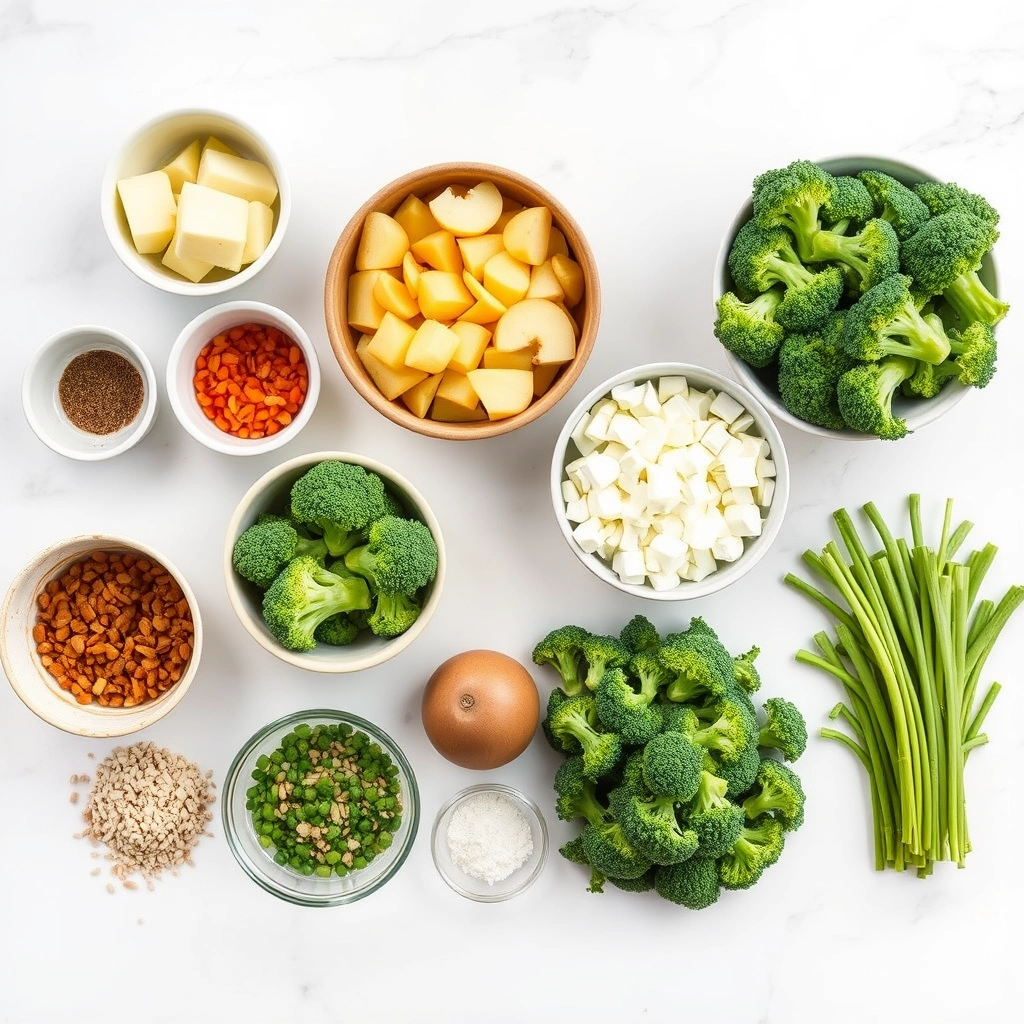
Crunchy Honeycrisp Apple Broccoli Salad is a refreshing blend of crisp broccoli, sweet-tart apples, and a creamy dressing that ties everything together. Unlike heavy, mayo-laden salads, this version feels light yet satisfying. The Honeycrisp apples add natural sweetness, while the broccoli provides a satisfying crunch. Toss in some nuts or seeds for extra texture, and you’ve got a dish that’s as versatile as it is delicious. This salad fits perfectly with our blog’s focus on easy, flavorful recipes that don’t sacrifice health or taste.
What makes this recipe stand out? First, it’s incredibly adaptable. You can customize it with ingredients like dried cranberries, sunflower seeds, or even a sprinkle of cheese. Second, it’s a crowd-pleaser. Whether you’re serving it at a potluck or packing it for lunch, it always gets rave reviews. If you love vibrant, nutrient-dense meals, you’ll also enjoy our Rainbow Kale Salad or our Creamy Avocado Dressing as a tasty alternative. Ultimately, this salad proves that eating well doesn’t mean skimping on flavor.
Why I Love This Recipe
This Crunchy Honeycrisp Apple Broccoli Salad holds a special place in my heart because it reminds me of family gatherings. My aunt used to make a similar version for summer picnics, and the combination of sweet apples and crunchy broccoli always felt like a celebration. Now, I love whipping it up for my own kids, who devour it without realizing how healthy it is. It’s one of those rare recipes that bridges nostalgia and everyday practicality—quick to make, impossible to resist, and always a hit.
Health and Nutrition
Why it’s good for your body
Crunchy Honeycrisp Apple Broccoli Salad packs a powerful nutritional punch while delighting your taste buds. First, the broccoli delivers a hefty dose of fiber, which supports digestion and keeps you feeling full longer. Additionally, it’s rich in vitamin C, boosting your immune system and promoting healthy skin. Meanwhile, the Honeycrisp apples add natural sweetness along with antioxidants that help fight inflammation.
Moreover, this salad includes healthy fats from ingredients like nuts or seeds, which are great for heart health. The combination of textures and flavors also makes it easier to enjoy nutrient-dense foods without feeling like you’re sacrificing taste. Furthermore, Crunchy Honeycrisp Apple Broccoli Salad is low in calories but high in volume, making it a smart choice for weight management.
Finally, the dish offers a balanced mix of macronutrients. The broccoli provides complex carbs, while any added protein (like chicken or chickpeas) keeps energy levels steady. Whether you’re looking for a light lunch or a vibrant side, Crunchy Honeycrisp Apple Broccoli Salad nourishes your body without compromise.
How it fits in a healthy lifestyle
Crunchy Honeycrisp Apple Broccoli Salad fits seamlessly into a variety of dietary plans. If you’re gluten-free, this recipe naturally avoids grains, making it a safe and flavorful option. For those focused on heart health, the unsaturated fats from nuts or olive oil support cholesterol levels. Plus, the fiber content aids in maintaining steady blood sugar.
Busy weeknights call for quick, wholesome meals, and this salad delivers. Pair it with a protein-rich main like grilled salmon for a complete dinner. It also works well as a make-ahead lunch, staying crisp for hours. If you’re meal prepping, try pairing it with our creamy avocado dressing for extra healthy fats and flavor. No matter your routine, this salad helps you eat well without extra effort.
A refreshing and crunchy salad featuring crisp Honeycrisp apples and fresh broccoli, tossed in a creamy dressing.
Ingredients
Scale
For the Crust:
4 cups fresh broccoli florets
2 Honeycrisp apples, diced
1/2 cup dried cranberries
1/4 cup sunflower seeds
1/4 cup red onion, finely chopped
1/2 cup plain Greek yogurt
2 tablespoons honey
1 tablespoon lemon juice
1/2 teaspoon salt
1/4 teaspoon black pepper
Instructions
1. Prepare the Crust:
In a large bowl, combine broccoli florets, diced apples, dried cranberries, sunflower seeds, and red onion.
In a small bowl, whisk together Greek yogurt, honey, lemon juice, salt, and black pepper until smooth.
Pour the dressing over the salad and toss gently to coat all ingredients evenly.
Refrigerate for at least 30 minutes before serving to allow flavors to meld.
Notes
You can customize the seasonings to taste.
“`html
="how-to-prepare-this-dish">How to Prepare This Dish
Steps and time-saving tips
Start by washing and drying the broccoli thoroughly, then chop it into small, bite-sized florets. Next, slice the Honeycrisp apples into thin matchsticks, leaving the skin on for extra crunch and color. Toss the broccoli and apples in a large bowl, then add shredded carrots and toasted sunflower seeds for texture. In a separate bowl, whisk together Greek yogurt, honey, apple cider vinegar, and a pinch of salt until smooth. Drizzle the dressing over the salad and gently fold everything together until evenly coated. For the best flavor, let the Crunchy Honeycrisp Apple Broccoli Salad chill in the fridge for at least 30 minutes before serving. If you’re short on time, prep the dressing a day ahead and store it separately. To save even more time, buy pre-cut broccoli or use a food processor for quick chopping. Just before serving, sprinkle with dried cranberries for a sweet contrast.
Mistakes I’ve made and learned from
I used to overdress this salad, making it soggy within minutes. Now, I mix in half the dressing first, then add more as needed. Another mistake? Skipping the toasting step for the sunflower seeds—raw seeds lack that nutty depth. For perfectly toasted seeds every time, I follow my toasting nuts guide. Also, I once substituted regular yogurt for Greek yogurt, and the dressing turned out too thin. Stick with thick Greek yogurt for the right consistency. If you’re new to working with Honeycrisp apples, check out my guide to choosing apples for salads to avoid overly tart or soft varieties. Trust me, these small tweaks make all the difference.
Crunchy Honeycrisp Apple Broccoli Salad feels like a love letter to fresh, vibrant ingredients. Originally inspired by Midwest potluck traditions, this dish blends the crisp sweetness of Honeycrisp apples with hearty broccoli, creating a texture that’s both refreshing and satisfying. Families in the region often tweak the recipe—some add raisins for extra chewiness, while others toss in sunflower seeds for a nutty crunch. Meanwhile, in coastal areas, you might find versions with dried cranberries or even a splash of citrus dressing to brighten the flavors.
Across the globe, simil
ar salads take on local twists. In Australia, cooks might swap the mayo-based dressing for yogurt and lime, leaning into a tangier profile. In Japan, shredded cabbage often joins the mix, turning it into a lighter, crunchier side dish. My grandmother, however, always insisted on adding a handful of toasted pecans to her Crunchy Honeycrisp Apple Broccoli Salad, giving it a rich, buttery depth that made it a holiday staple. Whether served at picnics or family gatherings, this salad adapts effortlessly to tastes and traditions.
How it fits in today’s cooking
Today, Crunchy Honeycrisp Apple Broccoli Salad shines as a versatile star in modern kitchens. Meal preppers love it for its make-ahead convenience, while health-conscious cooks appreciate its nutrient-packed ingredients. During fall, it pairs perfectly with cozy dishes like butternut squash soup, balancing sweetness with earthy warmth. In summer, it’s a refreshing counterpoint to grilled meats at backyard barbecues.
Many home chefs now experiment with dairy-free or vegan dressings, using avocado or tahini for creaminess without mayo. Others fold in superfoods like chia seeds or swap broccoli for kale. Whether you’re serving it alongside garlic herb roasted chicken or packing it for lunch, this salad fits seamlessly into today’s fast-paced, flavor-driven cooking. Its adaptability ensures it stays a beloved favorite, season after season.
>Taste and Texture
What makes it delicious
Crunchy Honeycrisp Apple Broccoli Salad delivers a vibrant mix of textures and flavors that excite the senses. First, you’ll notice the crisp bite of fresh broccoli florets, perfectly balanced by the juicy sweetness of Honeycrisp apples. Meanwhile, toasted almonds add a satisfying crunch, while dried cranberries bring a chewy, tangy contrast. The creamy dressing ties everything together with a hint of zesty brightness, making each forkful irresistible. Fragrant herbs like fresh parsley or dill elevate the aroma, ensuring every bite of Crunchy Honeycrisp Apple Broccoli Salad feels fresh and inviting.
Boosting the flavor
For an extra flavor kick, try swapping the almonds for candied pecans or tossing in crumbled feta for a salty twist. A drizzle of honey mustard dressing adds depth, while a sprinkle of chili flakes brings subtle heat. If you love bold contrasts, pair this salad with a tangy lemon garlic sauce to brighten the flavors. Experiment with fresh herbs or a squeeze of citrus to keep each bite dynamic and delicious.
Tips for Success
Best practices for results
Always chop the broccoli into small, bite-sized florets for the best texture in your Crunchy Honeycrisp Apple Broccoli Salad. Meanwhile, toss the apple slices in lemon juice right after cutting them to prevent browning. For maximum crunch, toast the nuts or seeds lightly before adding them to the mix. Additionally, let the salad chill for at least 30 minutes before serving so the flavors meld perfectly. Finally, drizzle the dressing just before serving to keep everything crisp and fresh.
Mistakes to avoid
Avoid overdressing the salad, as too much liquid can make the broccoli soggy. Instead, start with half the dressing and add more as needed. Similarly, don’t skip massaging the broccoli lightly with salt—this step tenderizes it just enough while keeping its crunch. If you’re unsure about balancing flavors, check out our guide to dressing salads for pro tips. Also, remember that Honeycrisp apples work best here—softer varieties can turn mushy. For more apple selection advice, see our choosing the right apple breakdown.
Serving and Pairing Suggestions
How to serve this dish
For a stunning presentation, serve your Crunchy Honeycrisp Apple Broccoli Salad in a large wooden bowl or on a colorful platter to highlight its vibrant ingredients. Meanwhile, garnish with extra apple slices and a sprinkle of toasted almonds for added texture. This dish shines at potlucks, picnics, or as a refreshing side for holiday gatherings. If you want to elevate it further, layer the salad in individual mason jars for a portable and Instagram-worthy option. The crispness of the Crunchy Honeycrisp Apple Broccoli Salad makes it a crowd-pleaser year-round.
h-it">What goes well with it
Pair your Crunchy Honeycrisp Apple Broccoli Salad with a chilled glass of sparkling apple cider, which enhances the natural sweetness of the apples. Alternatively, serve it alongside grilled chicken or our honey-glazed salmon for a balanced meal. For a lighter option, try it with a scoop of creamy avocado dip, which adds a rich contrast to the salad’s crunch. Each pairing brings out the fresh, tangy flavors of the dish while keeping the meal satisfying.
What makes Crunchy Honeycrisp Apple Broccoli Salad so healthy?
Crunchy Honeycrisp Apple Broccoli Salad packs a nutritious punch with fresh broccoli, fiber-rich apples, and healthy fats from nuts or seeds. The combination provides vitamins C and K, antioxidants, and a satisfying crunch without heavy dressings.
ank-math-faq-item">
Can I make Crunchy Honeycrisp Apple Broccoli Salad ahead of time?
Yes! This salad holds well for up to 24 hours if stored airtight. For best texture, add nuts or crispy toppings right before serving to maintain the signature crunch of Honeycrisp Apple Broccoli Salad.
What protein pairs well with Crunchy Honeycrisp Apple Broccoli Salad?
Grilled chicken, roasted chickpeas, or crumbled feta cheese complement the sweet-and-crunchy profile perfectly. The lightness of Honeycrisp Apple Broccoli Salad balances richer proteins beautifully.
How do you keep apples from browning in this broccoli salad?
Toss sliced Honeycrisp apples with a teaspoon of lemon juice before mixing. The acid prevents oxidation while enhancing the bright flavors in your Crunchy Honeycrisp Apple Broccoli Salad.
div>
Best Cheesy Spinach Stuffed Chicken Breasts Recipe
Introduction
There’s something undeniably comforting about a dish that feels indulgent yet wholesome, and that’s exactly what you get with Cheesy Spinach Stuffed Chicken Breasts. Whether you’re craving a cozy weeknight dinner or impressing guests with minimal effort, this recipe delivers juicy chicken, melty cheese, and vibrant spinach in every bite. Best of all, it’s easier to make than you might think. Let’s dive into why this dish deserves a spot in your regular meal rotation.
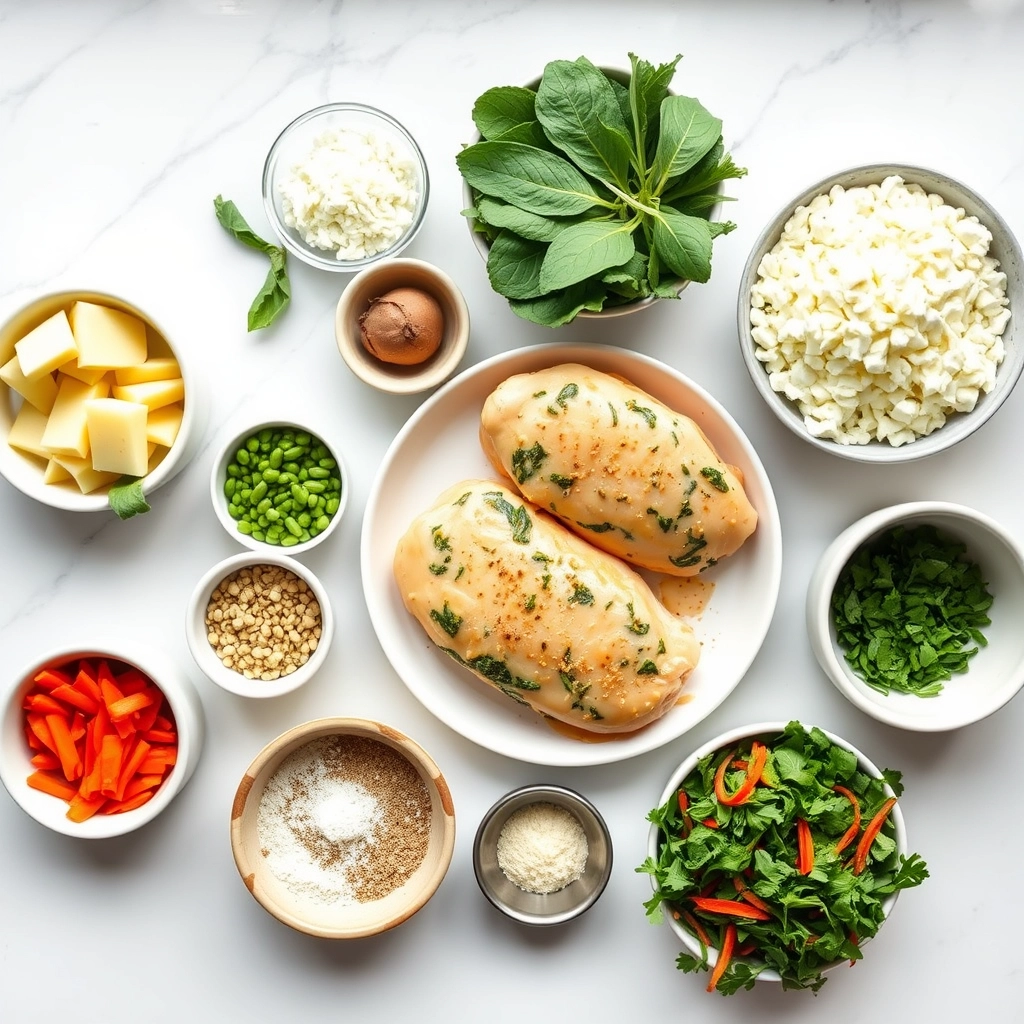
Cheesy Spinach Stuffed Chicken Breasts combine tender chicken breasts stuffed with a rich filling of creamy cheese and fresh spinach, then baked to golden perfection. This dish matters because it strikes the perfect balance between flavor and nutrition, making it a crowd-pleaser for both busy families and entertaining occasions. The spinach adds a pop of color and nutrients, while the cheese ensures every bite feels decadent. If you love dishes that feel restaurant-quality without the fuss, you’ll appreciate how this recipe fits into our blog’s philosophy of simple, satisfying meals. For more easy dinner ideas, check out our quick weeknight dinners collection. Plus, if you’re looking for ways to elevate your chicken game, our chicken recipes guide has plenty of inspiration.
Why I Love This Recipe
Cheesy Spinach Stuffed Chicken Breasts hold a special place in my heart because they remind me of Sunday dinners with my family. My mom used to make a version of this dish, and the aroma of baking chicken and melted cheese would fill the house, signaling that something delicious was coming. Now, whenever I make it, I get that same warm, nostalgic feeling—plus the joy of seeing my own family devour it. It’s a recipe that feels like a hug on a plate, and I hope it becomes a favorite in your home too.
Health and Nutrition
Why it’s good for your body
Cheesy Spinach Stuffed Chicken Breasts pack a powerful nutritional punch while delivering delicious flavor. First, lean chicken breast provides high-quality protein to support muscle growth and repair. Additionally, the spinach stuffing offers a boost of iron, fiber, and vitamins A and C, which help strengthen immunity and digestion. Meanwhile, the melted cheese adds calcium for bone health without overloading the dish with excessive calories.
Moreover, this dish balances macronutrients smartly. The protein keeps you full longer, while the healthy fats from cheese promote nutrient absorption. Furthermore, spinach’s antioxidants combat inflammation, making Cheesy Spinach Stuffed Chicken Breasts a great choice for overall wellness. Even better, you can easily tweak the recipe to reduce sodium or use low-fat cheese for a lighter version.
Finally, this meal fits seamlessly into various diets. Whether you focus on high-protein eating or simply want a wholesome dinner, Cheesy Spinach Stuffed Chicken Breasts deliver satisfaction and nourishment in every bite. With its combination of lean protein, veggies, and dairy, it’s a well-rounded option for anyone prioritizing health.
How it fits in a healthy lifestyle
Cheesy Spinach Stuffed Chicken Breasts adapt effortlessly to different dietary needs. If you follow a gluten-free lifestyle, this recipe naturally fits the bill since it relies on fresh ingredients rather than processed additives. For those tracking macros, the high protein content supports fitness goals, while the moderate fat and carb levels keep meals balanced.
This dish also aligns with heart-healthy eating when prepared with minimal salt and lighter cheeses. Pair it with a side of roasted vegetables or a crisp salad for a complete, nutrient-dense meal. If you love meal prepping, Cheesy Spinach Stuffed Chicken Breasts store well, making them a convenient option for busy weekdays. Check out our meal prep guide for more time-saving strategies.
For families, it’s a sneaky way to incorporate greens into picky eaters’ diets. The creamy cheese masks the spinach’s flavor while keeping the nutritional benefits intact. Explore our family-friendly recipes for more ideas that please both kids and adults. Whether you’re cooking for one or a crowd, this dish makes healthy eating simple and satisfying.
Juicy chicken breasts stuffed with a creamy spinach and cheese filling, baked to perfection.
Ingredients
Scale
For the Crust:
4 boneless, skinless chicken breasts
1 cup fresh spinach, chopped
1/2 cup cream cheese, softened
1/2 cup shredded mozzarella cheese
1/4 cup grated Parmesan cheese
1 teaspoon garlic powder
1 teaspoon onion powder
1/2 teaspoon salt
1/2 teaspoon black pepper
1 tablespoon olive oil
Instructions
1. Prepare the Crust:
Preheat oven to 375°F (190°C).
In a bowl, mix together spinach, cream cheese, mozzarella, Parmesan, garlic powder, onion powder, salt, and pepper.
Cut a pocket into each chicken breast, being careful not to cut all the way through.
Stuff each chicken breast with the spinach-cheese mixture and secure with toothpicks if needed.
Heat olive oil in an oven-safe skillet over medium-high heat. Sear chicken for 2-3 minutes per side until golden.
Transfer skillet to the oven and bake for 20-25 minutes, or until chicken reaches 165°F (74°C) internally.
Let rest for 5 minutes before serving.
Notes
You can customize the seasonings to taste.
“`html
="how-to-prepare-this-dish">How to Prepare This Dish
Steps and time-saving tips
Start by preheating your oven to 375°F so it’s ready when you finish prepping the Cheesy Spinach Stuffed Chicken Breasts. While it heats, grab a mixing bowl and combine softened cream cheese, shredded mozzarella, minced garlic, and thawed spinach. Use a fork to blend everything evenly, then season with salt, pepper, and a pinch of red pepper flakes for a subtle kick. Next, lay each chicken breast flat on a cutting board and slice a deep pocket into the thickest side—just be careful not to cut all the way through. Stuff each pocket generously with the spinach mixture, then secure the edges with toothpicks to keep the filling inside. Drizzle the chicken with olive oil and sprinkle paprika for extra flavor and color. Bake for 25-30 minutes until the internal temperature hits 165°F. For a golden finish, broil for 2-3 minutes, but watch closely to avoid burning. Let the chicken rest for 5 minutes before slicing to keep the filling from oozing out. Serve with roasted veggies or a crisp salad for a complete meal.
Mistakes I’ve made and learned from
Early on, I rushed the stuffing step and ended up with dry, unevenly cooked Cheesy Spinach Stuffed Chicken Breasts because I overfilled the pockets. The fix? Use just enough filling to close the chicken comfortably—about 2 tablespoons per breast. Another blunder: skipping the toothpicks, which caused the cheese to leak everywhere. Now I always secure them tightly, like I do with my Pro Tips for Perfect Stuffed Chicken. And if you’re short on time, prep the filling ahead (it keeps well for a day) or try my 5-Ingredient Spinach Dip as a shortcut—just drain excess moisture to avoid soggy chicken. Trust me, these small tweaks make all the difference.
Cheesy Spinach Stuffed Chicken Breasts feel like a dish that bridges comfort food and elegance, and their roots reflect that balance. While the exact origin isn’t pinned to one culture, the concept of stuffing meat with greens and cheese echoes Mediterranean traditions—think Greek spanakopita or Italian involtini. In my family, though, this recipe became a weeknight hero during busy winters, blending creamy spinach and melty cheese into juicy chicken for a meal that felt special without fuss.
Around the world, cooks
put their own spin on stuffed chicken. In France, they might swap spinach for herbed mushrooms and brie, while in the American South, a Cajun-inspired version could add peppers and hot sauce. Even within households, Cheesy Spinach Stuffed Chicken Breasts adapt. My aunt layers in sun-dried tomatoes, while my neighbor swears by feta instead of mozzarella. The beauty lies in how one dish can hold so many stories.
How it fits in today’s cooking
Today, Cheesy Spinach Stuffed Chicken Breasts fit perfectly into modern cooking because they’re versatile and crowd-pleasing. Meal preppers love them for high-protein lunches, while home chefs dress them up for date nights with a side of garlic butter pasta. They’re also a sneaky way to pack in veggies, making them a hit with parents—especially when paired with kid-friendly sides like these easy roasted carrots.
Seasonally, this dish shines year-round. In spring, fresh spinach and lemon zest lighten it up, while winter calls for heartier additions like bacon or wild mushrooms. And let’s not forget holidays—many families now include stuffed chicken as a lighter alternative to heavy roasts. For more cozy dinner ideas, check out these creamy Tuscan soup pairings. Whether you’re craving simplicity or celebration, Cheesy Spinach Stuffed Chicken Breasts deliver every time.
>Taste and Texture
What makes it delicious
Cheesy Spinach Stuffed Chicken Breasts deliver a mouthwatering blend of flavors and textures in every bite. The juicy, tender chicken wraps around a rich, creamy filling of melted cheese and earthy spinach, creating a satisfying contrast. As you cut into it, the golden-brown crust gives way to a gooey, savory center that smells irresistibly buttery and herb-infused. Garlic and Parmesan add a sharp, umami depth, while a hint of black pepper brings just the right warmth. Whether served fresh from the oven or reheated, Cheesy Spinach Stuffed Chicken Breasts remain irresistibly moist and packed with comforting, cheesy goodness.
Boosting the flavor
Elevate your Cheesy Spinach Stuffed Chicken Breasts with a few easy tweaks. For extra tang, mix crumbled feta into the cheese filling or drizzle with a bright lemon garlic sauce. Smoked paprika or a pinch of cayenne will add a subtle kick, while crispy bacon bits on top introduce a salty crunch. Pair it with a side of roasted garlic mashed potatoes to balance the dish’s richness. A quick brush of herb-infused butter before baking also deepens the golden crust and aroma. With these small upgrades, every bite becomes even more memorable.
Tips for Success
Best practices for results
First, always pat the chicken breasts dry before stuffing them to help the filling stick better. Next, use room-temperature cream cheese for the spinach mixture so it blends smoothly without lumps. Additionally, secure the stuffed chicken tightly with toothpicks or kitchen twine to prevent the filling from leaking during cooking. Finally, let the Cheesy Spinach Stuffed Chicken Breasts rest for 5 minutes after baking so the juices redistribute evenly.
Mistakes to avoid
Avoid overstuffing the chicken breasts, as this can cause them to split open while baking. Instead, aim for a thin, even layer of filling for the best results. Also, don’t skip searing the chicken first if you want a golden crust—this step locks in moisture and flavor. For more tips on handling chicken safely, check out our guide on cooking chicken perfectly. If your filling seems too runny, thicken it with a bit of grated Parmesan, as explained in our cheesy stuffing tips.
Serving and Pairing Suggestions
How to serve this dish
Cheesy Spinach Stuffed Chicken Breasts deserve a plate that highlights their golden, crispy exterior and gooey filling. For a restaurant-worthy presentation, slice them diagonally to reveal the vibrant green spinach and melted cheese center. Arrange the slices over a bed of garlic mashed potatoes or a light arugula salad for contrast. Meanwhile, a sprinkle of fresh parsley or a drizzle of balsamic glaze adds a pop of color and flavor. Since this dish feels indulgent yet balanced, it works beautifully for date nights, holiday dinners, or even a fancy Sunday brunch. Just add a few lemon wedges on the side for a bright finishing touch.
h-it">What goes well with it
Pair Cheesy Spinach Stuffed Chicken Breasts with a crisp white wine like Sauvignon Blanc to cut through the richness. Alternatively, a light lemonade or sparkling water with mint keeps the meal refreshing. For sides, try roasted asparagus or a creamy wild rice pilaf—both enhance the dish without overpowering it. If you love bold flavors, our Garlic Herb Roasted Potatoes add a satisfying crunch. Finally, don’t skip a tangy dipping sauce; our Creamy Dill Sauce balances the cheesy filling perfectly.
How do you keep stuffed chicken breasts from drying out?
To prevent Cheesy Spinach Stuffed Chicken Breasts from drying out, sear them first to lock in moisture, then bake at 375°F until the internal temperature reaches 165°F. Brining the chicken for 30 minutes before stuffing or wrapping it in bacon also helps retain juiciness.
ank-math-faq-item">
What cheese melts best for stuffed chicken?
Mozzarella, provolone, and cream cheese work best for Cheesy Spinach Stuffed Chicken Breasts because they melt smoothly without separating. For extra flavor, mix shredded cheddar or parmesan into the spinach filling—just avoid hard cheeses that don’t melt well.
Can you prepare stuffed chicken breasts ahead of time?
Yes! Assemble Cheesy Spinach Stuffed Chicken Breasts up to 24 hours in advance—store them covered in the fridge until ready to cook. For best results, let them sit at room temperature for 20 minutes before baking to ensure even cooking.
What sides go well with spinach stuffed chicken?
Cheesy Spinach Stuffed Chicken Breasts pair perfectly with roasted potatoes, garlic green beans, or a crisp Caesar salad. For a low-carb option, serve with roasted asparagus or cauliflower mash to complement the rich filling.
div>
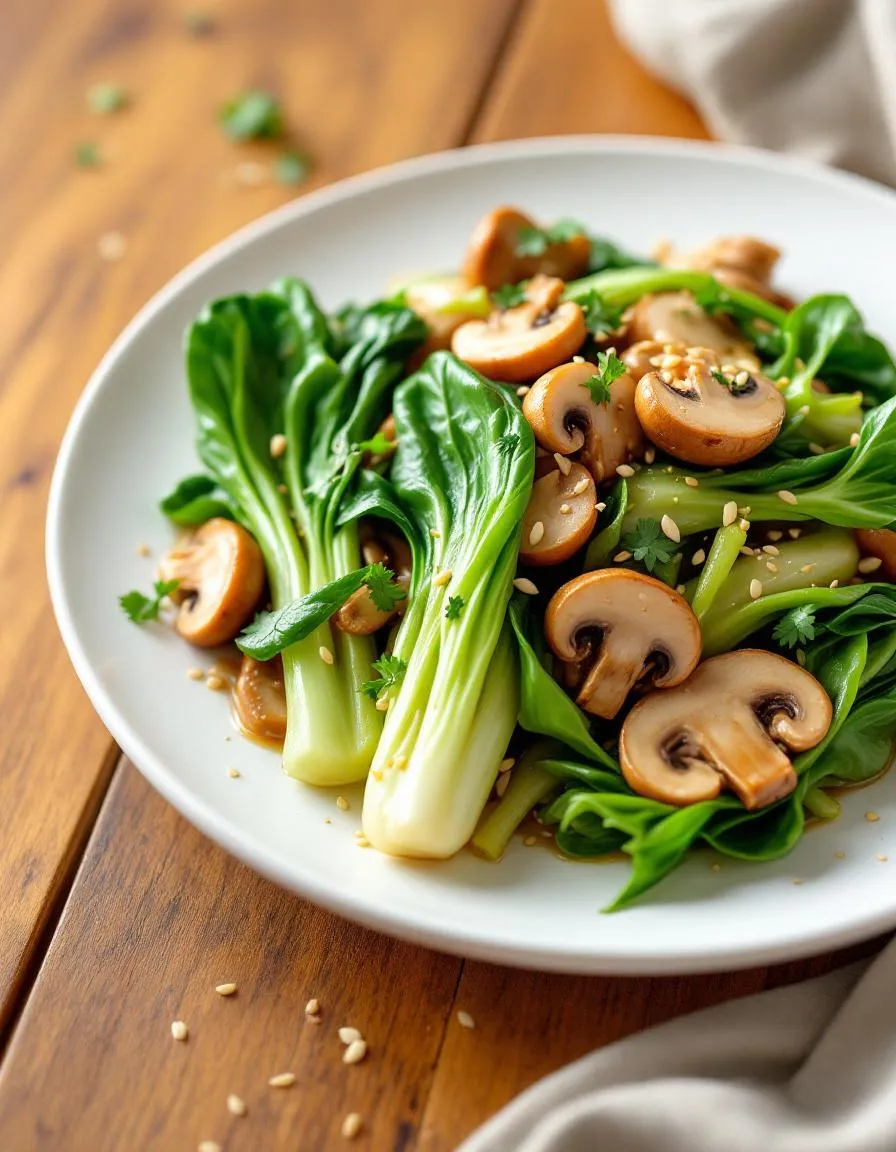
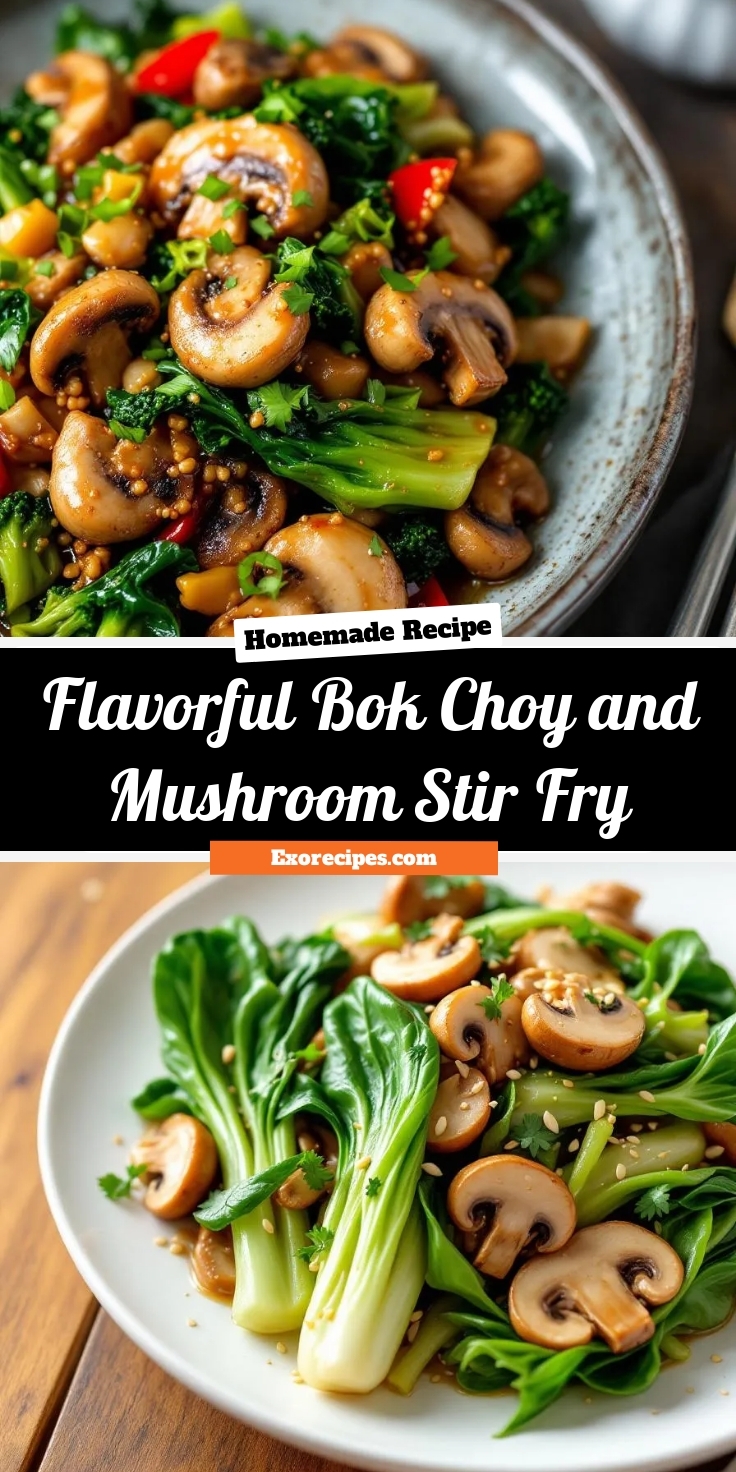
Easy Bok Choy and Mushroom Stir Fry Recipe
Introduction
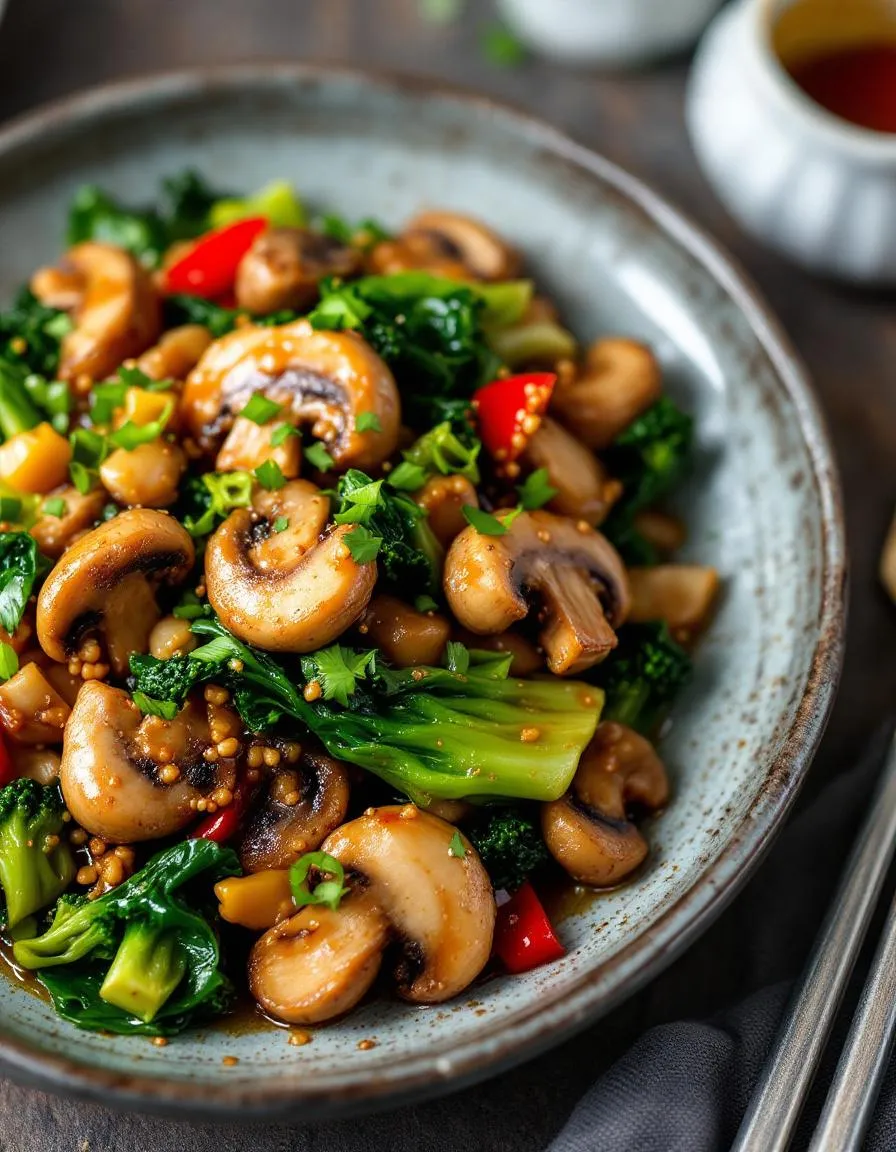
There’s something deeply satisfying about a stir-fry that comes together in minutes yet tastes like it took hours to prepare. If you’re craving a dish that’s both nourishing and bursting with umami, this Flavorful Bok Choy and Mushroom Stir Fry delivers. With crisp greens, meaty mushrooms, and a savory sauce, it’s the kind of meal that feels like a warm hug after a long day. Whether you’re a busy parent or a solo cook looking for a quick win, this recipe promises big flavor with minimal effort.
Flavorful Bok Choy and Mushroom Stir Fry is a vibrant, plant-forward dish that celebrates simplicity without sacrificing depth. Bok choy, with its tender stems and leafy greens, pairs perfectly with earthy mushrooms, while garlic, ginger, and a well-balanced sauce tie everything together. This stir-fry isn’t just delicious—it’s also packed with nutrients, making it a smart choice for weeknight dinners or meal prep. Unlike heavier takeout options, it’s light yet satisfying, and it aligns perfectly with our blog’s mission to share wholesome, approachable recipes. Plus, it’s versatile. You can swap in other veggies like bell peppers or snap peas, or add tofu for extra protein. If you love quick Asian-inspired meals, you’ll adore our Easy Garlic Noodles or Spicy Sesame Cucumber Salad as complementary sides.
Why I Love This Recipe
This stir-fry holds a special place in my kitchen because it’s the dish I turn to when I need something reliable yet exciting. The first time I made it, I was amazed by how such simple ingredients could create such bold flavors. Now, it’s my go-to when I’m short on time but refuse to compromise on taste. The sizzle of garlic in the pan, the way the bok choy wilts just enough to stay crisp—it’s a little ritual that never gets old. Every bite reminds me why I fell in love with cooking: it’s practical magic at its finest.
Health and Nutrition
Why it’s good for your body
Flavorful Bok Choy and Mushroom Stir Fry packs a powerful nutritional punch while delighting your taste buds. First, bok choy delivers a hefty dose of vitamins A, C, and K, which support immunity, skin health, and bone strength. Meanwhile, mushrooms add a rich umami flavor while providing selenium and B vitamins to boost energy and antioxidant defenses. Together, these ingredients make Flavorful Bok Choy and Mushroom Stir Fry a nutrient-dense meal that fuels your body efficiently.
Additionally, this dish keeps calories in check without sacrificing satisfaction. Since bok choy and mushrooms are naturally low in calories but high in fiber, they help you feel full longer. Furthermore, the stir-fry method preserves the crisp texture and nutrients of the vegetables, ensuring you get the most from every bite. With minimal oil and no heavy sauces, Flavorful Bok Choy and Mushroom Stir Fry stays light yet deeply satisfying.
Finally, the dish supports heart health and digestion. Bok choy contains potassium to help regulate blood pressure, while mushrooms contribute compounds that may lower cholesterol. The fiber from both ingredients also promotes gut health. Whether you seek a quick weeknight dinner or a meal that aligns with wellness goals, Flavorful Bok Choy and Mushroom Stir Fry delivers on all fronts.
How it fits in a healthy lifestyle
Flavorful Bok Choy and Mushroom Stir Fry effortlessly fits into a balanced diet. If you follow a plant-based or gluten-free lifestyle, this dish naturally meets your needs without requiring substitutions. It’s also ideal for meal prep, as the flavors deepen when stored, making it a smart choice for busy weeknights.
For those focused on heart health or weight management, the stir-fry offers a low-sodium, high-fiber option that keeps cravings at bay. Pair it with quinoa or brown rice for extra staying power, or enjoy it solo for a light yet nourishing meal. If you’re exploring more ways to incorporate veggies into your routine, check out these simple vegetable side dishes to round out your plate. No matter your dietary priorities, Flavorful Bok Choy and Mushroom Stir Fry adapts to support your goals.
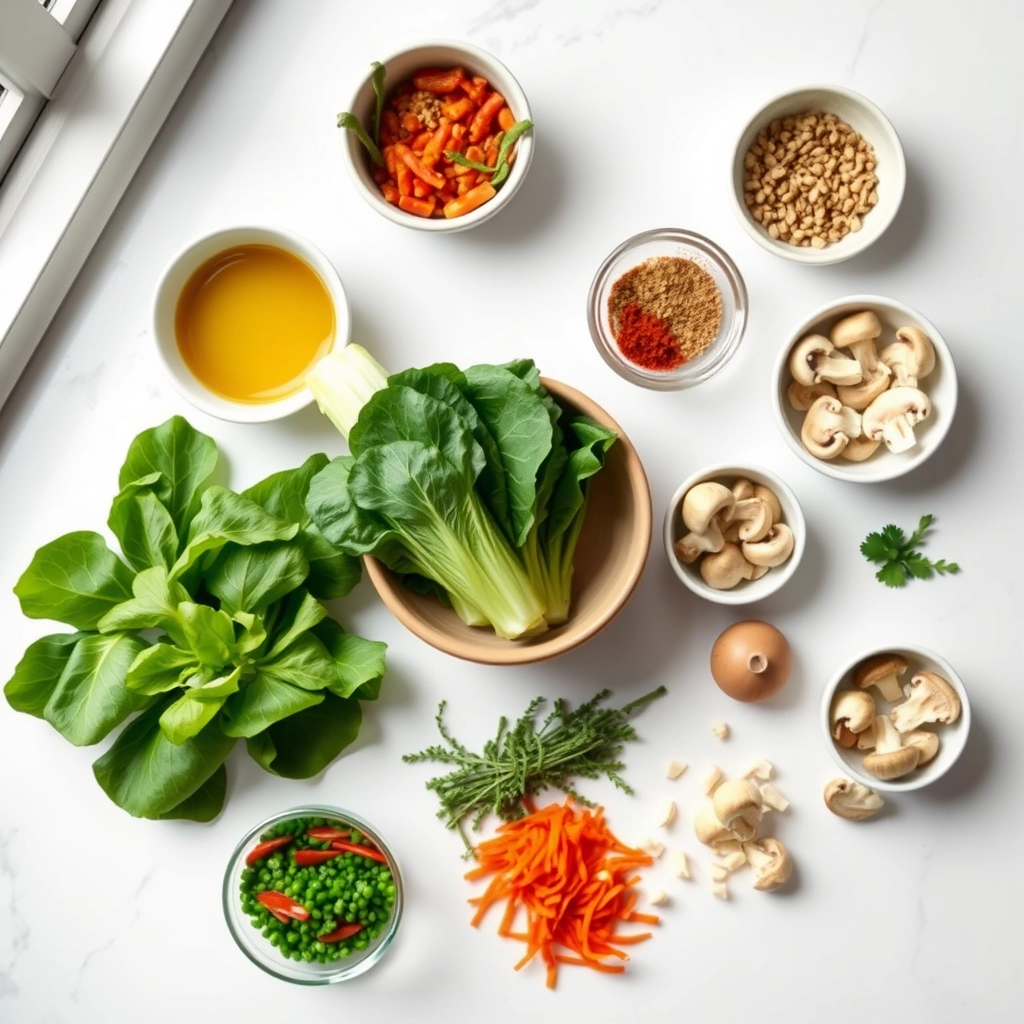
A quick and healthy stir fry featuring crisp bok choy and savory mushrooms in a light garlic sauce.
Ingredients
Scale
For the Crust:
2 heads bok choy, chopped
8 oz mushrooms, sliced
2 cloves garlic, minced
1 tbsp soy sauce
1 tbsp oyster sauce
1 tsp sesame oil
1 tbsp vegetable oil
1/2 tsp red pepper flakes
Instructions
1. Prepare the Crust:
Heat vegetable oil in a large wok or skillet over medium-high heat.
Add garlic and red pepper flakes, stir for 30 seconds until fragrant.
Add mushrooms and stir fry for 3-4 minutes until softened.
Add bok choy and continue cooking for 2-3 minutes until leaves wilt.
Stir in soy sauce, oyster sauce, and sesame oil. Toss to combine.
Cook for 1 more minute then remove from heat.
Notes
You can customize the seasonings to taste.
How to Prepare This Dish
Steps and time-saving tips
Start by washing and chopping your bok choy into bite-sized pieces, separating the stems from the leaves since they cook at different rates. Next, slice your mushrooms evenly so they brown beautifully in the pan. Heat a large wok or skillet over medium-high heat and drizzle in a high-smoke-point oil like avocado or peanut oil. Toss in the mushrooms first, stirring occasionally until they release their moisture and turn golden, about 4 minutes. Push them to one side and add the bok choy stems, cooking for another 2 minutes until slightly tender. Now fold in the leaves along with minced garlic and ginger, stirring constantly to prevent burning. Meanwhile, whisk together your sauce—a simple blend of soy sauce, sesame oil, and a pinch of sugar works wonders. Pour it over the veggies, tossing everything until glossy and fragrant. Finish with a sprinkle of sesame seeds or red pepper flakes for extra flair. To save time, prep all ingredients before heating the pan and use pre-minced garlic or ginger from the fridge.
and-learned-from">Mistakes I’ve made and learned from
Early on, I’d overcrowd the pan, steaming the mushrooms instead of searing them—now I cook in batches if needed. Another blunder? Adding the sauce too late, leaving the bok choy soggy. I learned to drizzle it just as the leaves wilt, locking in that crisp-tender texture. If your stir-fry feels bland, check out my guide to balancing Asian flavors for seasoning tweaks. And if you’re new to wok cooking, my wok care tips will help you avoid sticky disasters. Trust me, a well-seasoned pan makes all the difference for this Flavorful Bok Choy and Mushroom Stir Fry.
Cultural Connection and Variations
Where this recipe comes from
Flavorful Bok Choy and Mushroom Stir Fry carries deep roots in East Asian cuisine, where quick-cooked greens and earthy mushrooms shine in simple yet satisfying dishes. In southern China, cooks often prepare it with garlic and oyster sauce, while in Japan, they might swap bok choy for tatsoi and add a splash of mirin. My grandmother, however, always tossed in extra ginger and a pinch of chili flakes for warmth, turning weeknight dinners into something special.
Across Southeast Asia,
street vendors sizzle bok choy with shrimp paste or fermented tofu for bold umami punches. Meanwhile, vegetarian versions thrive in Buddhist temple cooking, where chefs spotlight mushrooms like shiitake or wood ear for texture. Even my college roommate, who grew up in Taiwan, taught me to finish the Flavorful Bok Choy and Mushroom Stir Fry with toasted sesame oil for an aromatic touch. The dish adapts beautifully, whether you crave it spicy, sweet, or tangy.
How it fits in today’s cooking
Today, Flavorful Bok Choy and Mushroom Stir Fry wins hearts as a speedy, nutrient-packed meal for busy households. Health-conscious cooks love it for its plant-powered goodness, while meal preppers batch-cook it with quinoa or brown rice. During Lunar New Year, families still serve it for prosperity, since bok choy symbolizes wealth. But really, it’s just as perfect for Tuesday dinners when you need greens fast.
Modern twists keep it fresh, like adding cashew cream for richness or tossing in rainbow chard for color. Some even pair it with glazed tofu for extra protein. Whether you stick to tradition or experiment, this stir fry bridges generations and cuisines effortlessly. It’s the kind of dish that feels both timeless and totally now.
>Taste and Texture
What makes it delicious
Flavorful Bok Choy and Mushroom Stir Fry delivers a mouthwatering balance of crisp and tender textures. The bok choy stays slightly crunchy, while the mushrooms turn buttery and rich, soaking up the savory sauce. Garlic and ginger add a warm, fragrant kick, and a splash of soy sauce brings deep umami notes. Every bite bursts with freshness, thanks to the bright bok choy leaves and earthy mushrooms. Whether you serve it over rice or noodles, Flavorful Bok Choy and Mushroom Stir Fry satisfies with its lively flavors and satisfying contrasts.
Boosting the flavor
For an extra flavor boost, try swapping regular soy sauce for tamari, which adds a smoother, richer taste. A sprinkle of toasted sesame seeds or a drizzle of chili oil elevates the dish with nutty or spicy notes. If you love heat, toss in sliced jalapeños or a dash of homemade chili crisp for a fiery finish. Fresh herbs like cilantro or Thai basil also brighten the stir-fry, adding a pop of color and freshness. With these easy tweaks, Flavorful Bok Choy and Mushroom Stir Fry becomes even more irresistible.
Tips for Success
Best practices for results
Always slice your bok choy and mushrooms evenly so they cook at the same rate. Meanwhile, heat your wok or skillet until it’s very hot before adding oil—this ensures a perfect sear for your Flavorful Bok Choy and Mushroom Stir Fry. Stir constantly to prevent sticking, and add sauces gradually to control the dish’s saltiness. Finally, taste as you go and adjust seasoning right before serving for the best flavor balance.
Mistakes to avoid
Avoid overcrowding the pan, as this steams the vegetables instead of crisping them. Instead, cook in batches if needed for even browning. Also, don’t skip prepping your ingredients beforehand—stir-fries move quickly, so having everything ready saves stress. For more on knife skills, check out our guide to chopping techniques. Additionally, resist the urge to overcook the bok choy; it should stay slightly crisp. Learn how to spot doneness with our vegetable textures breakdown.
Serving and Pairing Suggestions
How to serve this dish
For a stunning presentation, serve Flavorful Bok Choy and Mushroom Stir Fry in a wide, shallow bowl to showcase its vibrant colors. Meanwhile, garnish with toasted sesame seeds or thinly sliced green onions for a pop of freshness. This dish shines as a quick weeknight dinner, but it also makes an elegant addition to holiday spreads or potlucks. If you want to impress guests, pair it with steamed jasmine rice in a bamboo steamer for a restaurant-worthy touch.
h-it">What goes well with it
First, try pairing Flavorful Bok Choy and Mushroom Stir Fry with a light, citrusy white wine like Sauvignon Blanc. The crisp acidity balances the savory umami flavors perfectly. Alternatively, serve it alongside fluffy coconut rice for a subtle sweetness that enhances the dish. For a complete meal, add our Garlic Ginger Chicken Skewers or a refreshing Cucumber Avocado Salad. Both options add texture and contrast while keeping the meal balanced.
What’s the best way to cook bok choy for a stir fry?
For a Flavorful Bok Choy and Mushroom Stir Fry, separate the bok choy leaves from the stems and chop them into bite-sized pieces. Cook the stems first since they take longer, then add the leaves at the end to keep them crisp and vibrant.
ank-math-faq-item">
Can I use other mushrooms besides shiitake in this stir fry?
Absolutely! While shiitake mushrooms add a rich umami flavor to Flavorful Bok Choy and Mushroom Stir Fry, you can substitute with cremini, button, or oyster mushrooms. Just adjust cooking times slightly based on the mushroom type.
How do I make my stir fry sauce more flavorful?
Enhance your Flavorful Bok Choy and Mushroom Stir Fry by balancing soy sauce with a touch of honey or maple syrup, garlic, ginger, and a splash of rice vinegar. For depth, add a teaspoon of sesame oil or chili paste.
Is bok choy and mushroom stir fry healthy?
Yes! Flavorful Bok Choy and Mushroom Stir Fry is packed with vitamins, fiber, and antioxidants. Bok choy is low in calories but high in nutrients, while mushrooms provide protein and immune-boosting benefits, making this dish both delicious and nutritious.